
Pacific Drive has proven to be one of the most unique indie games to release this year so far, where your closest companion in the midst of the Olympic Exclusion Zone is your car.
However, there is more to this rough-and-tumble station wagon than meets the eye, and for it to help protect you on your journey to discover the truth of the Exclusion Zone, you’ll need to give it all the emotional and mechanical care it needs.
Thankfully, one of the first quests in the game has you giving your car a much-needed tune-up, and there are a few steps or so to get your four-wheeled comrade in proper working order. If you’re wondering what all needs to be done, here is our handy guide for how to complete the ‘Fix The Car’ Quest in Pacific Drive.
How to Unlock Fix The Car Quest in Pacific Drive
You’ll get this quest soon in Pacific Drive after discovering Oppy’s Auto Shop, your sanctuary away from the Instability storms that are plaguing the wilderness for miles around. After you restore power to the shop via the breaker that’s right past the front door, you’ll get acquainted with Oppy herself, also known as Ophelia Turner. She’s little more than a mysterious and knowledgeable voice over the radio right now, having since relocated elsewhere.
She’ll take you through a preliminary rundown of what’s going on around you, and what you’ll need to do to survive the deadly anomalies plaguing the Olympic Exclusion Zone. The most important one right now is getting your car up and running, as you won’t be able to venture out further into the Exclusion Zone without it.
After you patch yourself up via the First Aid station (green box on the left wall) in the garage, Oppy will kick off the ‘Fix The Car’ quest, which involves making multiple basic repairs on your car.
How to Complete ‘Fix The Car’ Quest in Pacific Drive
This quest helps you get acquainted and familiar with all the tools at your disposal in Oppy’s garage, as you’ll be coming back here plenty of times throughout the game to keep your car in tip-top shape, and eventually make upgrades.
First of all, if you left your car parked outside after initially seeking shelter in the shop, you’ll need to go back out and pull it around into the garage. It’ll drive awkwardly because it turns out that one of your wheels fell off during the frantic drive there. Thankfully, it’s lying on the ground nearby, so you can recover it.
When driving into the garage, make sure the car is pulled all the way up over the charging mechanism on the floor. You’ll know when it’s in position by the screen on the wall to the right nearby that will say ‘Connected’ when it’s in place. If you stop early or go too far, it’ll say ‘Disconnected’, so adjust the vehicle as needed.
After retrieving your lost wheel from outside, place it back on the car’s front left wheel arch (left-click/’R2′ button).
Craft a Crude Door
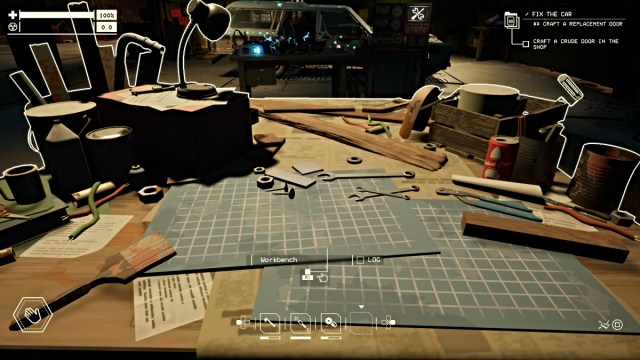
For the first big fix on your car, you’ll be asked to craft a Crude Door, as you’ll notice that one is missing on the right passenger side. To do this, head over to the Workbench nearby, interact with it and you’ll see a long list of Blueprint recipes.
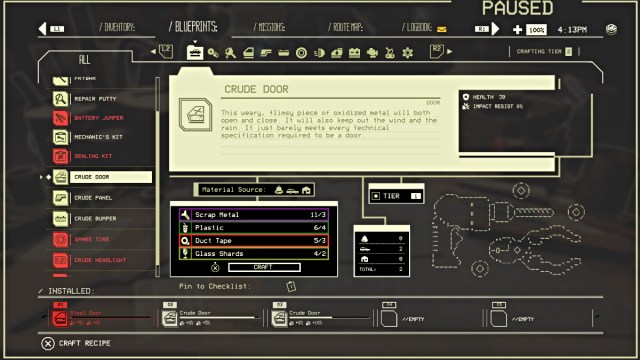
The recipe for a Crude Door includes the following:
- 3 x Scrap Metal
- 4 x Plastic
- 3 x Duct Tape
- 2 x Glass Shards
All of these items are easy to obtain, as they’re all within the vicinity of the garage. The quest’s objective markers will point you in the right direction. First, go over to the rusty, scrapped car just outside the garage. Turns out you’ll need a Prybar to get its trunk open, so go over to the red Toolbox on the left side of the garage room, and you’ll find one inside along with some other useful items.
Go back out and pry the trunk open to get the Plastic parts you need, along with some Road Flares. Then you’ll be told to go the ‘Friendly Dumpster’ nearby. Interact with it, and it’ll hilariously spit out a variety of useful items. This can only be done once at a time, as if you try again the Dumpster will refuse. Your next opportunity will come after you successfully complete a trip.
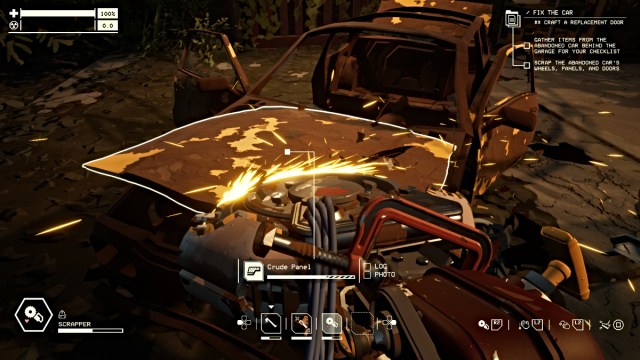
Among the items the Friendly Dumpster gives you is a Scrapper, which is a tool you can use to break down scrapped cars and other items for crafting resources. Take it over to the same rusty car nearby and grind it down for the remaining parts you need for the Crude Door.
Go back to the Workbench and craft your new door, then go to your car and install it in the empty space on the right passenger side, the same as you did with the wheel earlier (left-click/’R2′ button).
Use Repair Putty to Buff the Car
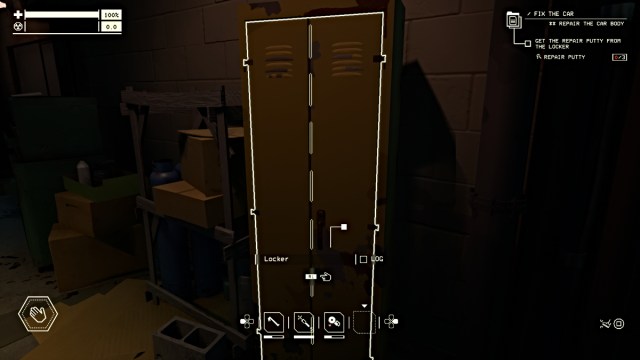
Next on the quest’s to-do list is to obtain and use Repair Putty on the car. This can be used to repair damage on various panel components of your car when needed. You’ll find plenty of it inside the nearby Locker, which will be indicated by the quest marker.
Once you have it in your inventory, you’ll need to use the Repair Putty to buff up several damaged components, until the repair gauge on your objective list reaches 100%. Be sure to get each main car part that the putty can be used on (ignore the wheels), which you’ll know by seeing the action pop up above your quick menu.
Be aware that you have a limited amount of putty in each can, which is noted by the gauge at the bottom of the screen, so use it wisely.
Repair the Front Right Tire
Next up, you’ll need to properly repair the right front tire, which you’ll see is looking rather flat. There are a couple of ways to go about this. You can choose to craft a Sealing Kit at the Workbench, if you have the parts, which will patch up the existing tire. This requires the following:
- 3 x Rubber
- 2 x Duct Tape
- 1 x Glass Shard
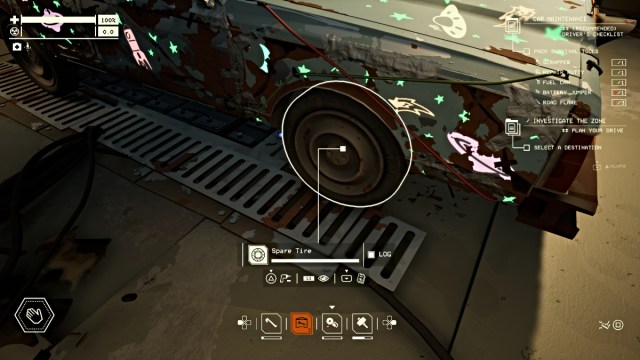
Otherwise, you can simply go get the Spare Tire in the nearby Locker, yank the flat one off the car, and replace it with the new spare. That leaves one last wheel-related issue to take care of.
Use a Mechanic’s Kit on Front Left Tire
Last but not least, you’ll need to fix up the front left tire a bit differently. It’s too loose and needs to be aligned and adjusted in order to drive properly. To fix it, you’ll need a Mechanic’s Kit, an item that will become very important for the road ahead.

You can either find a Mechanic’s Kit in the shop or craft one at the Workbench easily with the following materials:
- 3 x Scrap Metal
- 1 x Plastic
- 1 x Duct Tape
Once you have one, go over to the front left tire and use the Mechanic’s Kit to repair it like new. This is the last of the primary fixes you’ll need to get the car going.
That concludes our guide for how to complete the Fix The Car quest in Pacific Drive. We hope you found this helpful, and let us know how you’re enjoying the game so far.
Be sure to check out all of our other recent guides and reviews, such as our official review of Final Fantasy VII: Rebirth.
