
Looking for Company of Heroes 3 tips and tricks for beginners? Company of Heroes 3 is here and, with its predecessor having launched almost a decade ago, there might be many players who are jumping into this WW2 real-time strategy franchise for the first time. If you want to earn your medals and become a Company of Heroes 3 pro, but don’t know where to start, then you’re in the right place.
We’re hoping these tips give everyone a broad overview of how to approach Company of Heroes 3, and that franchise veterans get a sense of the changes they can expect. For those entirely new to Company of Heroes, these tips should help you feel more prepared to take on the fights ahead.
In this guide, we’ll break down 20 Company of Heroes 3 tips and tricks for beginners. We’ll cover everything that we wish we knew when we started playing, which should give you a strong advantage in the fights ahead.
1. Practice against AI before jumping into multiplayer
If you’re new to RTS games in general, the multiplayer components are usually highly competitive. Online players will often learn build orders, which are basically a sequence of optimal actions to take during each step of a match, which will help them play incredibly fast.
When you’re just starting out, we’d strongly recommend practicing in AI Skirmish battles first. In AI battles, you can hit the Spacebar to enter Tactical Pause, which stops all action while allowing you to still drag the camera around the map.
While in Tactical Pause, you can queue commands for units and generally scope out the map, giving you chance to strategise and prepare before leaping into combat. Using Tactical Pause is also a great way to keep up with AI opponents before learning keybinds (which we’ll touch on later in this guide).
For example, you can hit pause during combat and safely check the health of your various squads. This gives you chance to queue the Retreat command before action resumes, so that your injured squads immediately fall back to headquarters when you unpause.
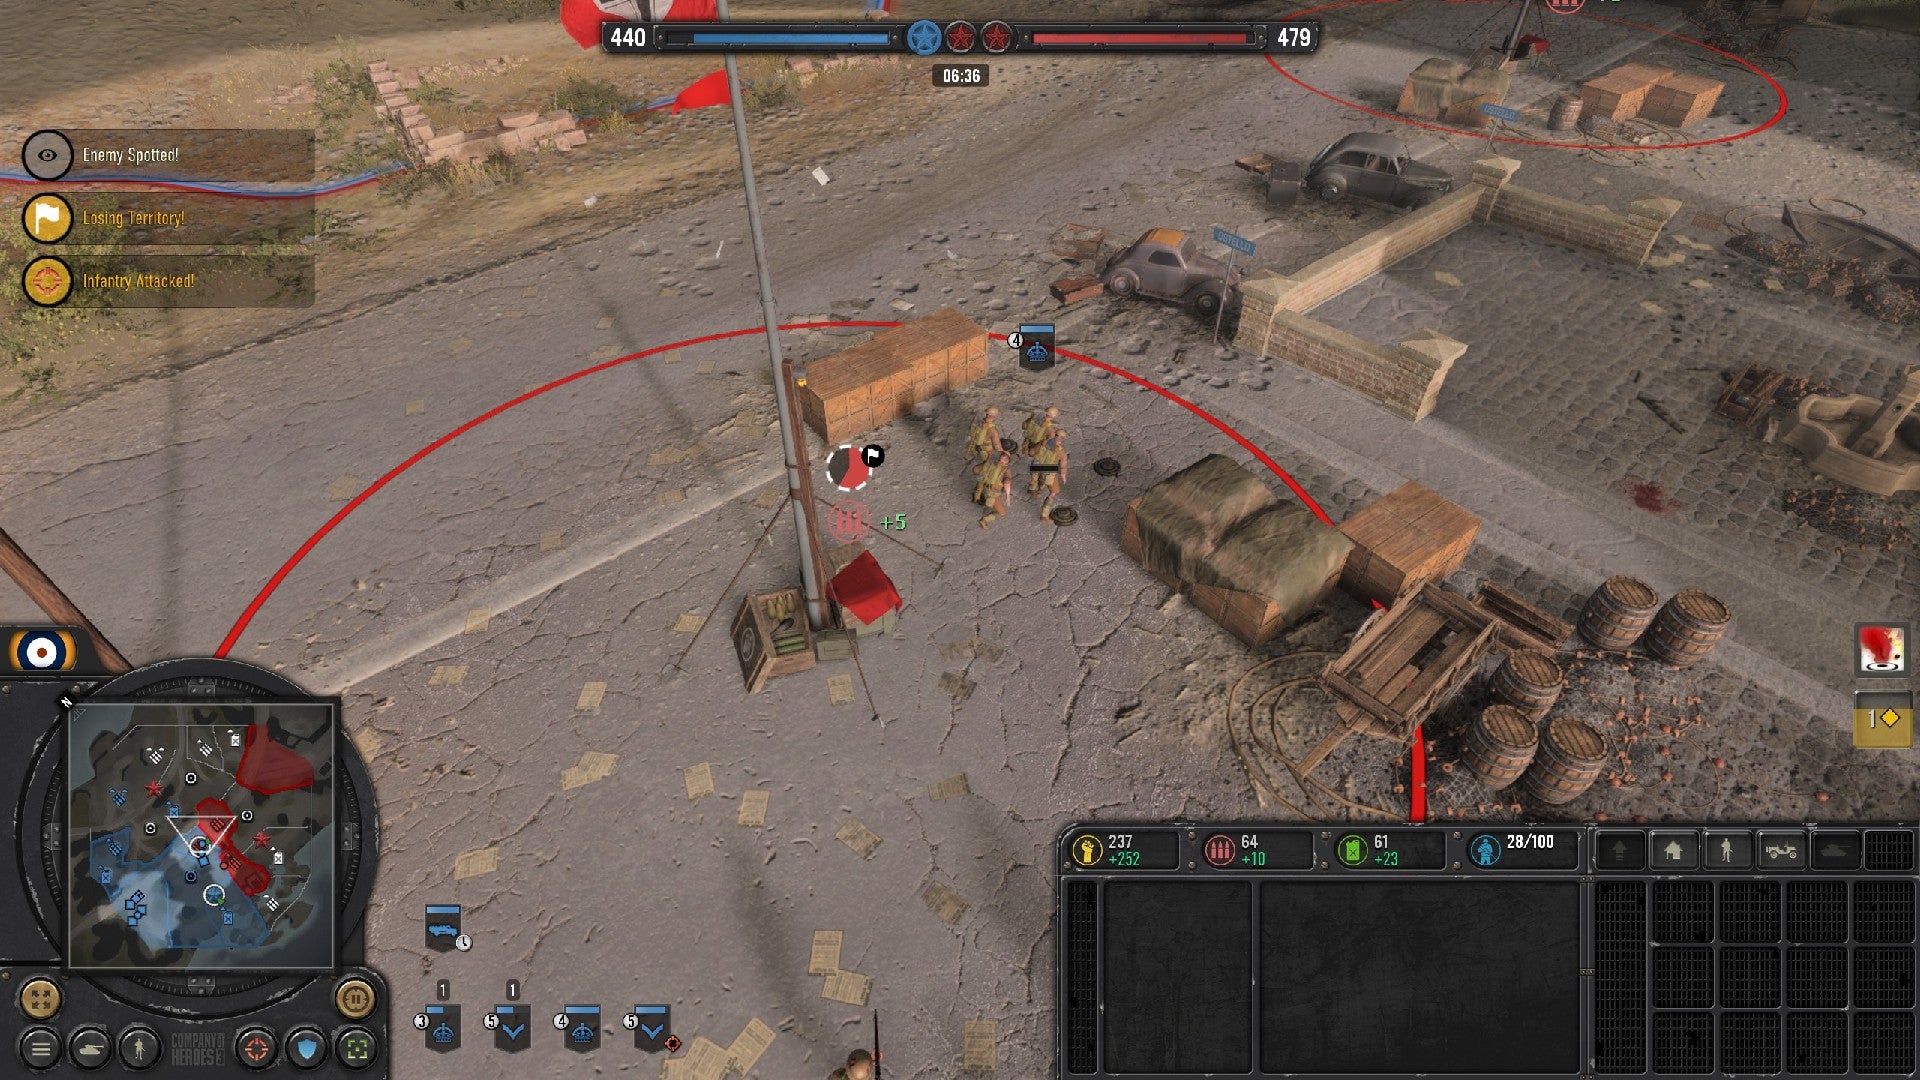
2. Start capturing points immediately
When you start a Skirmish game in Company of Heroes 3, you will likely have a single unit. Immediately command this unit to capture nearby points on the map. Do not let them idle, as this will waste precious seconds and could give your opponents an early advantage.
There are three resource types in Company of Heroes 3: Manpower, Munitions, and Fuel. Manpower generates steadily without capturing any resource points, but to generate Munitions and Fuel, you must capture their respective resource points.
You also want to make new units as quickly as possible in those opening minutes. The more units you have, the more capture points you can control. Use cheap units early to rush capture points between your base and the center of the map, so that you can get a quick burst of resources.
3. Focus on Fuel stations first
At the start of a game, focus on capturing Fuel stations. You’ll need Fuel to construct new buildings and train armored units, such as tanks, so you’ll need a large supply throughout a game.
The earlier you capture Fuel and build that supply, the faster you can construct buildings that allow you to train stronger units, including vehicles. If you can rush those higher-tier units before your opponents, you’ll have a strong advantage that could push you to victory.
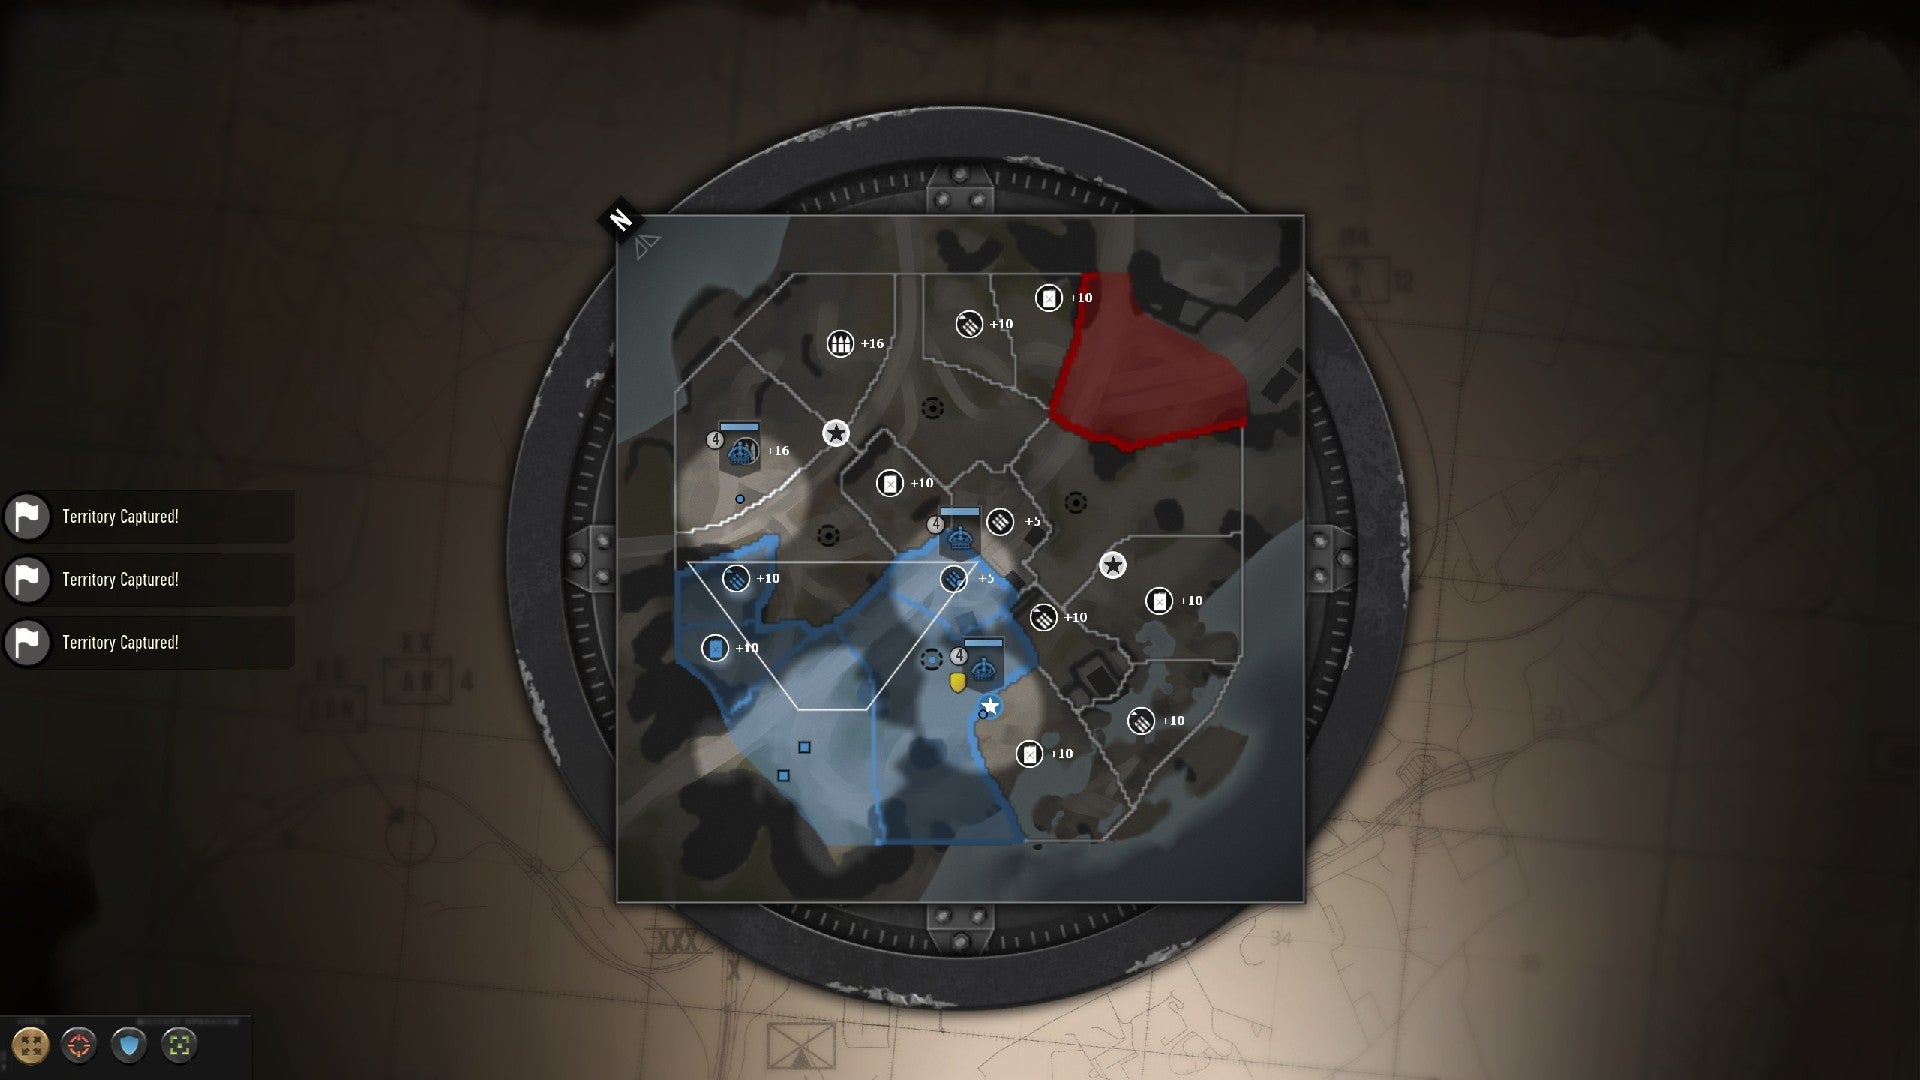
4. Capture Victory Points to win
Victory Points, denoted by star icons on the map, are crucial for winning. If you hold a Victory Point, it will take one ticket from your enemy every three seconds. By default, each team starts with 500 tickets, although this can be raised in the settings to allow for longer games.
Victory Points stack, so holding two will drain two enemy tickets every three seconds, for example. After capturing a few resource points and establishing your supply chain, switch focus to grabbing the majority of Victory Points on the map.
If you can hold the majority, your opponents will lose tickets faster than yourself, and capturing them early will give you an easy lead that’ll set you up for victory later on.
5. Don’t let your resources float
When you start building up a large army, it’s easy to focus solely on moving units around the map. However, don’t forget about your resource stockpiles, as it’s key to not let resources float during a game.
“Resource float” refers to the stockpile of unused resources that you could spend on units, buildings, or upgrades. If you let resources float in the early game, it means you aren’t using them to increase your forces and bolster your army.
If you let your resources float, your opponents might gain the advantage by training more units or upgrading their current army while yours remains stagnant. If they do so, you’ll find yourself quickly outmatched.
Resource float, and the efficiency and speed with which you use resources, can often determine the outcome of a game, so make sure you’re always spending your resources whenever possible.
6. Make sure captured points are connected to your headquarters on the map
When you capture a point, it will highlight that chunk of the map in your team’s colour. However, simply capturing a point isn’t enough to gather its resources. You also need to make sure the point is connected to your headquarters through an unbroken chain of captured points.
For example, if you run across the map and capture a Fuel point near your opponent’s base, you’ll deprive them of those resources. That’s good! However, to actually generate Fuel from that point, you must also control an unbroken chain of points between that and your headquarters. That means you’ll need to capture various points that would connect it back to your headquarters on the map.
During a game, your enemies will also use this to their advantage. If they run through all of your positions and capture the points closest to your headquarters, it might break a lot of links and completely shut down your supply chain, halting unit production and preventing you from training more troops. Always keep an eye on the map to ensure that vital resource points aren’t cut off from your headquarters.
7. Pay attention to unit type when training your army
RTS games commonly have various unit types, and certain types will perform stronger against others. Company of Heroes 3 is no different, and you must pay attention to unit types to build an army that’s ready for anything.
There are various types of units in Company of Heroes 3, such as Infantry and Vehicles. However, those may also have sub-types that denote which units they’re best against. Anti-Infantry units, for example, will perform best against Infantry, while Anti-Vehicle will be crucial for destroying enemy tanks.
To achieve victory on the battlefield, you’ll need an army that has a mix of Anti-Infantry and Anti-Vehicle units.
This doesn’t necessarily mean you need a mix of Infantry and Vehicle units yourself. You could absolutely win with an army that solely uses Infantry units, for example. But, it’s important that you have a mix of Anti-Infantry and Anti-Vehicle weaponry within your army. This could mean building a few tanks to support your Infantry, or it could mean training squads that can use rocket launchers.
Whatever your preference, the earlier you pay attention to this, the better, as it’s much harder to make a comeback if you need to train a whole new army mid-game to adapt to unexpected enemy units.
8. Use explosives to win stalemates or surprise your enemies
There’s an old adage that any Company of Heroes veteran will know, and it’s important to learn it now. Explosives mean victory. Or, more specifically, mines mean victory. But, for this tip, we’ll talk about all explosives.
Infantry squads don’t always have grenades by default. But, if you look in the control panel of the building which you use to train infantry, you may see a Grenade Package that you can purchase with resources. When researched, it will give all of your Infantry squads the ability to throw grenades. These might be Anti-Infantry, Anti-Vehicle, or a mix of the two.
If your Infantry unit is stuck in a stalemate with an enemy Infantry unit, a well-placed grenade could be the key to winning the battle. Grenades deal huge damage, and could immediately kill a bunch of soldiers in an enemy squad. This gives you the advantage, tipping the fight heavily in your favour.
Likewise, Anti-Vehicle grenades are ideal ways for Infantry units to deal with vehicles. Without the Grenade Package researched, you might not be able to deal with such heavy firepower, and that’ll hand your enemies control of key Victory Points.
Engineers can build Field Defenses on the battlefield (use the S hotkey with an Engineer unit selected), and one of these Field Defenses allows them to place mines. When capturing key positions, consider doing so with an Engineer.
You can order Engineer units to place mines on a capture point, and they will capture the position while doing so. This allows you to capture the point, but you’ll also leave explosive defenses that will wipe out enemy units that try to claim the point for themselves later on.
When stuck in a stalemate, well-placed grenades could give your squads a huge advantage. When defending positions, well-placed mines could stop enemy armies in their tracks. Explosives win games, so use them liberally to turn the tide in your favour.

9. Use Battlegroups to trigger devastating abilities
Explosives are crucial, but Battlegroups allow you to unleash even more destructive abilities, bolster your army, or unlock key skills that could prove crucial in future fights. In Company of Heroes 3, Battlegroups are found on the right-side of the screen. Each faction has three Battlegroups available, but you must choose just one to activate during a match.
Each Battlegroup offers two ability trees. After selecting the Battlegroup you want to use, you can start purchasing abilities with Commander Points. Commander Points are also listed on the right-side, just below the Battlegroups, and will generate automatically during a match.
After spending Commander Points to unlock an ability, you can then activate it during gameplay. Abilities offer a range of game-changing effects. Some can unleash artillery barrages on capture points, for example, while others might deploy exceptionally powerful units onto the battlefield under your control. Most abilities cost resources, so you can’t just spam them constantly to overwhelm your opponents.
It’s important to think of Commander Points like another resource and spend them often throughout a match. If you forget about Battlegroups, which is easy to do with them tucked away at the side of the screen, then you’re leaving yourself at a significant disadvantage.
If you find yourself overwhelmed at a capture point, for example, a well-timed strafing run could wipe out the enemy army and suddenly put you back on top. Like explosives, using Battlegroup abilities liberally will bring you much closer to success.
10. Issue commands from the minimap or tactical map
As you build up your army, it can be hard to command all of your units to different areas by moving the camera back and forth. To speed this up, select the unit that you want to move and then right-click somewhere on the minimap or tactical map to command them to move to that location.
Of course, this comes with a couple of caveats. You won’t be in direct control of their travel, which could mean they run into enemy units and get picked off while moving, and they also won’t get into cover upon arriving at their destination.
We’d recommend moving your units using the map, but then keep a close on eye on their journeys to ensure they’re safe. When they arrive, quickly jump over to their position and command them to get behind cover.
While each unit will still need these bits of micromanagement, it’s much better to get them all moving at the same time, rather than moving each unit to their respective destinations one-by-one.
11. Command idle squads with the unit icons
At the bottom of the screen, you’ll see various icons that represent your units on the field. Infantry squads will appear on the bottom row, and Vehicles will appear slightly above. If you spot a clock icon on any of these units, this means they’re idle.
If you realise that you have a bunch of idle units across the map, don’t panic. Rather than dragging the camera over to each of them, you can simply tap their unit icon at the bottom of the screen. You can then issue commands to the unit, such as ordering them to move to a new capture point using the map, without actually moving over to them with the camera.
This can also prove useful when commanding injured units to fall back, as each unit’s health bar appears next to their icon. If you see a unit’s health dropping to dangerous levels, tap their icon and then order them to retreat (or move elsewhere on the map, if you’d prefer) without taking your eyes off another key battle that you might be focusing on.

12. Group units to command them with ease
If you have multiple squads that you’d like to move to the same area, consider grouping them to a number key.
You can group units by dragging over the various units that you’d like to group, and then holding the Shift key while they’re selected and pressing a number key. For example, highlighting four squads and pressing Shift + 1 will assign them all to group 1. You can then select them all by simply pressing 1 in the future.
Grouping units will prove incredibly useful as your army increases in size and you push out further on the map. If you find yourself battling over multiple Victory Points at once, for example, you can send armies out to each point and use groups to keep them separate.
The unit icons on the bottom of the screen will also indicate which group a unit belongs to. If you’re keeping track of each group’s position on the map, you can use this to immediately know which units are in which fight.
This will hopefully streamline your micromanagement by giving you a clearer overview of how each group is performing in their current fight, without constantly panning the camera around the map.
13. Don’t bunch troops up on the battlefield
If you’re using multiple units in a fight, make sure there is some space between them. If you have all of your units on top of each other, they’ll be susceptible to easy bombing runs or well-placed explosives.
While you don’t want to position them worlds apart, consider placing each unit behind a different piece of cover to space them out. This way, you can still have them fighting as an army, but avoid having them all wiped out by one mortar shell.
14. Learn hotkeys to issue commands quickly
After selecting a unit or building, the control panel will pop up in the bottom-right corner of the screen. This is where you can issue commands to a unit, or train new units in a building. However, you don’t need to move your mouse over each time you want to select a command. Instead, you can learn hotkeys to issue commands quickly.
There are lots of hotkeys to learn, but don’t get overwhelmed off the bat. We’d start with focusing on the most crucial commands that you use often.
Retreat, for example, is hotkeyed to the R key when you’ve selected a Infantry unit. Clicking a unit (or using the unit icons at the bottom of the screen) and hitting R is much faster than dragging your mouse over to the Retreat command, especially if you’re trying to issue the same command to multiple units.
For buildings, consider learning the hotkeys that will train your favourite units. If you love having light tanks swarm the battlefield, for example, then check the hotkey assigned to training that unit. This will make it much faster to train one as soon as you have the resources ready.
While it might seem unnecessary, speed is of the essence in any RTS, and Company of Heroes 3 is no different. Even if you’re shaving off literal seconds while training your army, those seconds could prove critical later on when trying to overwhelm your opponent.

15. Always place your units behind cover
When capturing points, fighting enemies, or doing just about anything else in Company of Heroes 3, make sure your units are behind cover. This will give them protection from enemy fire, and that means your units won’t die as fast (or at all). Crucially, that means you can build up an army, rather than constantly replacing dead troops.
When ordering units to take cover, it’s important to consider the level of cover that they’ll receive. If the cover icon appears green, this is good, as it means your squad will receive the highest level of protection. If it’s yellow, then the cover might not be great, but it’s still better than standing in the open.
16. Flank enemies to gain the advantage
When a unit is in cover, this doesn’t mean they are completely safe from all directions. They are only safe on the sides which have cover, so an enemy squad could push around the side to attack for full damage.
Now that you understand directional cover, you’re ready to execute a flanking manoeuvre. This involves pushing around the side, or behind, an enemy to get past their cover. This means you can then fire on them as if they had no cover, dealing full damage and quickly draining their health.
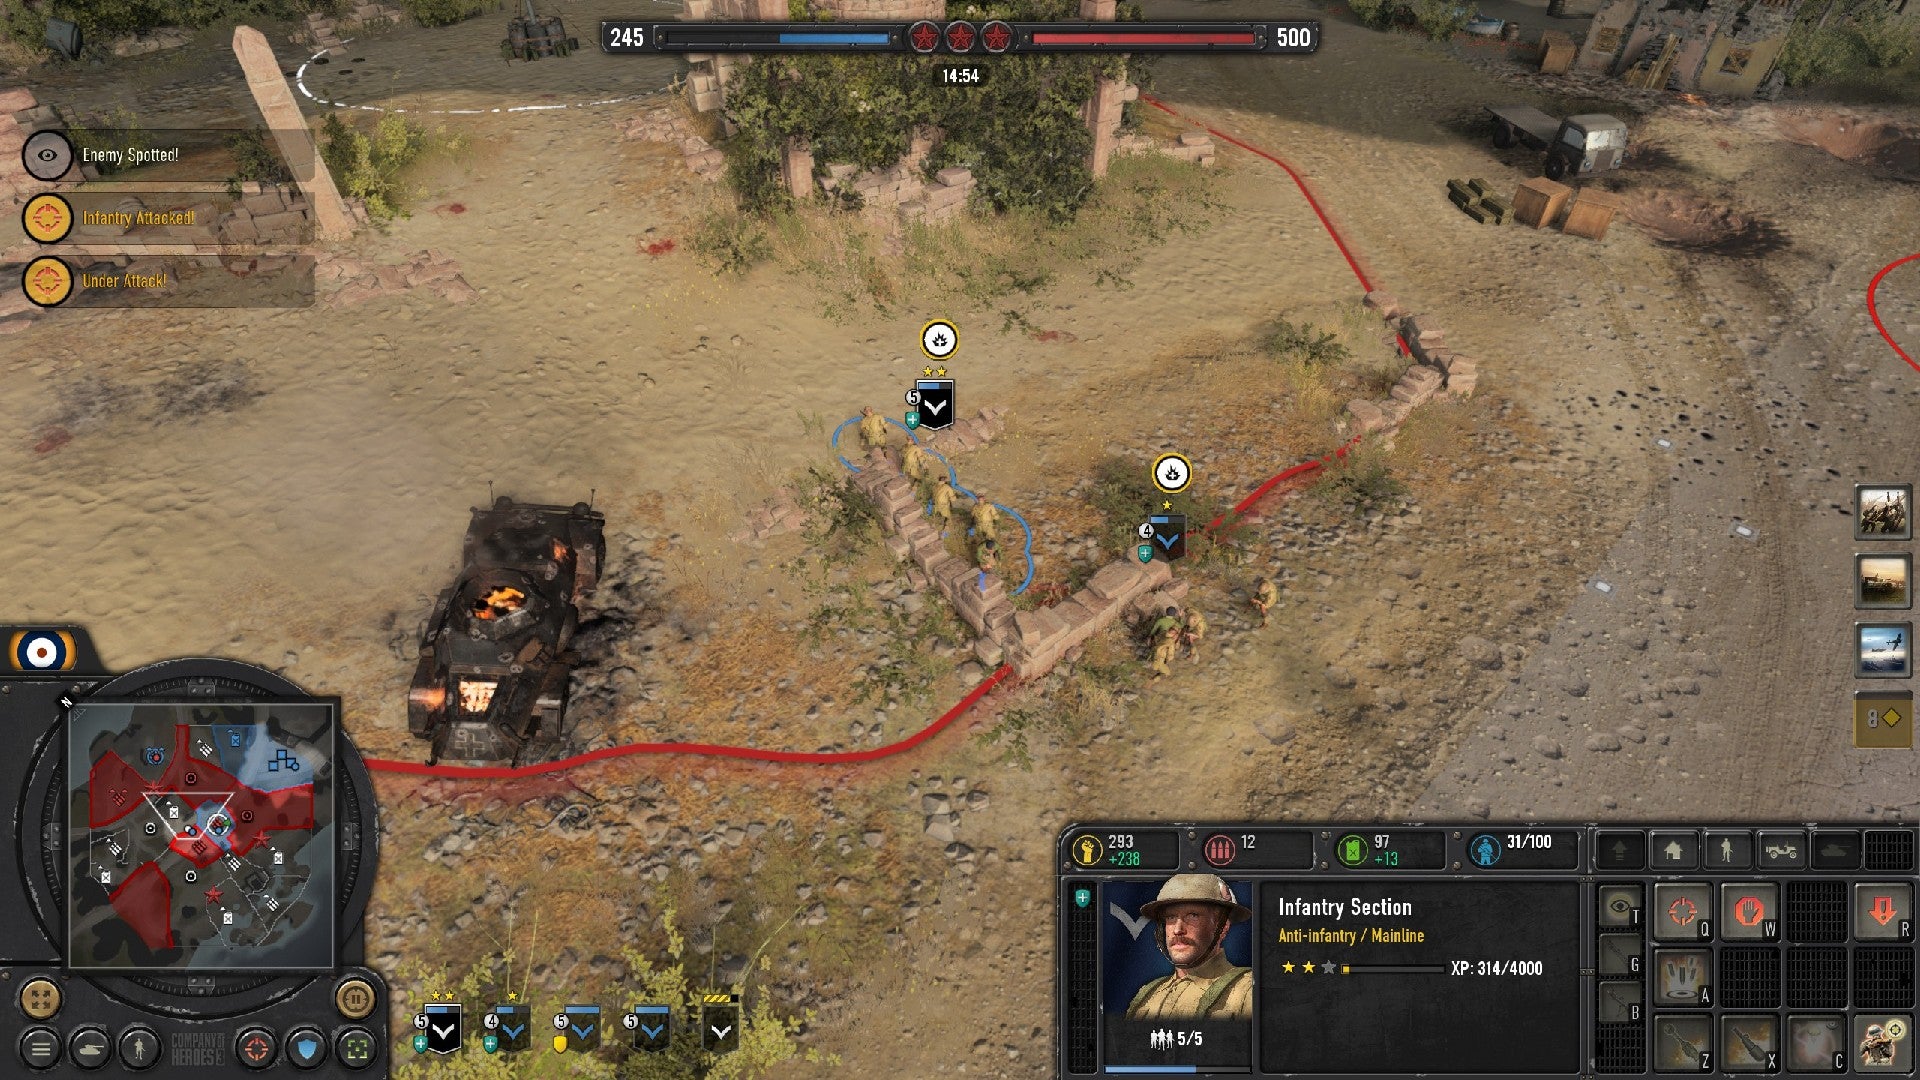
If you find enemies in cover that’s an L-shape, you can use this to your advantage to gain protection while also flanking your enemy. For example, moving your units to the outside edge of that cover will give them protection, but any enemies within the L-shape cover will be left vulnerable. You can see this represented with friendly units in the image above.
Flanking enemies is an excellent way to gain the advantage when struggling in combat, and using these tactics often will put pressure on your enemies and make it harder for them to defeat your units in battle.
17. Use buildings to avoid suppressive fire
If an infantry squad is fired upon by a vehicle, MG turret, or some other kind of heavy weaponry, they can become suppressed. Suppressed units will drop to a prone position and crawl, making them move at a much slower speed. If they’re suppressed in the open, the squad will lose health rapidly and almost certainly die.
When contesting positions, consider moving your infantry squads into buildings. When inside a building, squads cannot be suppressed, which will help them survive against heavier weaponry. Buildings also provide cover on every side, meaning you’ll take less damage from incoming fire from any direction. They also provide cover from point-blank units, so you don’t need to worry about being flanked.
Of course, buildings have their weaknesses. Anti-Structure units, for example, will carve through buildings like a warm knife through butter. There are also certain Infantry units which can oust enemy units from buildings, forcing them out into the open. In general, though, the suppression immunity and lack of flanking opportunities make buildings an unparalleled option when in need of cover on the battlefield.
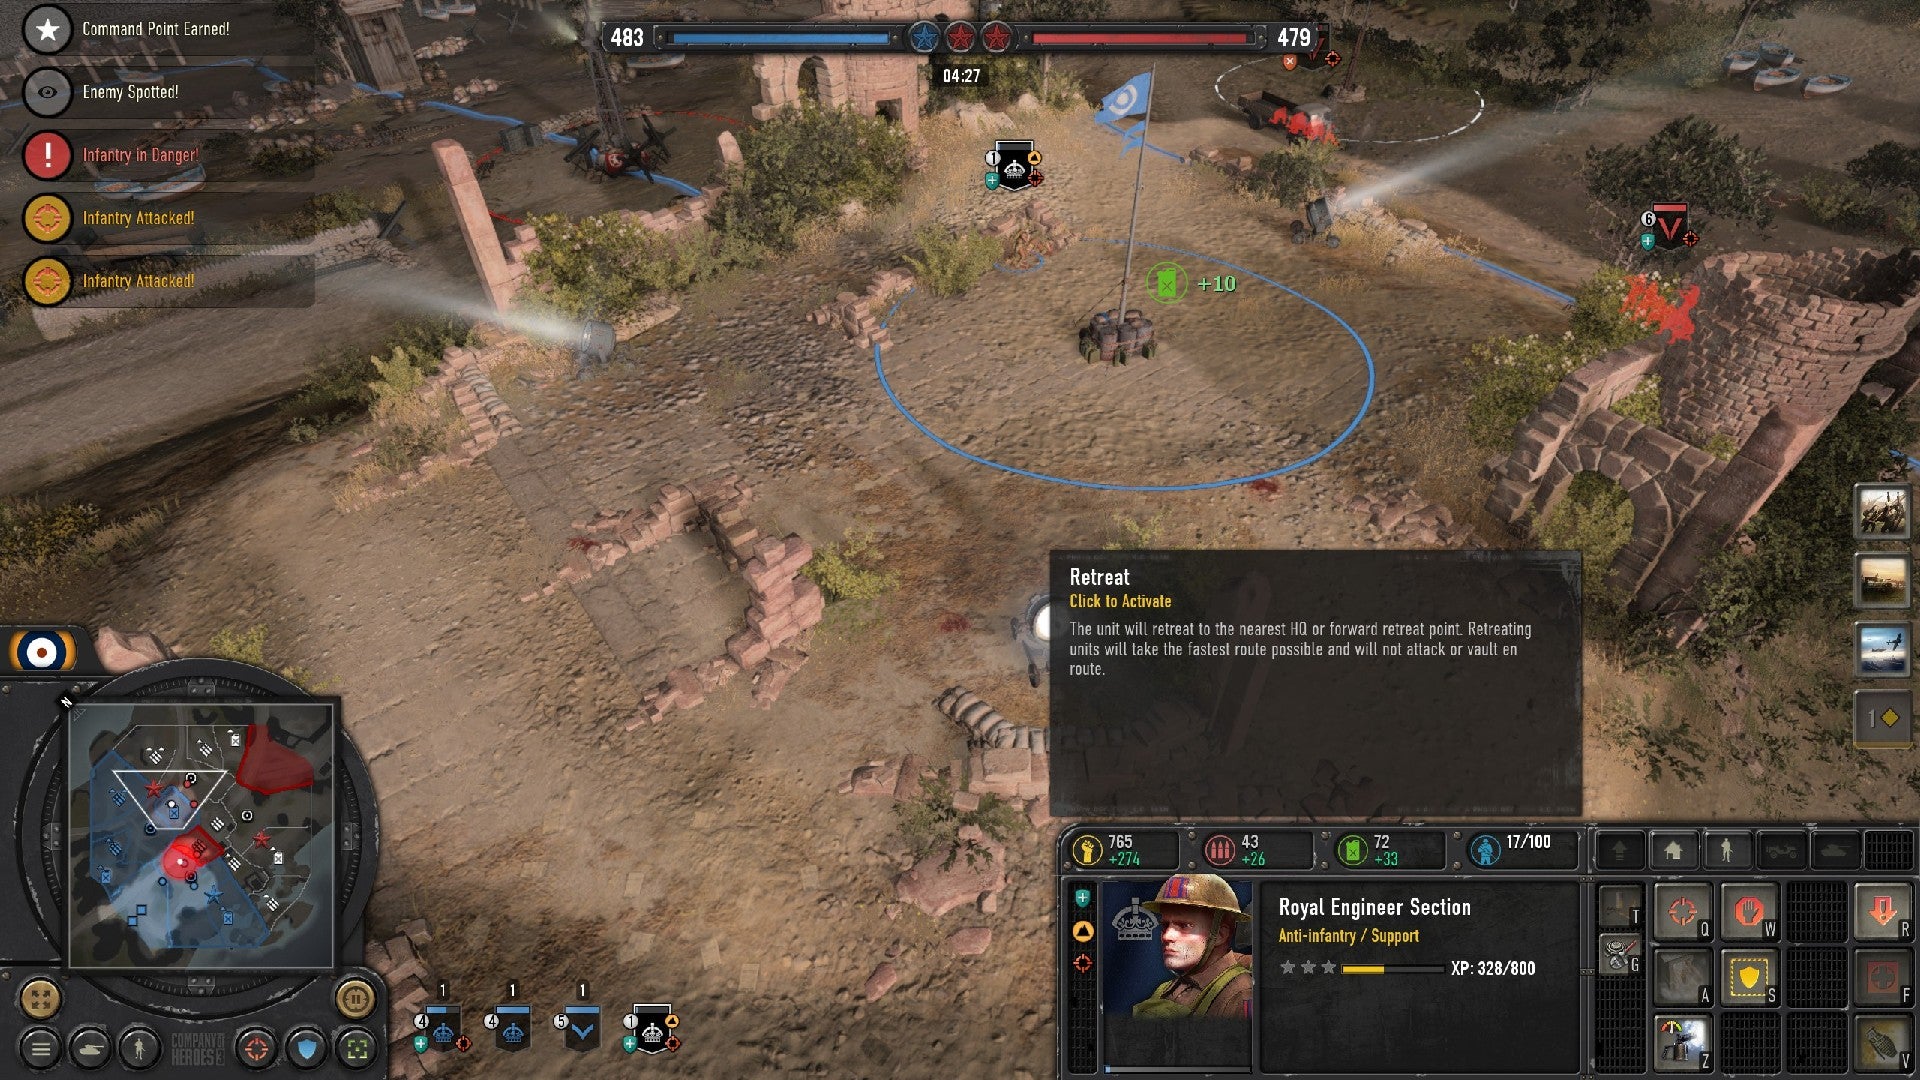
18. Use the retreat function to send squads back to base to heal and reinforce
Over time, your squads will inevitably take damage from enemy units. Your infantry squad might have six soldiers that you can see, and each of these soldiers has their own health points. A squad is wiped when all of the soldiers within that squad die.
However, if a squad makes it back to base with soldiers, or even a single soldier, still standing, they can heal and reinforce. This will refill the squad with soldiers and replenish any survivors back to full health. You can reinforce any infantry unit by pressing R while they’re selected. Vehicles cannot retreat.
When possible, it is always best to heal and reinforce a squad, rather than letting them die. While reinforcing a squad still costs Manpower, it uses far less than it would take to train a whole new squad. This allows you to use resources more efficiently, and also allows squads to build up experience over time.
As a squad gains experience, they will earn Veterancy bonuses. This might make them more accurate, or boost the firing rate of their weapons. Veterancy bonuses can make a significant difference over the course of a game, and an army of Level 3 units will easily outmatch an army of the same units at Level 1.
19. Find ways to heal and reinforce on the battlefield
When you order a unit to retreat, the squad will fall back to the nearest reinforce point. By default, your only reinforce point is your headquarters. However, you can get reinforce points out on the battlefield, allowing your units to reinforce closer to the action.
When building your army, look through the non-combat support units to see if any can heal or reinforce squads. The British CMP 15cwt Truck, for example, can reinforce squads. If you build this truck, it can function as a reinforce point for your retreating units. If you have multiple reinforce points, your units will default to using the nearest one.
By default, your headquarters is set to auto-reinforce. However, reinforce units, such as the British CMP 15cwt Truck, will have auto-reinforce disabled by default. This is because reinforcing a unit costs Manpower, and it could be detrimental if the game drained your Manpower without you realising. If you want a truck to act as a reinforce point, select it and enable auto-reinforce in the control panel.
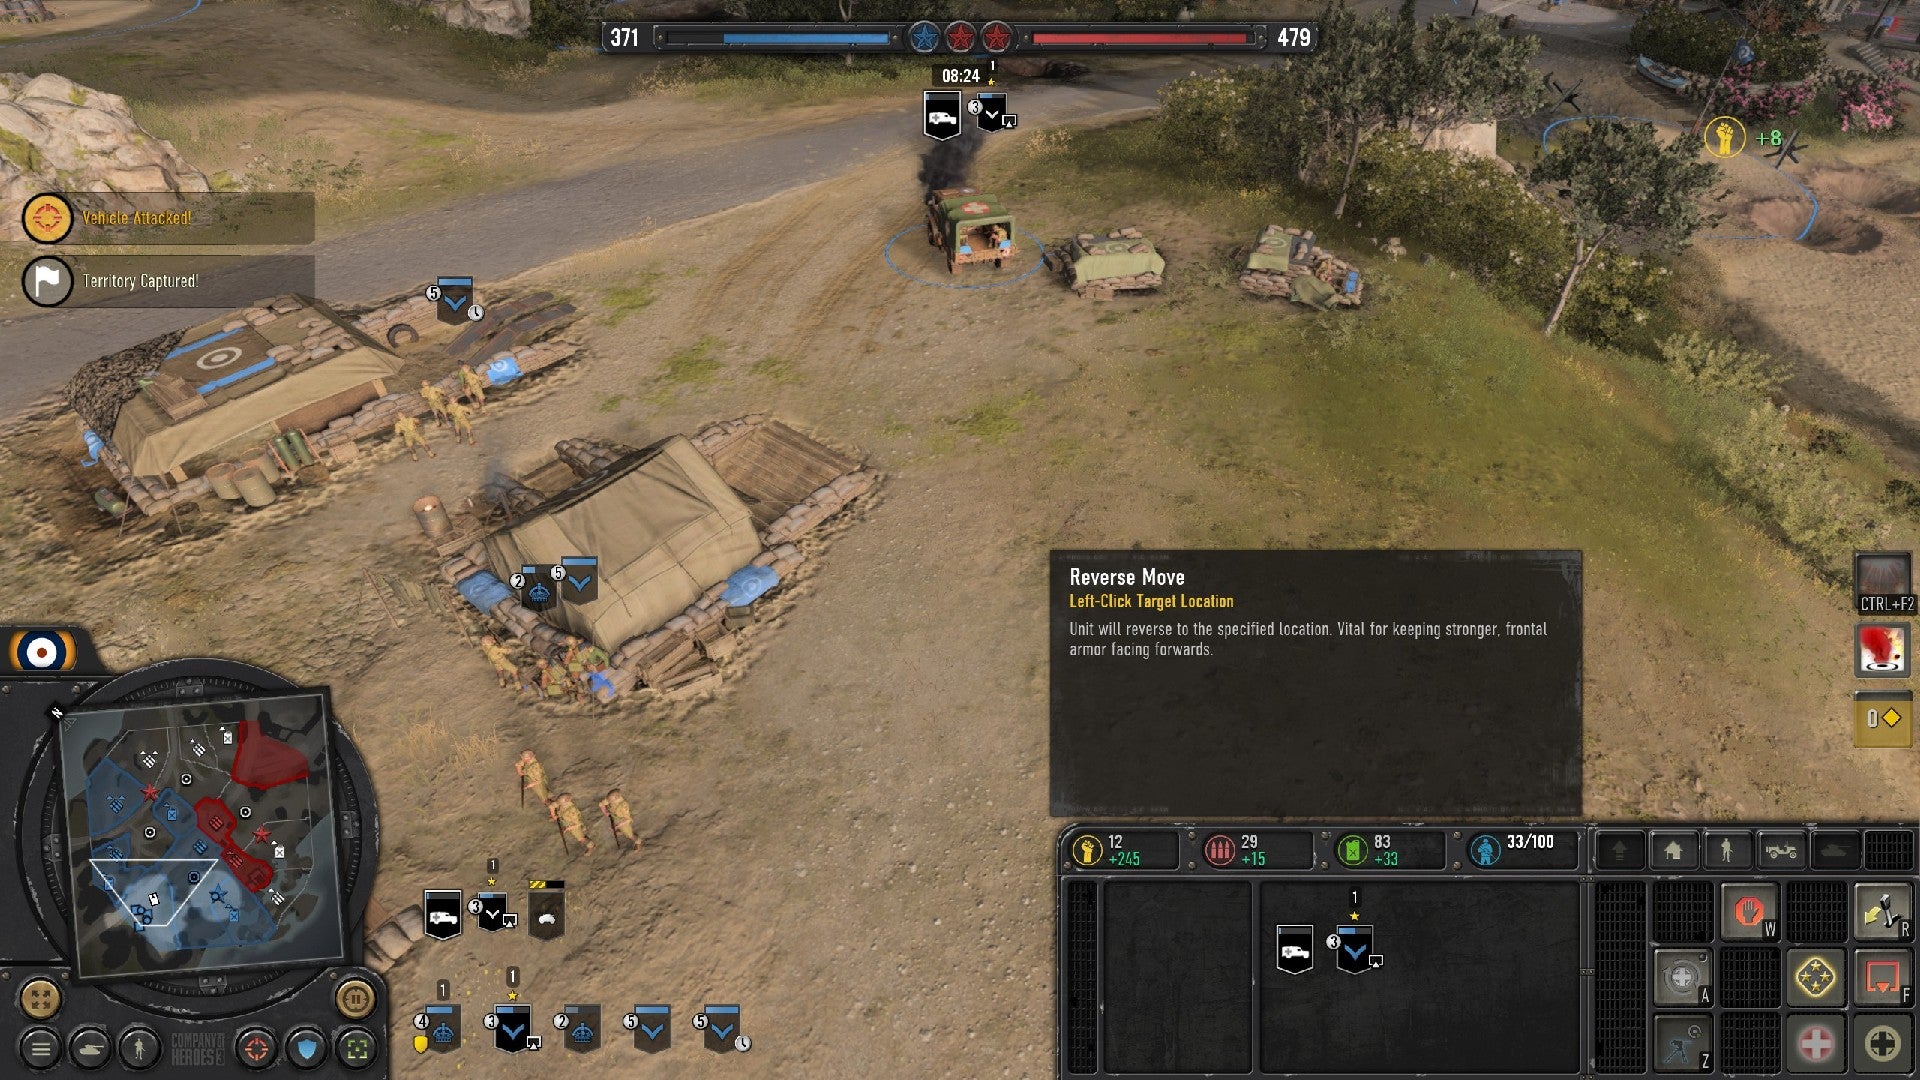
20. Reverse vehicles to get out of danger
Vehicles have Front, Side, and Rear armor. Typically, the Front armor is the strongest, the Sides are slightly weaker, and the Rear armor is weakest.
If you order a vehicle to move without reversing, it will turn until the front is facing the desired destination, and then start moving. This can expose the Rear armor to enemy fire, which could allow enemies to easily destroy your vehicles with a well-placed rocket.
While vehicles do not have access to a Retreat function, you can still get them out of danger safely by using the Reverse function. When a vehicle is selected, the Reverse hotkey is R, just like Retreat for an Infantry unit.
After selecting a vehicle and pressing Reverse, you must left-click on your desired destination. This will then cause them to reverse out of danger, which is important if you want to keep your vehicles alive whlle escaping combat. Reversing keeps enemy fire focused on the Front armor, giving your vehicles a much higher chance of escaping alive.
While vehicles cannot benefit from reinforce points, you can repair them using Engineer squads. Reverse them to safety, and then deploy an Engineer squad to their position (or consider pairing vehicles with an Engineer squad on the battlefield) to repair them to full health.
Like Infantry, keeping vehicles alive over a match will help them earn experience and gain Veterancy bonuses.
That wraps up our Company of Heroes 3 beginner’s guide. Whether you’re entirely new to the franchise, or just hopping into Company of Heroes 3 for the first time and needed a refresher, we hope this was helpful. If you want to hear more of our thoughts on the return of this WW2 RTS franchise, make sure to check out our Company of Heroes 3 review.
