It’s about time we did a guide on how to install Battle.net on the Steam Deck, what with Diablo IV out and about. Two, in fact, as there are a couple of ways to get ActiBlizz’s launcher running on your Deck, opening up even more of your games collection to the portable lifestyle. First, we’ll cover how to install Battle.net directly to your Steam Deck’s SSD, then cover an alternative method revolving around Lutris, a kind of all-in-one game launcher-of-launchers for Linux operating systems. Including, handily, SteamOS.
As with Steam itself, being able to use the Battle.net launcher on the Steam Deck is no guarantee of the games themselves being compatible. Diablo IV and Hearthstone should work fine, but don’t go expecting to play Warzone in bed, as Modern Warfare 2’s Ricochet anti-cheat is incompatible as incompatible gets. You’ll also need to use your Deck’s touchscreen (or a connected mouse) to navigate Battle.net as, in my experience, it doesn’t get on with the trackpads.
Still, the games are the ultimate prize, and when they are compatible, they’re playable without issue. Take a few minutes, then, and you can get around the lack of native SteamOS support to install Battle.net and make your library of Steam Deck games even bigger.
How to install Battle.net on the Steam Deck directly
This is a very similar technique to how you can install the Epic Games Launcher on your Steam Deck, using the regular Windows installer. To make it work, though, you’ll first need to install Proton GE (Glorious Eggroll). This expands the existing SteamOS compatibility afforded by Proton, the compatibility layer that comes with the Steam Deck as standard, so that non-Steam launchers can run as well. Be sure to have Proton GE already installed before you begin the following steps.
I also highly recommend using a USB-C hub or Bluetooth to connect a mouse to your Steam Deck. This Battle.net installation method isn’t impossible using just the Deck’s trackpads, but it does involve delving deep into file folders, which on the 7in screen is far more comfortably done with a mouse. Connecting a keyboard would also make things slightly easier, though isn’t vital since you can just open the Steam Deck’s onscreen keyboard by holding the Steam button and tapping X.
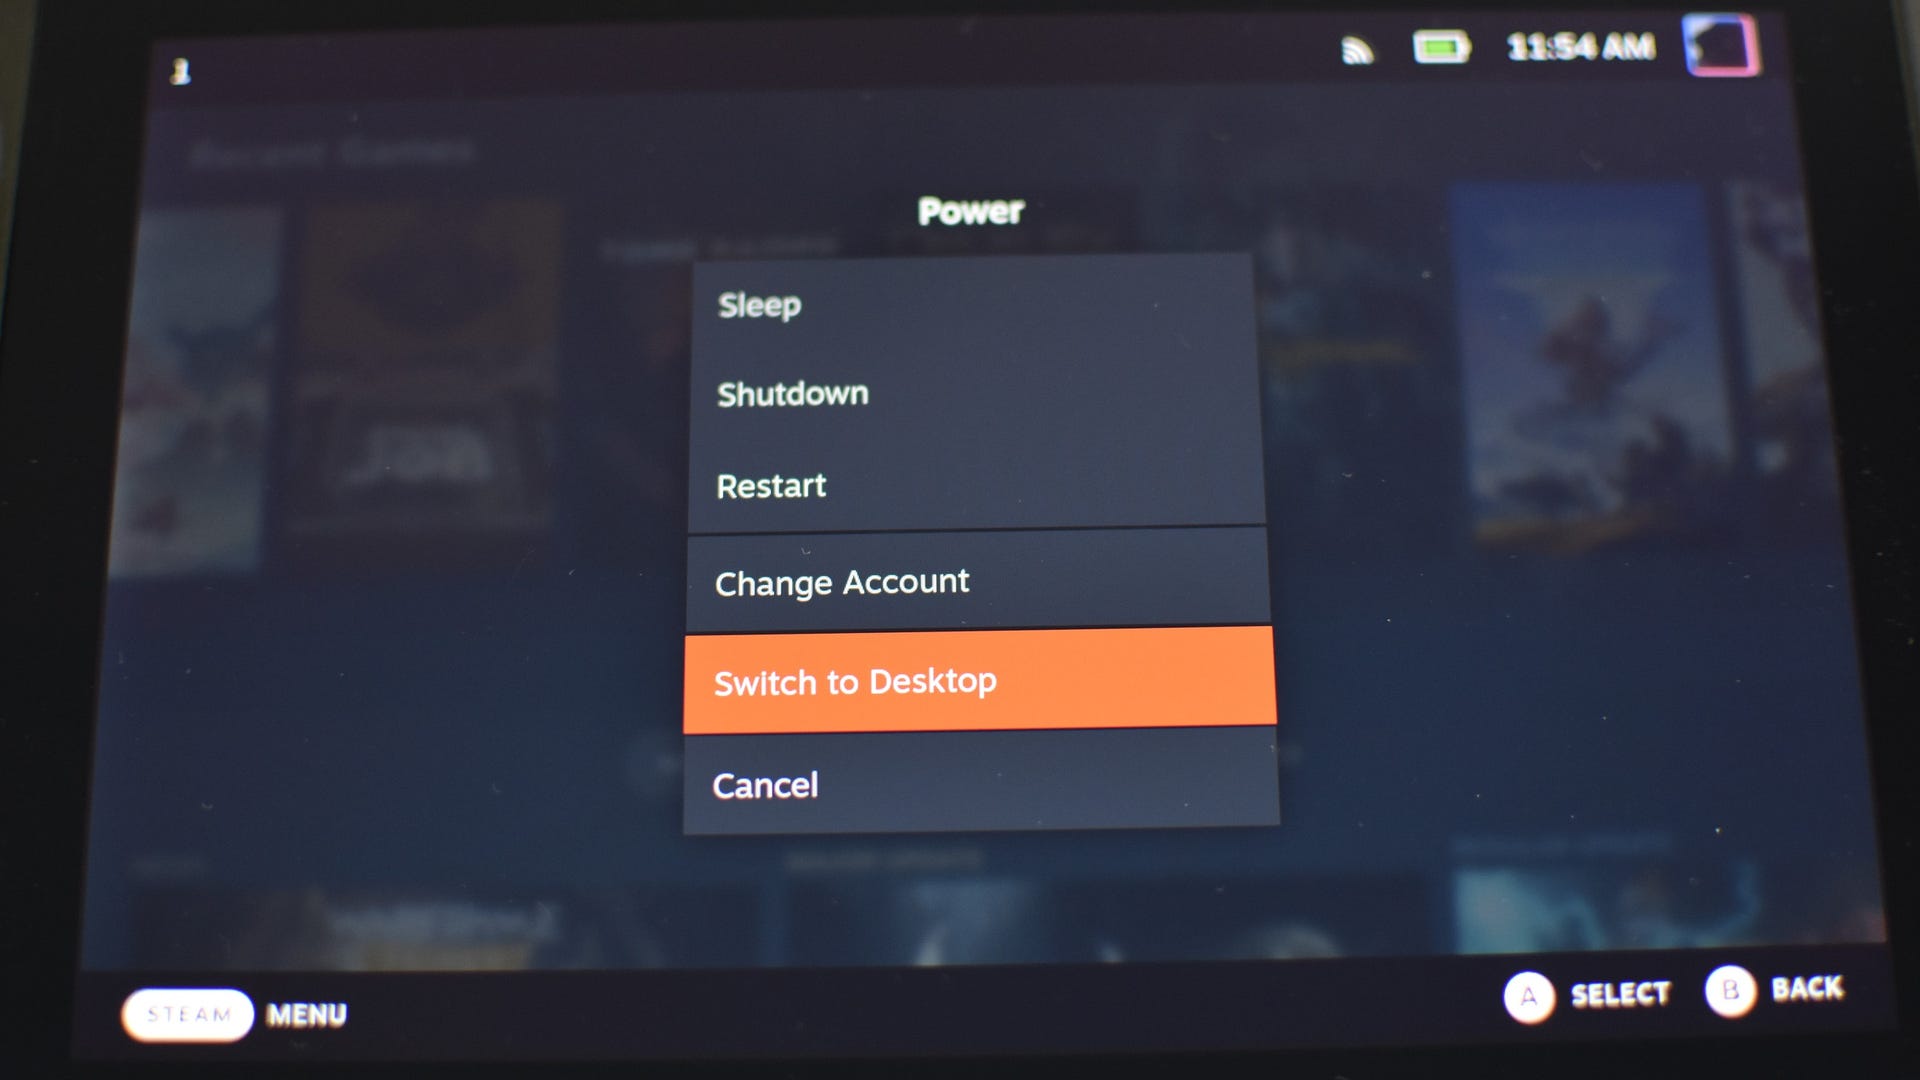
Step 1: Hold down the Steam Deck’s power button and select “Switch to Desktop”.
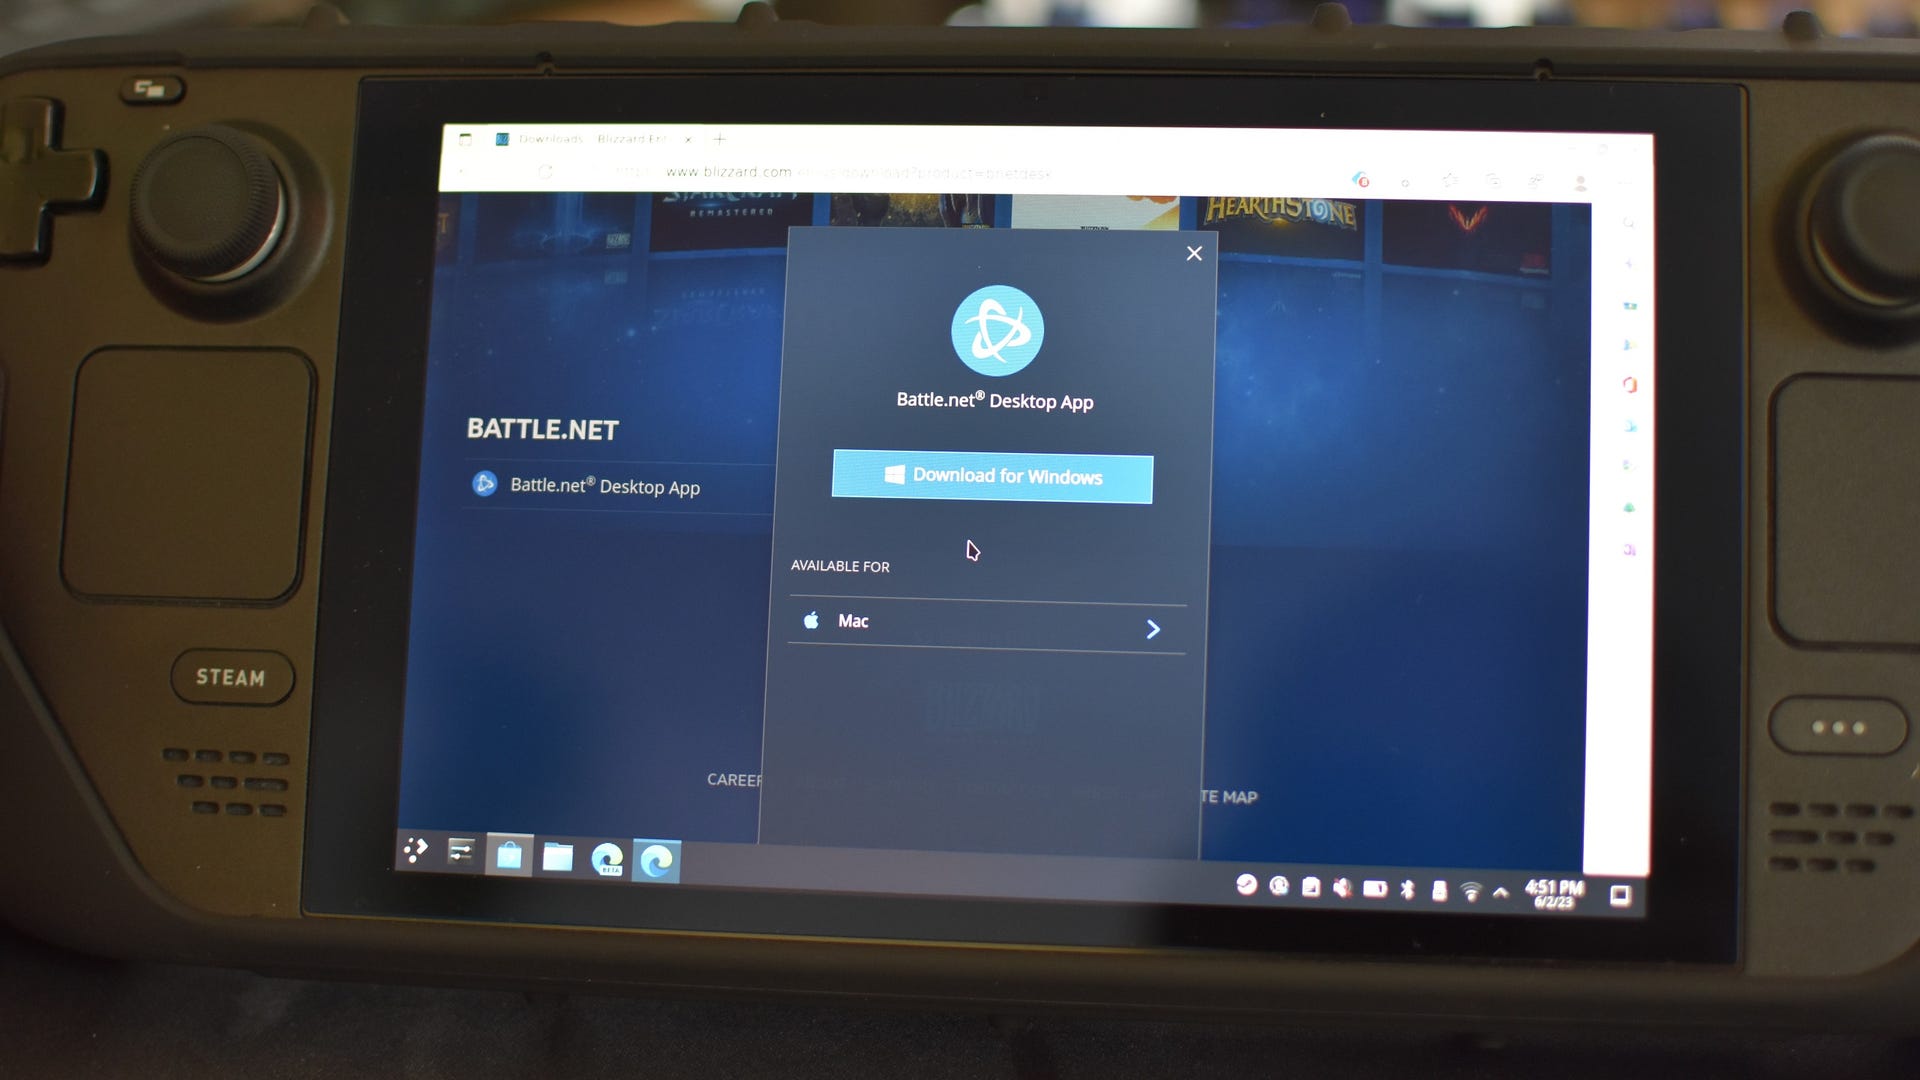
Step 2: Open up your preferred browser and head to the Battle.net download page. Select the Windows installer, and it should download in short order – but don’t open the .exe just yet. Instead, we need to add it to Steam.
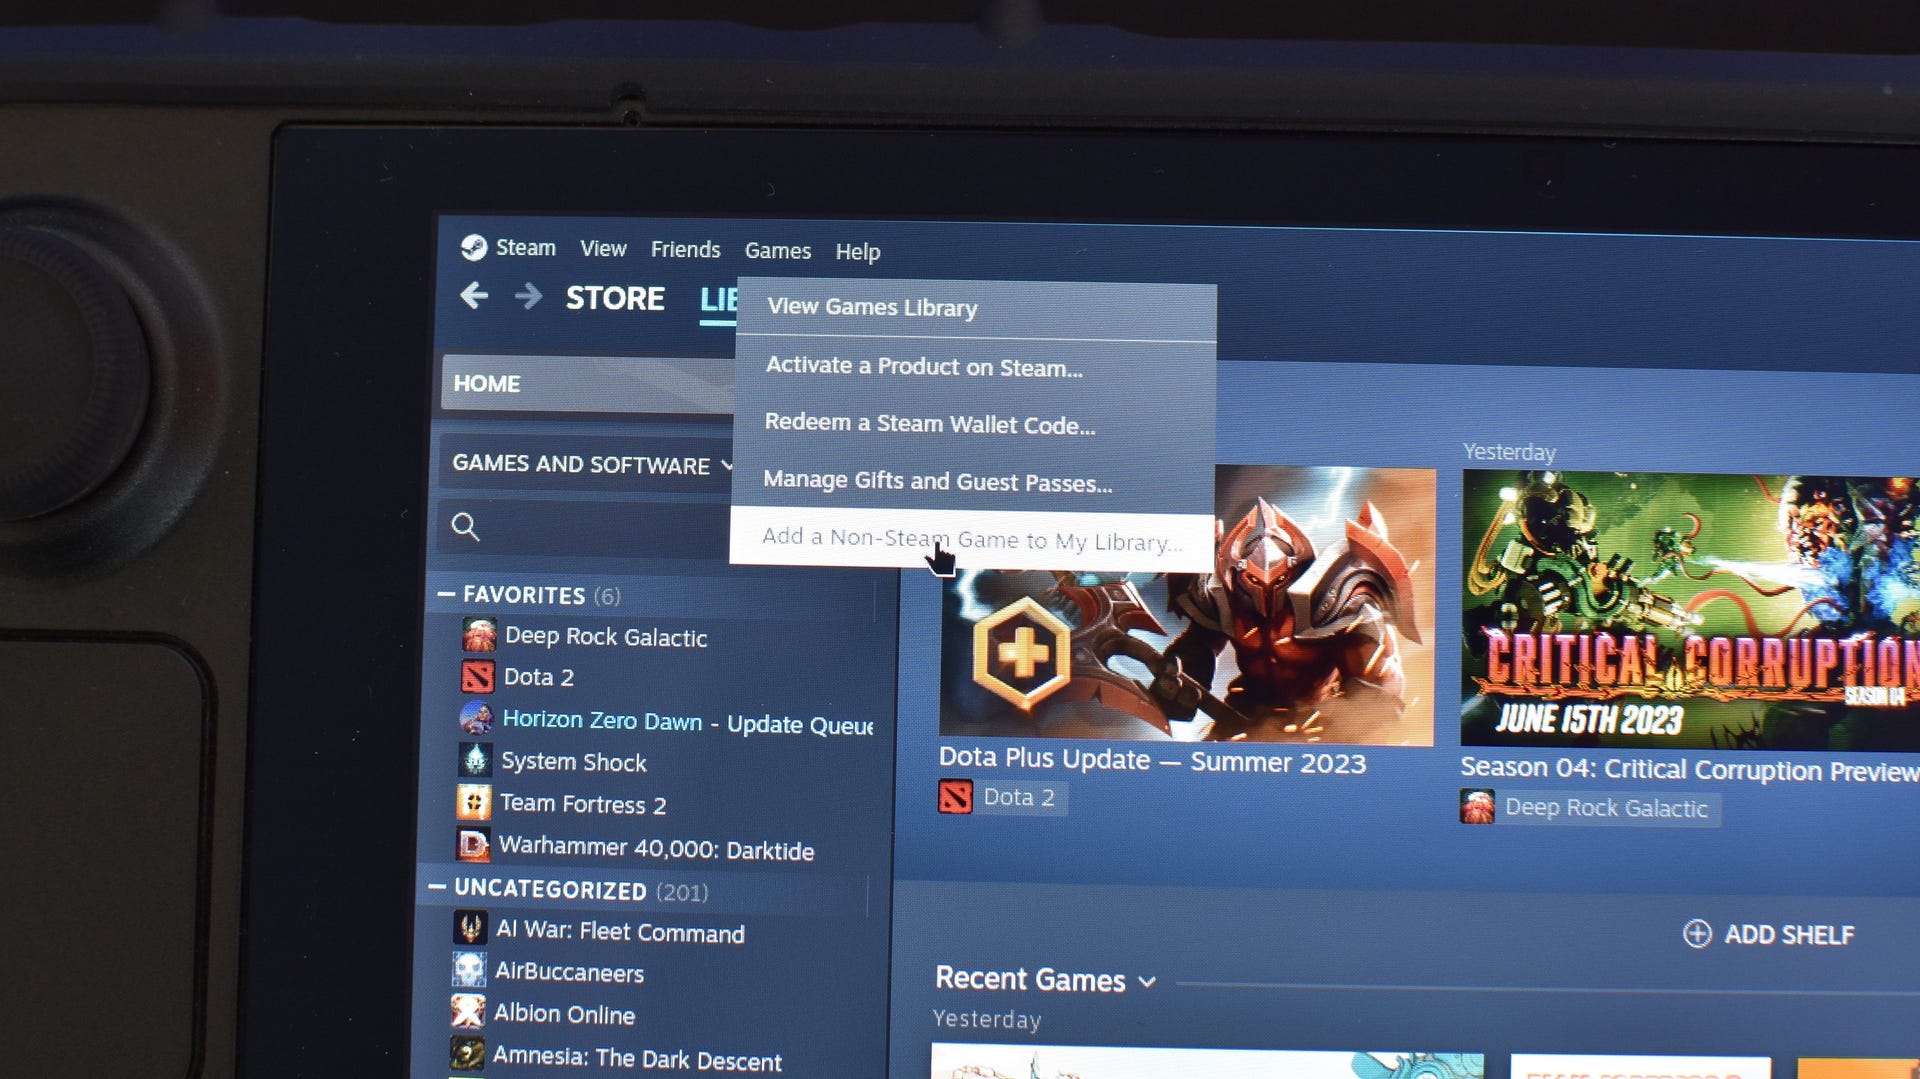
Step 3: Still in Desktop Mode, open the Steam app and click “Games” at the top. Then, select “Add a Non-Steam Game to My Library” from the drop-down list.
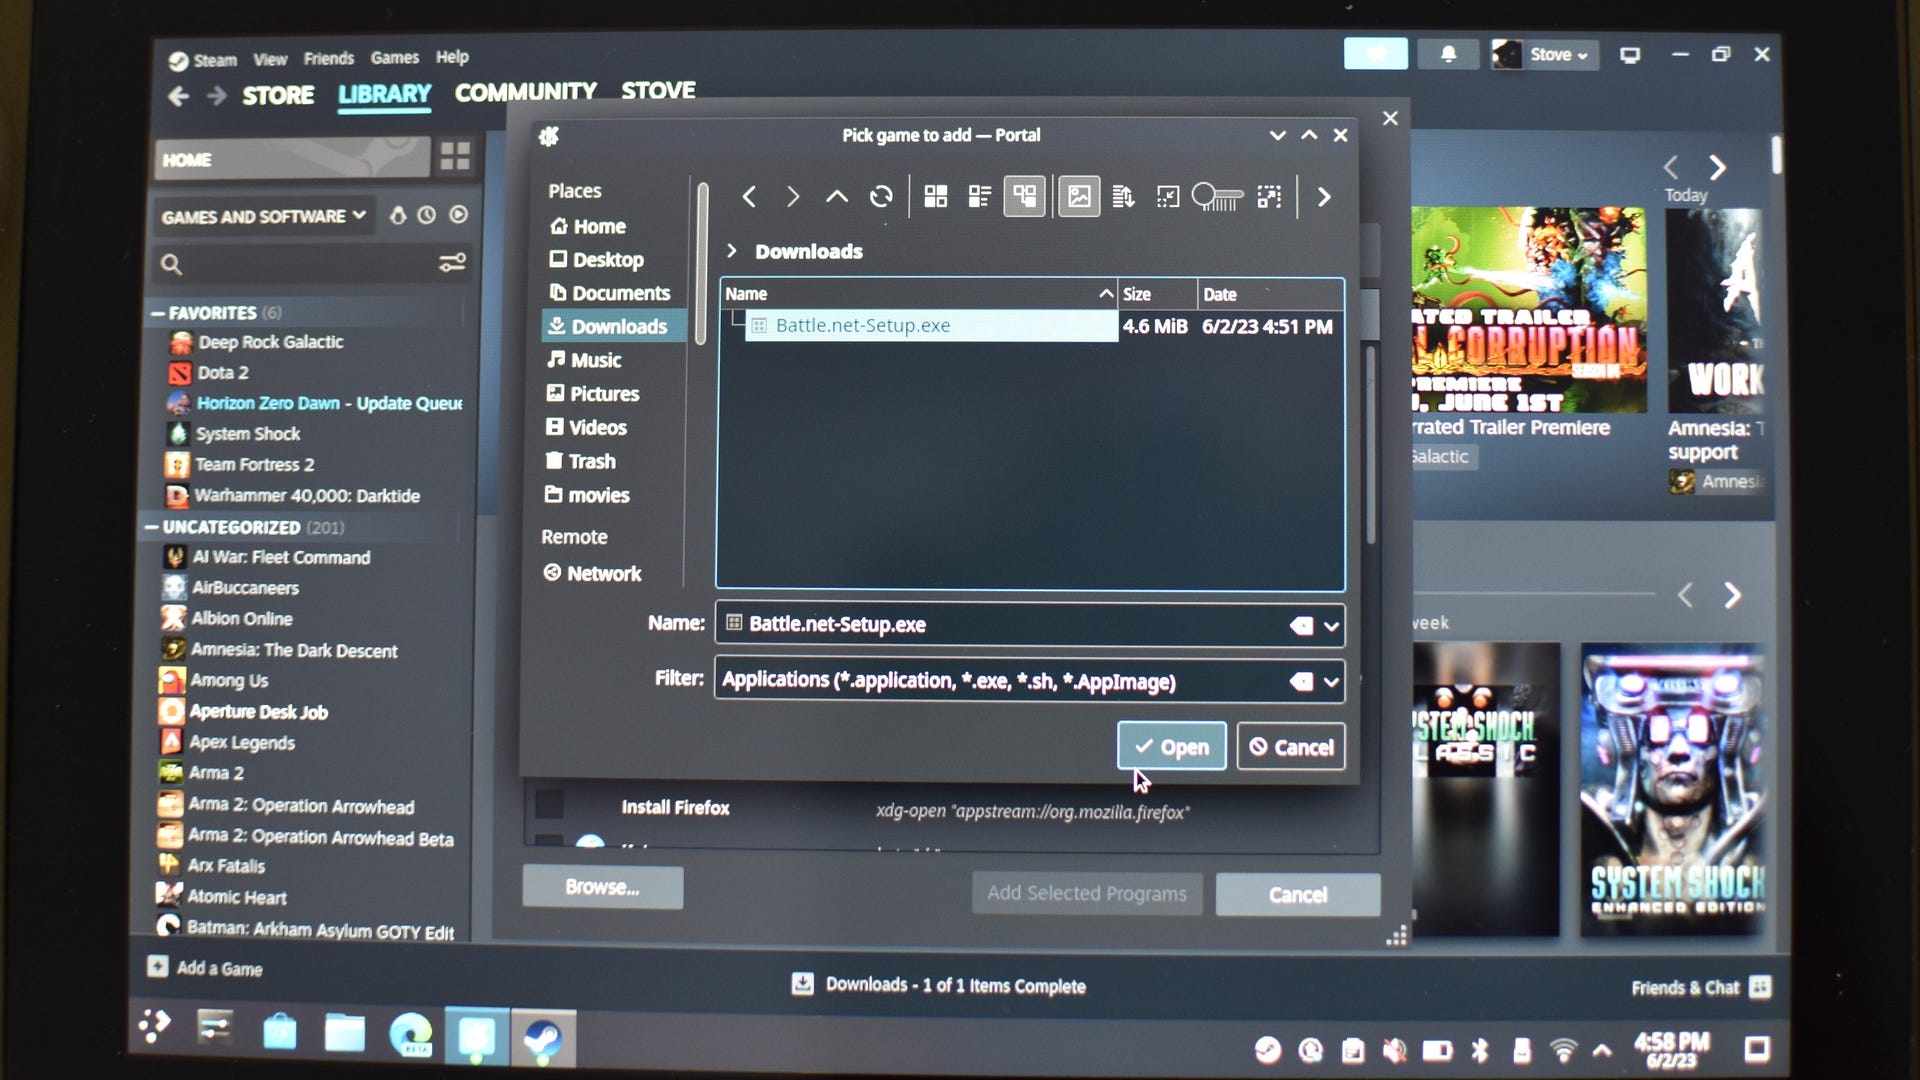
Step 4: In the window that pops open, click “Browse” down in the bottom-left corner, then navigate to your Downloads folder. You’ll find the Battle.net executable in there, so select it and click “Open” followed by “Add Selected Programs”. If for some reason, you don’t see it in the list, change the Filter to “All Files”.
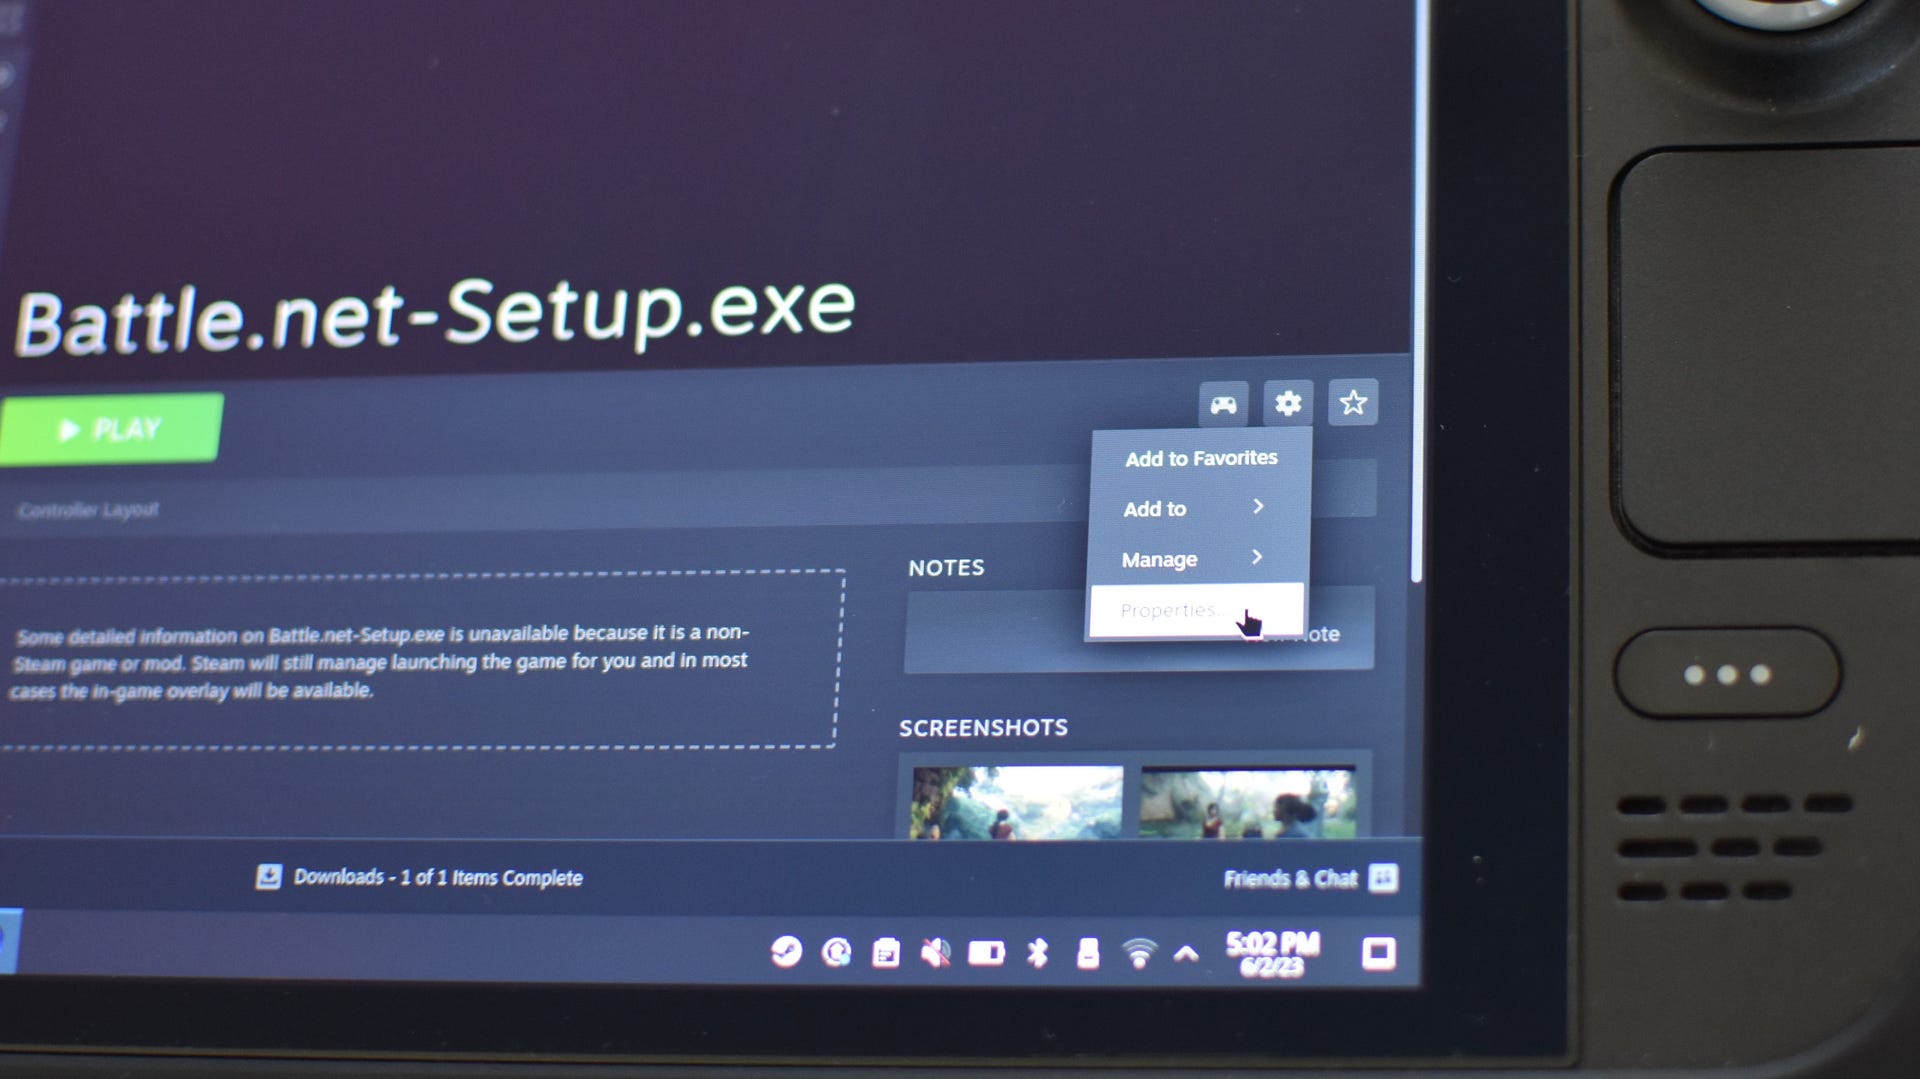
Step 5: Look for the executable, named “Battle.net-Setup.exe”, in your Steam Library. Again, don’t bother launching it yet. Click the cog wheel over on the right to open up the Manage menu, then select “Properties”.
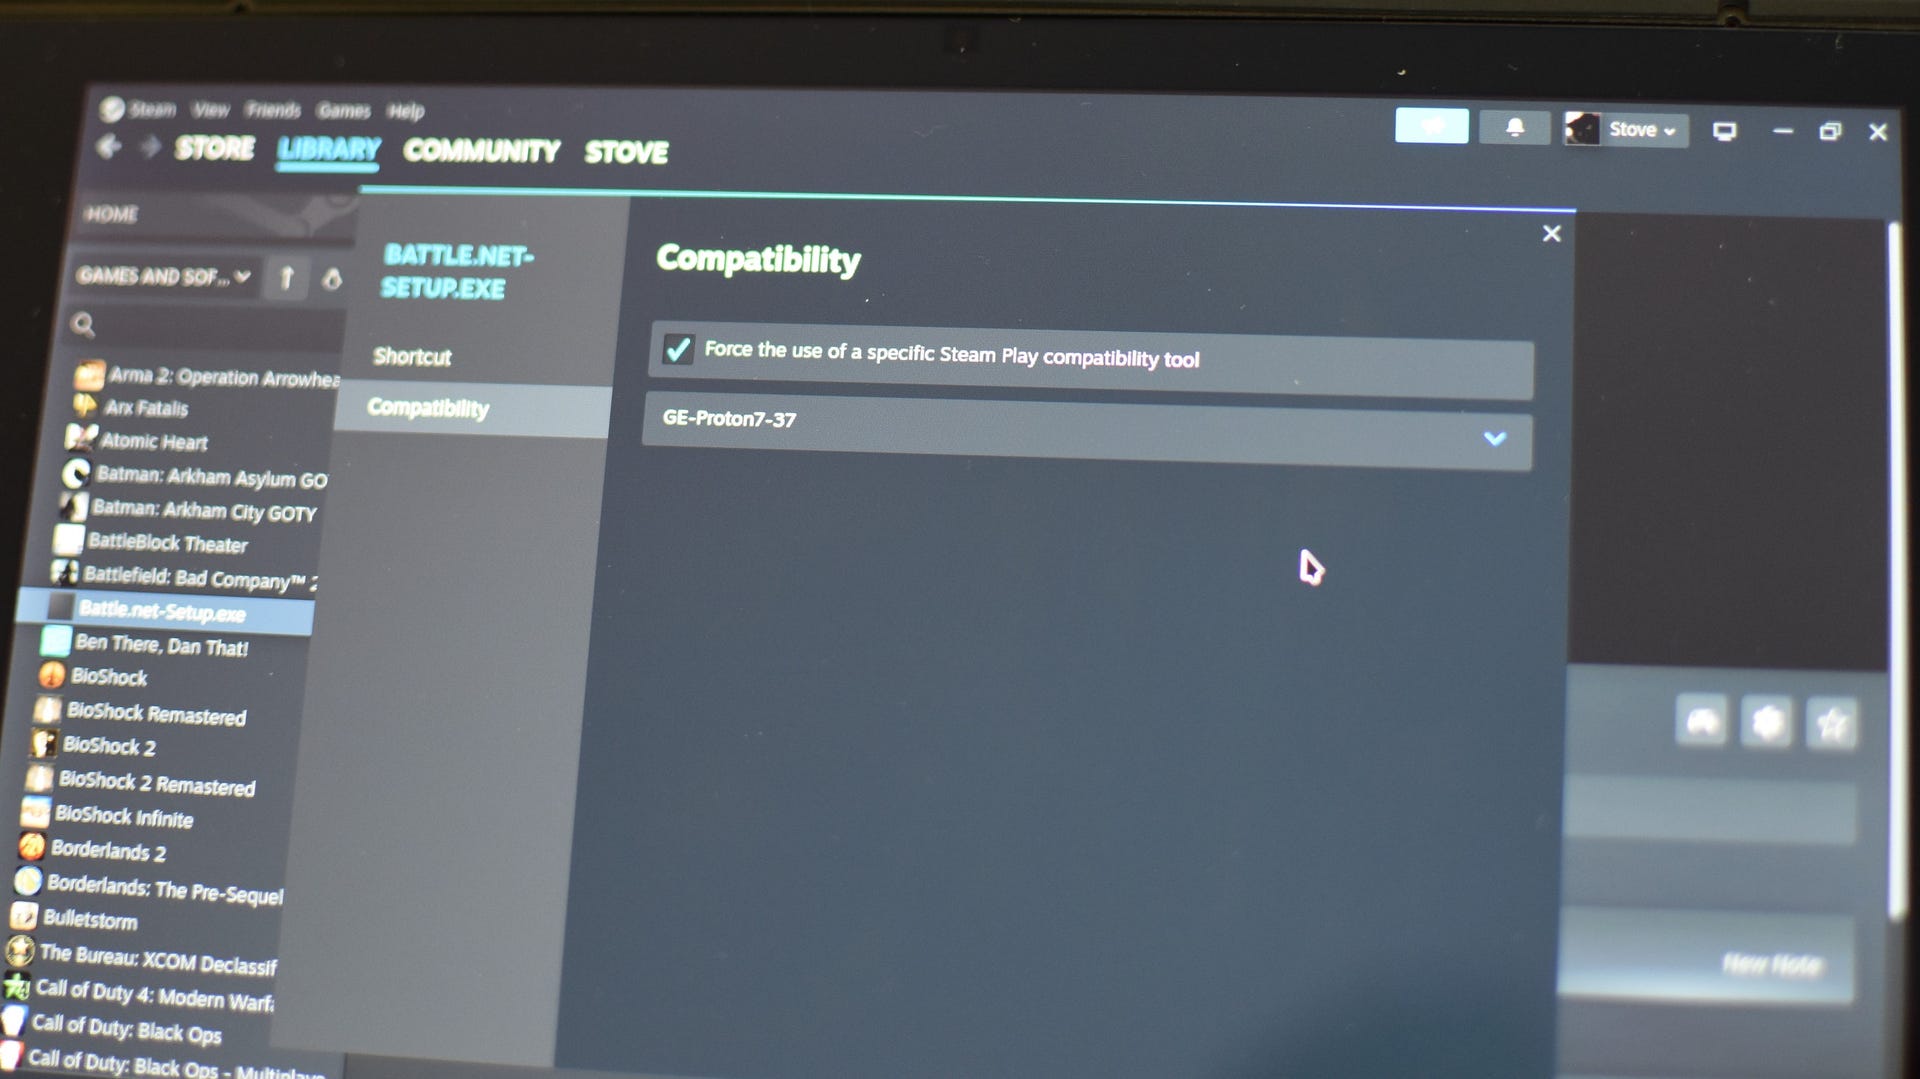
Step 6: Open the Compatibility tab and check “Force the use of a specific Steam Play compatibility tool”. This will create a drop-down list just below, so use that to select the latest version of Proton GE you have installed. Once selected, you can close the Manage window.
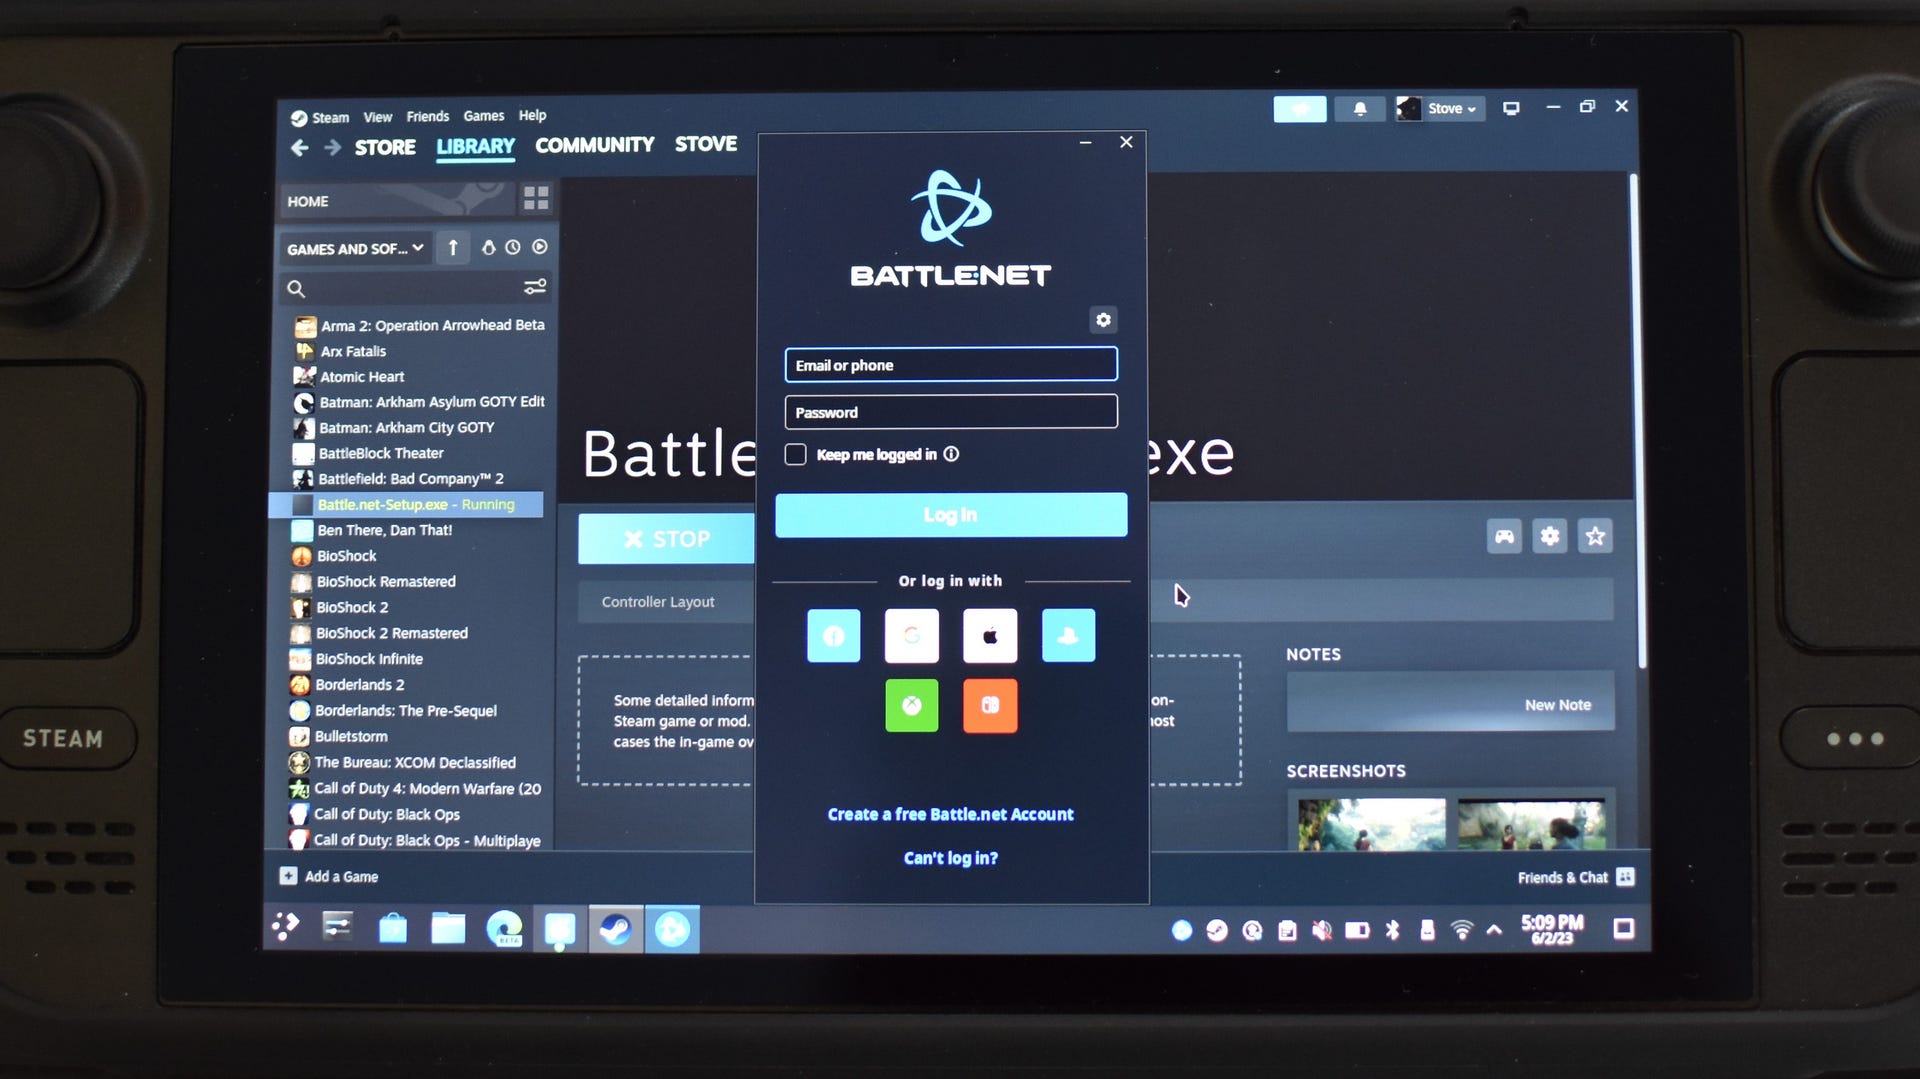
Step 7: Now you can hit Play to launch the installer through Steam. Run through it normally, just as if you were installing Battle.net on a Windows PC. After but mere moments, Battle.net will be ready to log in. However! Don’t do so just yet, as we still need to add Battle.net itself to the Steam Library. Close Battle.net for now.
Step 8: Once again, click Games, then “Add a Non-Steam Game to My Library”, then the Browse button. The installed Battle.net app is buried deeper than its installer was, and you’ll need to start by clicing the Options symbol in the top-right of this window and checking “Show Hidden Files”. Then, click on “Home” (uppercase), then the little rightwards-pointing arrow just next to it in the file address bar, then click on “home” (lowercase). From there, navigate to home/deck/.local/share/Steam/steamapps/compatdata/.
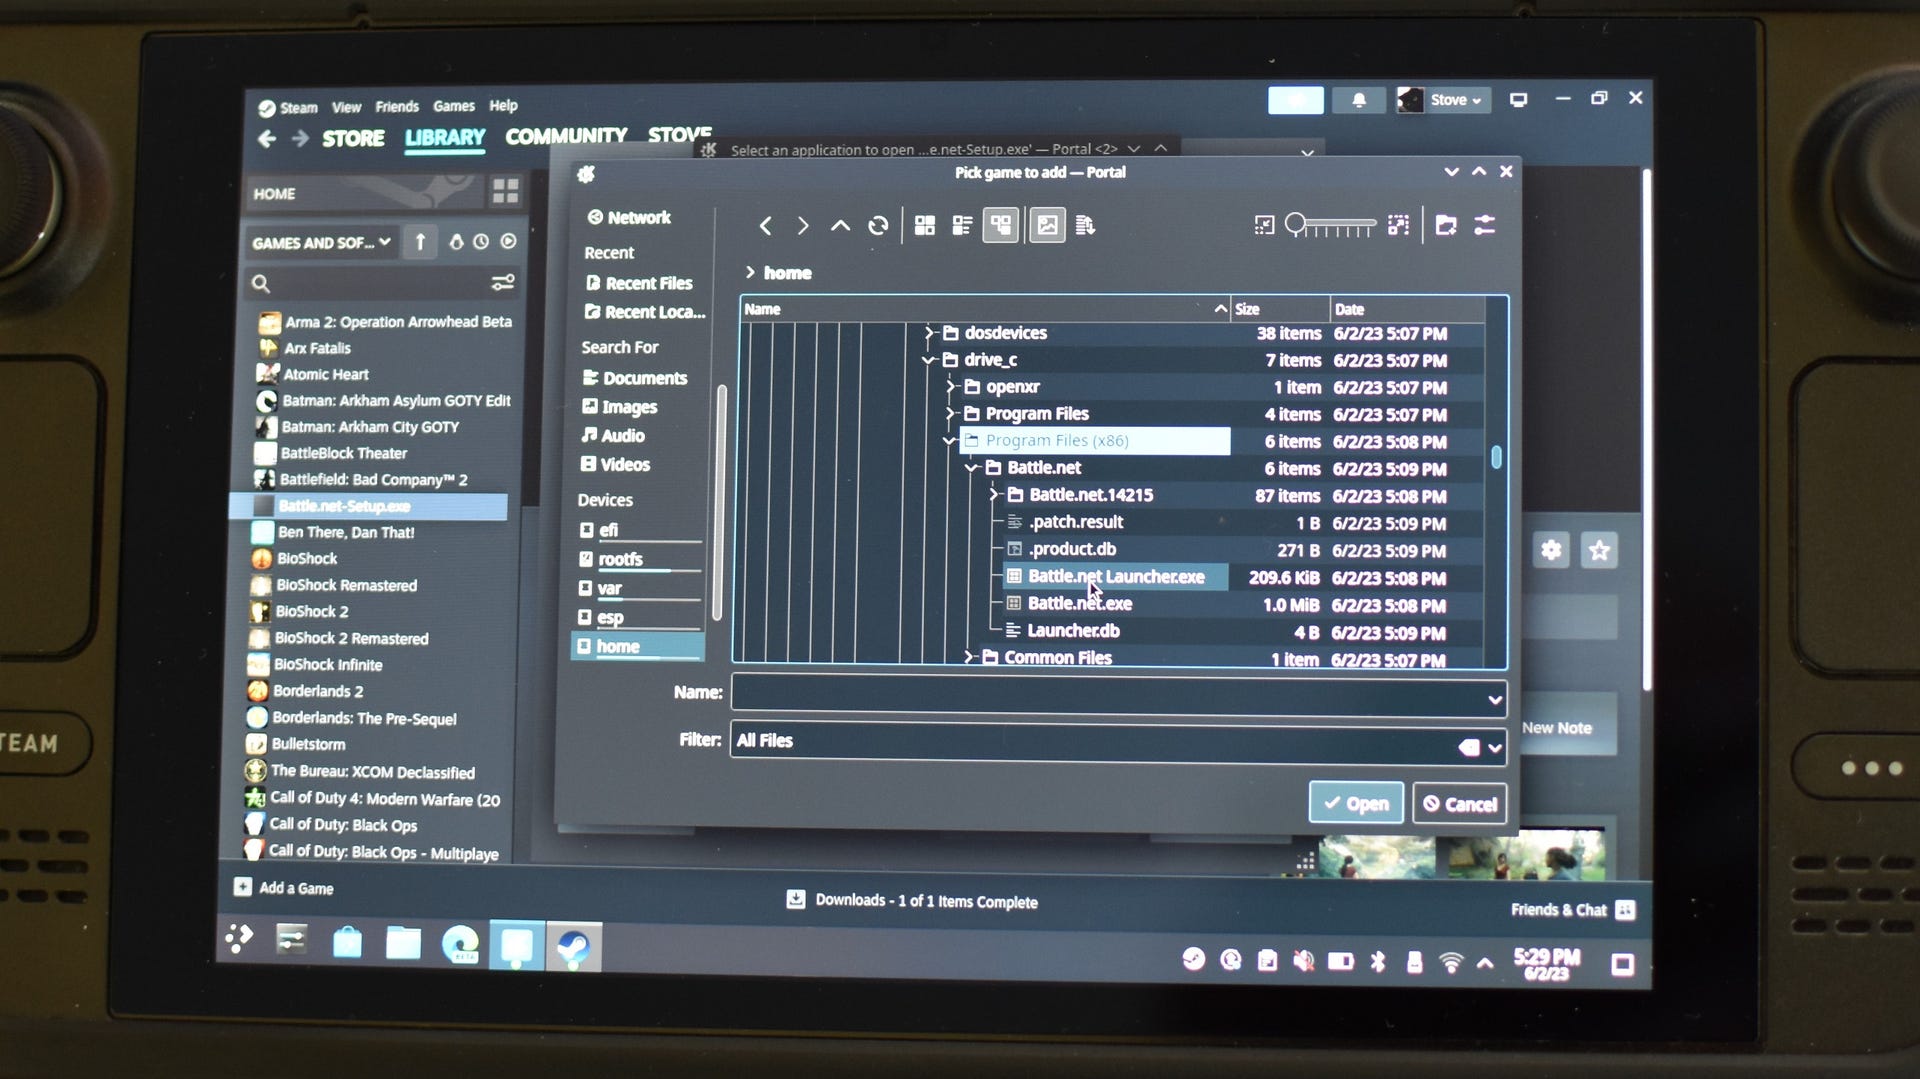
Scroll all the way down through compatdata to find what should be the most recently created folder – the folder name will just be a 10-digit number, but you can check its date to confirm. Open that up, then navigate to pfx/drive_c/Program Files (x86)/Battle.net. At last, you’ll find an executable named “Battle.net Launcher.exe” – select this, click “Open”, then “Add Selected Programs” to add it to Steam.
Step 9: Nearly finished, don’t worry. Just like with the installer, find the Battle.net launcher in your Library and open up its Manage menu. Head to Compatibility, check the box, and select Proton GE again.

Step 10: Aaaaaaaand donezo. You’ve successfully installed Battle.net on the Steam Deck, and it’s ready to launch from Desktop and Gaming mode alike.
Just to keep your library tidy, you can also get rid of the installer from your Library – just find it, open the Manage menu and select “Remove non-Steam game from your library”.
How to install Battle.net on the Steam Deck using Lutris
I personally prefer the cut-out-the-middleman approach to installing non-Steam launchers on the Steam Deck, but there are undoubtedly benefits to Lutris. It does most of the fiddly work for you, so there’s no descending into the bowels of your Steam Deck’s data folders just to find one executable, and it provides similarly easy installations for other launchers like GOG and Humble Bundle.
It’s still best done with a mouse, mind, so grab your USB-C hub and get one plugged in. A keyboard is essential, too – the first time I needed to log in to Battle.net via Lutris, the Deck’s onscreen keyboard didn’t work. On the bright side, there’s no need to install Proton GE or anything else in advance of beginning this method.
Step 1: Enter Desktop Mode by holding down the Steam Deck’s power button and selecting “Switch to Desktop”.
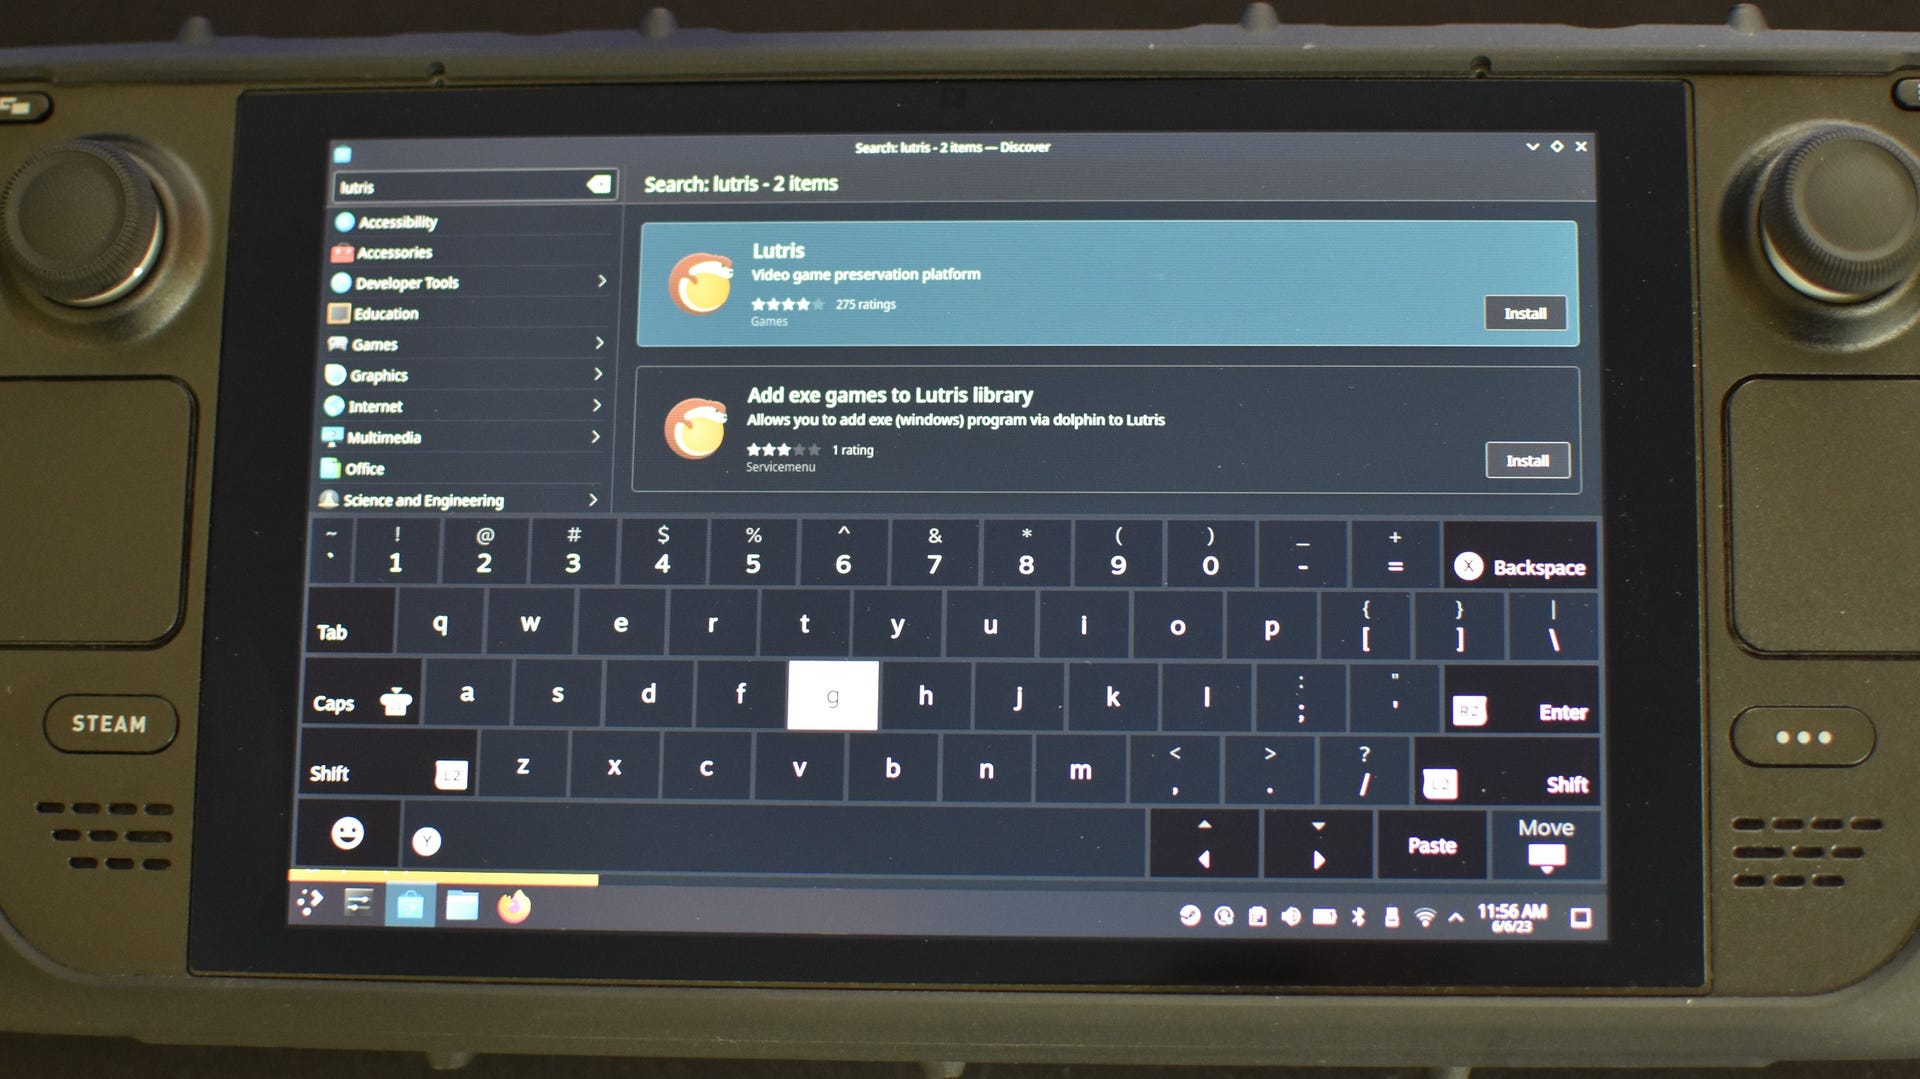
Step 2: Open the Discover application – it’s the little shopping bag-shaped icon in the Desktop Mode taskbar.

Step 3: In Discover, search for Lutris, select it from the results, and hit “Install”.
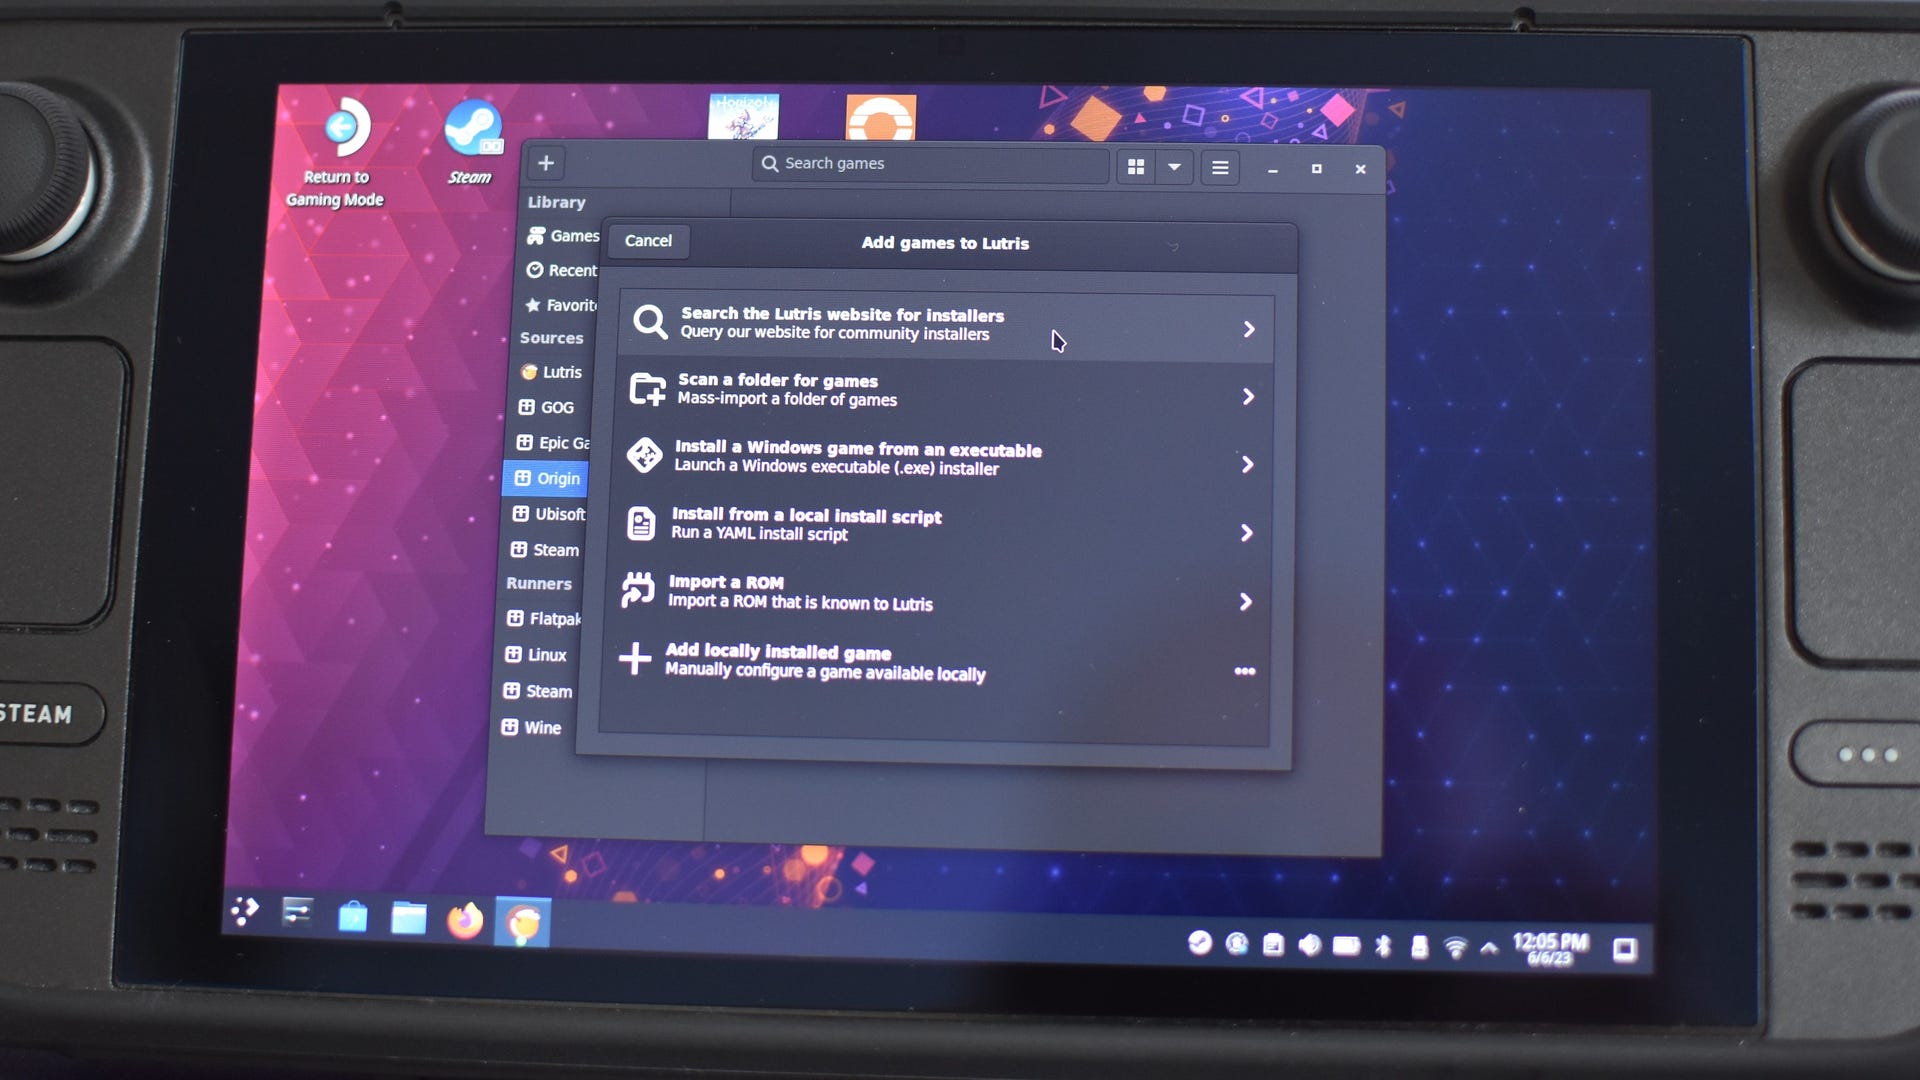
Step 4: Launch Lutris and click the “+” icon in the top-left corner. Then, select “Search the Lutris website for installers”.
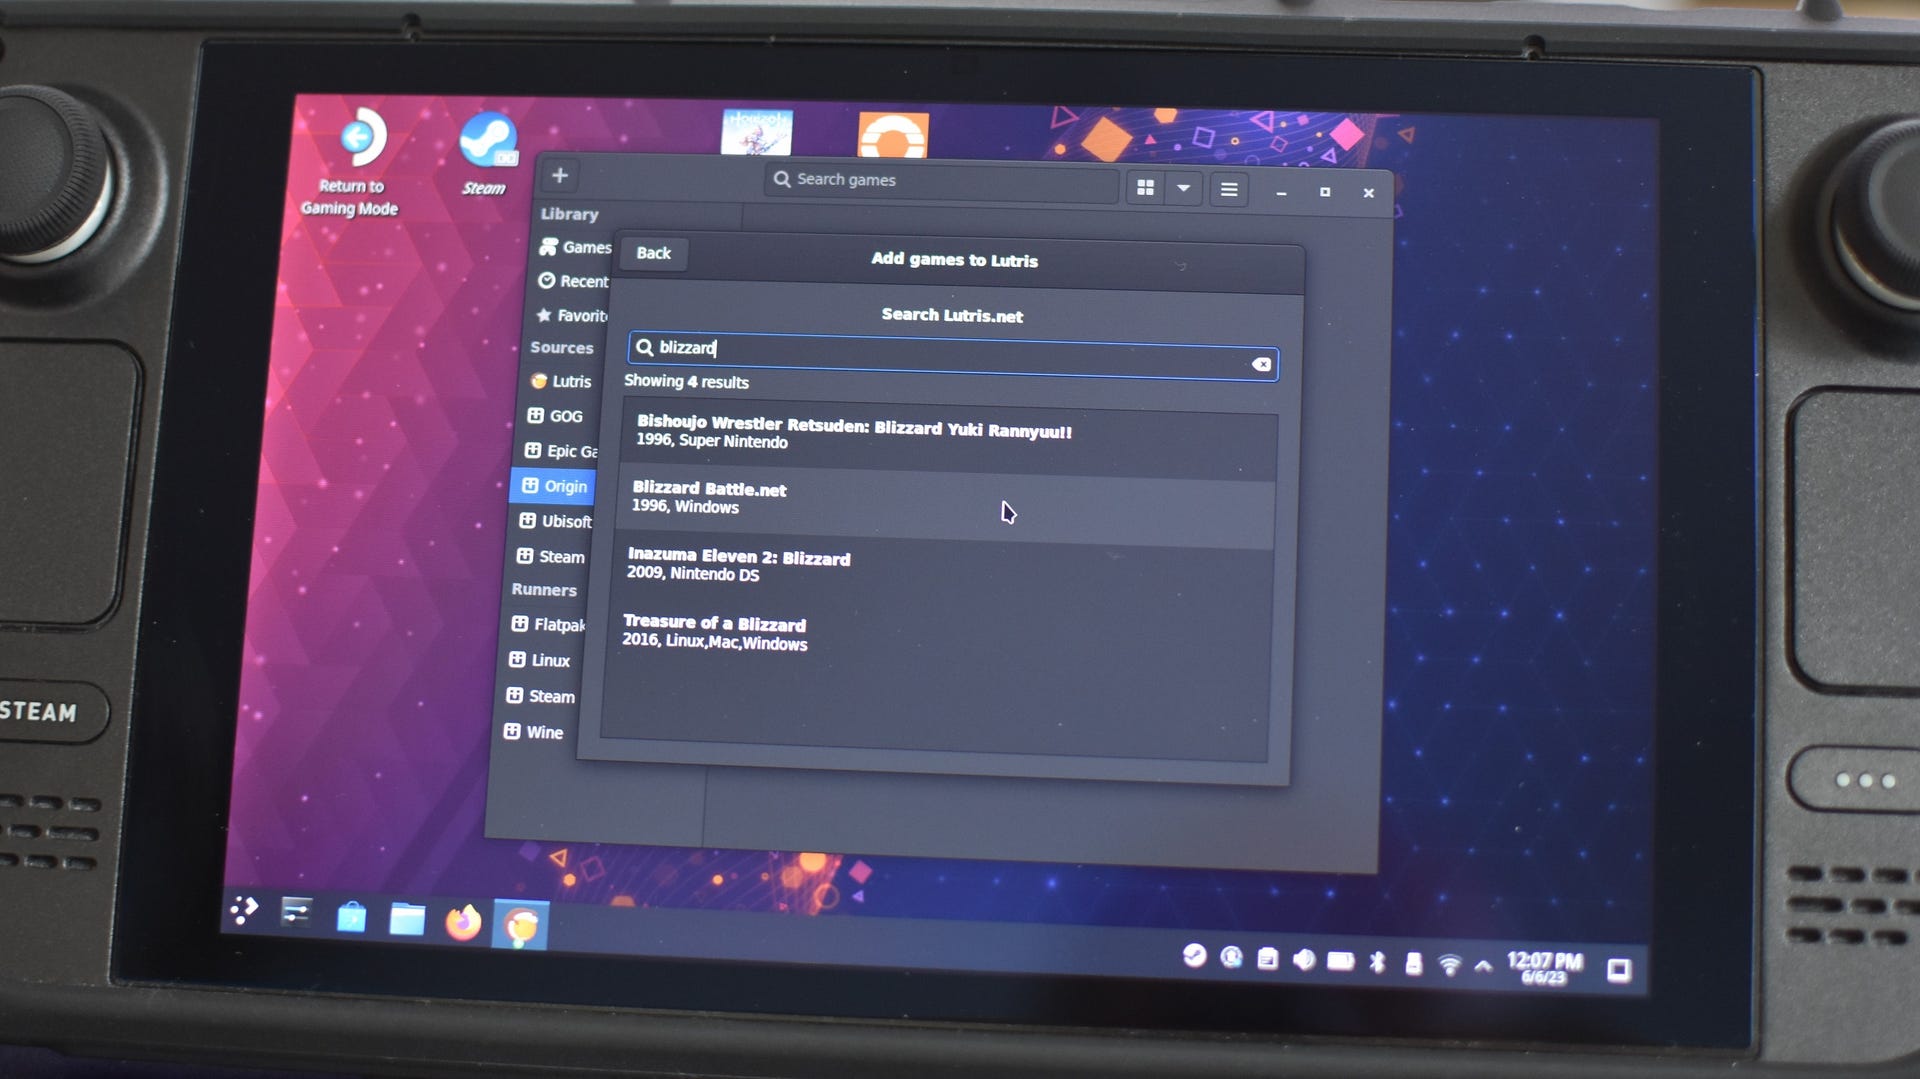
Step 5: Search for “Blizzard” and Select “Blizzard Battle.net” (how formal) from the results. Click “Install”.
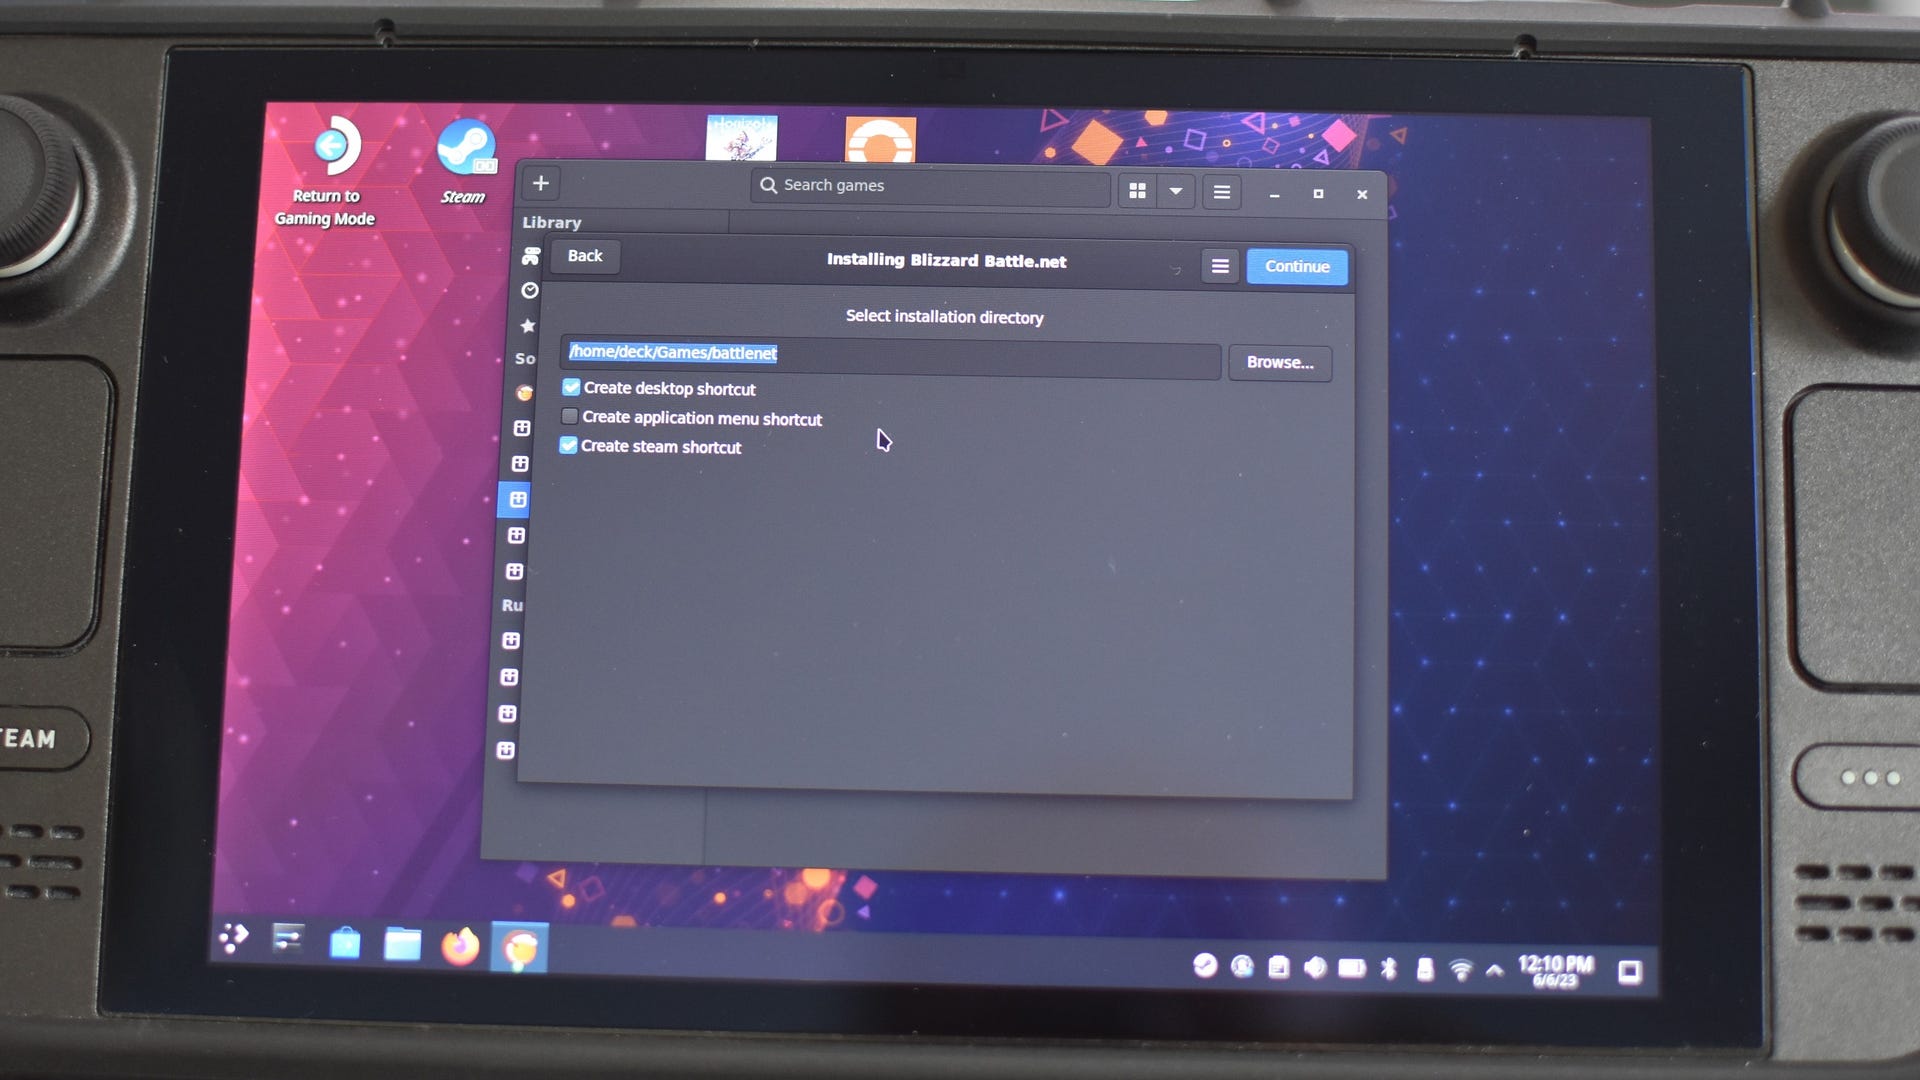
Step 6: On the next screen, you can choose where to install Battle.net on your Steam Deck’s storage, or just leave it as the default location. You can also opt to create desktop, application menu and Steam shortcuts – though none of these appear to make Battle.net appear in your Steam Library, so we’ll sort that out later. Once you’ve made your selections, click the blue “Continue” button.
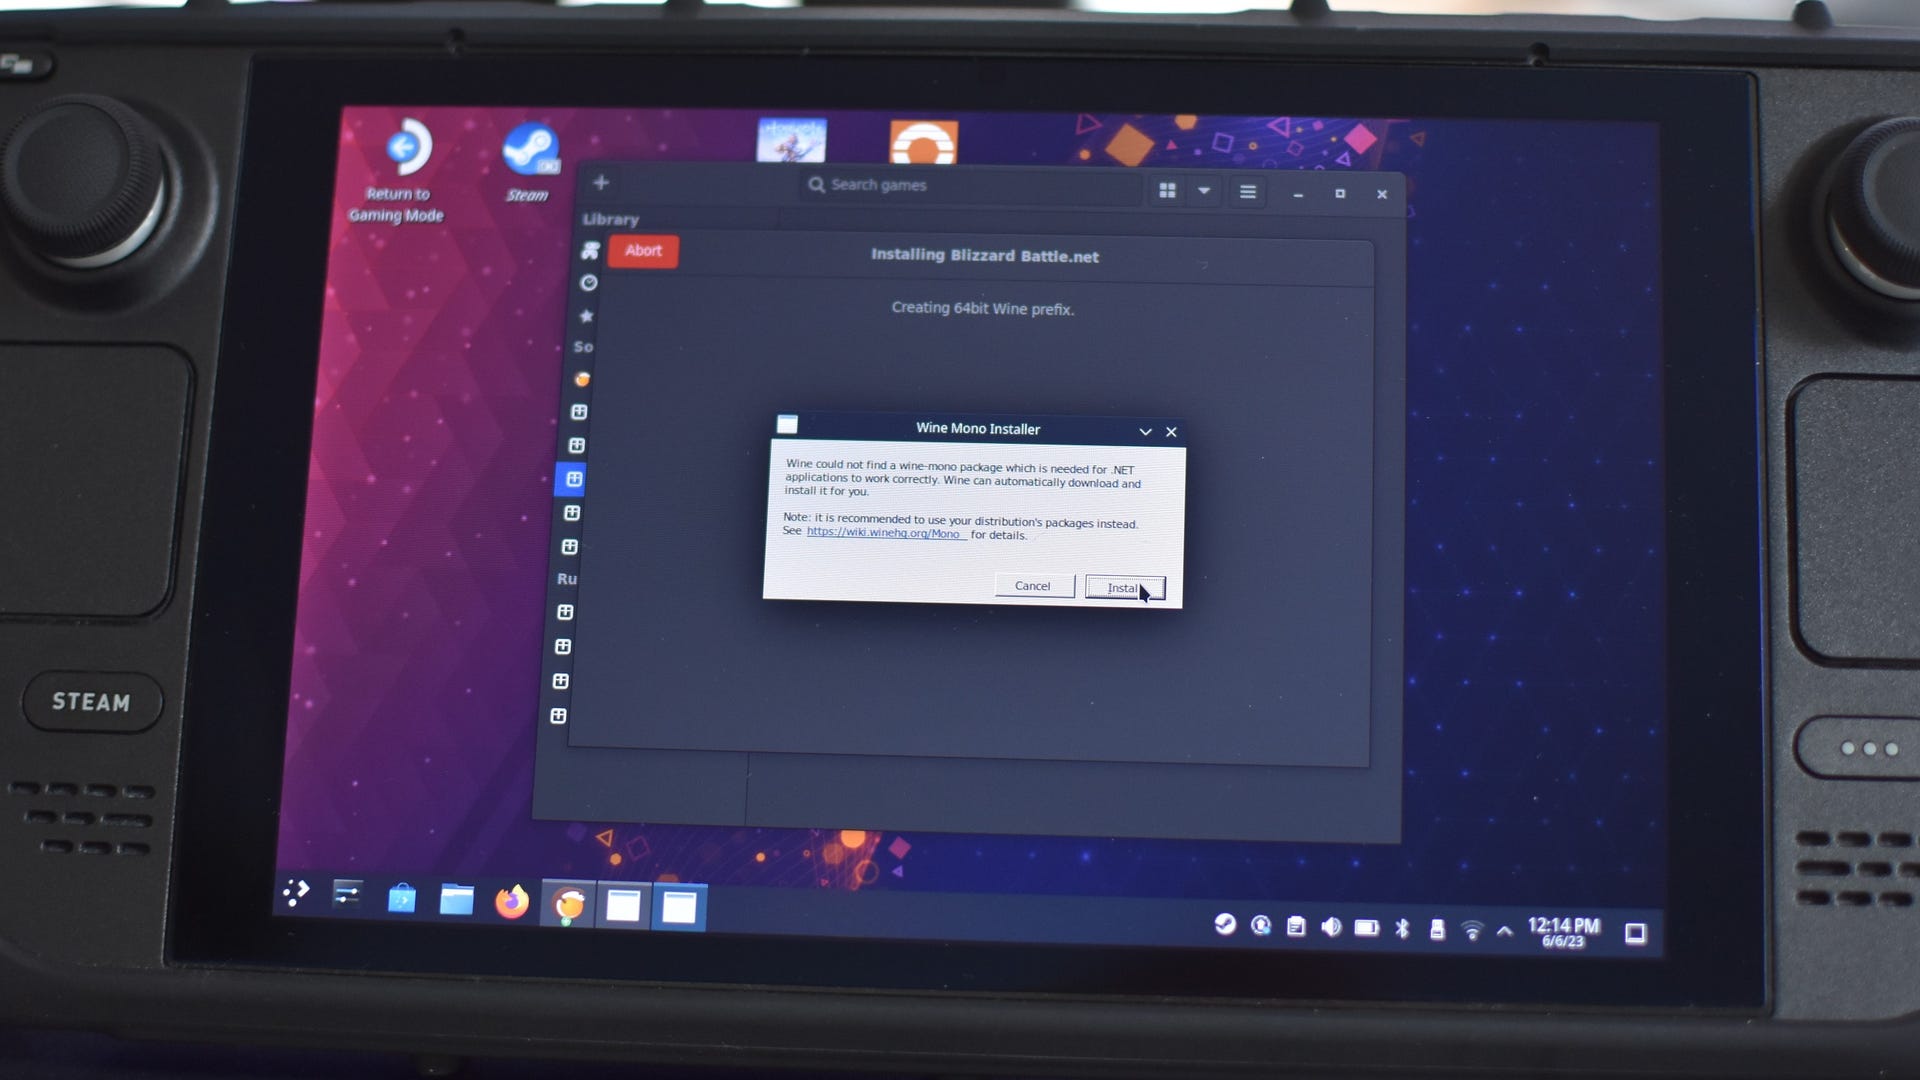
Step 7: Give Lutris a moment to install some required files, then click the blue “Install” button once it appears. This begins the installation process proper, though don’t leave it unattended as you might need to give permission to install a Wine compatibility package. Click £Install” on this so that Lutris can continue.
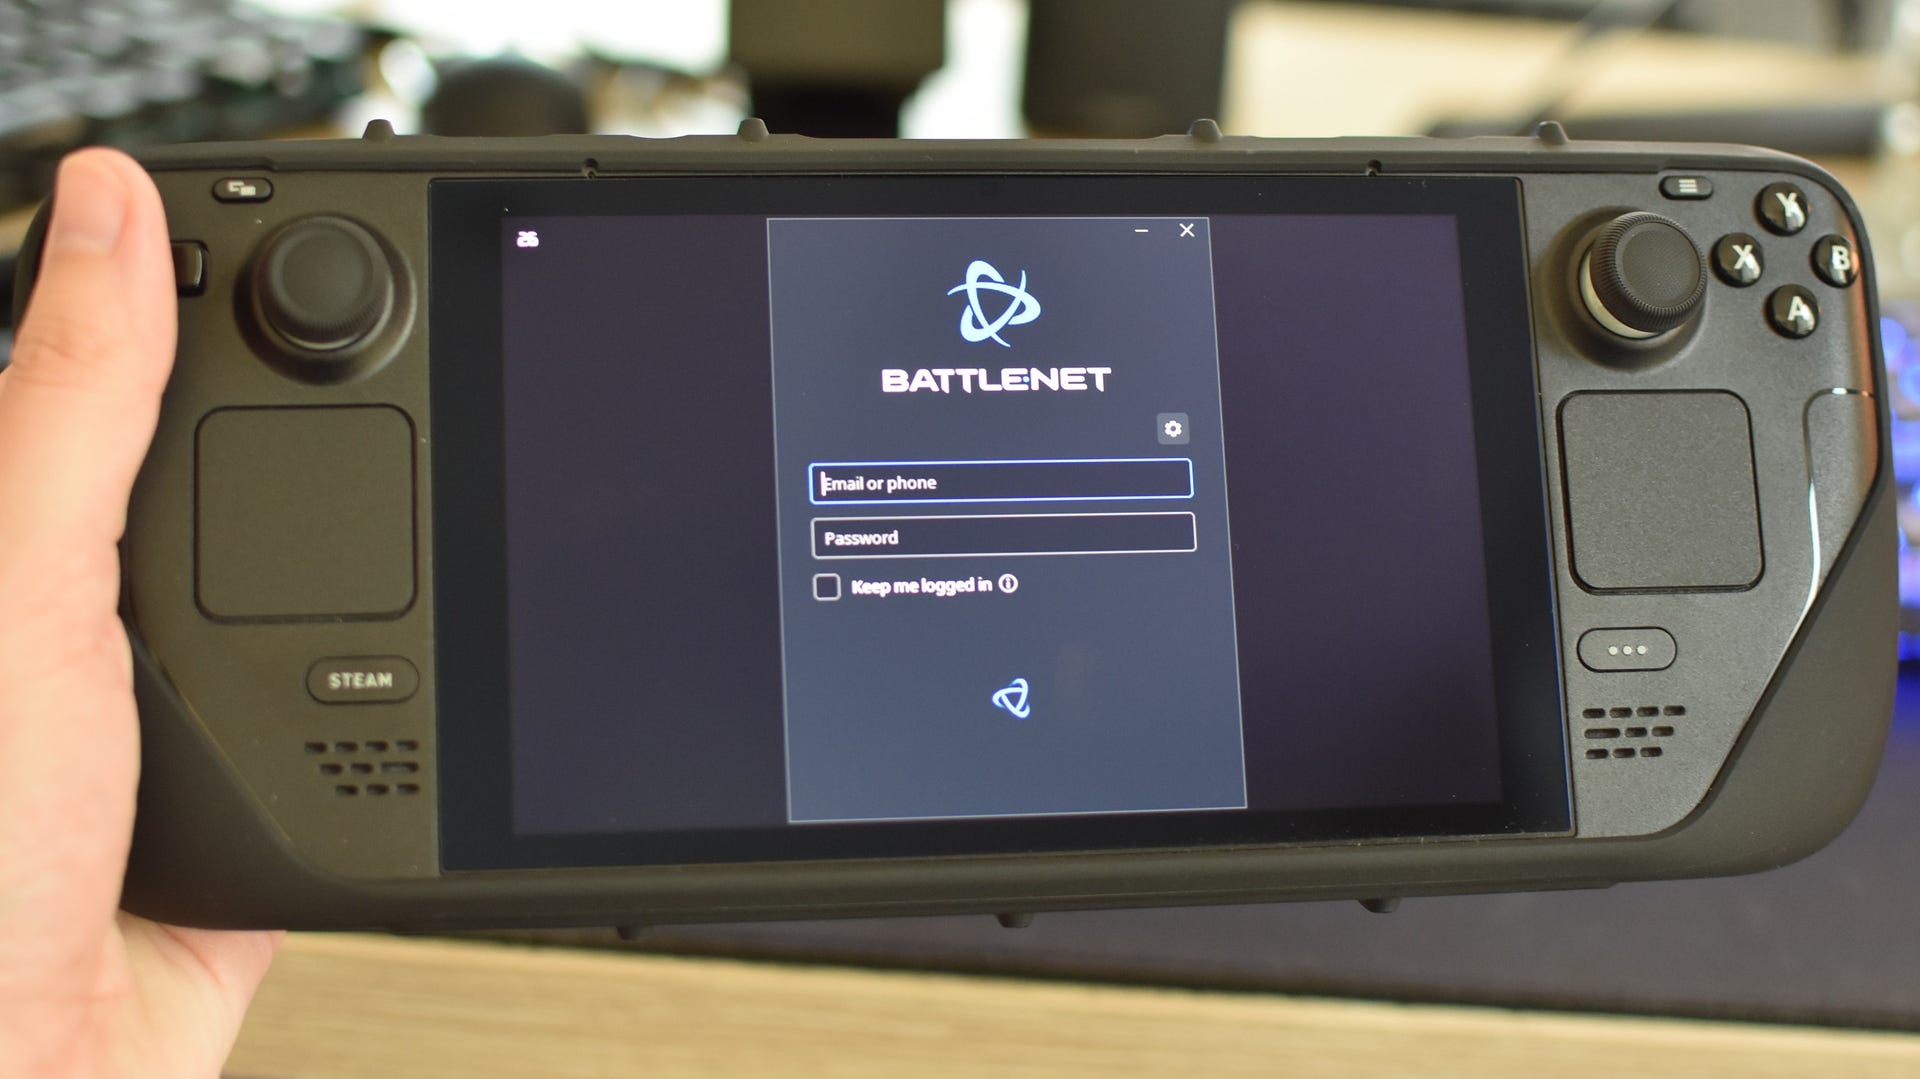
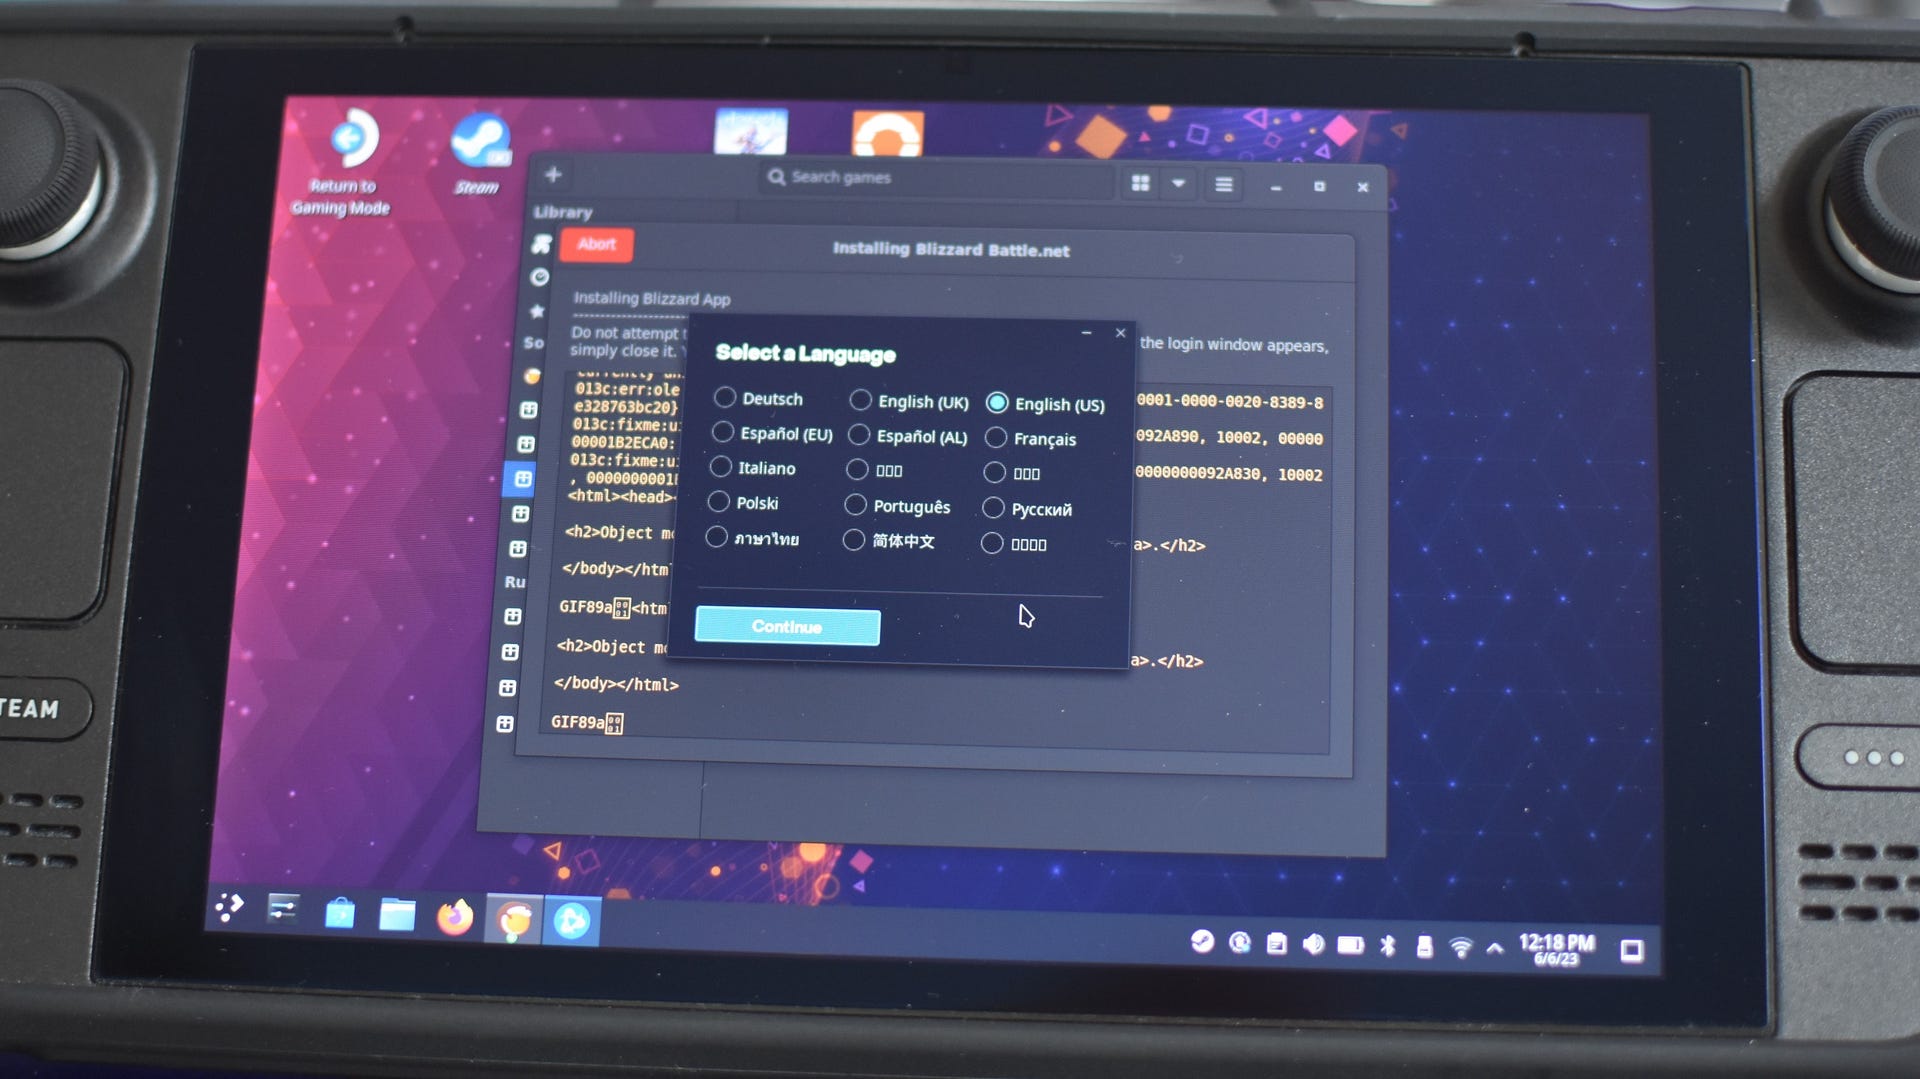
Step 8: Eventually you’ll see this language selection screen, heralding the arrival of the Battle.net installer itself. Follow the prompts to run through this as you would on PC. Eventually you’ll reach the Battle.net login screen, but don’t punch in your credentials yet – simply close the window for now.
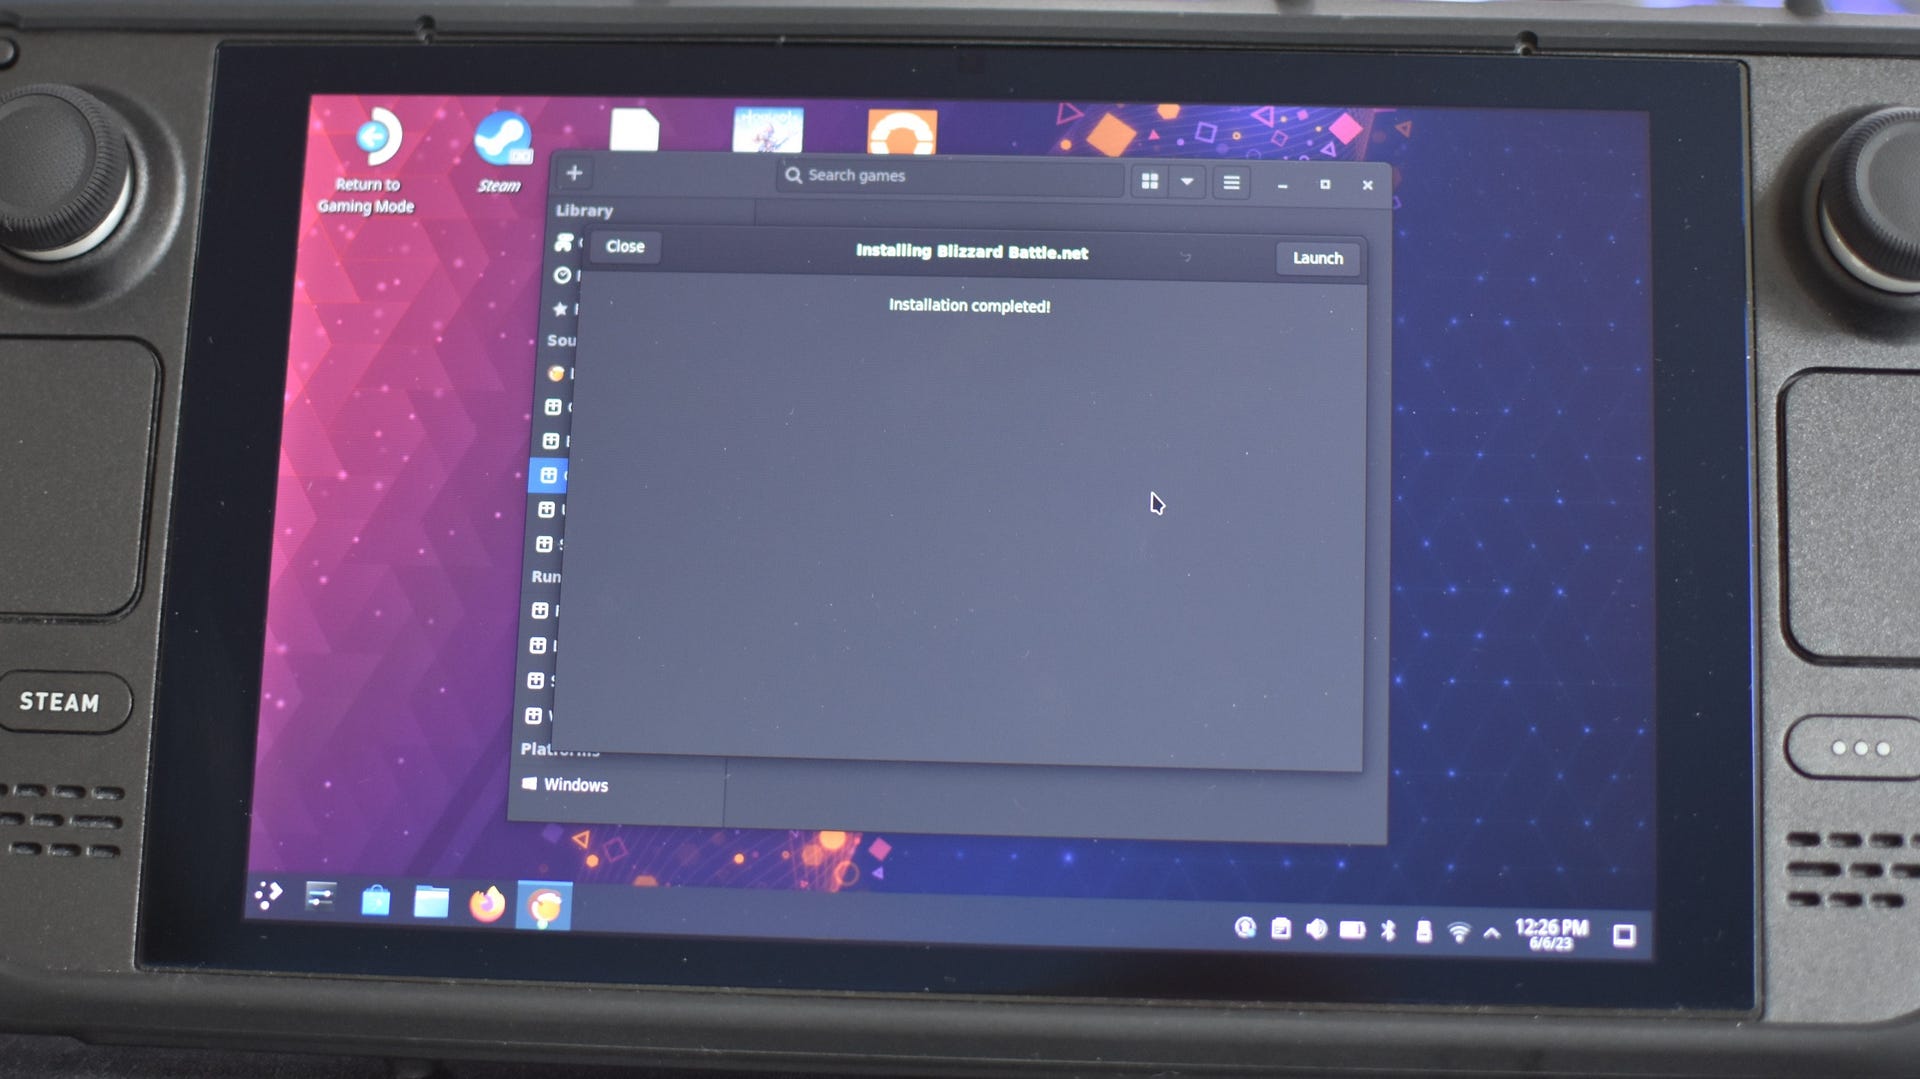
Step 9: Leave Lutris alone, even if it doesn’t appear to be doing anything, until you see the “Installation completed!” screen. From there, you can finally launch Battle.net, log in, and start downloading games. To launch it in the future, just find Battle.net in Lutris’ Games tab.
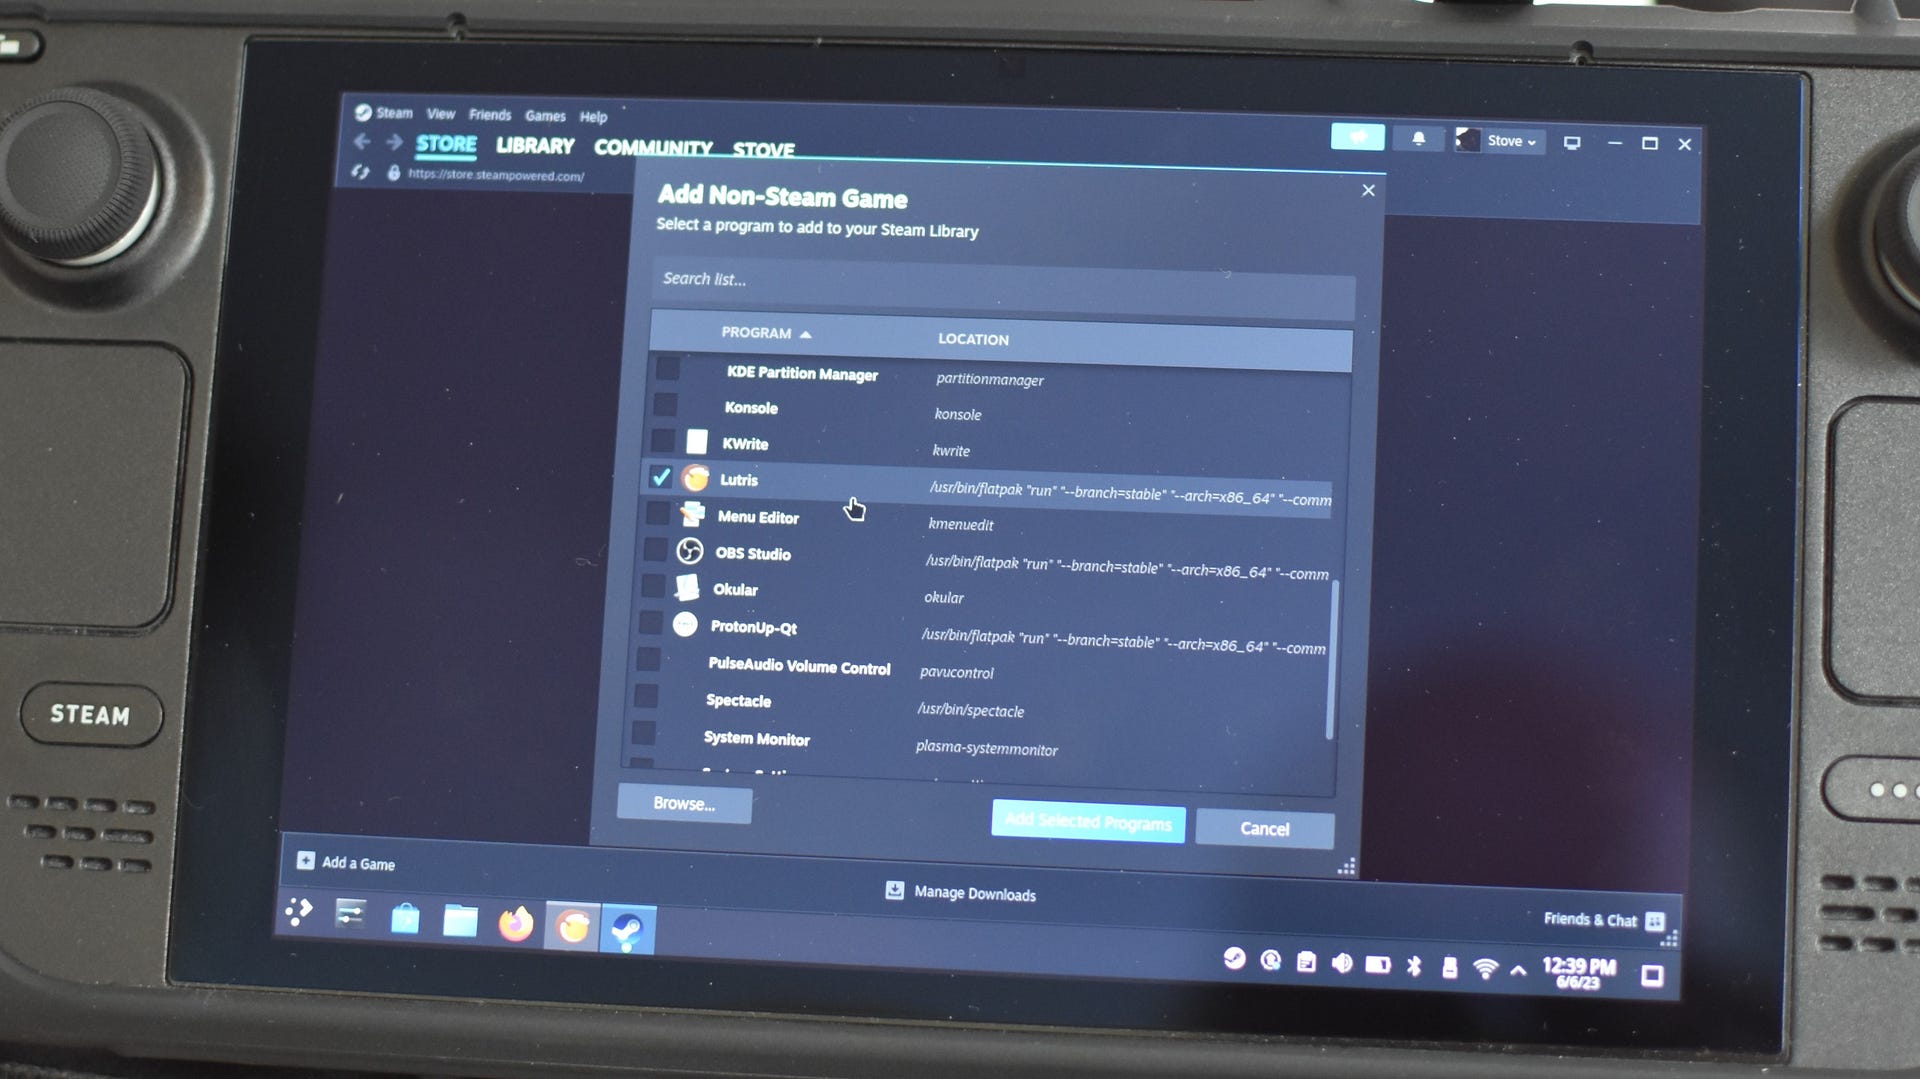
Step 10: Assuming you don’t want to go into Desktop mode every time you want to load up Lutris, the final step will be to add it as a non-Steam game. While still in Desktop mode, simply open Steam, click on “Games” at the top, then on “Add a Non-Steam Game to My Library”. You should be able to find Lutris in the list of available apps, so select it and add it. Now, once you’ve returned to the Steam Deck’s Gaming mode, you can launch it easy peasy.
For more tips and tricks to get the most out of Valve’s handheld PC, you can also peruse our Steam Deck battery life guide, our Steam Deck remote play guide, and our guide to the best microSD cards for the Steam Deck.
