
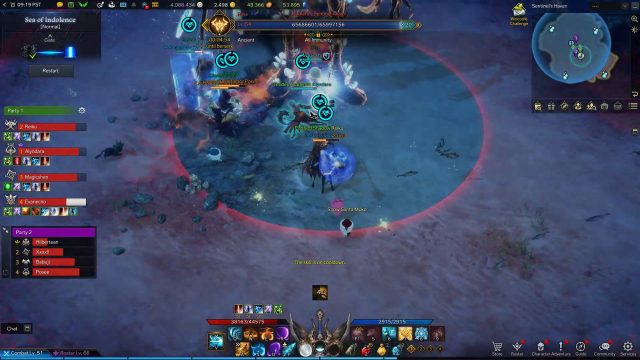
Sea of Indolence Lost Ark Guide: Sea of Indolence Tier 2 Abyssal Dungeon. In this Lost Ark Guide, I’m going to discuss the boss mechanics for the Sea of Indolence Tier 2 Abyssal Dungeon, the first Abyssal Dungeon in the Gate of Paradise after reaching Item Level 960. If you’re searching for ways to survive the encounter while slaying the two bosses efficiently, then this guide is for you!
Sea of Indolence Lost Ark Guide: Sea of Indolence Tier 2 Abyssal Dungeon
After honing your gear sufficiently and completing the Feiton main questline, you’ll reach Item Level 960, which will allow you to enter Gate of Paradise or the second set of Tier 2 Abyssal Dungeons in Lost Ark. Completing the Sea of Indolence will reward you with Legendary Accessories, a Legendary Ability Stone, Engraving Recipes, and Gold, to name a few. You can even purchase the Scar of Abyss Chest at the end to gain additional Accessories and honing materials.

Similar to Guardian Raids, you’re going to want to equip HP Potions or those that restore a percentage of your HP since they’re the only ones you can use. You should also allocate the right Tripods for your Skills such that you’ll always select Weak Point Detection to considerably deal damage to the Bosses you encounter.
Sea of Indolence is a unique Abyssal Dungeon in the sense that it introduces a Breath Mechanic, which we’ll get into later in the guide. You don’t immediately need to know how this works since you and 7 other players have been given special suits at the start to withstand the pressures of swimming and walking underwater. Everyone will start to traverse the seabed in a linear path while killing enemies left and right. None of you will have to perform a specific role and instead, you’ll simply have to spam the new skills that come with the suit you’re wearing. After about 5 minutes of doing so, you’ll approach the lair of the Deep Sea Orboros, the first boss in the Sea of Indolence.

Sea of Indolence Lost Ark Guide – Deep Sea Special Mechanic
Sea of Indolence Lost Ark Guide – Deep Sea Shankrima Mini-Boss
The Deep Sea Orboros is a three-headed creature who is accompanied by the Deep Sea Shankrima. When the first boss’ HP depletes to x9, the Shankrima mini-boss will invade the arena. What you and your allies have to do is redirect your attacks to him rather than the main boss. This is due to the Shankrima’s Power buff that he grants upon death, thereby boosting the damage you deal against Orboros.

Shankrima can swipe you with his tail as well as both of his fins. He also has a breath attack that inflicts Damage over Time (DoT). Additionally, he has the ability to jump on top of a target player so when he leaps into the air, remember to scatter to the sides. Because of these frontal attacks, it’s better to damage him from behind to safely avoid them. But note that you also have to dodge Orboros since he’ll continue hitting you in parallel.

Compared to the main boss, however, Shankrima is simpler to slay since he’s highly susceptible to stagger damage, which prevents him from executing abilities in rapid succession. Once you receive the buff, you can concentrate on attacking Orboros.

Sea of Indolence Lost Ark Guide – Deep Sea Orboros (First Boss) Basic Attack Patterns
Sea of Indolence Lost Ark Guide – Charge
Like the Guardian Raid bosses, Orboros will glow blue before he charges forward to deal damage while pushing affected players. Simply dash to the side to avoid it entirely or use a Counter Skill if you’re standing in front of the boss to stagger him.

Sea of Indolence Lost Ark Guide – Poison Bombs
Orboros will partially stand up and slam both paws on the ground to signal the emergence of red circles on the ground, which are the prime locations where poison bombs will land and subsequently explode. These circles spawn in random areas so before the bomb drops, be sure to walk away without dashing, otherwise, you might take high damage and DoT.

Sea of Indolence Lost Ark Guide – Tracking Orbs
On top of the poison bombs, this boss summons random blue orbs that will follow players around from time to time. If these are not dealt with, they’ll explode and deal damage to anyone nearby.
Sea of Indolence Lost Ark Guide – Breath Attack
When 3 red conal projections appear on the ground, Orboros is gearing up to unleash breath attacks coming from each of his 3 heads. Sidestepping the AoE will prevent you from getting pushed back as a result.
Sea of Indolence Lost Ark Guide – Breath Mechanic
In the next section of the Sea of Indolence Abyssal Dungeon, you’ll finally understand how the Breathing Gauge operates. This means that you’ll no longer be reliant on the suit you’ve worn and you’ll be reacquainted with your skills. With regard to this breath mechanic, you need to be constantly aware of the gauge on top of your head. Initially, its color is blue followed by green, orange, and lastly, red, as your oxygen meter decreases over time. What’s more is this could be significantly depleted if you get constantly hit by the second boss’ yellow telegraphed attacks.

The technique is to ensure that your Breathing Gauge is always blue or green so you have some leeway for recovery. As you’re fighting the monsters you encounter, you’ll notice purple corals around the area that will restore your gauge. If your oxygen meter is already orange and you interact with the coral, it’ll be completely filled up and turn into the color blue. Only do this when the color of your gauge is green since it takes a couple of seconds for the plant to respawn and your teammates may need it more than you. Alternatively, you can opt to stand on top of bubble spots in order to gradually restore your breath.
Sea of Indolence Lost Ark Guide – Indolence Sentinel Akam Wipe Mechanic
Throughout the fight against the Indolence Sentinel Akam or the second boss, there’ll be a wipe mechanic that you all have to be careful of. The only safe spot available would be a circle, which isn’t occupied by the sprawling red projection on the seabed. If you play as a melee Advanced Class, you’ll be able to quickly notice this, at which point, you’ll have to alert the rest of your allies to the safe zone by repeatedly pinging it. Everyone has to stay there until the deadly attack has been unleashed. If not, then there’s a high chance of them dying.

However, other Classes survive the wipe mechanic but only have about 5-10% of their HP remaining in the end. Akam will place his arm on the ground to initiate the ability, which happens every 30-40 second intervals. There’s also going to be a fair warning from Nineveh that the wipe mechanic is about to take place so when she appears on the screen, search for the safe spot at once. But when Akam loses his legs, the interval lowers to the point that he can initiate the wipe skill within just a few seconds of each other. Afterward, a huge explosion will take place.
Indolence Sentinel Akam (Second Boss) Basic Attack Patterns
Akam has two phases – one where he’s standing up with his long legs and the other when he’s crawling about using both arms. When his HP reaches x10, the encounter will transition to the next phase but he’ll retain most of his skills.
Sea of Indolence Lost Ark Guide – Stomp
This boss will lift one of his legs or arms and forcefully stomp on the ground, which will depict a huge red ring. Be sure to quickly dash towards him as this is the nearest safe spot. A second after, an explosion will occur which deals considerable damage.
Moreover, Akam will step forward or put his arm down once to trigger another explosion that can easily be avoided. Similar to the first stomp, there will be a red projection on the ground but this time around, you’ll have to dash away from him to dodge the attack, otherwise, you’ll take low damage and be knocked down.
Sea of Indolence Lost Ark Guide – Multiple Stomps
Another variation of the single stomp is the multiple stomps where Akam does a 360-degree spin while putting down his leg or arm forcefully every time he turns around. What happens is he’ll conjure 1 red projection per stomp that’ll also explode after a second so you ought to move away from him as far as possible until the ability’s animation completely ends or else, you can be knocked down. The fifth and final stomp with Akam’s hands will immediately cause petrification for you should you get hit.

Sea of Indolence Lost Ark Guide – Backstep Attack
When Akam extends his leg backward, he creates a straight water path behind him that explodes after a second to deal low damage while knocking you up. Without his legs, he’ll dig into the ground with both arms to inflict the same types of damage.
Sea of Indolence Lost Ark Guide – Water Geysers
As a followthrough, when Akam slams his arms on the ground and subsequently digs, he’ll also conjure water geysers, which spawn in random places. These geysers can push players back and deal damage upon erupting so be sure to dash away from them as soon as possible.

Sea of Indolence Lost Ark Guide – Red Explosive Orbs
Another instance for Akam to extend his leg backward is when he intends to summon red orbs with yellow circles on the ground. These will explode shortly to inflict Akkam’s Curse, which petrifies you for 10 seconds while notably depleting your Breathing Gauge. By then, a purple bar will appear underneath you indicating that you have to be attacked by your teammates to dispel the petrification debuff.

When the boss is fighting using his arms, he’ll simply move backward to summon several yellow fan patterns with corresponding red circles. These are tougher to evade since they irregularly overlap with one another to occupy a large part of the seabed so staying near Akam’s midsection will help you avoid the ensuing explosions that will occur.

Sea of Indolence Lost Ark Guide – Petrification Ray
The moment Akam conjures a single teal ray on the ground, immediately dash away from it. This ray will automatically petrify any player that goes near it.

When Akam losses his legs, he’ll move backward and then charge forward to petrify any player who will be crushed underneath him. Make sure to avoid this move entirely by dashing to the side once he begins moving forward.
Final Tips
For your teammates to benefit from the corals lying around, remember to interact with them only when your Breathing Gauge is orange or red because it takes quite a while for the plant to respawn. So by default, prioritize the bubble spots available in the area. Note that if your gauge has been fully depleted, you’ll take high damage per second so always keep an eye on this.

If your allies have purple bars underneath their characters, be sure to hit them even with your auto attacks because they’re immobile. Ensuring that none of them get stuck in the arena especially when Akam is about to initiate the wipe mechanic improves everyone’s survivability. Since this occurs every 30-40 seconds, remember to replenish your gauge beforehand so you avoid running out of oxygen when the boss is gearing up for the deadly attack. Furthermore, in case you’re far away from the safe zone, remember to use your HP Potions to reach full HP in an attempt to save yourself even if you don’t reach the spot.

Another way to get petrified is accumulating x4 of the debuff upon getting hit multiple times. In this instance, save yourself by using a Panacea when the stacks become equivalent to x3.
Stay tuned for more Lost Ark Boss and Endgame Guides and be sure to check out our Lost Ark Wiki or drop by our Twitch Channel if you have questions about the game. You can also check out our recent endgame content including the Tytalos and Flame Fox Yoho Boss Guides, Silver Farm Guide, Best Ways to Get More Skill Points, and Best Combat Engravings. We also have Build Guides for the Soulfist, Artillerist, Striker, Deadeye, and Bard, to name a few. What did you think of this Lost Ark Sea of Indolence Tier 2 Abyssal Dungeon Guide? Which Abyssal Dungeon Guide is giving you a tough time? Let us know in the comments below!
