Early on in The Legend of Zelda: Tears of the Kingdom, you can square off against Flux Construct I, a cluster of shapeshifting cubes serving as one of the game’s many overworld minibosses. Judging by this enemy’s name, you might assume that you will find other, more powerful variants as you explore, and you’d be 100% right. Commonly seen in the sky and occasionally down in the Depths, Flux Construct II and Flux Construct III behave fairly differently from their weaker counterpart. If you need some help on how to deal with both of these Flux Construct variants in Tears of the Kingdom, then feel free to read on.
Tips for fighting Flux Construct II
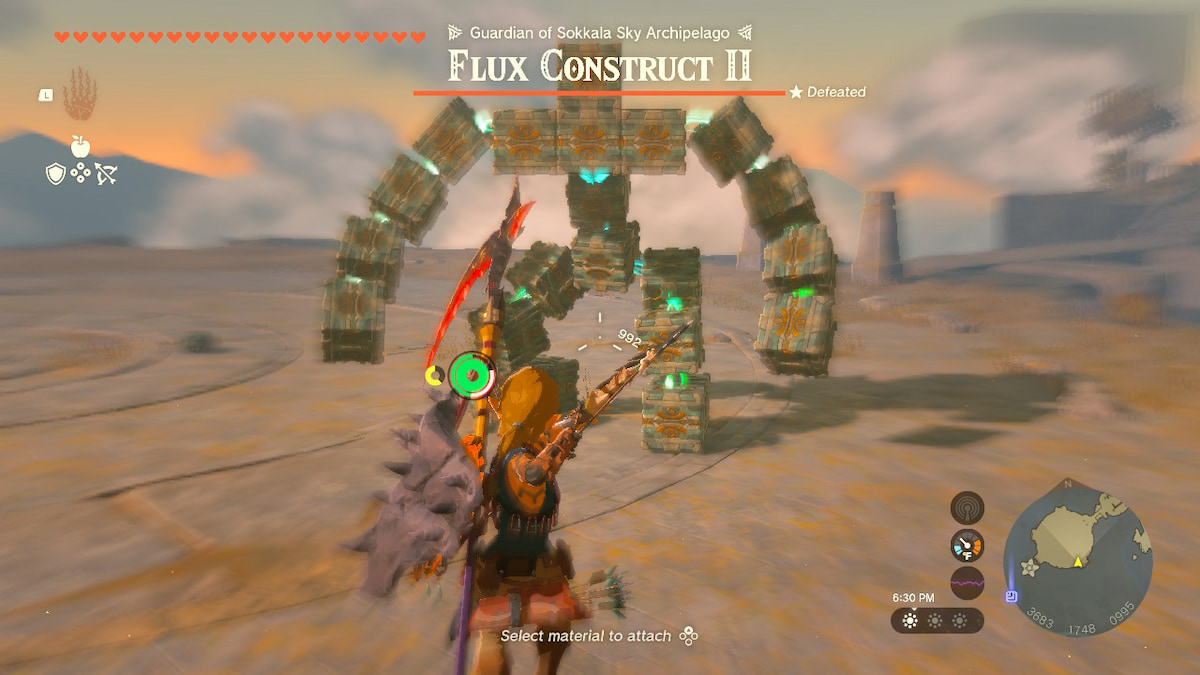
This guide will first go over how to deal with Flux Construct II, although note that all of the tips here can apply to Flux Construct III as well. The three forms that Flux Construct II can shapeshift into remain the same as Flux Construct I, but they boast key differences that you will need to keep in mind when fighting them. You can take a look at our Flux Construct I guide if you would like general tips on dealing with all Flux Construct variants in more detail.
Humanoid Form
Much like with the base variant, Flux Construct II always begins each encounter in its humanoid form. This time around, the humanoid form behaves much more erratically. Oftentimes, when it raises its arms up in the air in preparation for its fist-slamming attack, it will now warp closer to you before hitting the ground with them. This attack looks scary, but running away from it will generally work just as well as it does in the base version of this fight.
In addition to this move, it will occasionally rush you down and try to trample you, usually when you get up close to it. As long as you keep your distance and sprint away once you see it charging, this move shouldn’t pose much of a problem either.
Although using Ultrahand on the glowing green cube to shake it loose and leave it vulnerable was a useful strategy before, it’s practically essential here. Due to the boss’s faster movement and greater tendency to hide the green cube behind its other indestructible blocks, you will need Ultrahand more than ever to move the surrounding blocks out of the way and target the weak point more easily without wasting your resources. Of course, when the boss keeps its fists down after its slamming attack, that serves as the best opportunity to do so.
Arrows can still come in handy here, though, as using them on the green cube will stun the boss and give you a big opening to shake the green cube loose with Ultrahand. However, the usefulness of this strategy depends heavily on where the boss decides to place the green cube and whether or not you have higher vantage points you can jump off of to trigger bullet time.
Screenshot via PC Invasion
Cube Form
This was the easiest form to deal with during the Flux Construct I fights, but the same cannot be said here. The cube form tilts around much more quickly, making it tricky to get a good aim on the smaller green cube with Ultrahand. Additionally, the boss can now fly up toward you and try to slam down on you, creating a damaging shockwave in the process. This means you’re no longer completely safe at a distance, so be prepared to sprint away whenever it starts to fly up.
Theoretically, this slam attack should provide the perfect opening for you, but it usually lands with the green cube facing away from you. To make things more complicated, the boss recovers quickly enough that you may not be able to remove the surrounding blocks with Ultrahand before it starts moving again, leaving the green block out of view.
Removing those blocks still helps in making the green cube overall easier to target, though, and stunning the boss by shooting the green cube works even better here than it does with the humanoid form. Note that when you stun the boss, it tends to position itself so that the green block remains up top, usually surrounded by other blocks. But from my experience, this still serves as the most effective strategy for leaving the boss immobile for long enough that you can move blocks out of the way and grab the green block with Ultrahand without the need for pinpoint timing.
Flying Rectangular Form
The strategy for this last form differs substantially from the Flux Construct I version. It still launches five or so blocks at you, but this time, the boss stays high in the air in a manner similar to the Gleeoks. It also now places the green cube right at the top, so not even the farthest-traveling arrows can reach it.
This is the fight’s biggest puzzle your first time through, but fortunately, it has an easy solution. After it launches some of its blocks, stand on one of them and use Recall on it so that it escorts you right to the top of the boss. This will give you the perfect chance to unload on the green cube with melee attacks, which will then scatter the blocks and leave the weak point open for even longer.
Screenshot via PC Invasion
Tips for fighting Flux Construct III
In terms of behavior, Flux Construct III behaves almost identically to Flux Construct II. Aside from higher health and damage, the fight has one major new addition. During the humanoid and cube phases, the green block will intermittently swap places with one of the other blocks, forcing you to act quickly to leave the weak point vulnerable to Ultrahand before it teleports out of range. It also seems to recover any blocks you may have removed more quickly than before.
The overall strategies remain mostly the same as with Flux Construct II; you just have to execute them with greater efficiency. Fortunately, as soon as you grab the green cube with Ultrahand, you’ve pretty much succeeded. Even when the green cube teleports, Ultrahand will still keep its grip on it, allowing you to shake it loose without any annoying interruptions.
Rewards for beating the Flux Constructs
After defeating either Flux Construct II or Flux Construct III, they will drop their own, more powerful variations of the Flux Construct Core that you can fuse to augment your weapons. Alongside the usual Zonai charges, you can occasionally receive some Zonai capsules you can use to make your devious contraptions. Encountering either Flux Construct is also often required for certain shrine quests or to obtain Sage’s Wills for upgrading your sage’s attack power, so hunting them down will greatly help in making your Tears of the Kingdom playthrough more manageable.
