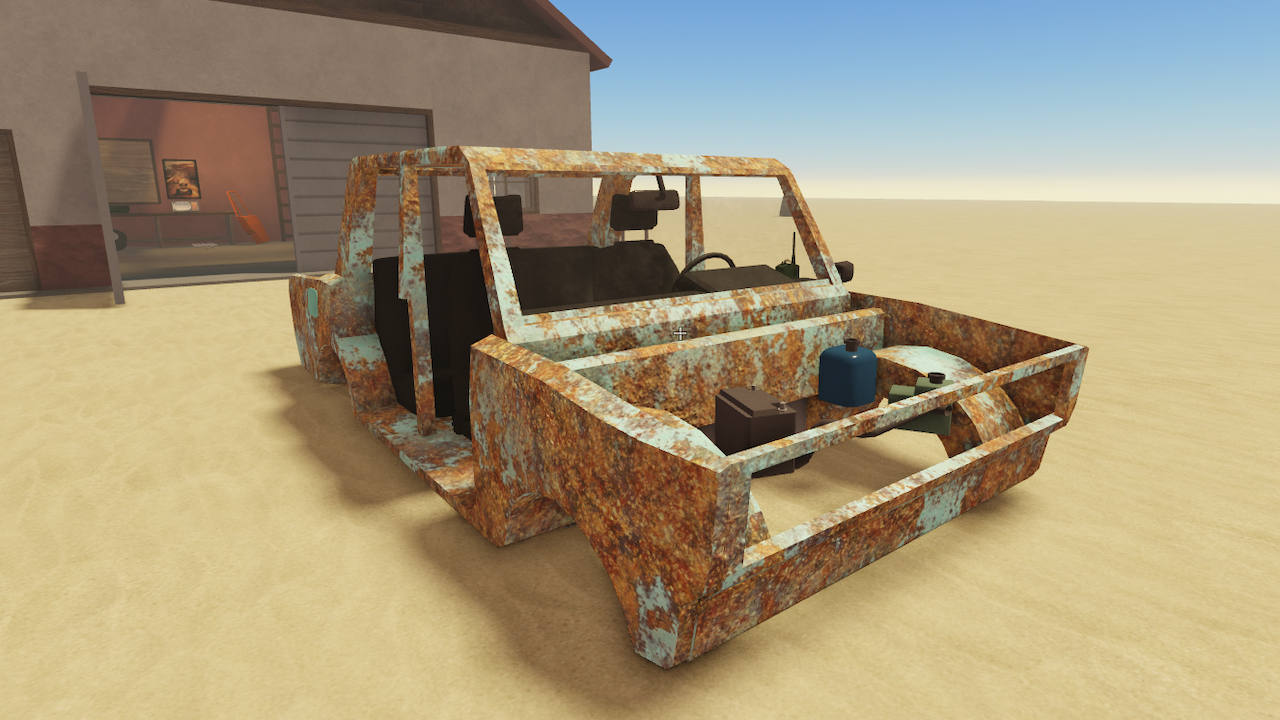
Building your car in A Dusty Adventure is honestly the best part. Being incredibly interactive, you’ll need to find the parts and install them youself.
How to build your vehicle in A Dusty Adventure
This will vary from vehicle to vehicle in A Dusty Adventure, but they’ll all require the same core steps. You will start in a building, with the parts scattered around the garage, car, or indoors.
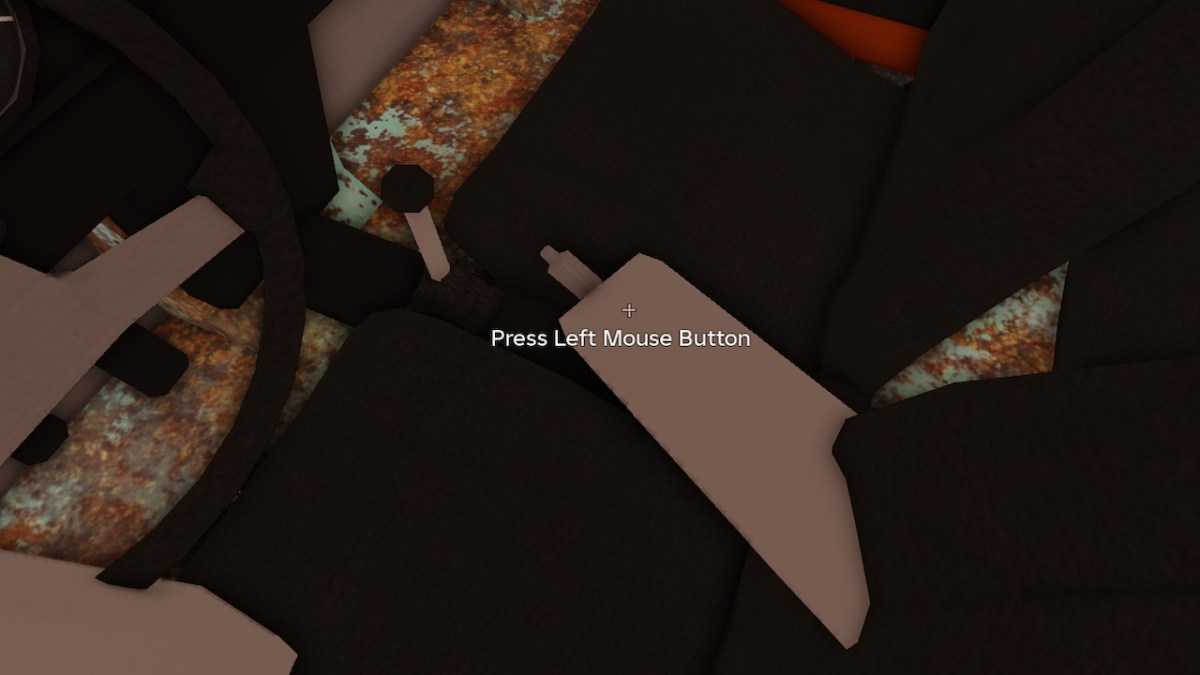
When building the car, you should always wait for the “Press to place” text to appear. Never simply attach it to the car!
Placing the wheels, engine and radiator in A Dusty Adventure
First things first, you’ll need to assemble the components that’ll make your car work. The engine, wheels, and radiator can all be found around the car or indoors – the hard part is placing them.
The easiest thing to do first is grab the wheels. They’re placed in plain sight, so grab them one at a time and go over to your car. Hover over the bare axles of the car where wheels would normally go, and you’ll be prompted to put them on. On keyboard, that’s the F button.
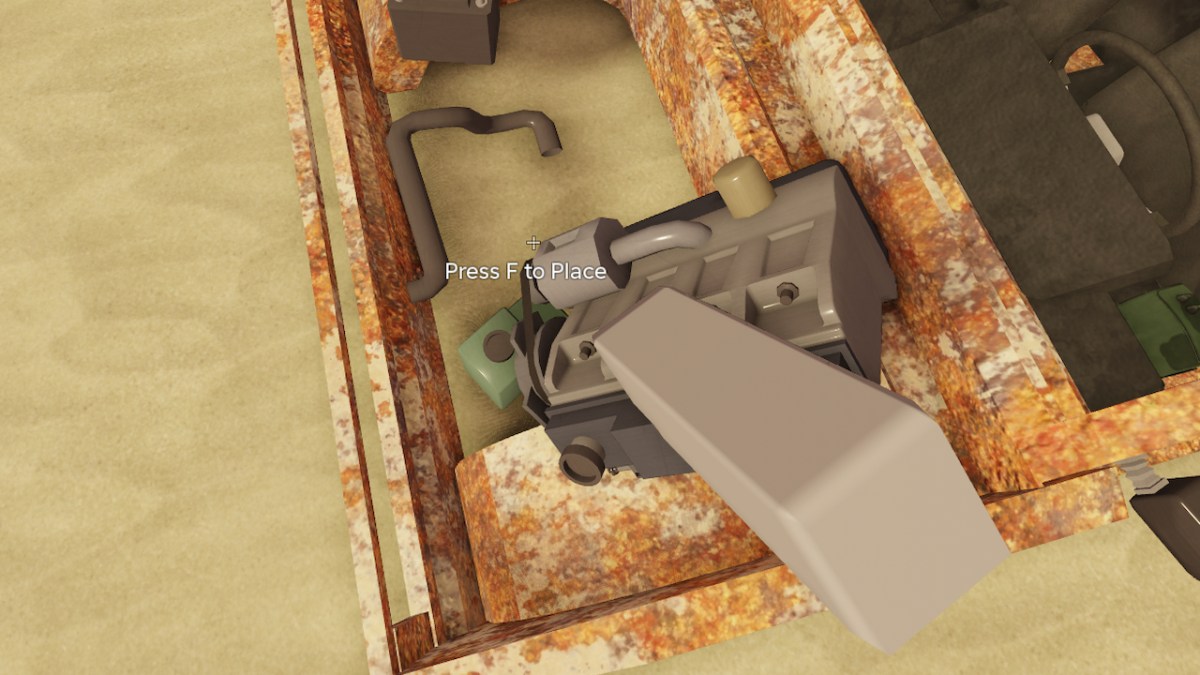
With all four wheels in place, locate the engine. On the desert map, you’ll find the engine on the table. Grab it, and head over to the hood of the car. Hover over the middle part of the hood, and you’ll be prompted to place it like the wheels. Sometimes I’ve had to drop the engine and pick it back up for the prompt to appear.
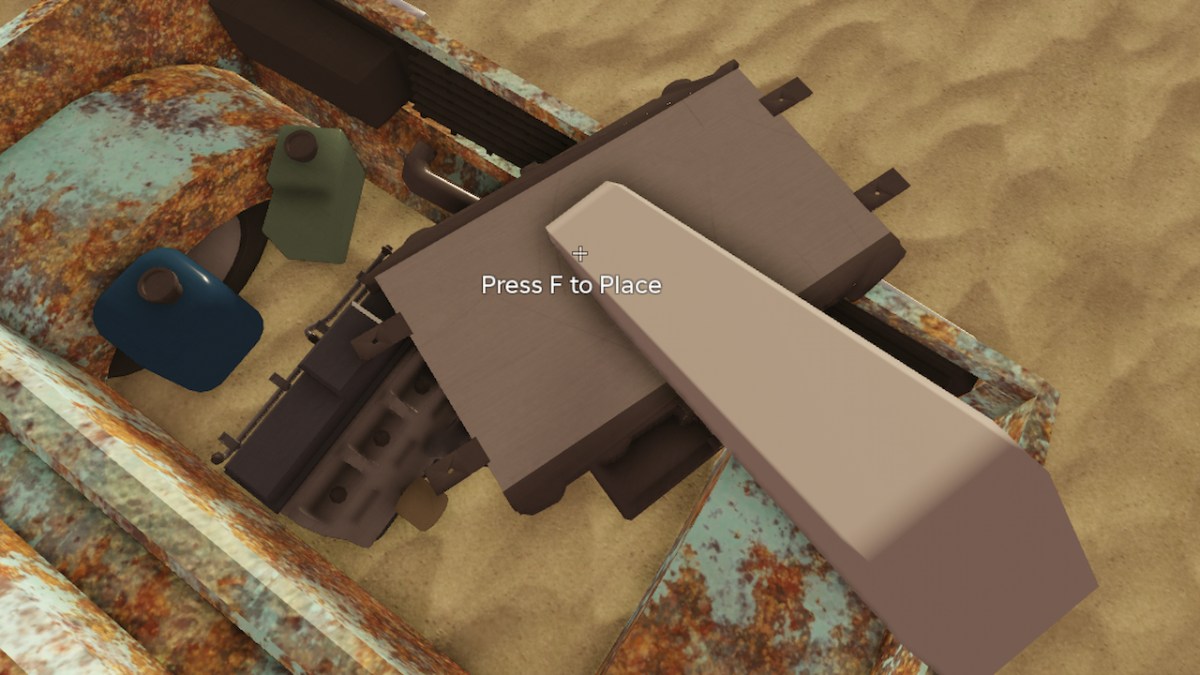
The radiator is a little more tricky, and I had to really search around the car until I was able to place it. It’ll be found on the floor, and you’ll have to place it just in front of the engine, like so. Place it when prompted.
With the internal components installed, you now must fuel the car to set off!
Fueling the car in A Dusty Adventure
To fuel the car in A Dusty Adventure, find the red gas can on the floor. With it picked up, head to the right side of the car where you’ll find a clean square. Hold the button prompted to fuel the car slowly.
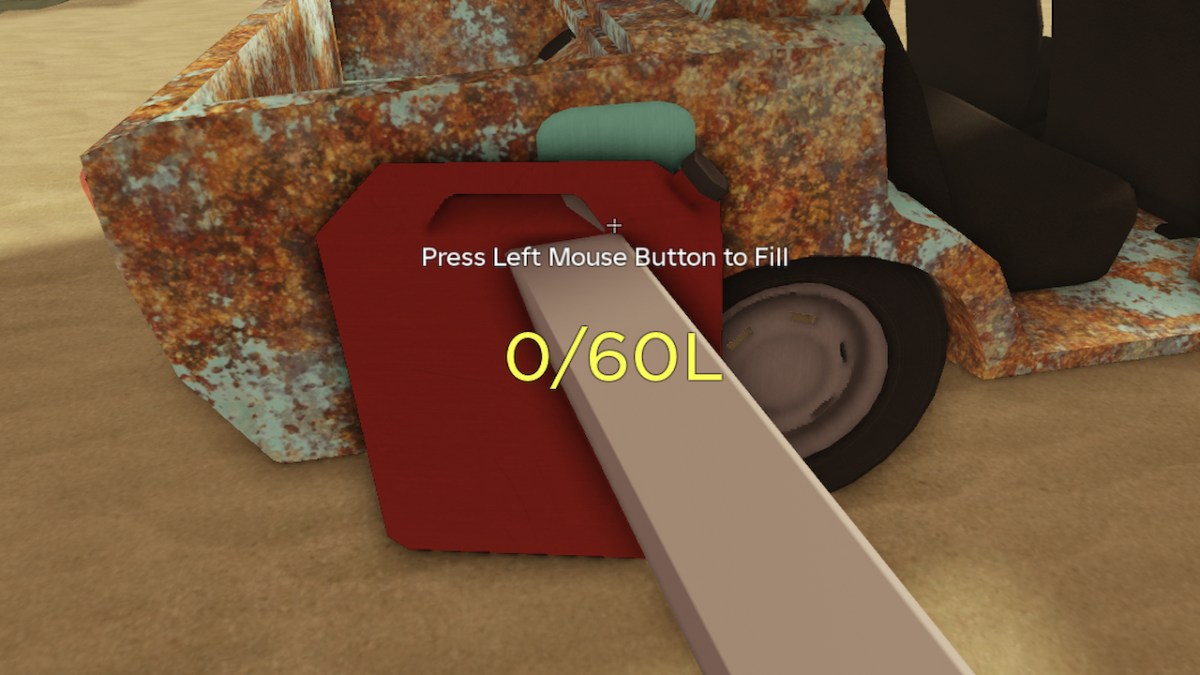
The tutorial recommends you add 7 litters, but it’s better to add all of it. The can only holds 9 liters, anyway.
You can drive off now, but it would be better to add the optional extras for more functionality.
Placing the doors, headlights, bumpers, and others in A Dusty Adventure
Doors, headlights, bumpers, and other car parts aren’t vital for the car to run, but they’re useful to have, especially the headlights.

The headlights I think look like little lunchboxes on their own, and you’ll find two of them scattered around the house or garage. Pick them up and go over to the front of the car, where you’ll be able to place them. Note that if the prompt to place it isn’t appearing, then you’ll need to try the other side.
The grill and bumpers can be found also scattered around. The grill will go in between the headlights, and the bumpers will go at either the front of back of the car, at the bottom.
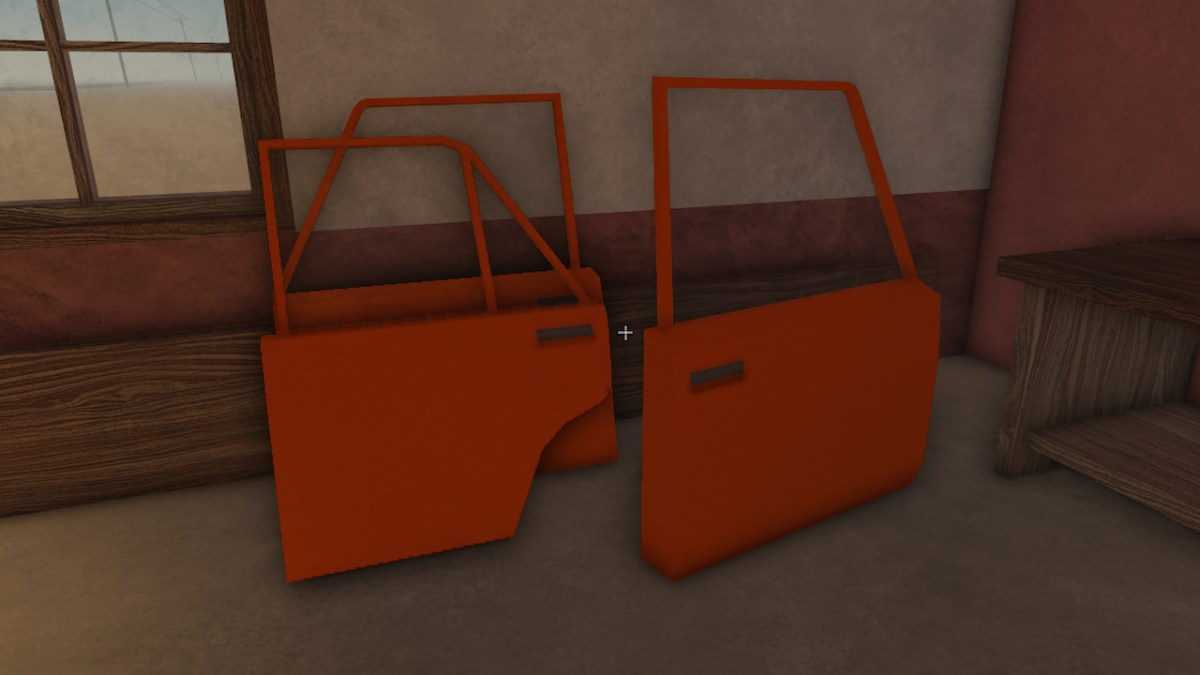
Doors are obviously placed, as they’re large and colorful. Just make sure you’re hovering over the hinge point of the car when placing the doors. Also, each door can only go in certain door slots, so keep trying around the car if the prompt to put it on isn’t appearing.
Finally, you can place on the hood and trunk doors. They look like colored slabs on the ground. The larger one will fit onto the front of the car, covering your engine, and the smaller one will fit on the back.
With everything fitted – let’s get going!
How to start and drive your car in A Dusty Adventure
If you thought the interactivity would stop with the building in A Dusty Adventure, then you’d be wrong. You’ll also need to manually operate different parts of the car to drive it properly.
Starting your car in A Dusty Adventure
To start your car in A Dusty Adventure, you need to do two things.
Firstly, make sure your car isn’t in brake. Look over to the right where you’ll see the hand brake is up. Interacting with it will put it down.
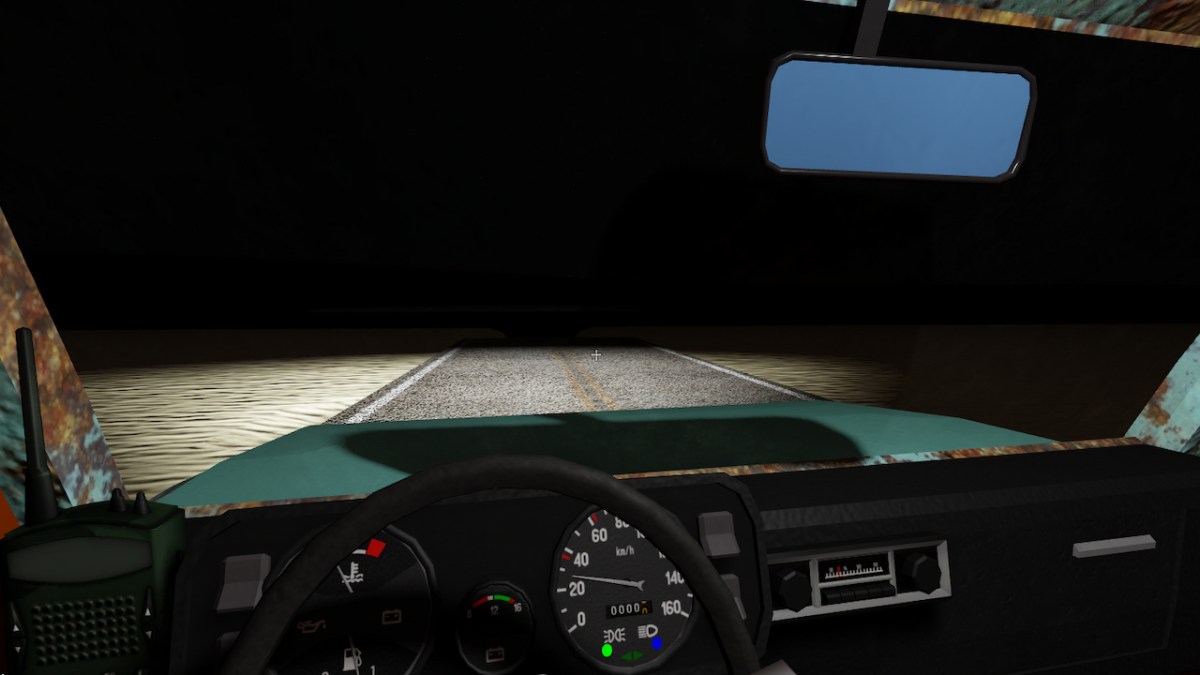
Then, you can start your car by pressing “R” on the keyboard. Using the “WASD” keys, you can move forward, turn, and reverse to begin your journey.
There are other things you’ll need to learn to have an easier time on the road, however.
All other car components explained
There are some other things you can do in your car in A Dusty Adventure.
Just behind the wheel to the right you’ll find two buttons. The top button will turn on the headlights, lighting the way in darkness.
The bottom button will turn on the hazards.
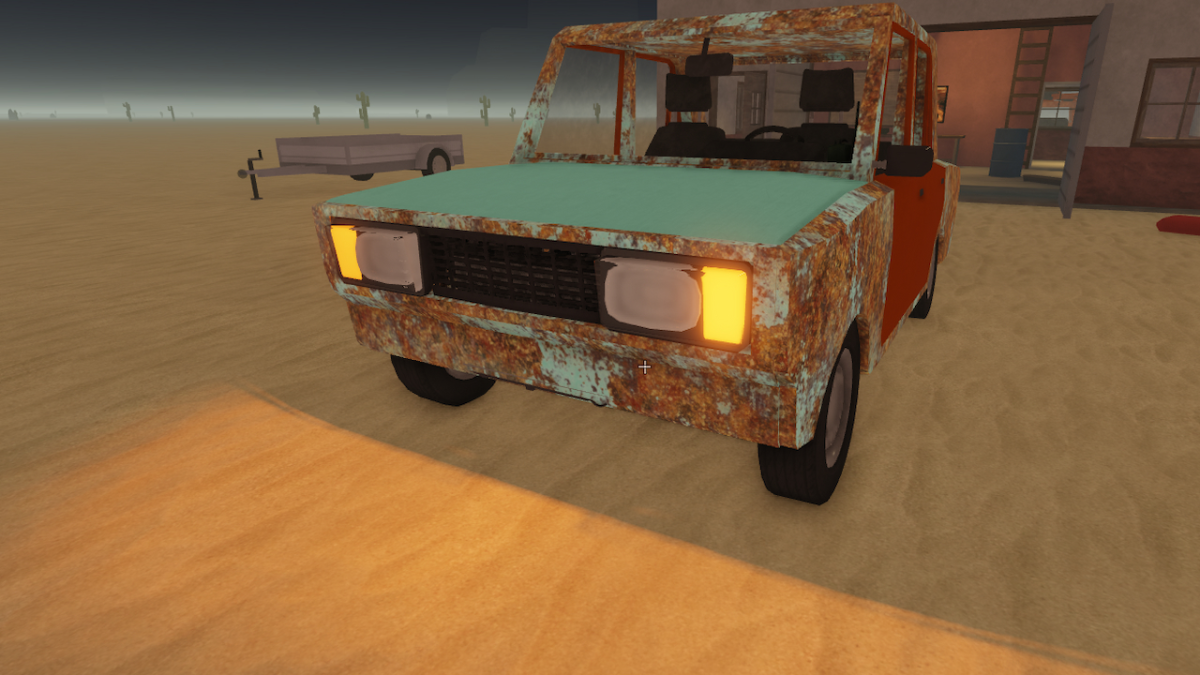
Both of these functions won’t work without the headlights installed, although the inside light will still light up if the doors are open (or not attached!)
Also, on keyboard, you can press “Q” to zoom in your view, which is useful for spying things from further away.
The radio in A Dusty Adventure
In your car, and in the house, is a radio. This radio can be used to call in an immediate resupply of your choosing, although access to the radio is locked behind a purchase. It costs 400 Robux to unlock the Radio. Although you can purchase individual resupplies for 49 Robux, however.
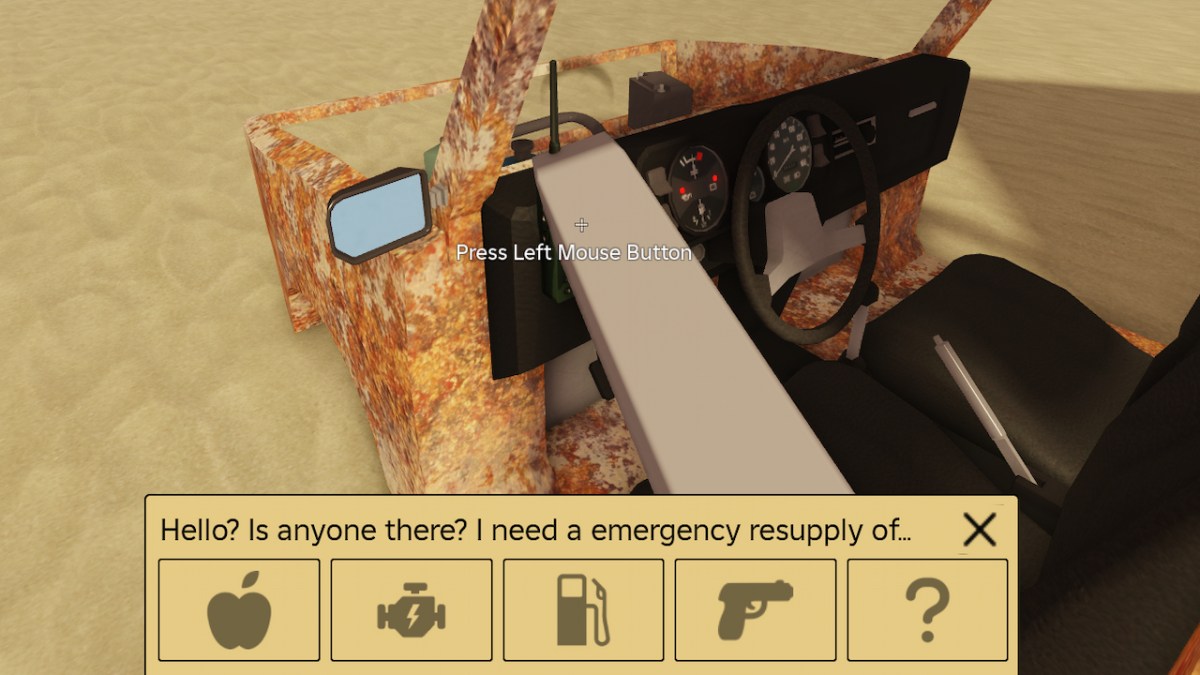
You can use the radio to call in resupplies of:
- Food
- Car parts
- Fuel
- Weapons
- Items
So only use it when you’re in need!
Now that you know everything you need to know to build your car and drive it in A Dusty Adventure, you can finally start your journey. Just don’t neglect your hunger bar – there is food in the building, by the way!
A Dusty Adventure is certainly an interesting and exciting adventure game, which is made even better by the helicopter.
