
The life of a shape-shifter in Haunted Hunt is fraught with danger! When you’re captured by a Hunter you must do anything you can to escape.
With so many tricky puzzles and hidden secrets you might get a bit stuck so we have the complete Haunted Hunt walkthrough guide right here to help you out.
Welcome to Haunted Hunt! It is 1865 in Victorian London, a city full of supernatural beings and those who want to hunt them down. As a shapeshifter, you have spent your life trying to avoid the Hunters until one fateful night you are captured and imprisoned. Now you must try to escape.
Haunted Hunt: Chapter 1
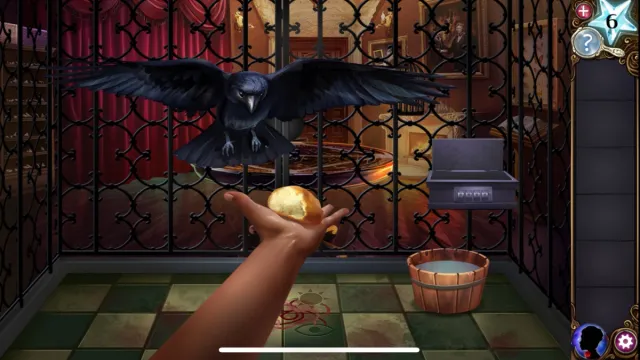
Chapter 1 of Haunted Hunt begins with you waking up in a cage. You need to find a way to escape! In the cage with you are a bucket of water, a cup covered with a cloth, and a safe with a passcode. A raven sits on a cage just beyond your own.
- Pick up the cloth;
- Pick up the cup;
- Tap the cup on the bars of your cage;
- Dip the cloth into the water;
- Wash the floor of the cage to reveal a coded message;
- The code opens the safe in this order: Heart, Sun, Eye, Moon;
- Pick up the bread from the safe;
- Offer the bread to the Raven.
Now you have touched the Raven you can shape-shift any time you like to gain a different view on the room. you won’t be able to pick up heavy objects as the Raven, so remember to switch back to Moira’s human form.
- Pick up the poker from beside the fire;
- Use the poker to pull the box down from the shelf on the left;
- Take the jeweled skull;
- Tap to pull back the red curtains;
- In Raven form tap the mirror to peck at it and let it fall;
- Back in Moira form, use the poker to move the lid from the mermaid tank;
- In Raven form pick up the net from the tank;
- Throw the net into the tank once more;
- Tap to remove again and you have also caught mermaid scales;
- Pick up the letter opener from on top of the butterfly board;
- Tap the other raven sat on the painting;
- Tap the painting to have a closer look;
- Back in Moira form, use the letter opener to cut some cloth from the red curtain at the top right side;
- Tap the butterfly display book;
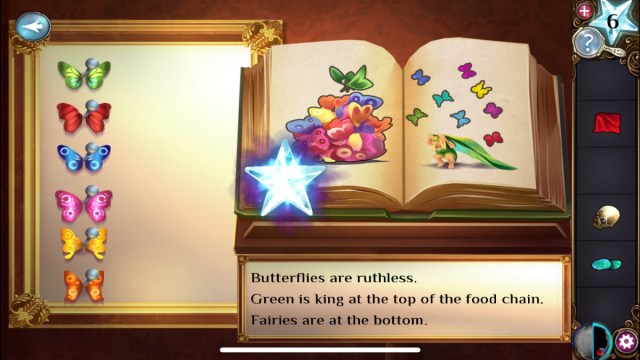
This puzzle shows you which butterflies eat each other. Your job is to put them in order to show which one is at the top of the food chain all the way to the fairies at the bottom. Green is at the top, followed by Red, Blue, Pink, Yellow and finally Orange. You now have an orange butterfly in your inventory.
- Tap the mirror;
- Take the mirror and place it on the stand beside the shelf of teeth;
- Tap the three sets of teeth which do not show in the mirror;
- You now have fangs in your inventory;
There is a table in the middle of the room. It needs four objects placed on top in a specific order. The key to this order can be found on top of the cabinet of teeth when you are in Raven form. Place the objects you have on the table. Now they need to be moved into the correct places. To do this tap each of them in this order:
- Butterfly
- Skull
- Teeth
- Scales
- Skull
- Teeth
- Scales
- Butterfly
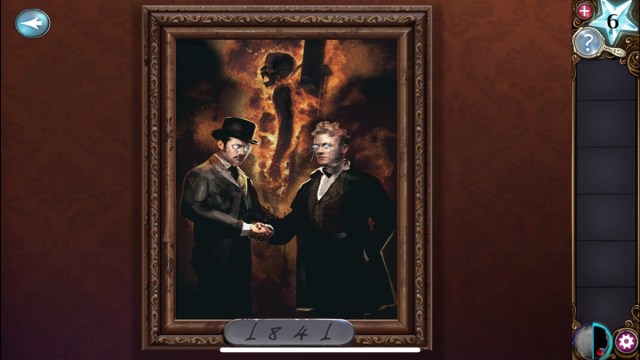
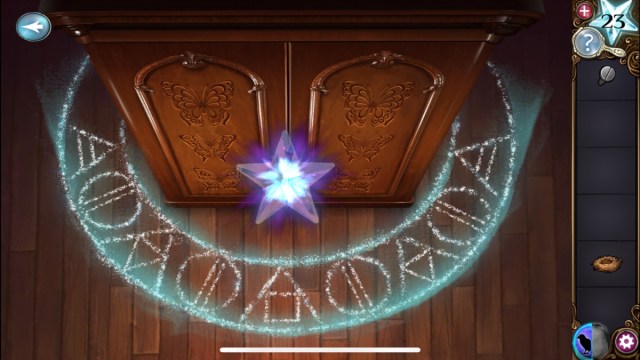
Take your red cloth, put it in the polish you just discovered and use it to shine up the scratched label under the painting. It will show a date: 1841. Enter this date on the door panels.
Haunted Hunt: Chapter 2

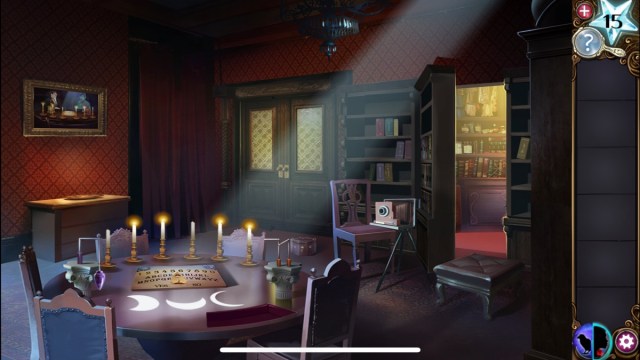
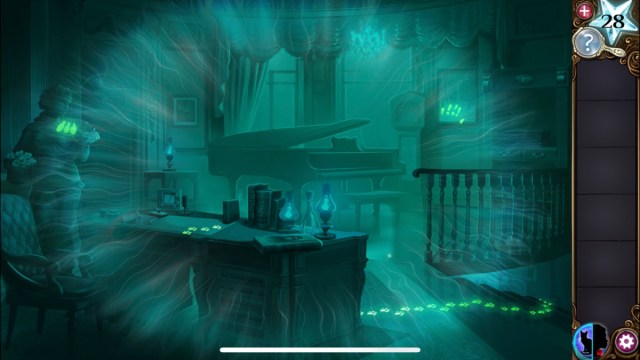
Haunted hunt Chapter 2 begins as you escaped the last room and now find yourself in the Seance Room. Perhaps you can summon a ghost to help you escape?
- In Raven form pick up the planchette Half and the candle from the side;
- Tap the painting to look behind it and get the second candle.
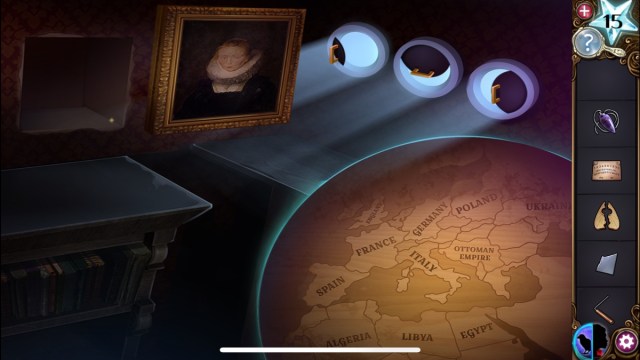
Next examine are the colorful books of the world lined up on the shelves. Take note of the number of lines on five of the books. These denote a sequence:
- Great Britain
- Egypt
- France
- Spain
- Italy
In Raven form tap the globe and peck each of those countries in the order above. A hidden room appears behind the bookcase. As Moira, enter the secret room.
- Tap the broken picture frame to obtain a shard of glass;
- Tap the blue box above to open and find the pendulum inside;
- Tap open the bottom left cupboard to find another candle;
- Tap the covered desk on the left to open and find a ouija board;
- Transform into the Raven to find the other planchette half, candle, and dowsing rod in the wardrobe;
- Tap the clothes to move them aside and find another candle;
- Another candle is hidden in the left drawer;
- Tap the moths to find the stopwatch which is pointing at 43 seconds.
Head back to the main Seance Room. Place the candles in the candle holders on the Seance Table. As the Raven tap each window to close it just enough so it looks like the moon phase shown on in the painting on the back wall. Note that the painting shows the table mirrored so everything you see will be the other way round in the room.
Next is the camera puzzle. Place your Glass Shard in the Camera and tap the camera to see the blurry picture. To sharpen the image you need to move the objects in the right hand list according to how far away they are with the closer items at the bottom. As you move each one you will see them become sharper in the photograph. They should end up in this order:
- Raven
- Window
- Curtain
- Lamp
- Cup (handle right)
- Woman
- Man
- Table cloth
- Teapot
- Crystal Ball
- Cup (handle left)
A ghostly figure appears and is pointing to the number 20 revealed in the bottom left corner. In the main room pick up the second Dowsing Rod which appears under the camera. Place the Ouija Board on the Seance Table with the now-complete Planchette. Place the two pieces of Dowsing Rod on the right of the table and the Pendulum on the left. Pick up the Tinderbox from the table near the moon phase and light the candles according to how they are in the picture. Remember that the painting shows the room in a mirrored aspect. Light the candles from left to right like this:
- Not lit
- Lit
- Lit
- Not lit
- Lit
- Lit
To communicate with the ghost you need to tap the ouija board and enter the time of death. This time is 20:43, the two numbers discovered in the painting and the stopwatch. Drag the planchette to the 2, 0, 4, and 3 to commune with the ghost of a man called Baxter.
Baxter tells you that you are both in grave danger and you must move the box. Before anything can happen the box trap Baxter and red beams appear. Turn into the Raven form to solve the next puzzle.
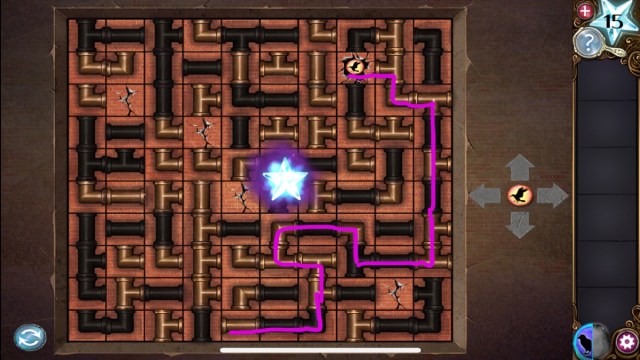
In the left corner you can enter a set of pipes to escape but first you need to find a safe exit through one of the cracks. Only one crack is the correct exit, the rest are dead-ends. The crack on the top right corner is the correct one. The pipes need to be moved so Moira can travel to that crack.
Haunted Hunt: Chapter 3
Chapter 3 of Haunted Hunt finds you in an armory full of weapons with a strange whining sound coming from another room.
- As the Raven, pick up the two piles of wood chips;
- Open the drawers to find more wood chips and a screwdriver;
- Pick up the cobwebs;
- Tap the hole to fly into the attic;
- Find more wood chips and cobwebs;
- Tap to blow away the dust piles with your wings to reveal mysterious pattern of circles.
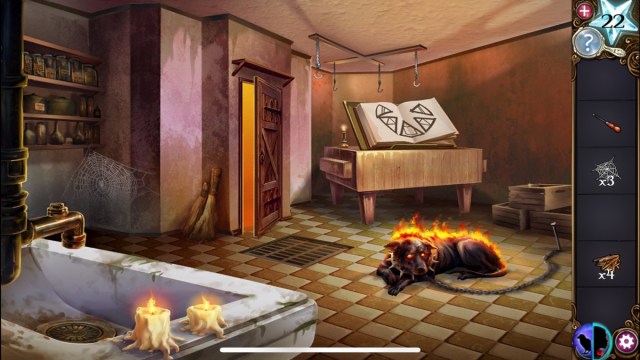
In human form you can collect another cobweb in the top right corner. Next, tap the door on the left to find what has been making the whining sound. A poor hellhound puppy is chained up in the small room. There are some mysterious triangle symbols in a book. Collect the cobweb before transforming into the Raven.
- Collect wood chips from the top shelf and small shelves on the right;
- Tap the small cobweb to collect it;
- Pick up the screwdriver and use it to collect a screw from the hook on the ceiling;
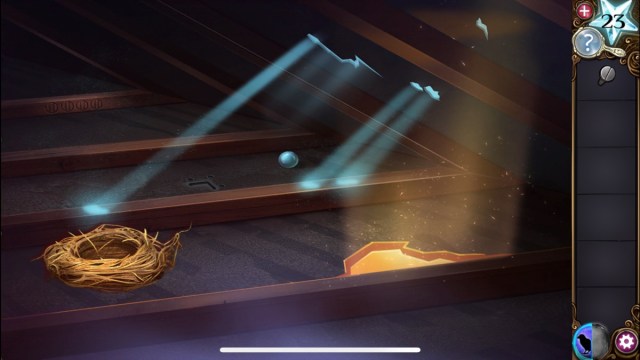
- Transform into the Raven and head to the attic again;
- Create a nest using 6 cobwebs and 6 wood chip piles;
- Pick up the nest and the salt hidden underneath it;
- Head back to the main room;
- Tap the mysterious pattern under the dresser;
- Use the salt to complete the protective symbols;
- Tap the circles so they each have two vertical lines through them just like the symbols in the attic;
- Tap the triangles so they look identical to the ones in the book.
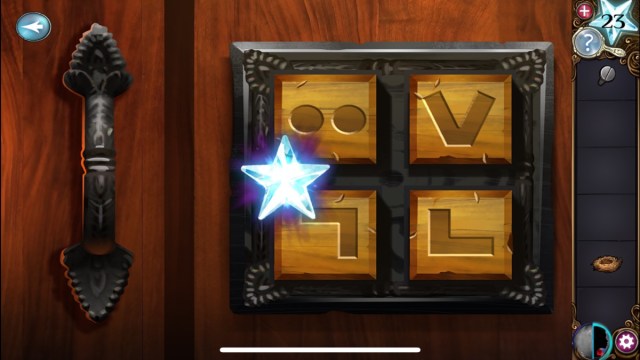
Now you can discover what is inside the wardrobe but not before you solve the lock puzzle! In Raven form you can find the symbols you need hidden in the rooms. One is on the wardrobe, another in the attic, and two in the room with the hellhound puppy. The symbols should show, clockwise from the top left: two dots, V shape, top right angle, bottom left angle.
There is a suit of armor in the wardrobe! Tap to take his gauntlets and use them to pick up the silver ball in the attic. Back in the main room as Moira, tap on the glass weapon case at the back and repair the sword with the screw you found earlier.
Tap the blueprints on the table and place the silver ball on the table beside them. Rearrange the blueprints so it shows how to clean and reload the musket like this:
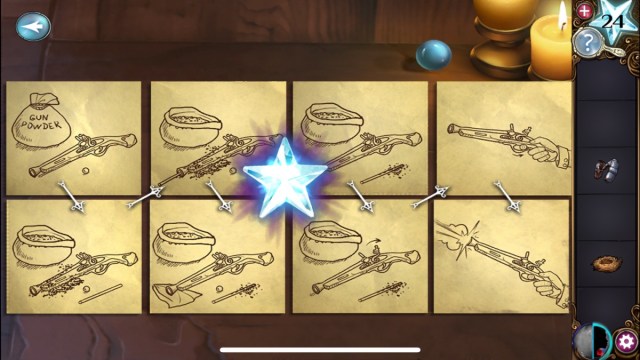
- Pick up the loaded musket and take it into the other room;
- Shoot it at the sink;
- Pick up the cork;
- As the Raven find a golden pin on the shelf;
- Tap the puzzle on the wall.
- Tap the blank spaces until each creature has an equal territory;
- A secret compartment opens to reveal a whetstone for you to pick up.
- In the main room use the whetstone on the sword;
- Collect the sword using the gauntlets.
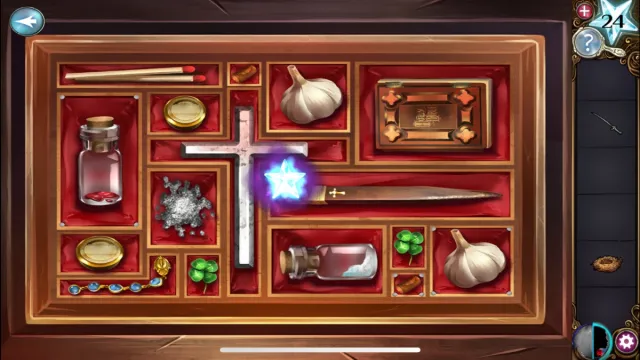
The next puzzle is the box beside the weapons case. Place the cork inside and the arrange the objects like a jigsaw until the entire area is covered. Pick up the broken handle and take it to the sink in the other room.
Place the broken handle on the tap and the nest in the sink. Turn on the tap to fill the nest with water and then give the water to the thirsty dog. Use the sharp sword on the chain to set the dog free. There is a hole to escape through hidden right under the dog!
Haunted Hunt: Chapter 4
You are in raven form as Haunted Hunt Chapter 4 begins. Clear the attic of dust by tapping around the space. Now you can see objects you need to pick up or fix.
- Pick up the bell ringer and place it in the bell;
- Pick up the jar of fish;
- Tap to ring the bell and awaken the cat;
- Place the jar of fish on top of the box;
- Tap the jar to push it to the floor where it breaks open;
- Tap to shapeshift into the cat!
As a cat you can see in the dark. Tap the paw prints to get to a maze puzzle and use the cat ability to move through to the other side. If you come to a dead end just head back and find another path.
- In Moira’s human form pick up the Ghost Book from the table;
- Head downstairs and through to the bedroom;
- Pick up the chair leg from the floor;
- Open the drawer in the bedside table and pick up the wheel;
- Go back into the library;
- Fix the stair with the chair leg;
- Attach the wheel to the stairs;
- Place the Ghost Book on the top shelf;
- Tap the rug under the table to reveal a safe.

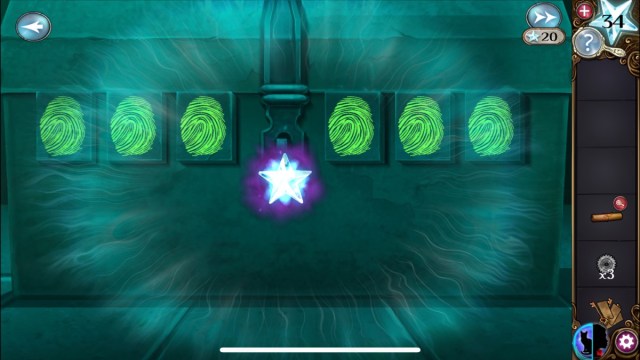
The safe code answers can be found in every room. In cat form you can see fingerprints on various pieces of art: Spring statue has three, Winter painting has five, Summer painting has one and the Autumn leaves rug in the library has seven.
- Enter the code in the safe: 5,3,1,7;
- Pick up the vault door ring;
- Tap the tapestry at the back of the room and then pick up the cord hanging there;
- Go into the bedroom and use the cord on the cauldron in the fire;
- Tap to pick up the brass tab and the door ring;
- Head upstairs to the first room and tap the puzzle on the front of the desk;
- Place the brass tab where it belongs.
This puzzle needs you to take notice of where the cat paw prints go. Each set points you towards a set of objects, one of which is missing. The brass tab on the puzzle must be placed in the position of where the object is missing. Eventually the sequence will show the brass tabs in the following places from top to bottom:
- 2
- 5
- 1
- 2
- 5
In cat form you can pick up the ghost key and the second door ring. Take the key to the bedroom downstairs and open the box on the table. Pick up the diamond ring and the winding key. The diamond ring is used on the glass panel on the bookshelves in the library. Take the oil can and use it on the crank to the right. Lower the chandelier and grab the fourth door ring.
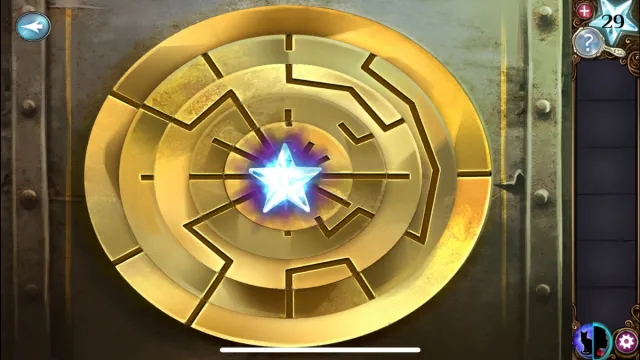
Back in cat form, head upstairs and use the winding key on the musical box at the back of the room. As you wind it you can see the sounds as rings. Take note of how many there are in the sequence: 5, 4, 1, 3, 2. Go to the piano and tap the paw print in that same order. The musical box is now open and you can grab the fifth door ring. We can finally place the rings where they belong. In either human or cat form, tap the puzzle in the top left corner of this first room. Place the rings inside and solve the puzzle. There should be a line going from the outer edge to the middle and back to the edge.
Now you are inside Otto’s vault. On the wall is a puzzle with colors and animals. As a human, change the three triangles pointing down to green to represent land animals. The other three triangles should be blue to represent flying animals. As a cat, put a flying animal in the blue spaces and land animals in the green spaces. Pick up the key and read the book to find out Otto’s secret! Take the key down to the library and use it to escape out of the door.
Haunted Hunt: Chapter 5

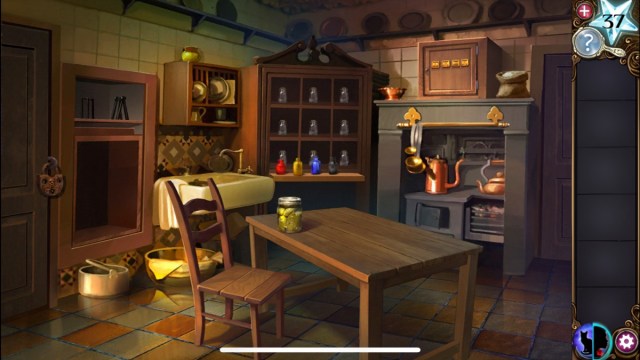
Haunted Hunt Chapter 5 brings us to Otto’s parlor room. In cat form you can find two ghostly gears in this first room. Pick up the puzzle solution from the table to see a bunch of shape pieces. Use these to solve the puzzle on the mirrored doors behind. You can only see the puzzle in cat form. Change each shape until it matches the piece you saw on the paper. Back in human form you can investigate what is inside this wardrobe.
- Open the drawer to find a box of matches;
- Clear away dust to find a key;
- Go into the next room where there is a locked door;
- Pick up the to-do list for Baxter;
- Open Baxter’s drawer and take the oil can.
There are three lamps to refuel and light with matches but they need to be done in a specific order. First the Parlor lamp, then the kitchen lamp, and finally the lamp in the small back room. A secret compartment will open under the third lamp. Take the key inside.
- Pick up the watering can;
- In cat form you can find a ghostly gear in the cupboard on the left;
- Fill the watering can in the kitchen and return to the small room;
- Use the watering can to water the plants;
- Pick up the contract and the key;
- Read the contract and take note of the fingerprint.
Back in the kitchen you can use cat form to see images of fingerprints on the trunk. Match all of the fingerprints with the one on Otto’s contract to open and collect the ghostly gear.
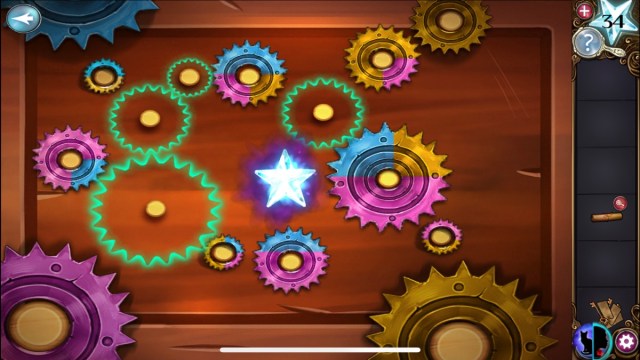
The last task on Baxter’s to-do list is to fix the grandfather clock in the parlor. Open the clock and place all ghostly gears on the panel. Now you have to move them onto knobs with no overlaps or gaps. If gears are right next to each other they must also color match! Remember to use cat form to see the colors of the ghostly gears. You will end up with something like this:
Pick up the keys from the clock and go to the small back room. Tap the trap box and place each key on top of the box individually. They each have a label with a different image showing one of Baxter’s chores. Place the keys in order: Cigar, Lamp, Flower, Clock. This triggers another puzzle.
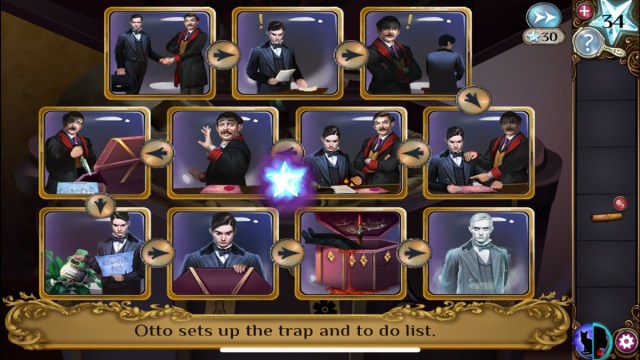
Put the images in the right order of the timeline of Baxter’s demise:
- Baxter is hired;
- Baxter finds proof of Otto’s fraud;
- Otto catches Baxter with proof;
- Baxter promises to keep quiet;
- Baxter burns proof;
- Otto fears Baxter’s betrayal;
- Baxter completes the to-do list;
- Baxter opens the trap;
- Baxter is killed;
- Baxter becomes a ghost.
Finally, take the key and escape from the locked door in the kitchen.
Haunted Hunt: Chapter 6
Chapter 6 of Haunted Hunt moves into the servants’ quarters. A ghostly maid sits at the table but you only see her in cat form. Move to the bedrooms through the door and see, still in cat form, numbers under the bells. Pull the bell rope by the beds and see different bells ringing. The numbers correspond with the safe codes on each servant’s box:
- Baxter’s box code: 1, 2, 7, 4, 9
- Joan’s box code: 2, 4, 6, 1, 3. Take the key and shoe.
- Lilly’s box code: 8, 6, 8, 8, 9. Take the vegetable shortening.
- Cole’s box code: 7, 4, 5, 1, 7. Take the spade.
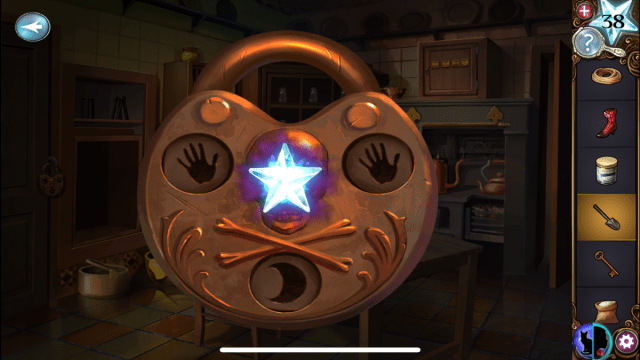
Back in Moira form, pick up the rope from under Baxter’s bed and head back to the kitchen. Take the jar of pickles from the table. Pick up the flour from above the cooker and pour it on the table so the ghost can communicate with you. The ghost has given you a clue to the lock combination on the door to the left. Tap the gaps until the top two are hands and the bottom one is a moon.
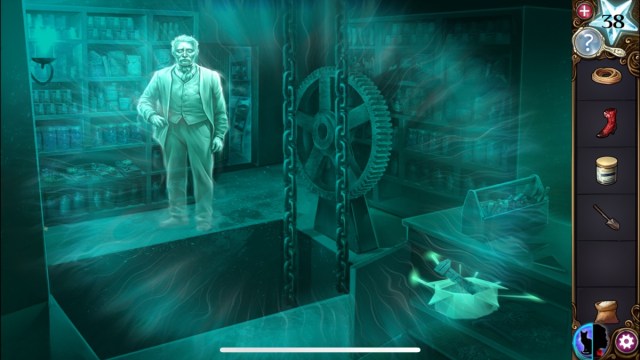
Go into the next room and unlock the cupboard with the key. Find a trap inside you need to disable completely. In cat form you can see where the beams are so you can direct them through the spiders. Make sure every spider is covered by a beam. Now another ghost has appeared!
- Pick up the wrench;
- Use the vegetable shortener on the rusted wheel;
- Use the wrench on that same wheel;
- Pick up the red boot;
- Pick up the horseshoe;
- Pick up the large rusty wheel;
- Get the rope.
On the back shelf are a row of stones with flowers on top. In cat form you can see the names of the servants on them. Place each person’s personal items on the stones:
- Baxter: horseshoe
- Joan: red boots
- Lilly: jar of pickles
- Cole: spade
In return for completing that puzzle the ghost gives you a gear and four numbers: 4727. This code opens the safe in the kitchen located above the cooker. Grab the alcohol from inside. Click on the bottles in the kitchen and place the bottle of alcohol in the space provided. In cat form you can see the colors on the bottles in the cubby holes. In human form you can see the colors on the row of bottles at the front.
Your job is to mix the right colors into the bottles provided. The alcohol you brought is used to lighten colors. You will need to switch back and forth between human and cat form to complete this puzzle. If you get a color wrong just empty it into the sink and start again.
When that is complete you can pick up the ammonia cleaner from the edge of the sink. Place the large rusty wheel in the space above the dumb waiter. Add the two ropes and the small rusty wheel. Clean them all with alcohol and escape through the dumb waiter!
Haunted Hunt: Chapter 7
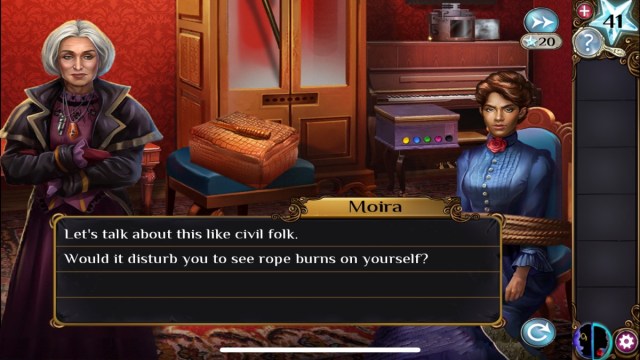
Haunted Hunt Chapter 7 continues with a surprising reveal! The woman who left the raven with Moira in the first chapter is back, but all is not as it seems. Euphemia, a Hunter, wanted to see Moira’s powers in action so she could enjoy chasing her down and capturing her again. After a brief scuffle, Moira is tied up, but she can now transform into Euphemia.
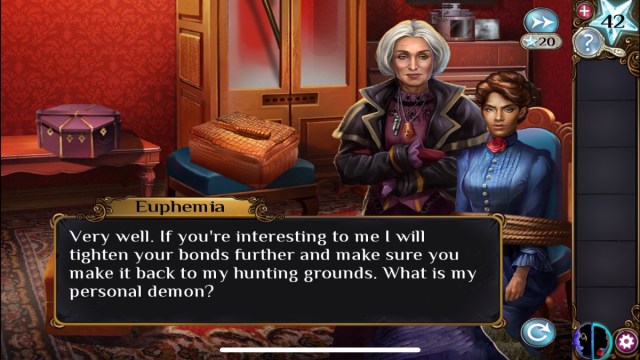
Look around the room as Euphemia and tap objects to give you more dialogue choices. You want to make choices that make Euphemia move closer. We found she reacted best to the following dialogue options:
- If these bonds are like that broken wand, I’ll easily escape.
- I can outrun you. It’s taking you forever to fix that trap.
- You’ll have to hunt me again here if you don’t secure the bonds.
- So you disapprove of Otto’s practices?
- You’re right. His wealth is his illusion of security.
- Let me try finding your personal demon.
- Nothing.
Euphemia comes closer to tighten your bonds and you use the whistle around her neck to call the hellhound puppy. Now we have a trap box puzzle to solve. Each cell contains an image of either a supernatural or regular creature. Tapping each one changes that cell and others so they must be done in a specific order. To solve this puzzle click the following creatures in this order:
- Dragon (south east cell)
- Unicorn (north east cell)
- Ghost (east cell)
- Dracula (south west cell)
- Angel (north cell)
Now Euphemia is trapped in the box we can find an exit in this room. First collect all the objects around you:
- Miniature helmet on the table at the front;
- Miniature shield from the outfit;
- Miniature sword from the jacket lapel;
- Another miniature sword from the table at the back;
- Miniature horse from the shelf above;
- Another miniature helmet from above the wardrobe;
- Another miniature shield under the blue seat cushion.
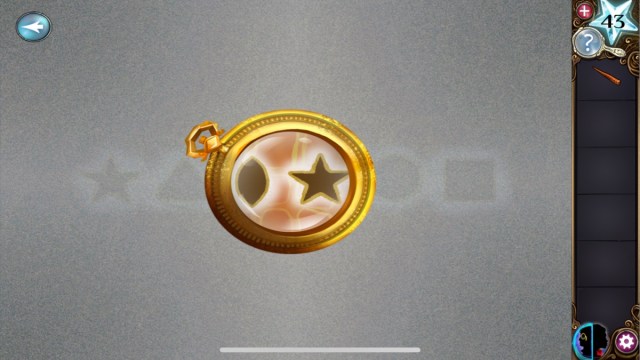
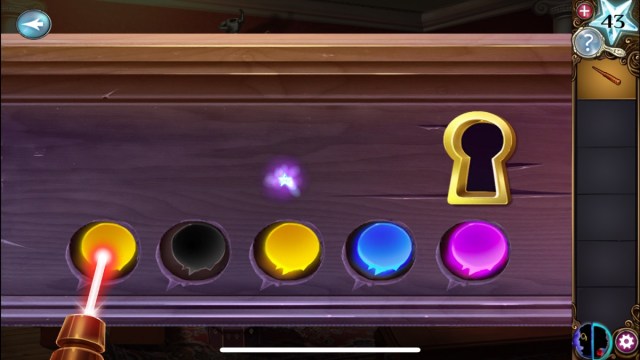
In Euphemia form look around the room and in the bottom left corner. Tap on the box to see the next puzzle hint. There is a series of six shapes: star, triangle, diamond, star, circle, square. Go back and find the device just above with the crystals inside. In Moira form you can only see them as blindingly bright crystals but as Euphemia you can see they actually have shapes. Put them in the order you saw in the previous box: star, triangle, diamond, star, circle, square. Next, pick up the beam wand.
Now you have the wand you can open the box sat on the piano to the right of the room. The hint to this puzzle is on one of the boxes on the left. In Euphemia form you can see colored shapes and it is the color sequence we need to remember: yellow, black, yellow, blue, purple. Use the wand on the box above the piano to change the colors until they match the sequence.
Another puzzle hunt can be found using the beam wand on the device sat on the high shelf on the left. Tap on each small hole in the device with the wand to reveal parts of the painting with swords, shields, the horse, and helmets. You will eventually see they are shown in order: sword, shield, horse, shield, helmet, sword, helmet.
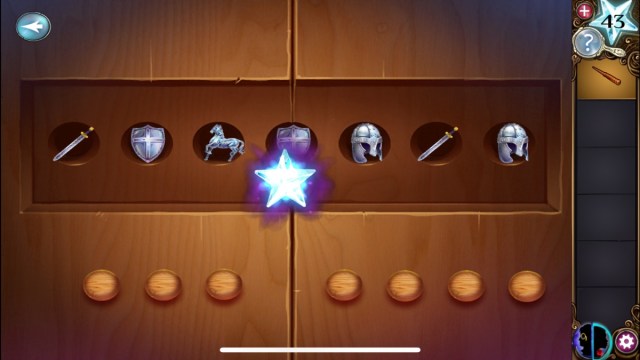
Tap on the wardrobe doors to start the next puzzle using the miniatures you found. Put the miniatures in the order you found in the painting. The wardrobe opens and you can take the halbert weapon from inside. Use the halbert to break the lock on the final box on the left and get Euphemia’s key. Use the key on the lock you discovered on the box above the piano. The secret door opens and you can escape!
Haunted Hunt: Chapter 8

The final Haunted Hunt chapter begins as Moira tracks down Otto in the final room. She wants to gather everyone he has killed so everybody can get their revenge.
- Pick up the Bust of Otto;
- A diamond ring in the coat pocket;
- In Euphemia form look at the cases in the bottom left corner.
One case says 972, and there is a small circle under the 7. This shows a hint at the code to unlock the case next to it. Enter the code 7 9 2 to unlock the case. Open the case and pick up Euphemia’s diagrams and map. The map will allow you to go to other rooms freely to help the ghosts escape. Go through the doors at the end of the hall and into the room.
- Open the top cupboards to find some flint;
- Find coal in the fire;
- Place the diagrams on the table;
The diagram shows what you need to make a flamethrower: coal, diamond, flint, and wood chips. Each piece needs to be in the right place so they match with colors next to them.
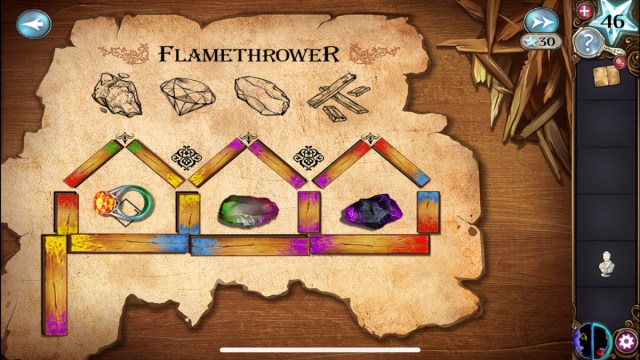
Now you have a flamethrower! Use it to burn down the weeds coming from the grate on the wall. Pick up the knife and gather bricks from the wall. Cut the rope in the ceiling with the rope and then pick it up. tie the rope to the chain in the hallway and attach the bust of Otto. Tap it so it swings and breaks the chandelier. Then you can gather up the crystals.
Tap on the map in your inventory and go to the room where Otto’s box is. Destroy the box trap with the flamethrower. Look at the map in Euphemia’s form and take notice of the numbers and clues hidden in the map. These will be the codes to unlock the traps. Otto’s trap is unlocked using the numbers 7, 8, 4, 3.
Head over to the cellar and destroy the box with the flamethrower. Open the box using the numbers 1, 3, 5, 6, 8. Next head to the boudoir and, again, destroy the box with the flamethrower before entering the code 1, 2, 3, 6, 8. The last ghost is in the library, destroy the box with the flamethrower and enter the numbers 4, 8 , 6, 2, 0.
Now you need to summon the ghosts! Go back to the hall and into the room through the doors. Tap the candlesticks on the floor and place the bricks behind the candlesticks to cast shadows. Light all the candles using the flamethrower. Next you will have to create the ghost summoning device.
Tap the ghost summoning device plans on the right side of the table and place the crystals on the plans. Arrange the wood pieces and crystals so the colors all match. there is a glitch with this puzzle so the left crystal actually has to be the wrong way round. The items are laid like this:
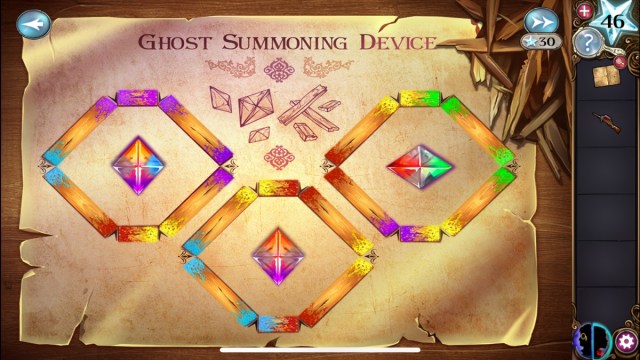
Collect the ghost summoning devices from the table and place them with the candles on the floor. The other blueprint on the table will show you where the shadows should fall for the device to work. As Euphemia look over the ‘Summoning the Ghost into the Device’ instructions and then place the candles with one in the centre by the box and the rest like this:

The final puzzle has a 15 second countdown before they all move one space. Your need to trap Otto while the rest of the guests are pushed out of the room. Each ghost has trap beams coming out of them so you can use them to block guests and force them to move. The trick is to keep Otto trapped against the left wall and away from the door, and to block any guests from reaching him. Focus first of all on getting Otto into the bottom left corner then use the other ghosts the guide the guests out of the door. You also can tap the timer to make them move quicker.
Your final choice is to either burn the house down or to leave it but either way, something or someone jumps from the window and escapes! Perhaps this is a hint at a continuation of the game.
So, that is the entire Haunted Hunt walkthrough completed. We hope that helped you escape some of those tricky rooms! If you need any more walkthroughs and guides including the Trace puzzle walkthrough, check out the list below.
About the author
