While most of Fortnite’s Oathbound quests are fairly simple, this one might leave you scratching your head.
Quick Links
Fortnite Chapter 4 Season 1 has been full of delights and surprises. The newest update has given players access to part 2 of the Oathbound quests. If you’re unfamiliar, Fortnite has broken down their quests in several sections. Daily, as you may have guessed, refresh daily. Weekly quests are only around for a short time. Milestone quests persist throughout the season. Oathbound quests also persist throughout the season, but new ones are only given to players every few weeks. If you’ve been waiting for these quests to drop, you’re probably eager to get started.
Most of these quests are going to be straightforward. If you ever have a doubt about where to go next, select the quest in the menu section and then look at your map. The map will always guide you to the area where the next step of the quest is located. One step, however, has left more than a few players scratching their heads. This step of the Oathbound quest will ask you to align the star sensors by damaging them in the correct order. Don’t worry, we’re here to shed some light on all of that correct order business.
The Correct Order Of The Star Sensors

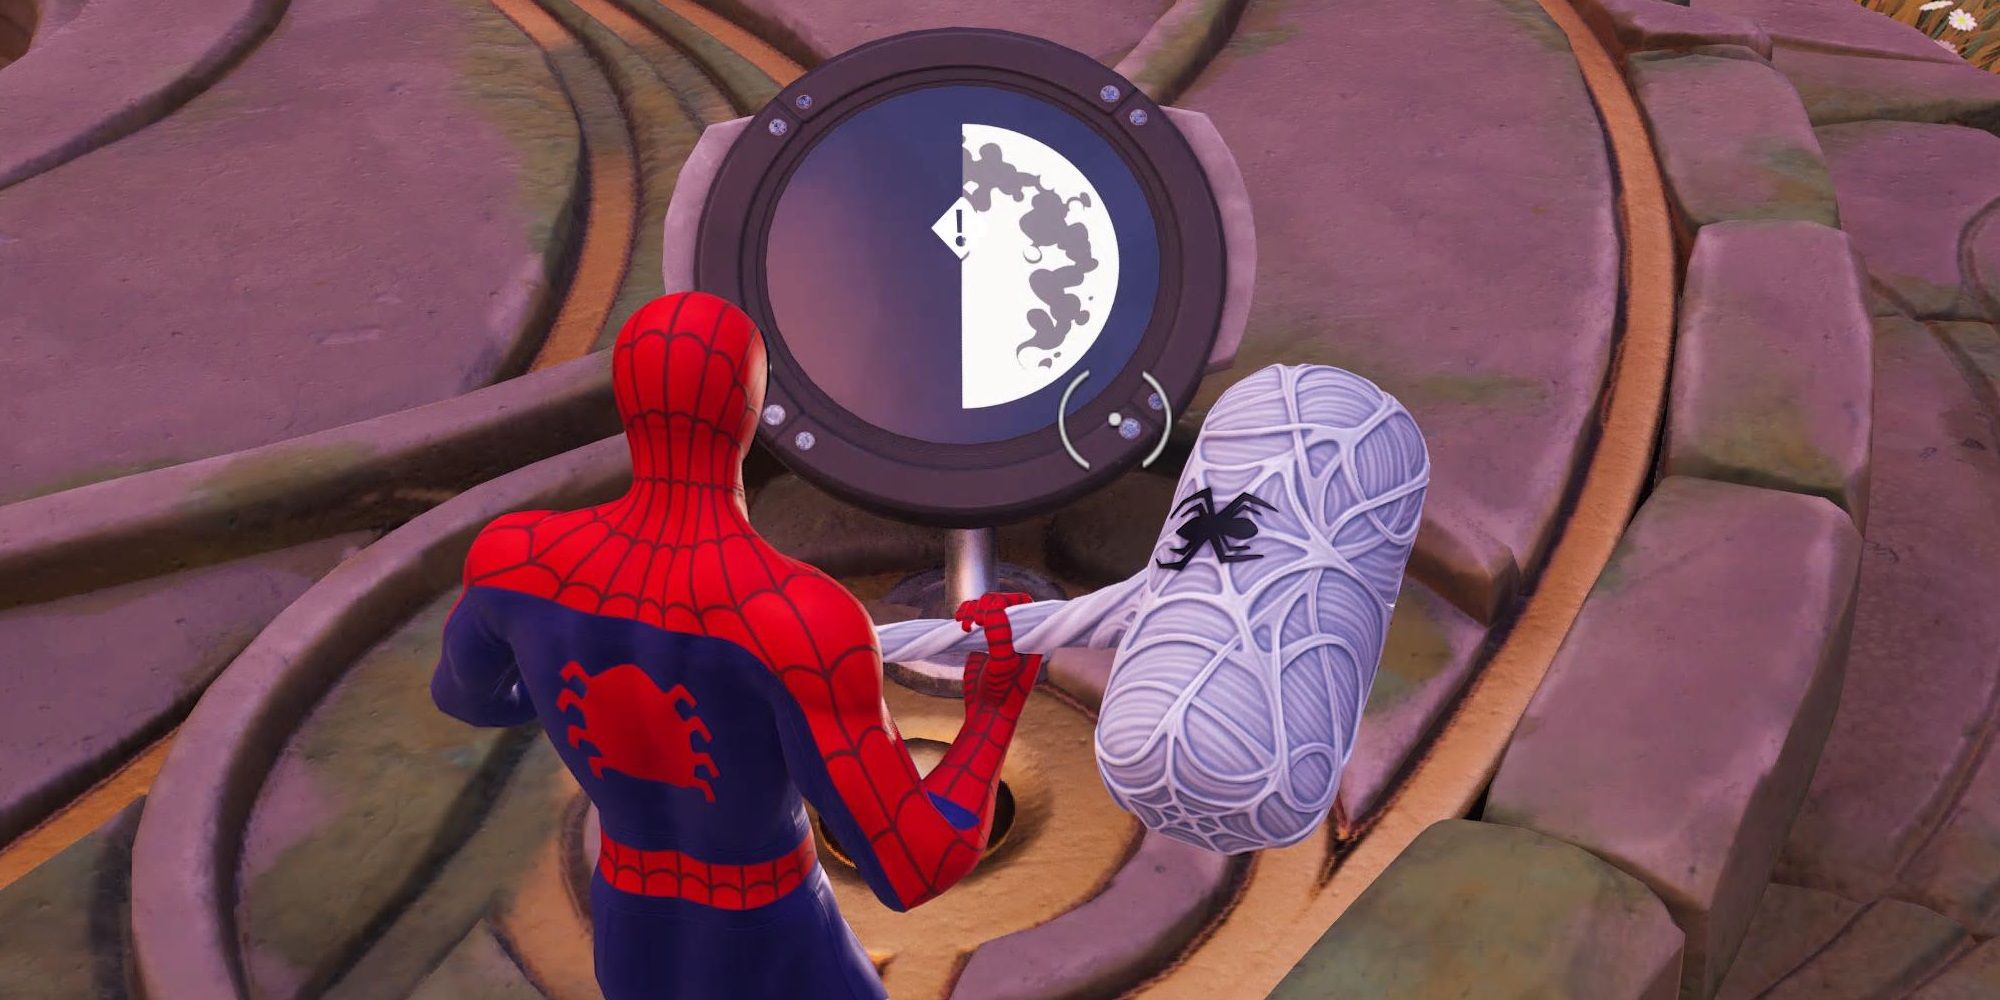
Your map will guide you to a small grove in the middle of some woods. Once you’ve landed, you’ll see large stone slabs jutting out of the ground in the form of a circle. In the middle is a stone platform. When you’re on this stage of the quest, you’ll see sensors near the slabs displaying the different phases of the moon. While you could run around hitting these randomly to determine the correct order, the easy answer is waiting for you on that center platform.
On the platform itself is what appears to be another sensor, but it’s actually the answer to the puzzle. Look at the center display. It looks just like the sensors scattered around, but it’s actually displaying which sensor you should damage. Determine which phase of the moon you’re looking for, then find that matching sensor near the outer stone slabs. Damage that sensor, then look at the center display again to determine your next target. Continue doing this until you’ve hit all of the sensors. Congratulations, you’ve solved the puzzle!

If you don’t have a gun, you can run back and forth from the center display to the sensor you need to hit. However, using a gun is going to be much quicker. Don’t forget that you’re doing this quest in the middle of a match, so another player can run up and eliminate you at any moment. You might want to be armed before you start doing the quest. Fortunately, there are usually some chests and a NPC nearby to help you get some starting gear. You can also land at another location first and make your way to this grove, though you’ll need to hope that the grove is in the next storm circle.
