Every Boss Item & What They Do
Risk of Rain 2 is famous for its chaotic gameplay and ability to become a true god of destruction, sweeping through crowds of dozens — or even hundreds — of enemies at a time. You can become a true force of nature by hoarding the game’s many items.
Each item has a rarity, or tier, that signifies how powerful that item is. White signifies Common items, Green signifies Uncommon items, Red means Legendary, Yellow are Boss/Planet items, Blue are Lunar Items, Purple signifies Void items, and Orange are Equipment.
How To Get Boss Items
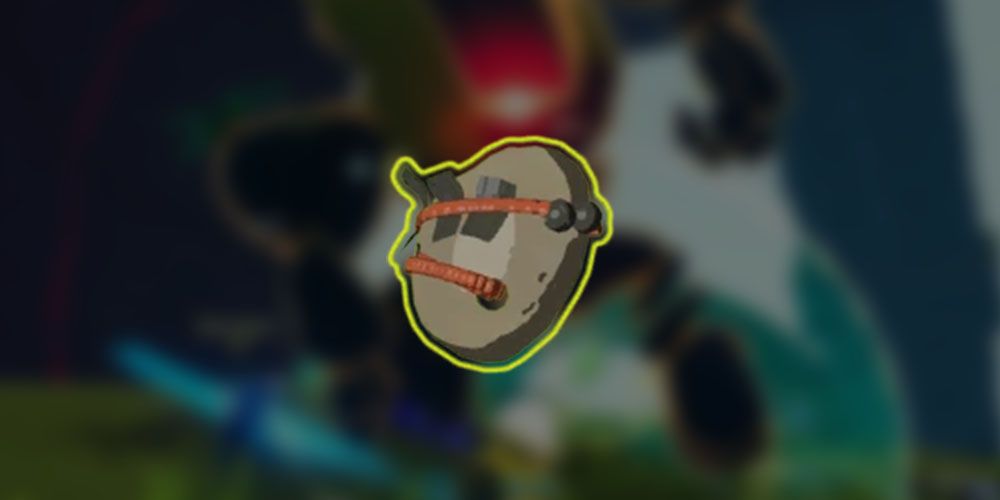
Boss items are rare items that are typically dropped from powerful boss monsters in one way or the other. You can obtain a boss item through the Teleporter Event, if you’re lucky; you can improve those chances by using Shrines of the Mountain, which increase the difficulty of the Teleporter Event in exchange for increasing the amount of rewards you get. An easier way to get Boss items is by using the Trophy Hunter’s Tricorn, an equipment item exclusive to the Survivors of the Void DLC.
The Tricorn is a one-use item that will instantly kill any boss enemy and make it drop its “trophy,” or boss item. The Tricorn is a much safer method than relying on Mountain Shrines, but if you don’t have the DLC, there is another way: 3D Printers! Special Boss-tier printers can spawn during your run, and you can obtain items to feed them with by exchanging Lunar Items for Pearls, which are considered Boss-tier. With Pearls or Yellow Item Scrap, you can just print Boss items — assuming you can find a printer.
Artifact Key
A stone shard with immense power.
You won’t have to worry about this item if you’re not hunting for Artifacts. This item only spawns during the fight with the Artifact Reliquary in Bulwark’s Ambry; its sole purpose is to be used on the Reliquary, which can’t be harmed otherwise. Defeat enemies, and an Artifact Key will eventually drop. Take it to the Reliquary and use it, which lowers the Reliquary’s HP. Rinse and repeat three more times, and you’ve got yourself a new artifact!
Charged Perforator (Overloading Worm)
10% chance on hit to down a lightning strike, dealing 500% (+500% per stack) damage.
The Charged Perforator is a great on-hit item, dealing a massive amount of damage to a single target. The rarity-to-effectiveness ratio here is great, as Charged Perforators will likely only appear after your first loop, assuming no printers spawn and Command is off. That being said, the Charged Perforator is always worth a pick-up.
Defense Nucleus (Xi Construct)
Killing elite monsters spawns an Alpha Construct with bonus 300% damage and 300% health. Limited to 4 (+4 per stack).
This item is exclusive to the Survivors of the Void DLC.
The Defense Nucleus, as far as items that bring in reinforcements go, is pretty solid. The Alpha Constructs don’t really get in your way, being stationary, and they deal good amounts of damage. Even the amount you’re limited to with just one Defense Nucleus is pretty good! Killing an elite can be tough, but bringing in reinforcements is a good trade-off.
Empathy Cores (Solus Control Unit)
Every 30 seconds, summon two Solus Probes that gain +100% (+100% per stack) damage per ally on your team.
The Empathy Cores encourages you to activate every drone and turret you come across. The Empathy Cores will summon two special Solus Probes; the Quiet Probe and Delighted Probe. Your two new children behave much like their aggressive cousins, attacking with a hit-scan beam that steadily deals damage. However, the friendly Probes become stronger with friends at their side, dealing more damage for every ally you have.
This includes additional players if you’re doing multiplayer (though the game will scale enemy stats to accommodate), turrets, drones, Beetle Guards, ghosts… Get your list of allies to go off the bottom of the screen and watch your Solus Probes obliterate all in their path.
Genesis Loop (Wandering Vagrant)
Falling below 25% health causes you to explode, dealing 6000% base damage. Recharges every 30 / (2 +1 per stack) seconds.
Ever wanted to get back at the Wandering Vagrant for using its supernova attack? Well, now you can: if you hit less than 25% HP, you’ll unleash a supernova of your very own, dealing a truly monstrous 6000% base damage. That’s a 60x multiplier! Much like the Vagrant’s supernova, the Genesis Loop’s explosion affects any and all enemies that aren’t behind cover. The Genesis Loop can be a great panic button if you’re cornered, but try not to rely on it too much. When you’re at low health, you’re walking on thin ice — any mistake could put an end to your run before the Genesis Loop has a chance to do its thing.
Halcyon Seed (Aurelionite)
Summon Aurelionite during the teleporter event. It has 100% (+50% per stack) damage and 100% (+100% per stack) health.
If you’re struggling through the Teleporter Event, swing by Gilded Shores and pick this bad boy up. Aurelionite is a super-powered Stone Titan with a blinged out golden body, and he is more than capable of single-handedly carrying the entire Teleporter Event. Of course, later on Aurelionite may wind up being overshadowed by you. Also, Aurelionite will make a guest appearance if you take him to Commencement; during Mithrix’s third phase where he steals your items, Aurelionite will appear to fight with you and prompt Mithrix to spout some unique dialogue.
Irradiant Pearl
Increases ALL stats by 10% (+10% per stack).
The Irradiant Pearl is hard to find, only appearing in one out of ten Cleansing Pools (you can find out by pinging Cleansing Pools). However, using a Cleansing Pool will re-roll those odds, so if you have a lot of Lunar Items you’d like to unload, you can try your chances at getting a spiffy new Irradiant Pearl. As an item, the Irradiant Pearl is pretty solid; it boosts all of your stats by 10%. Health, regeneration, damage, attack speed, movement speed… All great, valuable stats, and an omni-boost is always appreciated.
Item Scrap, Yellow
Does nothing. Prioritized when used with 3D Printers.
Yellow Item Scrap may be your way to get Boss Items if you can’t get a Trophy Hunter’s Tricorn. Yellow Item Scrap can be obtained from Scrappers by scrapping other Boss items or, alternatively, Pearls and Irradiant Pearls. Yellow Item Scrap allows you to use the Overgrown 3D Printers that can spawn during your run — this way, you won’t have to worry about surviving a Mountain-augmented Teleporter event or use a DLC item to get the yellow item of your dreams.
Little Disciple (Grovetender)
Fire a tracking wisp for 300% (+300% per stack) damage. Fires every 1.6 seconds while sprinting. Fire rate increases with movement speed.
The Little Disciple is a great item, providing an autonomous attack to you while sprinting. This item works best on survivors who can attack while sprinting, such as Huntress and Mercenary, but it honestly shines no matter what character you pick. Sprinting is important, and you should be sprinting 90% of the time you spend moving around the planet. The wisps the Little Disciple fires deal a good amount of damage, too — just two Disciples boosts the damage, so it passes Kjaro’s and Runald’s thresholds, allowing it to deal some real damage.
Mired Urn (Clay Dunestrider)
While in combat, the nearest 1 (+1 per stack) enemies to you within 13m will be ‘tethered’ to you, dealing 100% damage per second, applying tar, and healing you for 100% of the damage dealt.
The Mired Urn can provide a great source of healing if you’re looking for one. While in combat (combat is triggered by using an attacking skill), you’ll tether yourself to nearby foes, damaging them and draining HP. Considering how close you’ll be to at least one enemy at any given time, the Mired Urn will be healing you constantly. Combining this with the Rejuvenation Rack, and the only thing you’ll need to worry about is ranged attacks, as you’ll simply heal back any damage you take in close range.
Molten Perforator (Magma Worm)
10% chance on hit to call forth 3 magma balls from an enemy, dealing 300% (+300% per stack) damage each.
The Molten Perforator, much like its Charged cousin, is a fantastic on-hit item that will undoubtedly spell doom for your foes. When procc’d, the Molten Perforator spews fireballs that rain down and batter foes, dealing sizable amounts of damage. With a 57 Leaf Clover to boost your luck, fire will be raining from the skies at your command. The Molten Perforator is a fun item and always worth a pick-up.
Pearl
Increases maximum health by 10% (+10% per stack).
The Pearl is a good way to feed Overgrown 3D Printers. True, it boosts your health, but that can be done in so many other ways that this aspect of the Pearl just isn’t that noteworthy. Get Pearls to print more Boss Items.
Planula (Grandparent)
Heal from incoming damage for 15 (+15 per stack).
The Planula is in a tricky spot. The Planula makes it so that you heal for a flat 15 damage whenever you take any damage. This makes damage-over-time effectively nullified, as early on you won’t be taking 15 damage per tick from damage over time effects. In particular, Planula pairs well with the Helfire Tincture, allowing you to heal away the Tincture’s self-damage. That being said, for all this item is worth, it appears far too late in the run to be of any real use.
Without using Command or 3D Printers (which aren’t guaranteed to spawn), the earliest you can get a Planula is Stage 5. And, assuming you are going to fight Mithrix and aren’t planning on looping, Stage 5 will be the second-to-last stage of your run. At that point in the game, 15 HP when taking damage is worth very little. It’s unfortunate that Planula is stuck near the end of the game, as it makes for a fantastic early-game source of healing.
Queen’s Gland (Beetle Queen)
Every 30 seconds, summon a Beetle Guard with bonus 300% damage and 100% health. Can have up to 1 (+1 per stack) Guards at a time.
The Queen’s Gland is commonly agreed to be one of the worst Boss items. Let’s take a look at the positives first. The Queen’s Gland summons a respawning Beetle Guard to help you out, with an additional Beetle Guard per stack. Having allies can be great, as enemies may focus on your allies instead of you and give you ample time to kill them before they kill you. Also, early on in your run, having a big and tough Beetle Guard can help you take care of tankier foes like Golems or Elder Lemurians.
That said, this item falls off HARD. As you progress through your run, your Beetle Guard will be less and less effective, especially as more airborne foes (which the Guard can’t hit) are introduced. Also, the Beetle Guard may walk in front of your attacks. You cannot hurt the Beetle Guard, but your attacks cannot pass through it, either. The Beetle Gland might be useful in some niche situations, but it is almost always worth trading it in for another better item.
Shatterspleen (Imp Overlord)
Gain 5% critical chance. Critical Strikes bleed enemies for 240% base damage. Bleeding enemies explode on death for 400% (+400% per stack) damage, plus an additional 15% (+15% per stack) of their maximum health.
Critical hits are a very important source of damage. Merely ten Lens Maker’s Glasses gives you permanent double damage, even more if you manage to snag a Laser Scope. To work off this, Shatterspleen makes it so critical hits always apply a stack of bleed to enemies, dealing damage over time based on how many times bleed has been stacked. A fun fact about bleed is that whenever a new stack is applied, the timer for the damage-over-time is reset; this means that you can apply as many stacks of bleed as you want before an enemy goes down to either your attacks or the massive amount of bleed damage you racked up — whichever kills it first.
Shatterspleen is a borderline mandatory item if you’re building your run around critical hits, and that’s not even mentioning its on-death explosion effect, a cherry on top of this scrumptious cake of an item.
Titanic Knurl (Stone Titan)
Increase maximum health by 40 (+40 per stack) and base health regeneration by +1.6 hp/s (+1.6 hp/s per stack).
The Titanic Knurl is a great item if you’re looking for more defense. The Knurl boosts your HP and passive regeneration, and it can be dropped by one of the most common boss monsters in the game. The Stone Titan can be found on up to 11 of the game’s 22 different stages, so you’ll never be hurting for a Knurl. The only thing you may want to consider when finding a Knurl is shields; passive health regeneration does not affect shields, nor is it affected by items like Rejuvenation Rack or Corpsebloom. That said, Knurl is a great jack-of-all-trades item.

