Elden Ring is chock-full of dungeons and caves, with many powerful items and weapons hidden away in their depths. Gael Tunnel is an unusual one in that it actually has two entrances—one in Limgrave and the other main entrance in Caelid. Many players might encounter the Limgrave side first, meeting with Iron Fist Alexander on his way to the Radahn Festival.
The way through is blocked, however, and you need to find the Caelid entrance in order to fully explore the dungeon. This is worth it for some great weapons: the Cross-Naginata Spear and the Moonveil Katana, one of the best weapons in the game.
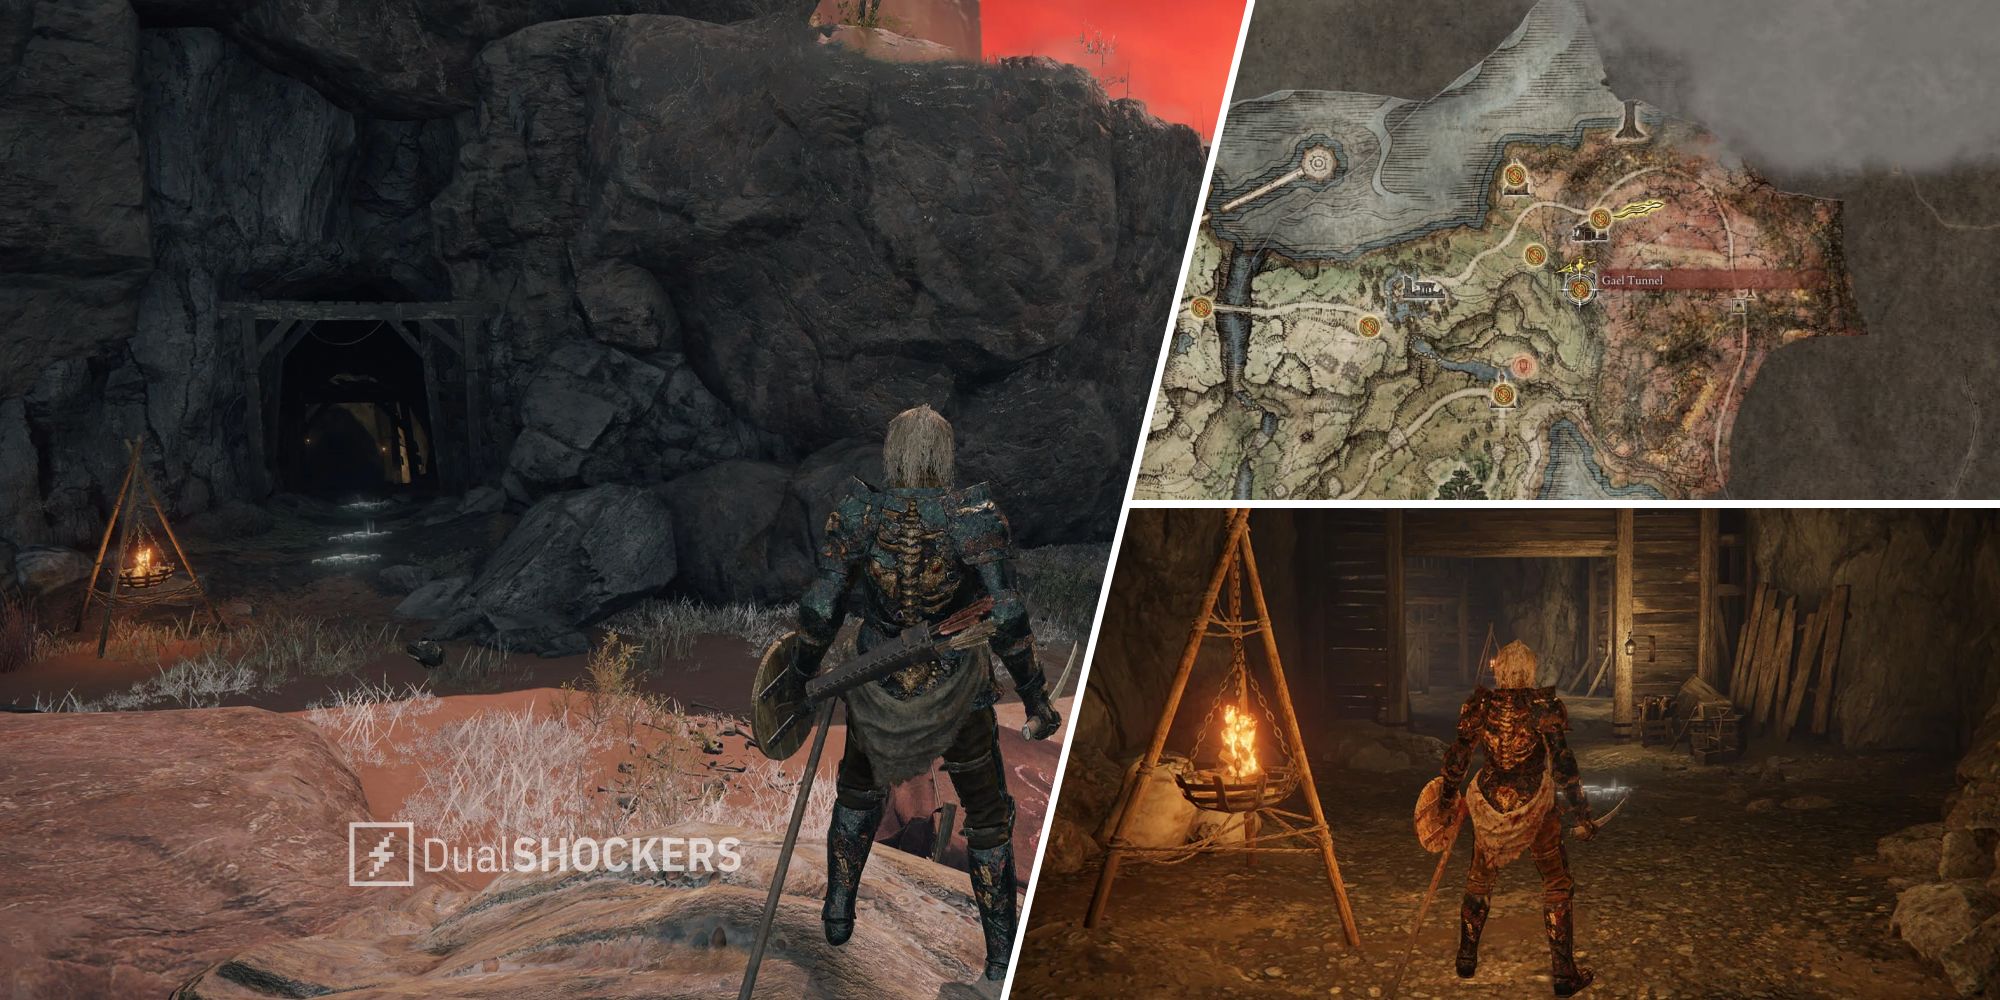
How To Reach Gael Tunnel

To reach the Limgrave side, you have to head up the sloping hills north of the Third Church of Marika in Mistwood. Just below the final slope with the waiting Troll enemy, you’ll find the cave entrance. If you’ve previously encountered Iron Fist Alexander and dug him out of his hole, you can encounter him here, on the Limgrave side of Gael Tunnel. He’s hoping to get through to Caelid and eventually reach Redmane Castle for the Radahn Festival, but the way is sealed shut.
Other than a single Smithing Stone [4] crystal growth in the corner of the cave, there’s nothing else to do on this side of Gael Tunnel.
- Instead, you’ll want to make your way into Caelid proper. From the Rear Gael Tunnel Entrance site of grace, head back out and continue making your way up the slope, past the rolling Troll.
- Cut a path straight north, and you’ll eventually pass into Caelid and reach the Smoldering Church site of grace.
- From here, follow the road eastward, past the rotten hordes of undead, until you reach Rotview Balcony site of grace.
- Reaching Gael Tunnel’s main entrance from here is quite simple.

- Face southwest. Cut a straight path toward the golden Erdtree in the distance.
- Just behind the burned-out shack, leap over the rock wall with Torrent.
- You’ll pass by some coffins along the way.
- When you reach the edge of the cliff, look down. You should find a ledge below you.
- Drop down to the ledges you find, and you will eventually land right in front of the main entrance to Gael Tunnel.
Enter the tunnel, and you’ll come across two guards over a pit. Dispatch them and carefully make your way down the pit, dropping down to ledges along the way. On the second ledge you reach, head down the short passage to find one Somber Smithing Stone [2] on a corpse. Continue carefully descending the ledges until you reach the site of grace at the bottom.
Navigating The Tunnels

In these tunnels, you will primarily be encountering Radahn Soldiers and miners, along with some Land Octopuses scattered about.
Past your first couple of enemies, you’ll find a corpse with one Golden Rune [5] on him. From this item, face northeast. You’ll spot a passage ahead guarded by two soldiers. Dispatch the soldiers and the Land Octopus further in. Make sure to loot the Smithing Stone [4] growing out of the wall near the entrance.

Continue down this passage until you encounter several Land Octopuses and one Giant Land Octopus. This is a pretty cramped room to be dealing with the flailing limbs of the large one, so you might be tempted to retreat into the passage. The Giant Land Octopus can’t pursue you far, but it means you’ll only be able to attack head-on, which can draw the fight out. Try to keep to the larger space of the cavern, so you have a better chance of getting around the enemy.
Once the battle is complete, you’re free to loot. You’ll find two Smithing Stone [4] and one Somber Smithing Stone [4] in the cave walls, and you’ll find the Cross-Naginata Spear on the corpse at the back of the cave.

Return to the main mining passage and clear the rest of the enemies. Be careful; one of the enemies beneath the stairs has a warning horn, which he’ll blow once he notices you. This will alert the enemies in the immediate vicinity. Once you’ve cleared the enemies from this section, you can find one Gold-Pickled Fowl Foot behind some barrels in the back, two Smithing Stone [4] growing from the cavern walls, and plenty of Cracked Crystal.

After the room is cleared, head down the western tunnel. You’ll encounter a single guard kneeling and looking over a ledge beside a ladder. At the bottom of the ladder, you’ll find a miner whittling away at the wall along with a soldier waiting beneath the ladder platform.
The two bodies at the bottom will grant you five Large Glintstone Scrap crafting items and five Grace Mimics. Loot one crystal growth by the south passage to gain one Smithing Stone [4].

Follow the south passage’s short ways, and it will put you out in a junction of sorts. The large wooden wall to the right leads to the dungeon’s boss fight. The smaller wooden door across the way will lead to the Rear Gael Tunnel Entrance and Iron Fist Alexander (if you progressed him to that point). Opening this will allow Iron First Alexander to continue his journey to Redmane Castle. You can also loot one Smithing Stone [4] in the wall. Open the smaller wooden door and rest at the Rear Gael Tunnel Entrance site of grace for a quick route back to the boss fight. You might just need it.
Boss Fight: Magma Wyrm

This is likely to be your first encounter with the Magma Wyrm boss. If so, it can be something of a wall for new players. It’s got some extra damage absorption to Slashing Damage, Fire Damage absorption, and strong resistances to Frostbite and Bleed. Strike and Pierce Damage are pretty effective against this boss, same as the miners themselves, so it might be worth upgrading a mace or hammer of some kind if you’re struggling.
The chamber in which you battle is fairly open but also pretty cramped. Ideally, you want to remain at a medium range between attacks. This allows you to see its movements much more clearly. When you’re up close and attacking, it’s harder to read its next attack and thus harder to avoid it. Your ideal combat rhythm will be to run in-between the boss’ large attack, strike it a few times, then fall back to see its next wind-up.

The boss’ head is vulnerable to attack, so when you’re able, strike its head for extra damage. A longer weapon (like the Cross-Naginata) can be helpful here. When the Magma Wyrm charges, spewing lava, this can be easily dodged if you run to the sides, as it can’t turn very quickly. It likes to do this move several times in a row without leaving much room in between charges for you to attack, so it’s best to wait it out until it finishes.
Attacks with its massive sword can be a bit delayed, so be careful not to dodge too soon. It might take a few attempts to get the dodge timing down, but when you do, you’ll find this boss’ move set fairly predictable, albeit devastating when it lands a blow. Upon defeat, the Magma Wyrm will drop 7,500 Runes, one Dragon Heart, and the coveted Moonveil Katana, one of the best weapons in Elden Ring.