Looking for a certain collectible location on Koboh in Star Wars Jedi: Survivor? It’s a big task, finding every last treasure, plant, chest, and secret in Koboh. This sprawling planet is the largest map in Star Wars Jedi: Survivor, and it’s filled to the brim with literally hundreds of collectibles.
If you’re wondering where that last missing chest or seed pod is on Koboh, then wonder no more. Below we’ll help you to 100% the planet with our guide on every last Koboh collectible location in Star Wars Jedi: Survivor, with screenshots and instructions on each one. We’ve got a lot of ground to cover, Jedi, so let’s dive in.
Bear in mind that Jedi: Survivor’s maps are built in a Metroidvania style, which means certain paths, secrets, and collectibles won’t always be available to you on your first pass through a region. Instead, you’ll need to progress further through the story and unlock new traversal skills and abilities before returning to find what you missed before.
Take a look below for our in-progress list of every last collectible location on Koboh in Jedi: Survivor.
Koboh collectibles: All locations
Dredger Gorge:
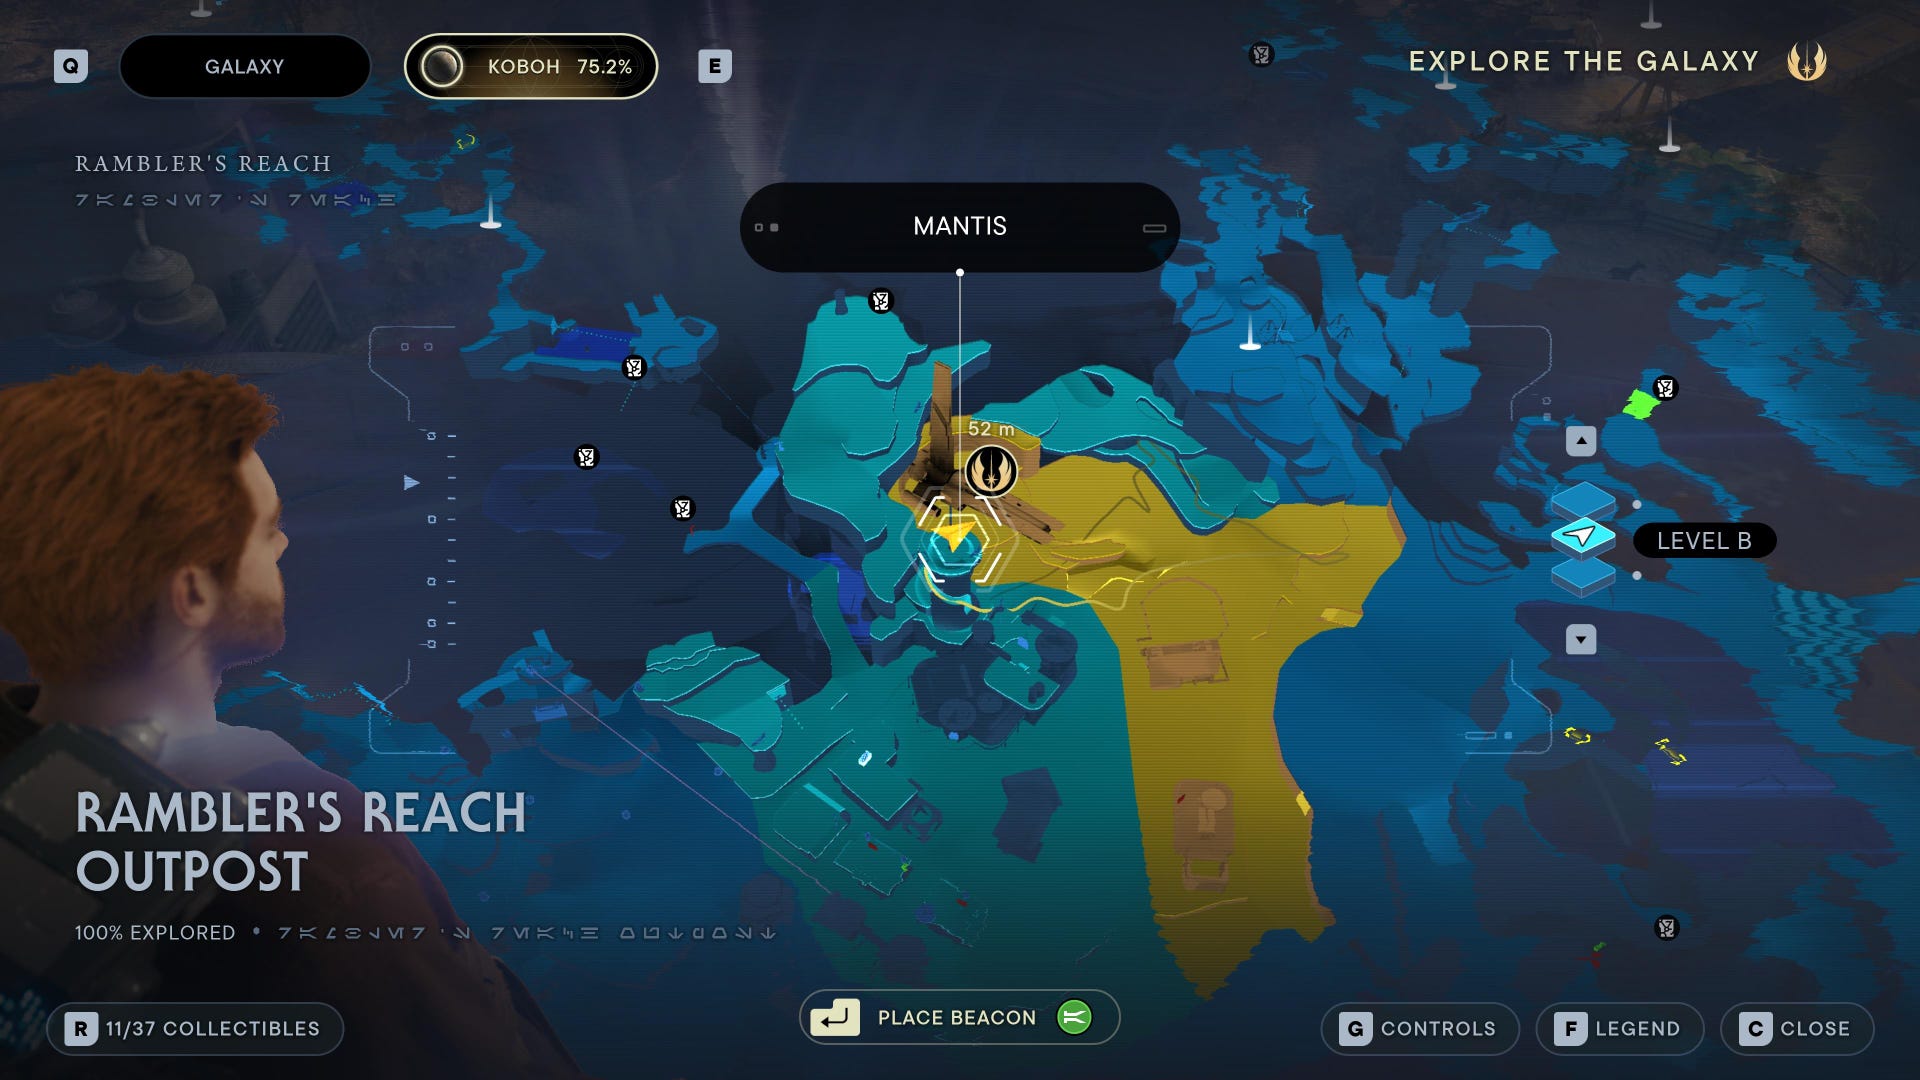
Rambler’s Reach:
Basalt Forest:
Stone Spires:
Viscid Bog:
Prospector’s Folly:
Mountain Observatory:
Meditation Chambers:
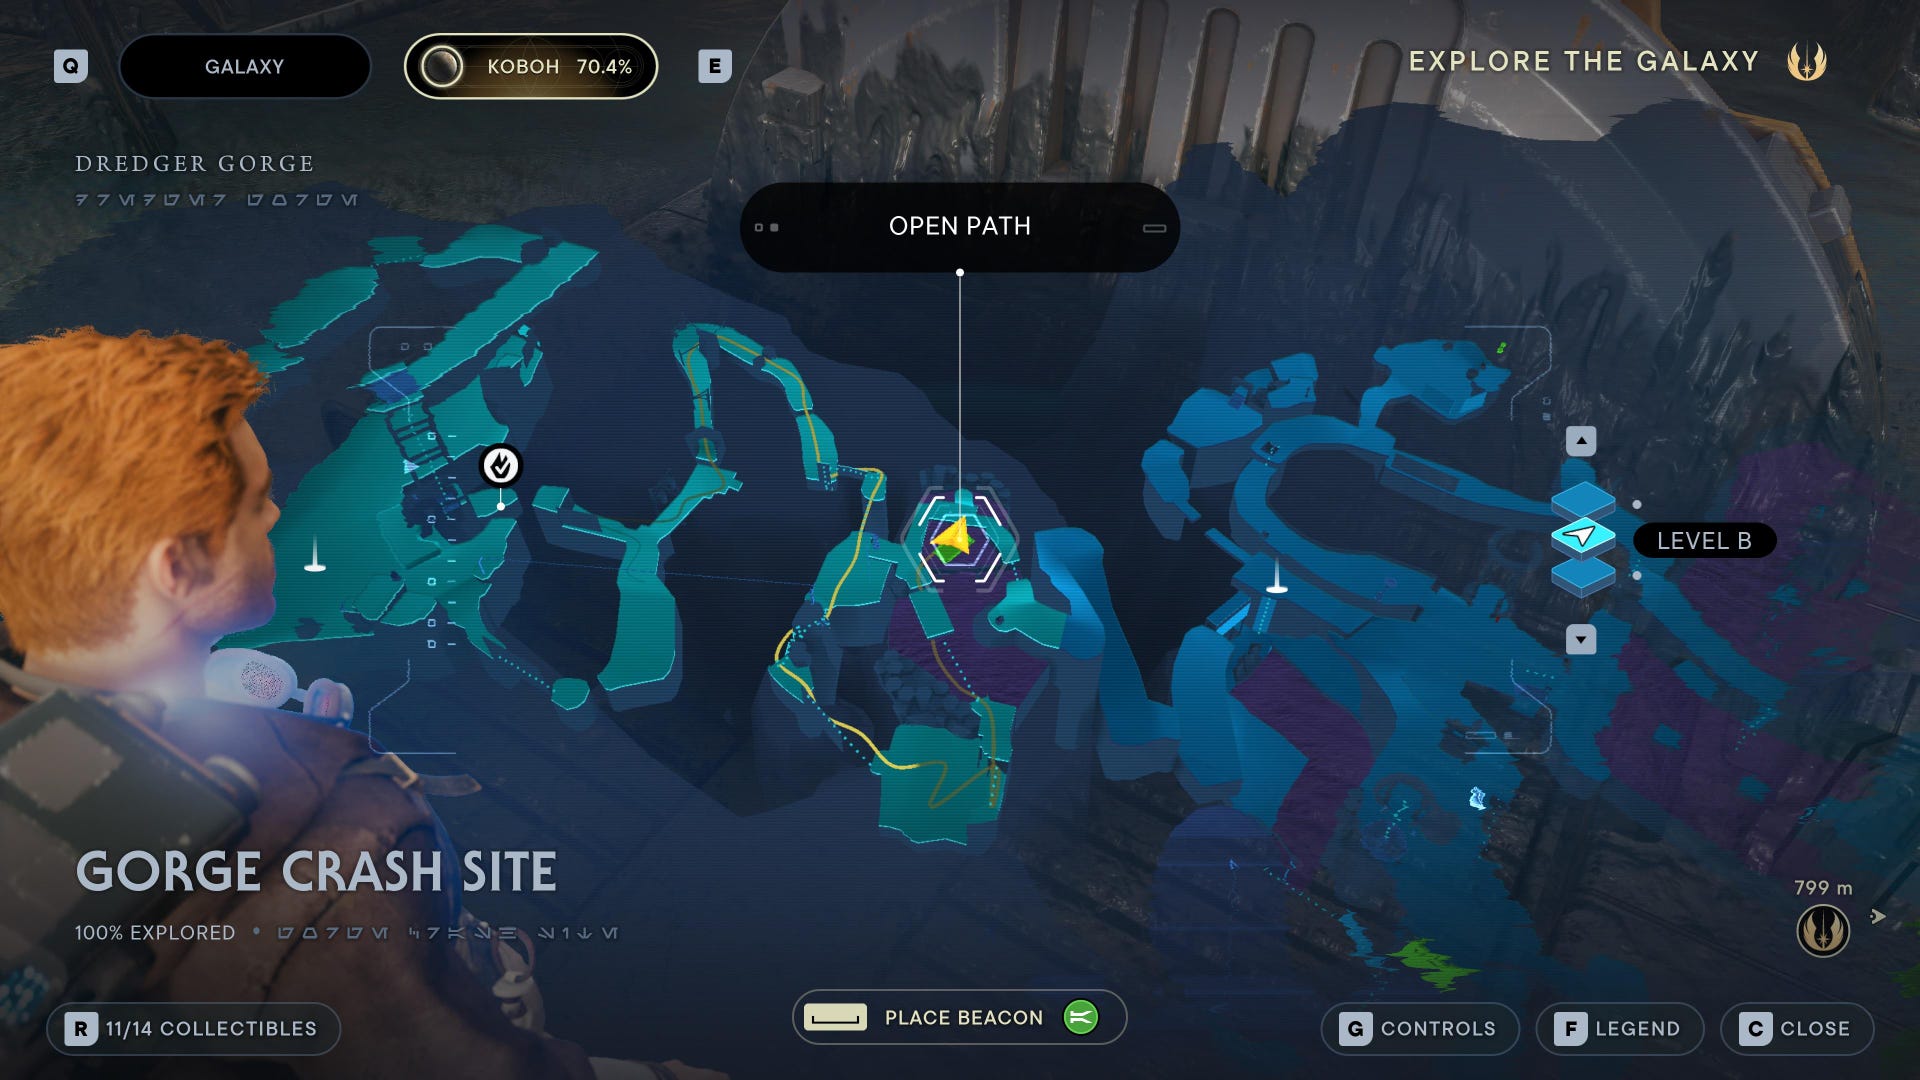
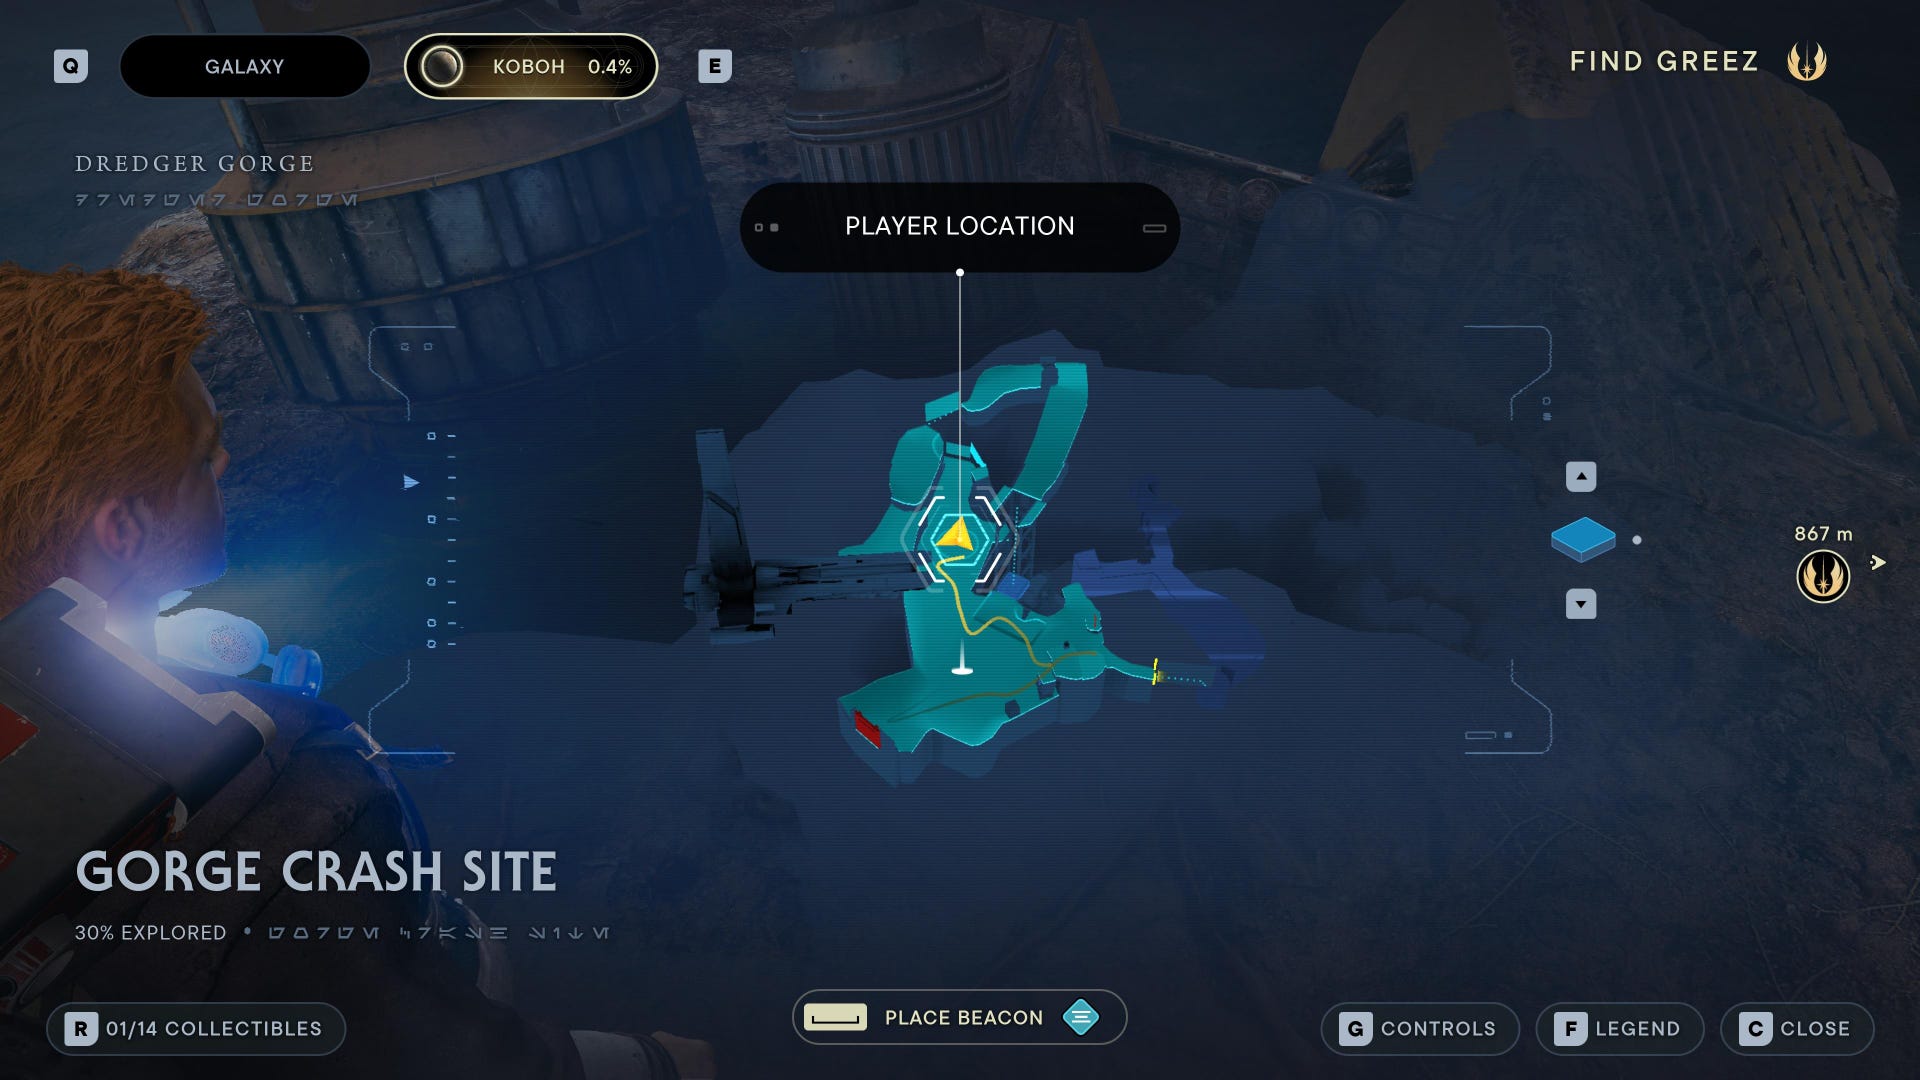
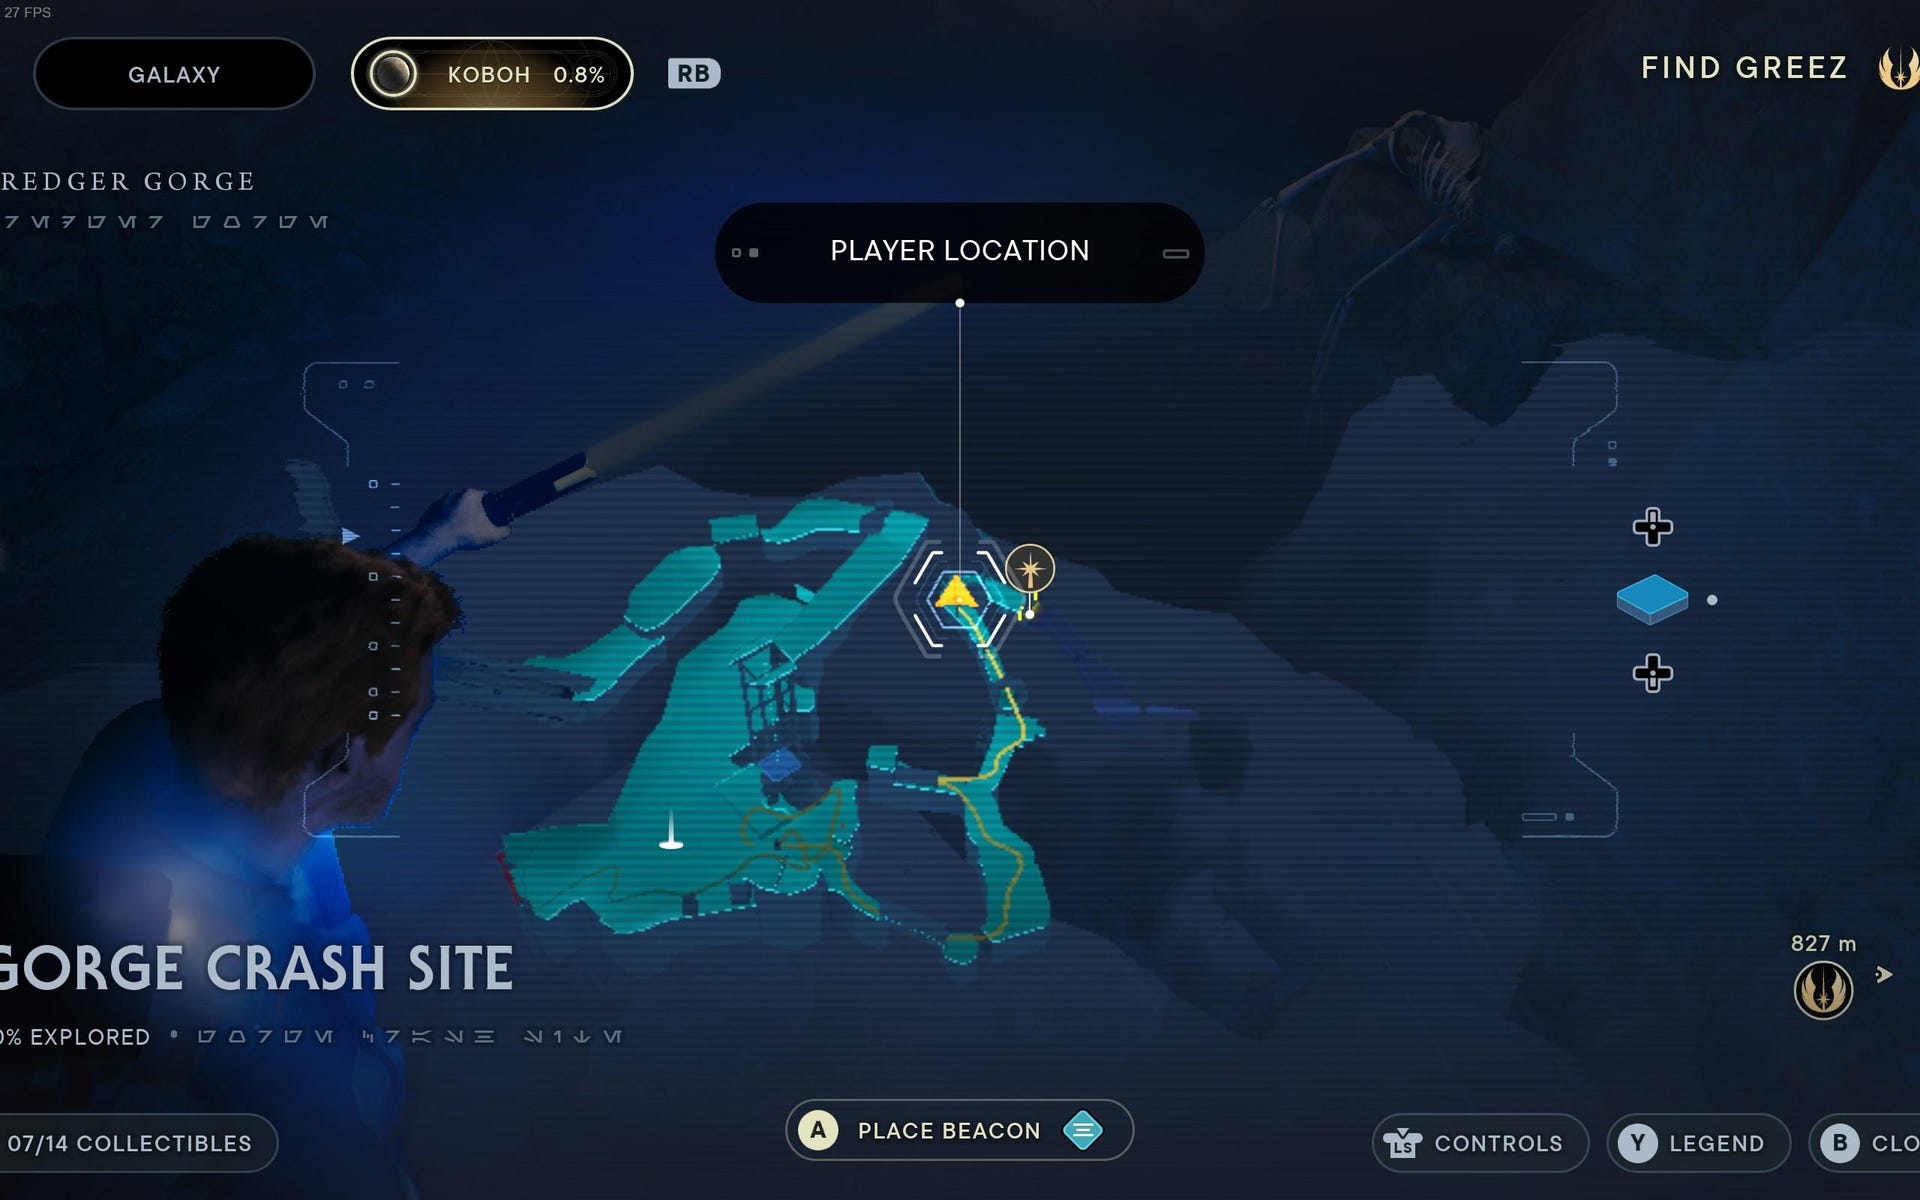
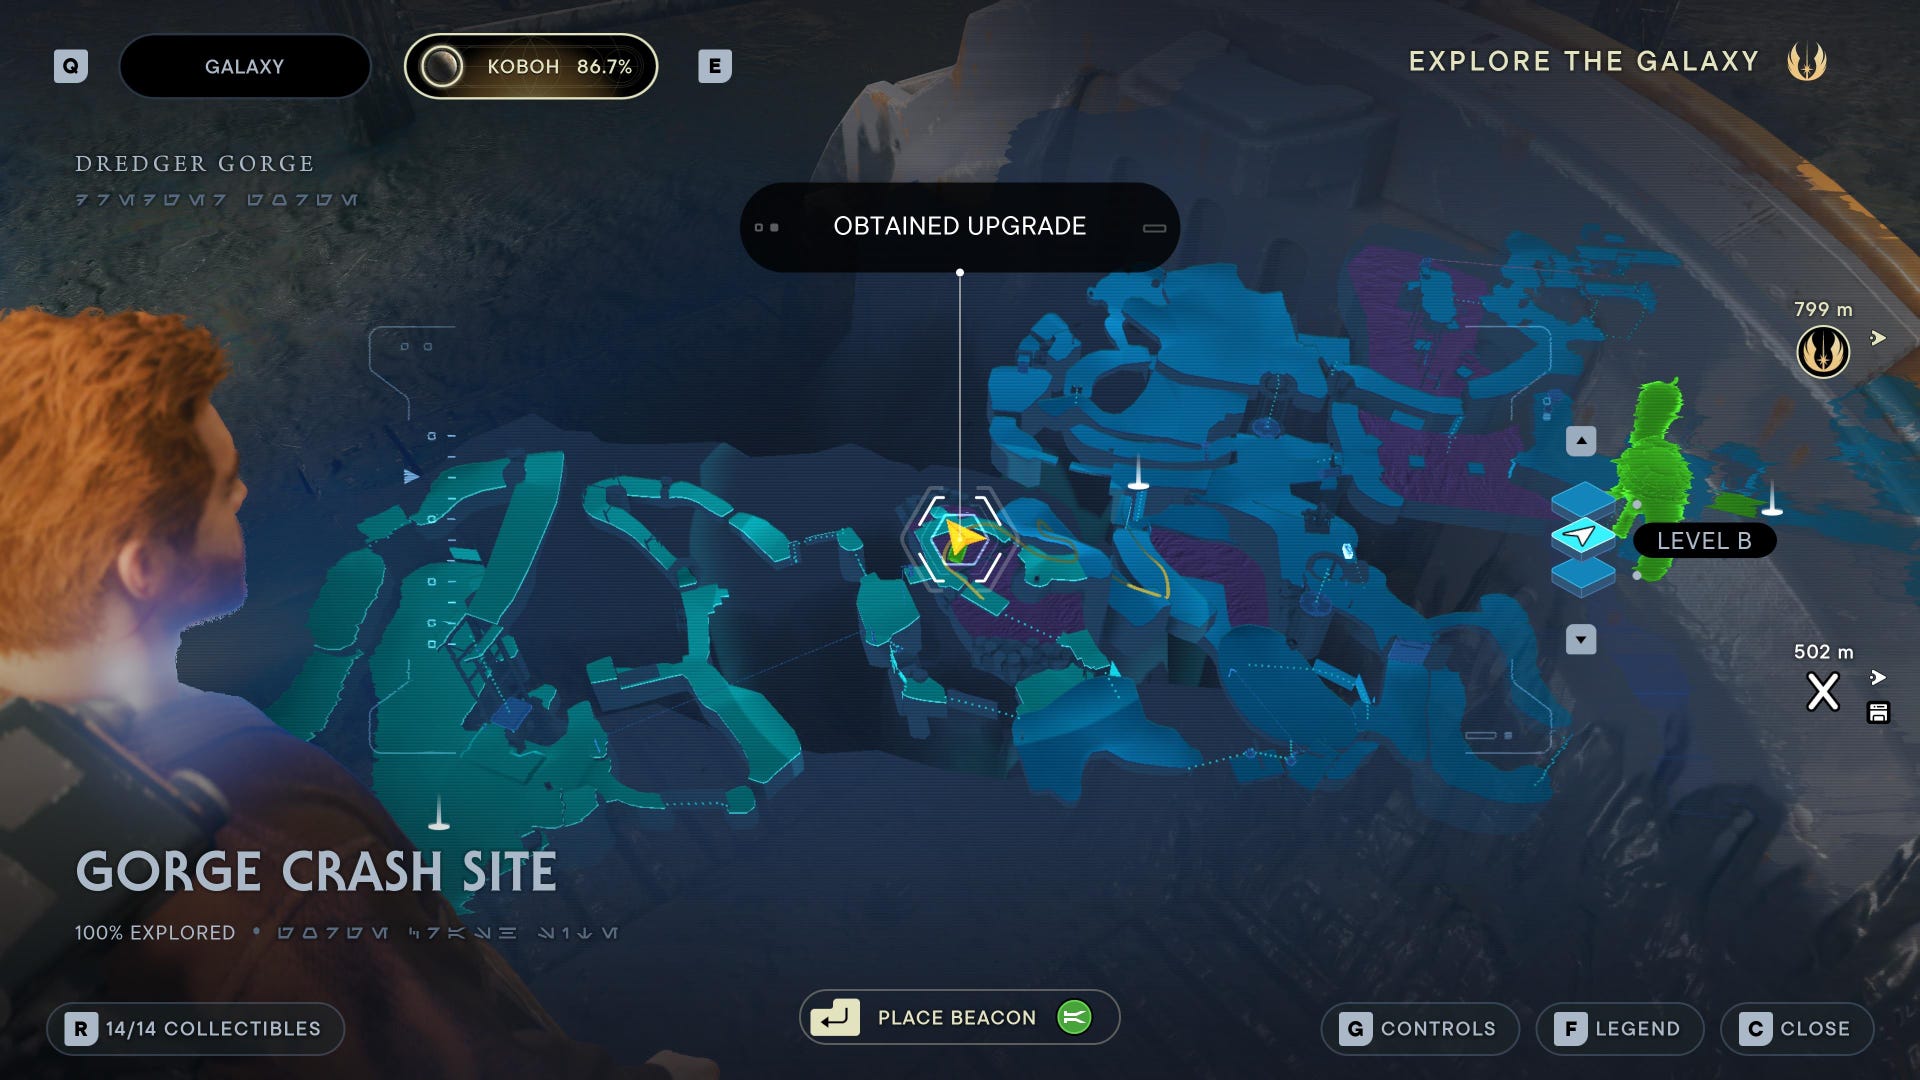
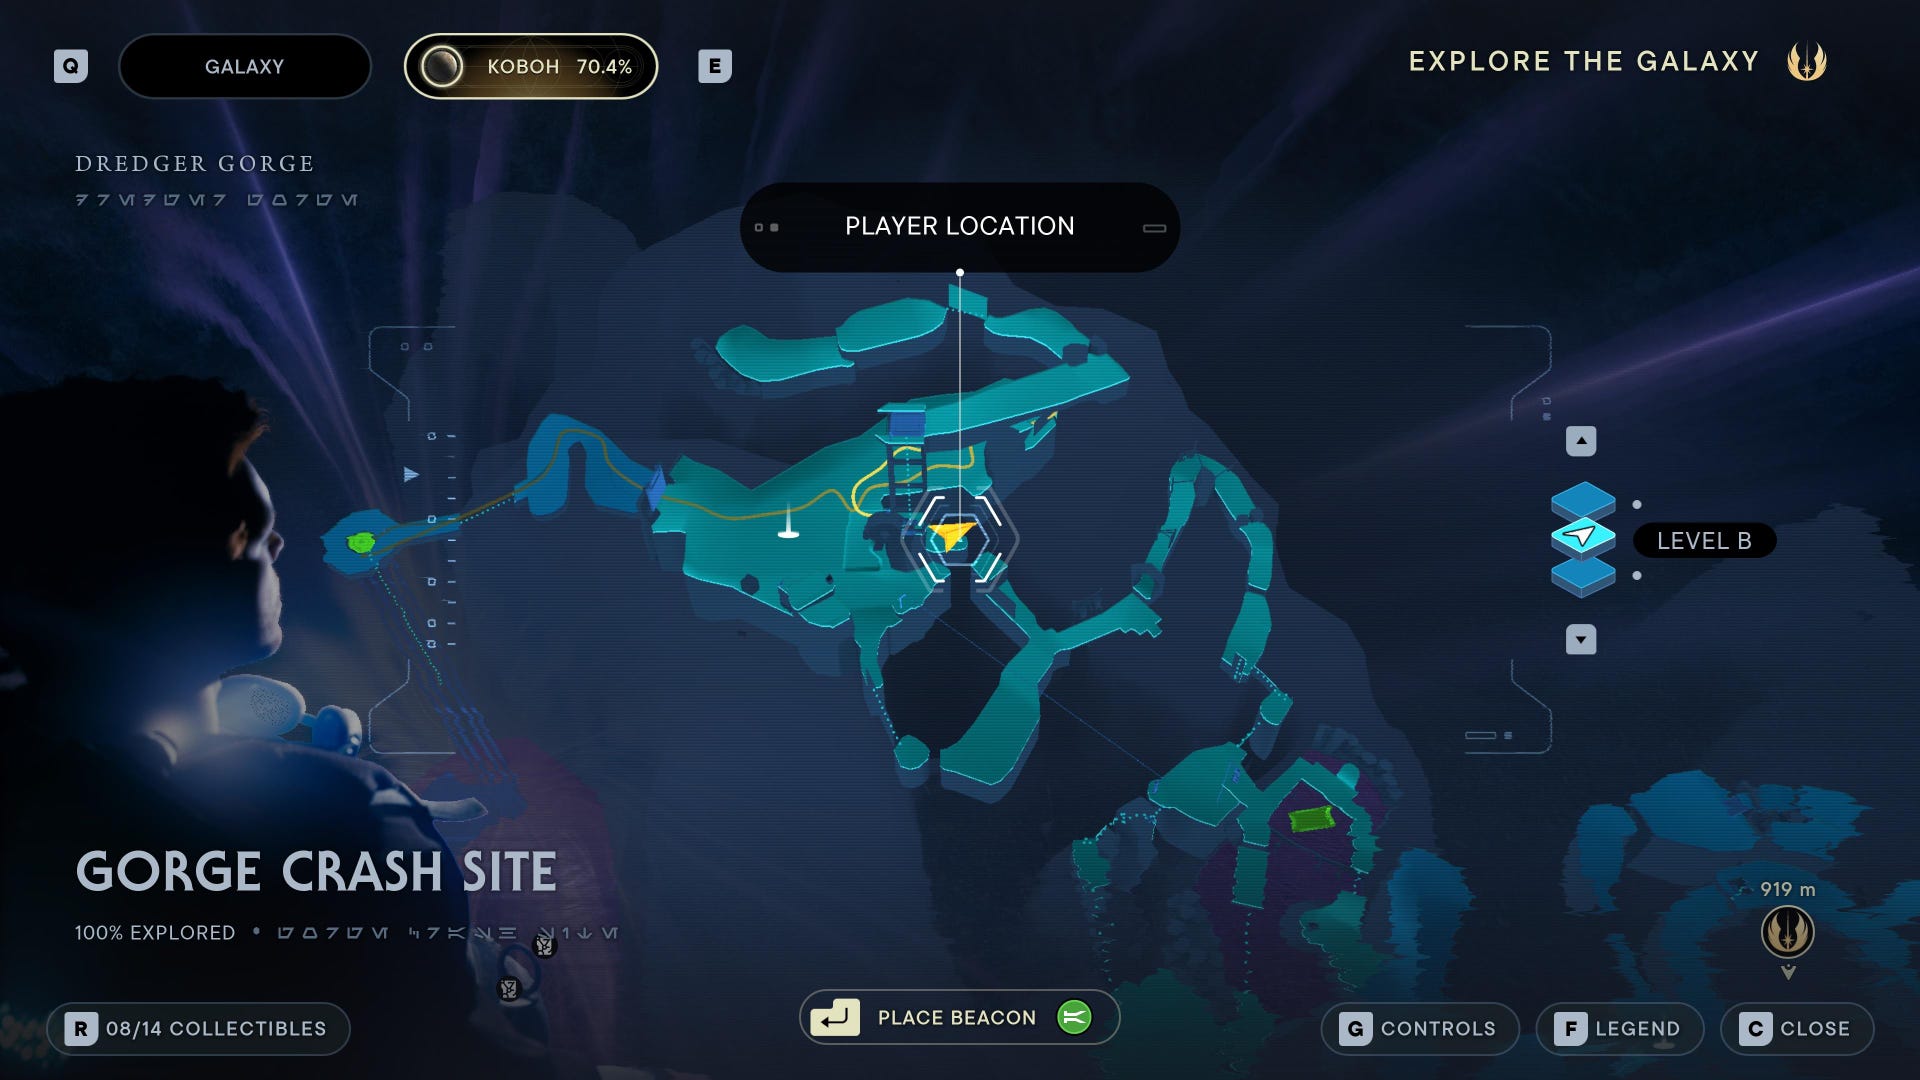
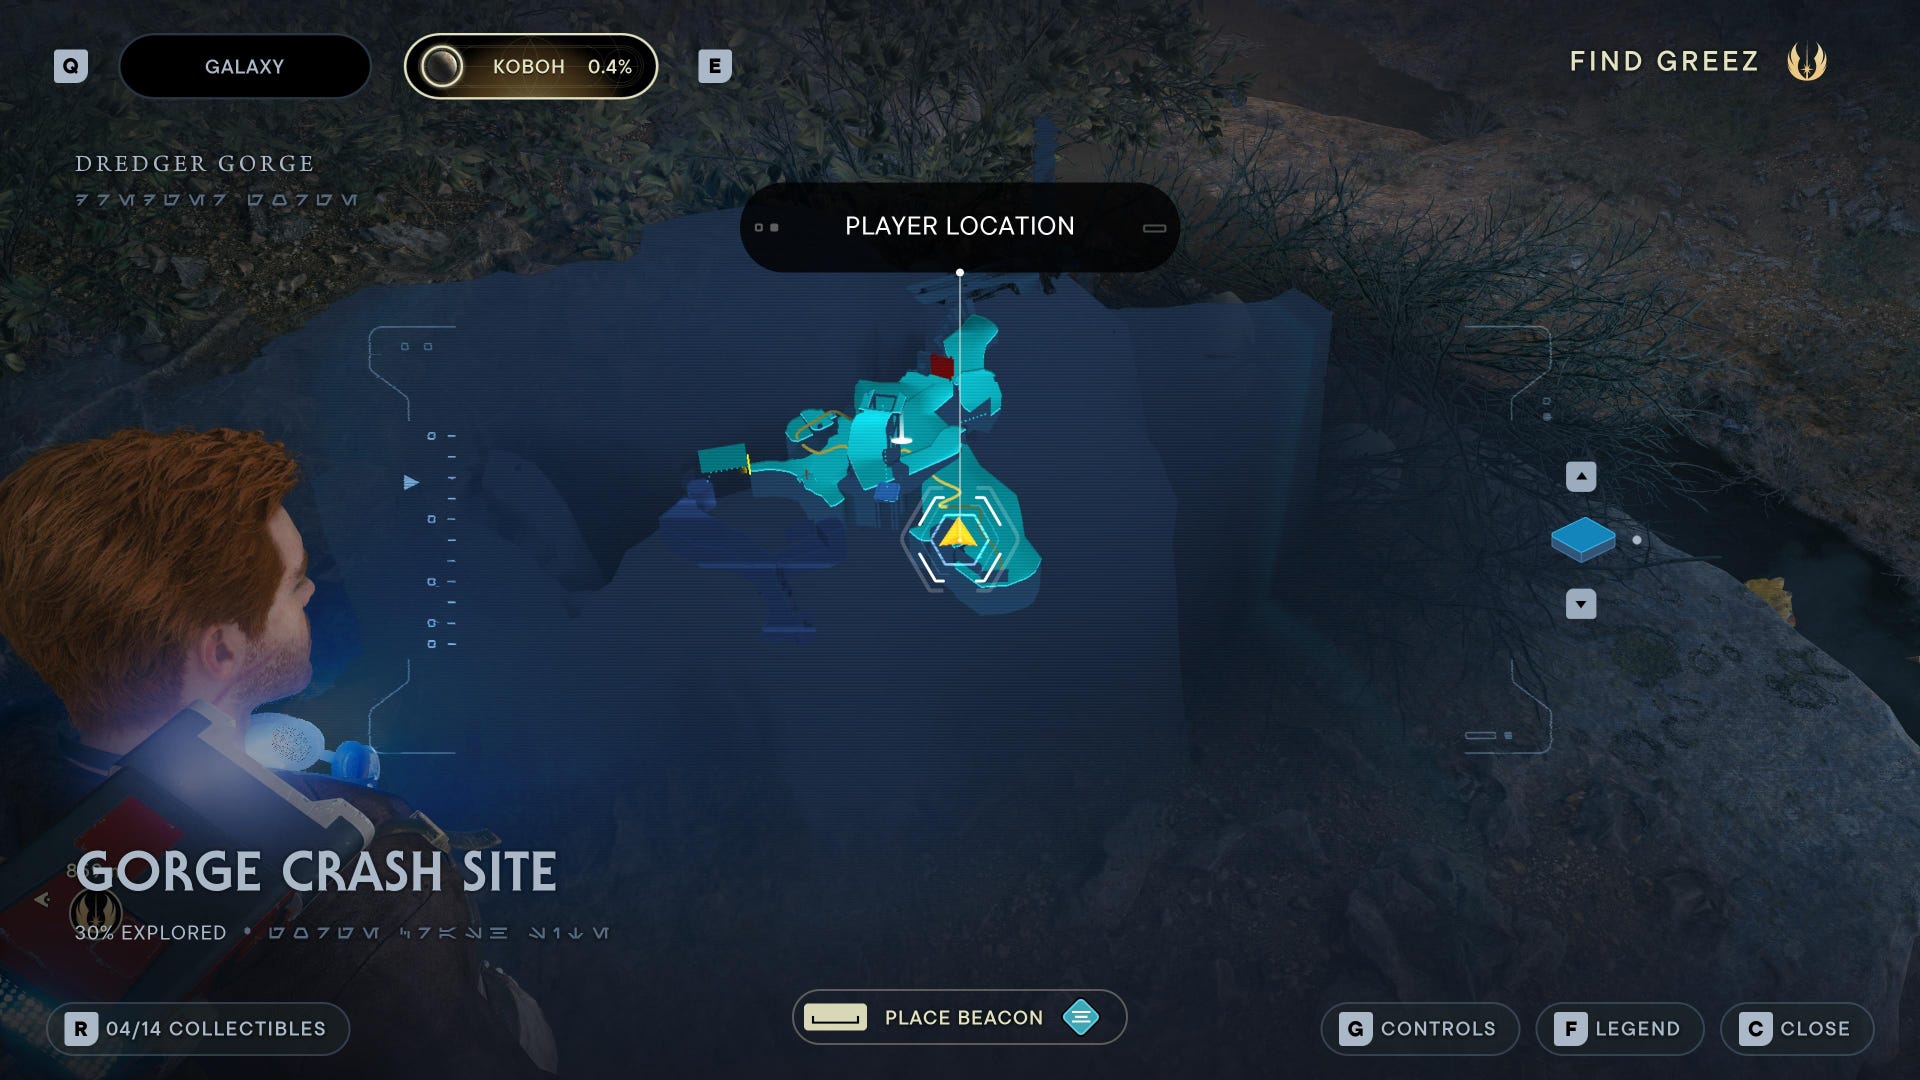
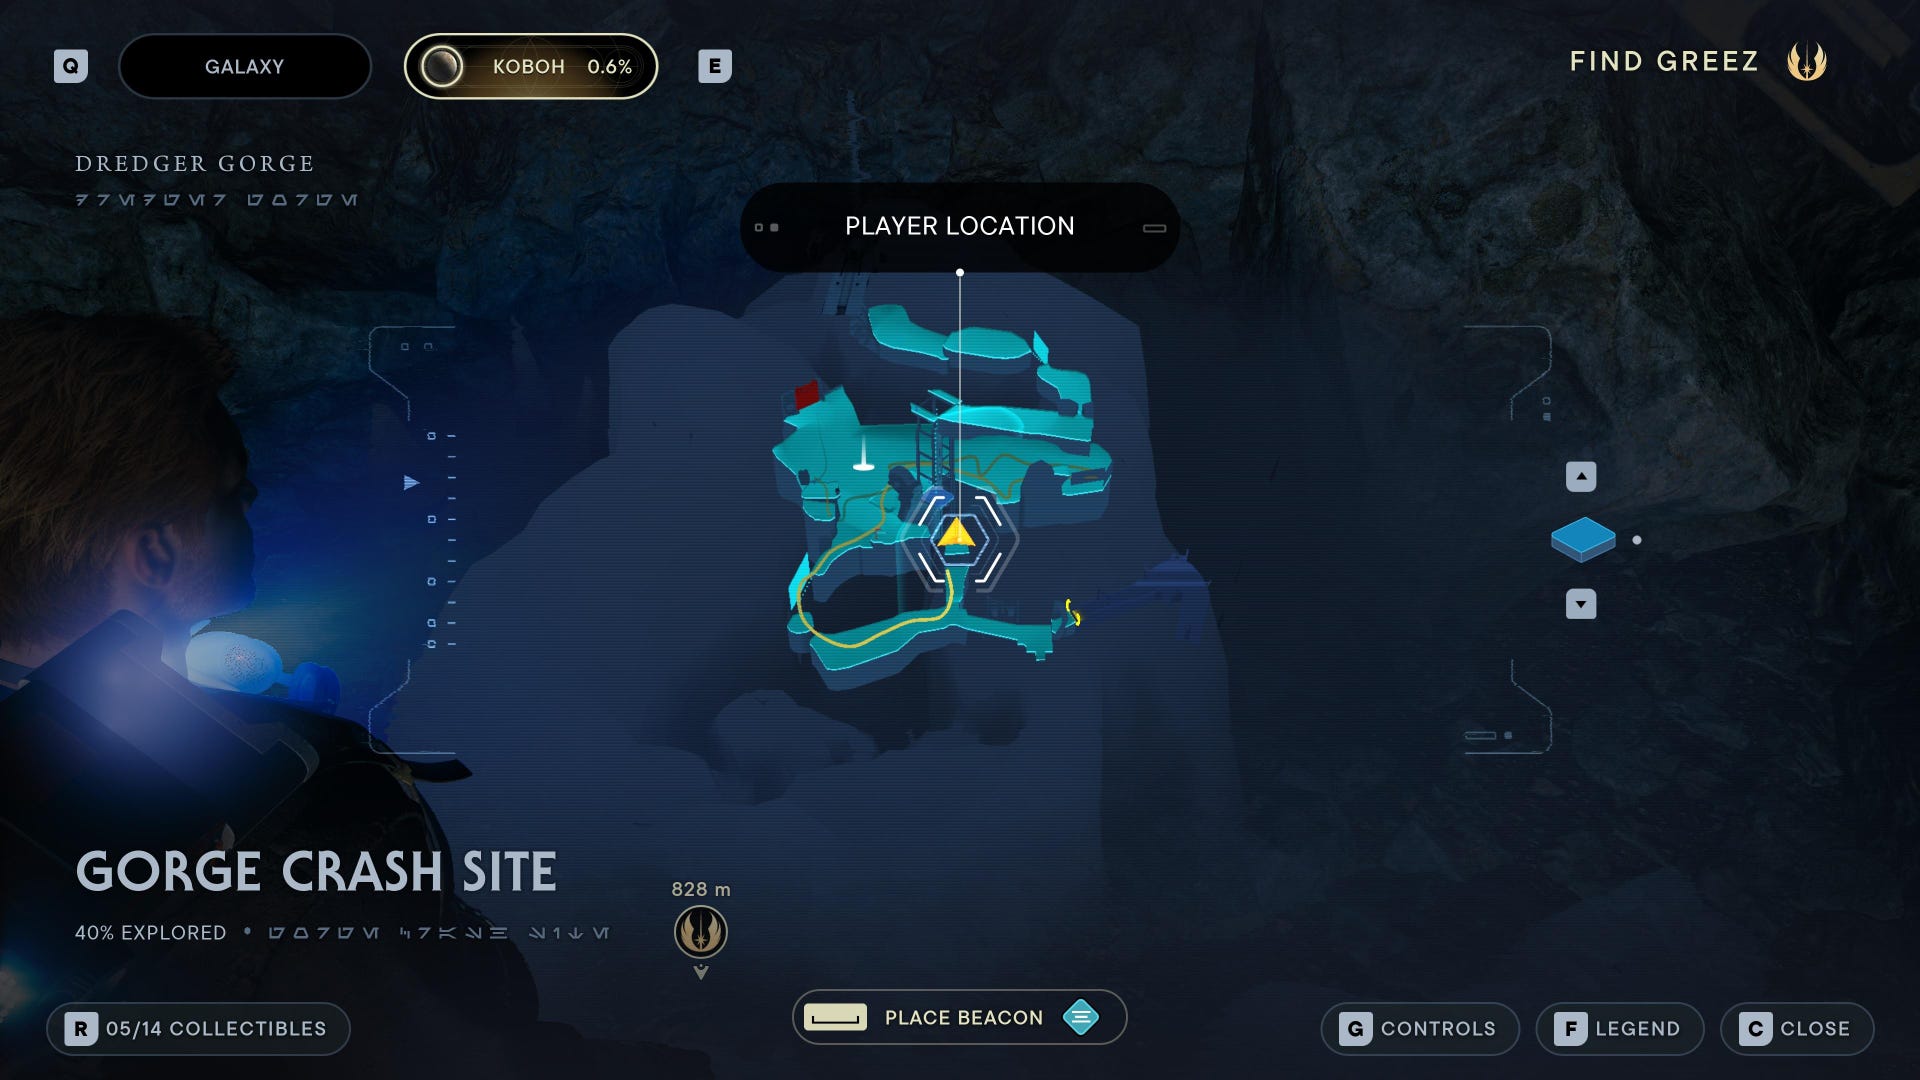
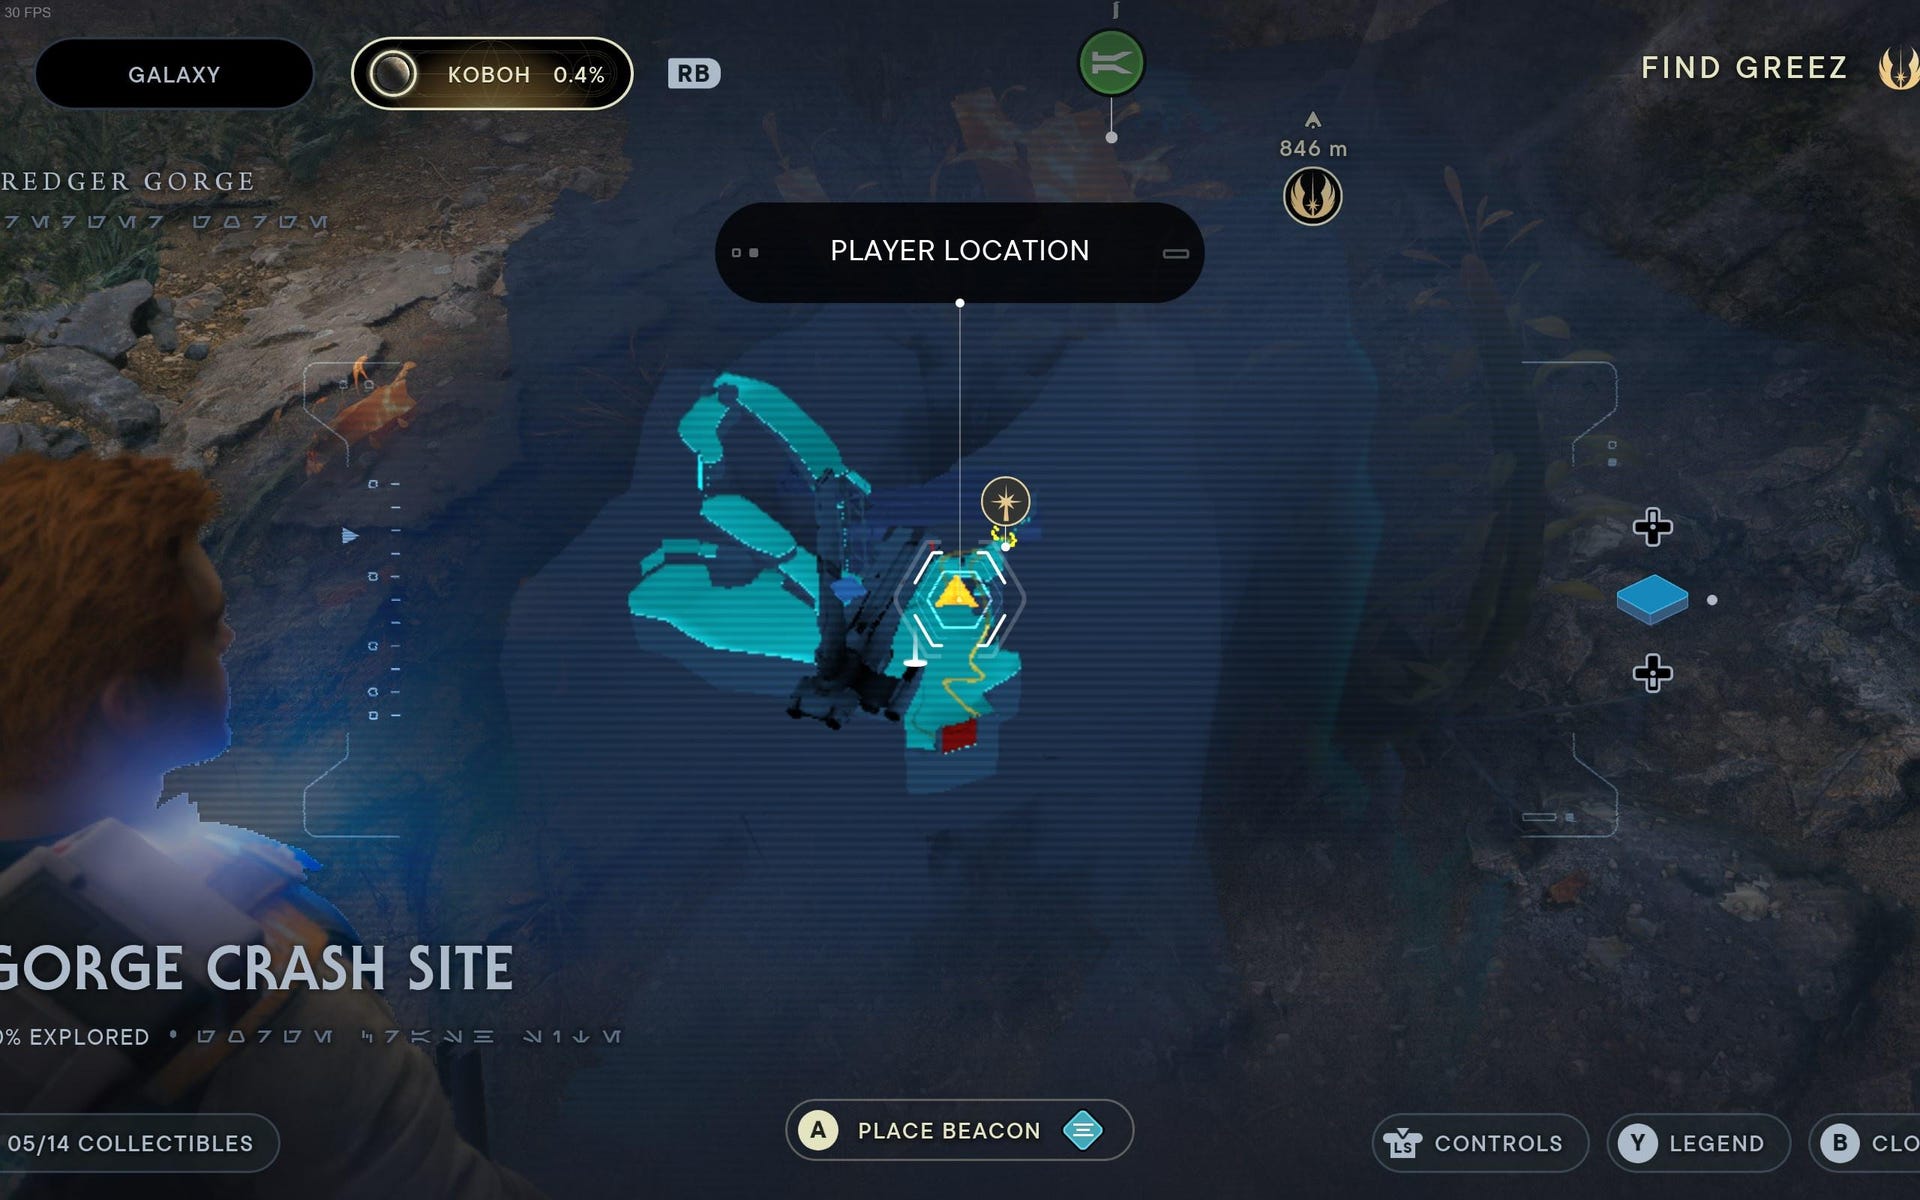
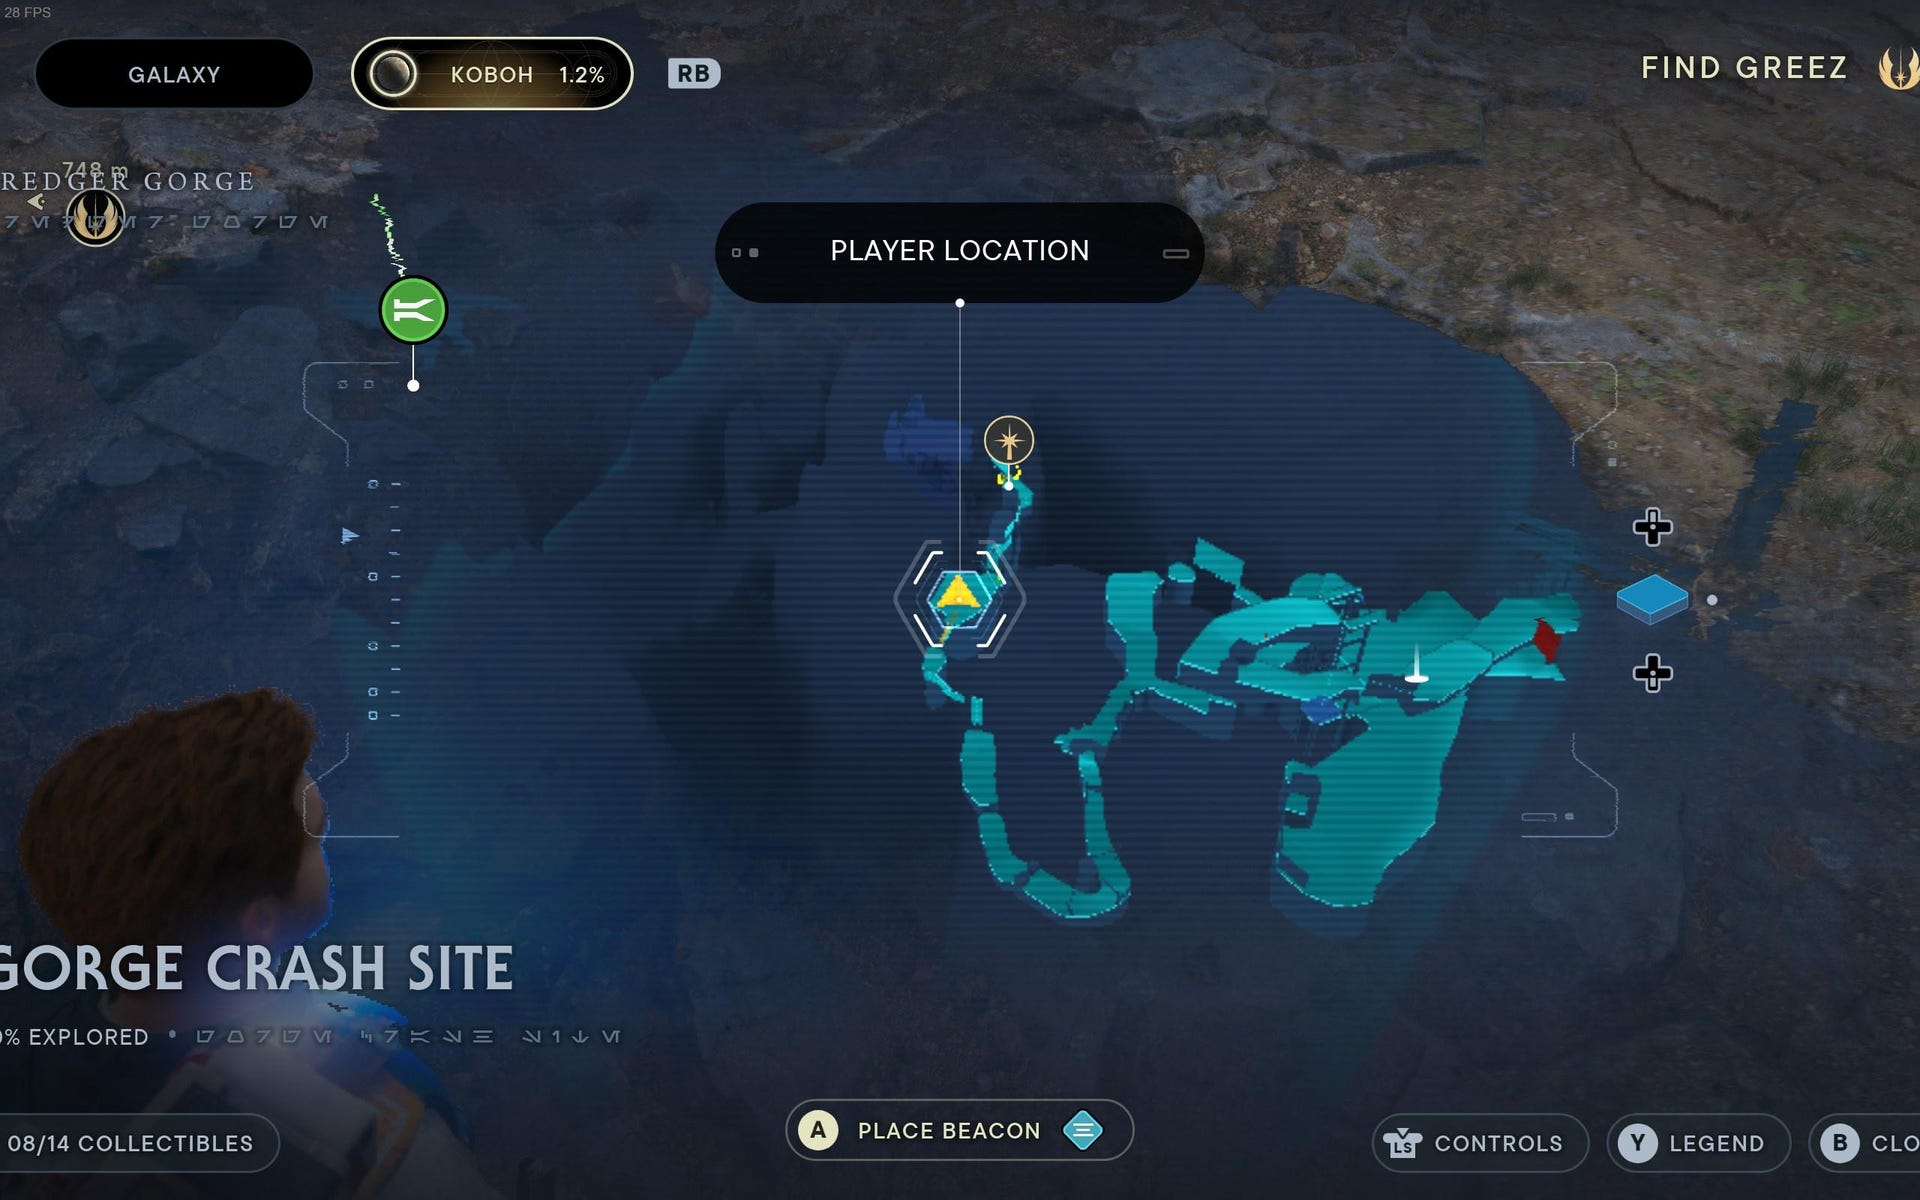
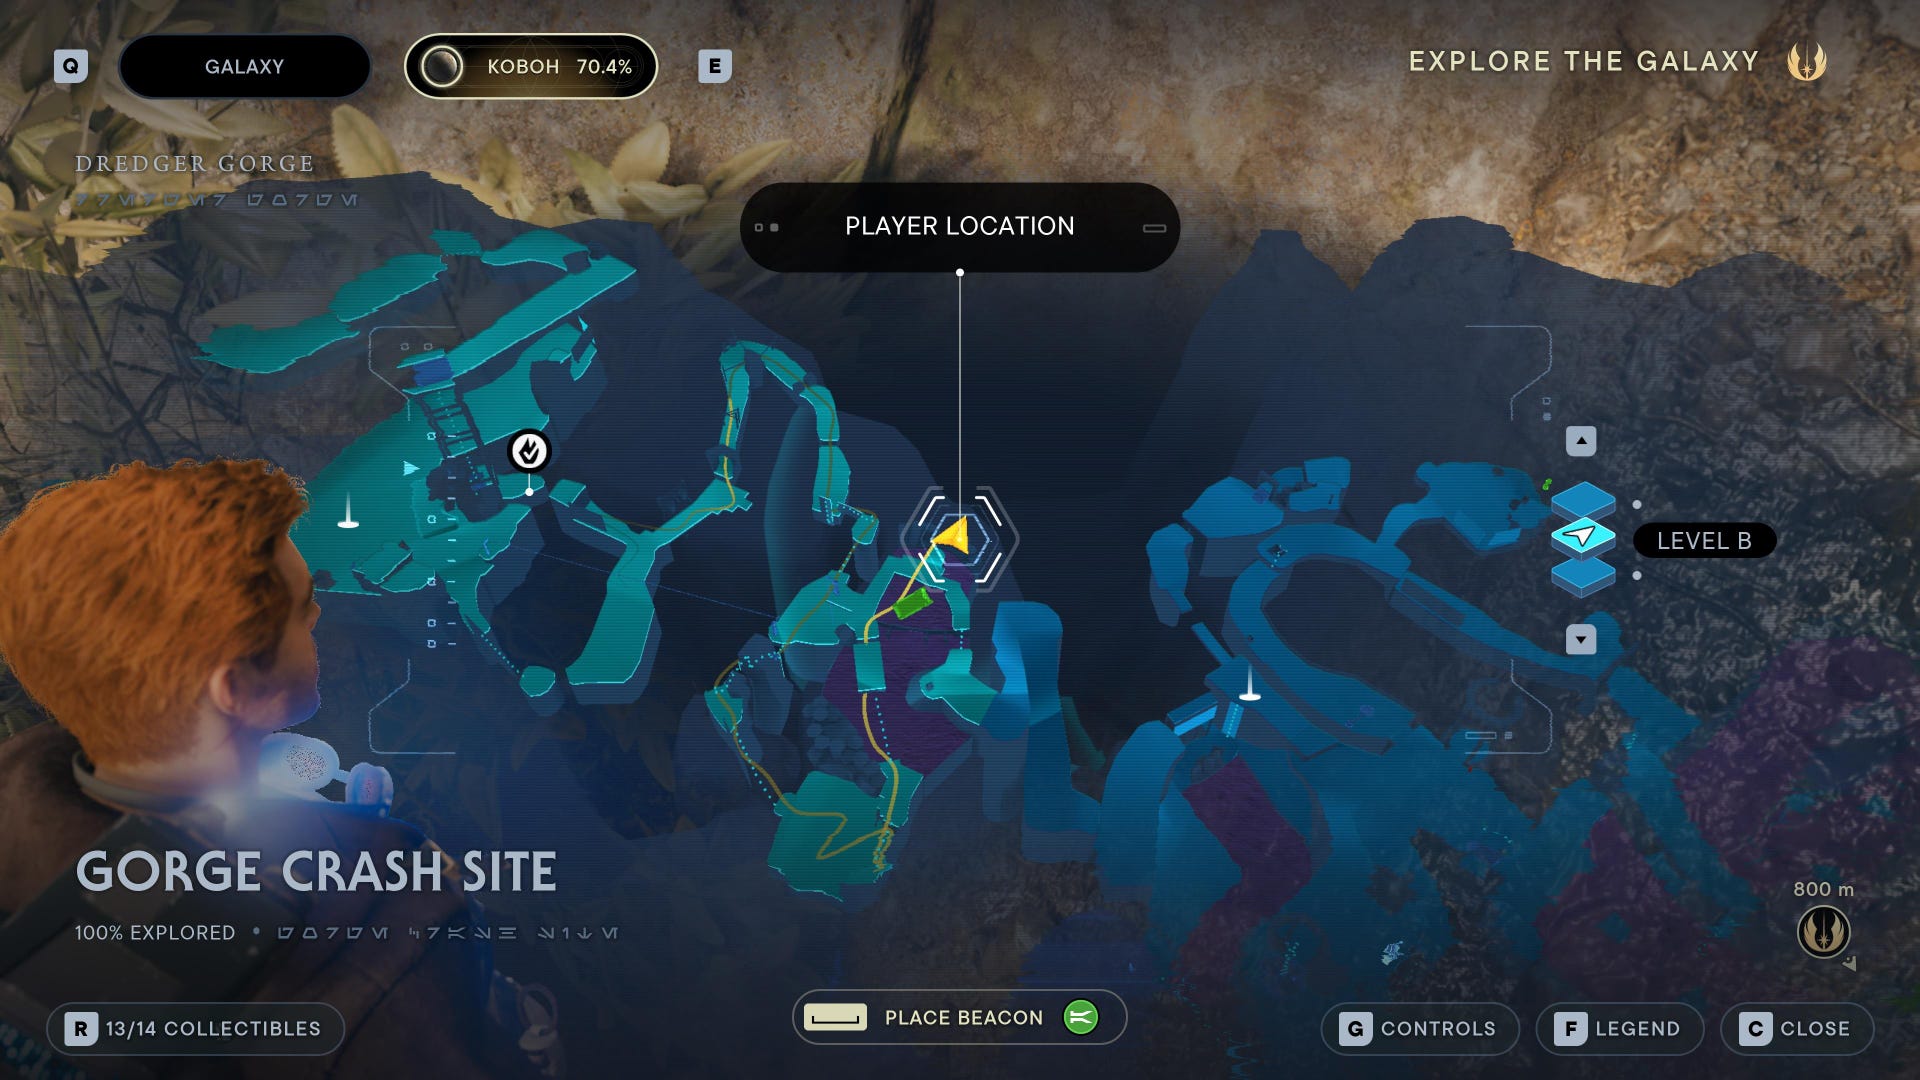
Gorge Crash Site collectibles
Gorge Crash Site Chests:
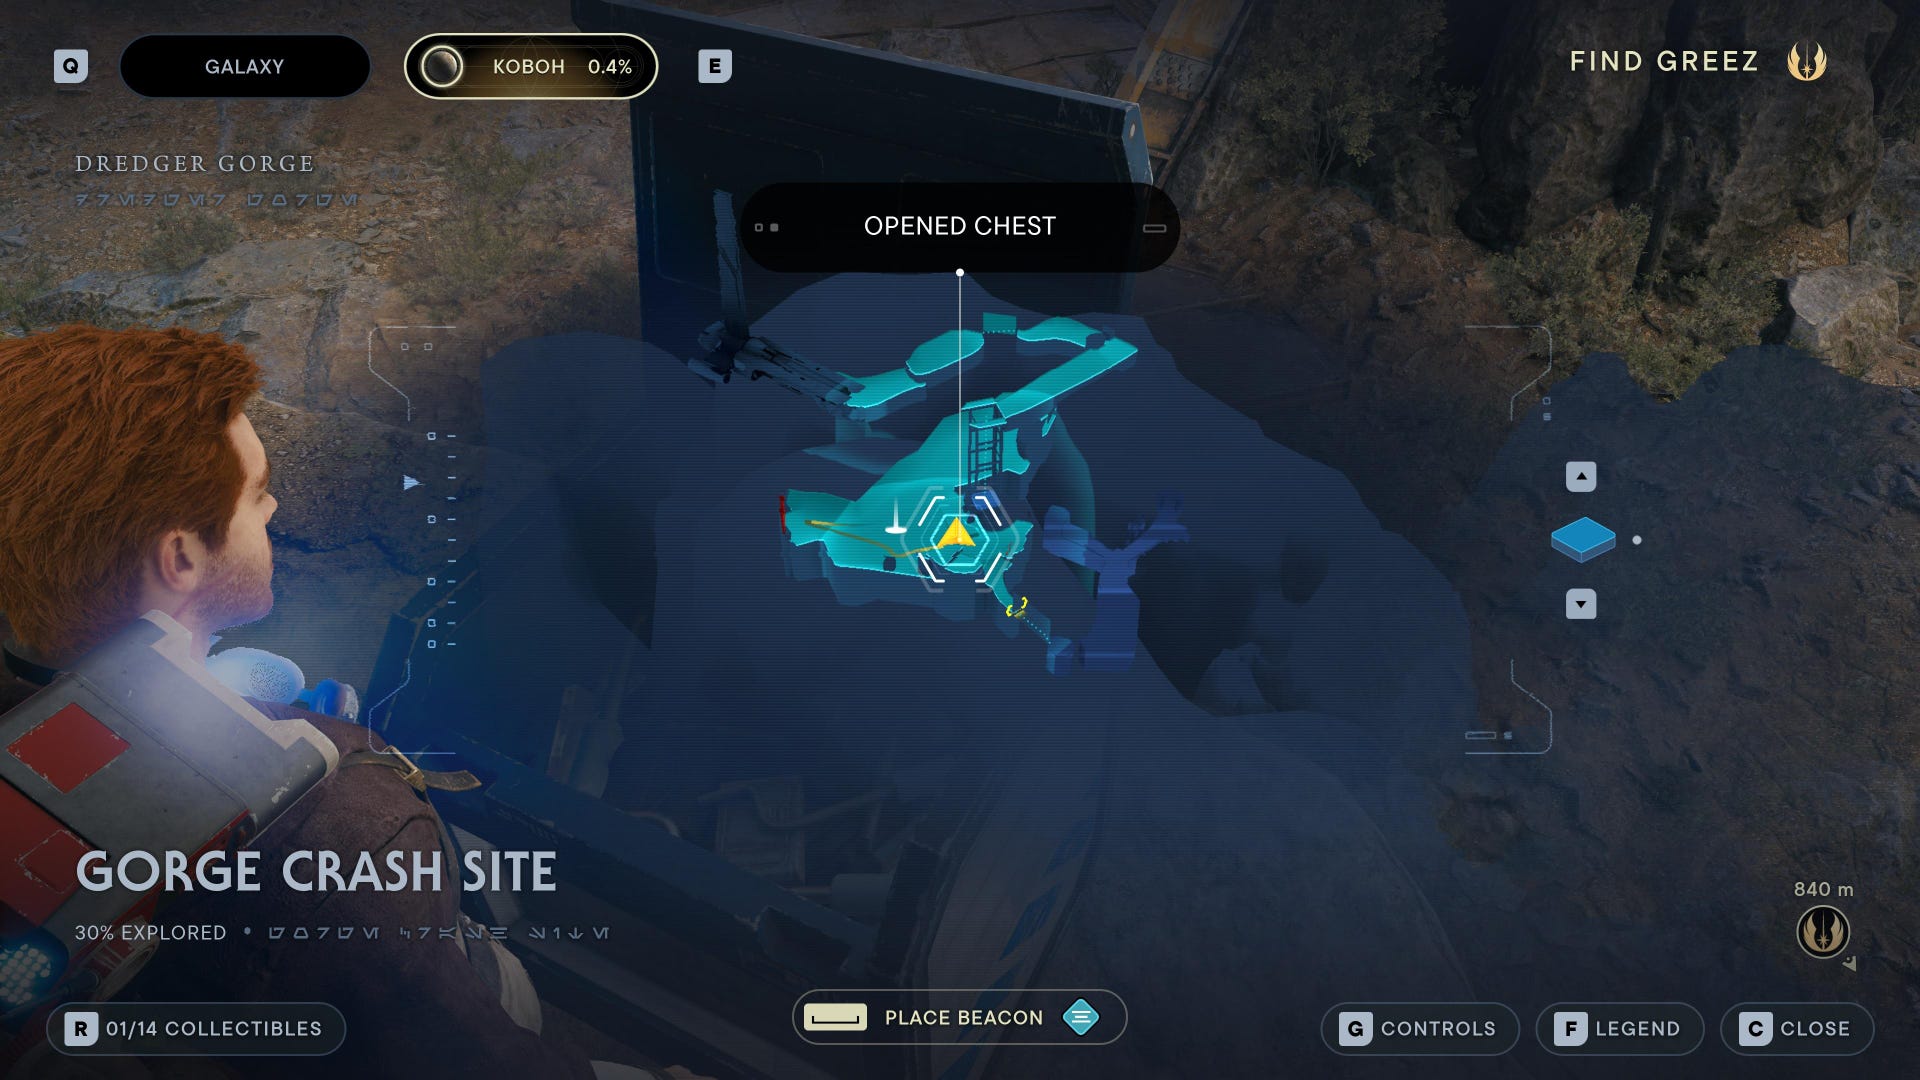
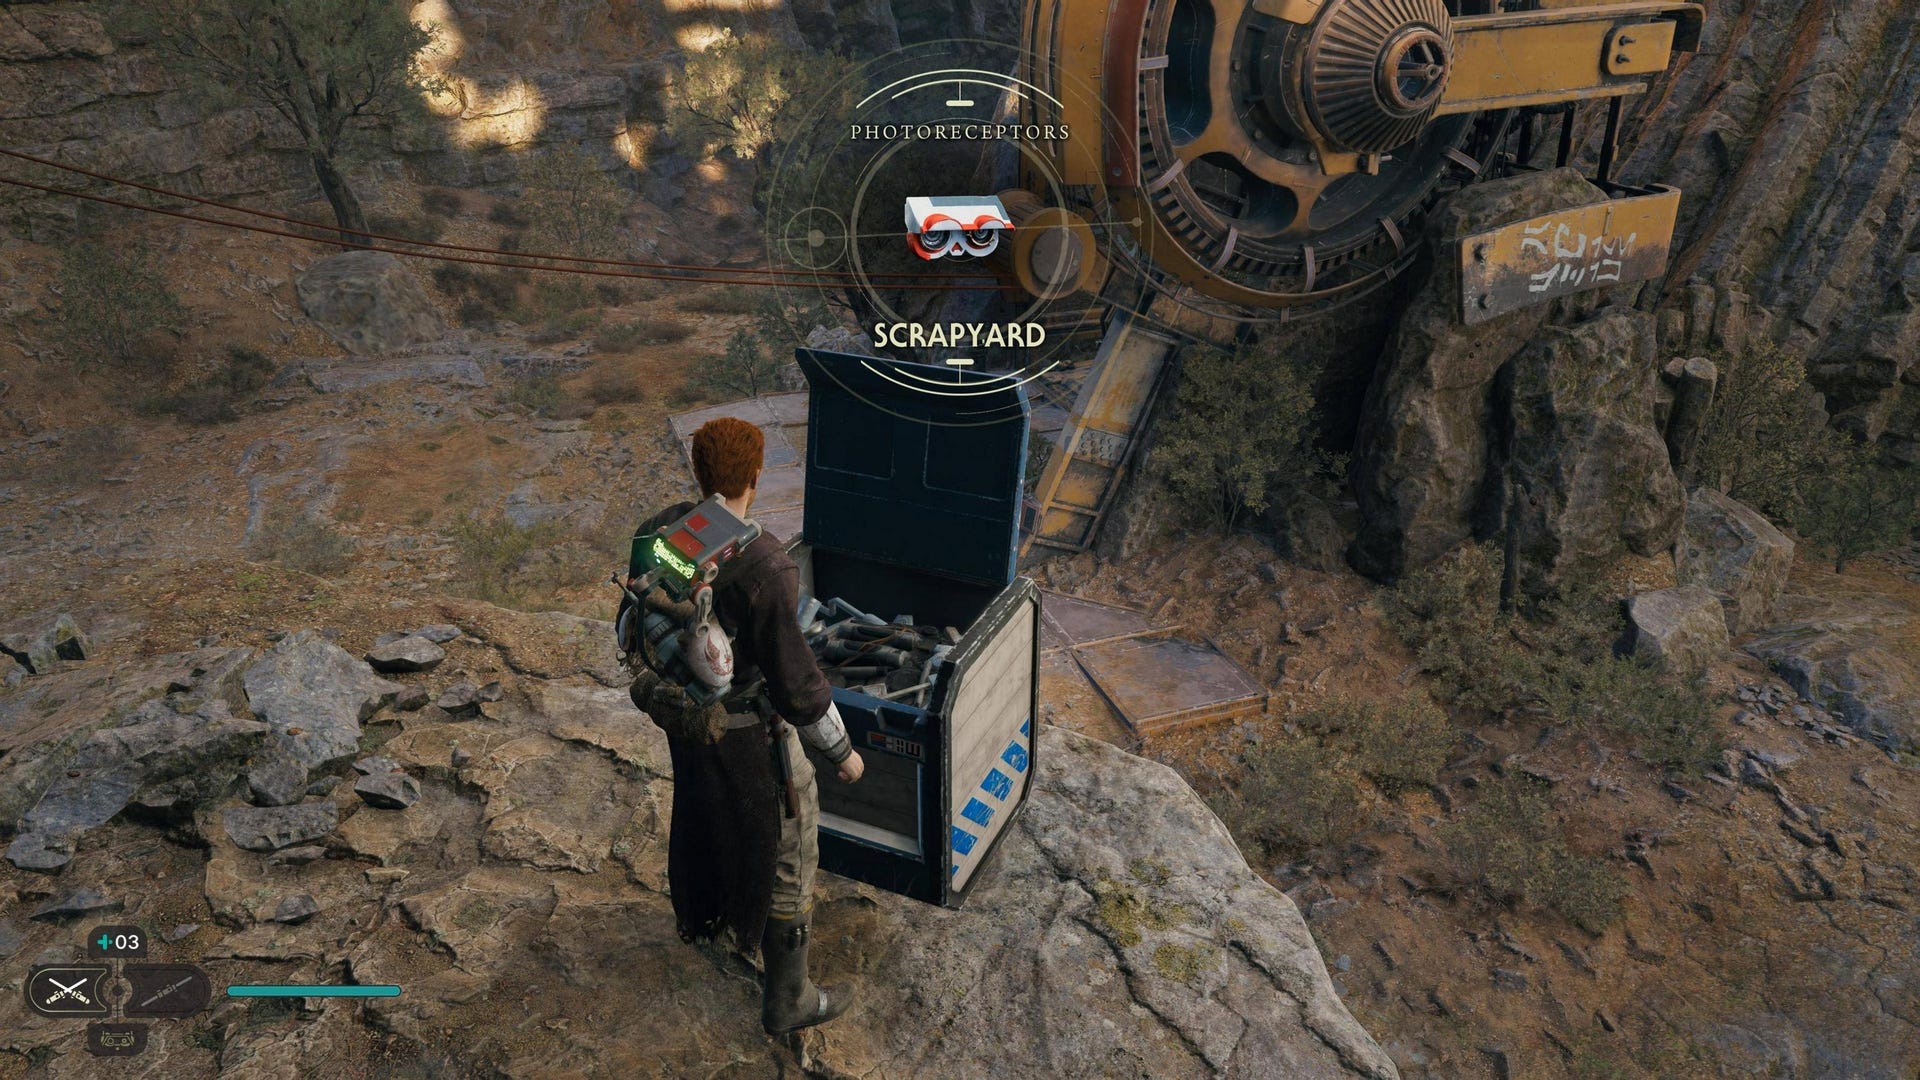
Chest #1 (Scrapyard photoreceptors): Up the ledge in front of the Gorge Crash Site Meditation Point.
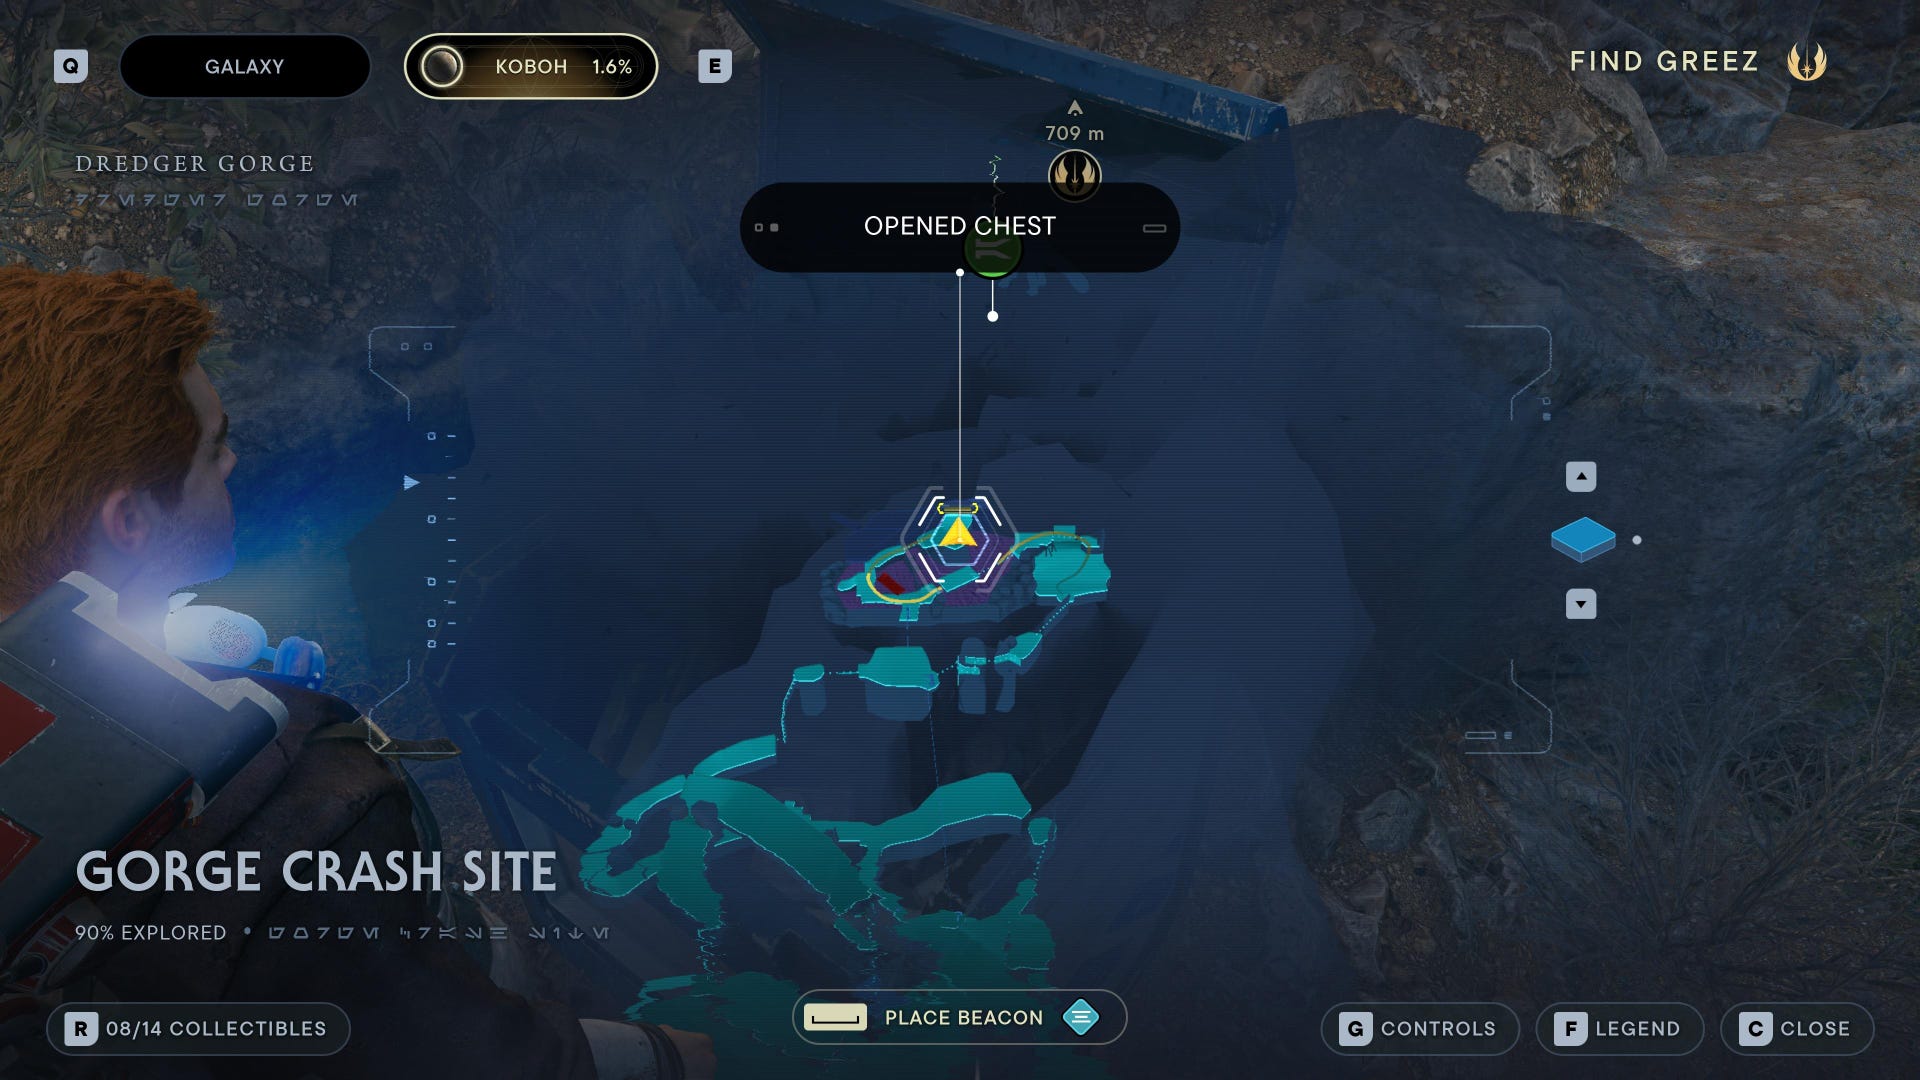
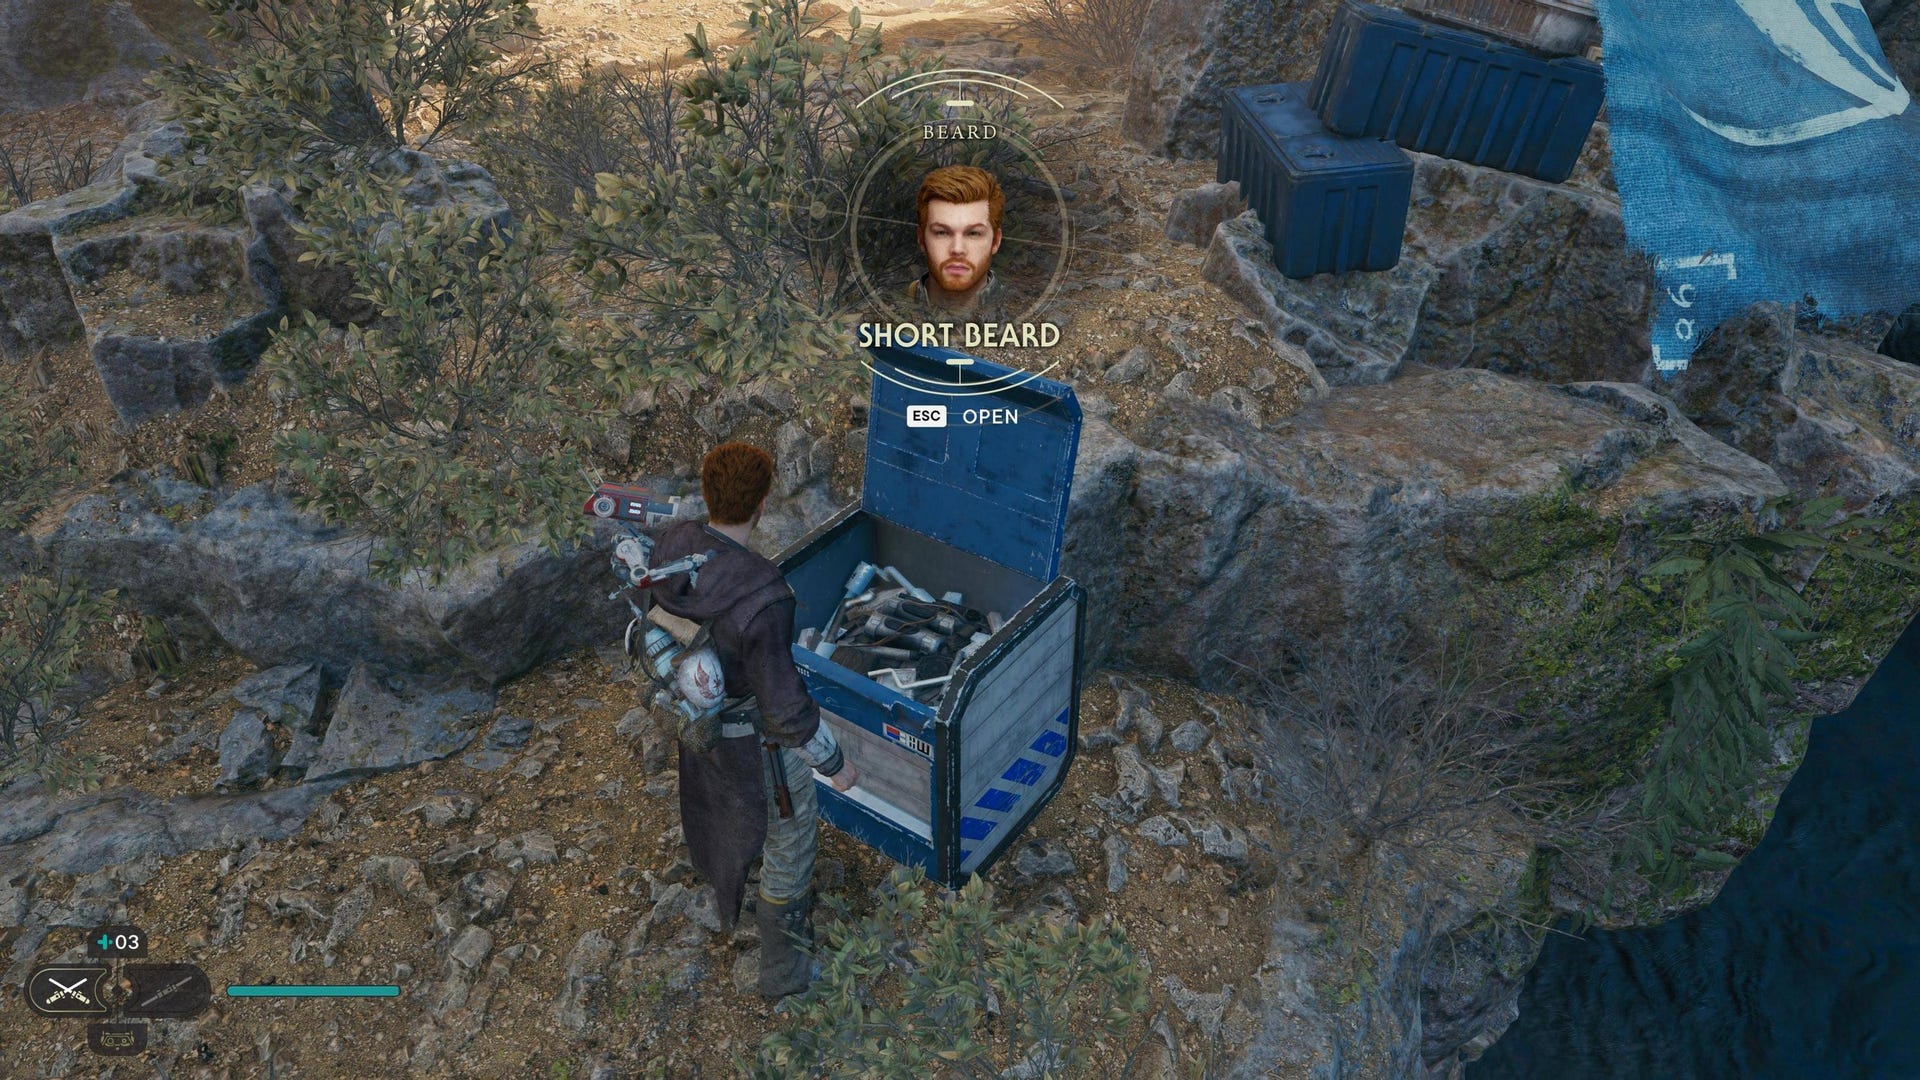
Chest #2 (Short Beard): On the far side of the mud pit at the end of the region, hidden in the leaves.
Gorge Crash Site Essences:

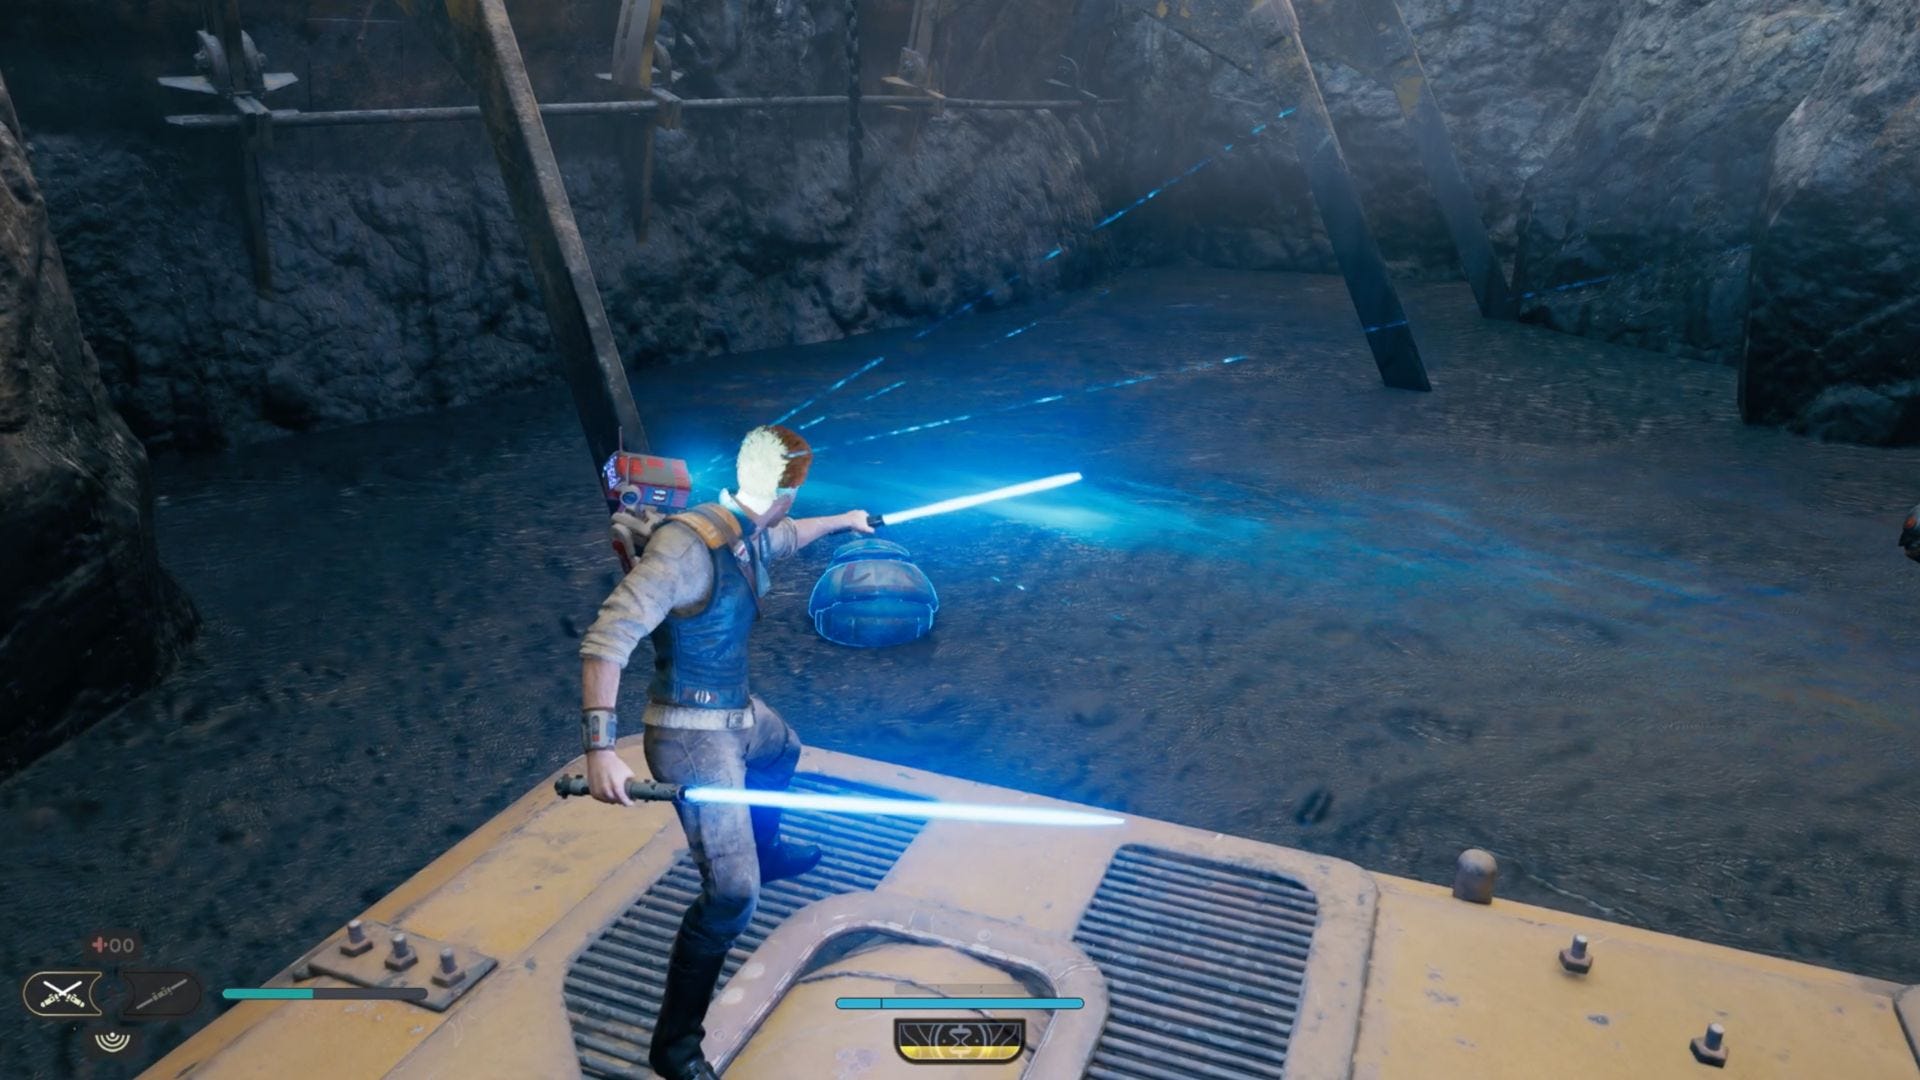
Skill Point Essence: Use Force Lift on the pit droid’s ship that’s stuck in the tar pit towards the end of the region. Then climb onto the ship to get the essence.
Gorge Crash Site Databanks:

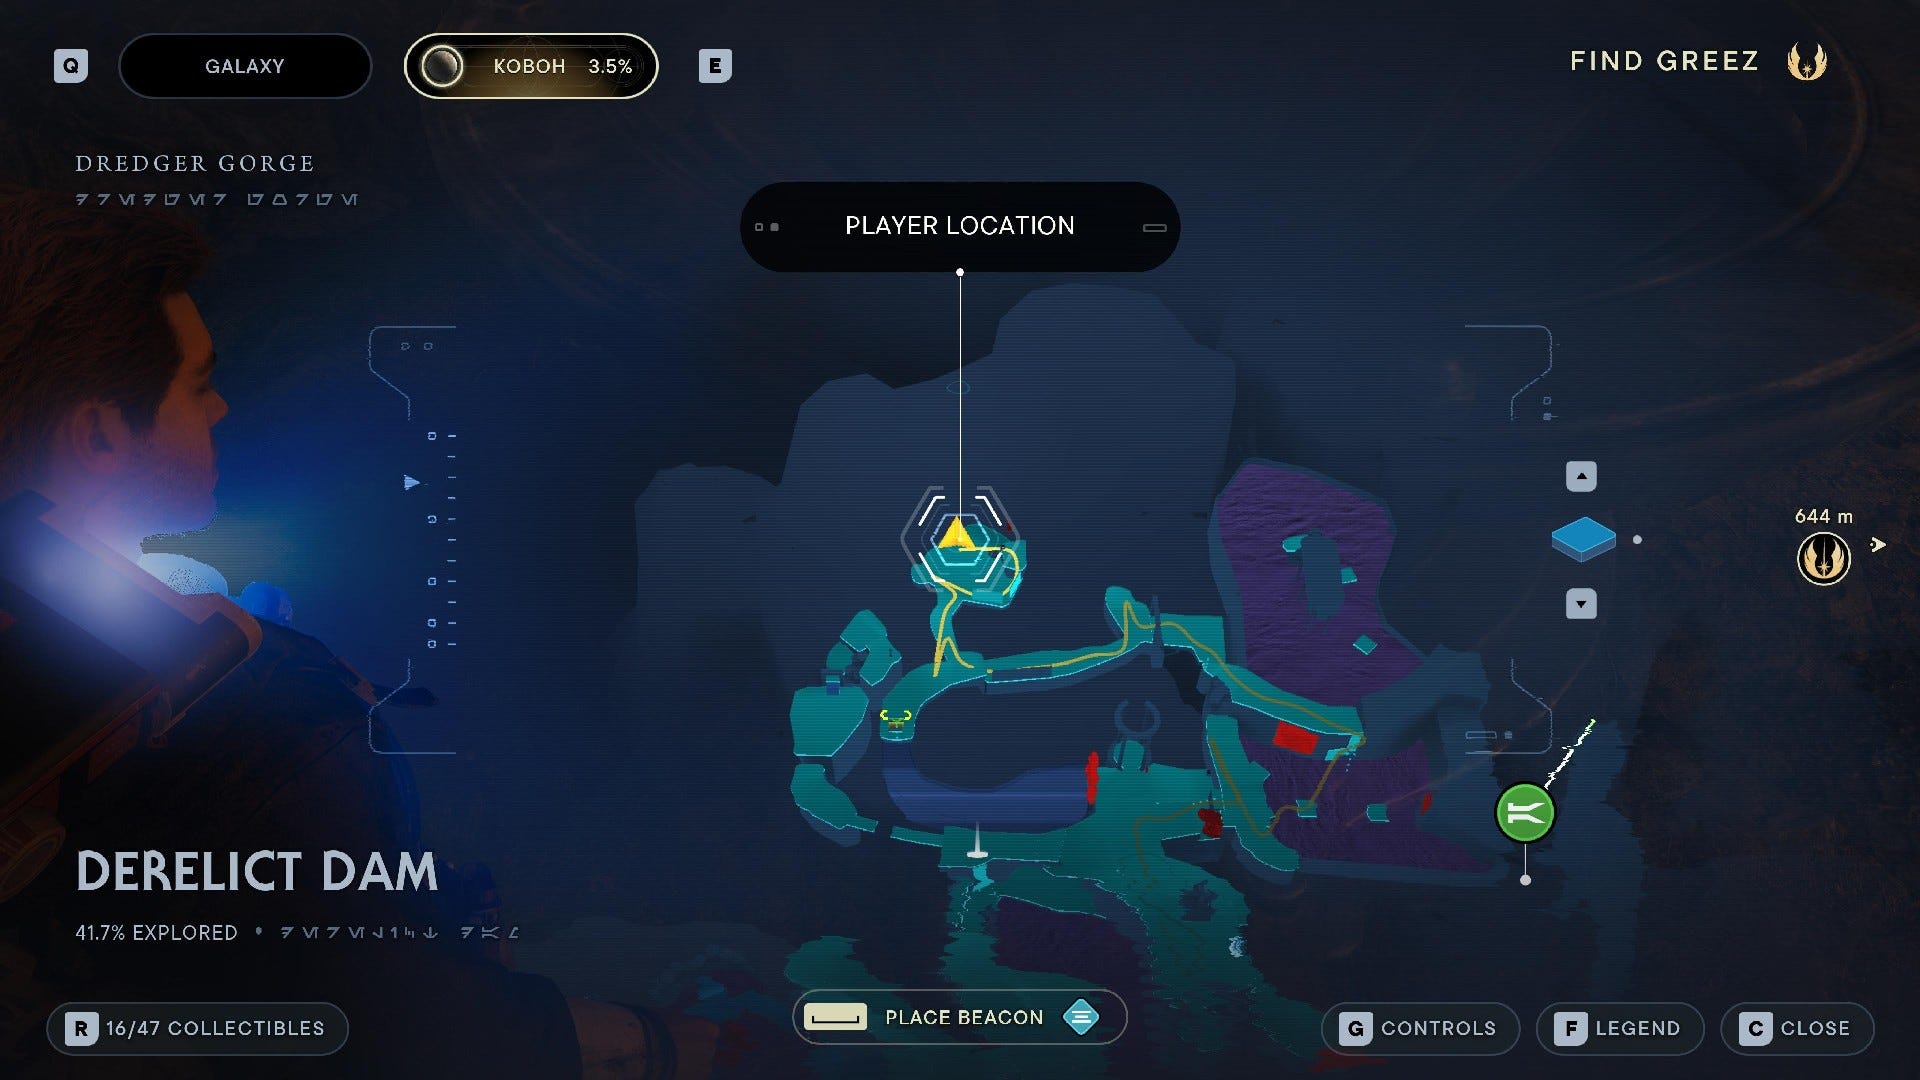
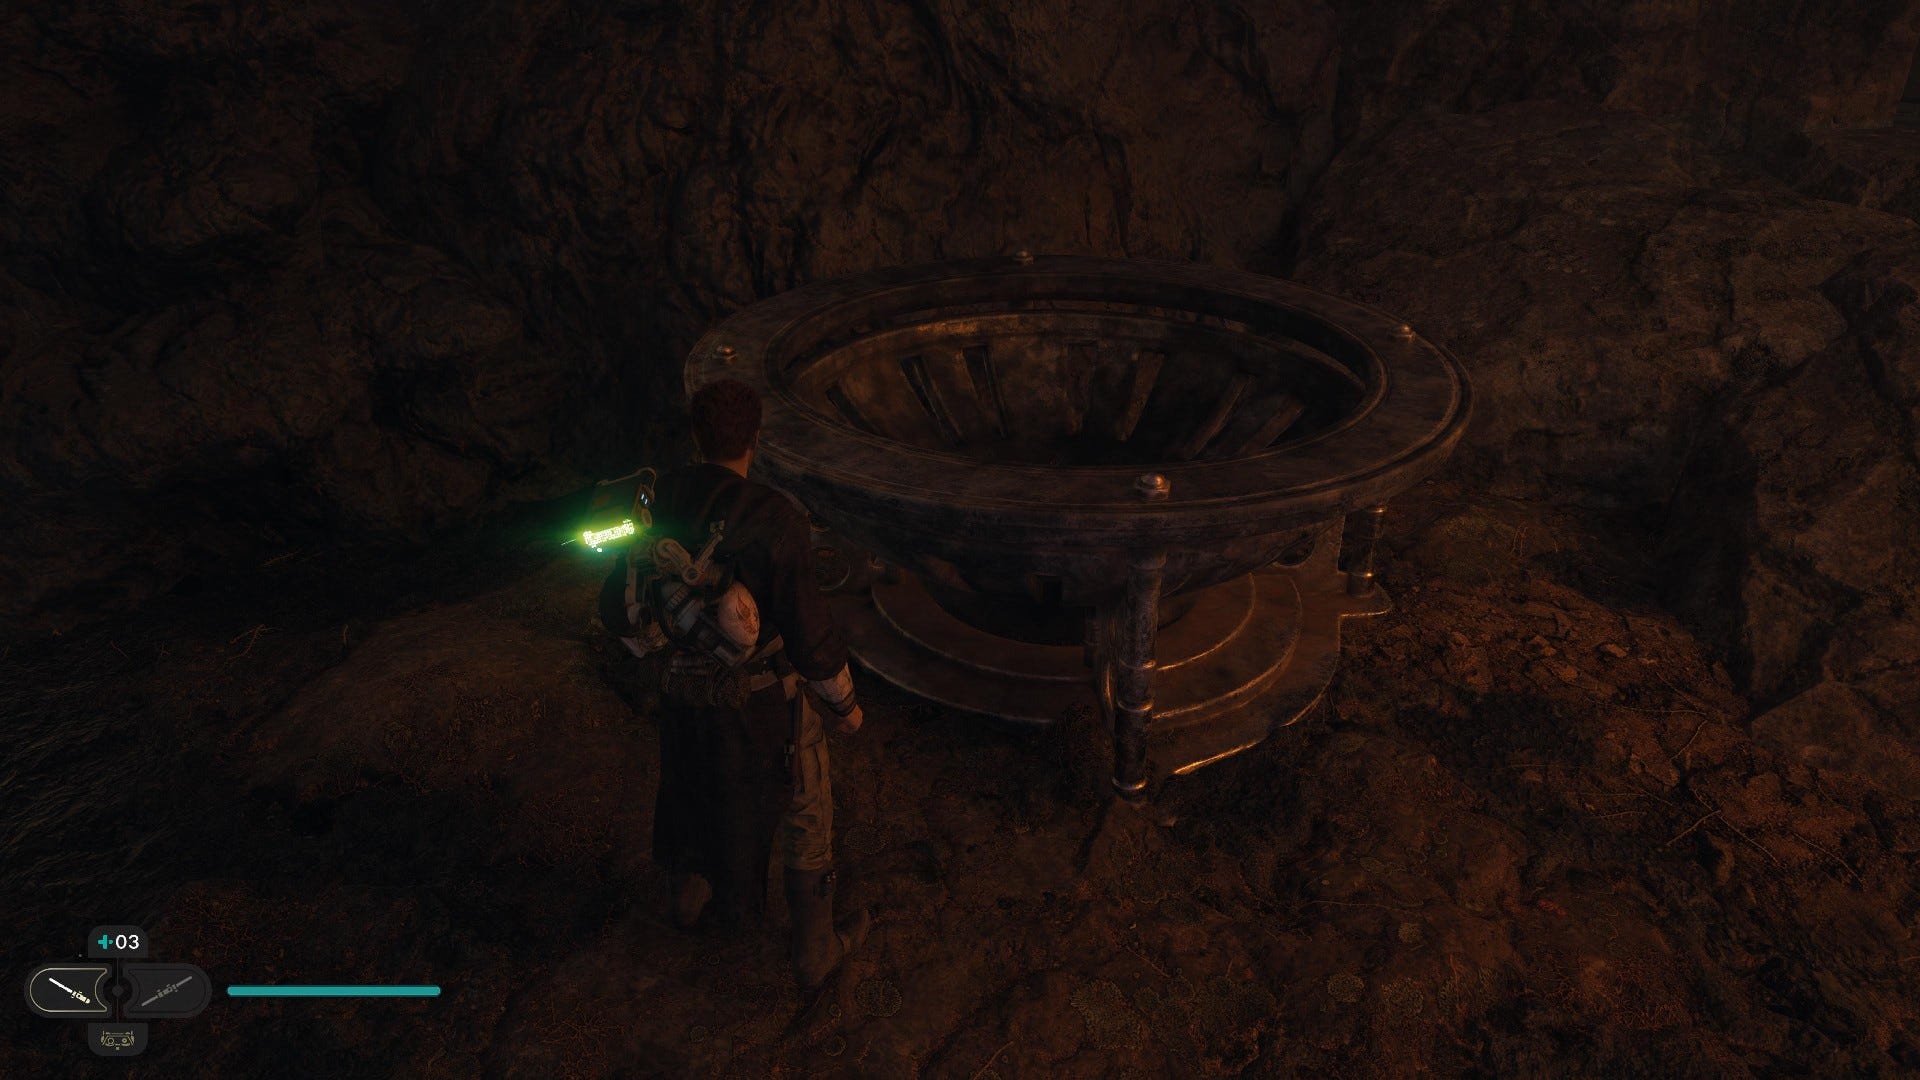
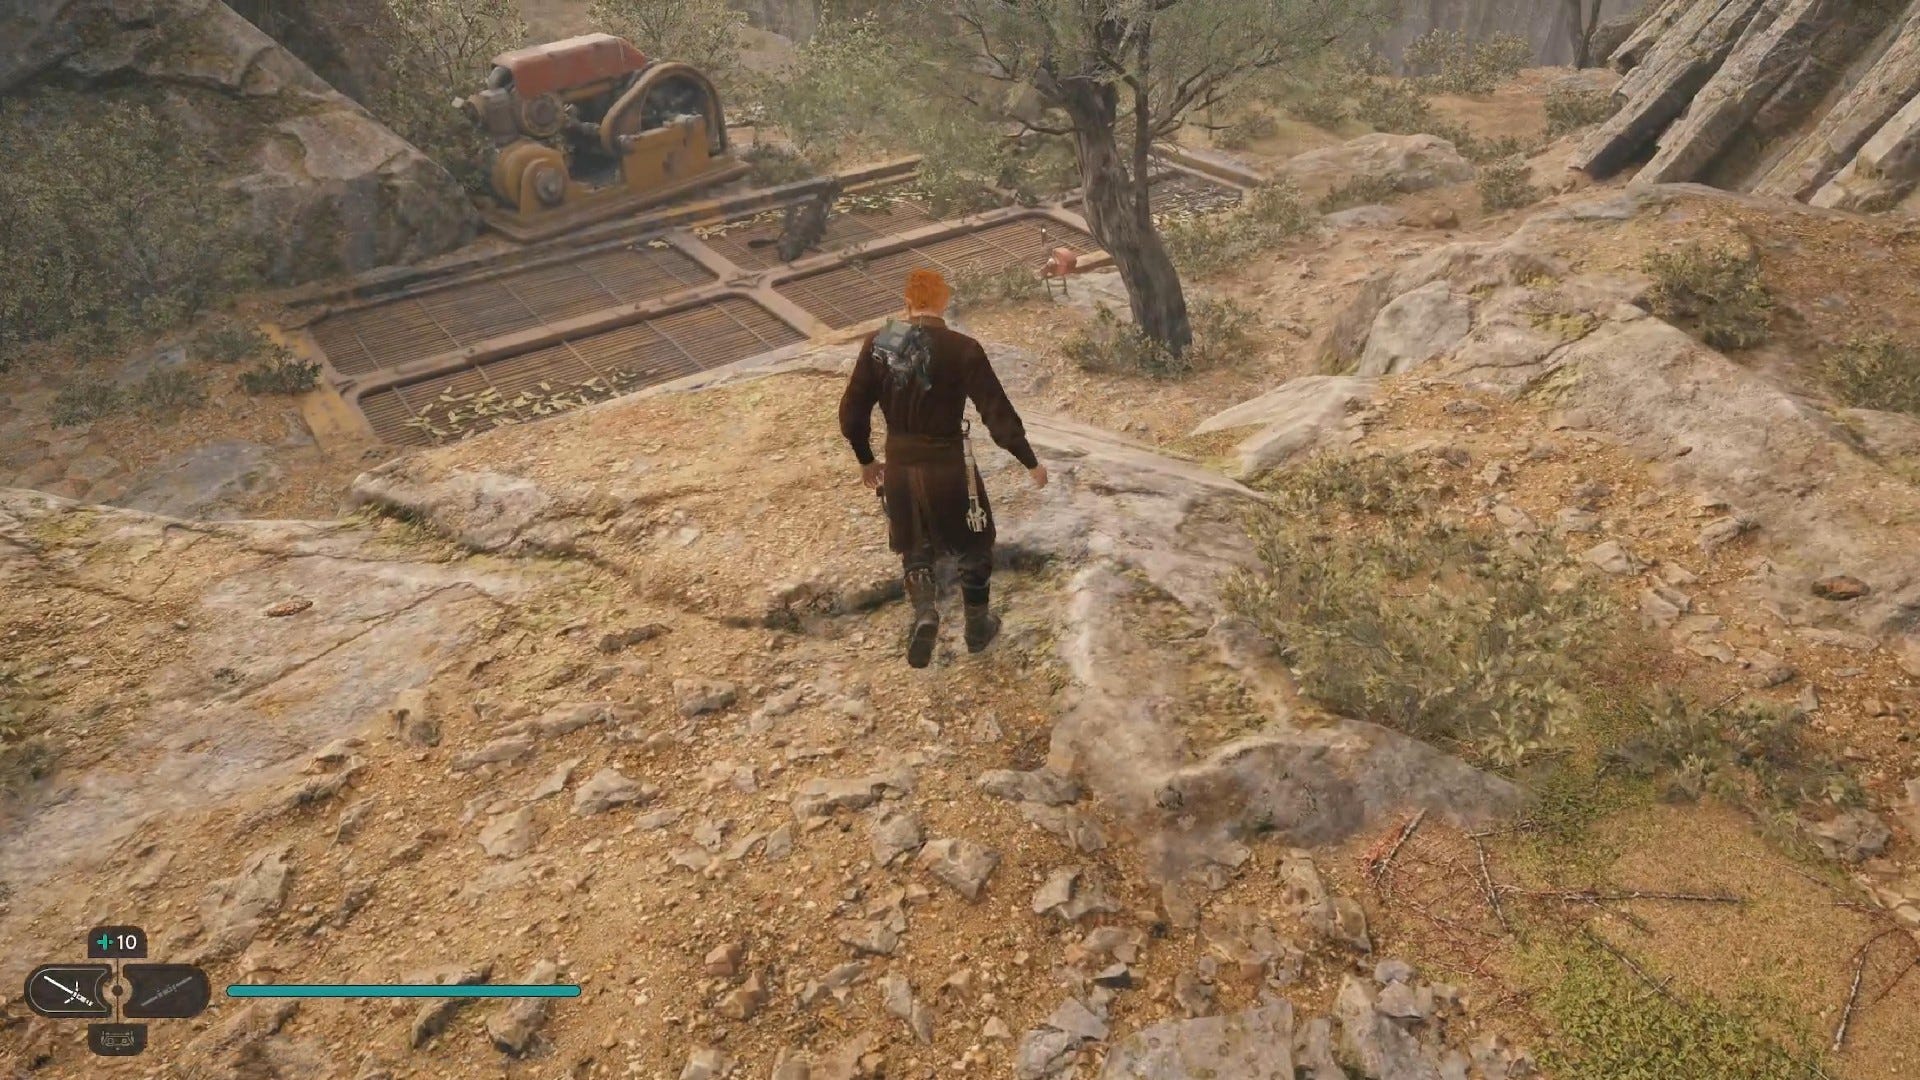
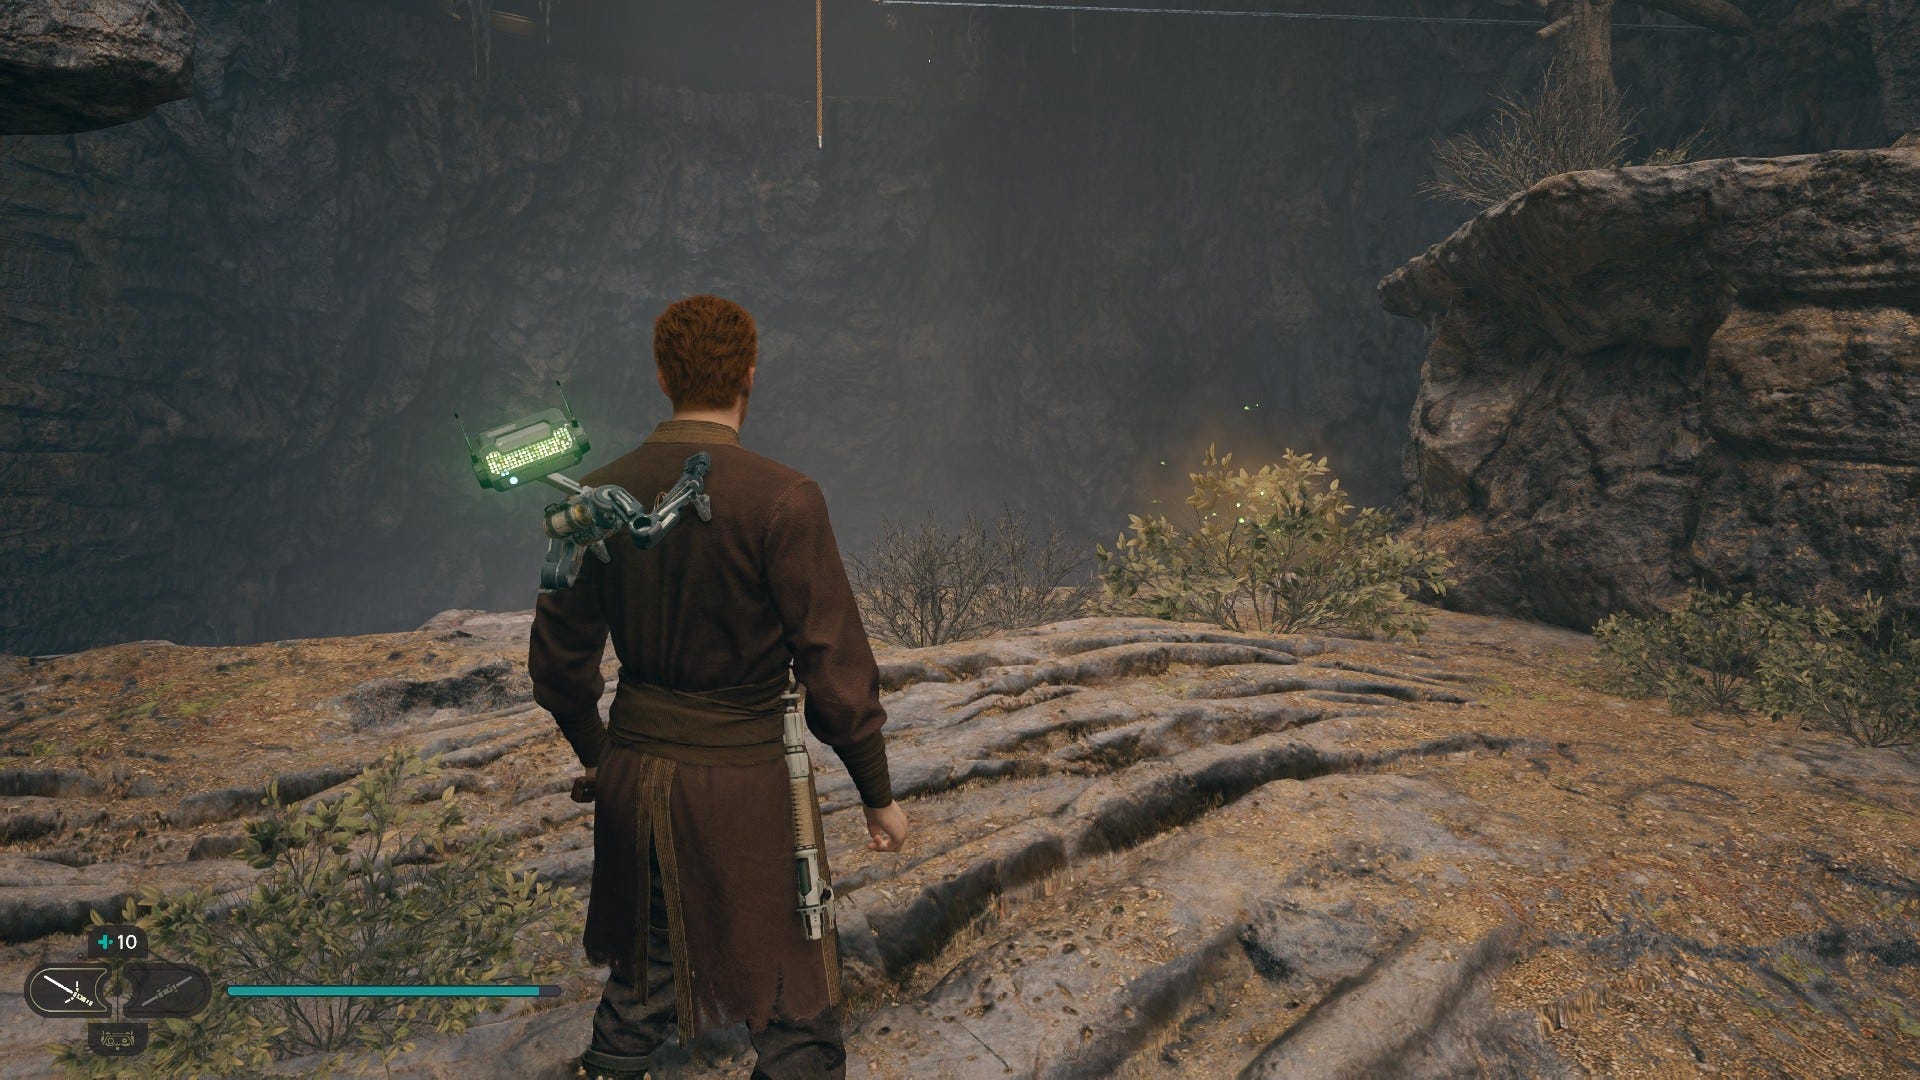
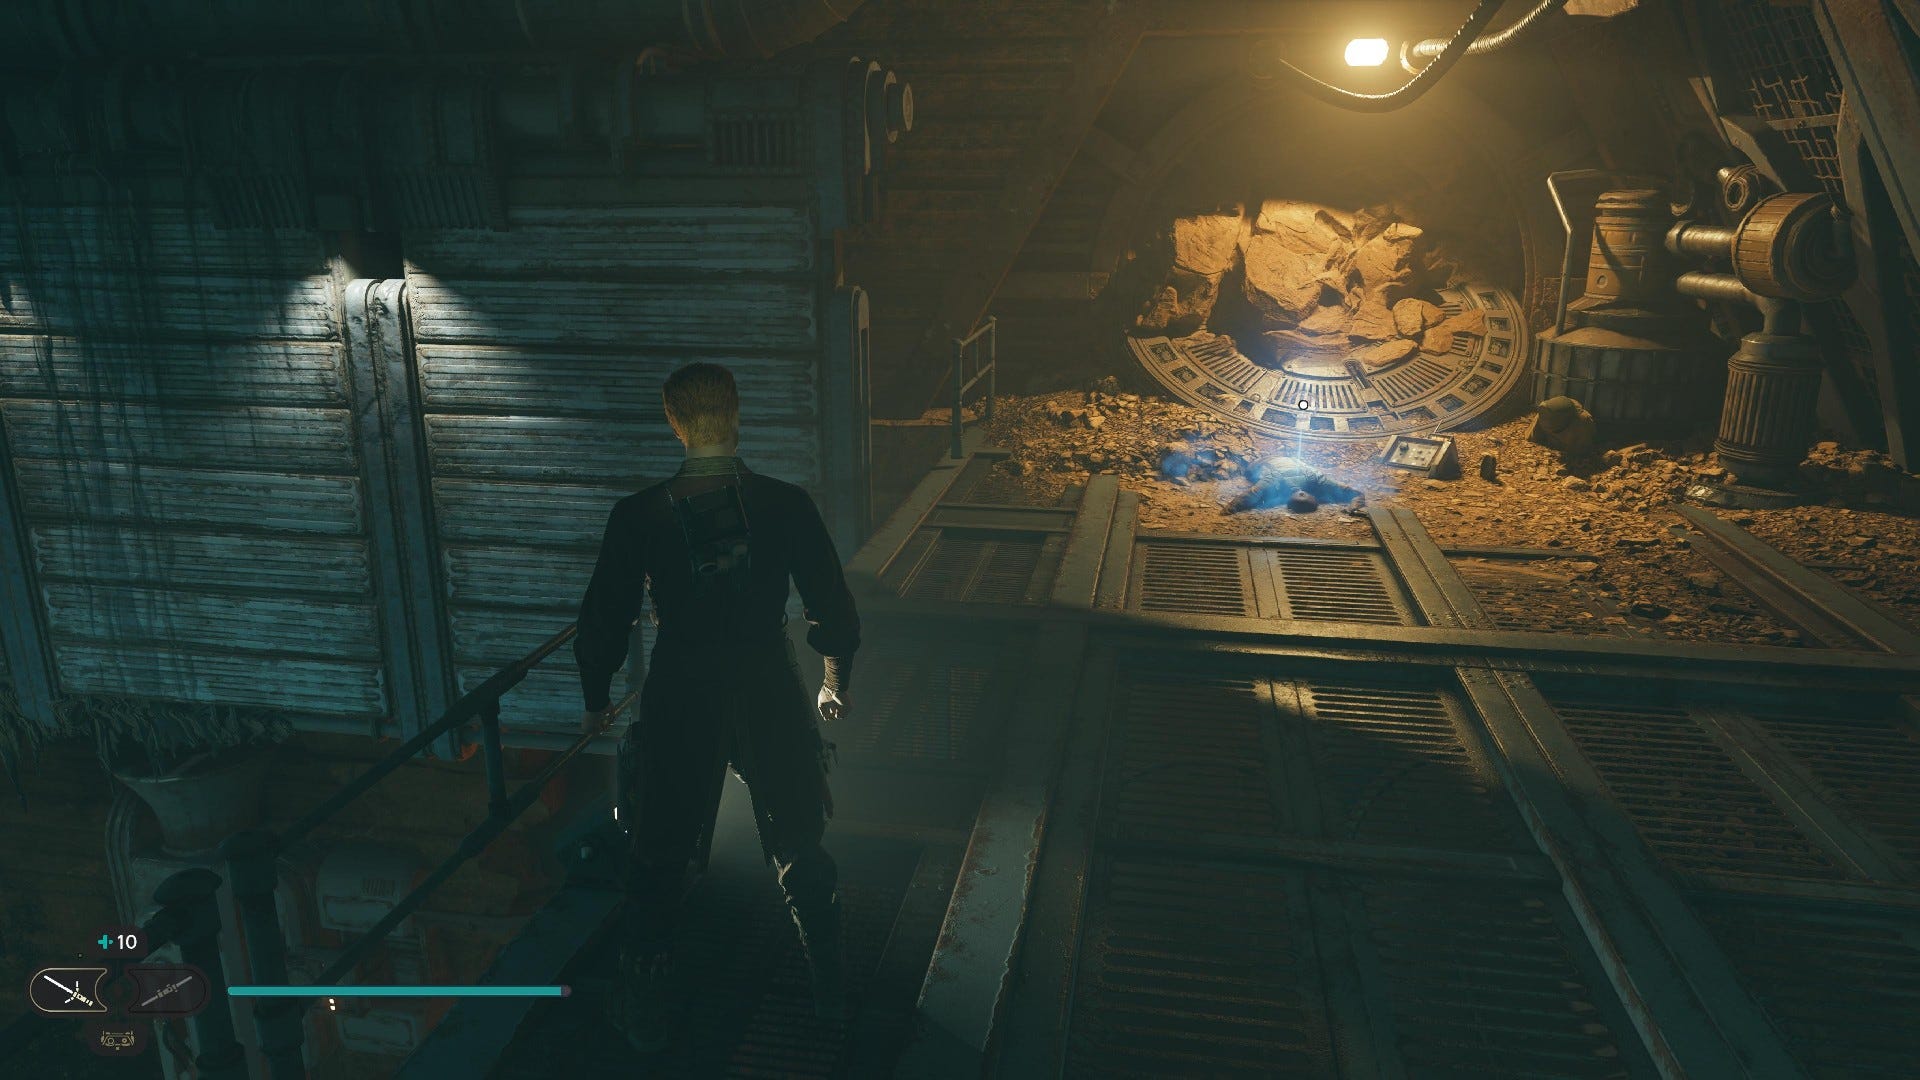
Force Echo (Broken Dredging Machine): A short way down the river path from the Gorge Crash Site Meditation Point.
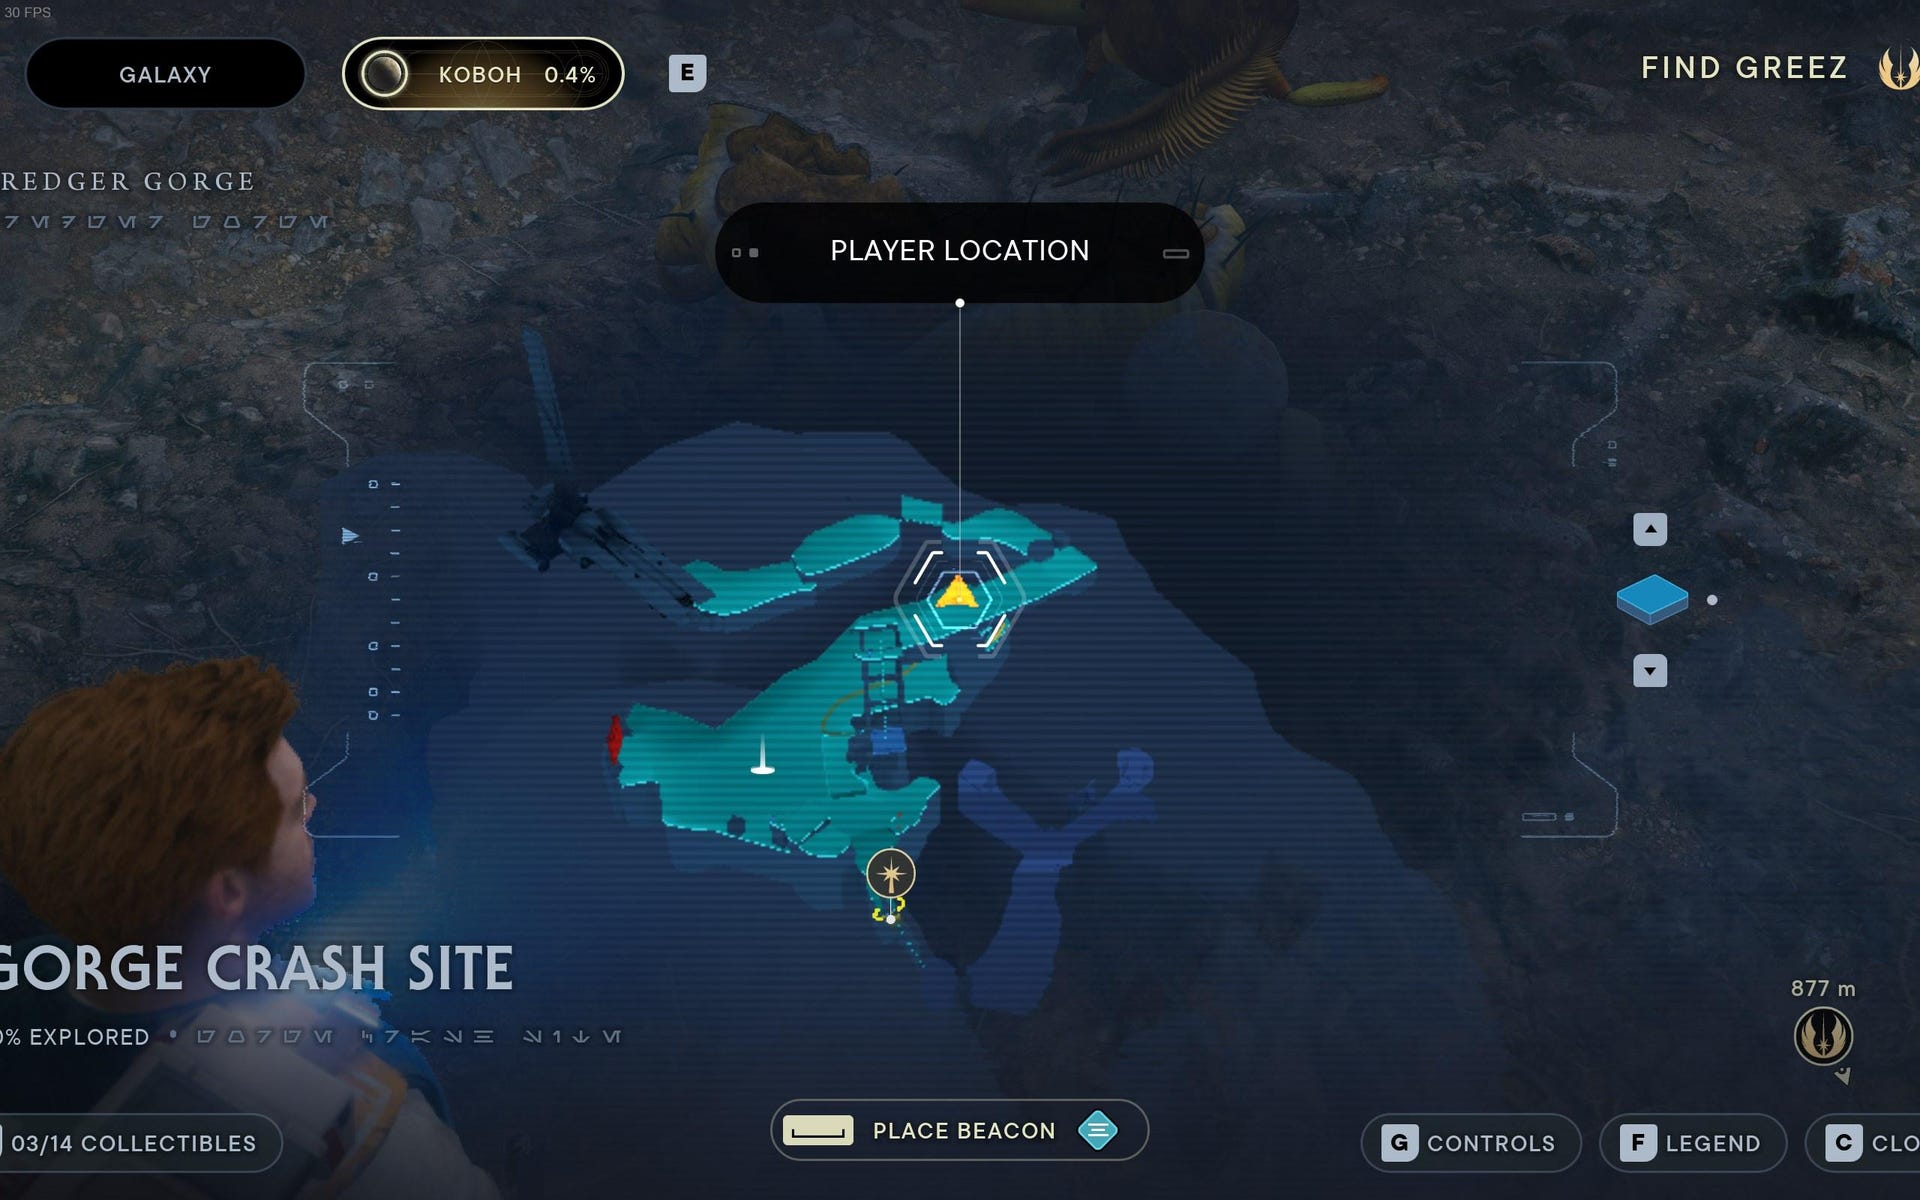
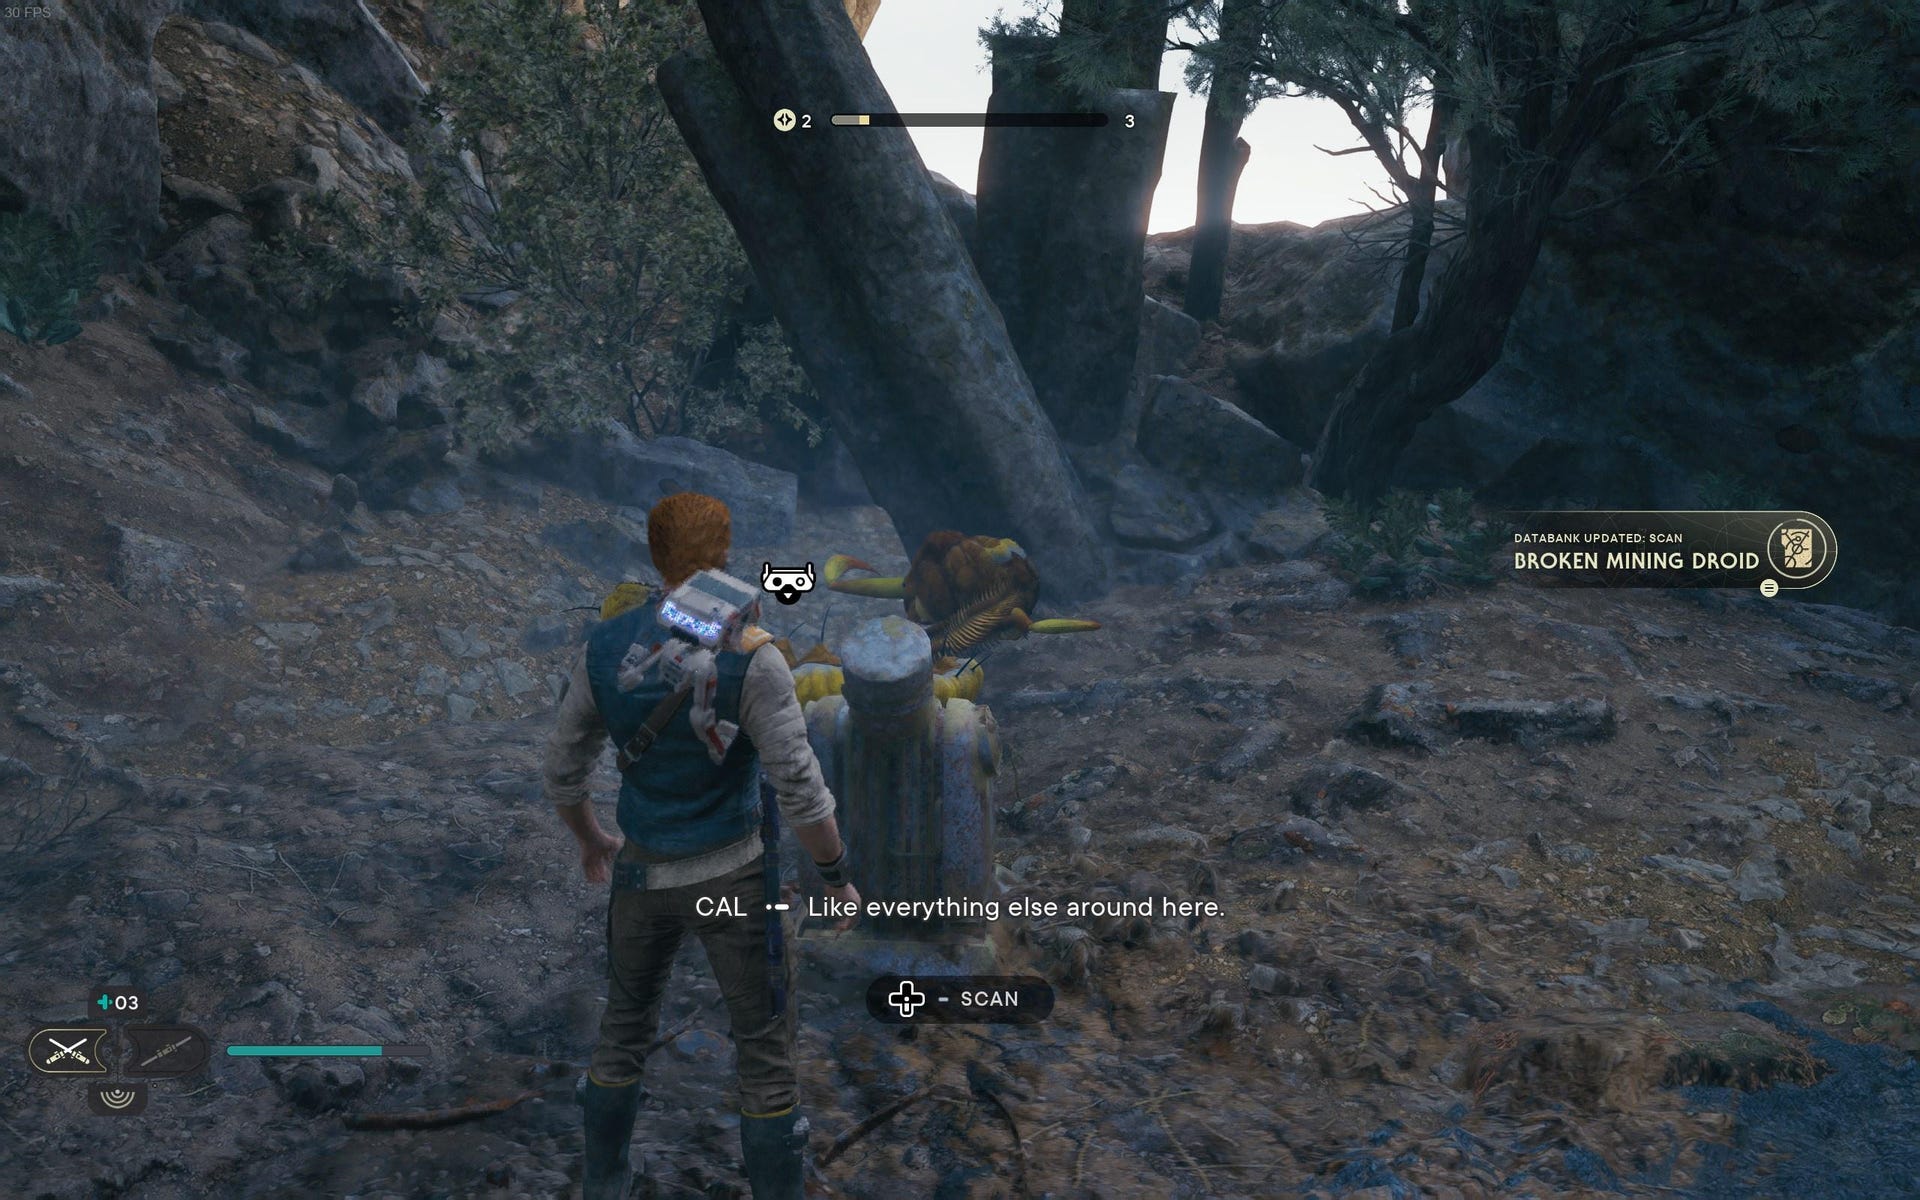
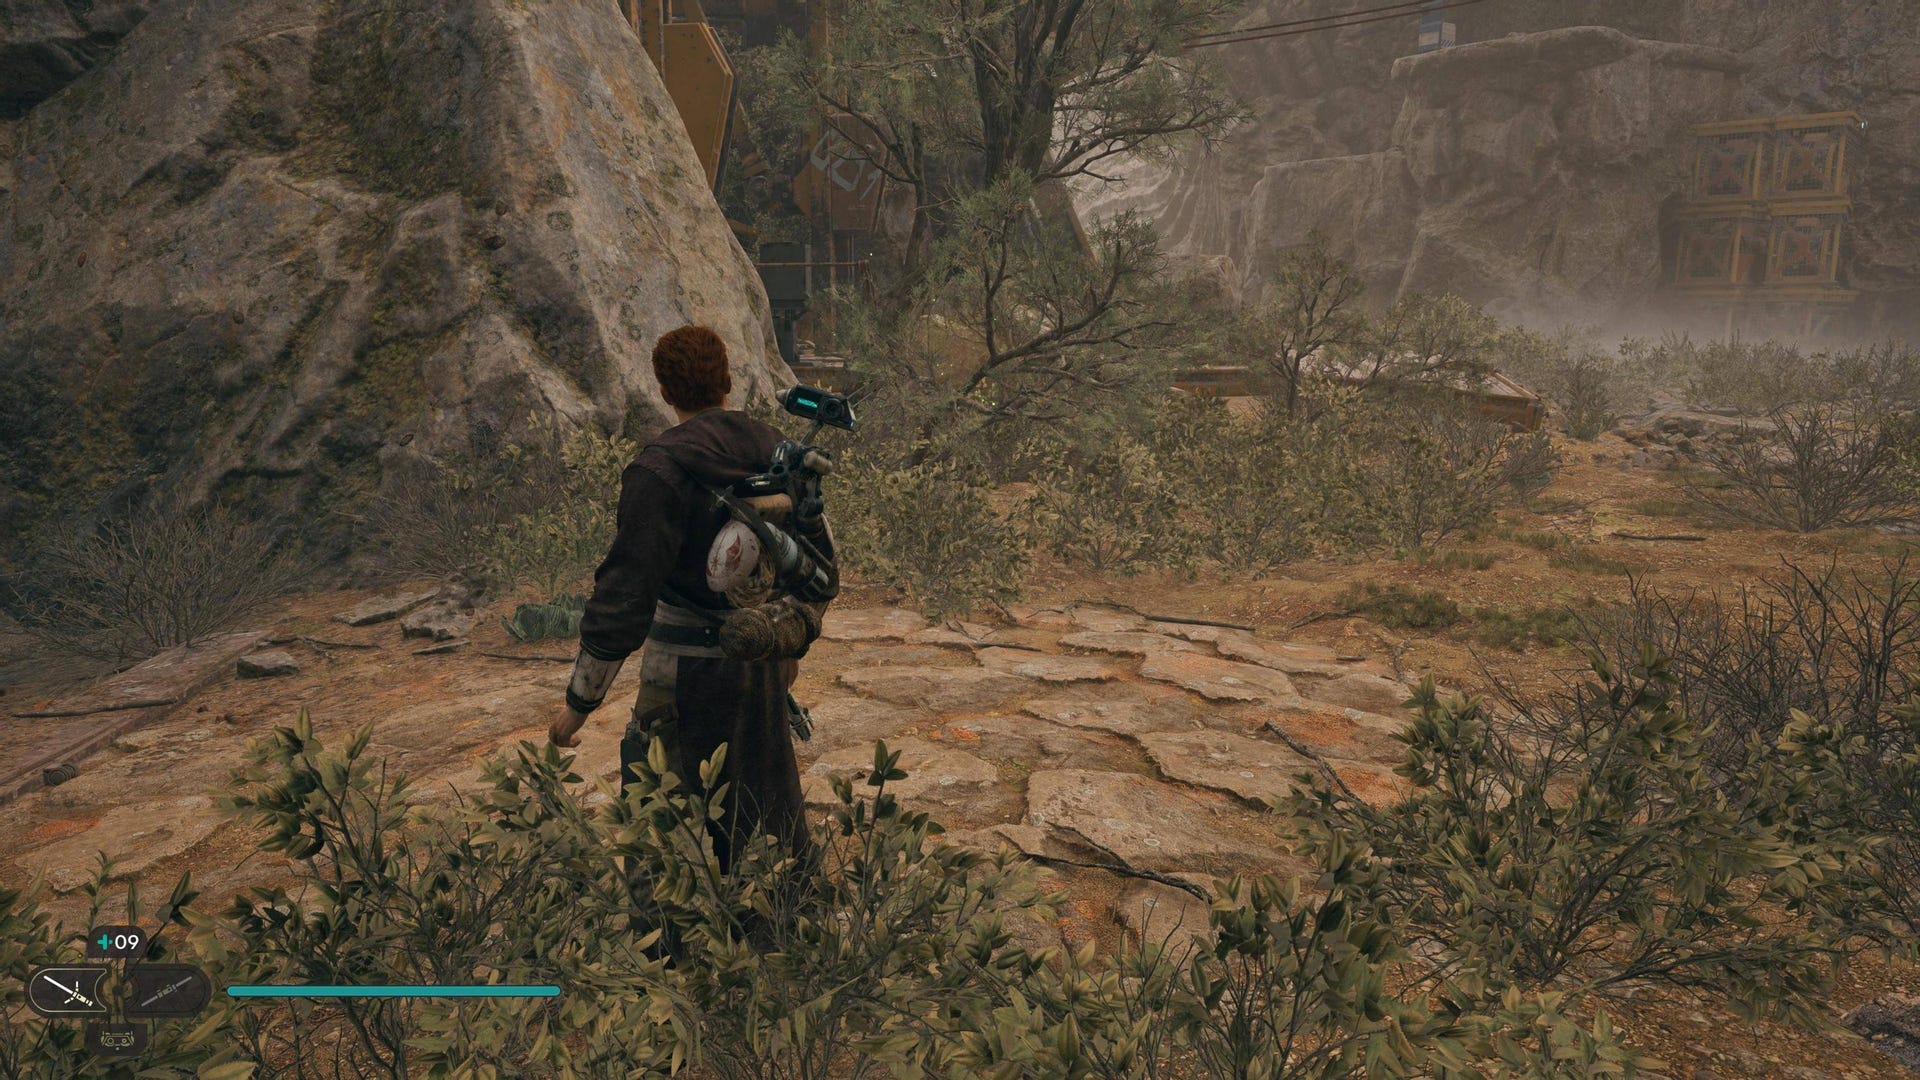
Databank (Broken Mining Droid): Continue past the Broken Dredging Machine in the river path to find another broken machine at the end.
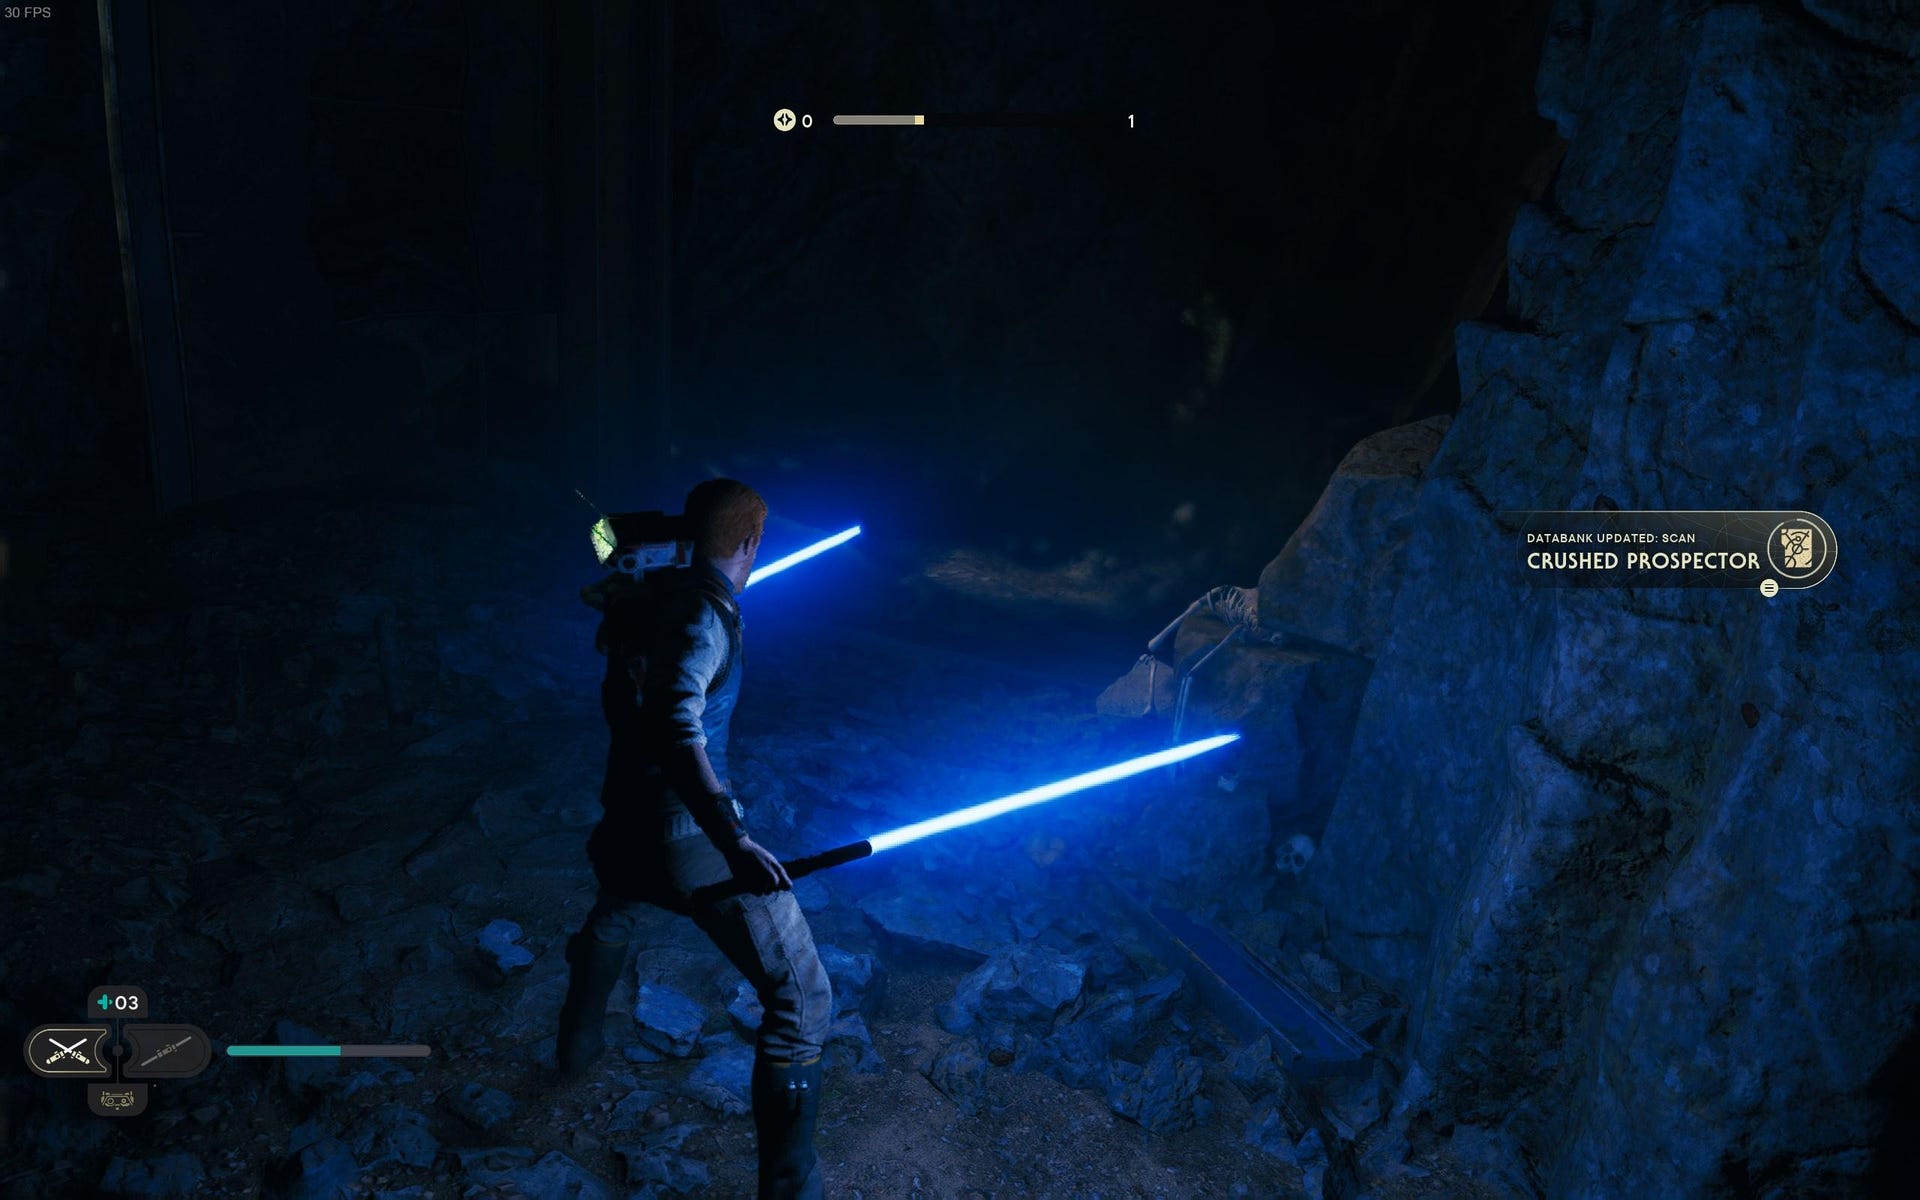
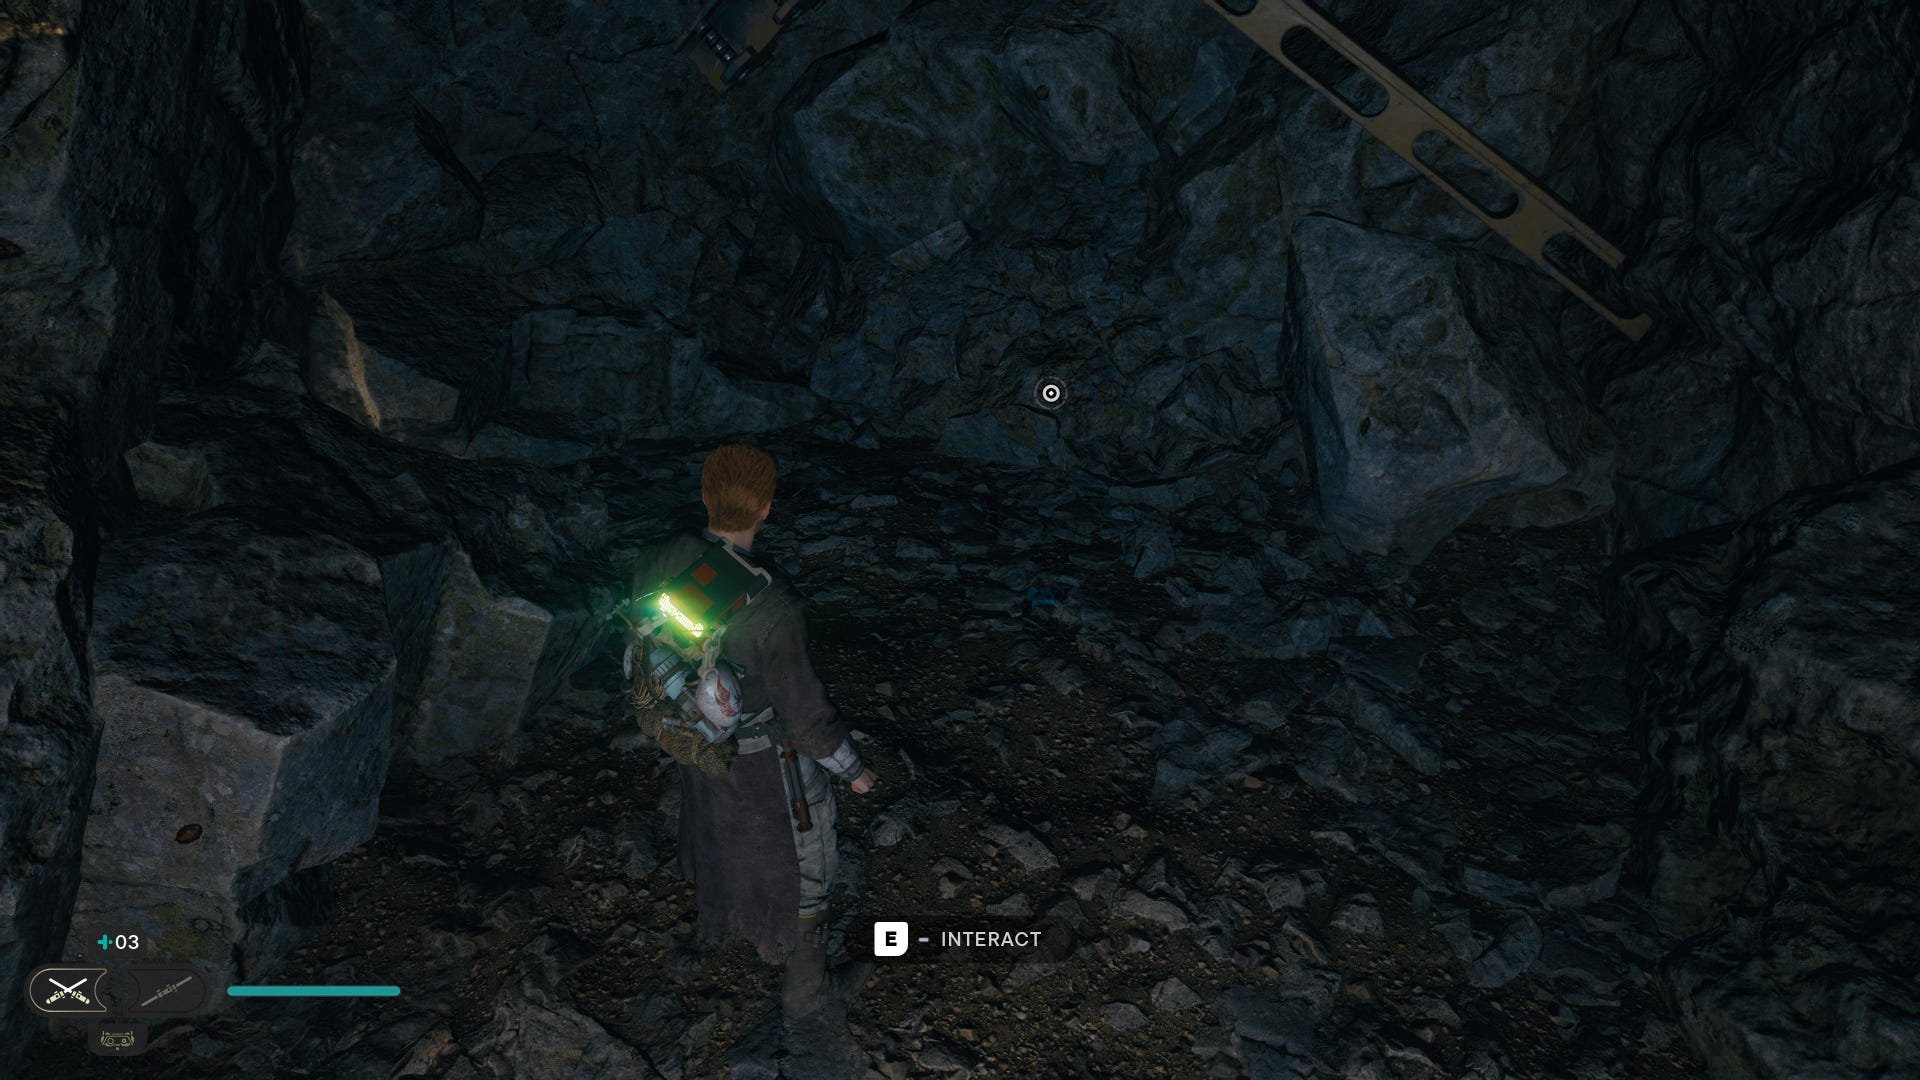
Databank (Crushed Prospector): In the dark tunnel after the first batch of Bedlam Raiders.
Databank (Koboh Tar): Scan the tar pit at the end of the region.
Gorge Crash Site Force Tears:
Force Tear (Fractured Burden): Requires Force Lift. Look underneath the elevator right next to the Meditation Point.
Gorge Crash Site Treasures:

Priorite Shard #1: In the nest up the ledge at the end of the river side path. Wall-run to get there.
Priorite Shard #2: Just after the first two B1 droid enemies, in the cave on the left.
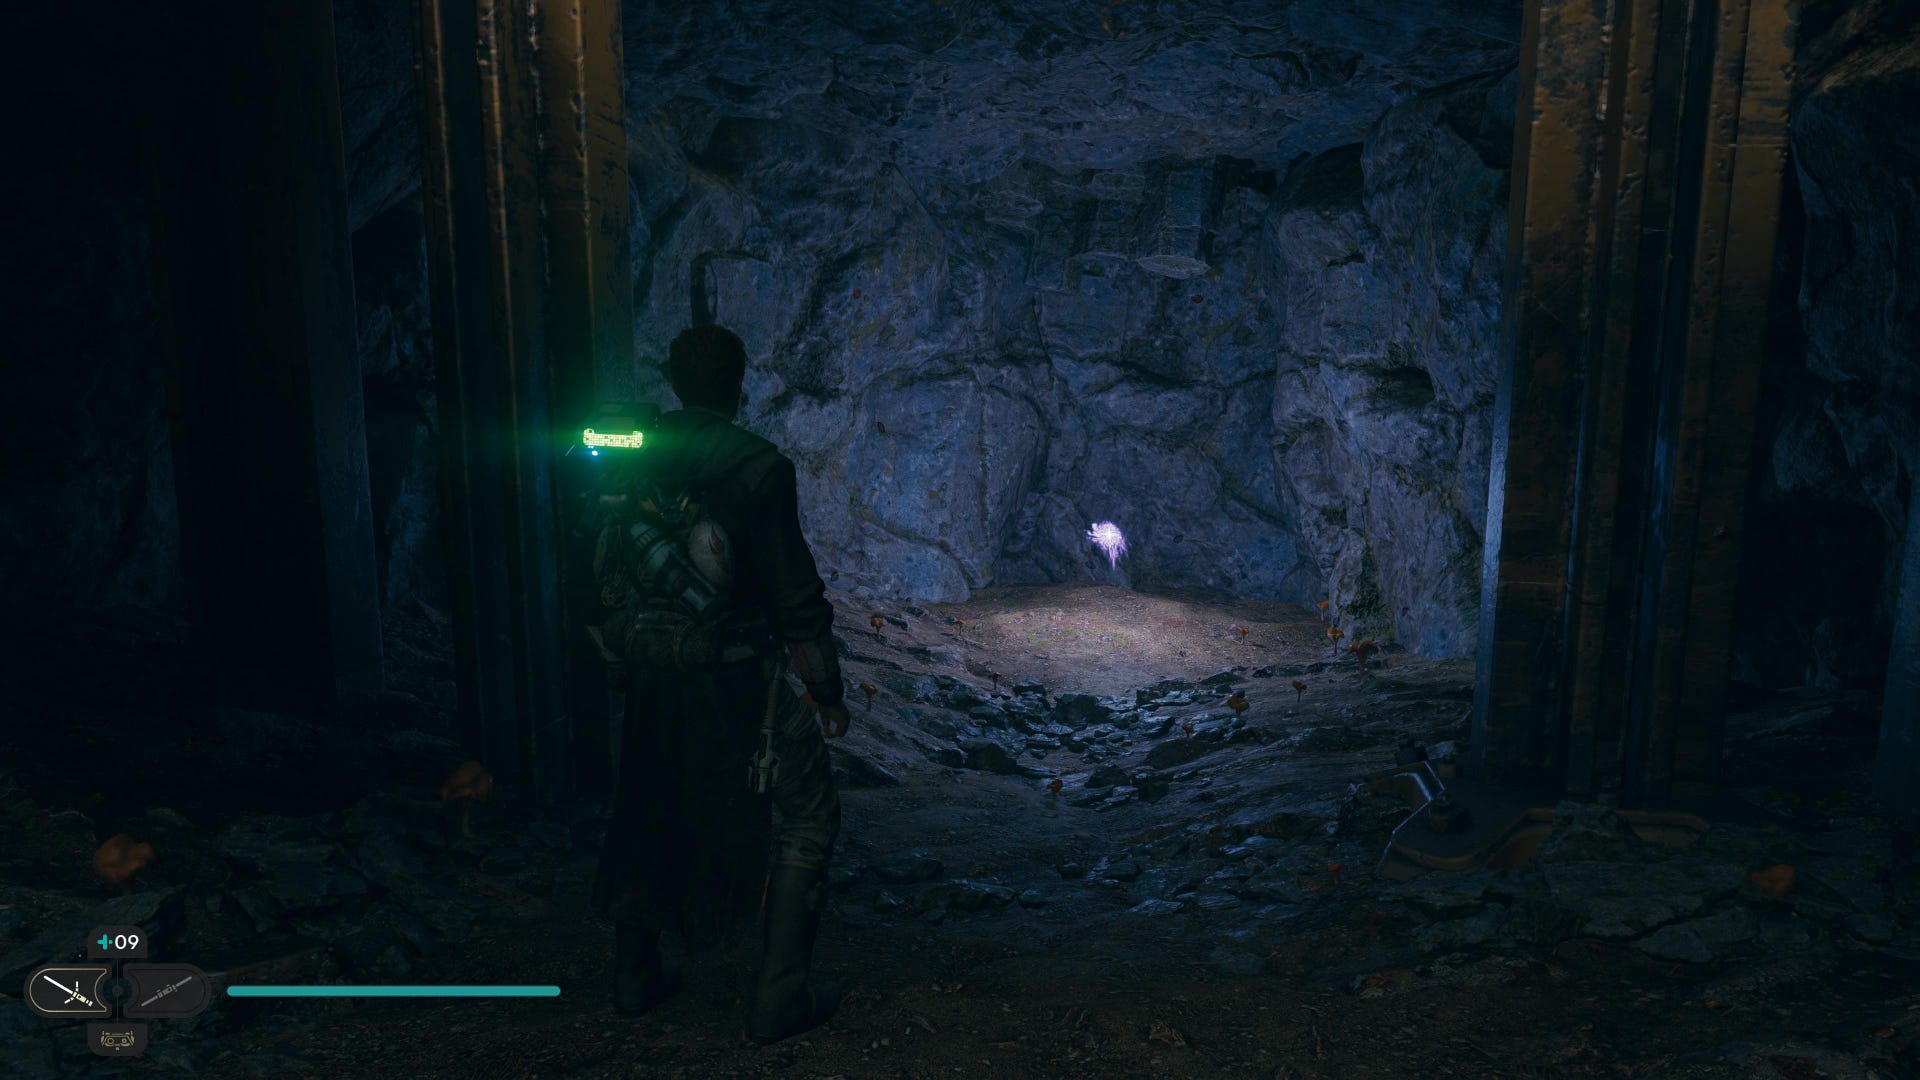
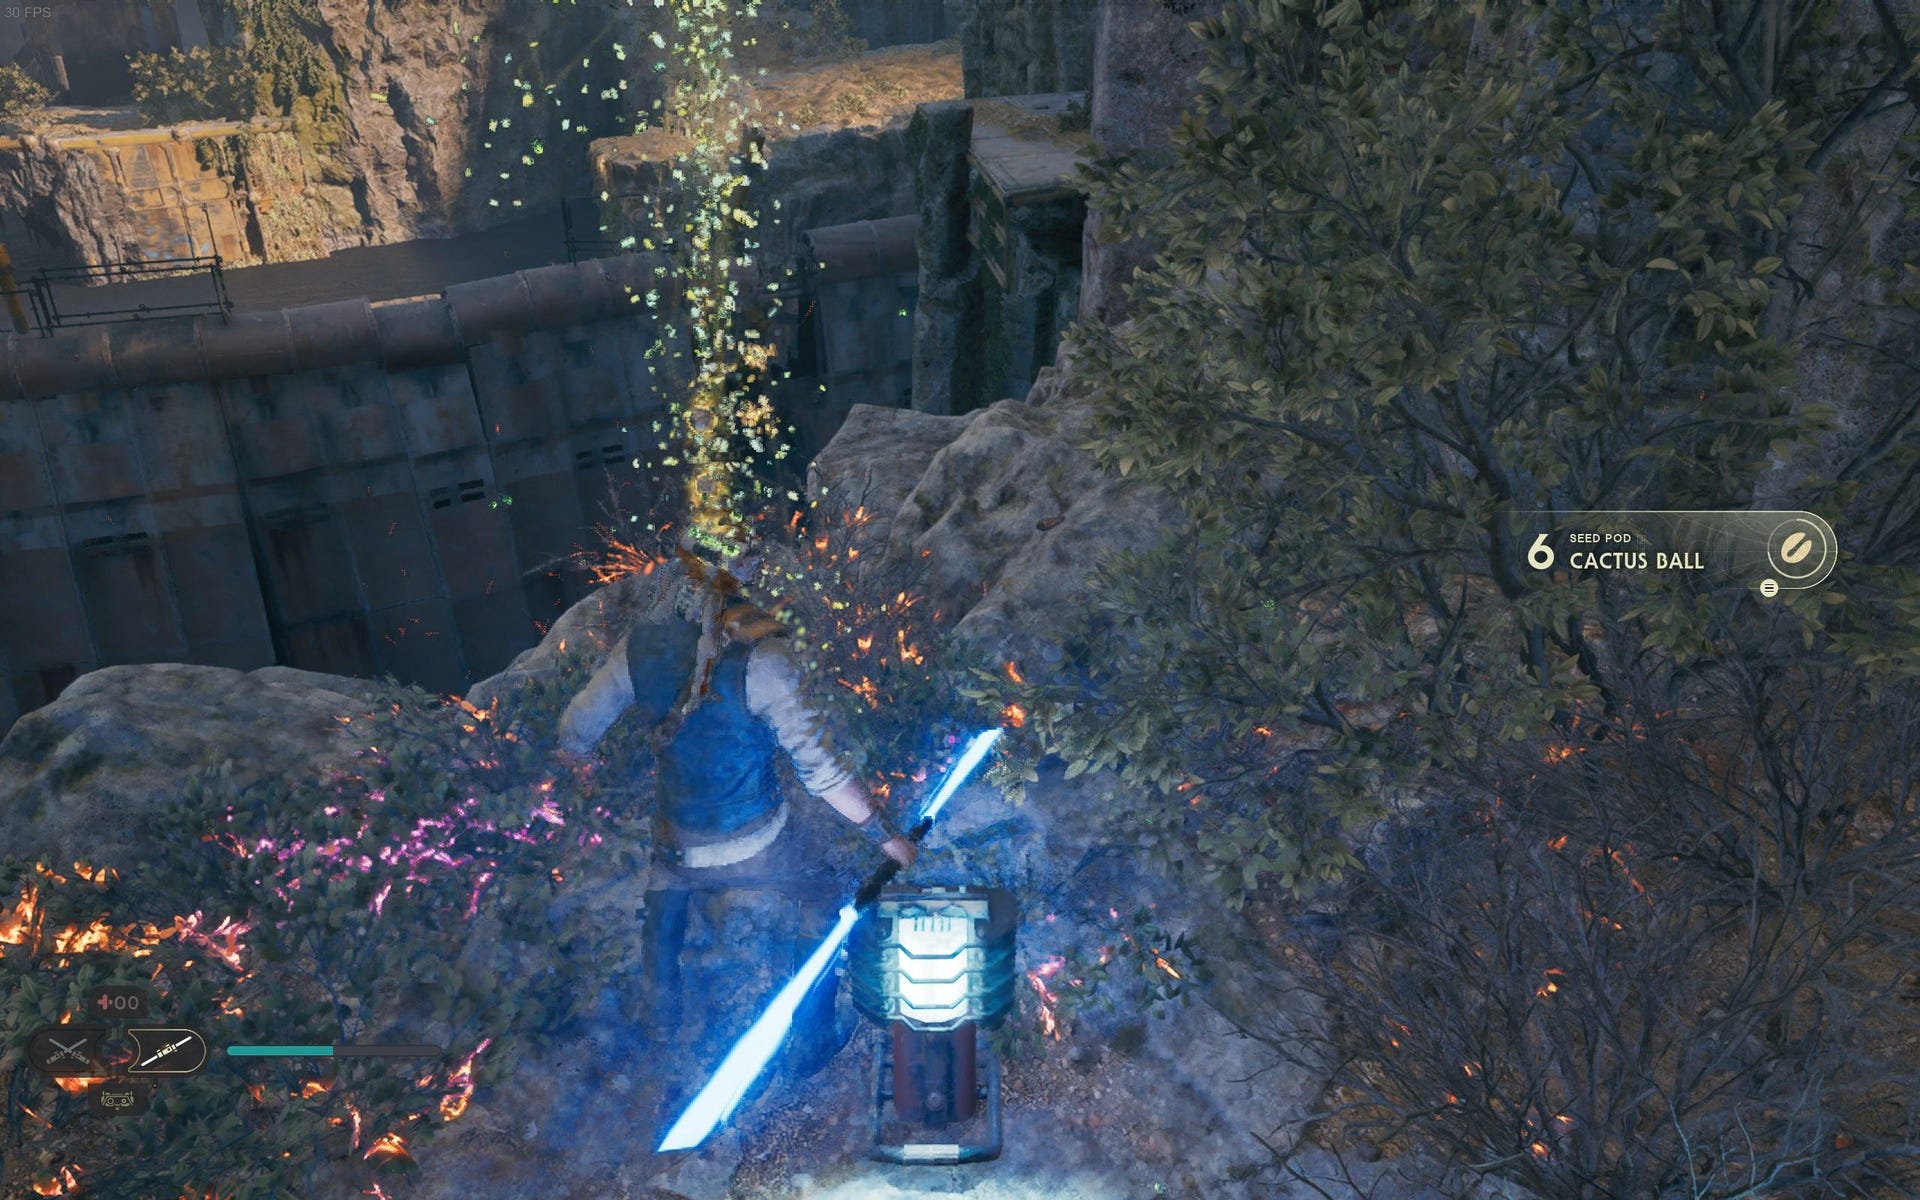
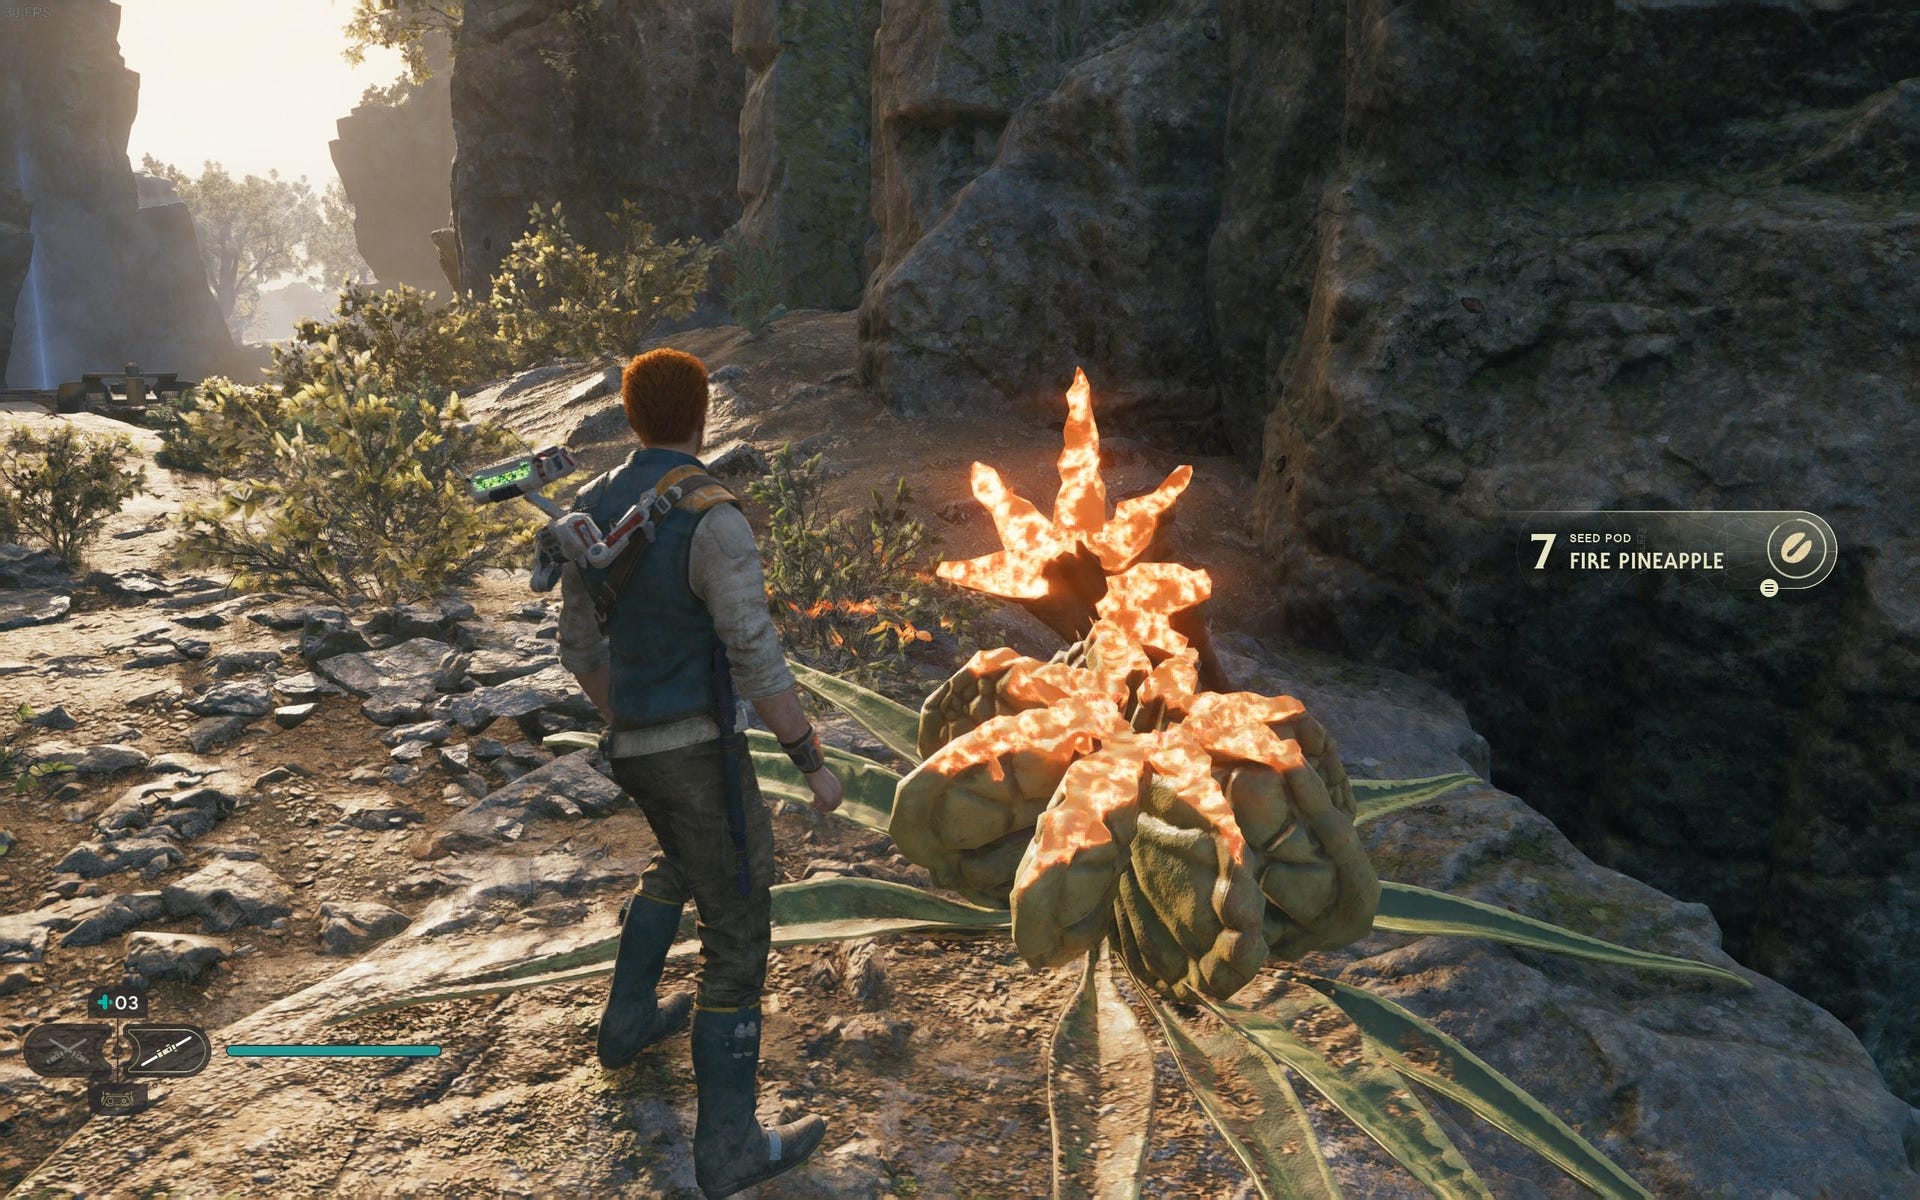
Gorge Crash Site Seed Pods:

Fire Pineapple: From the Meditation Point, look just to the left of the elevator, by the rock, for the glowing plant.
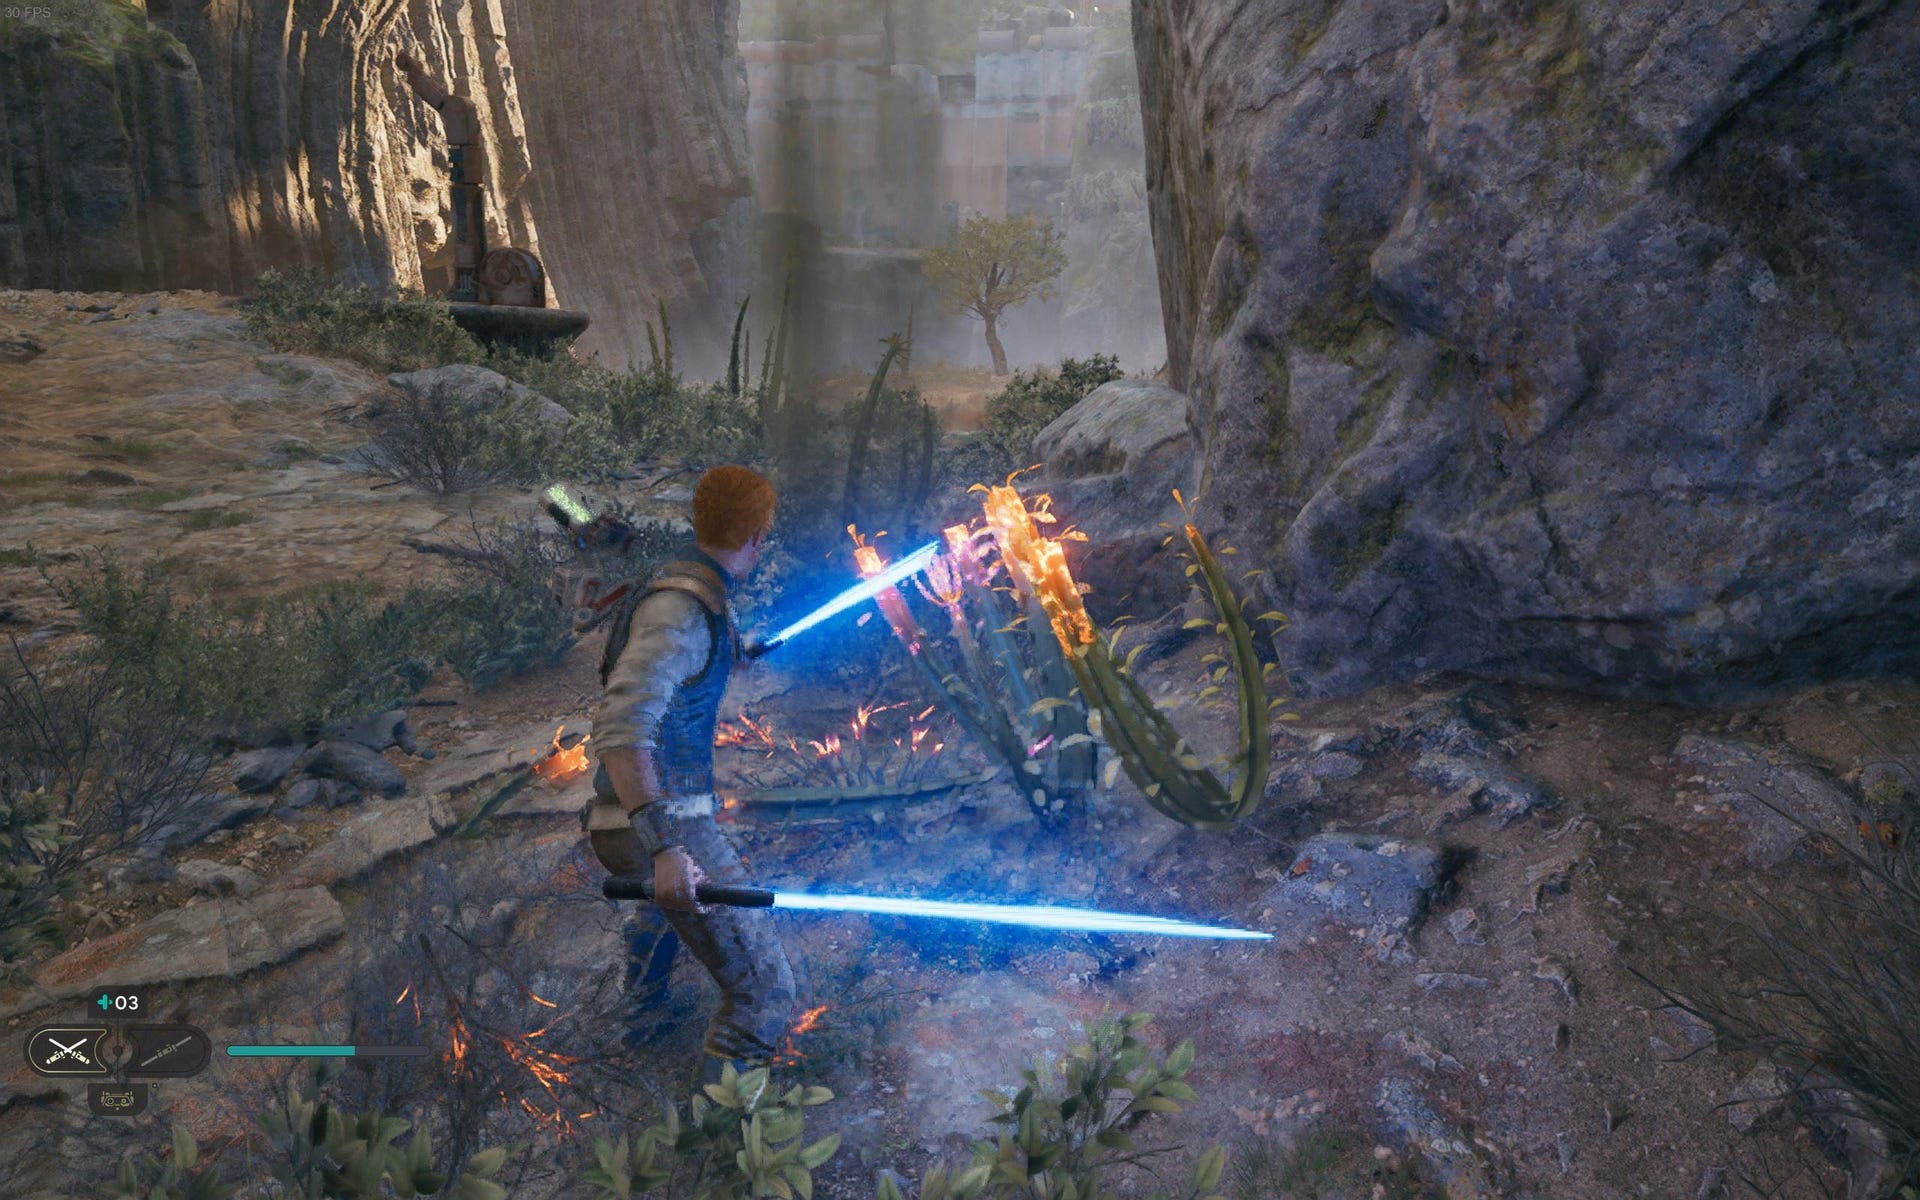
Cactus Ball (Nabooan Green): To the side of the stacked crates which leads to the Scrapyard photoreceptors chest, right next to the Meditation Point.
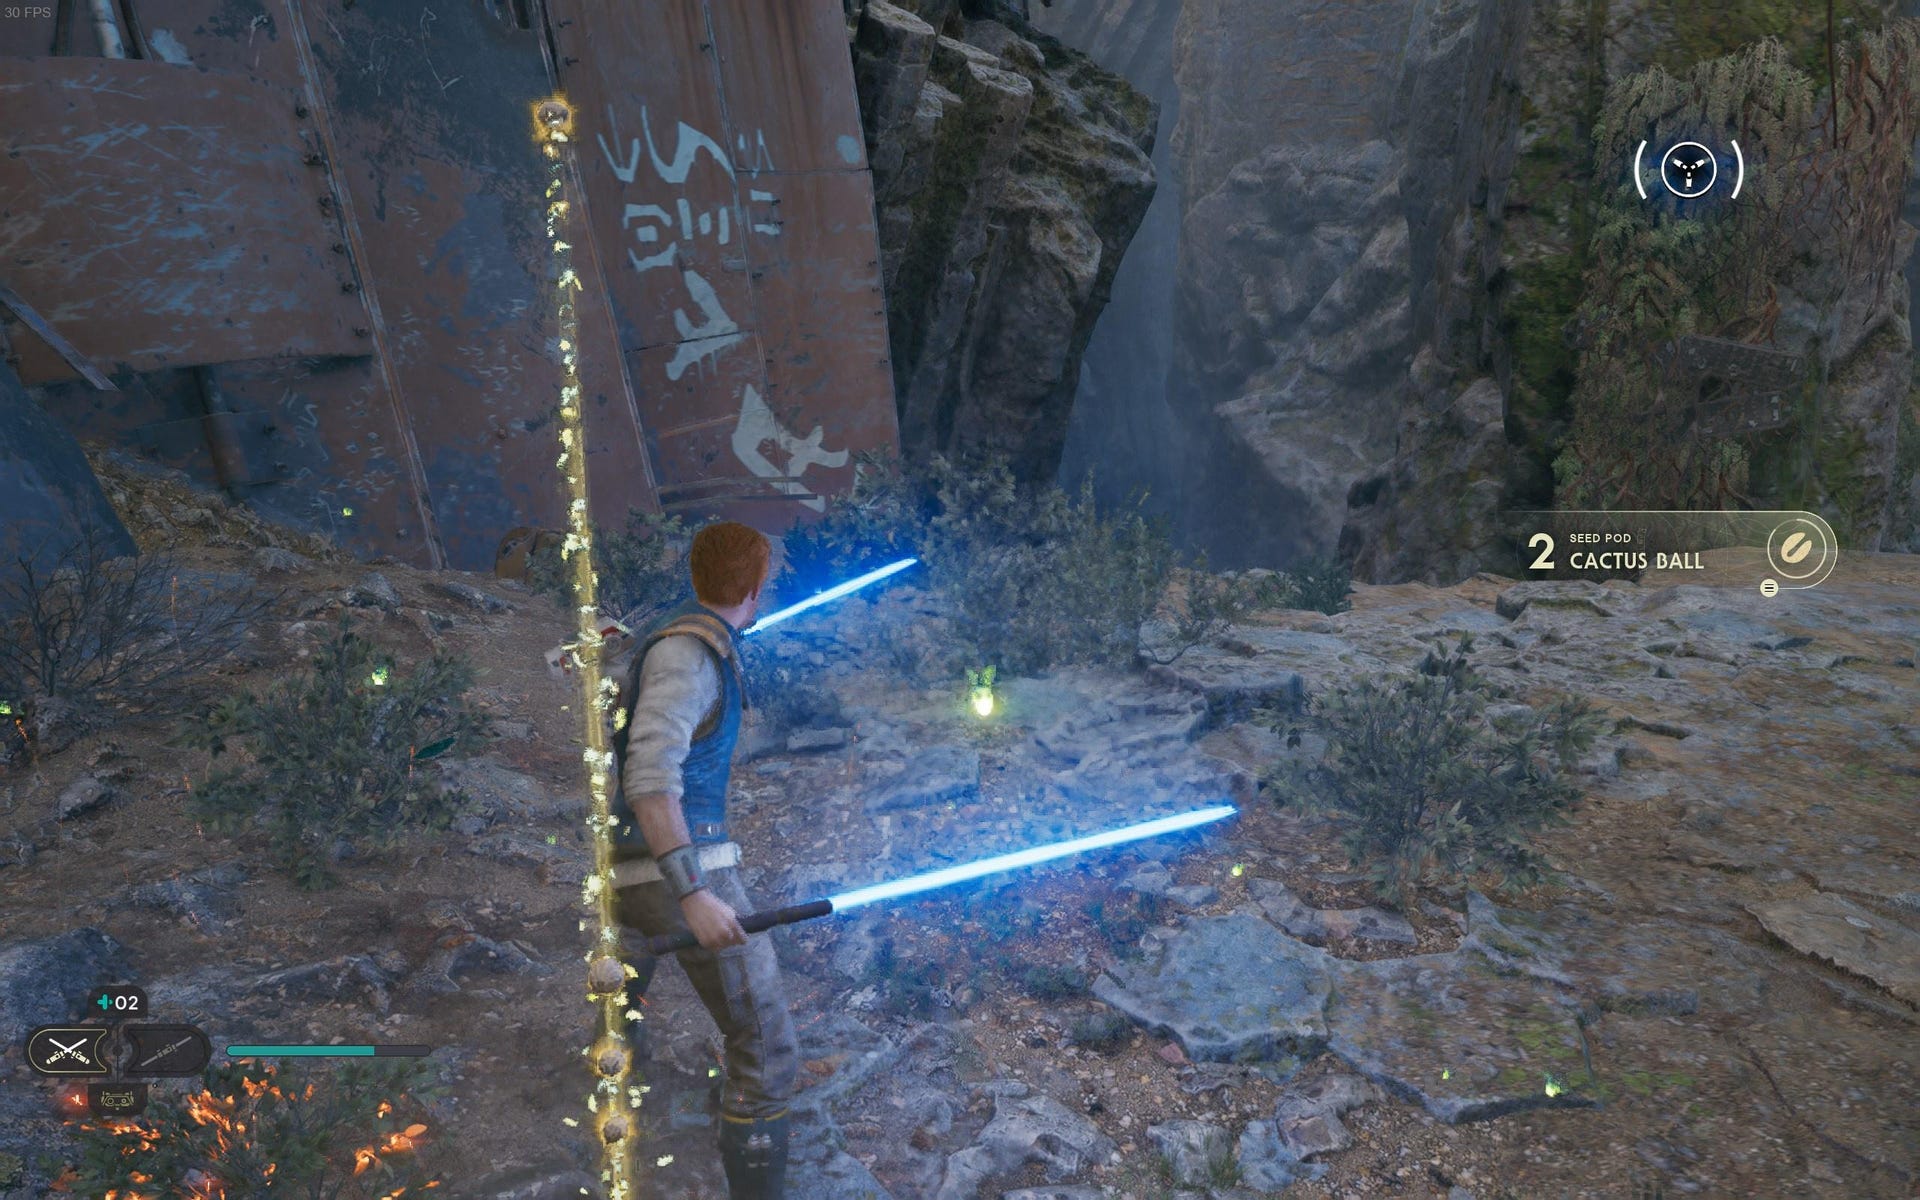
Cactus Ball: Head down the main path until you reach the platform with a pole leading out from it, back towards the cave. Slash the glowing plant in the centre of this platform.
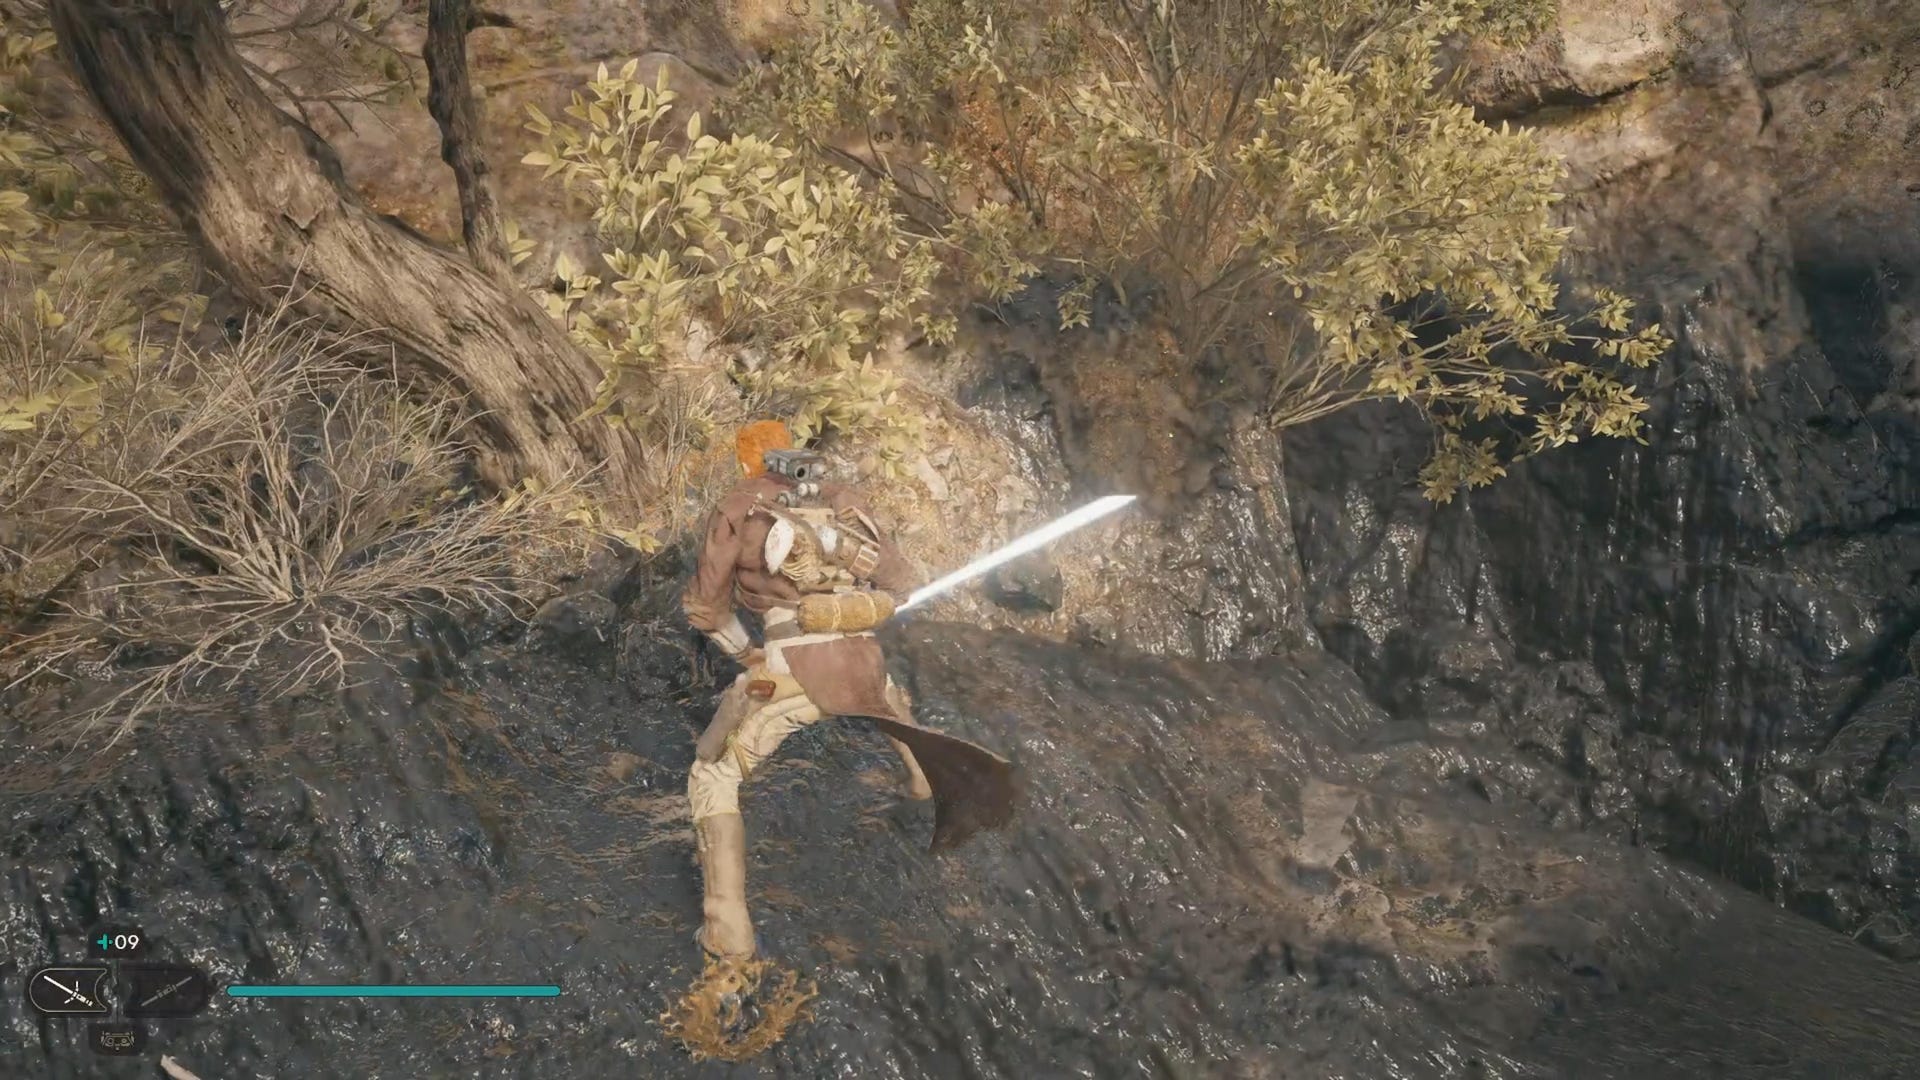
Fire Pineapple (Nabooan Green): On the edge of the tar pit just beyond the droid.
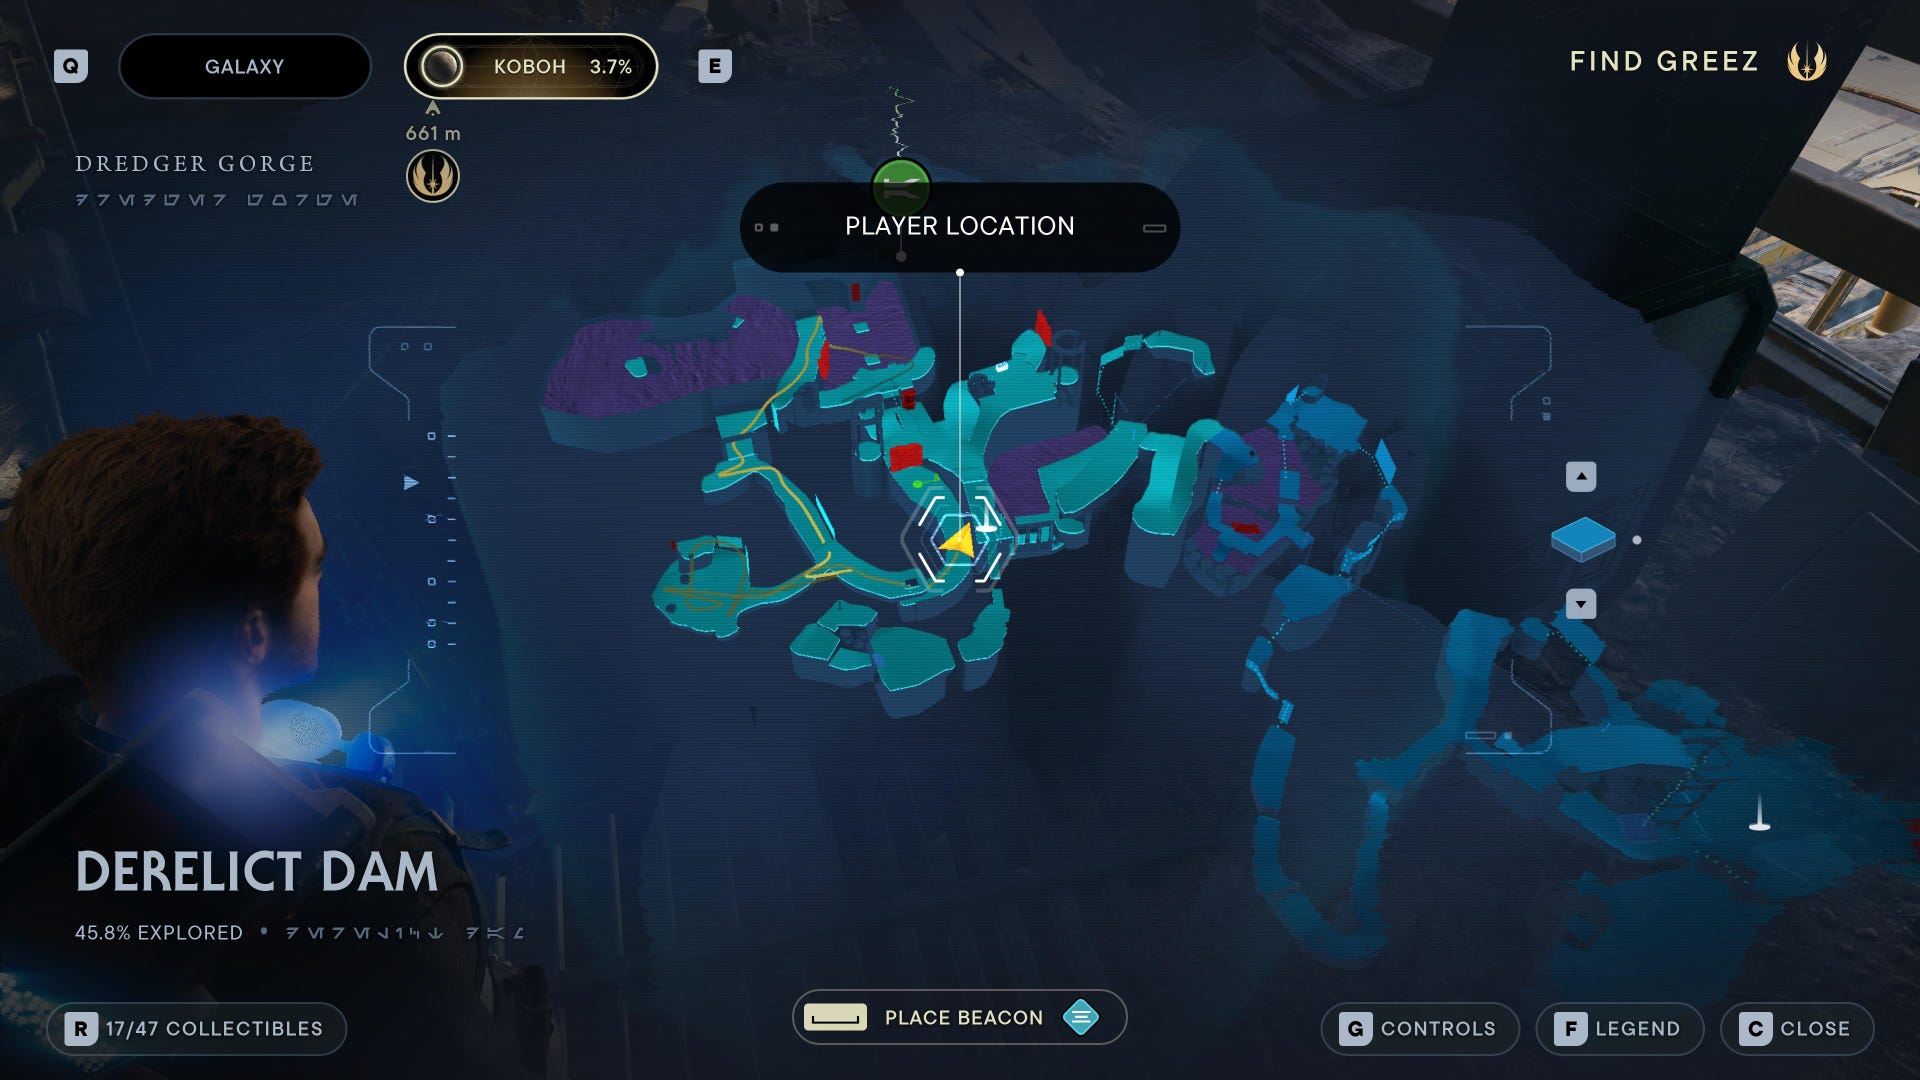
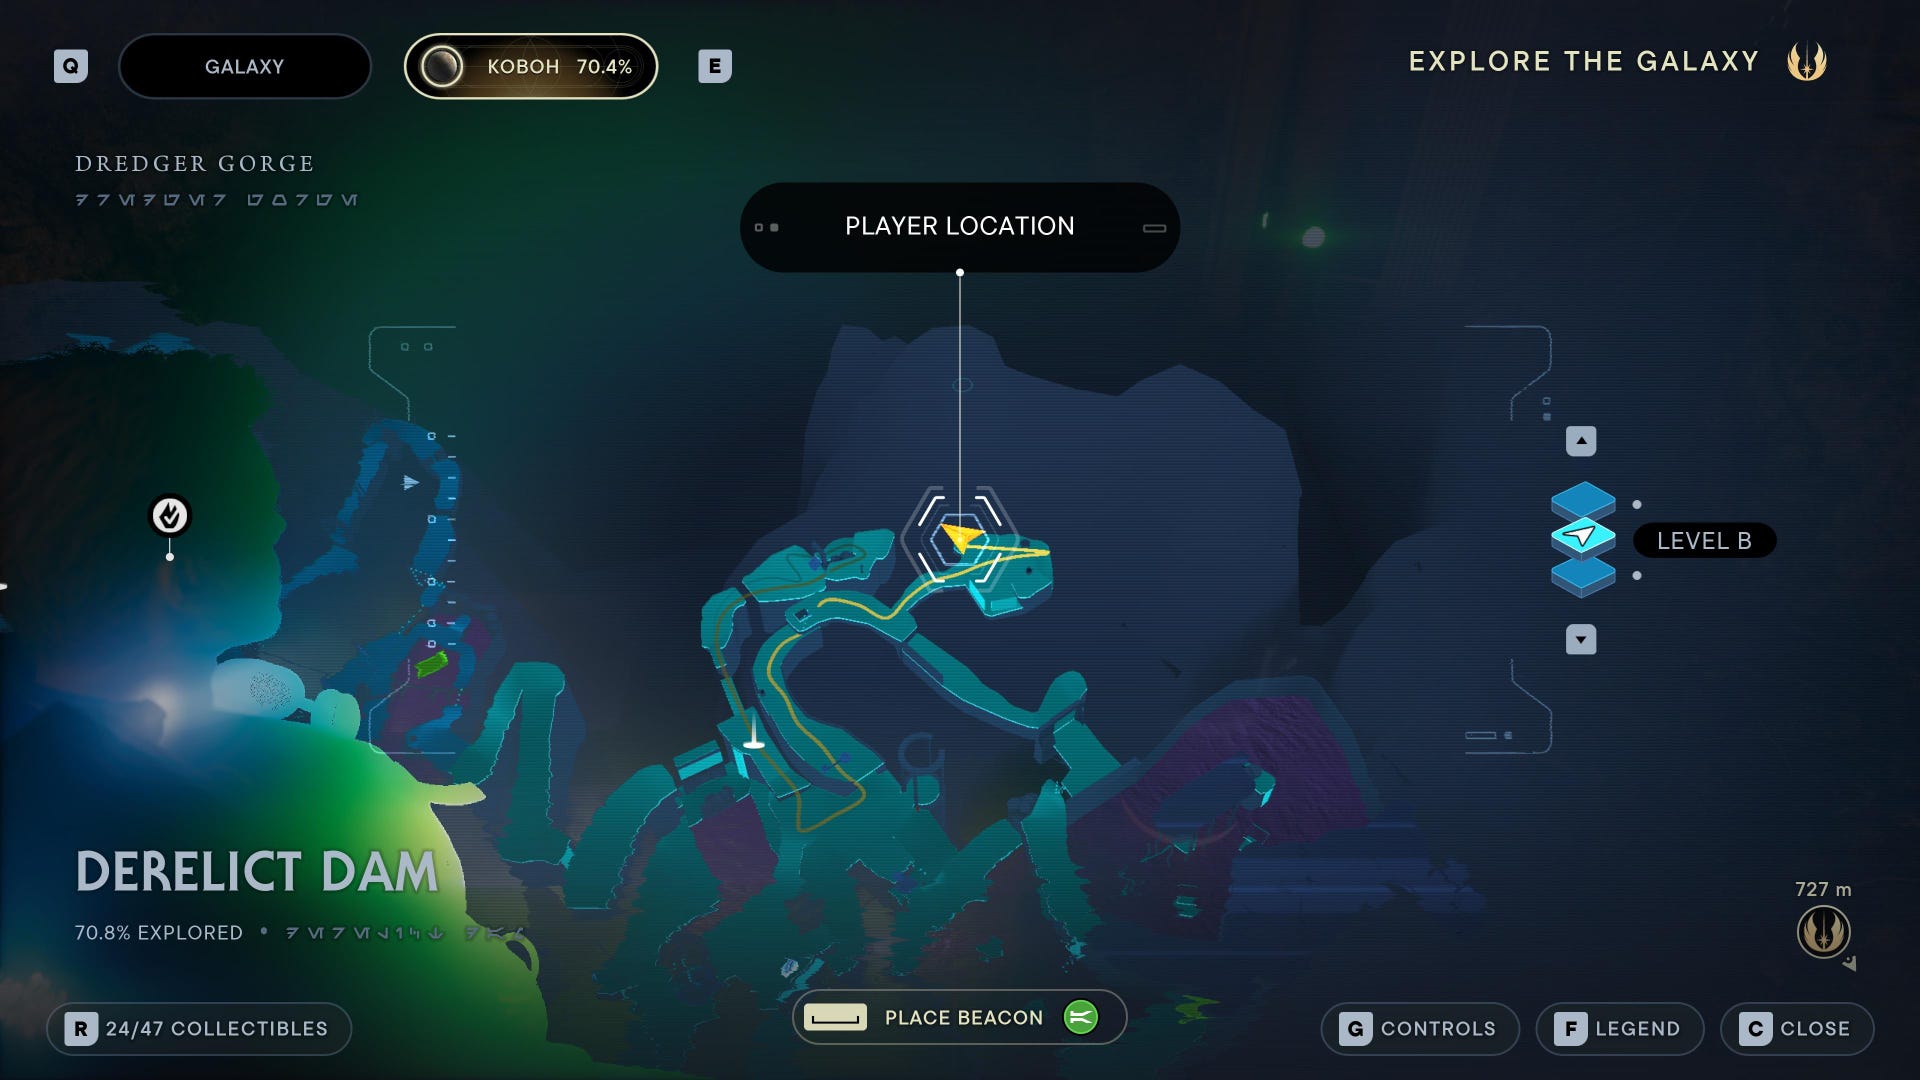
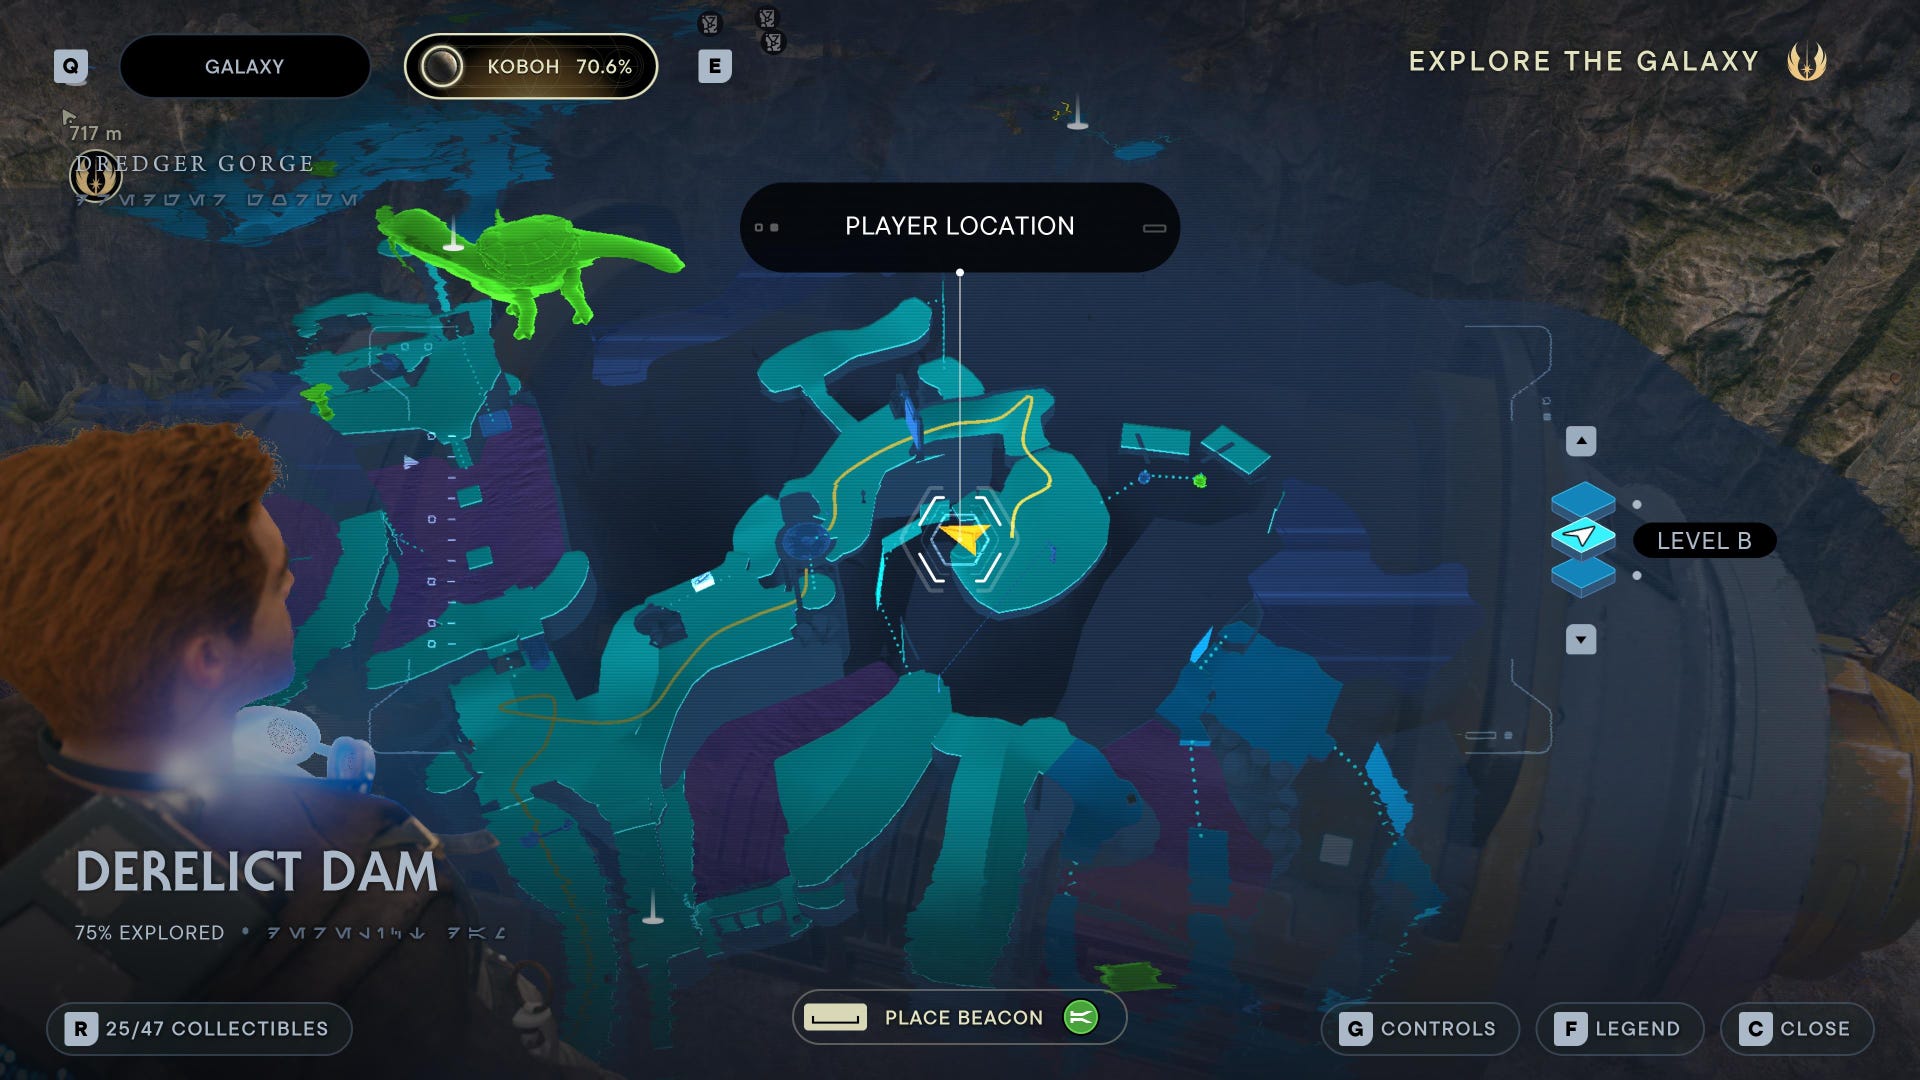
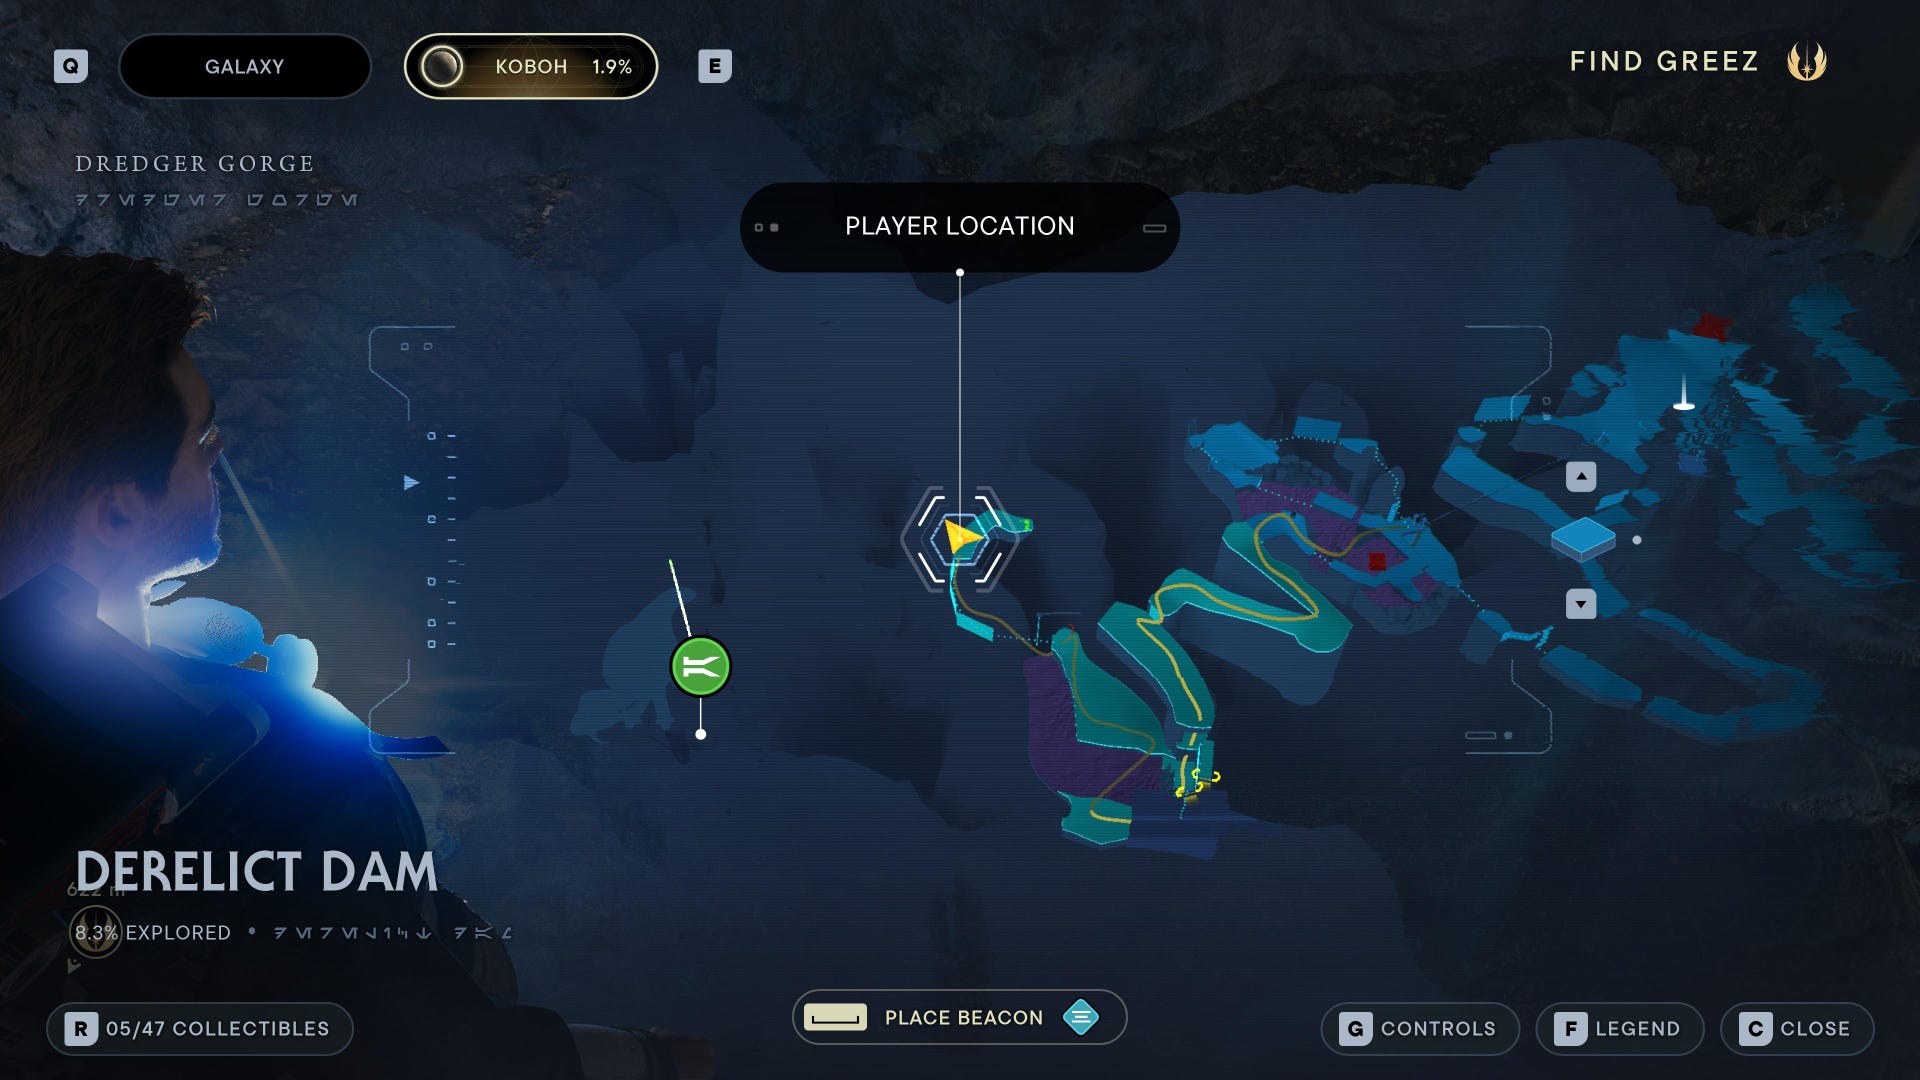
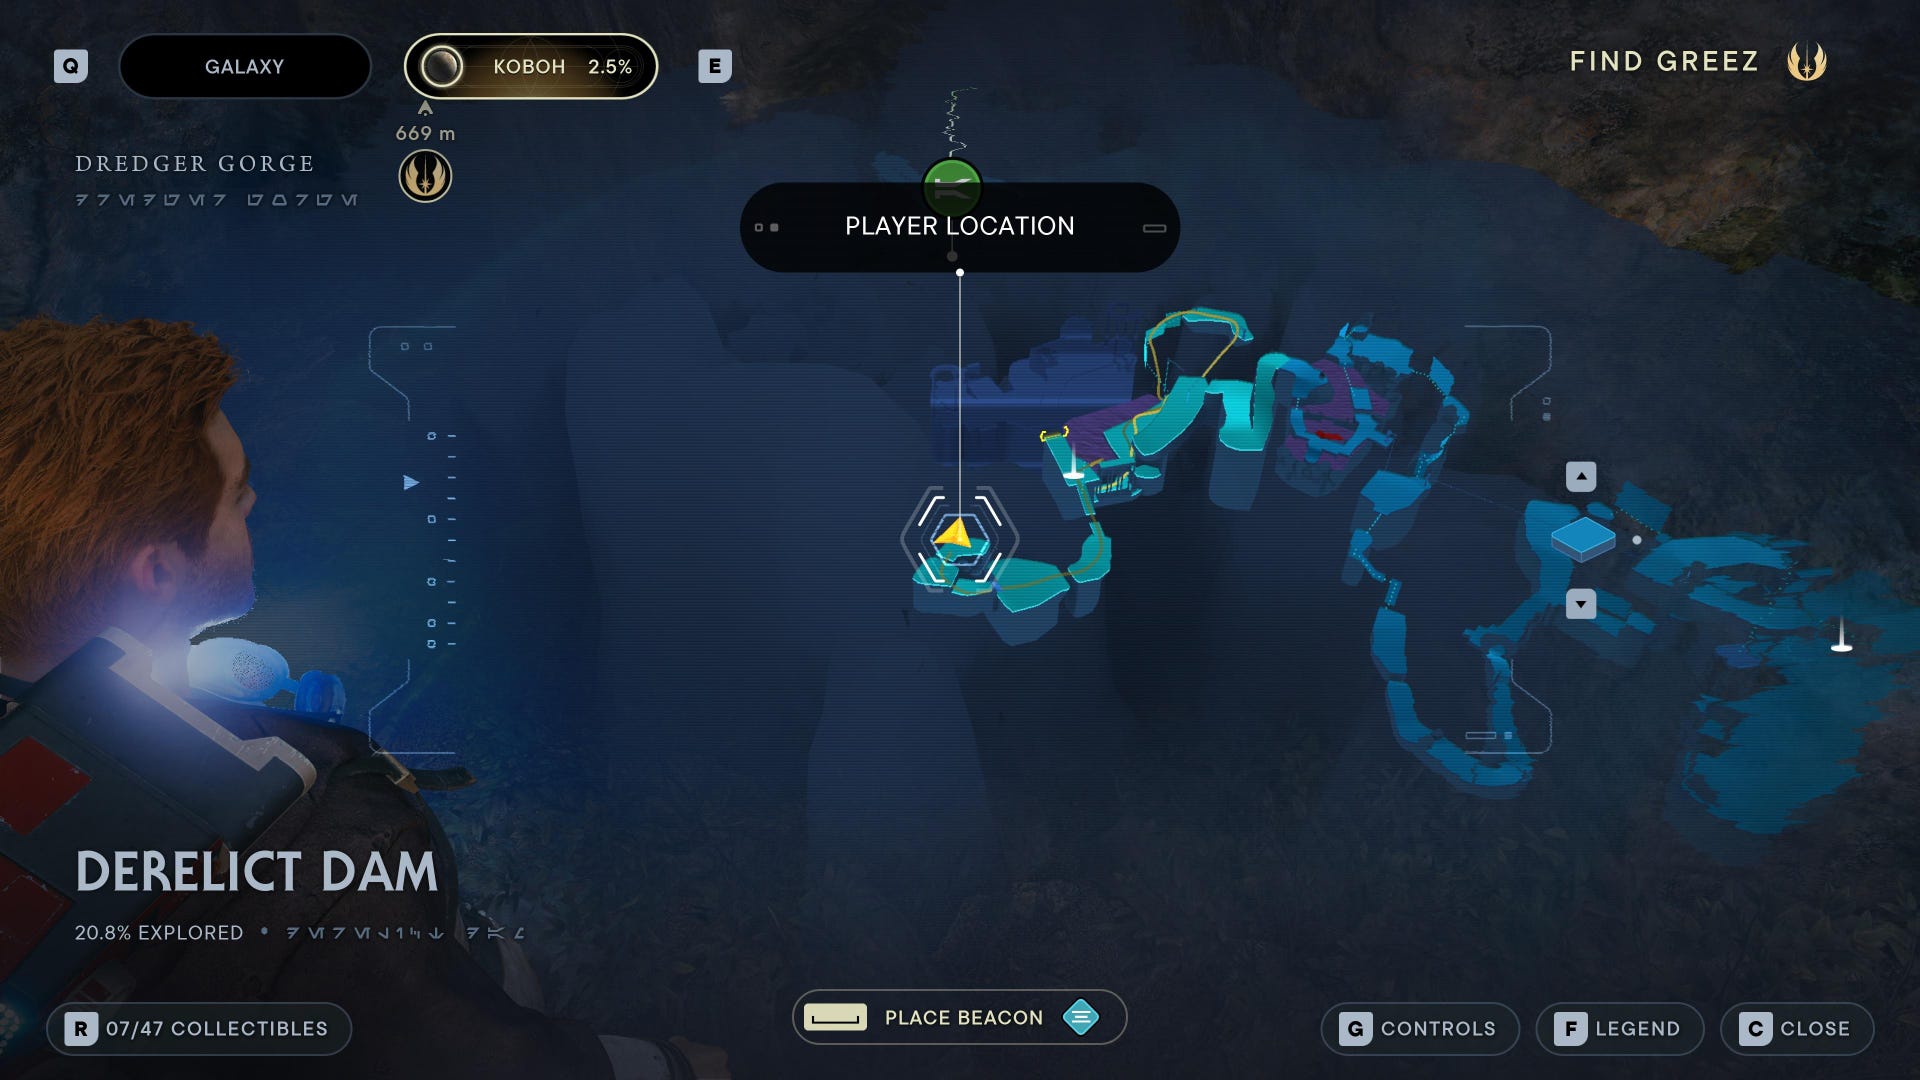
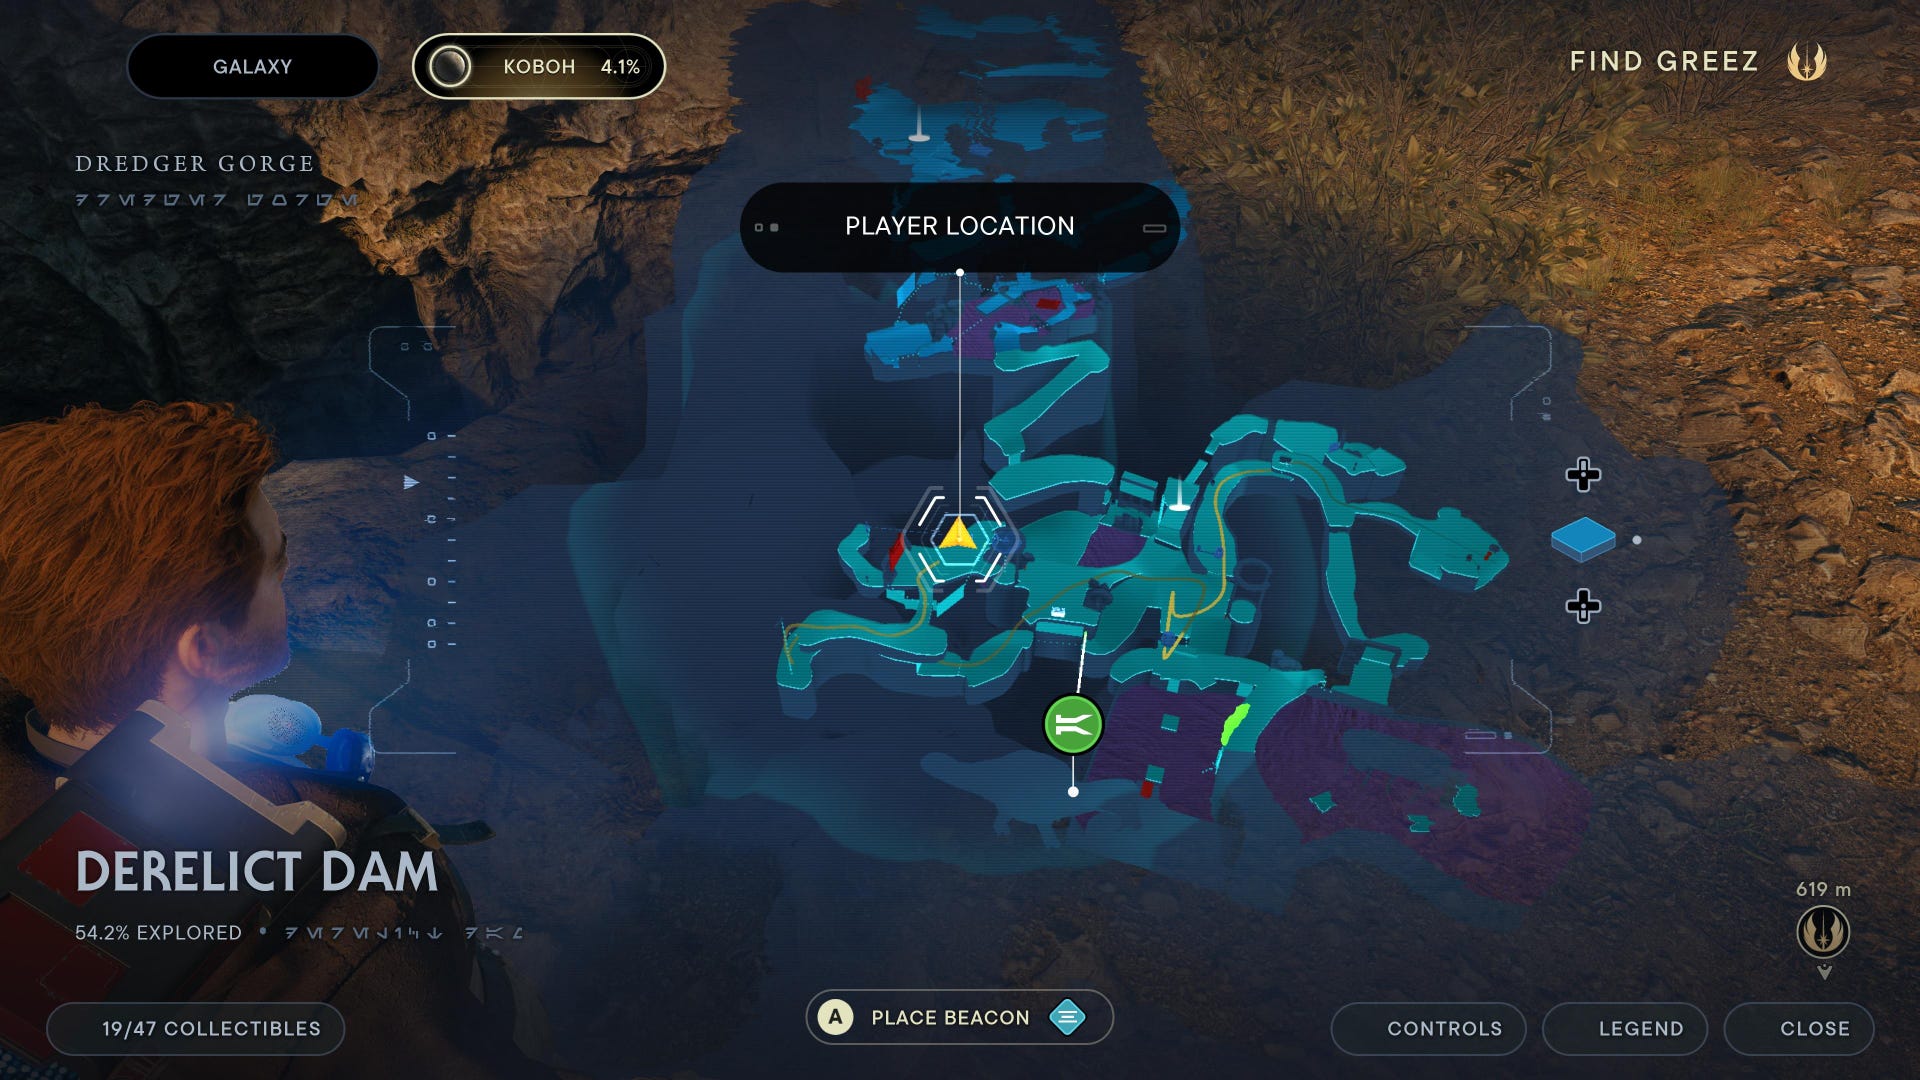
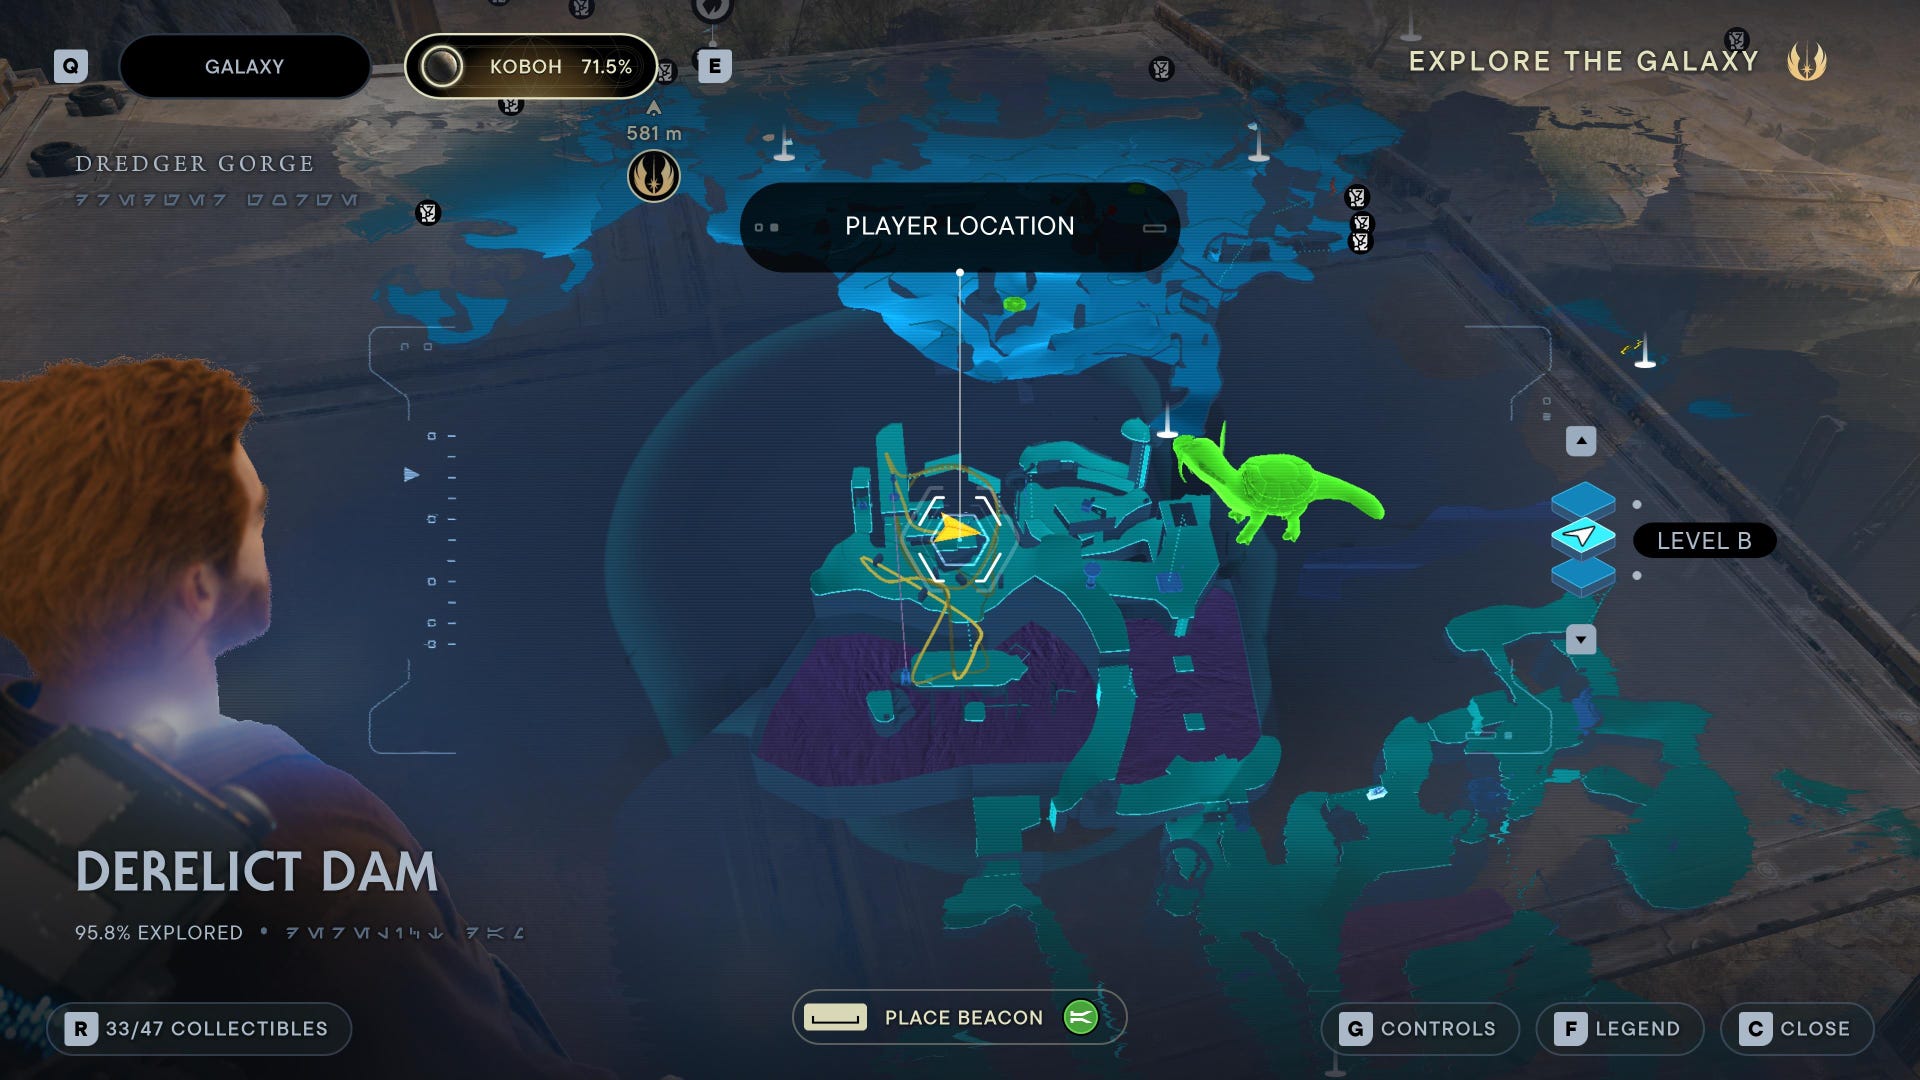
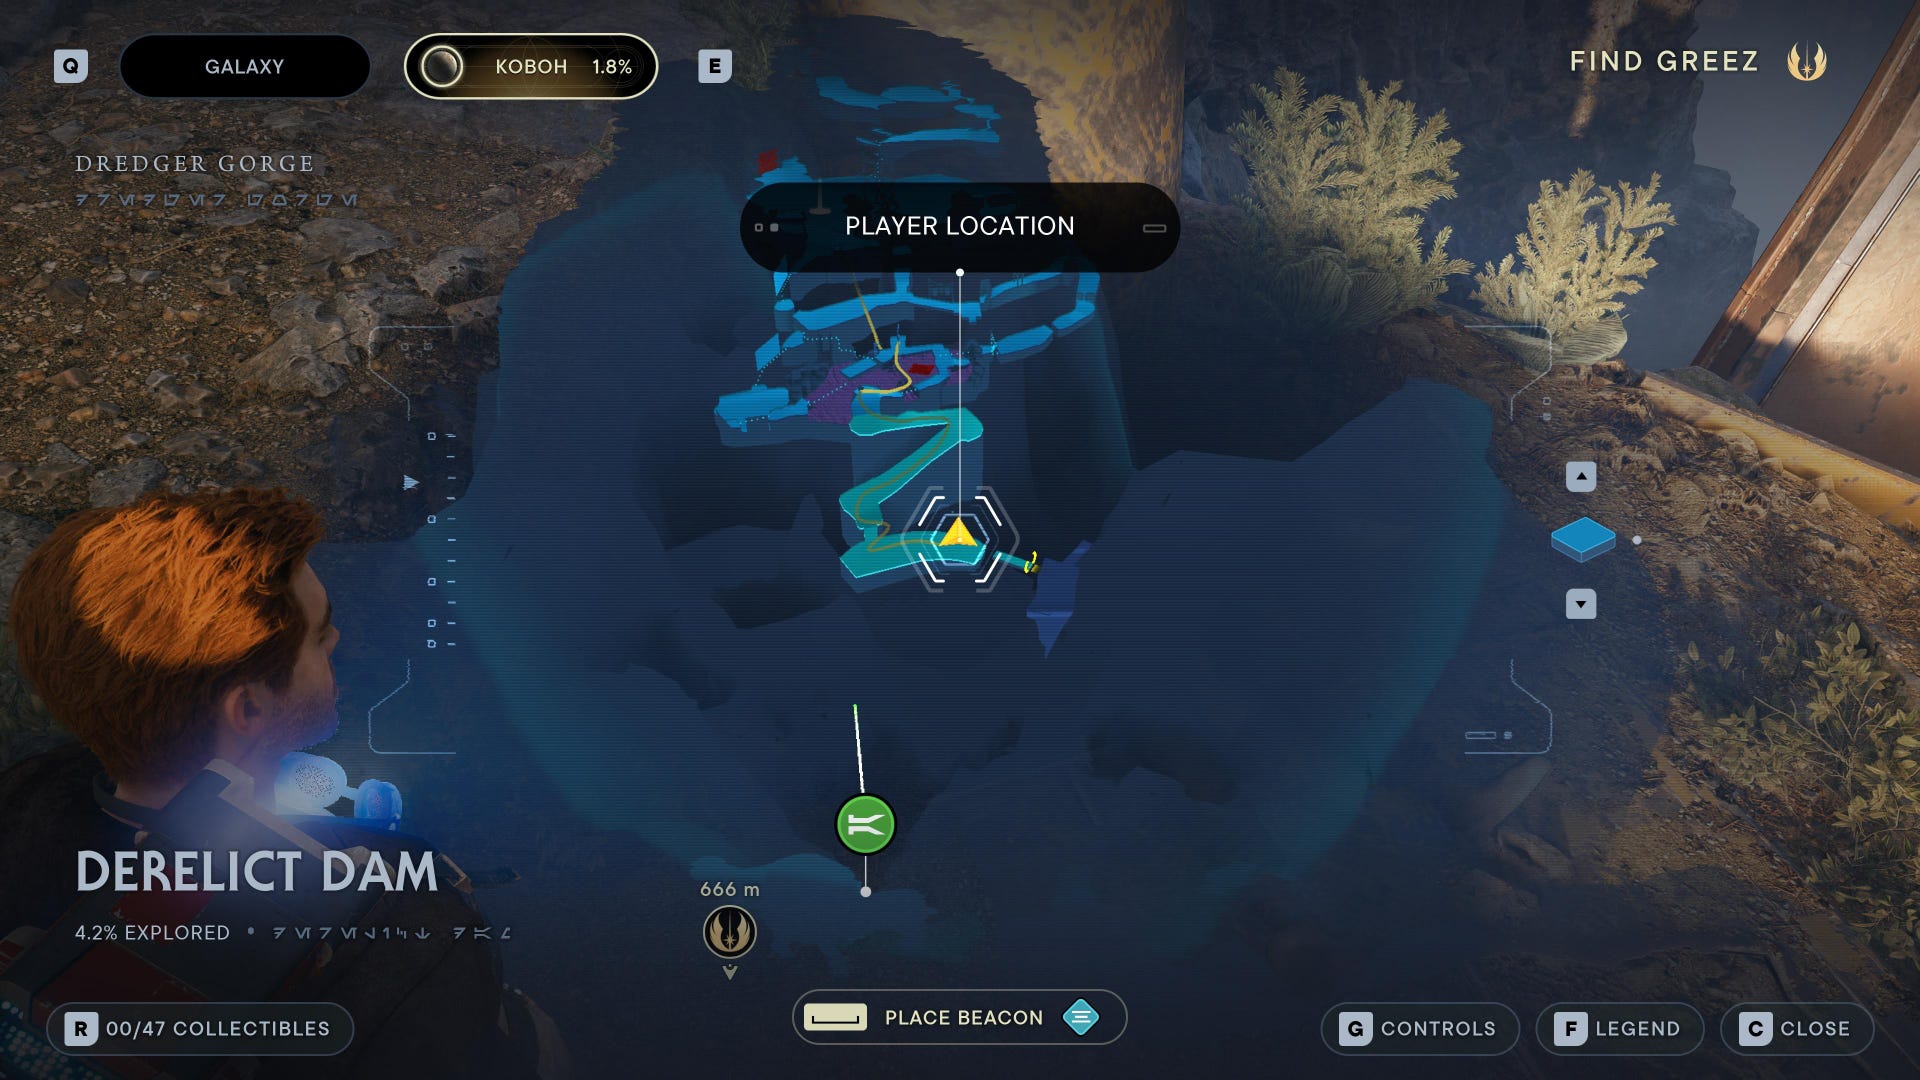
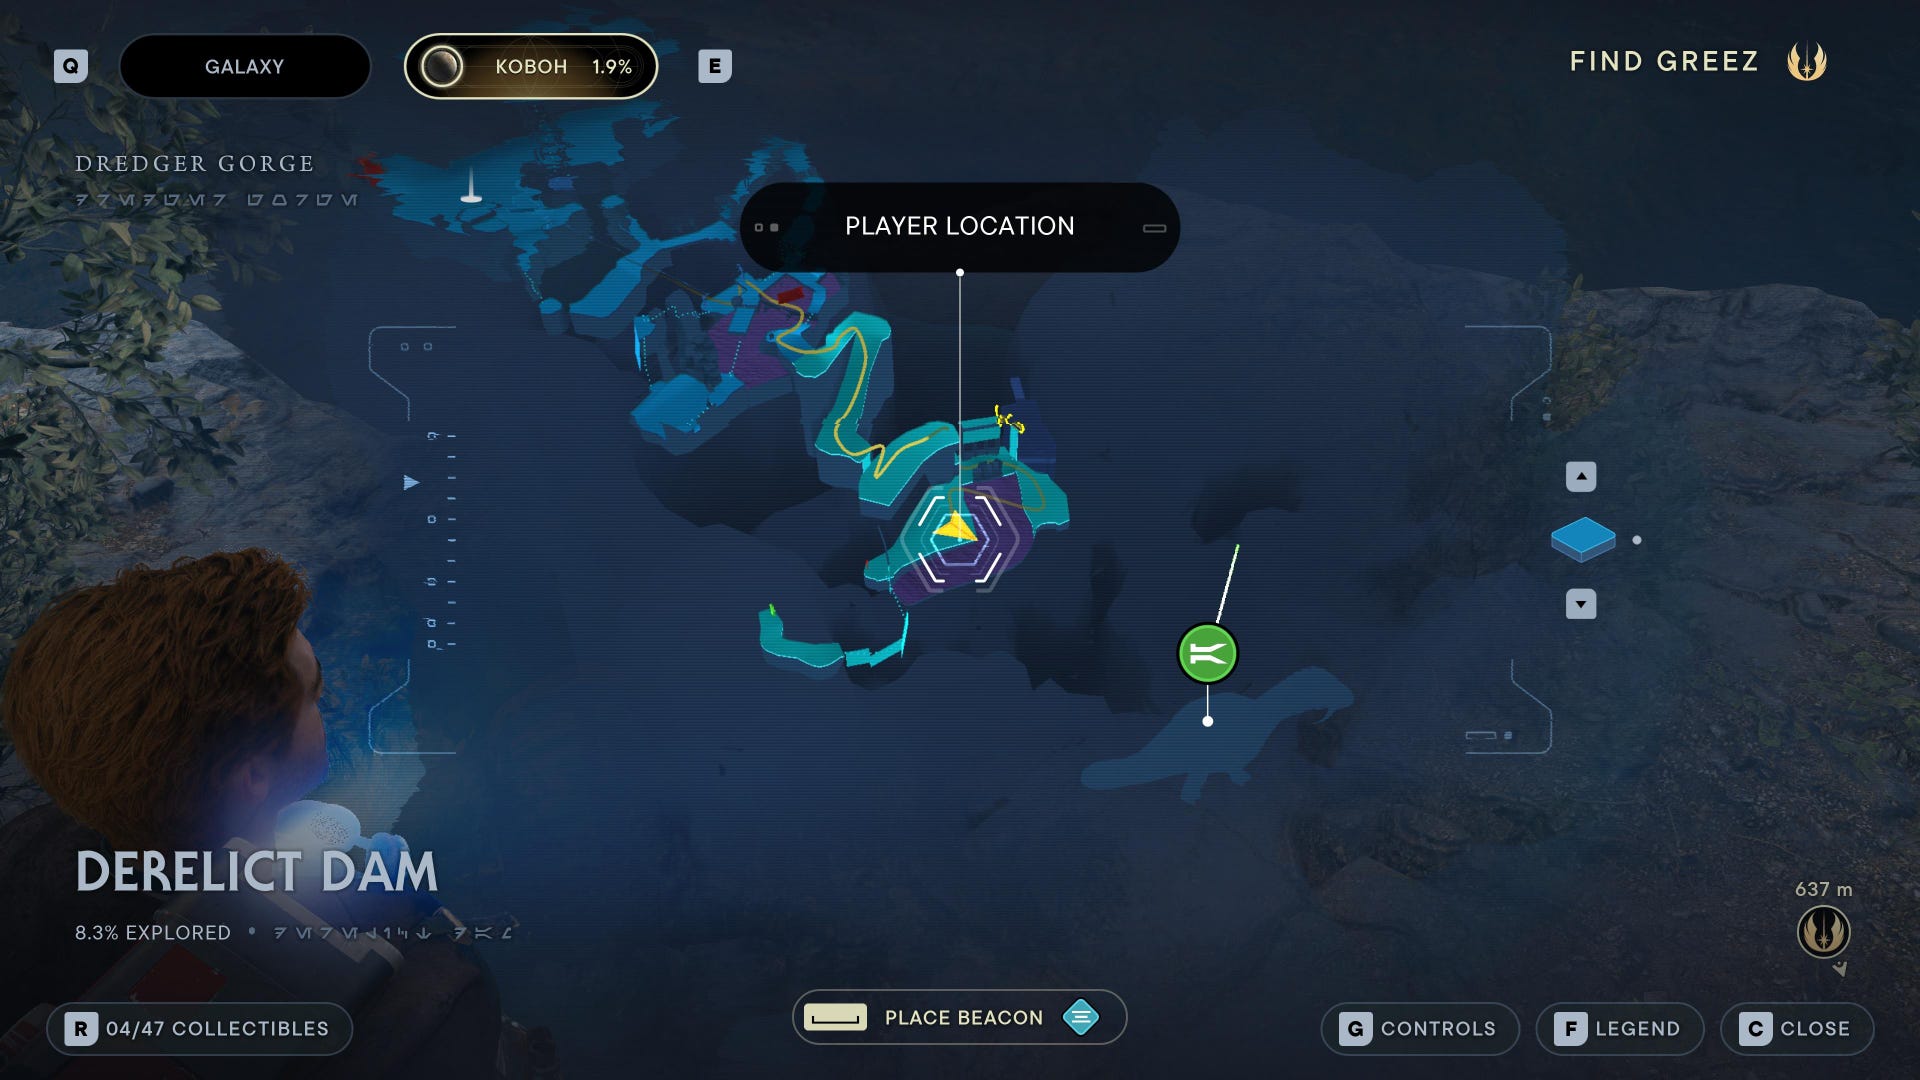
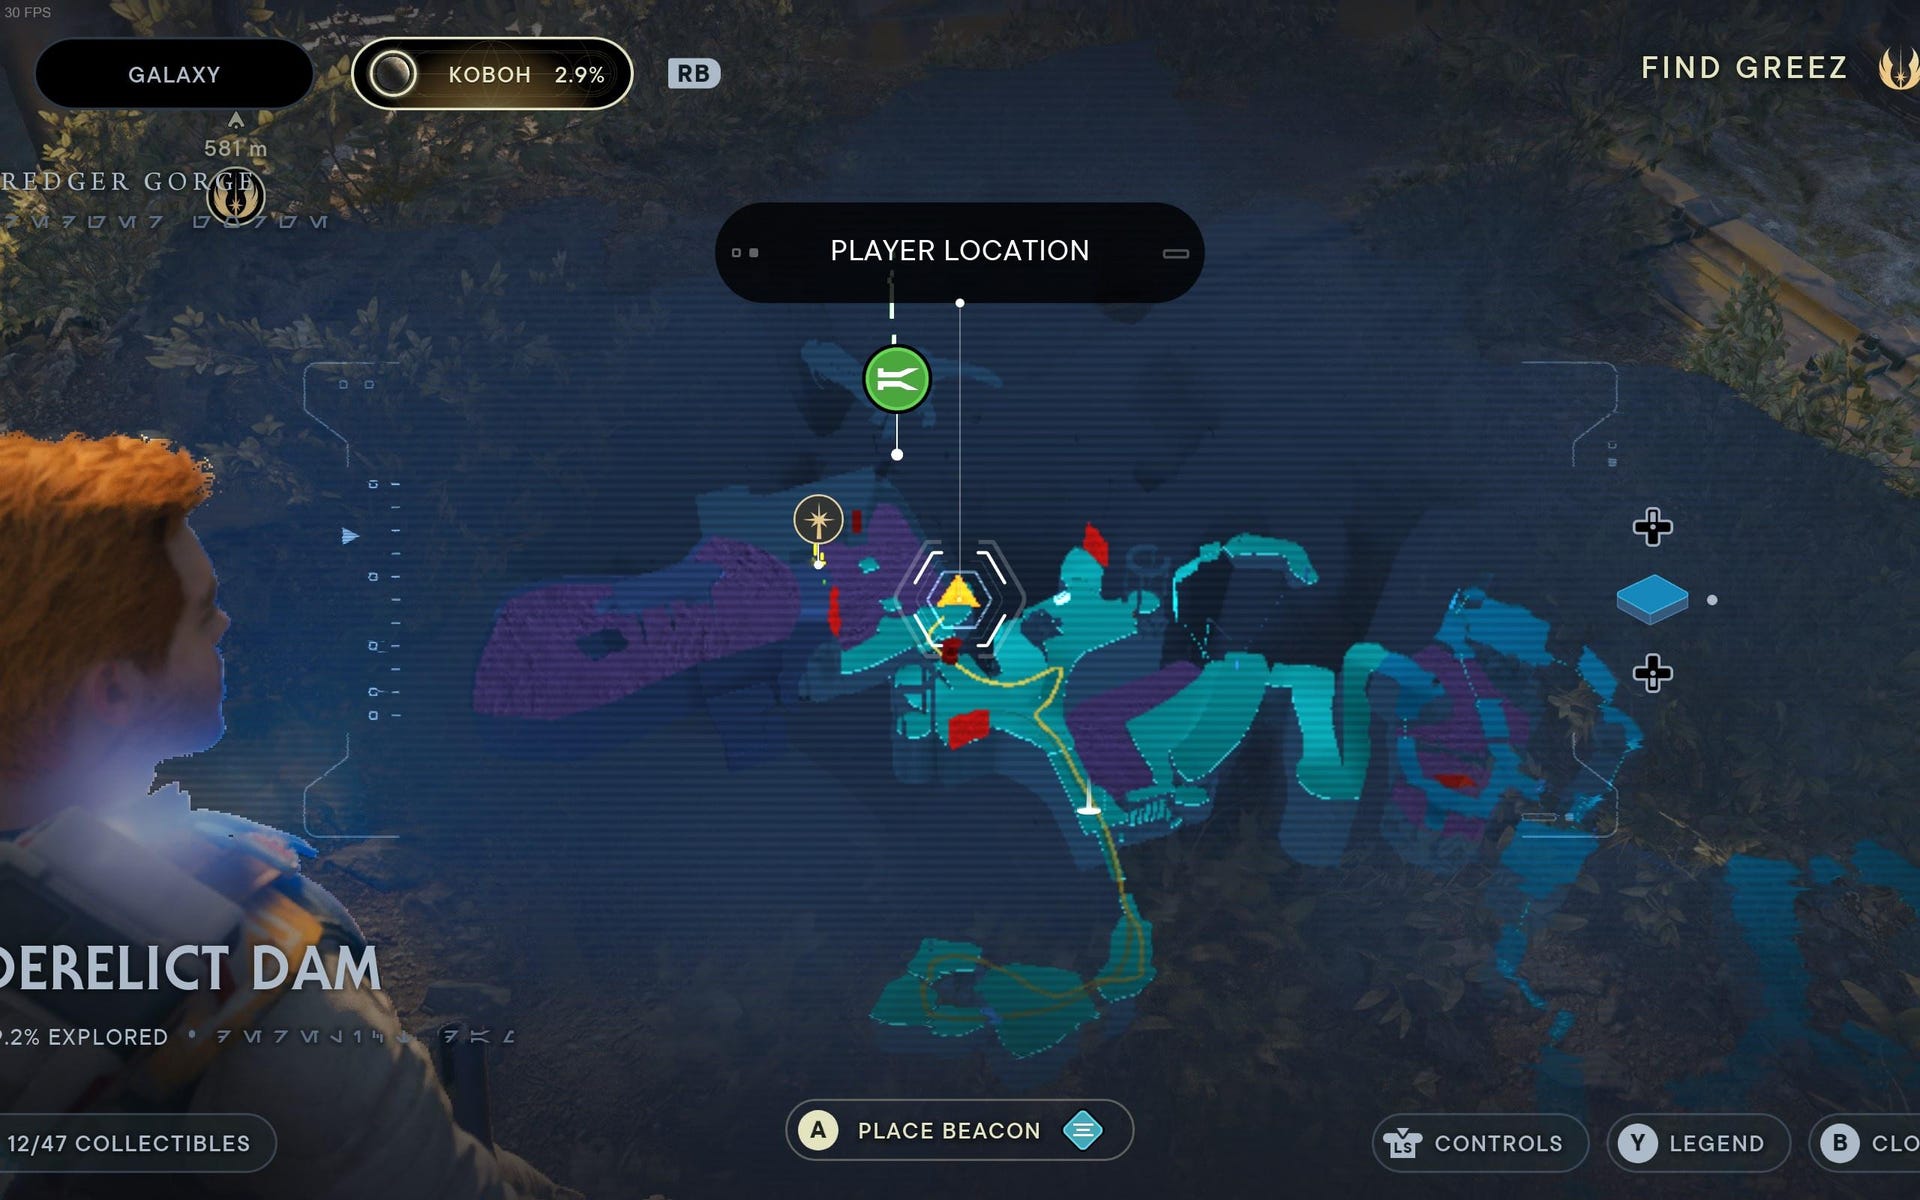
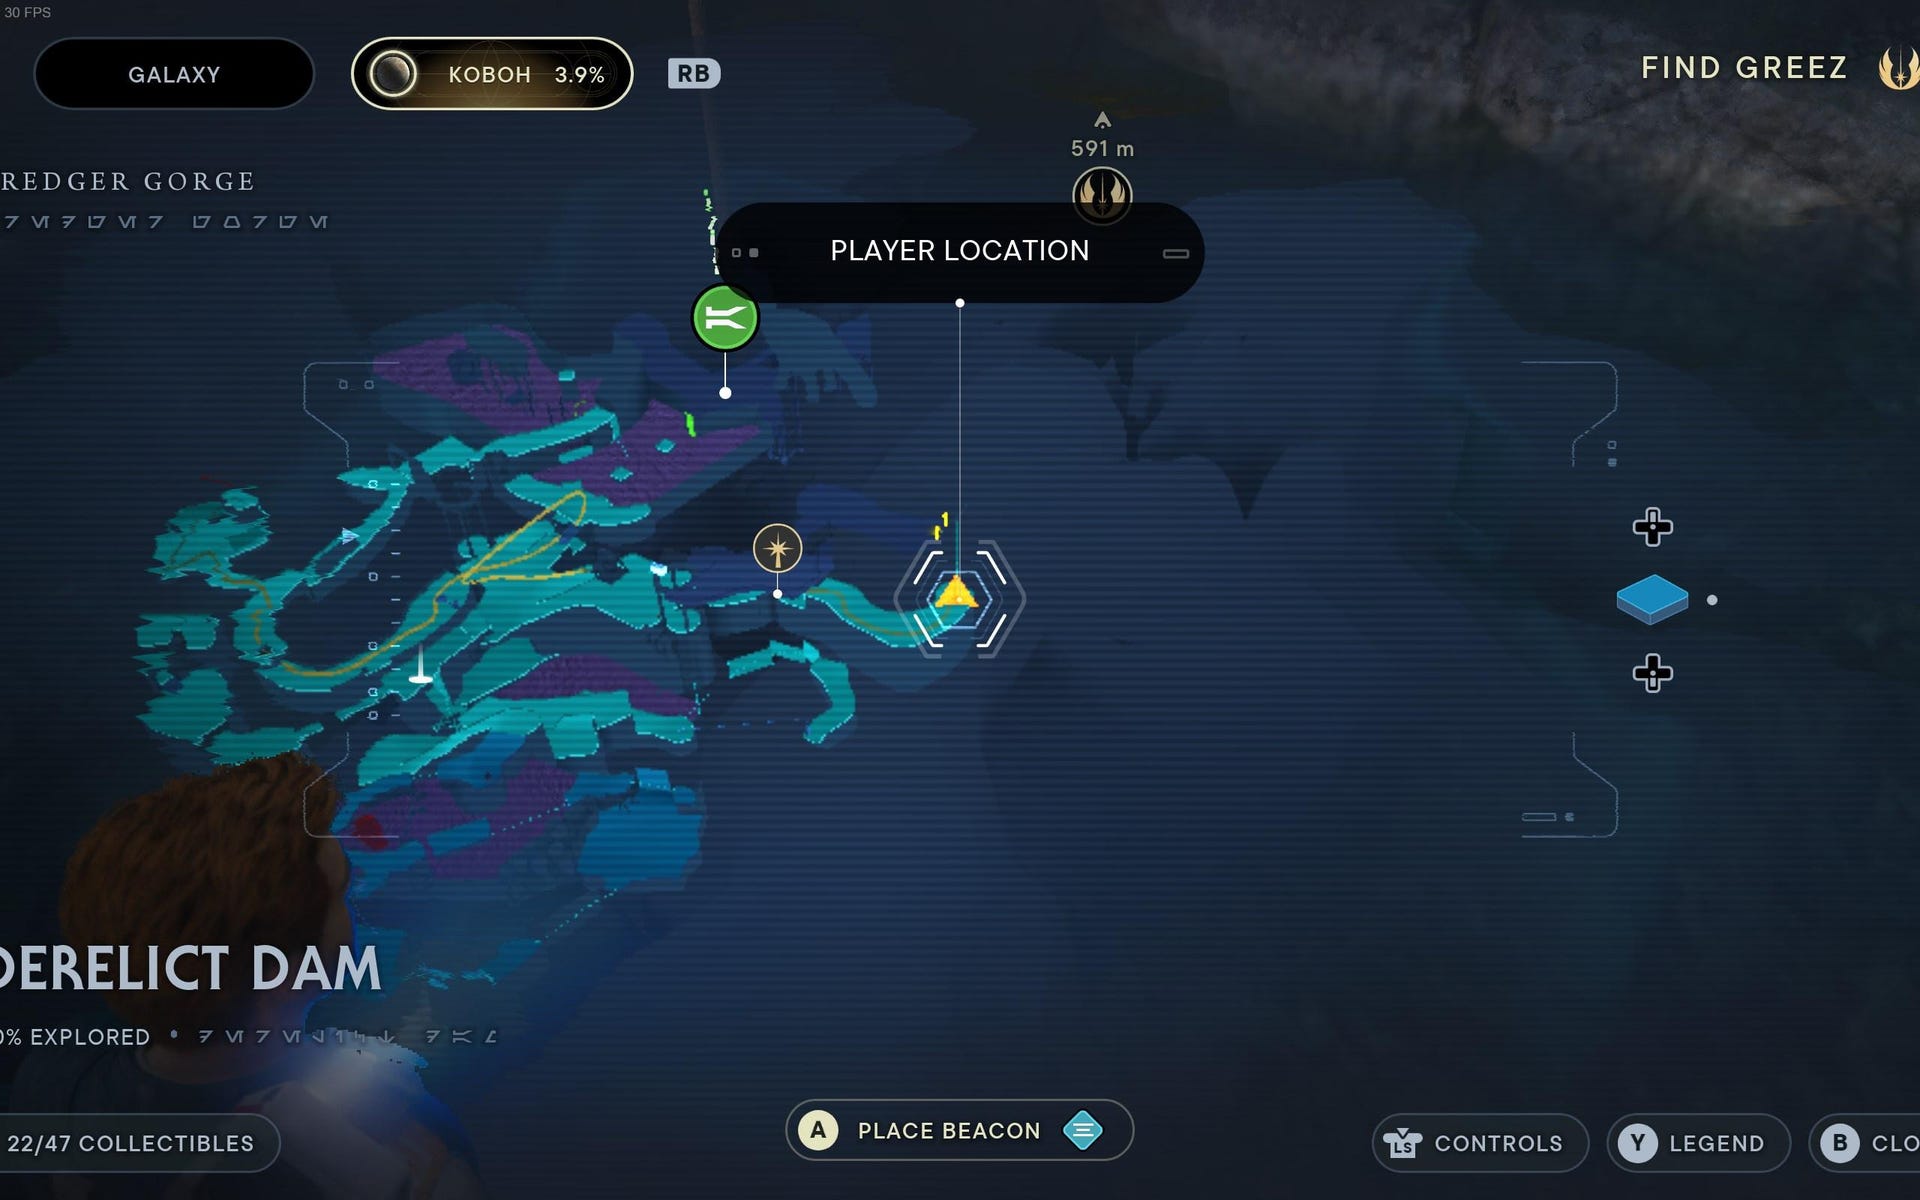
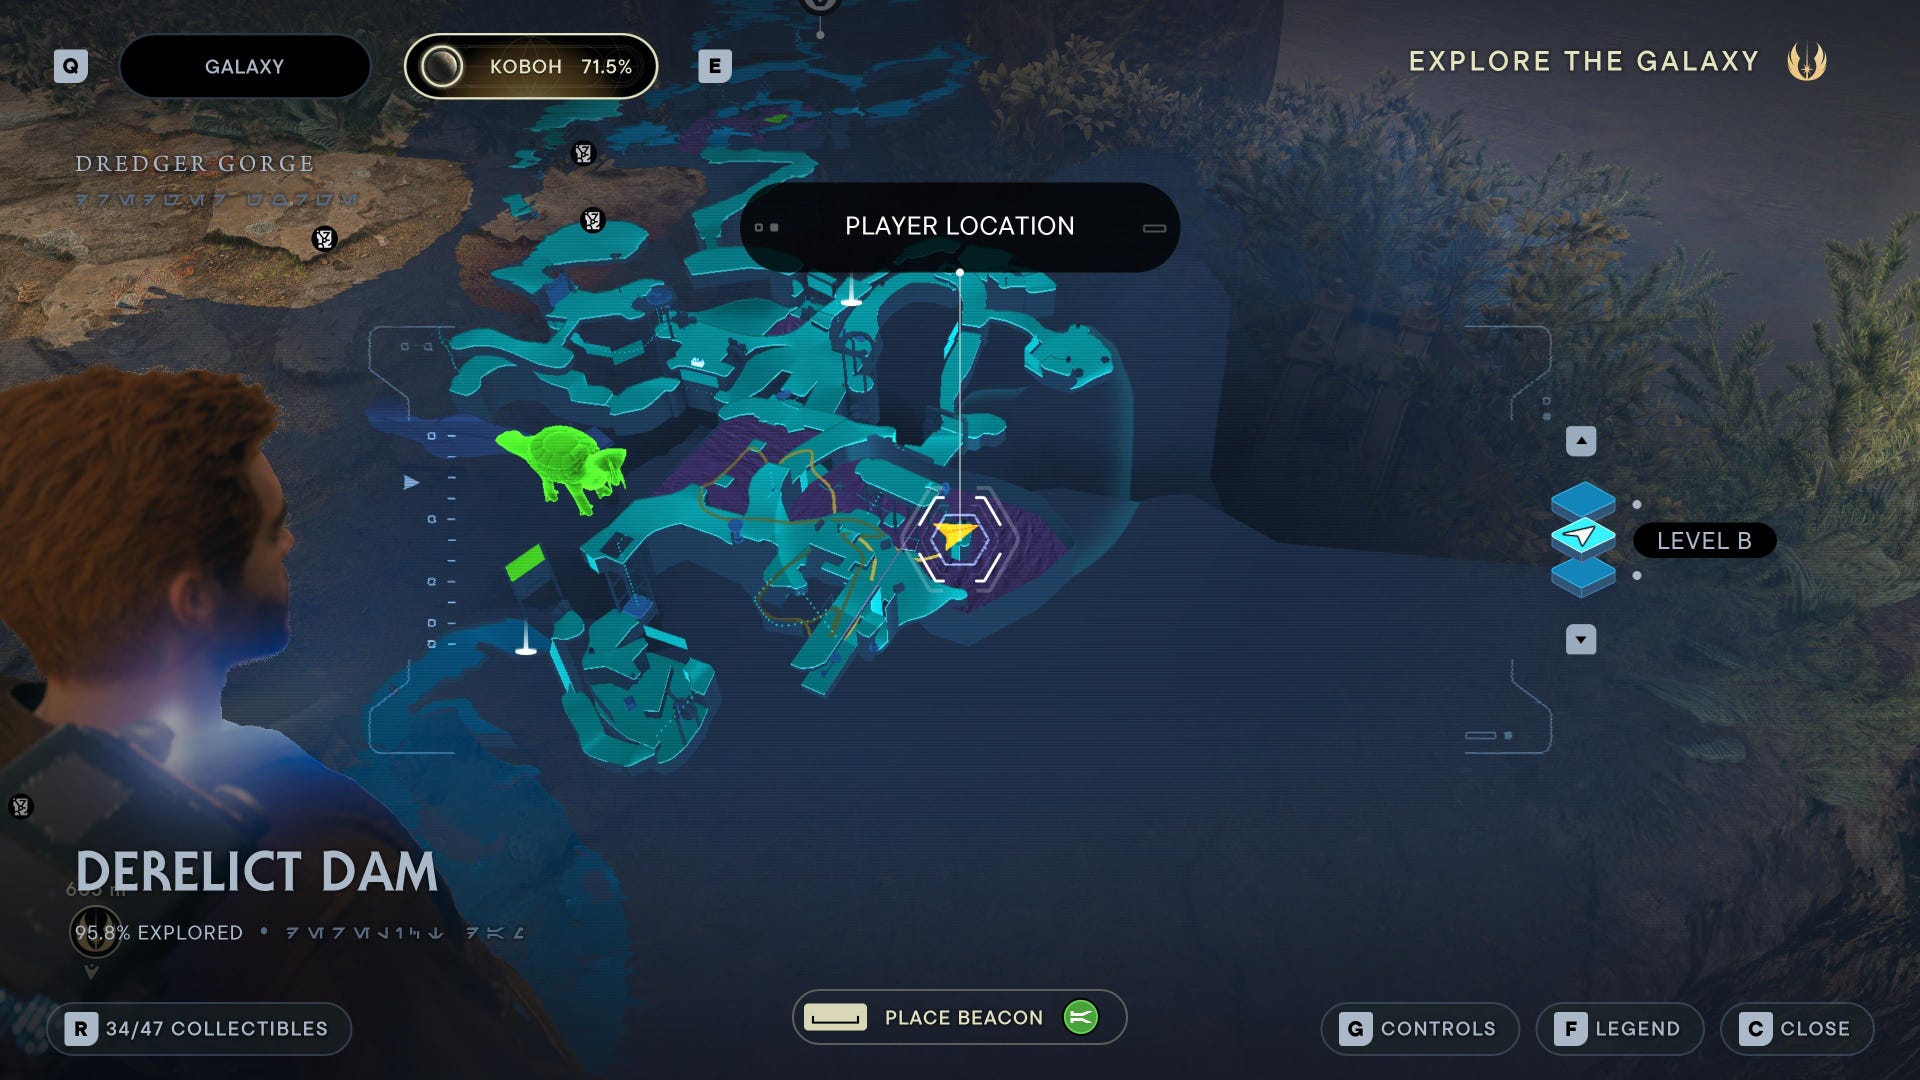
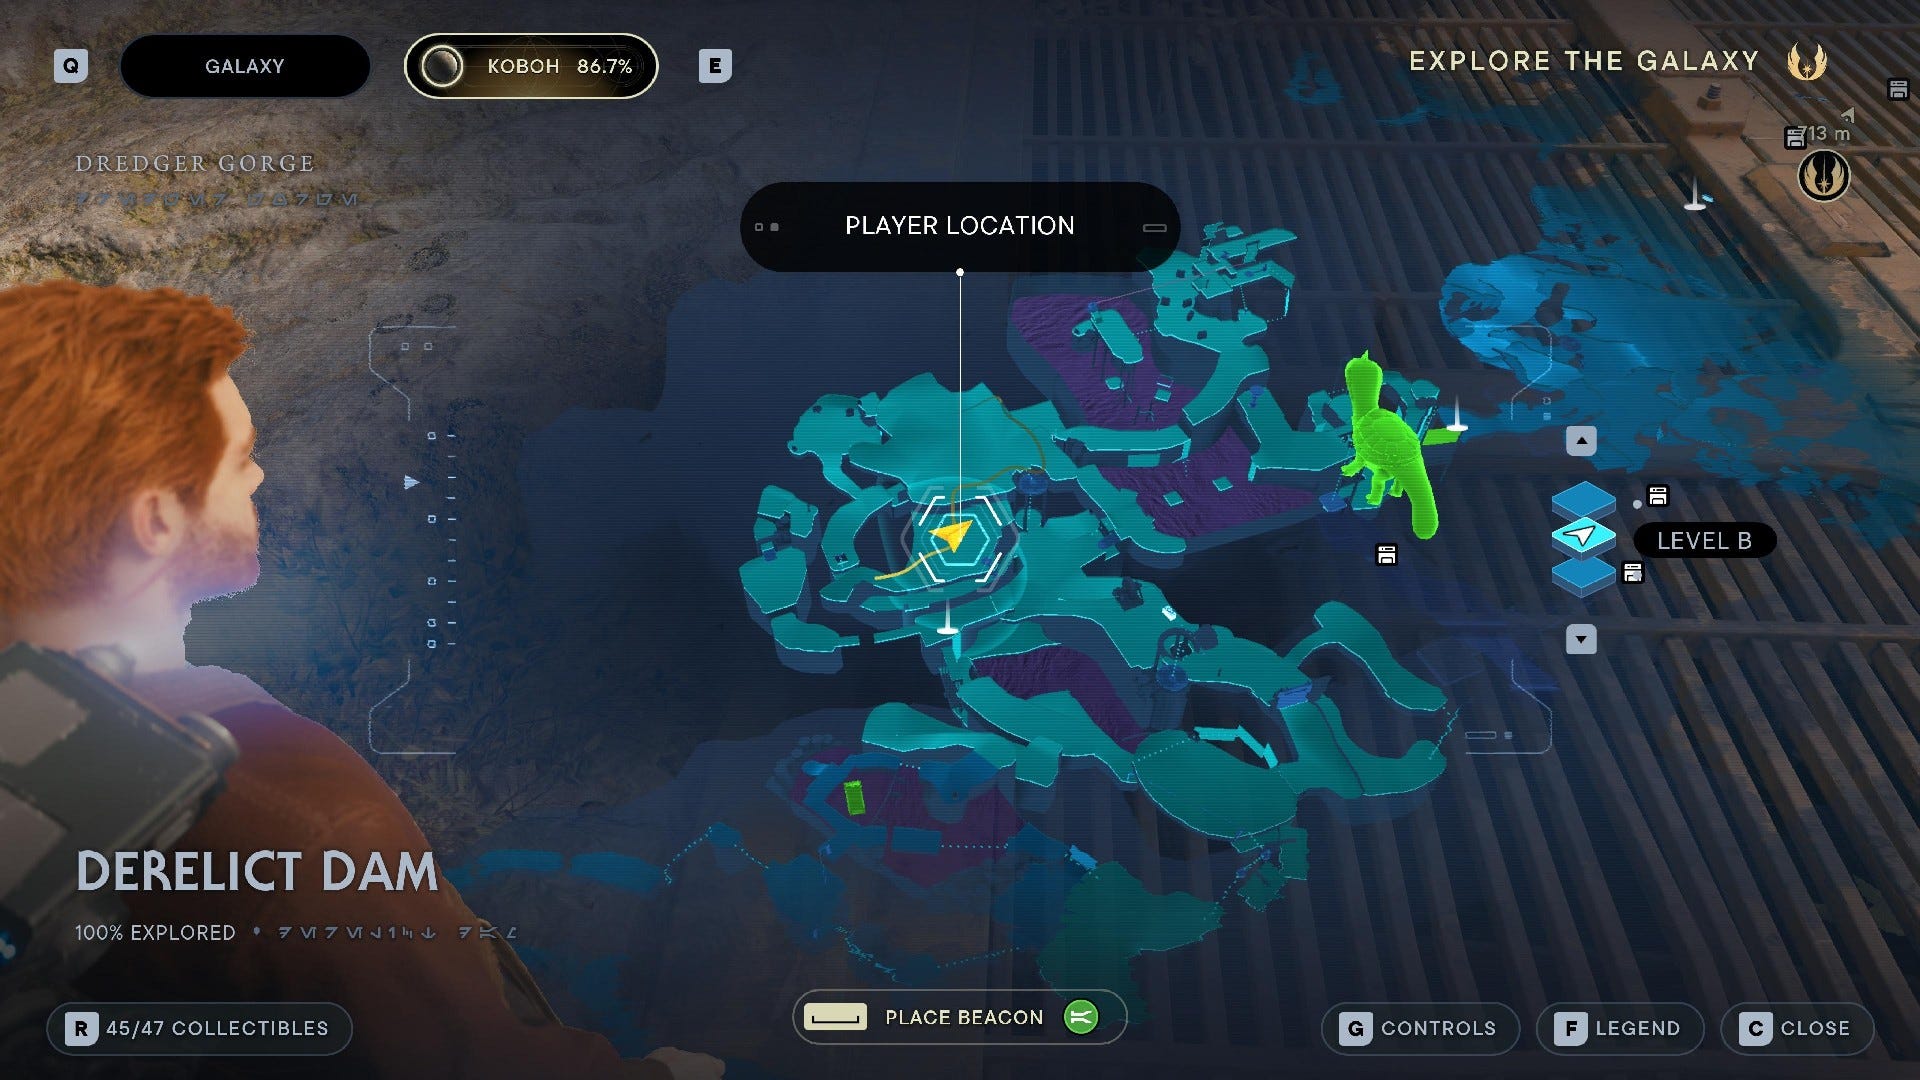
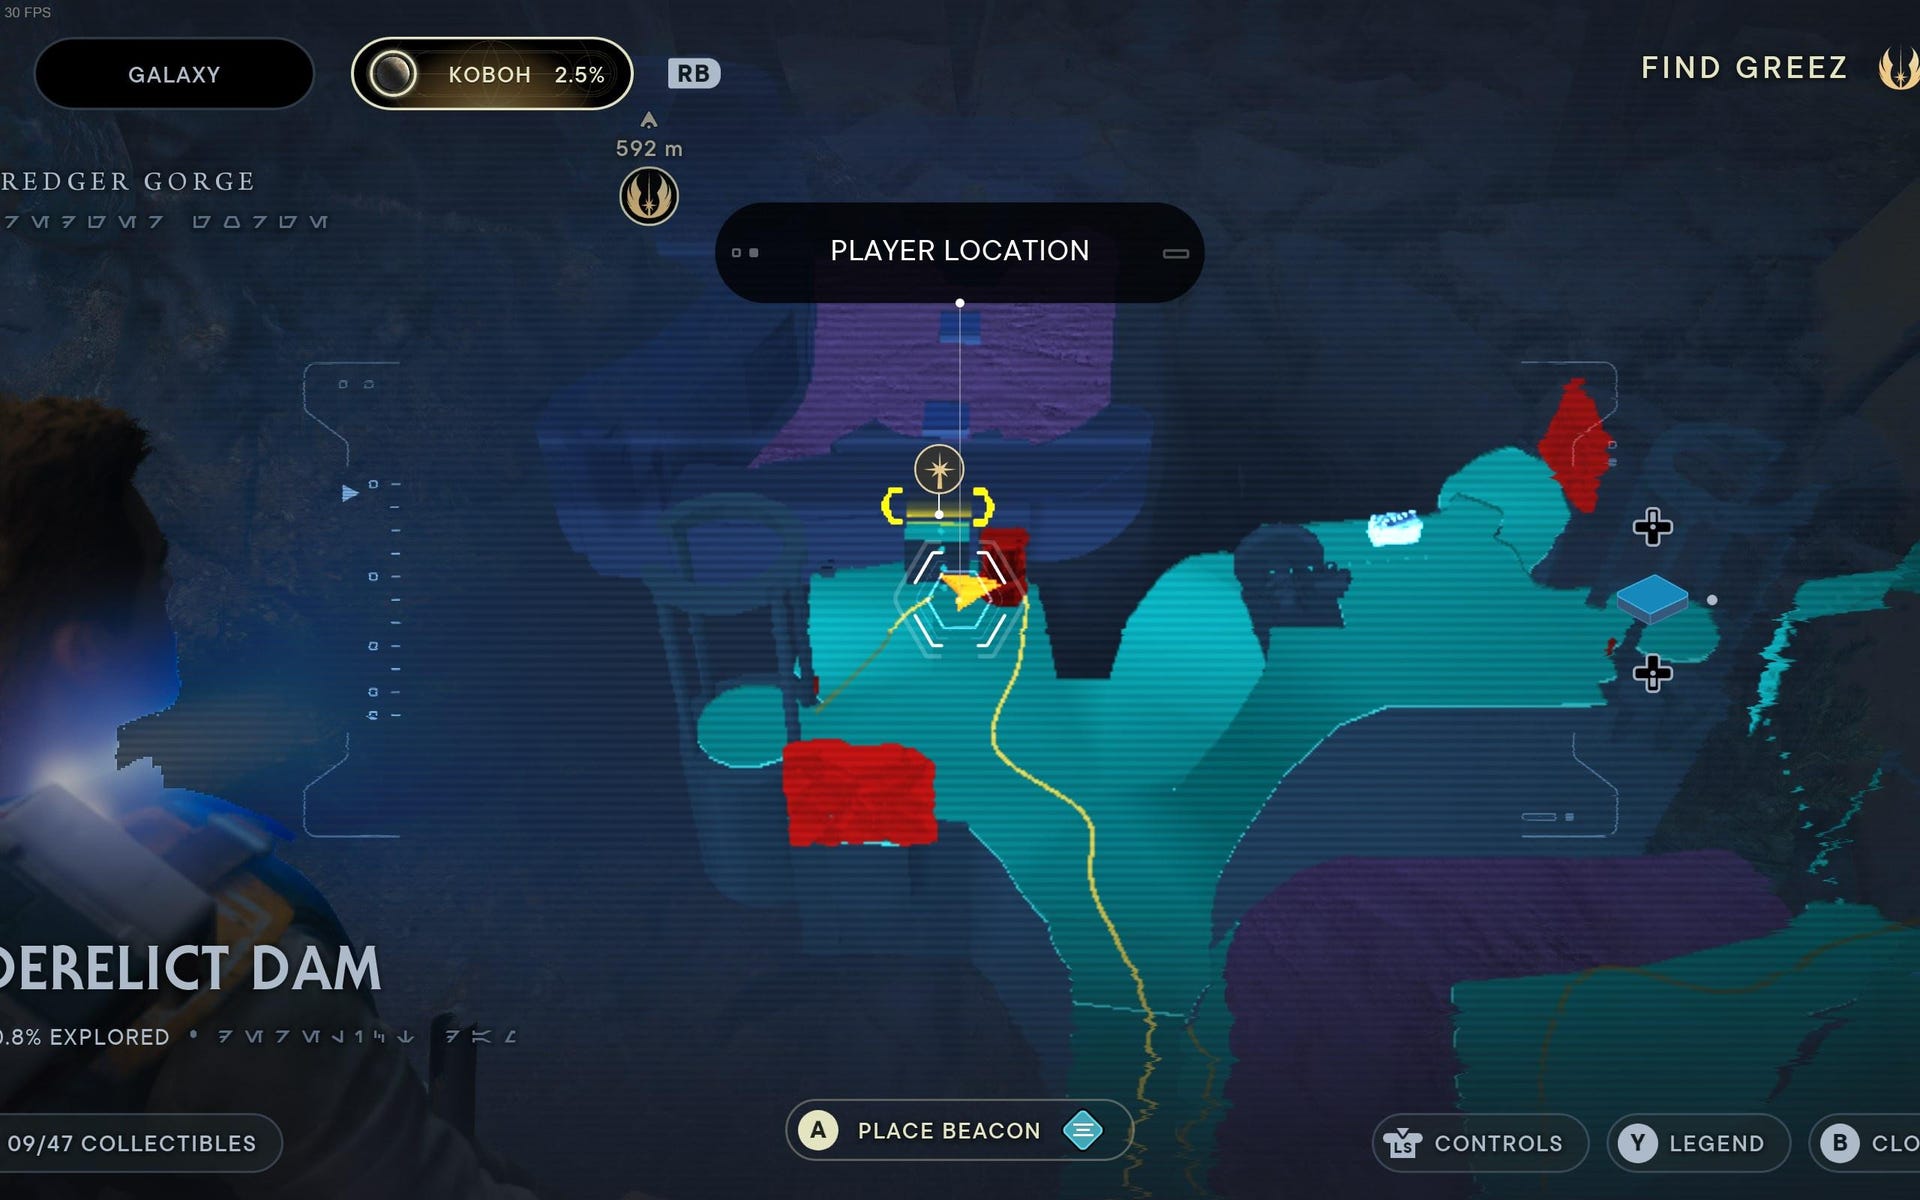
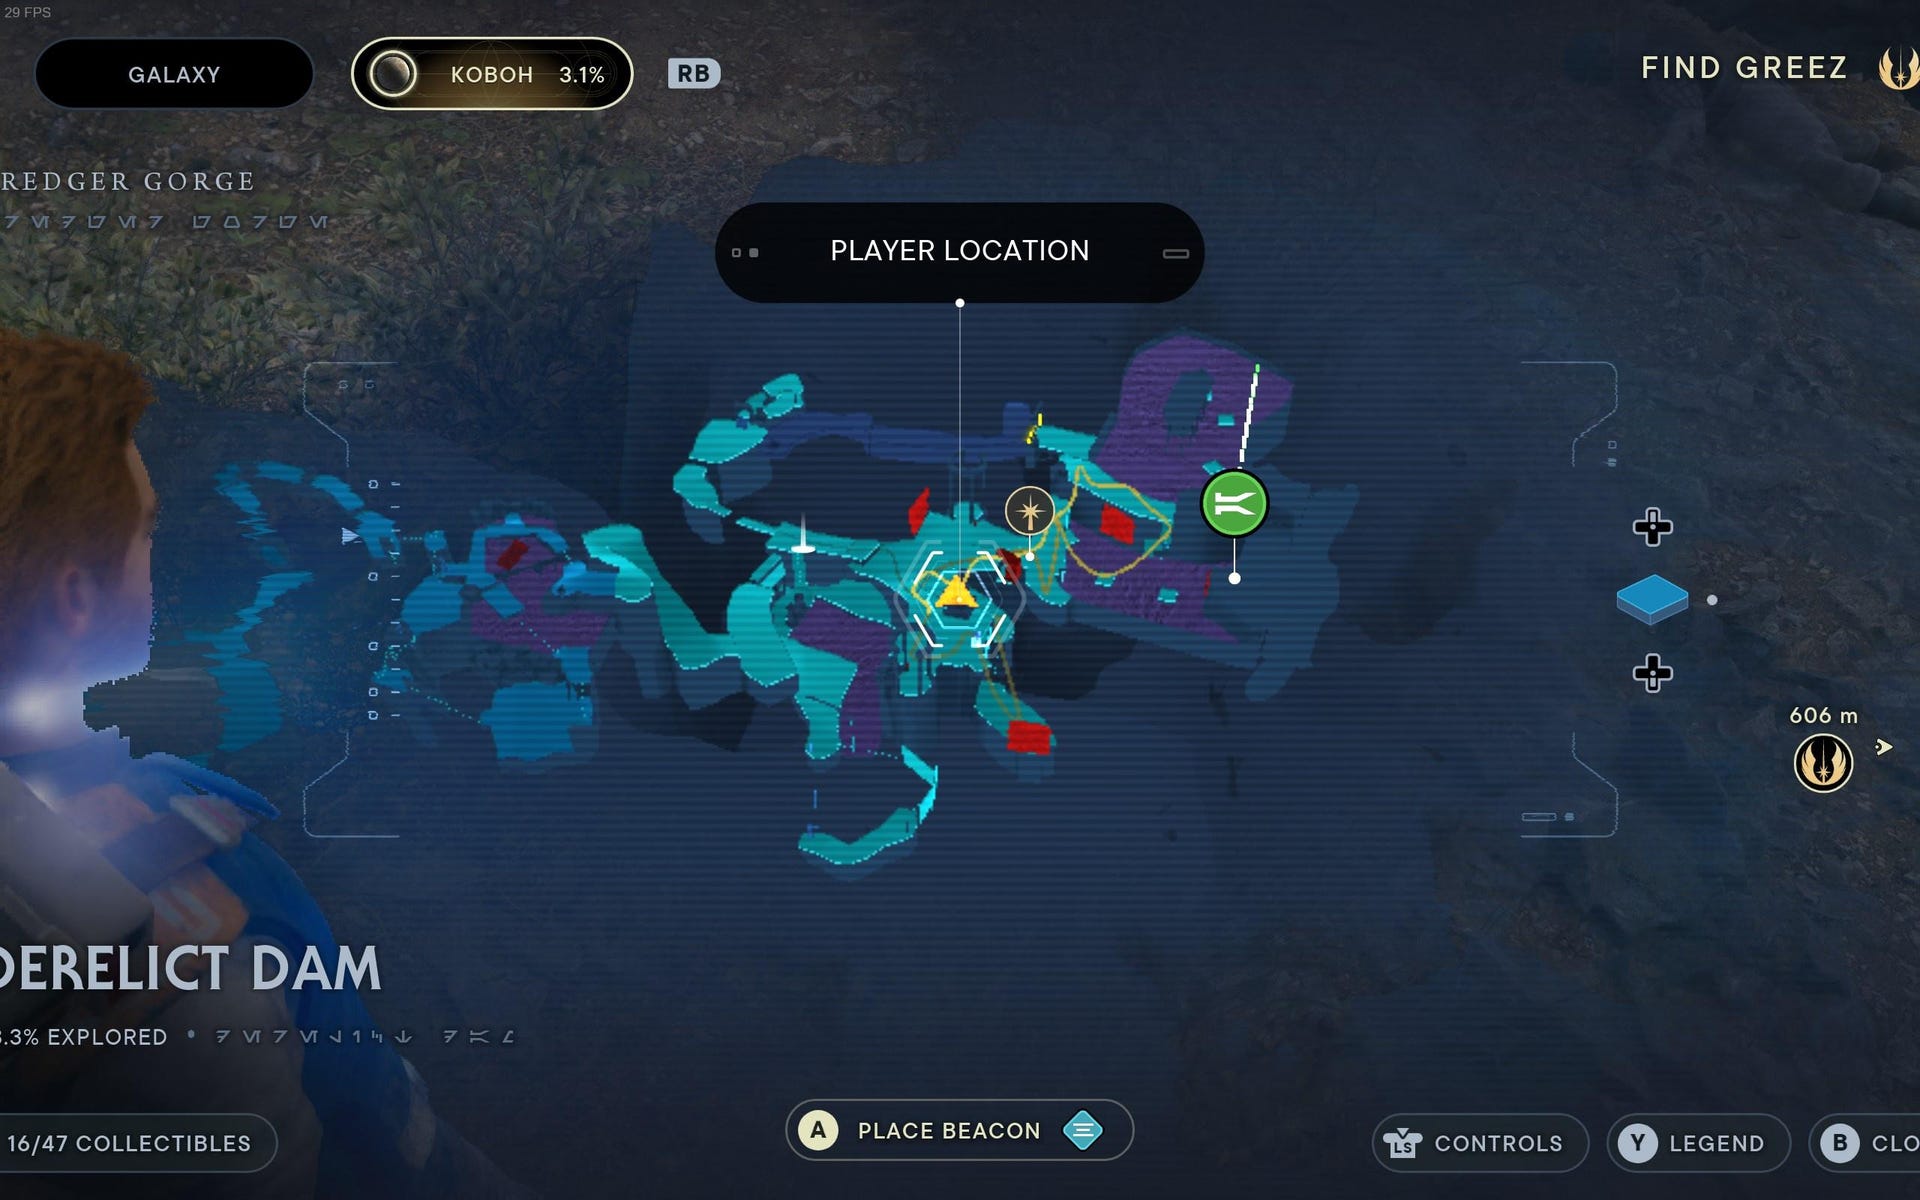
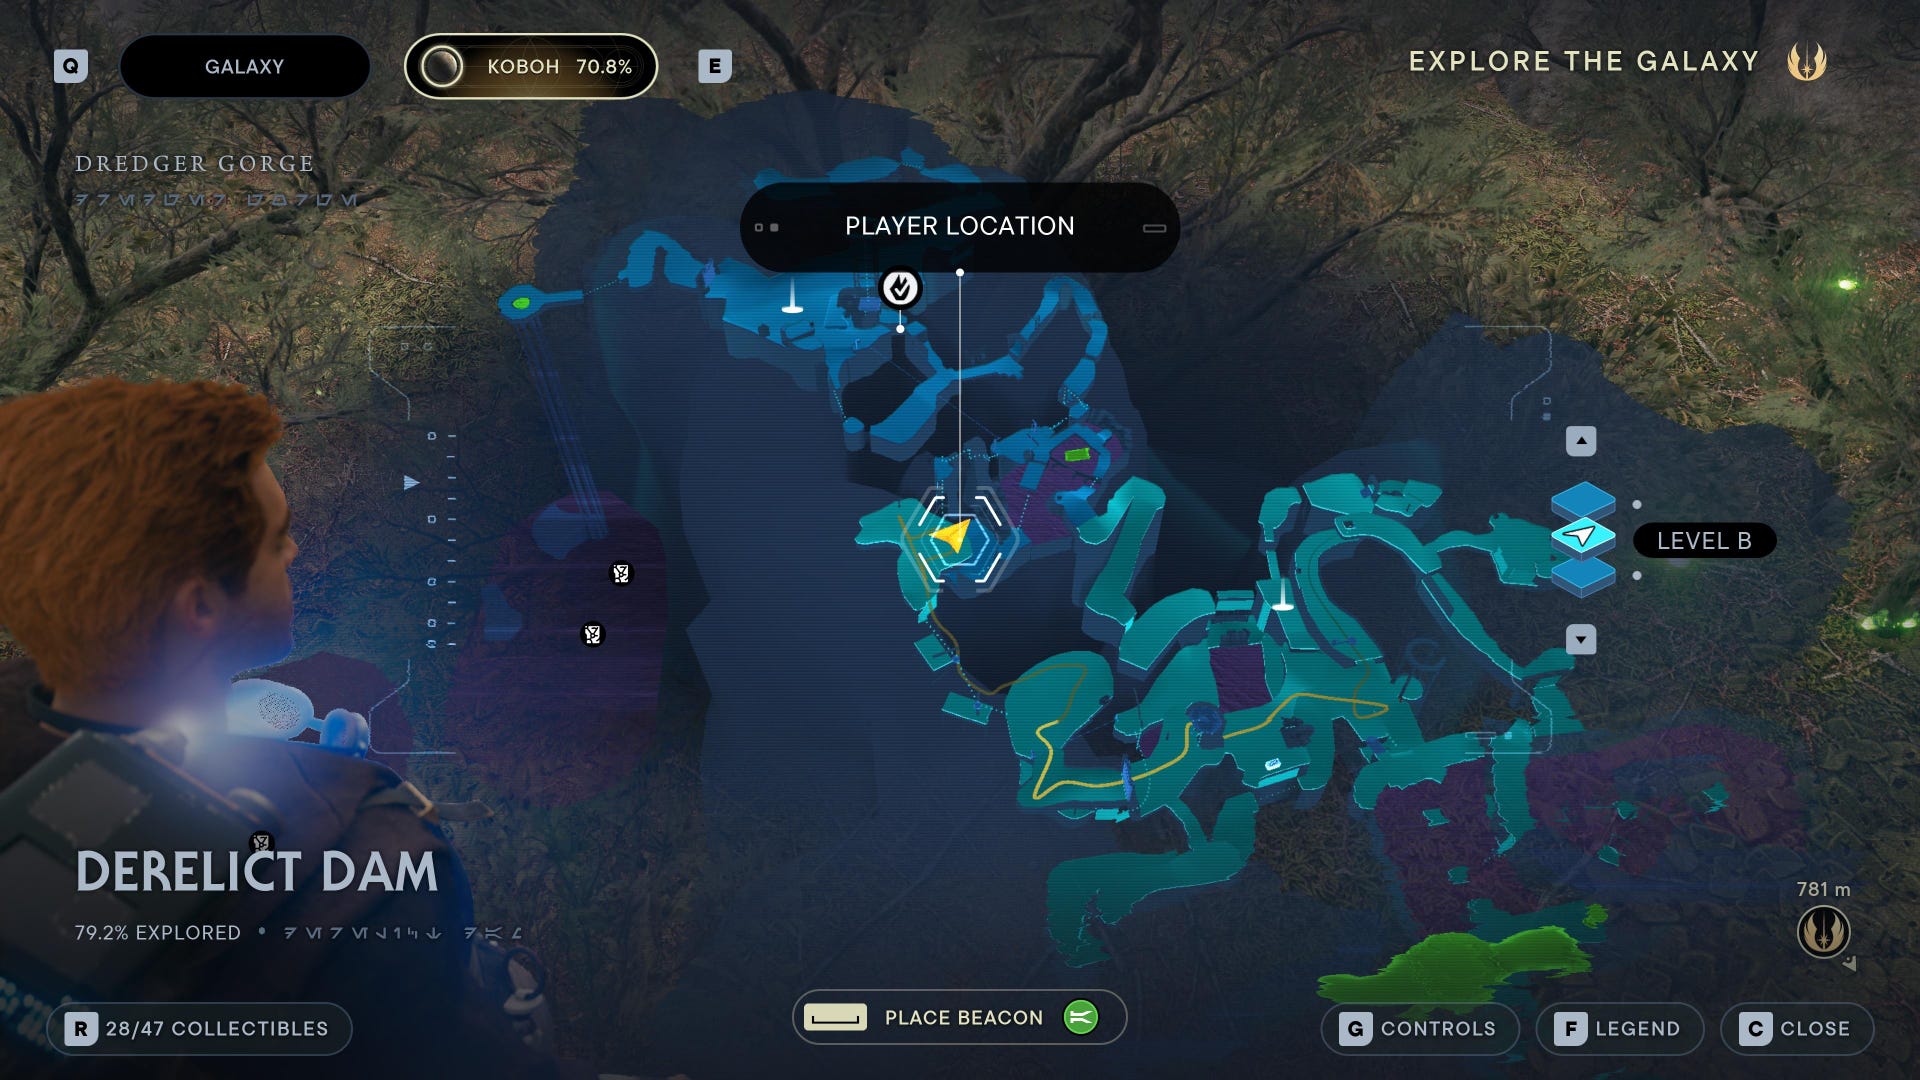
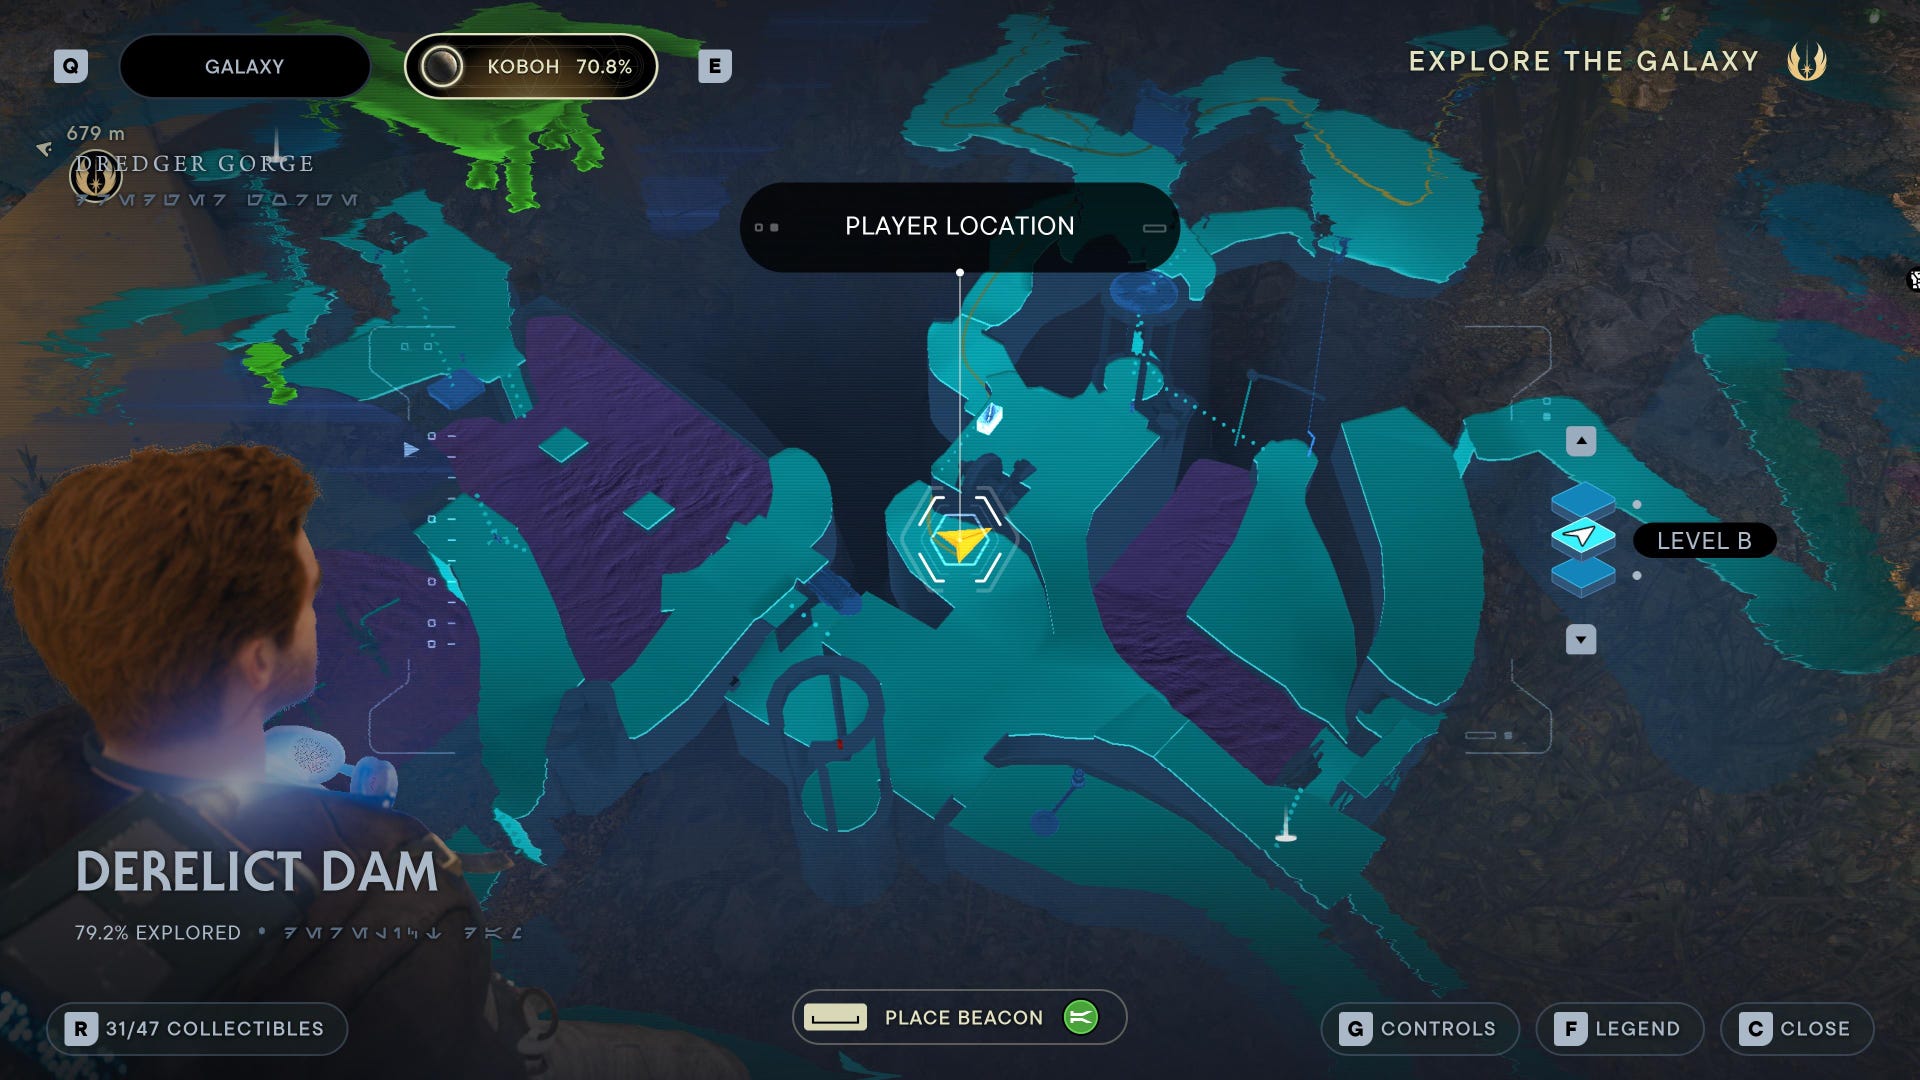
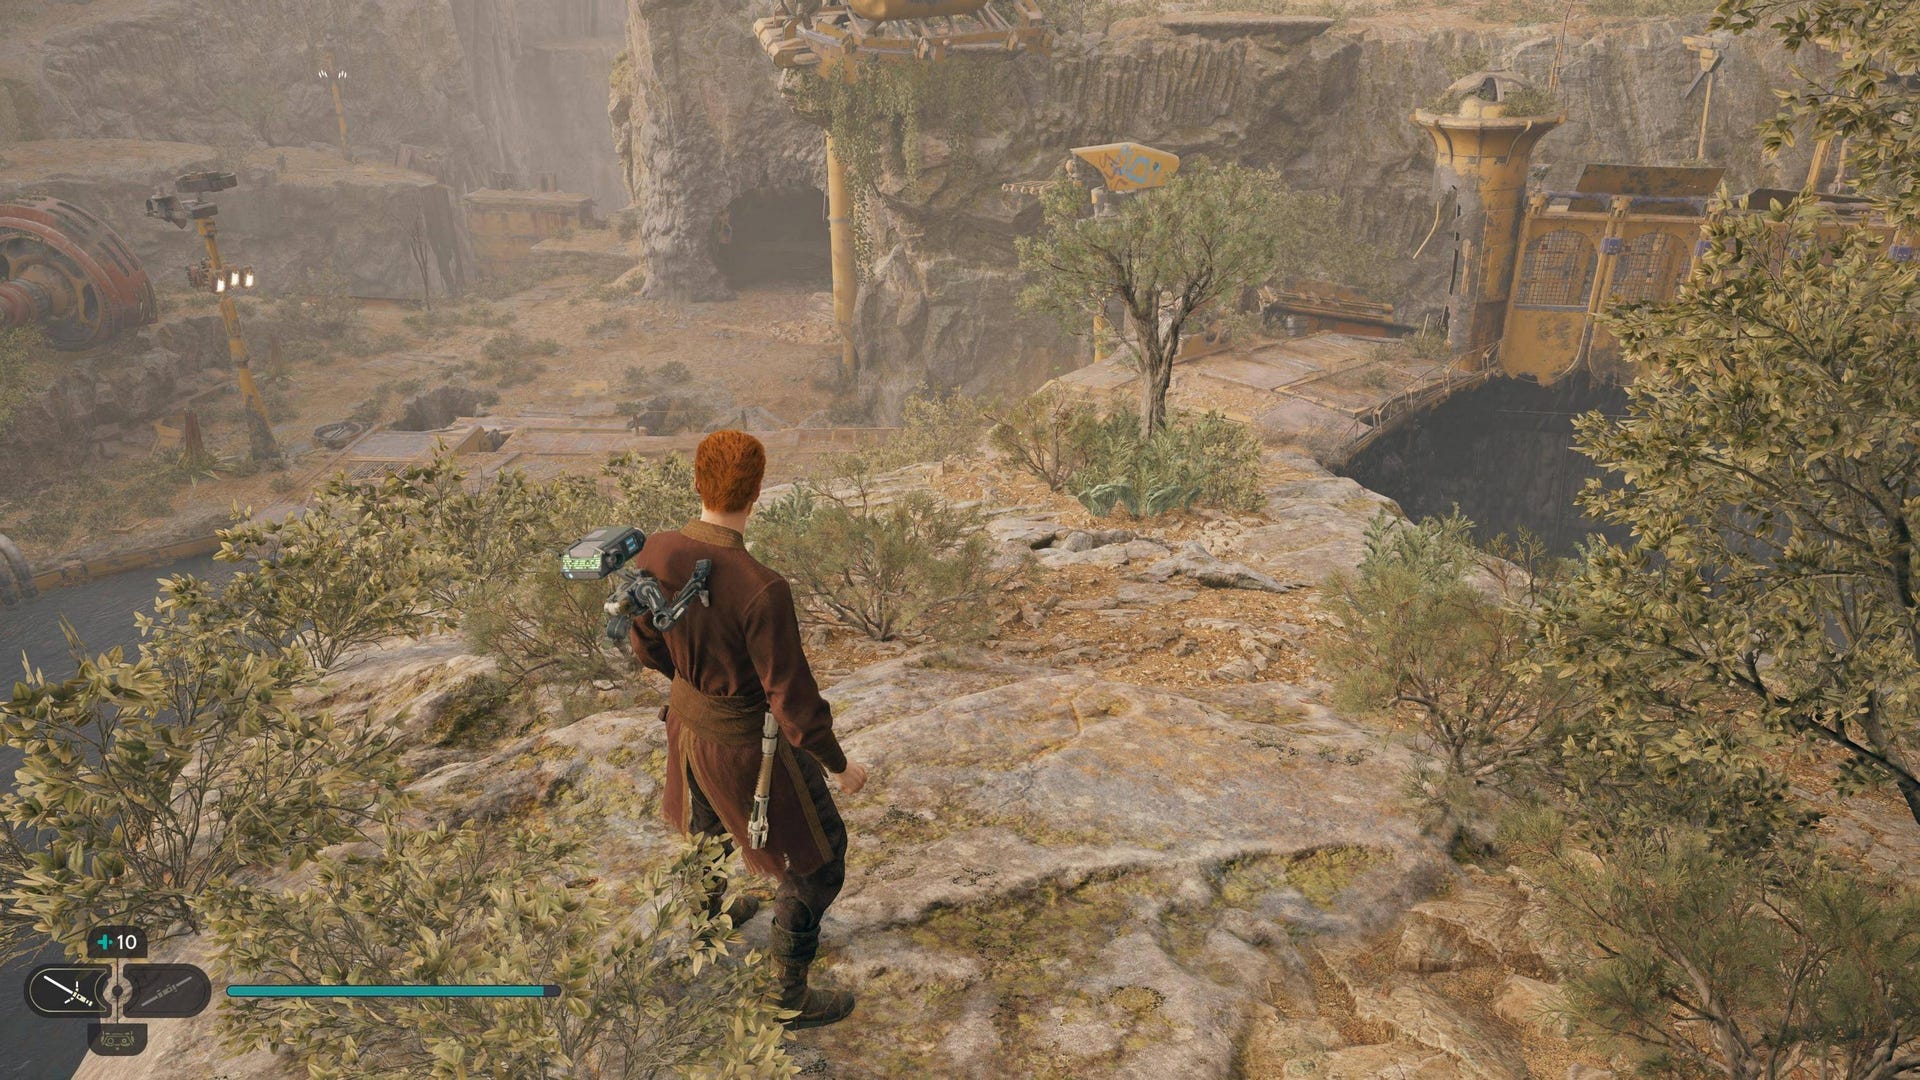
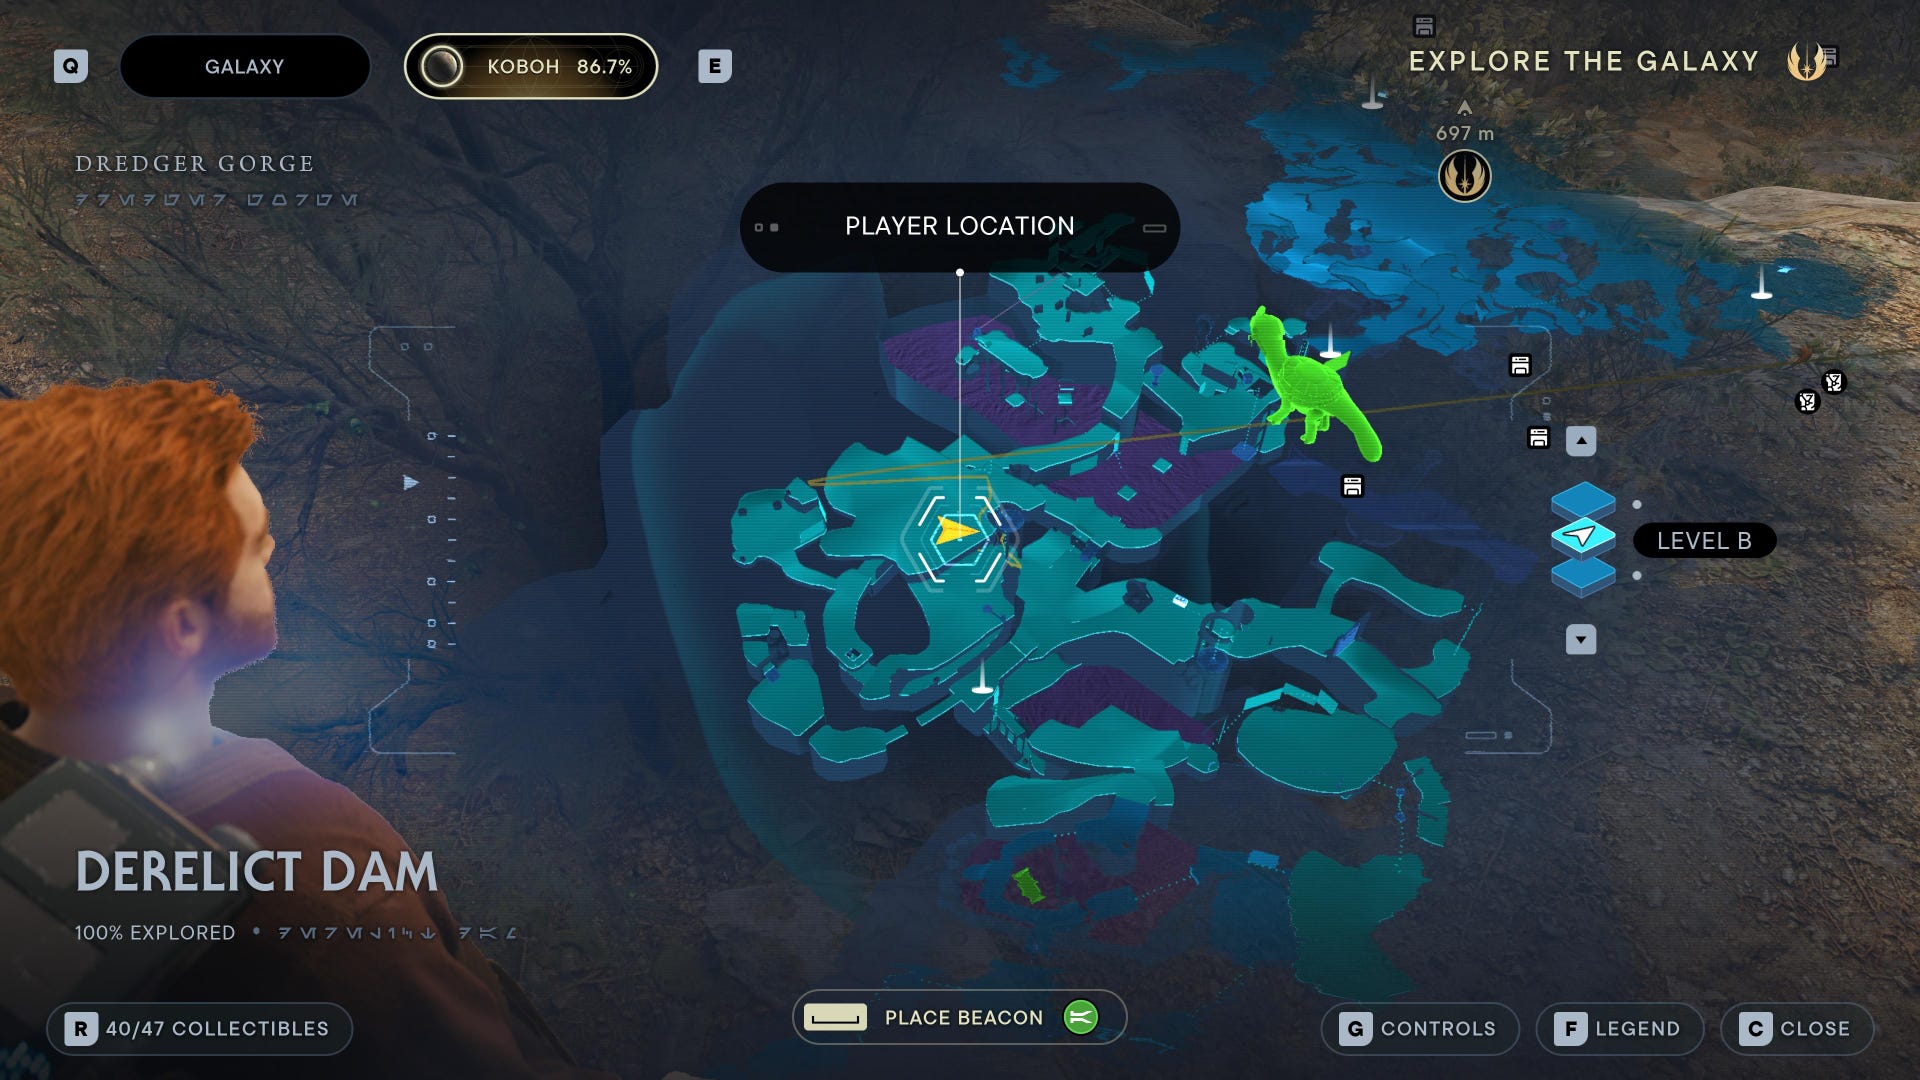
Derelict Dam collectibles
Derelict Dam Chests:
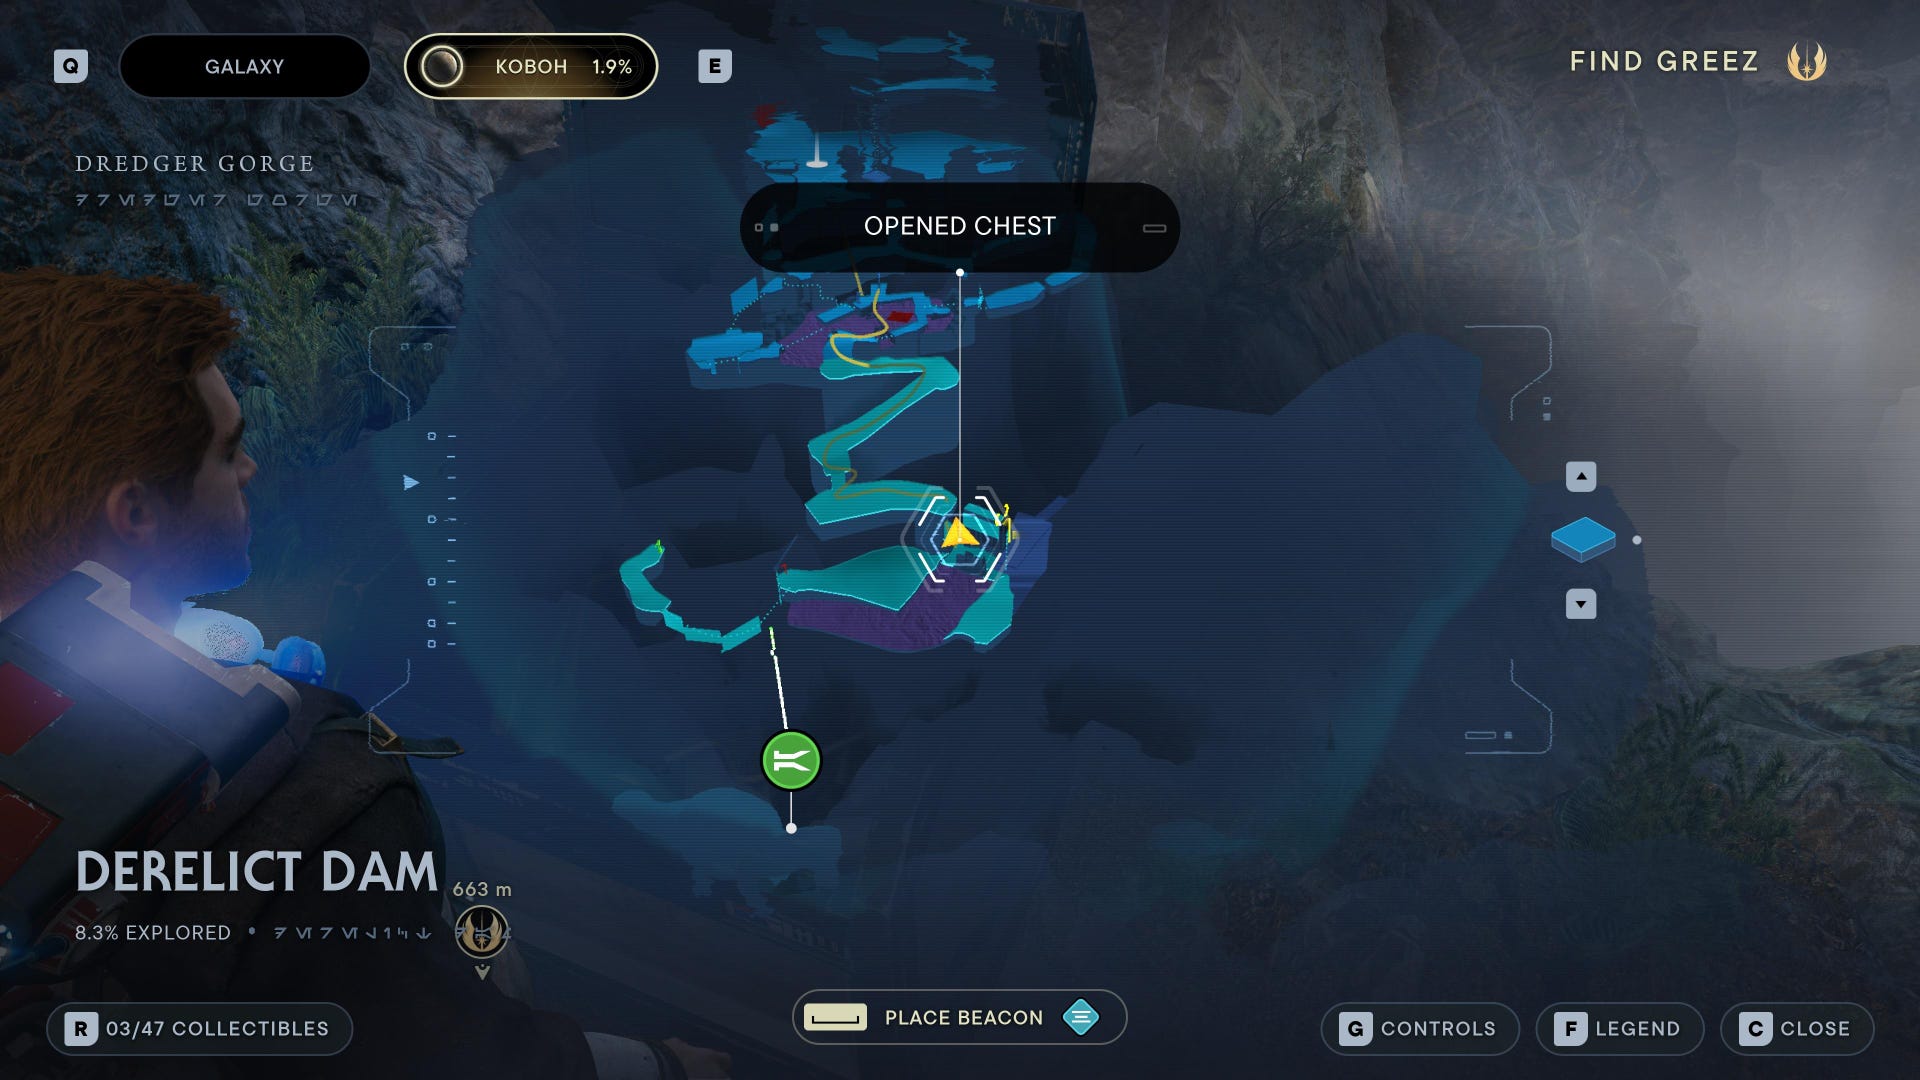

Chest #1 (Scrapyard Body): On the lower ledge just below the Murdered Prospector Force Echo, on the other side of the jumps that lead you to the Meditation Point. Hop down the nearby edge to find it.
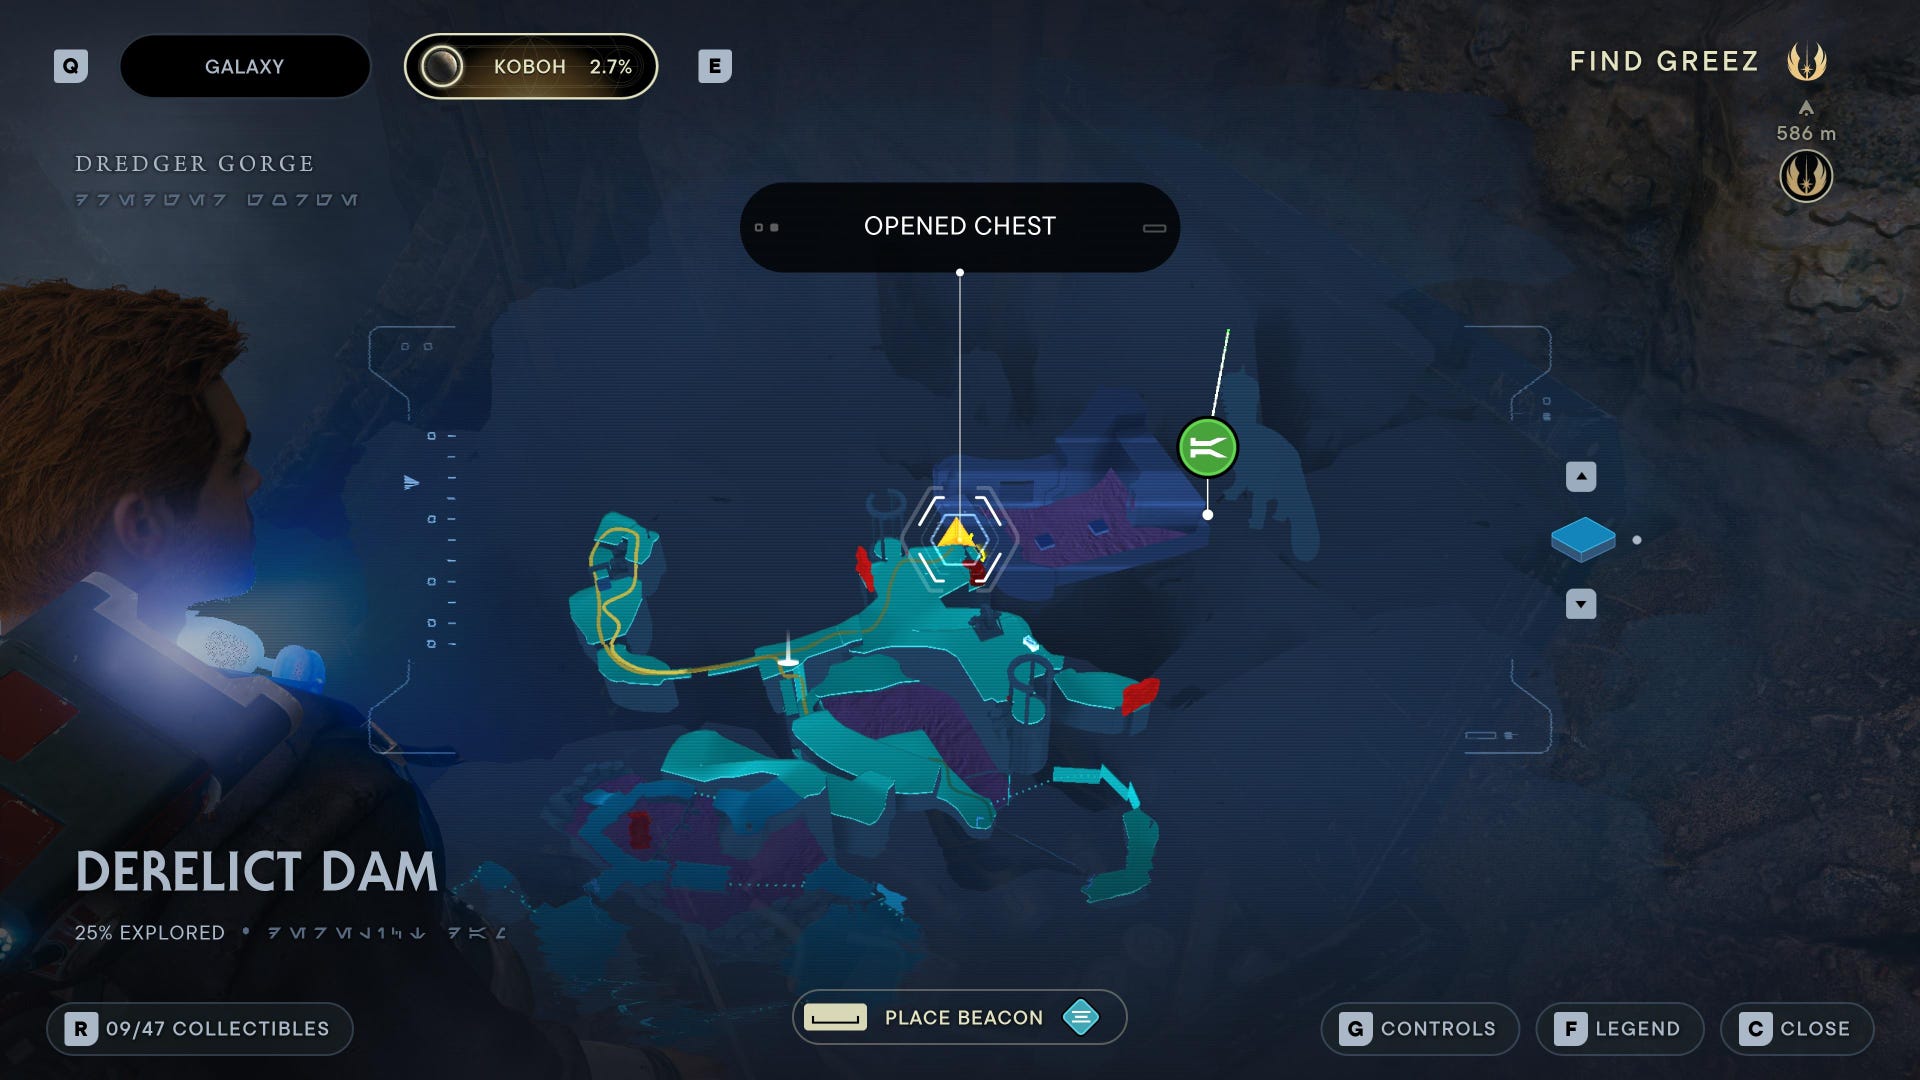
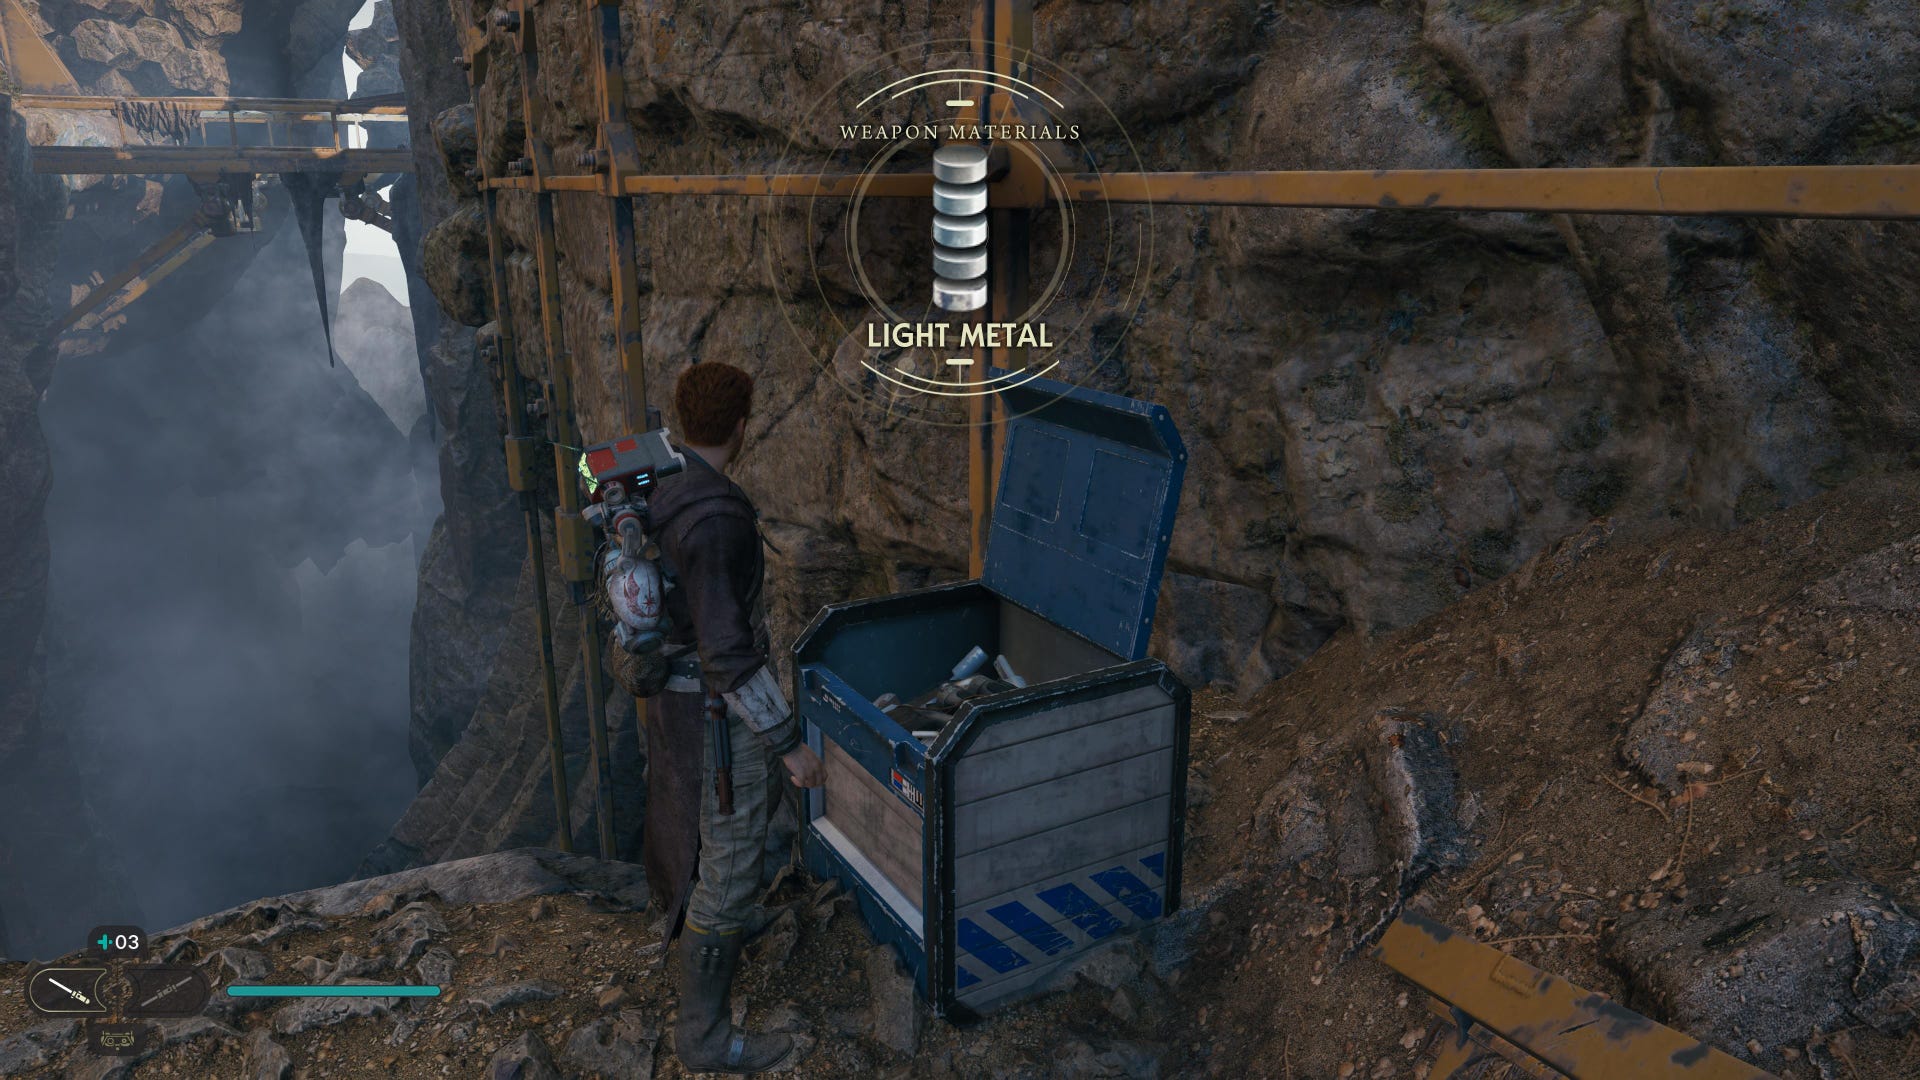
Chest #2 (Light Metals weapon materials): Follow the main path from the Derelict Dam Meditation Point. The chest is to the left, right in front of you.
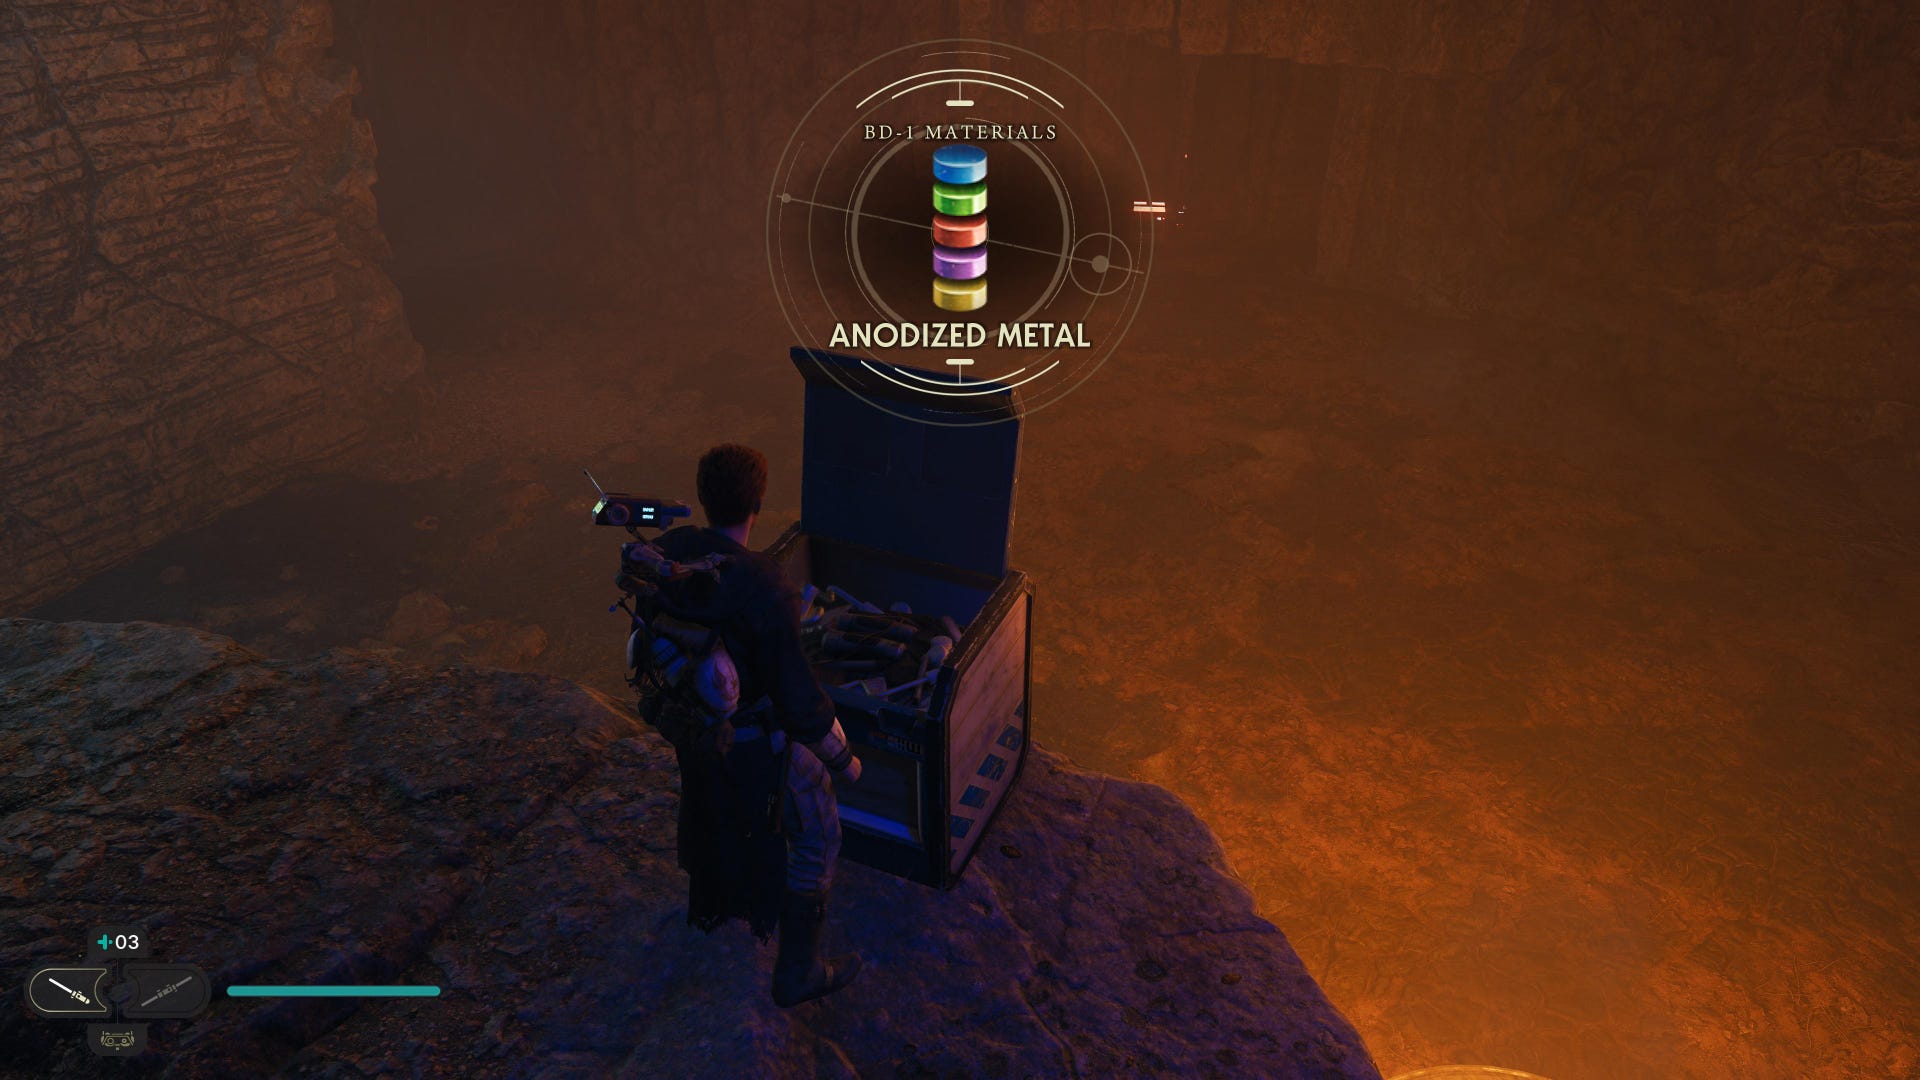
Chest #3 (Anodized Metal BD-1 materials): Inside Vashtan Wolfe’s lair, on the upper ledge.
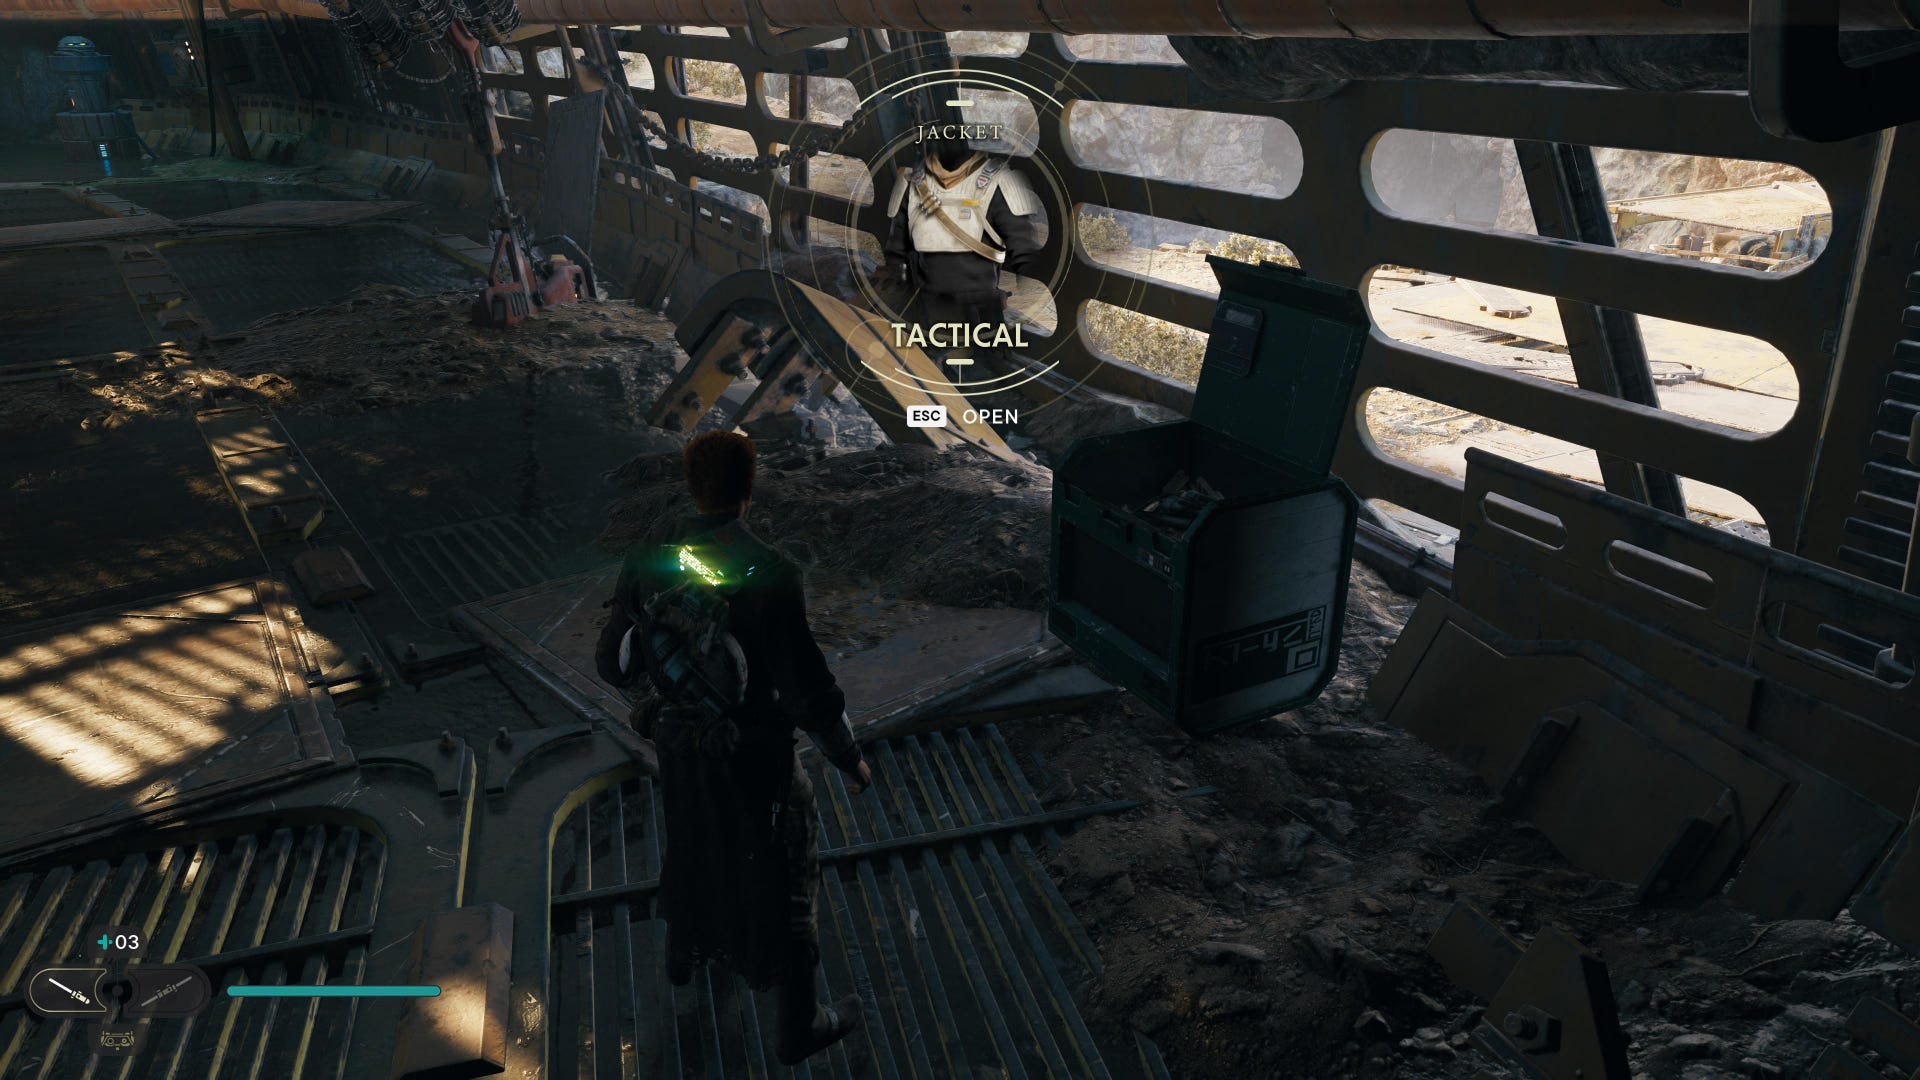
Chest #4 (Tactical jacket): Enter the cave on the left beyond the dam, and keep going until you drop down a hole where the chest lies waiting.

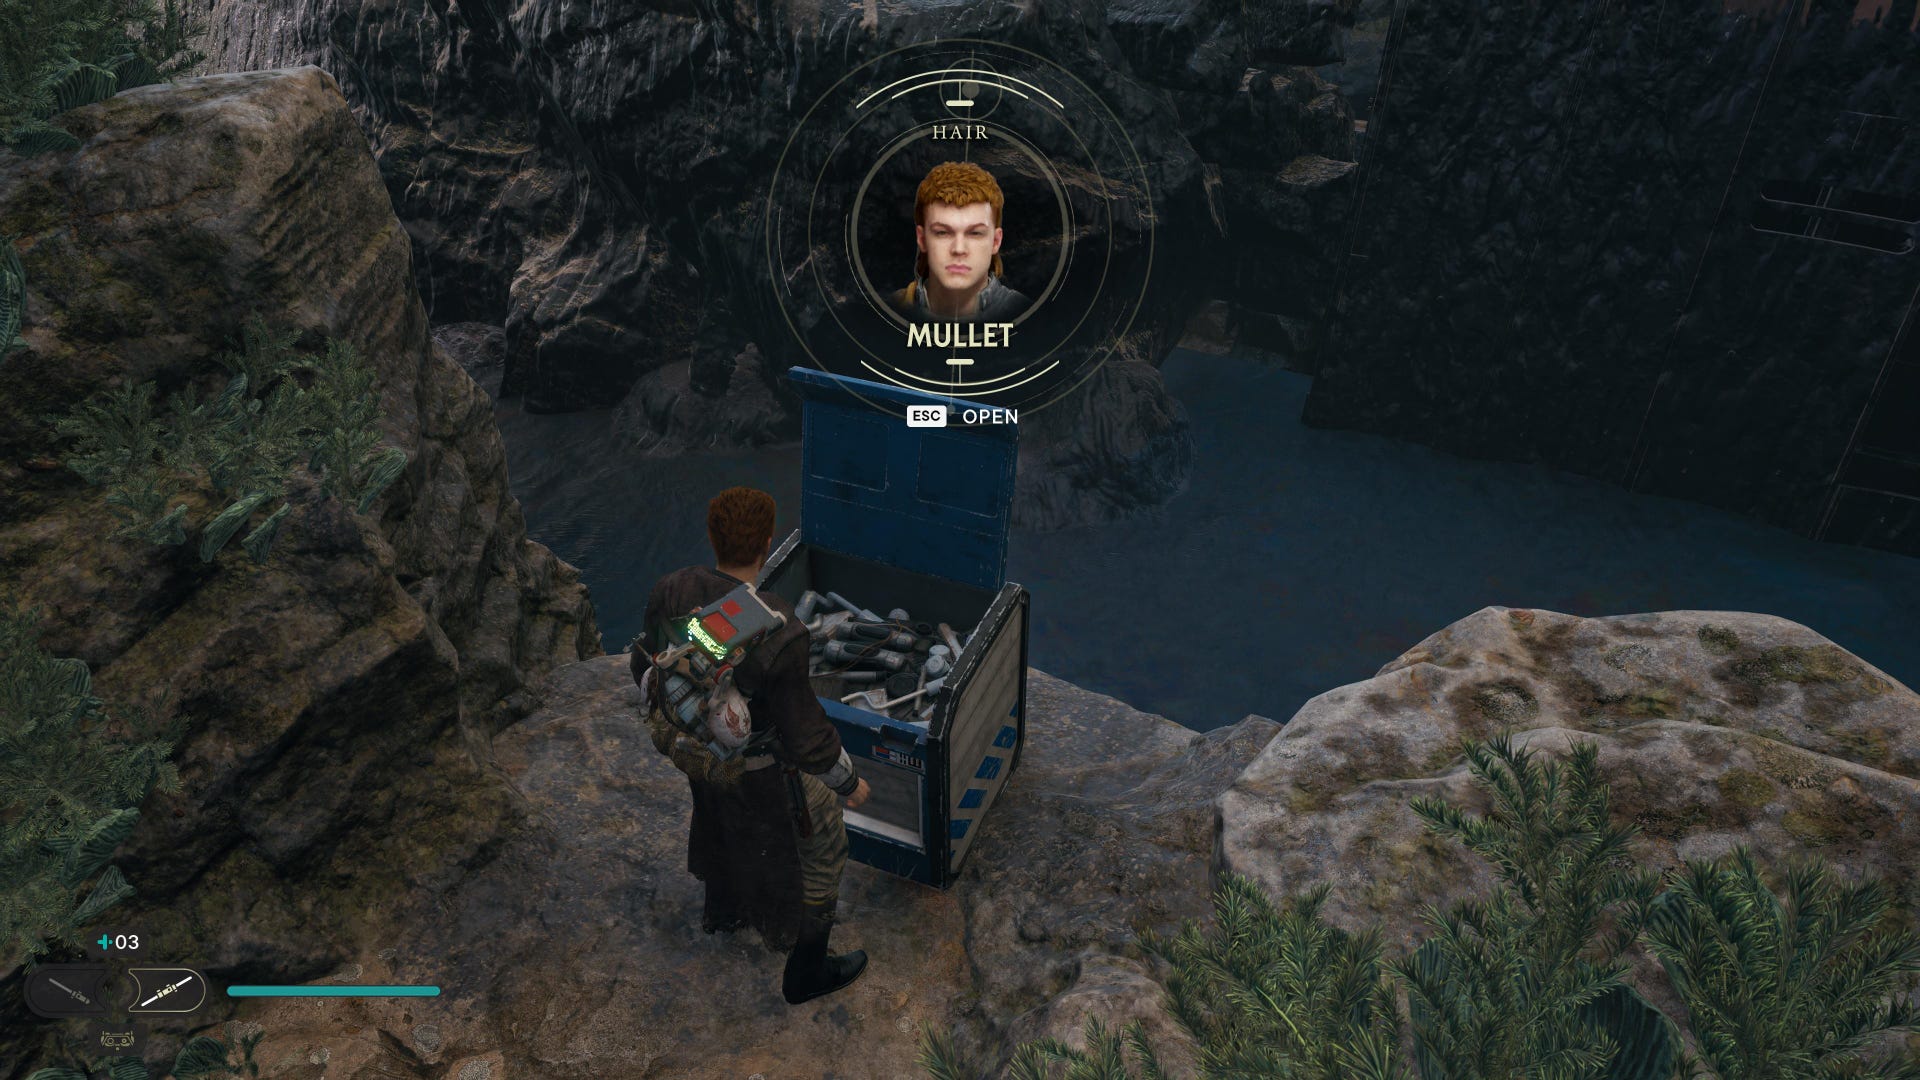
Chest #5 (Mullet hair): Climb to the top of the dam, use the poles and then the platforms in the tar lake on the right to reach the ledge with the chest.


Chest #6 (Scrapyard head): Beyond the Trontoshell (the giant bird), clear the enemies, then push the cube so you can reach the wall-run segment up to the ledge with the chest.
Chest #7 (Two-tone metal weapon materials): A red chest that requires the Electro-Dart ability. Come back to Vashtan Wolfe’s lair and hit the electrical conduit on the wall with a dart to open the chest.
Stim Canister: In the Gorocco Matriarch arena, which requires you to use Force Lift on the large gate atop the elevator next to the Derelict Dam Workbench.
Derelict Dam Essences:
Skill Point Essence #1: Beyond the mud lake below the Meditation Point, just after the curved wall-run section.
Health Essence: Just beyond the Gorocco arena across the rickety bridge from the Meditation Point.
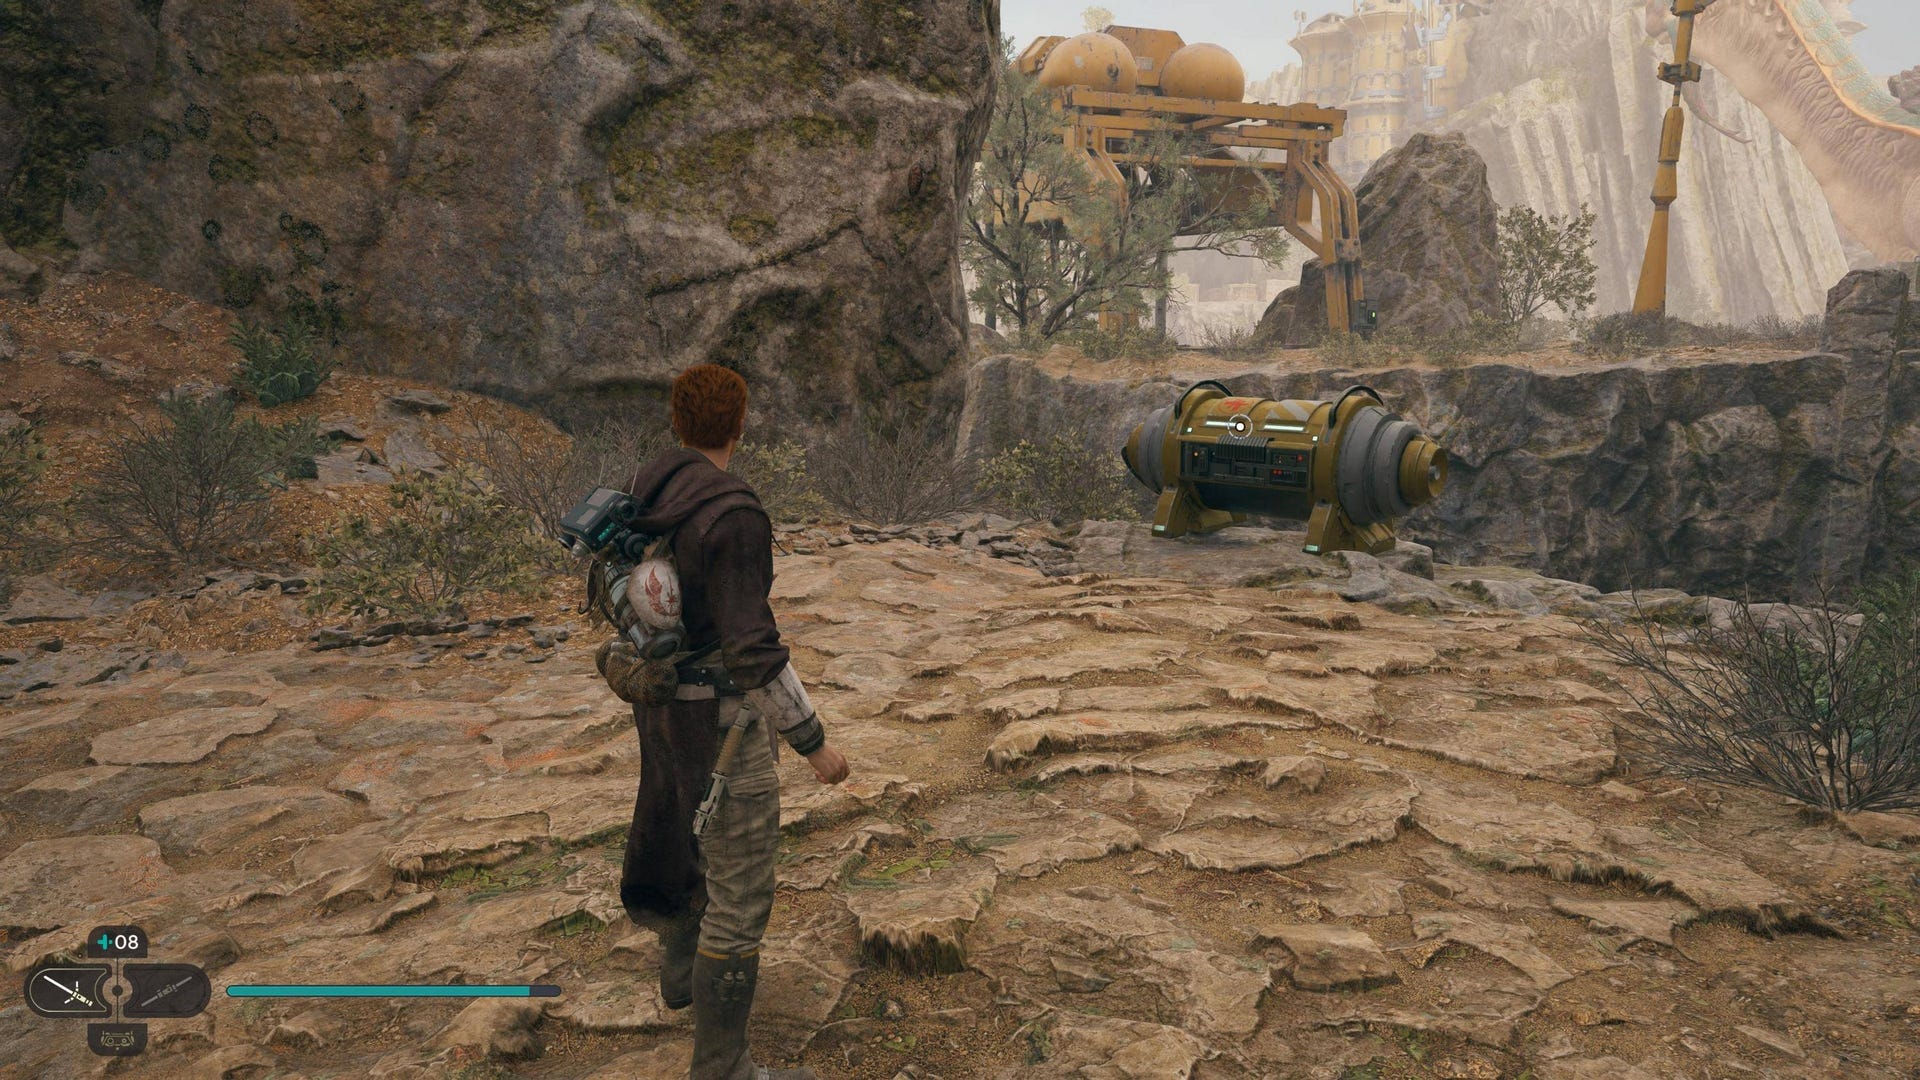
Force Essence: At the top of the elevator next to the Workbench. Use a Roller Mine to blow open the wall on the lower ledge beside the Workbench, then follow the path up and across the bridge.

Upgrade Essence #2: Beyond the Gorocco Matriarch arena, up the floating grapple points, just beyond the next Gorocco. Requires Force Lift to break open the gate leading to the arena, and also requires you to be able to launch yourself off floating grapple points.
New Perk Slot: Use Force Lift on the strangely pommel-shaped elevator near the Trontoshell, then follow the puzzle to the very end. Requires Force Lift and Koboh Grinding upgrade for BD-1.
Derelict Dam Databanks:
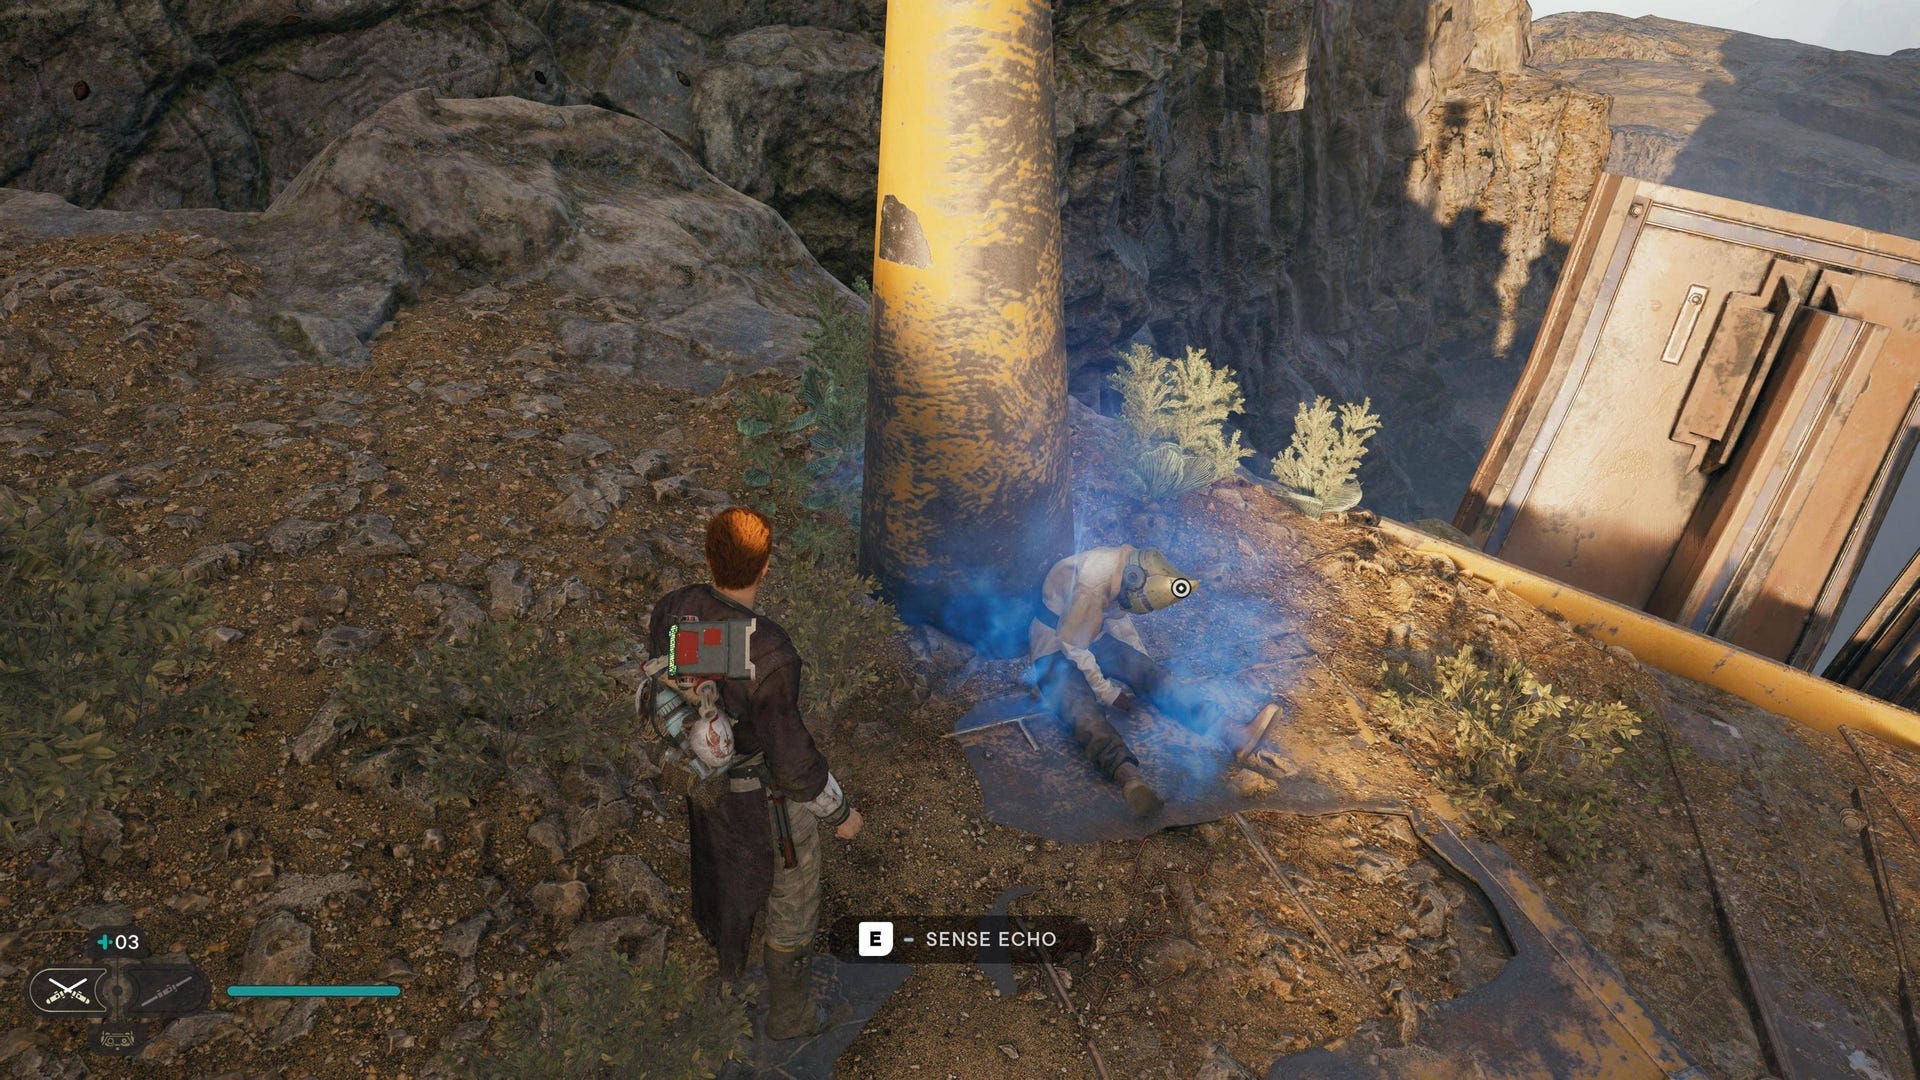
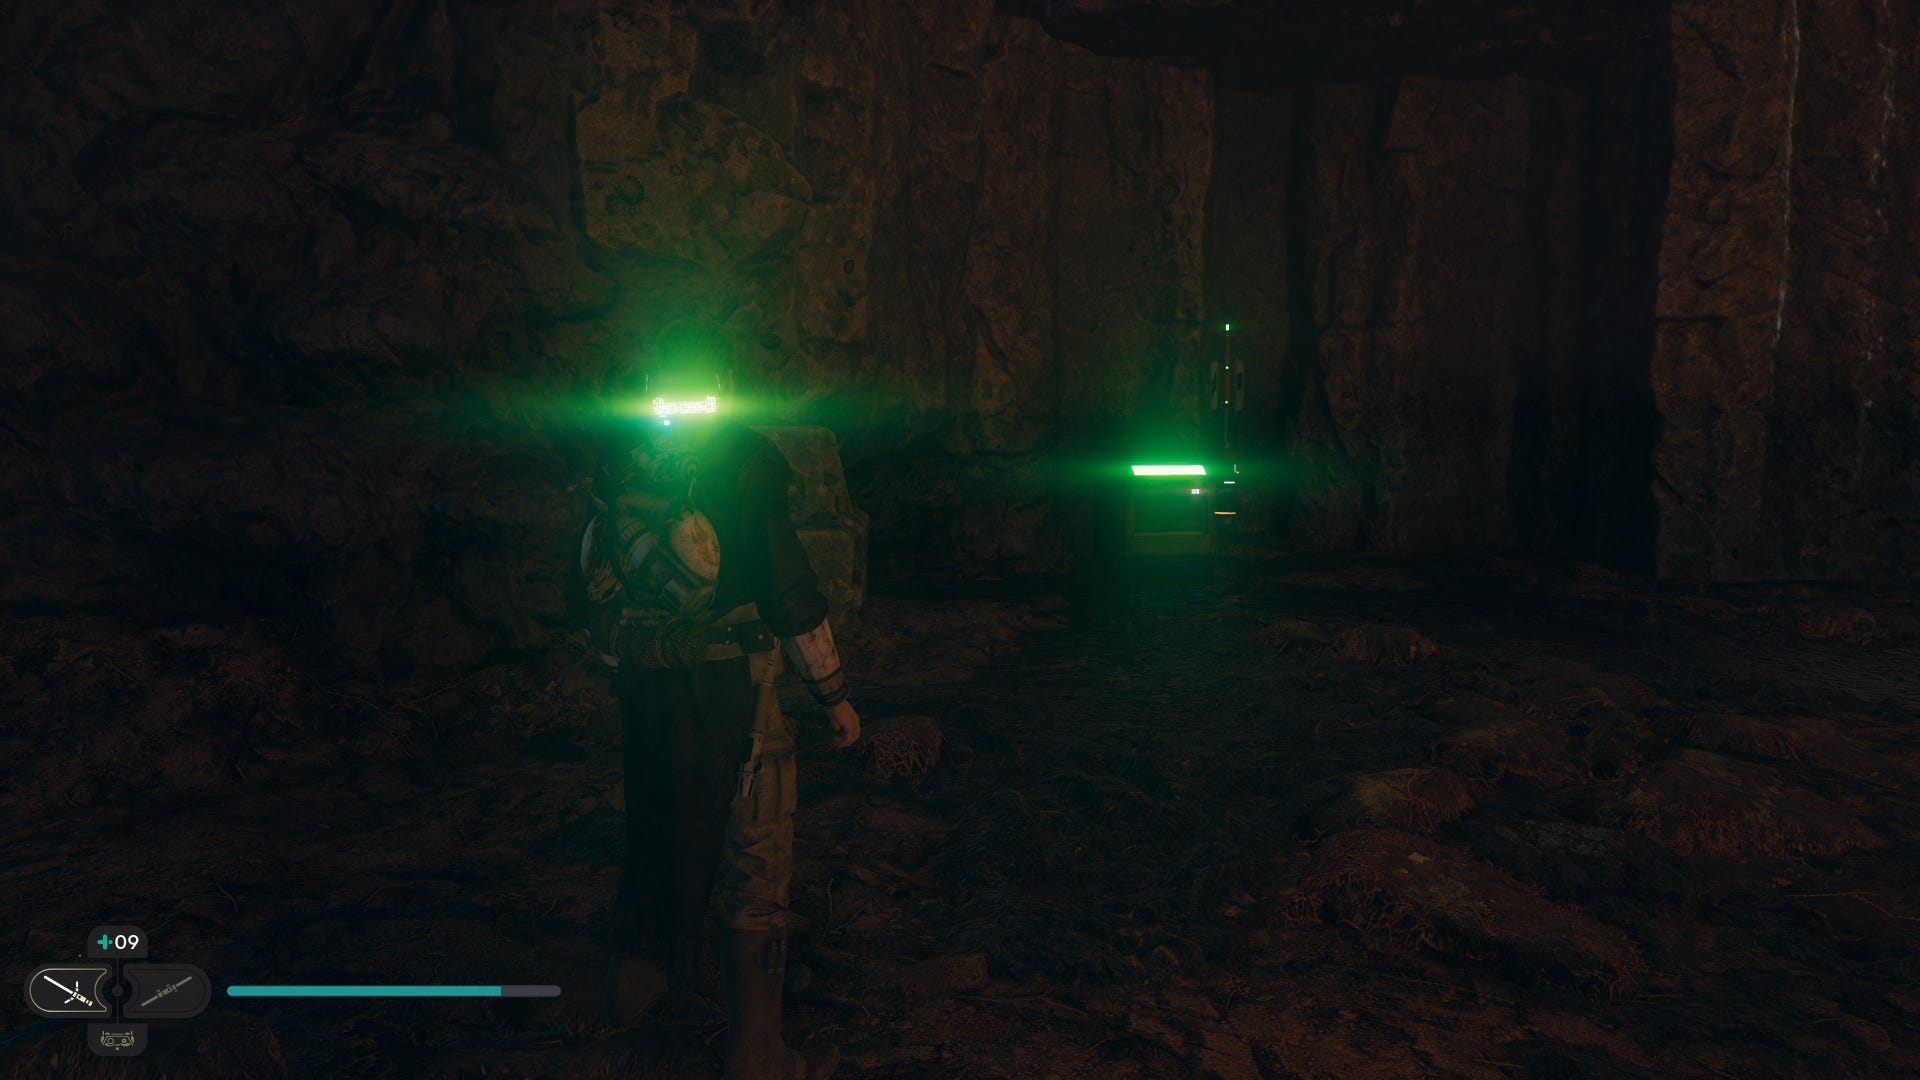
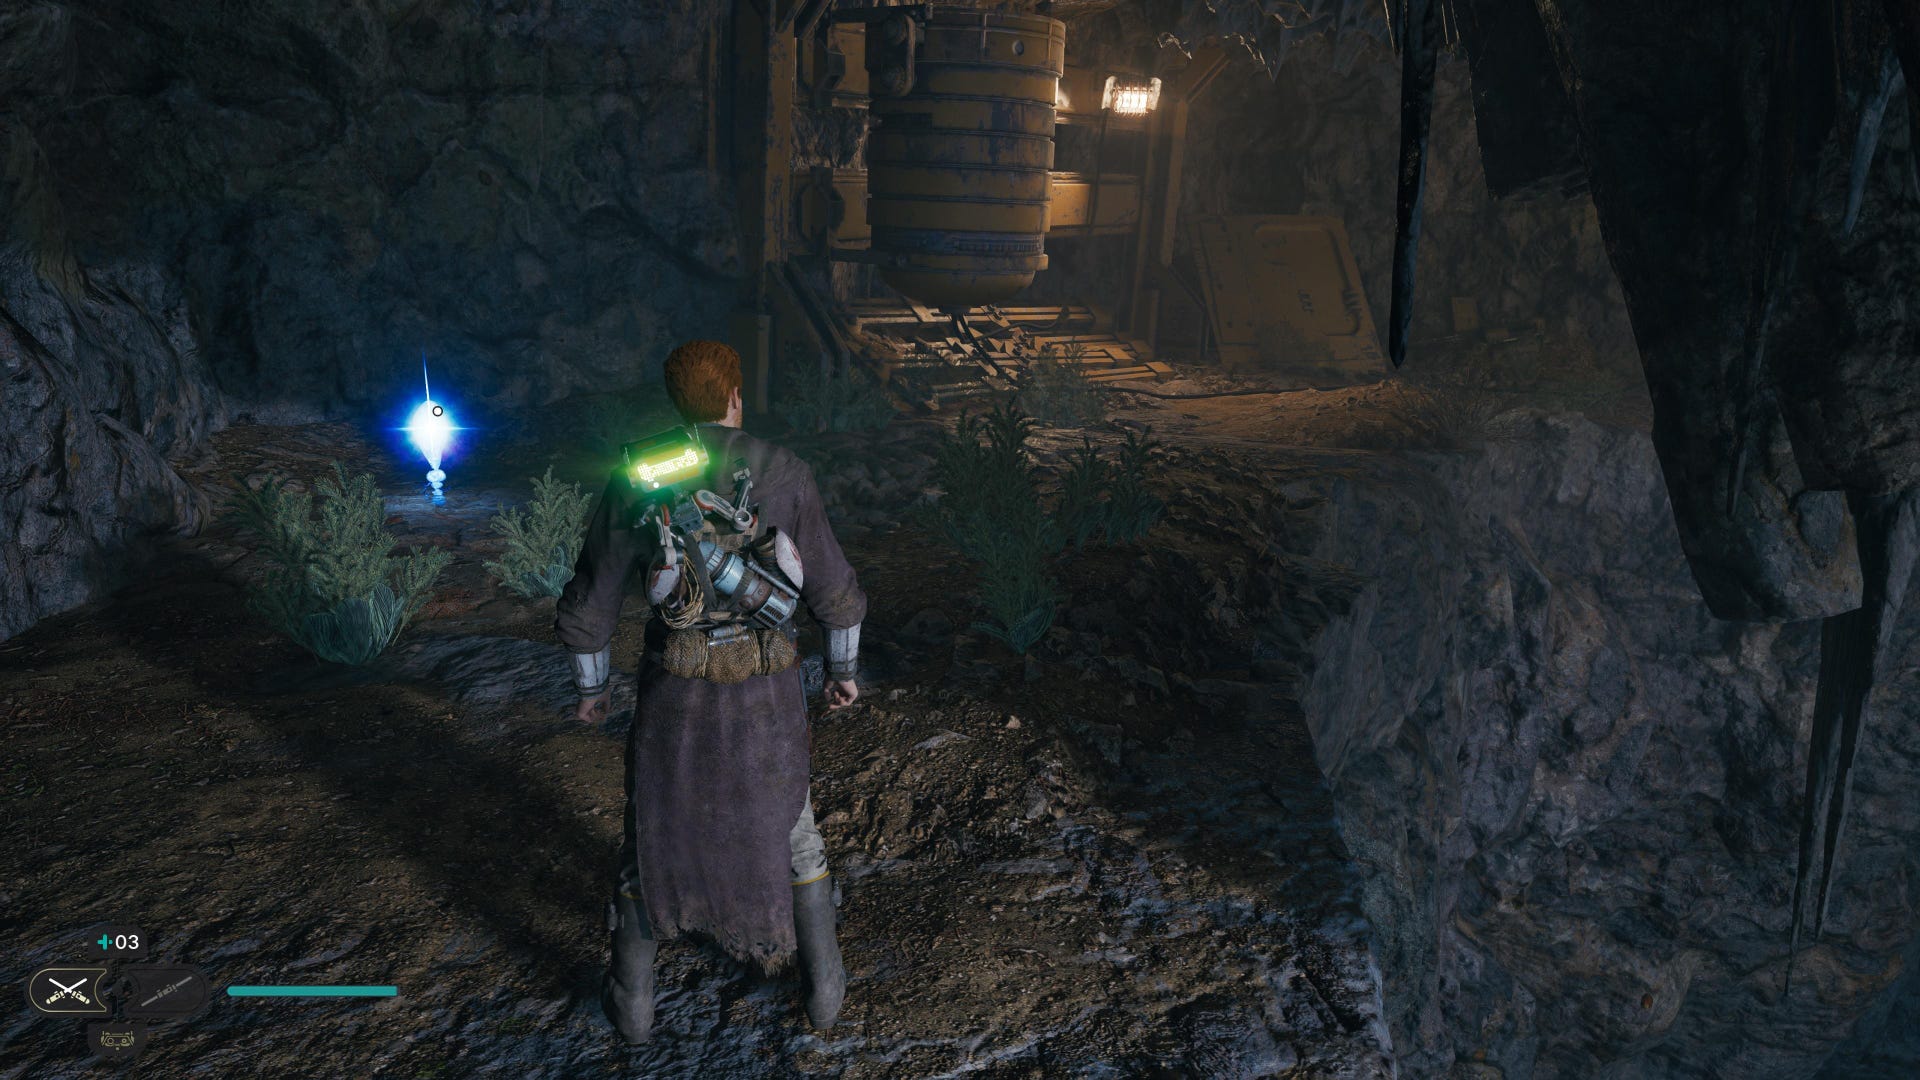
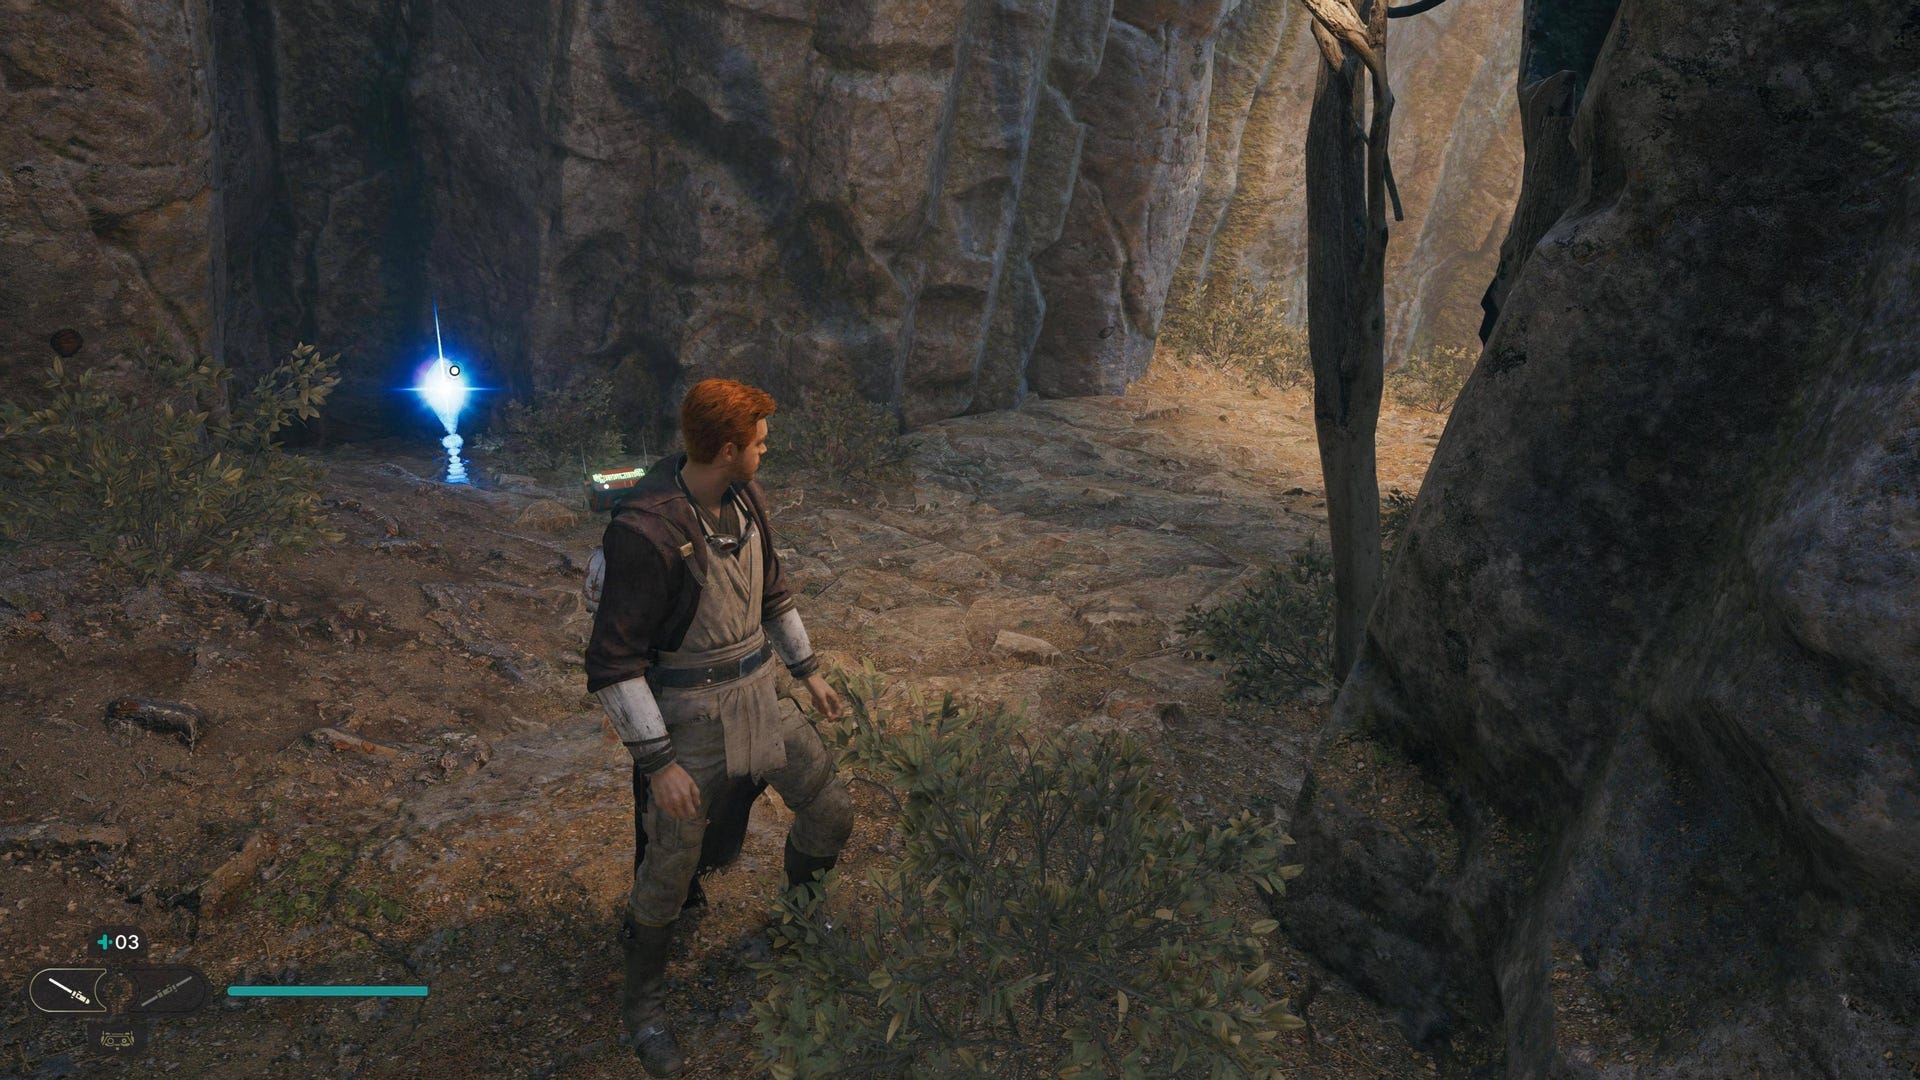
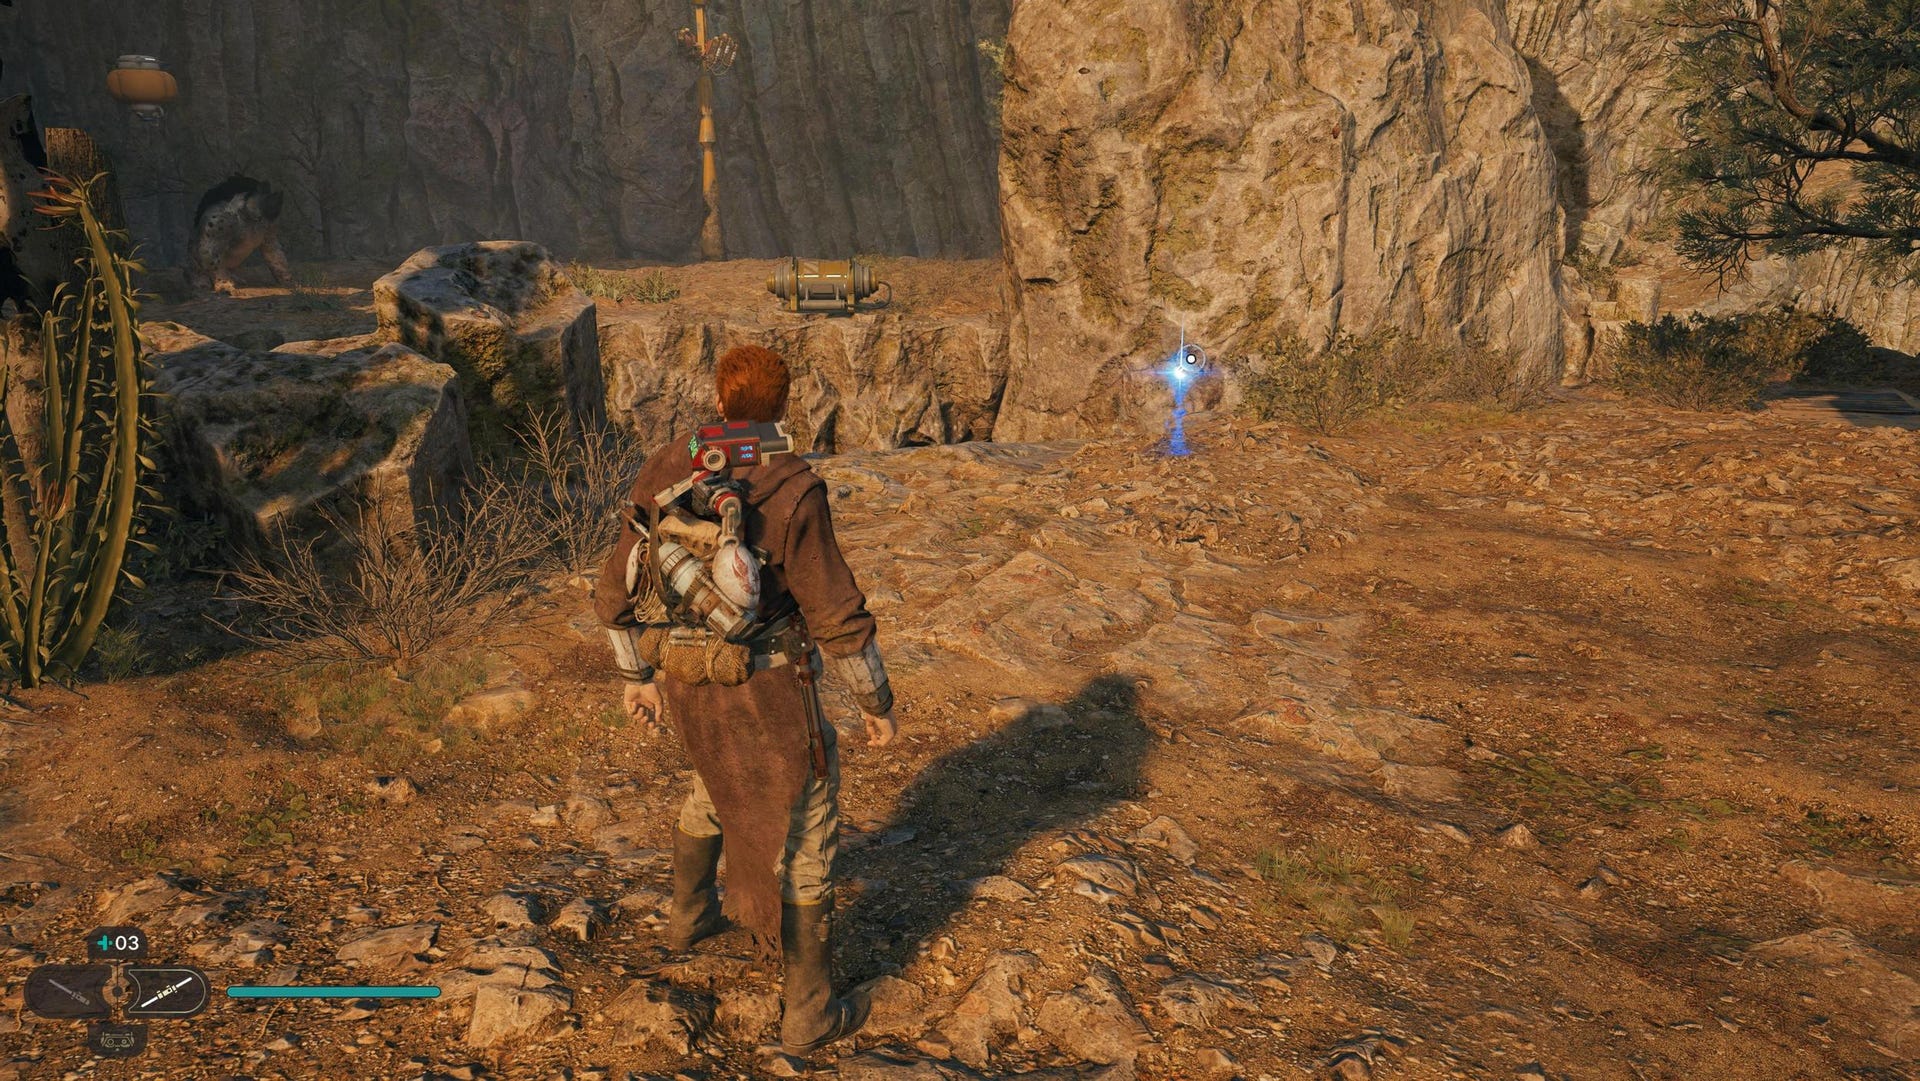
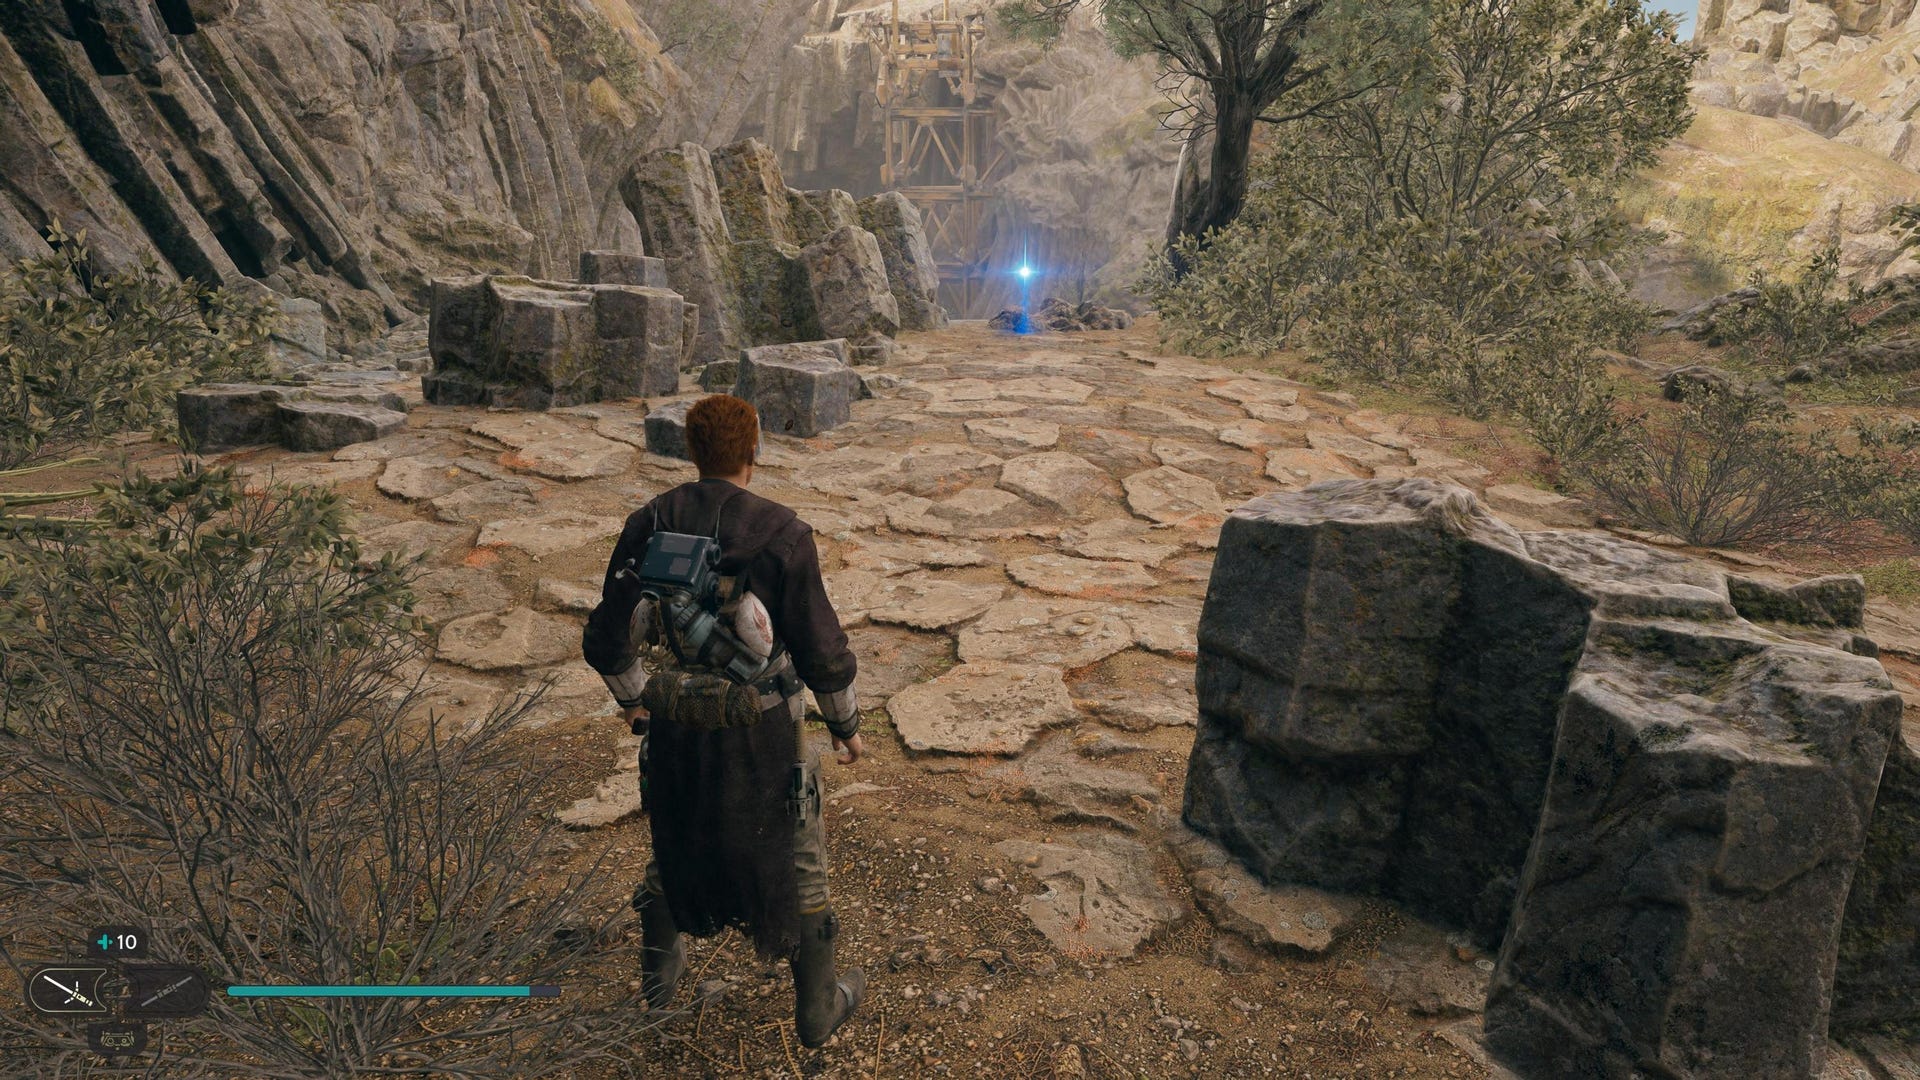
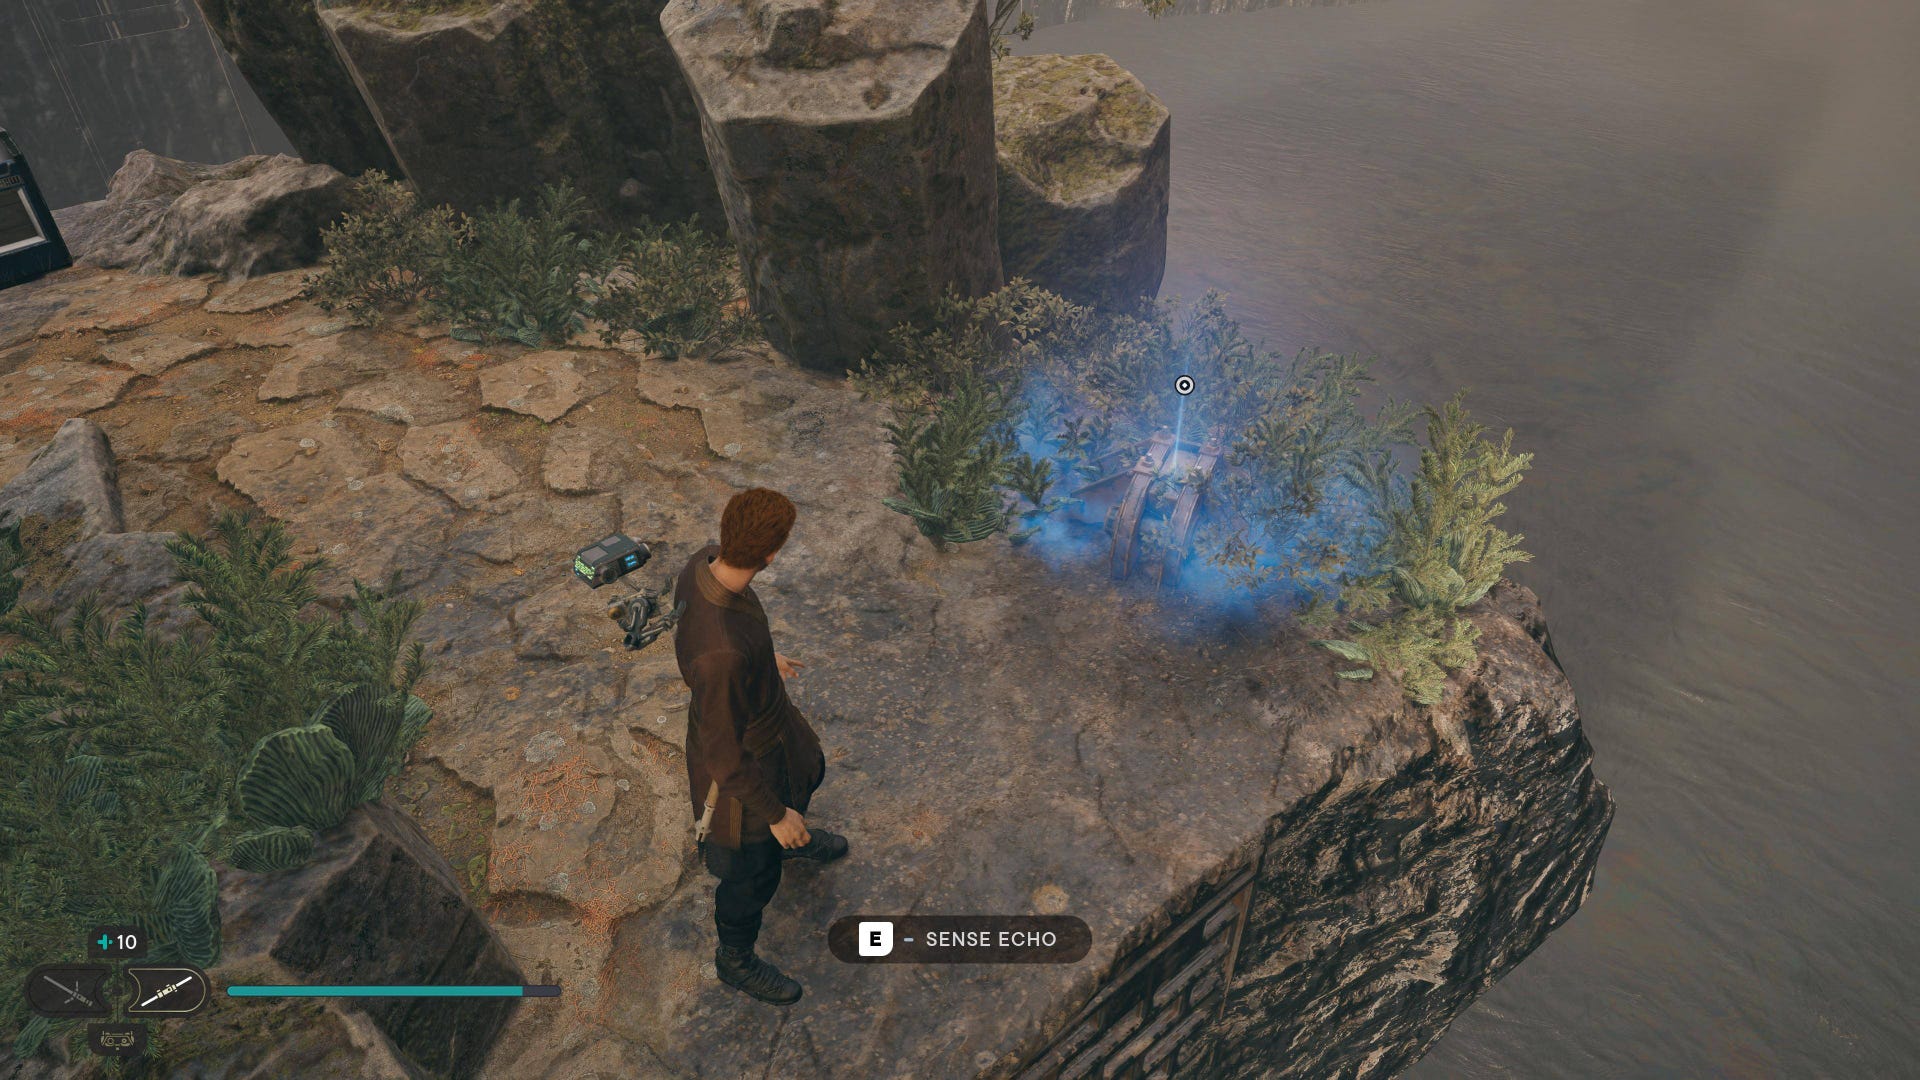
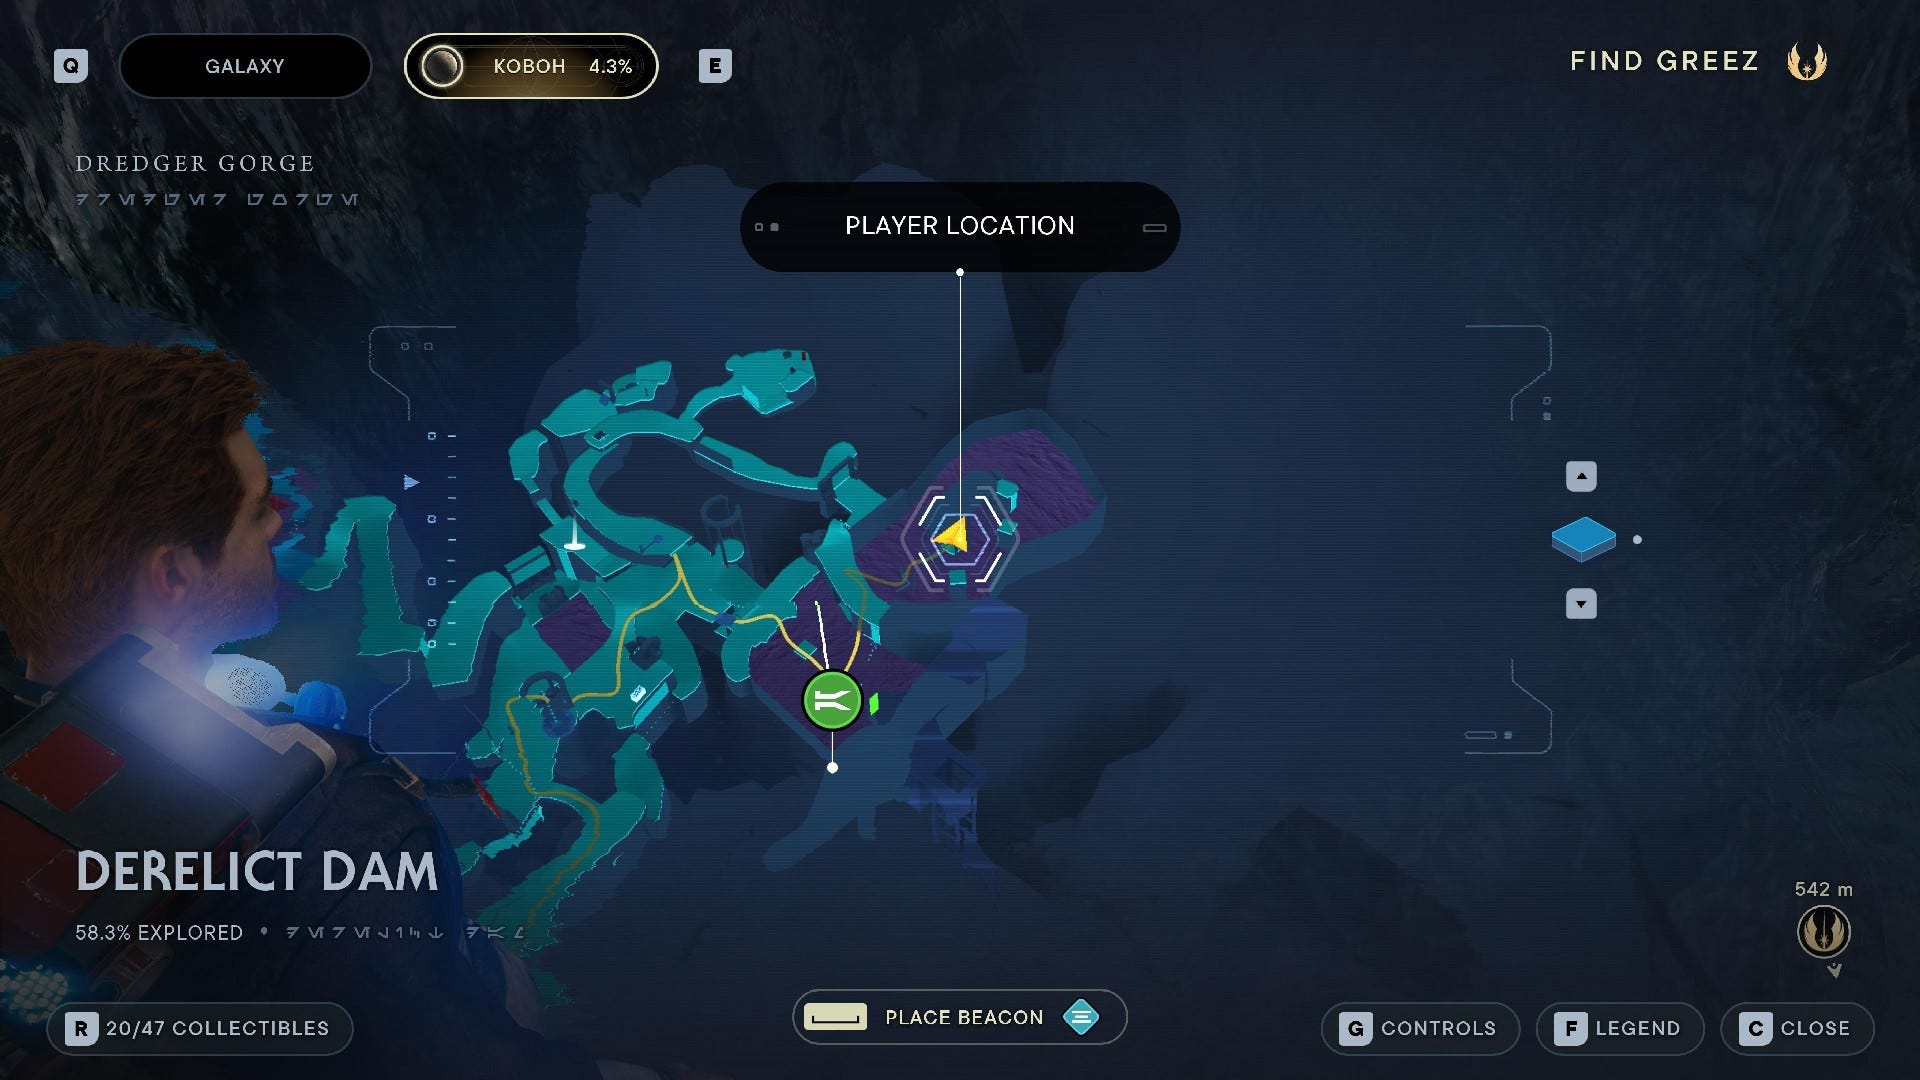
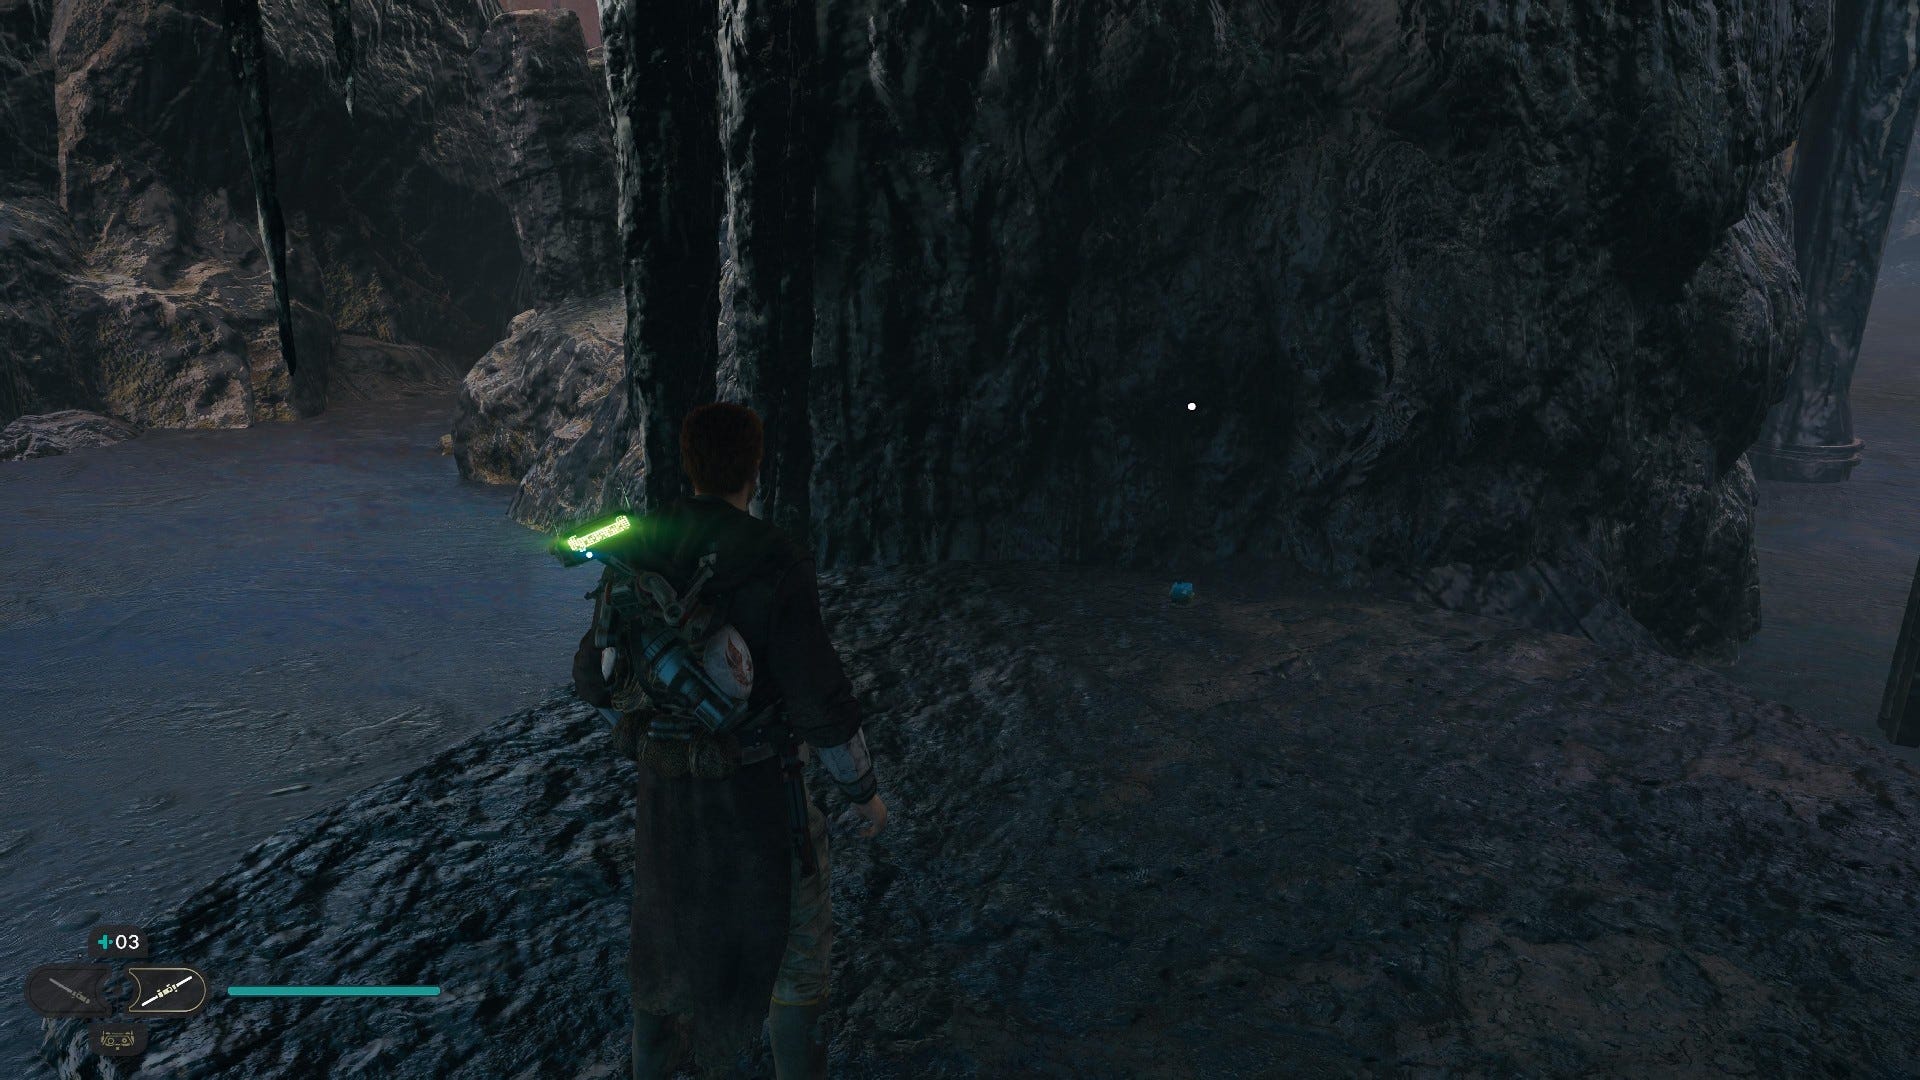
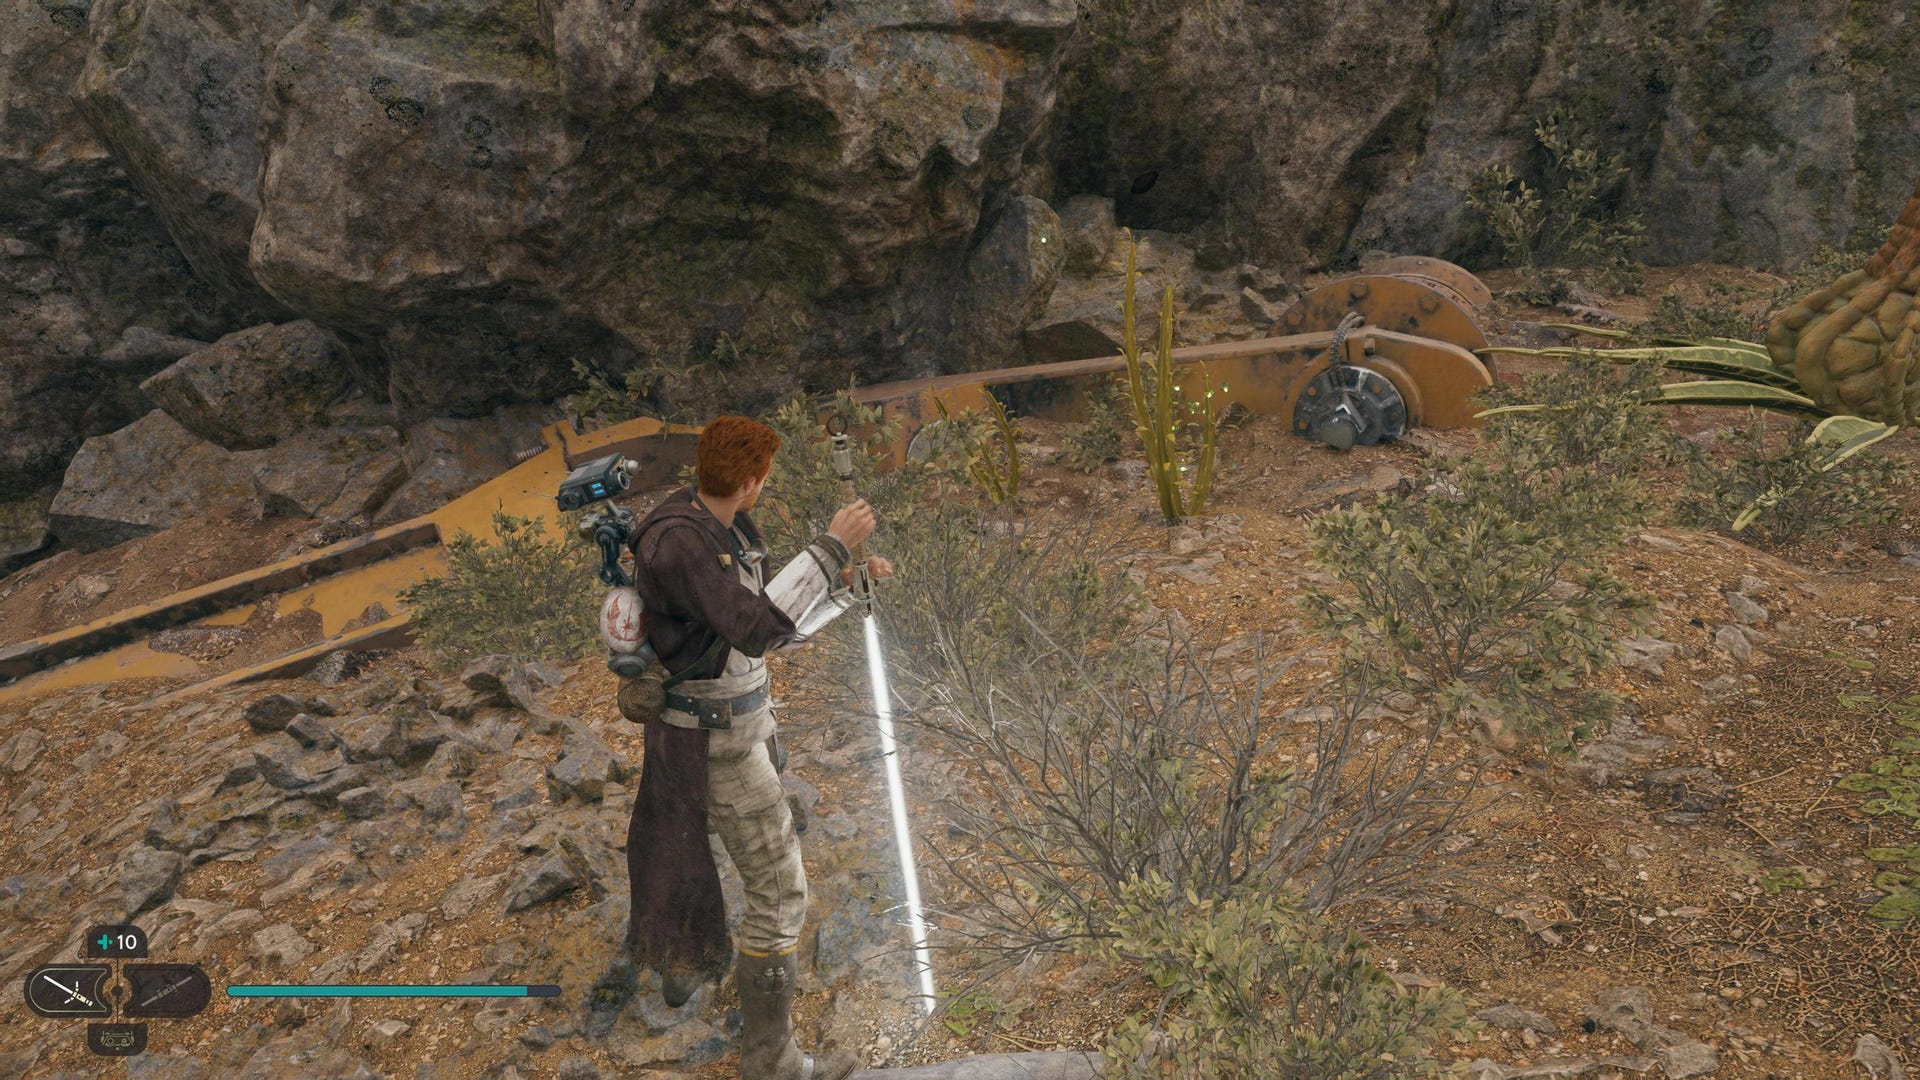
Force Echo (Murdered Prospector):A short way into the Derelict Dam, down the snaking ledges, propped up against a tree.
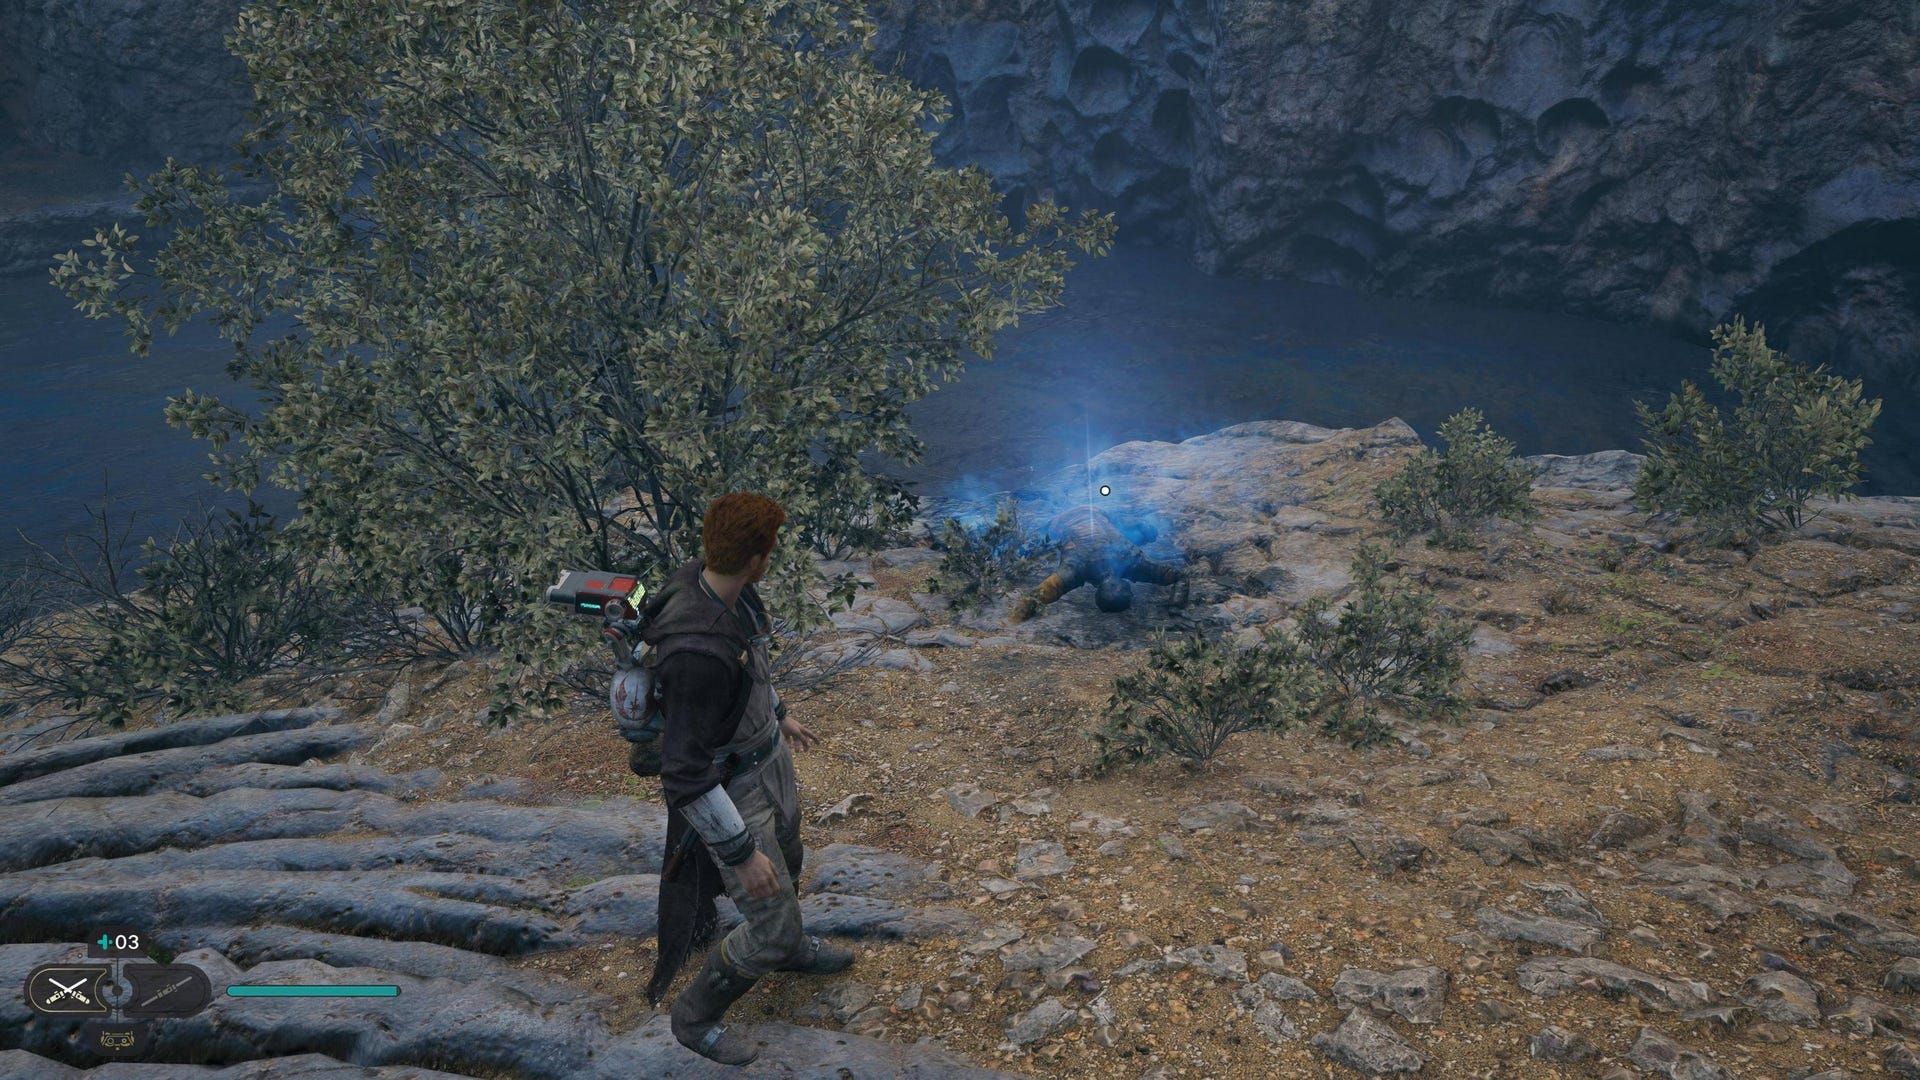
Force Echo (Drowned Prospector): By the edge of the mud lake beneath the Murdered Prospector and the Meditation Point.
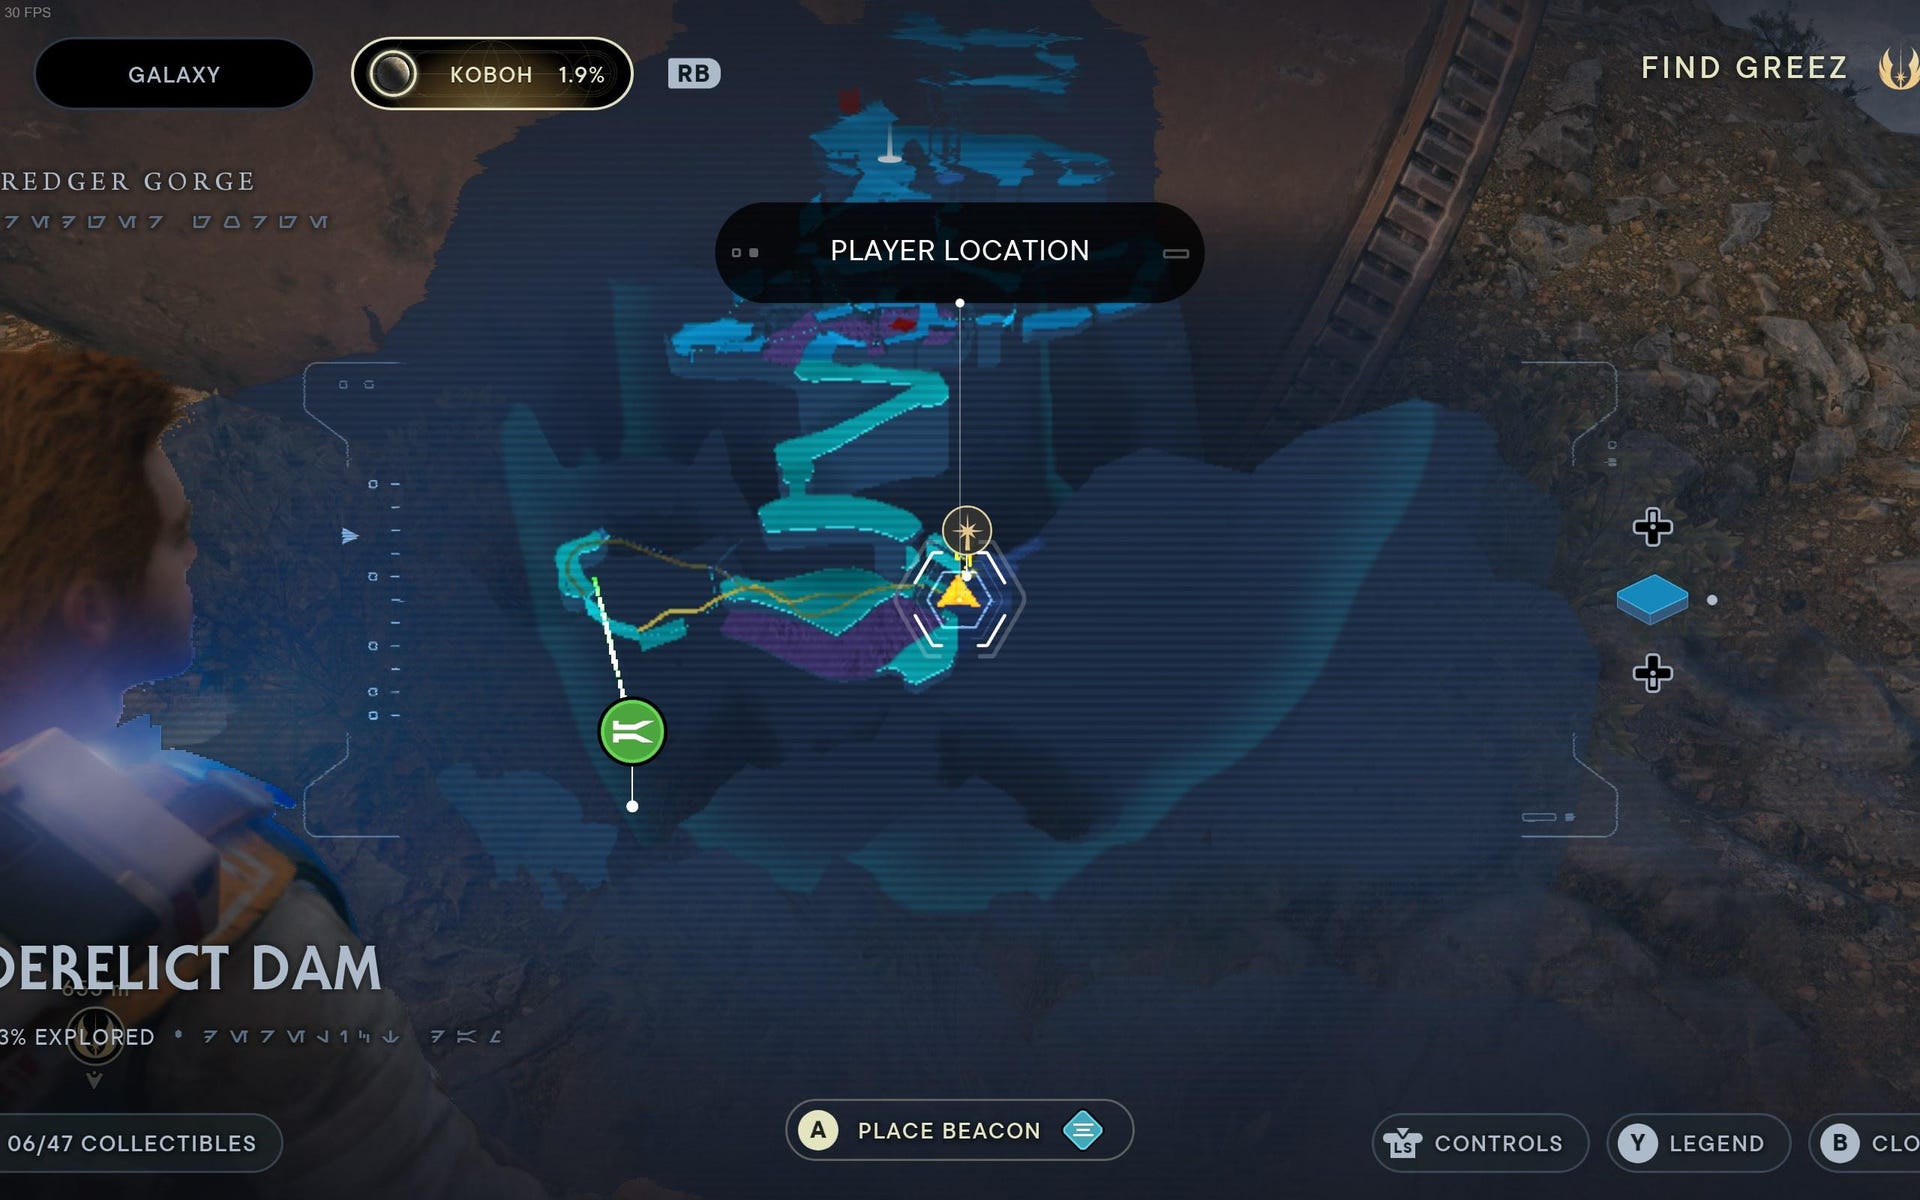
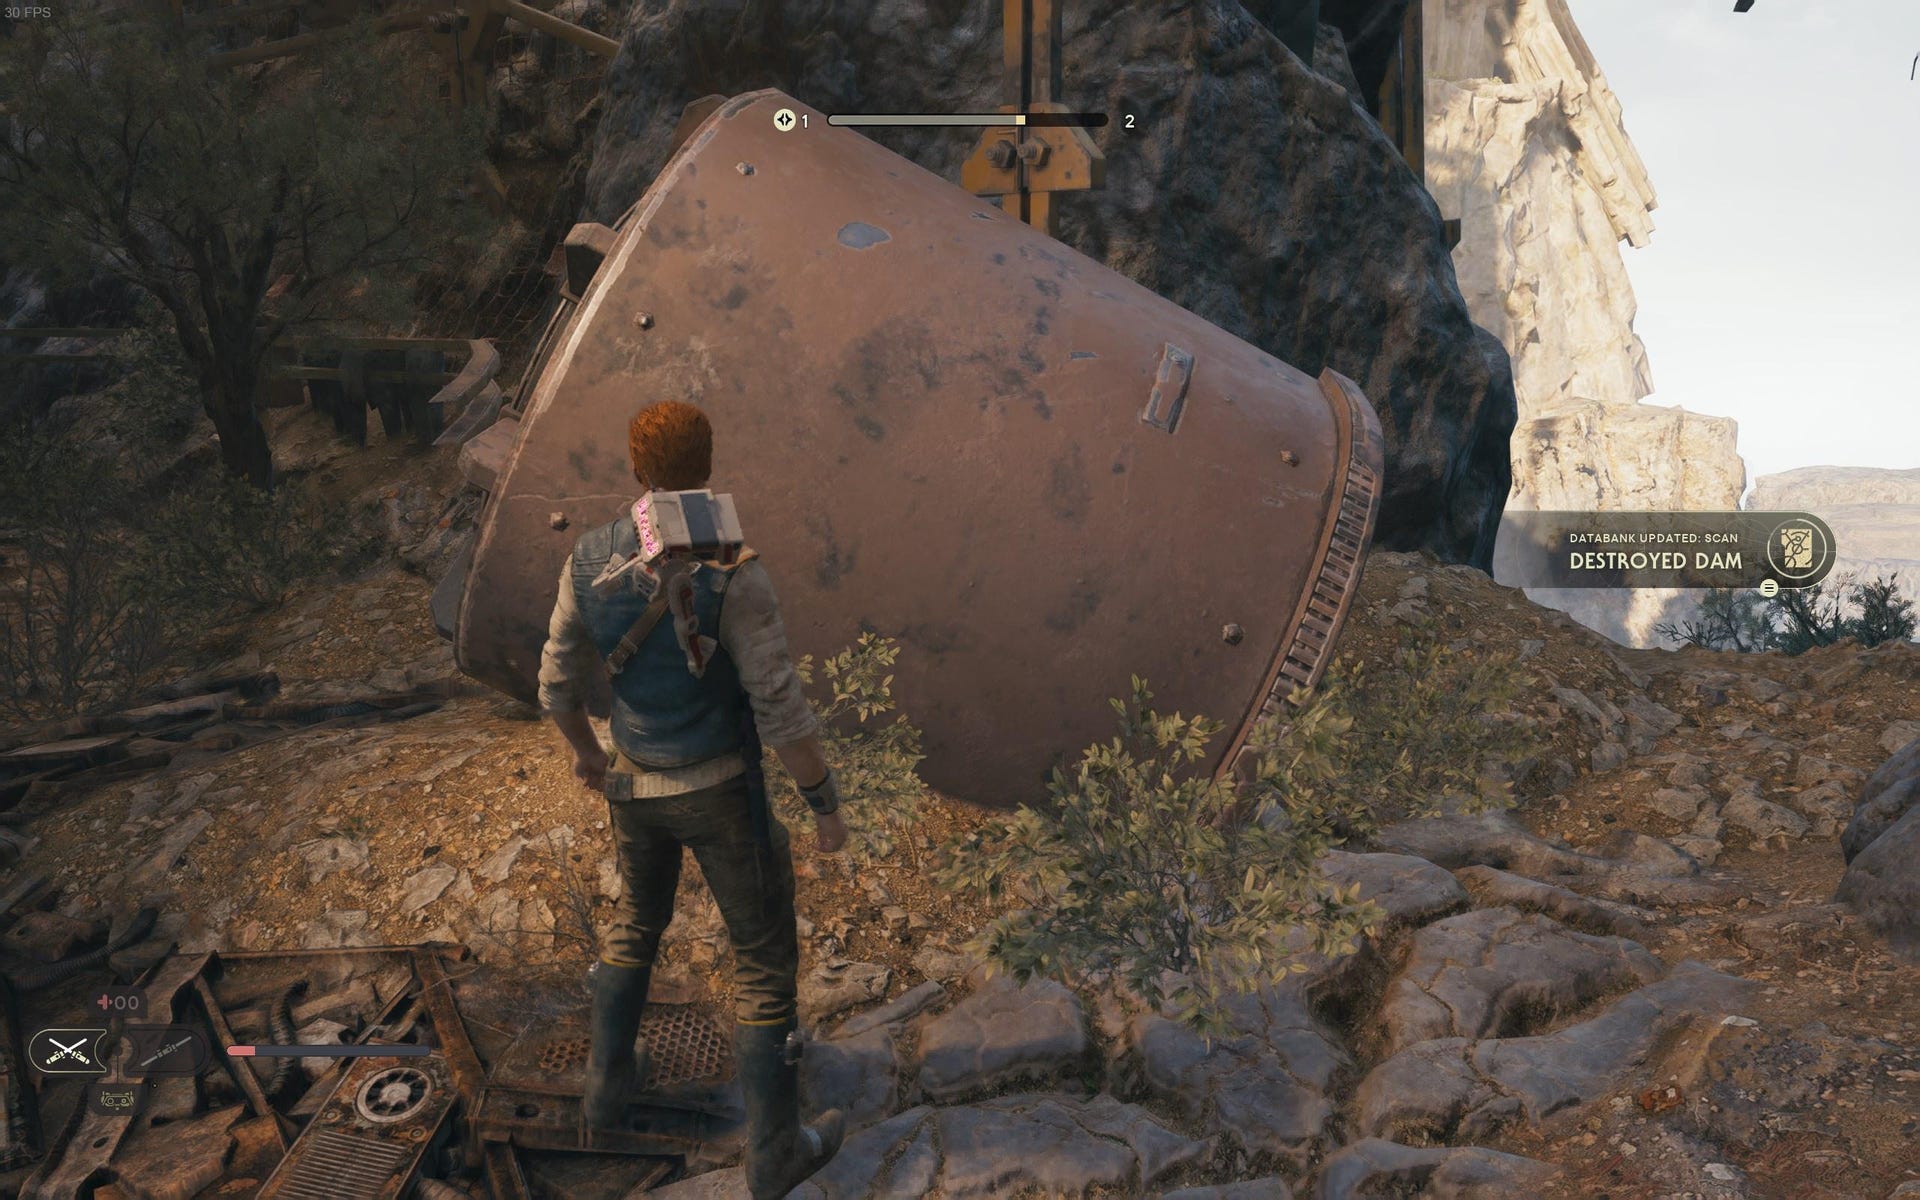
Databank (Destroyed Dam): Scan the large brown barrel by the edge of the mud lake beneath the Murdered Prospector and the Meditation Point.
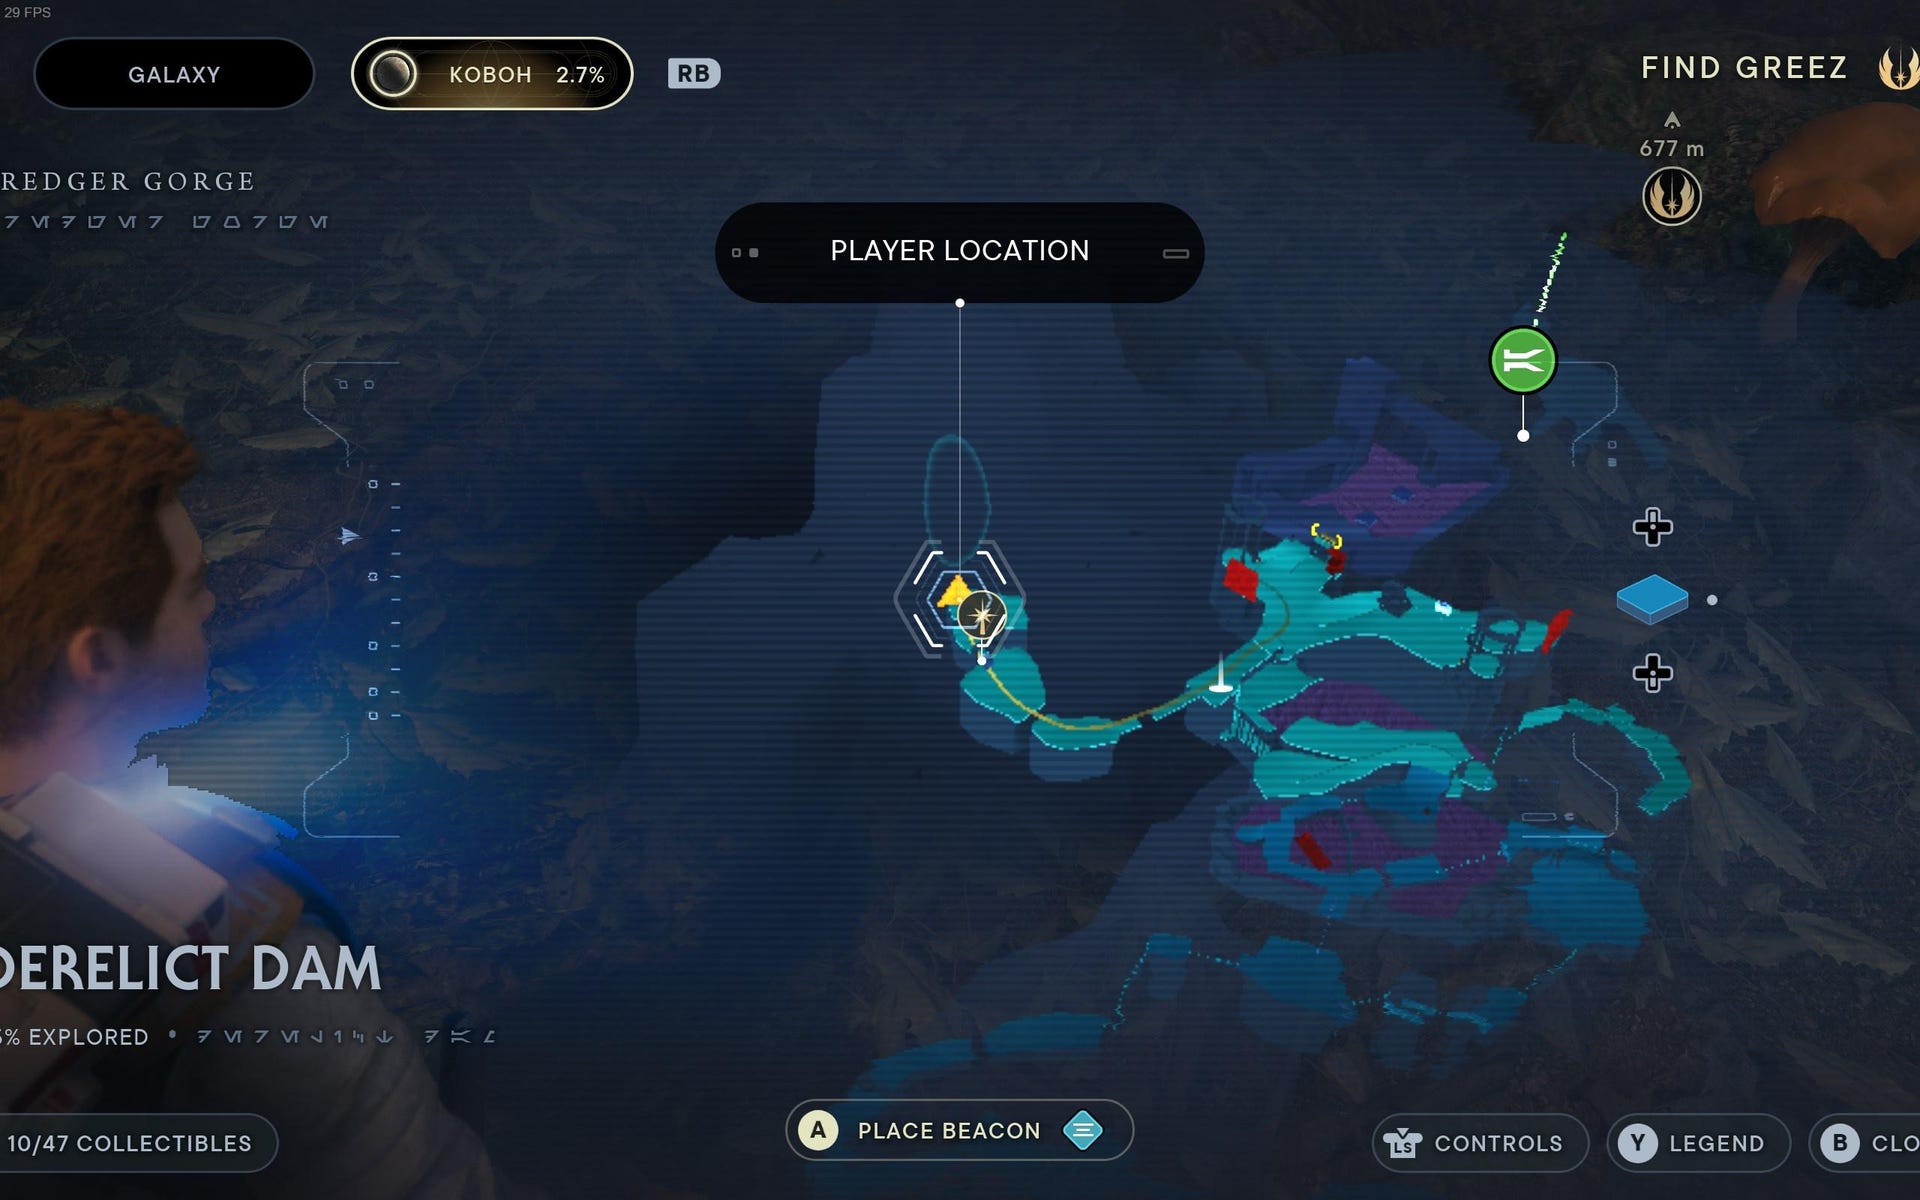

Databank (Gorocco Nest): After the Gorocco fight across the rickety bridge from the Meditation Point, Force Pull the side path and head down it.
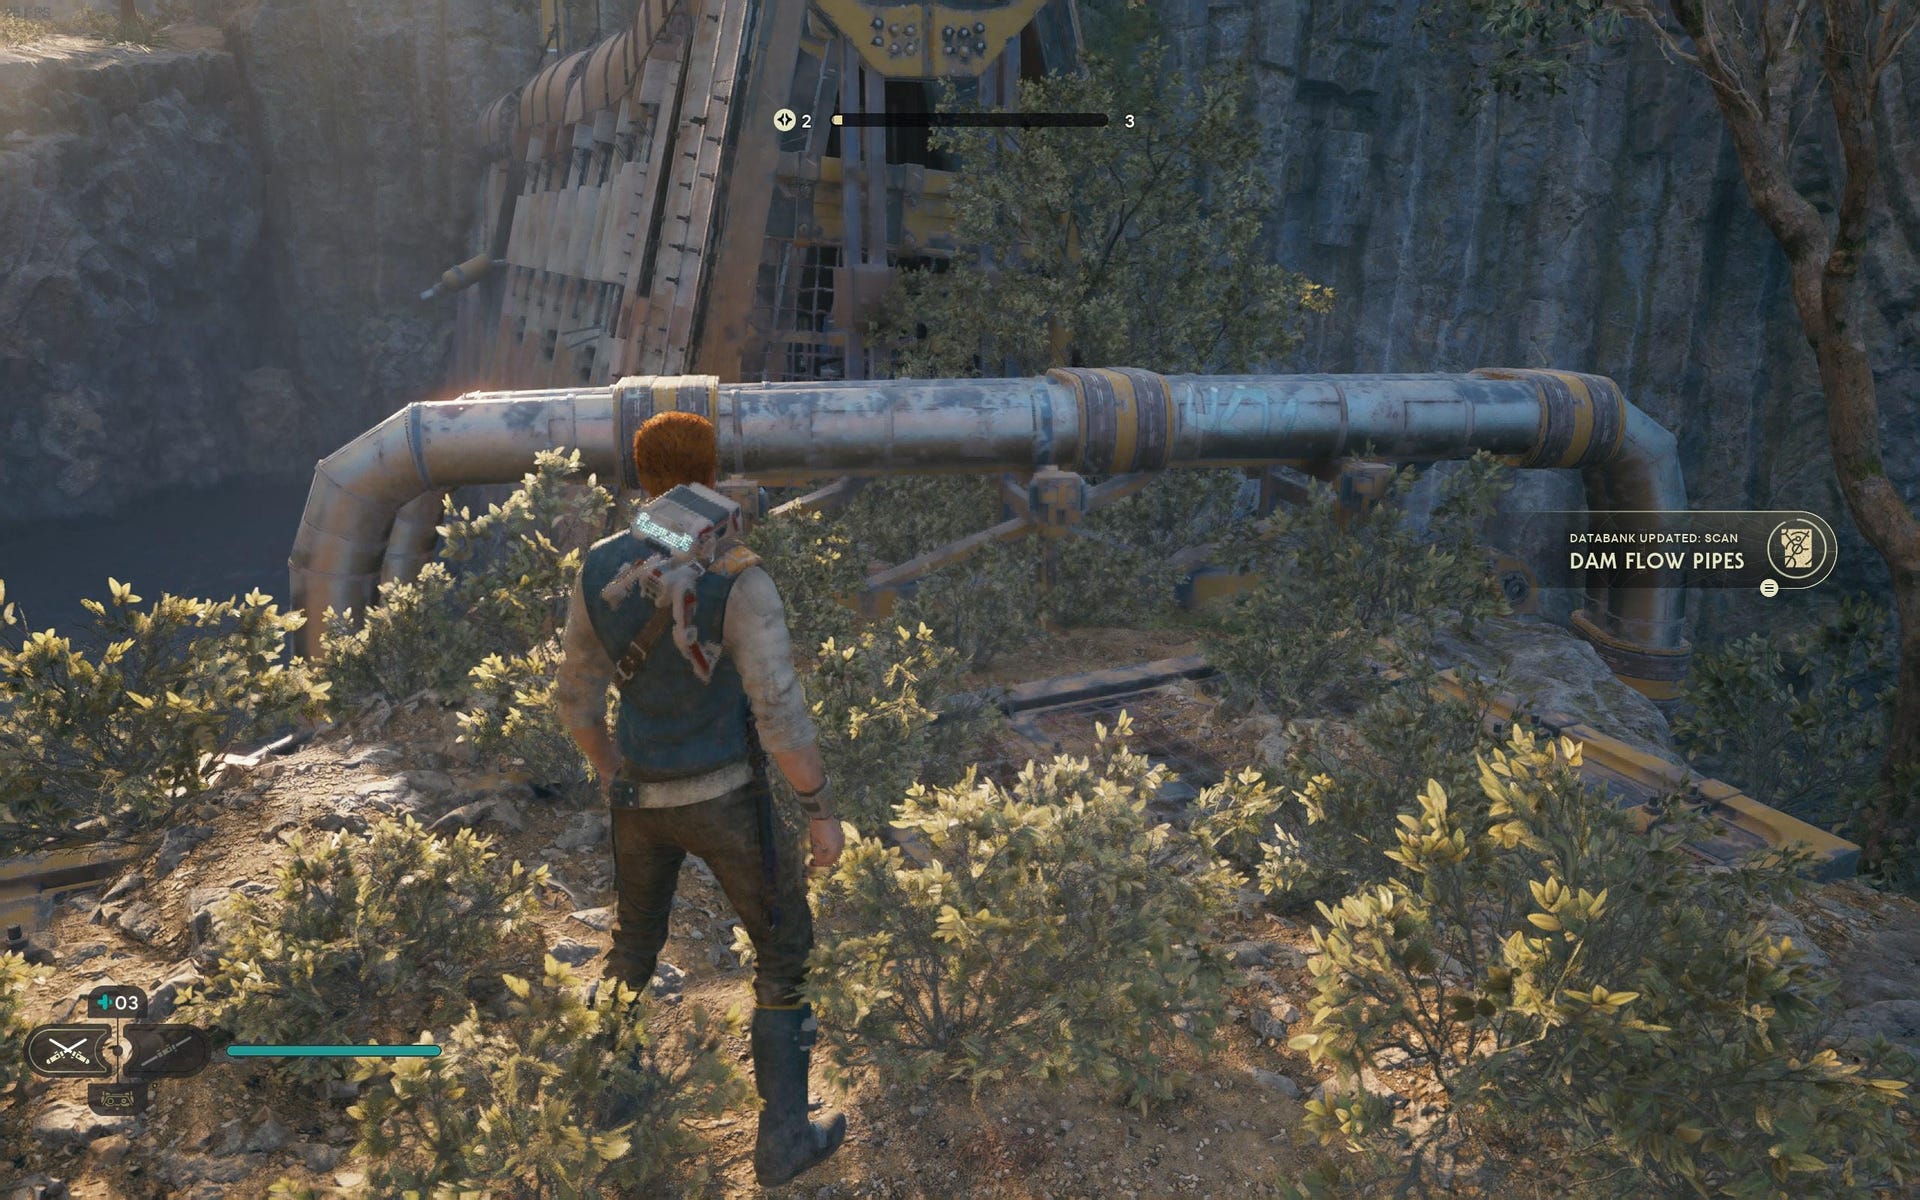
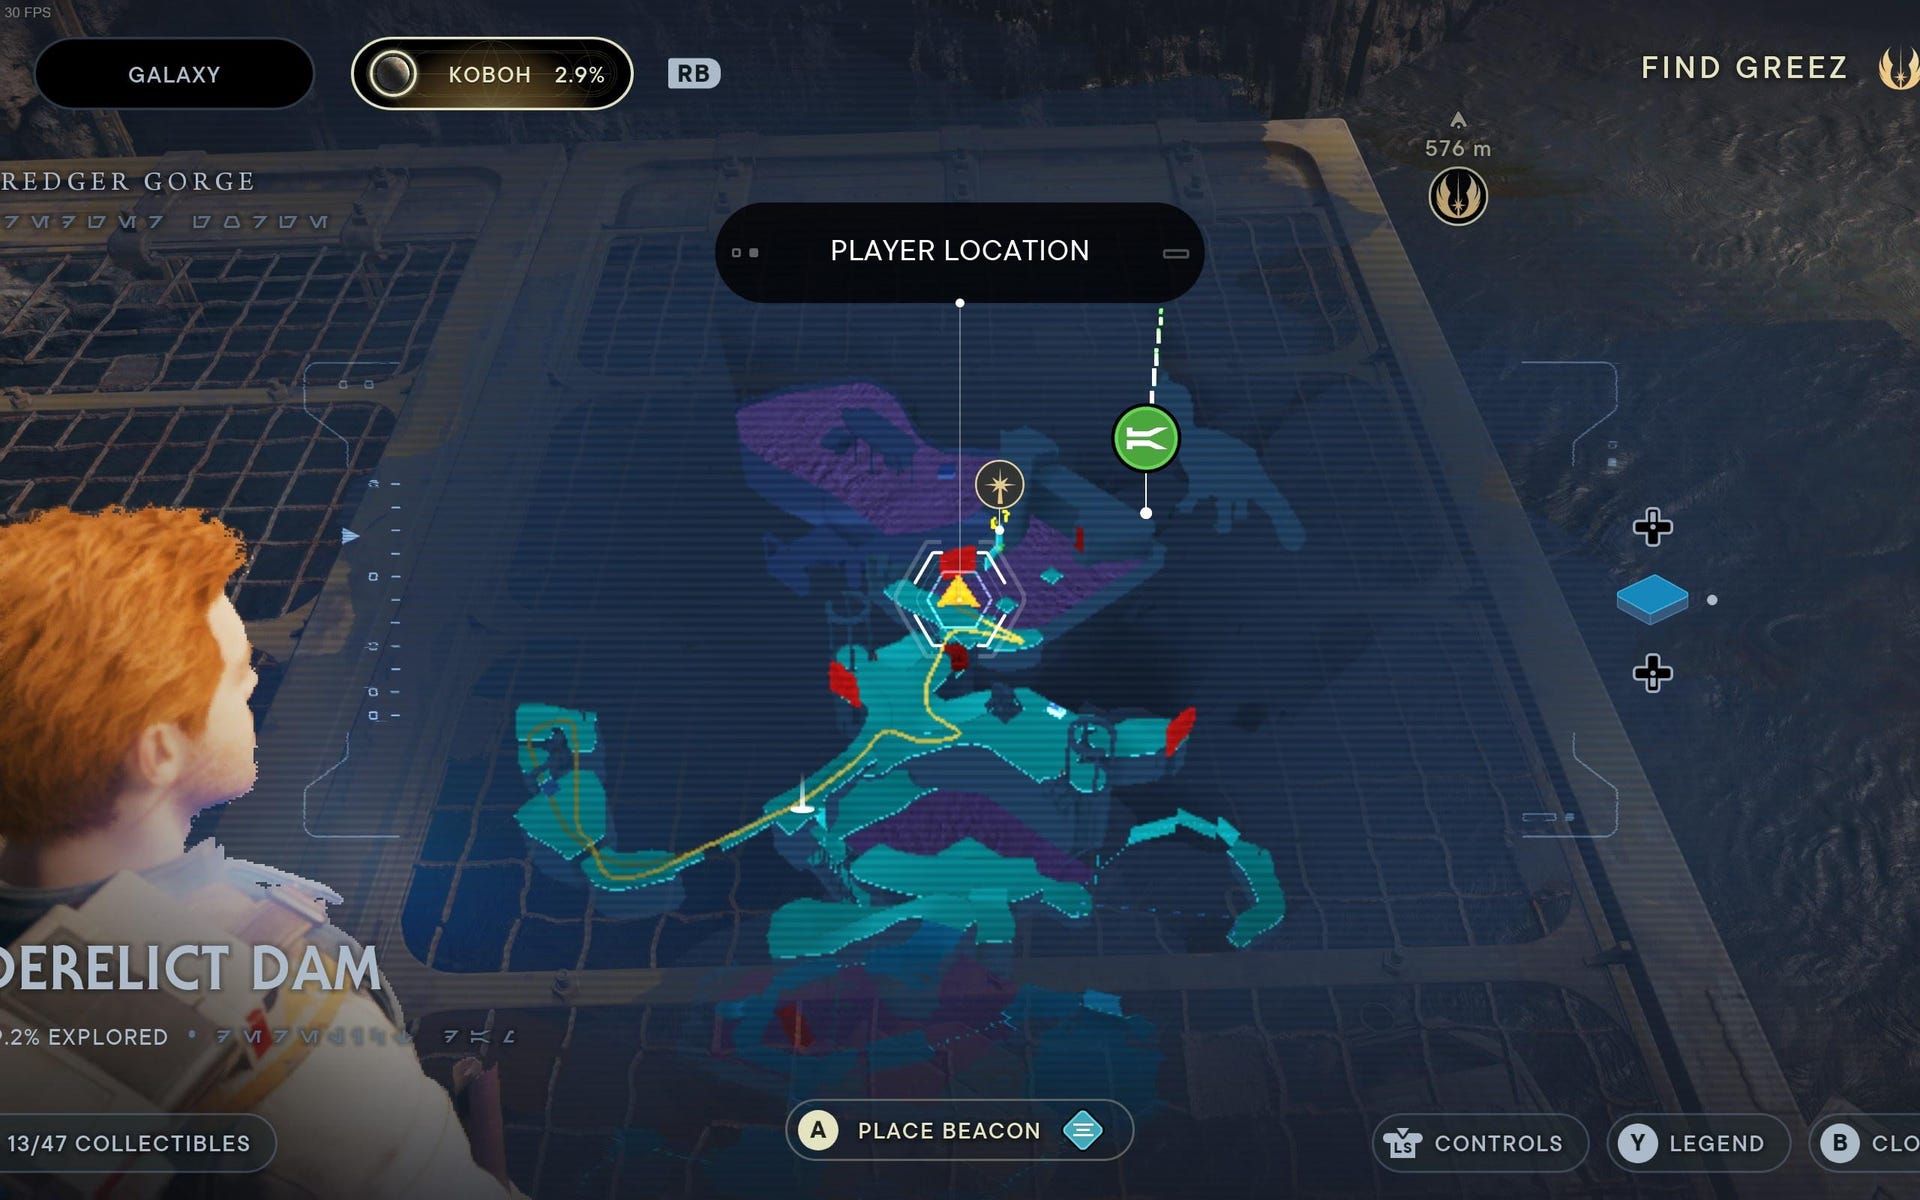
Databank (Dam Flow Pipes): From the elevator/workbench side, hop across the gap to near the dam itself, and scan the pipes on the right.

Databank (Crumbling Dam Wall): Scan the dam itself where the tar is leaking through.
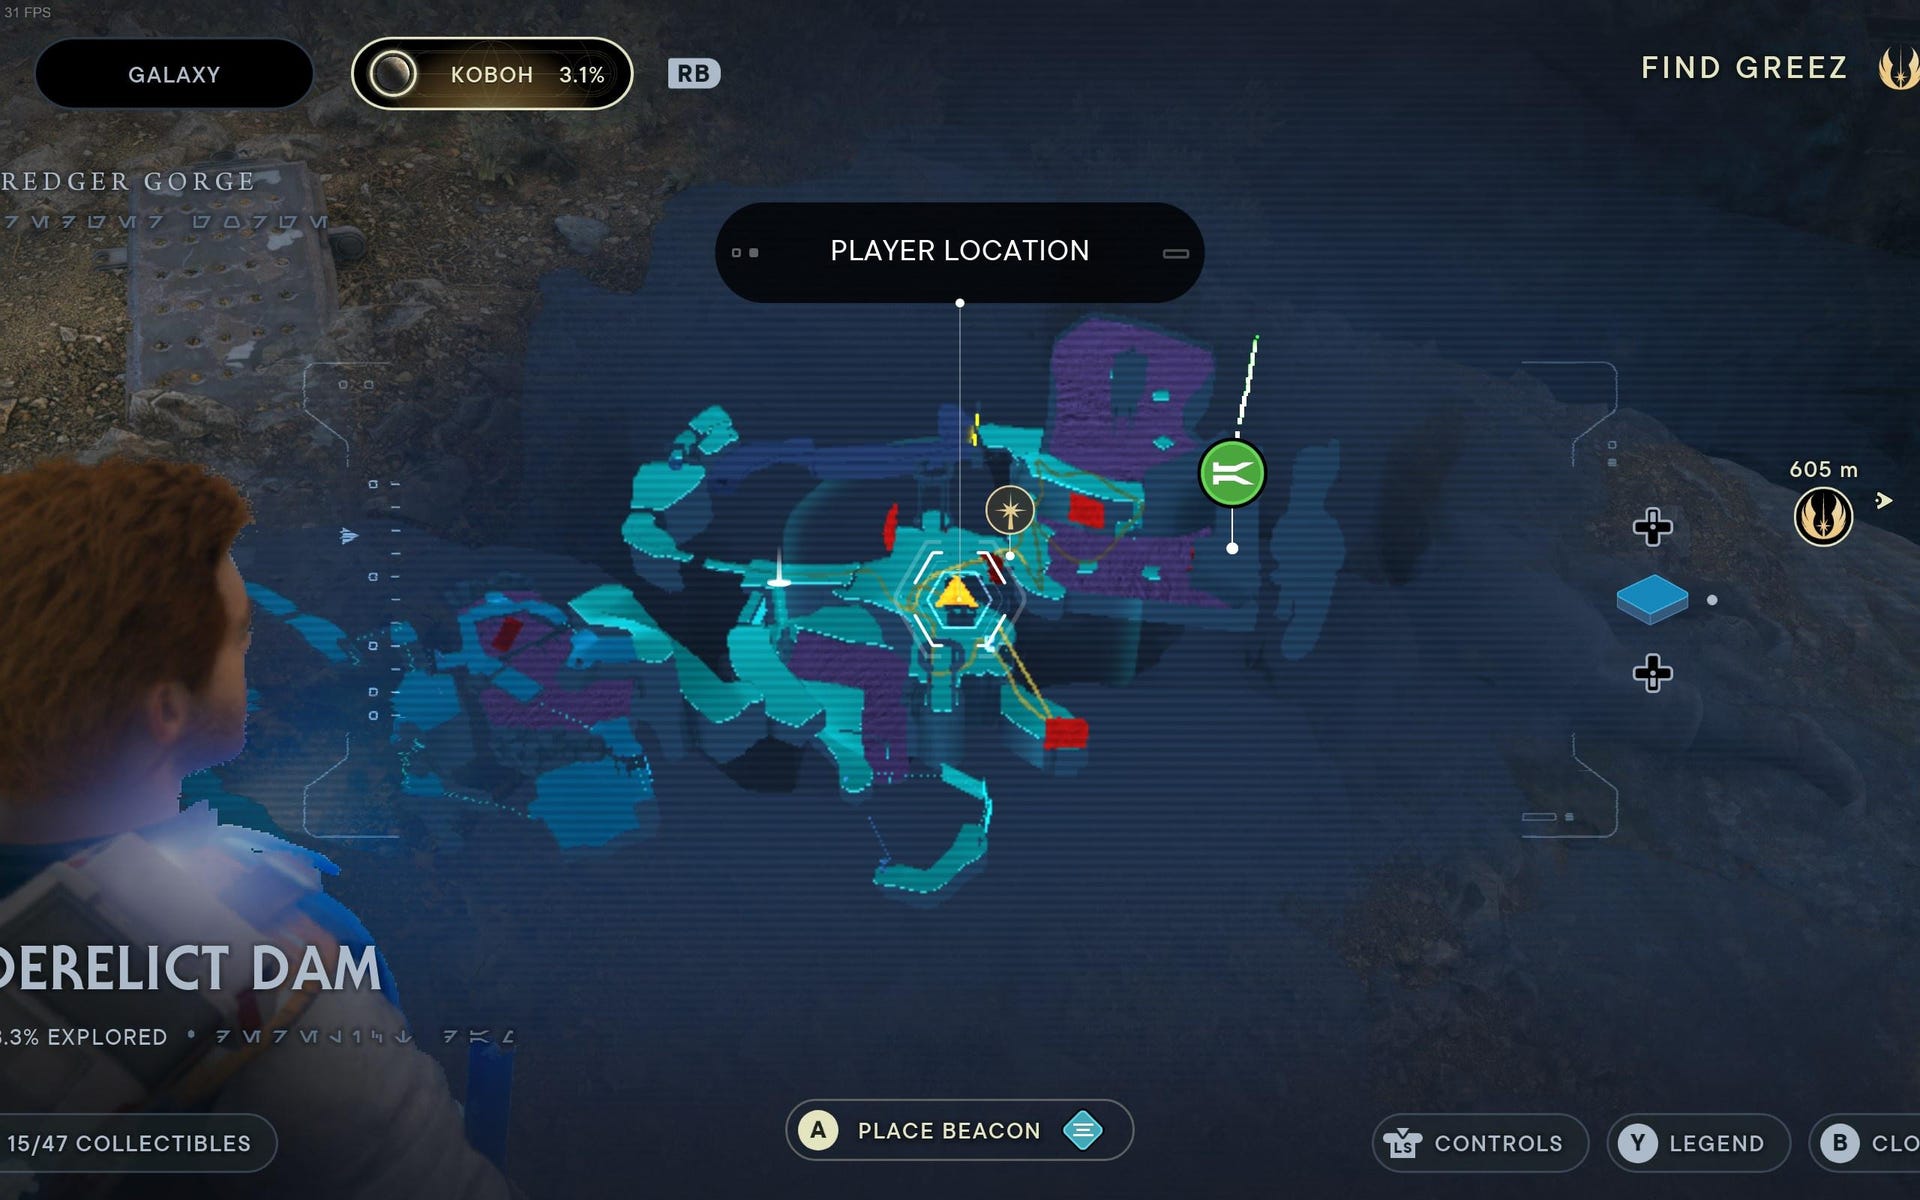
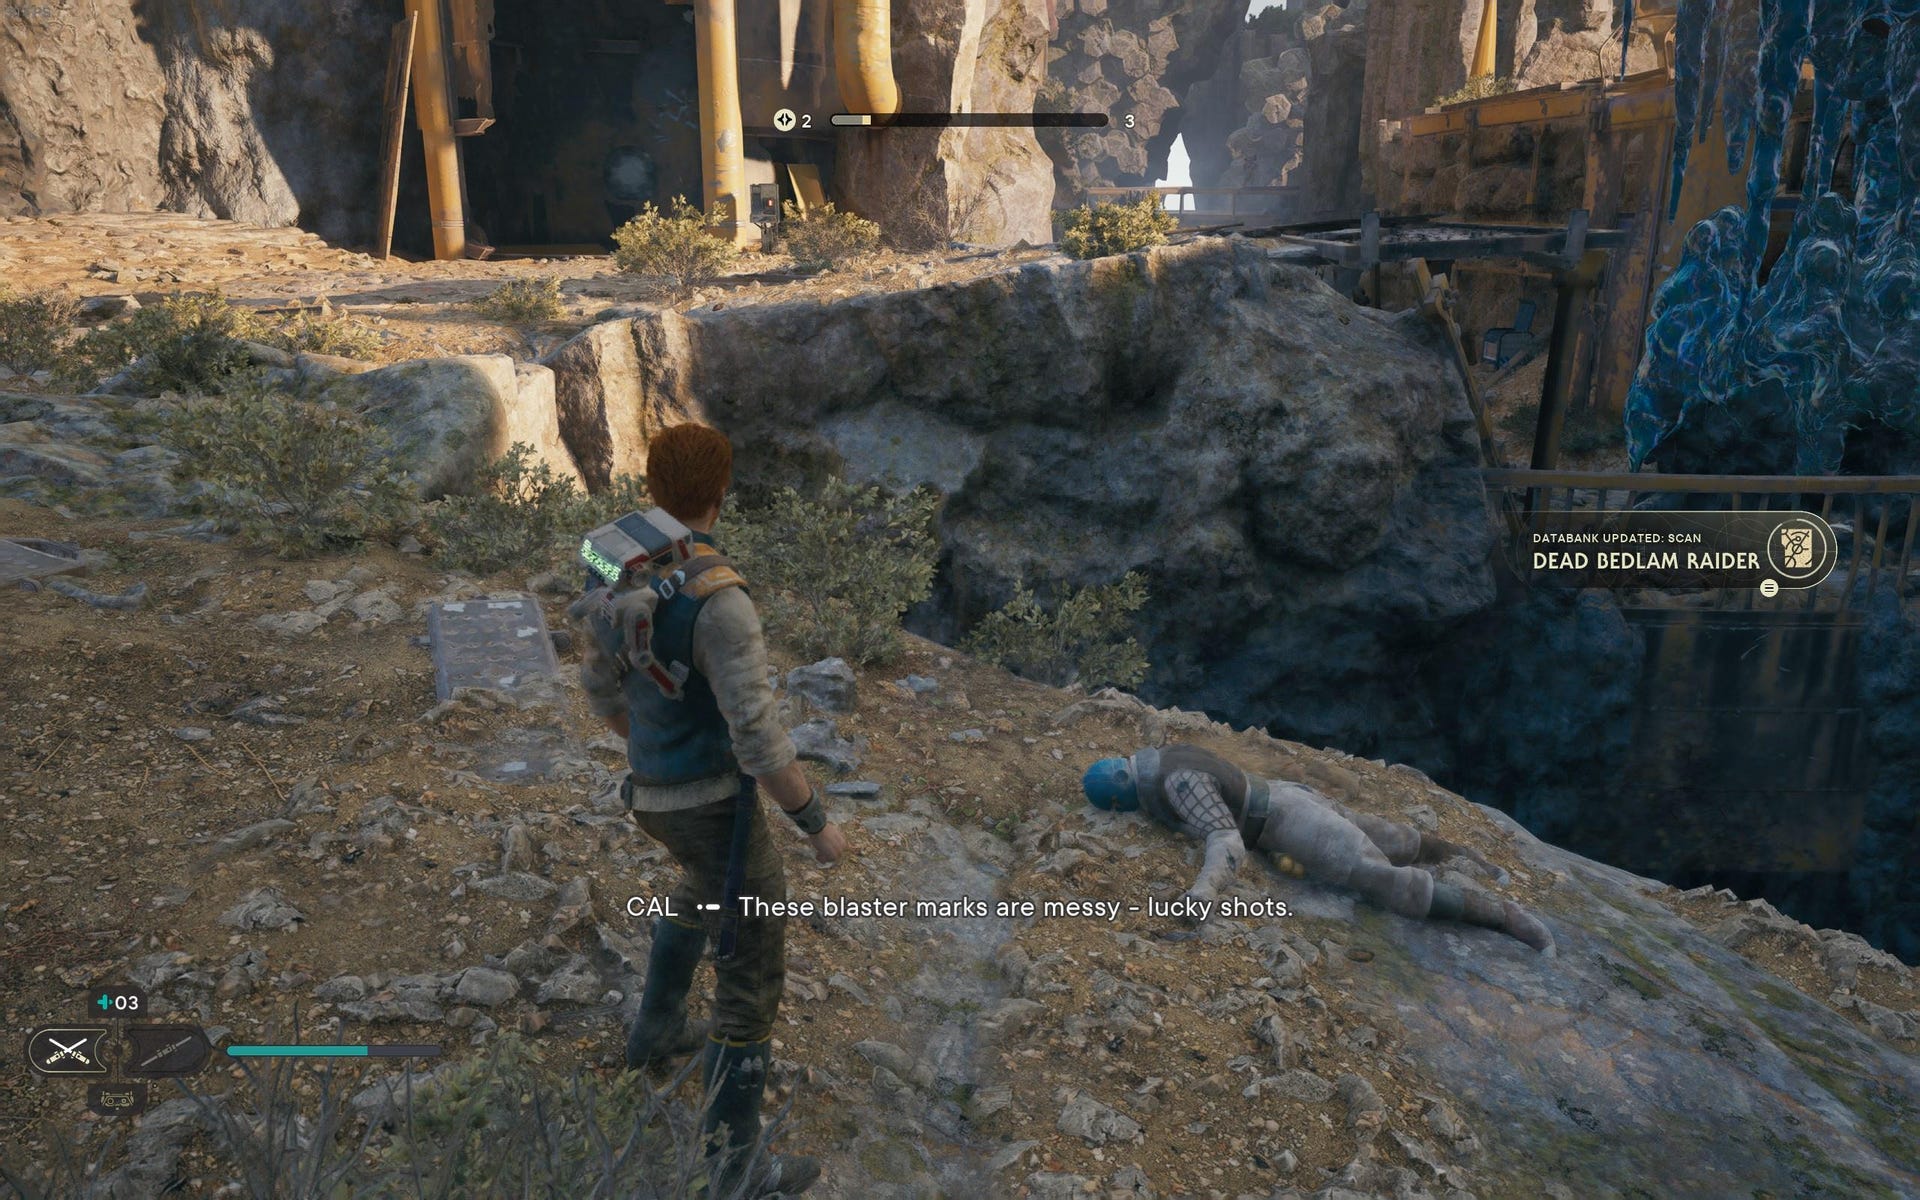
Databank (Dead Bedlam Raider): On the ledge beside the Workbench, wall-run across the gap and scan the dead body.

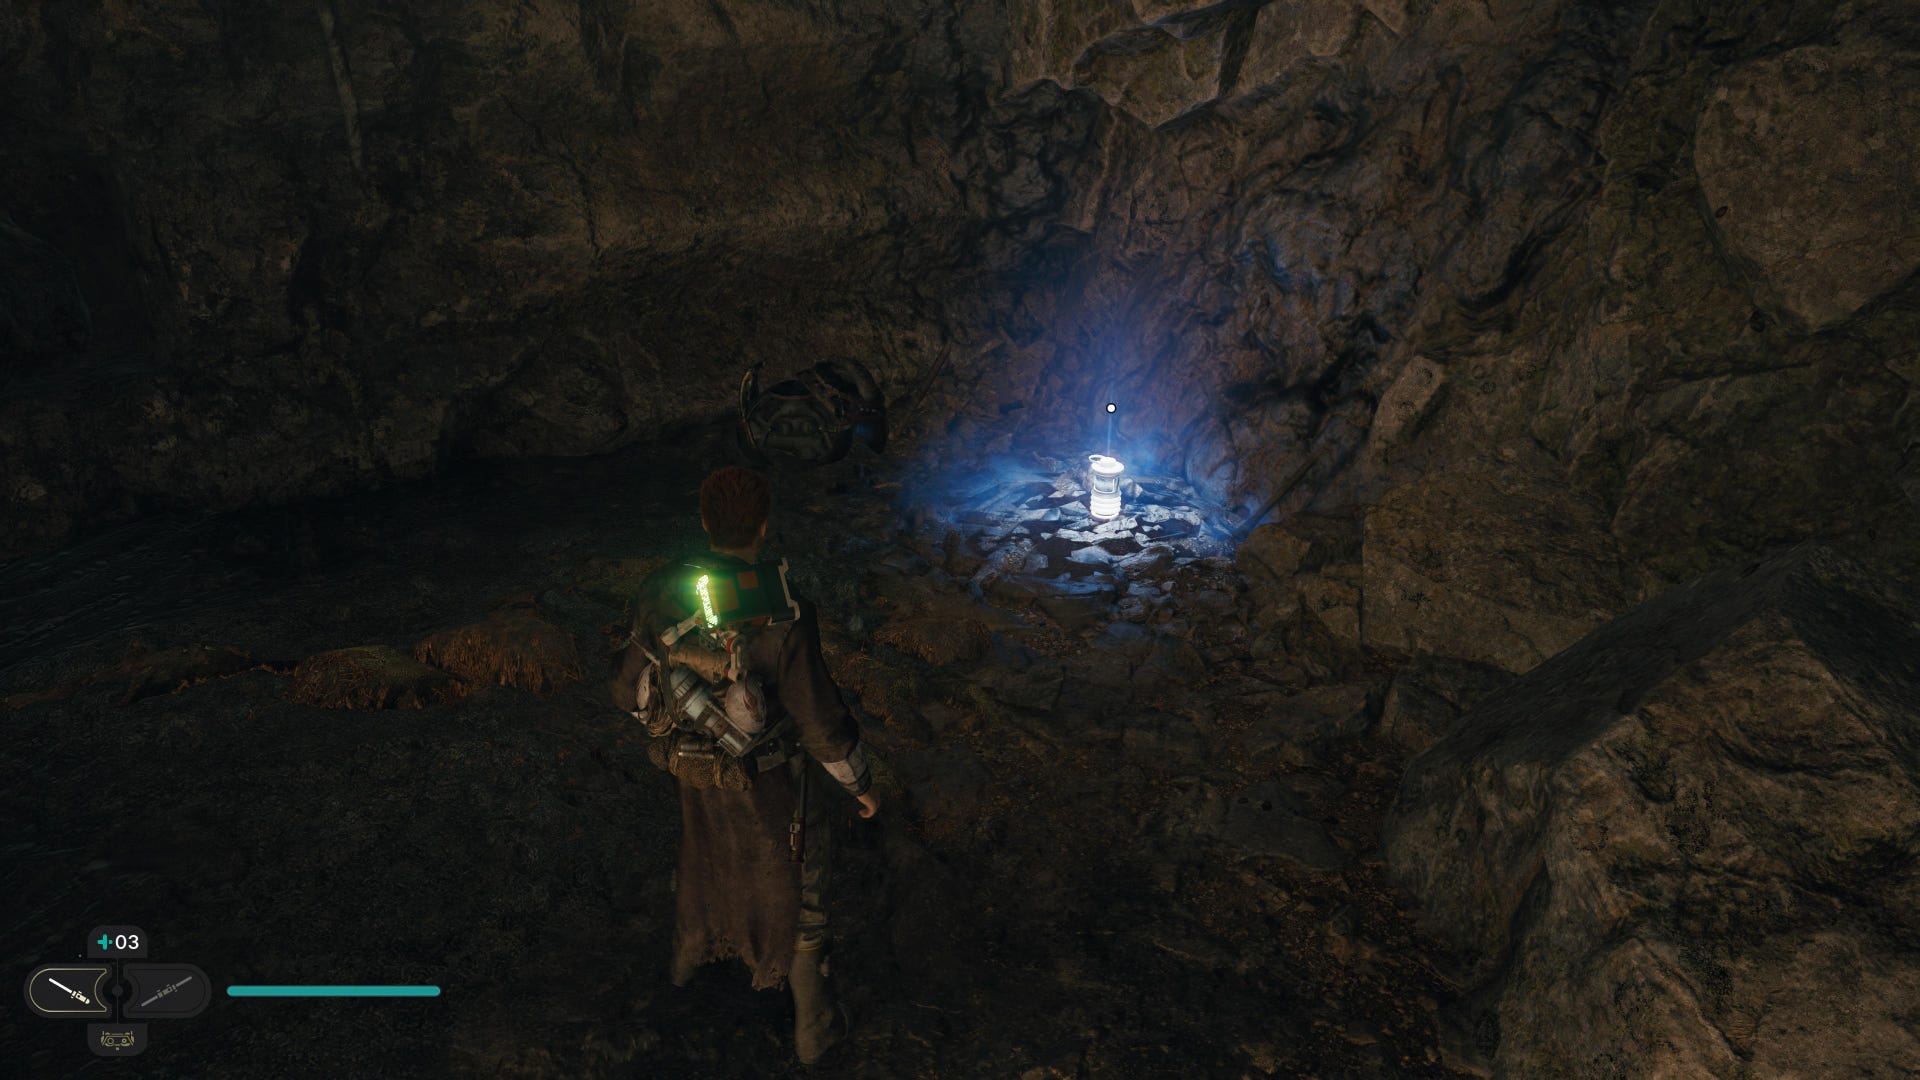
Force Echo (A Desperate Escape): In the cave after the first couple of Roller Mines to the left behind the dam.
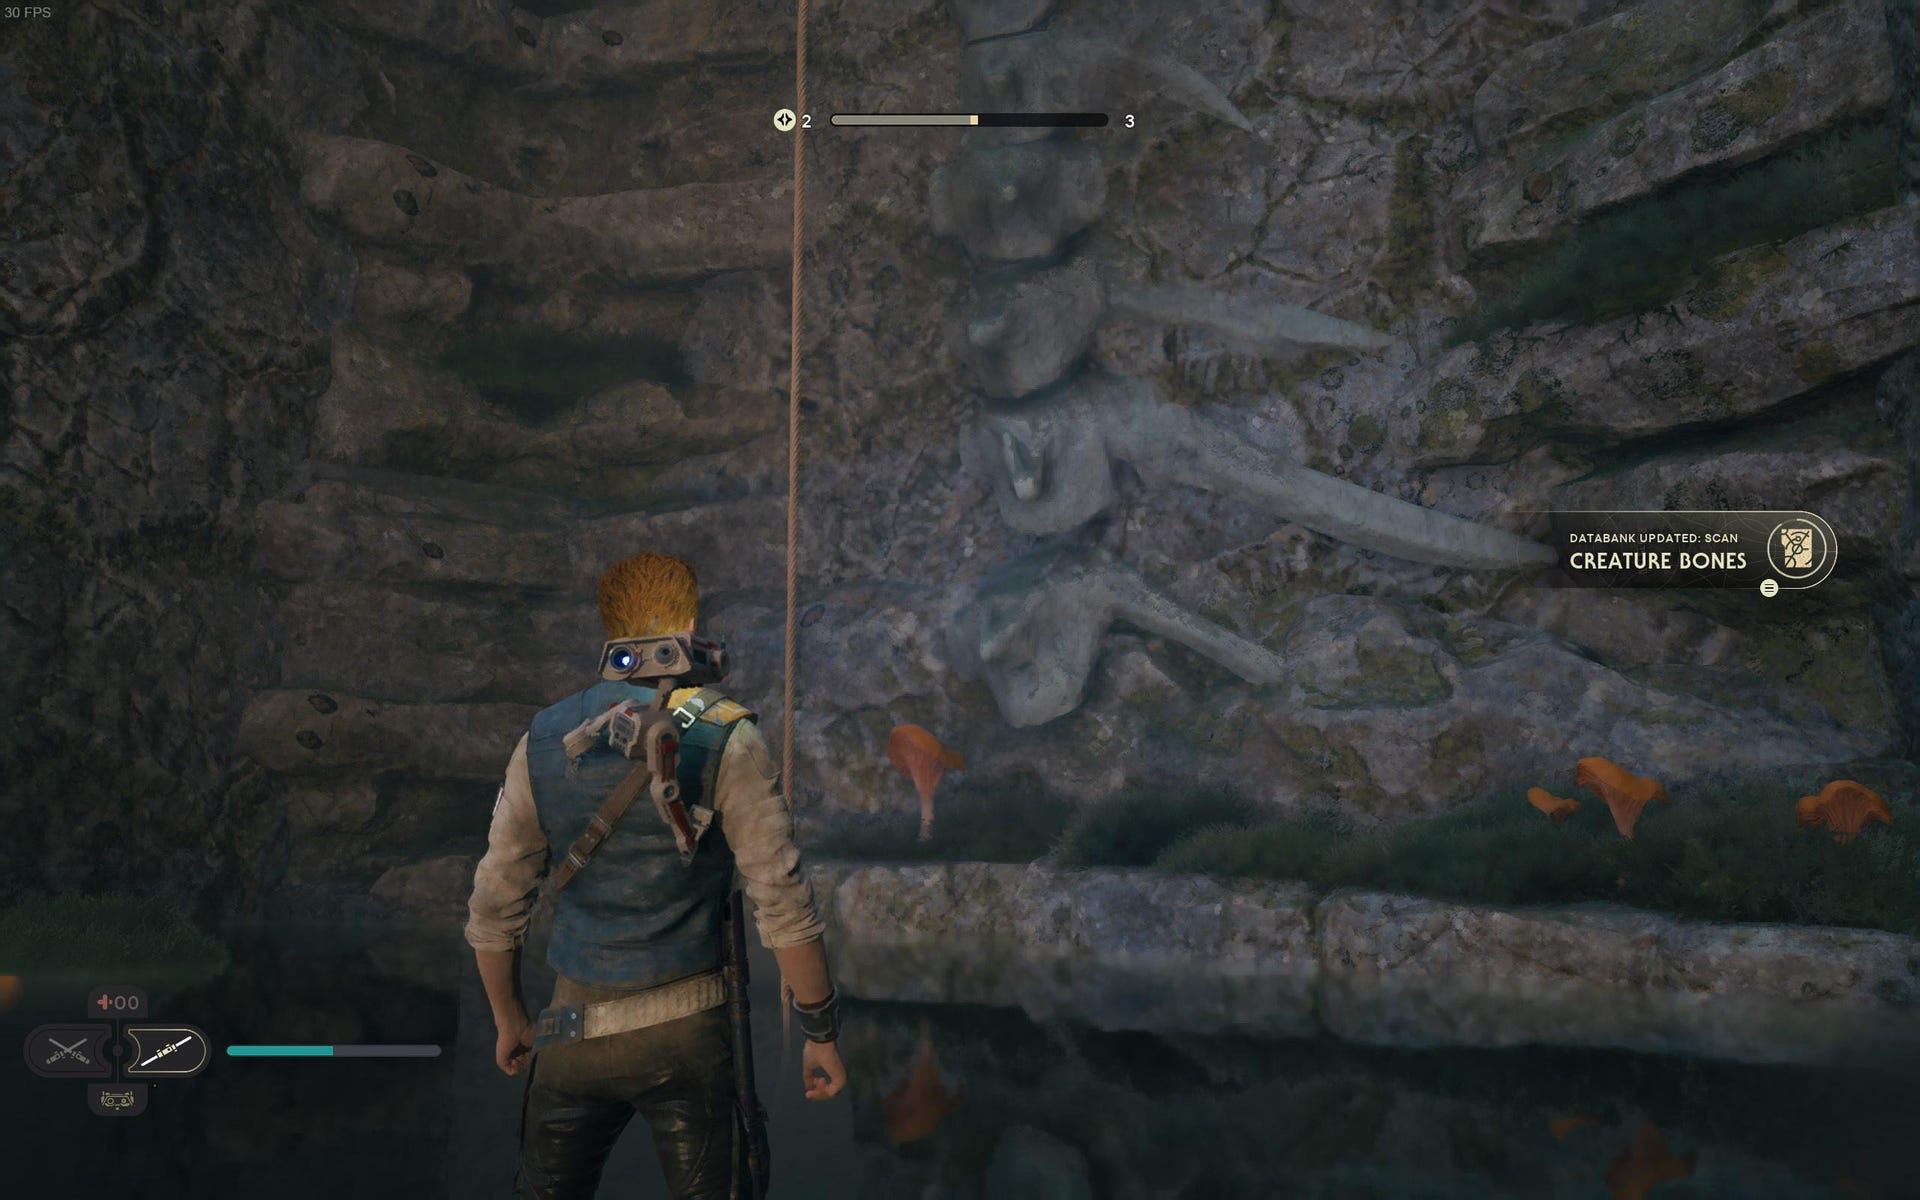
Databank (Creature Bones): At the top of the elevator next to the Workbench. Use a Roller Mine to blow open the wall on the lower ledge beside the Workbench, then follow the path up. Found while climbing the rope.
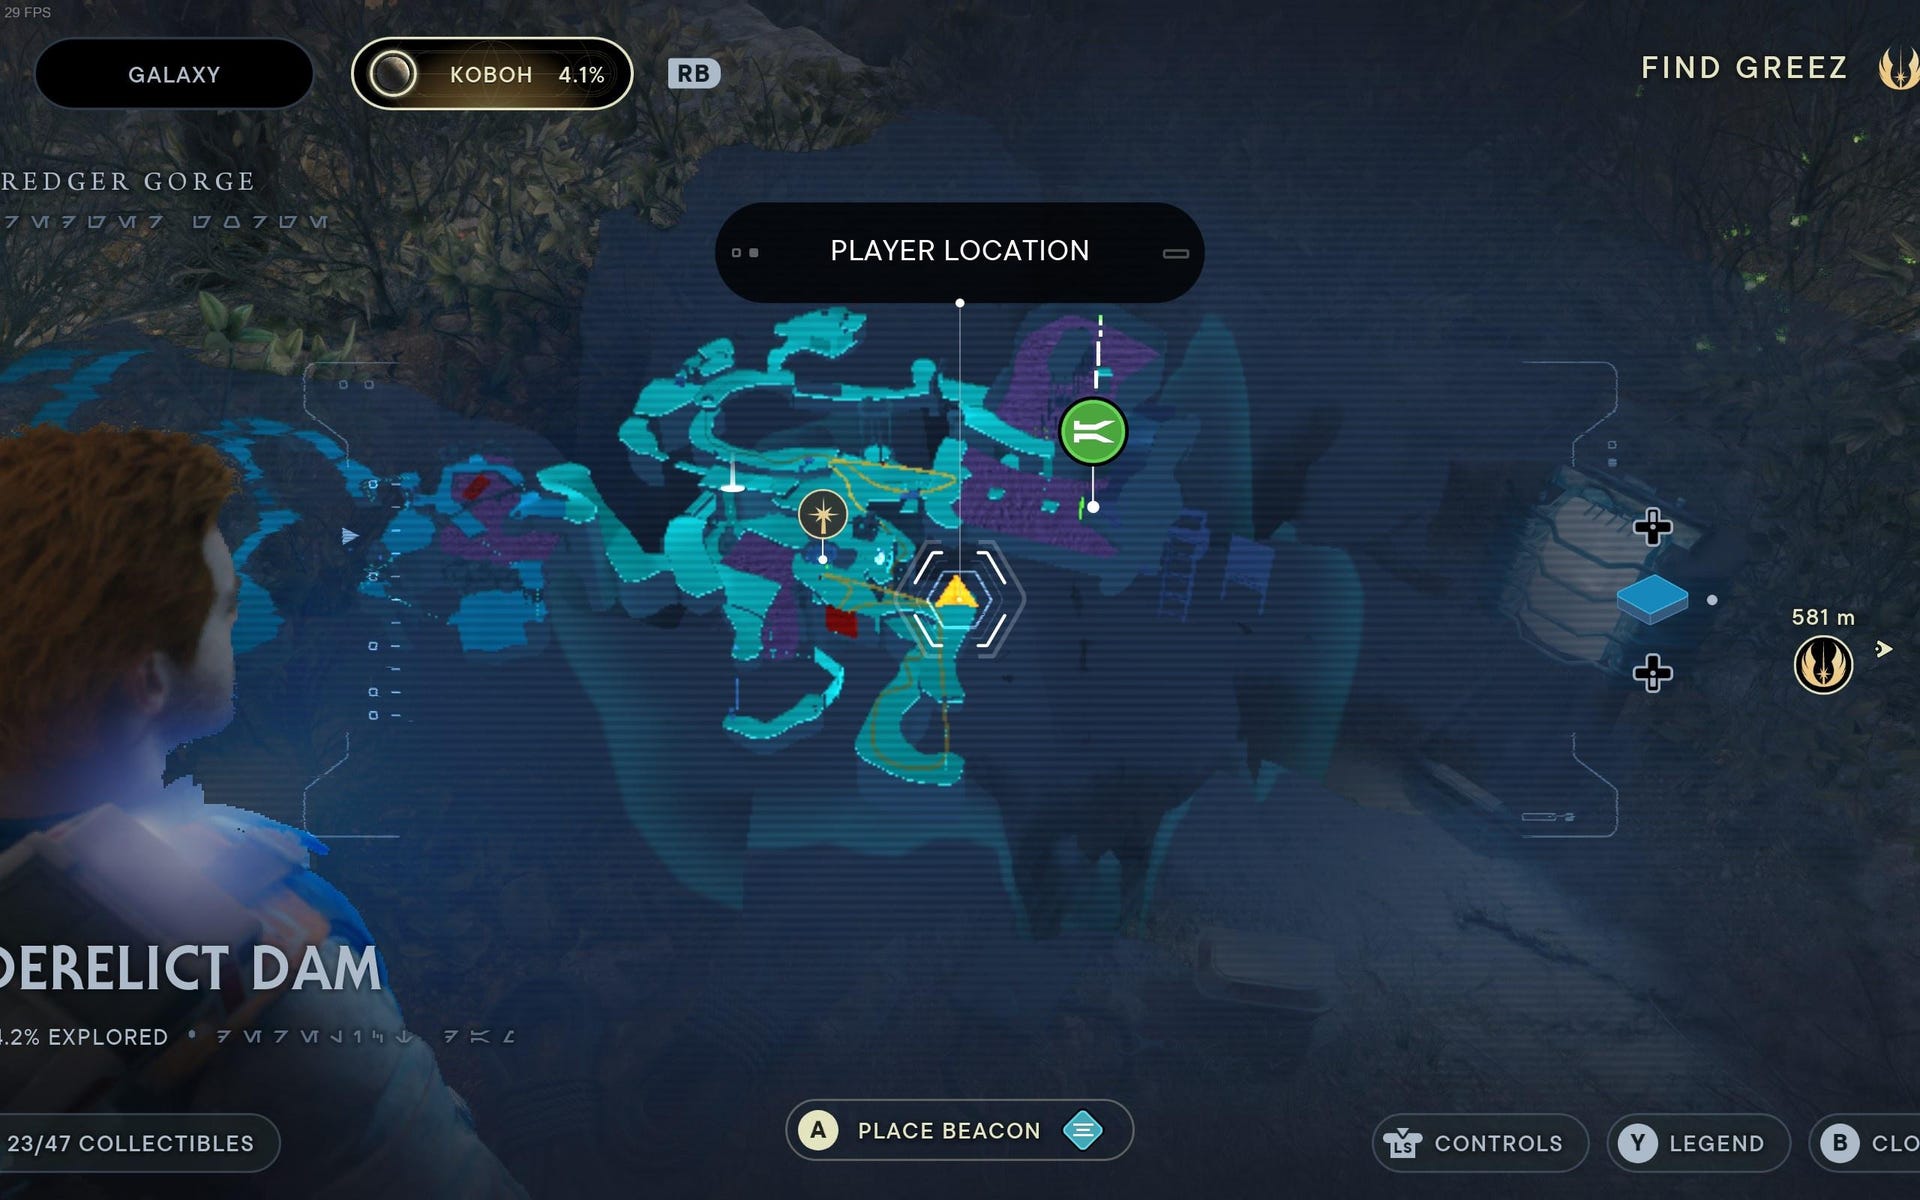
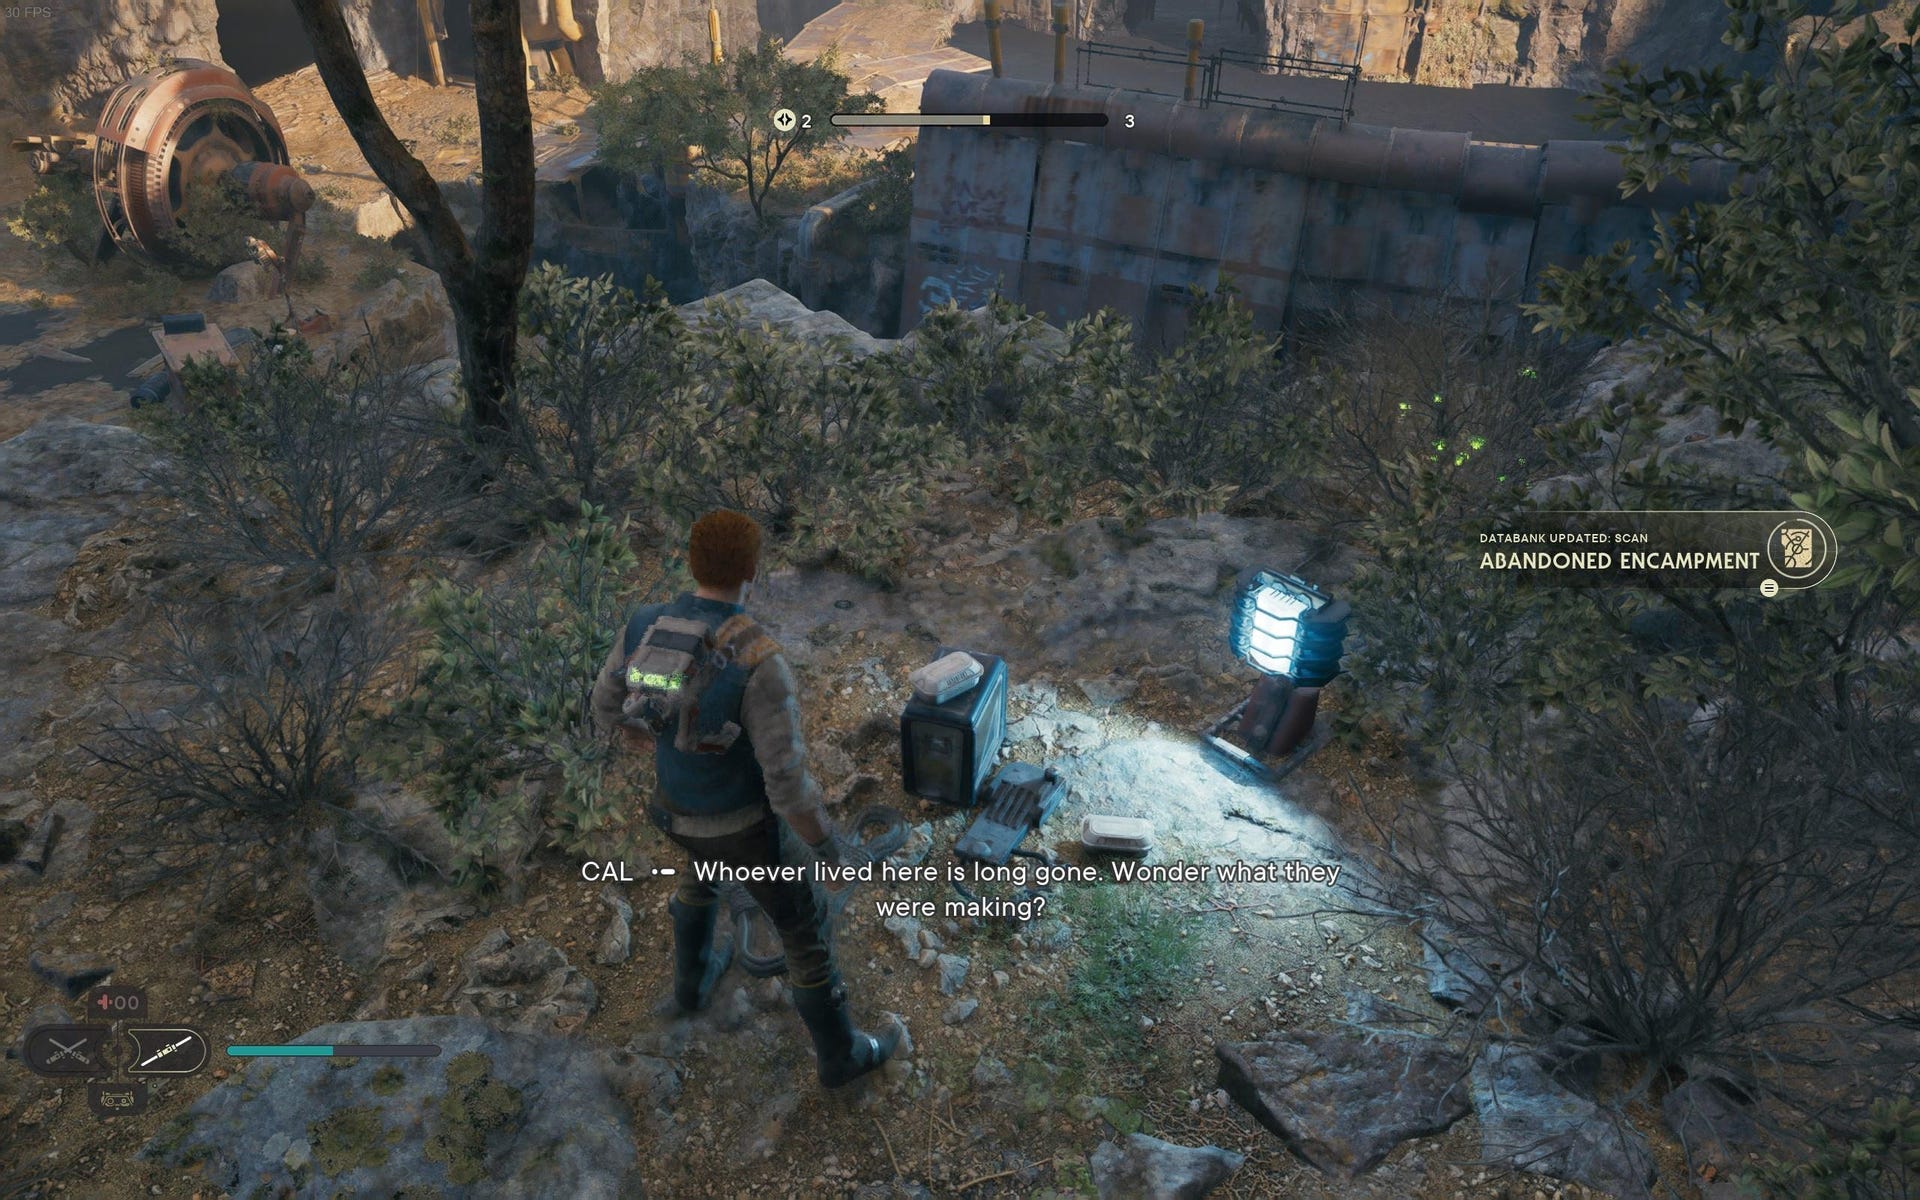
Databank (Abandoned Encampment): At the top of the elevator next to the Workbench. Use a Roller Mine to blow open the wall on the lower ledge beside the Workbench. Just before the bridge when you’re attacked by two Roller Mines.
Force Echo (The Dredger Run): In the bog beyond the dam, next to the Mullet hair chest. Use the platforms in the bog to reach the ledge.
Derelict Dam Force Tears:

Force Tear (Fractured Agility): In front of the top of the elevator between the Roller Mine cave and the dam. To reach the top for the first time, free the giant bird in Forest Array, then reach the end of Boiling Bluff and ride the bird across the map.
Derelict Dam Treasures:

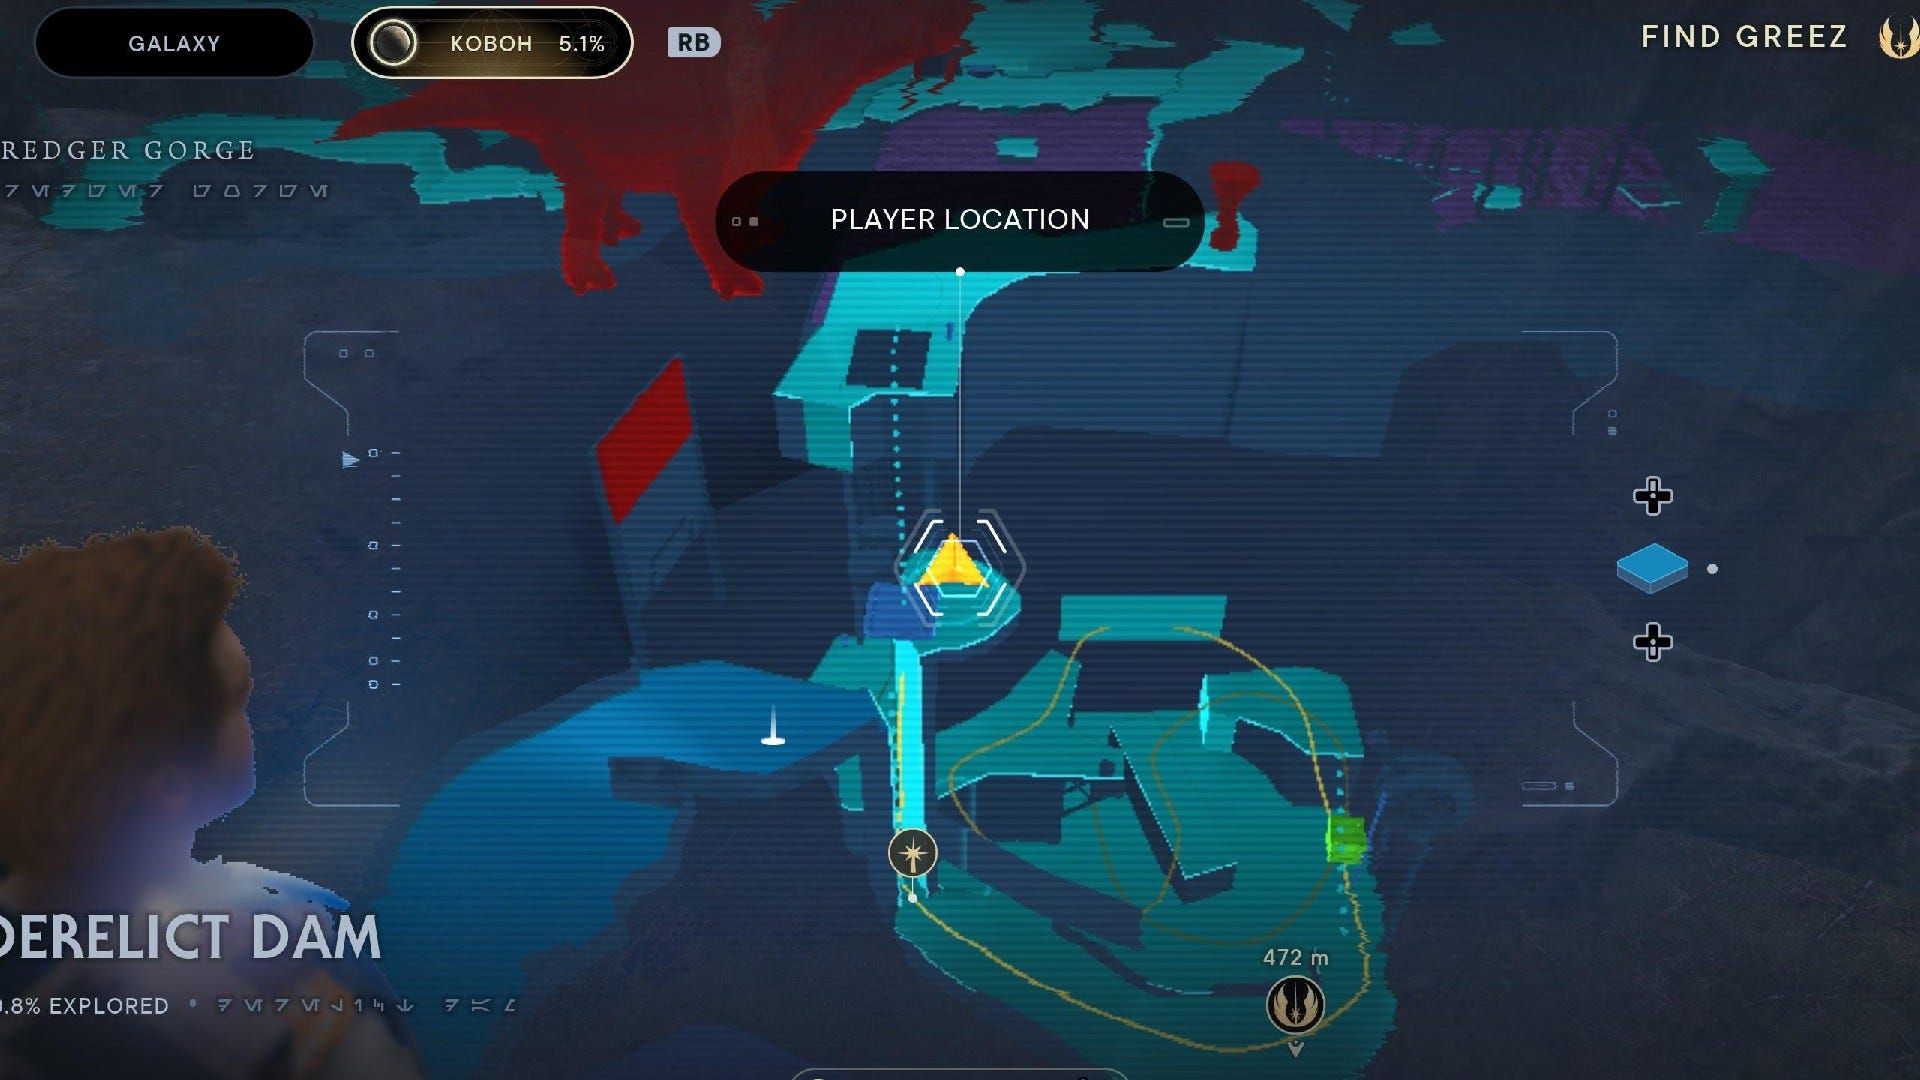
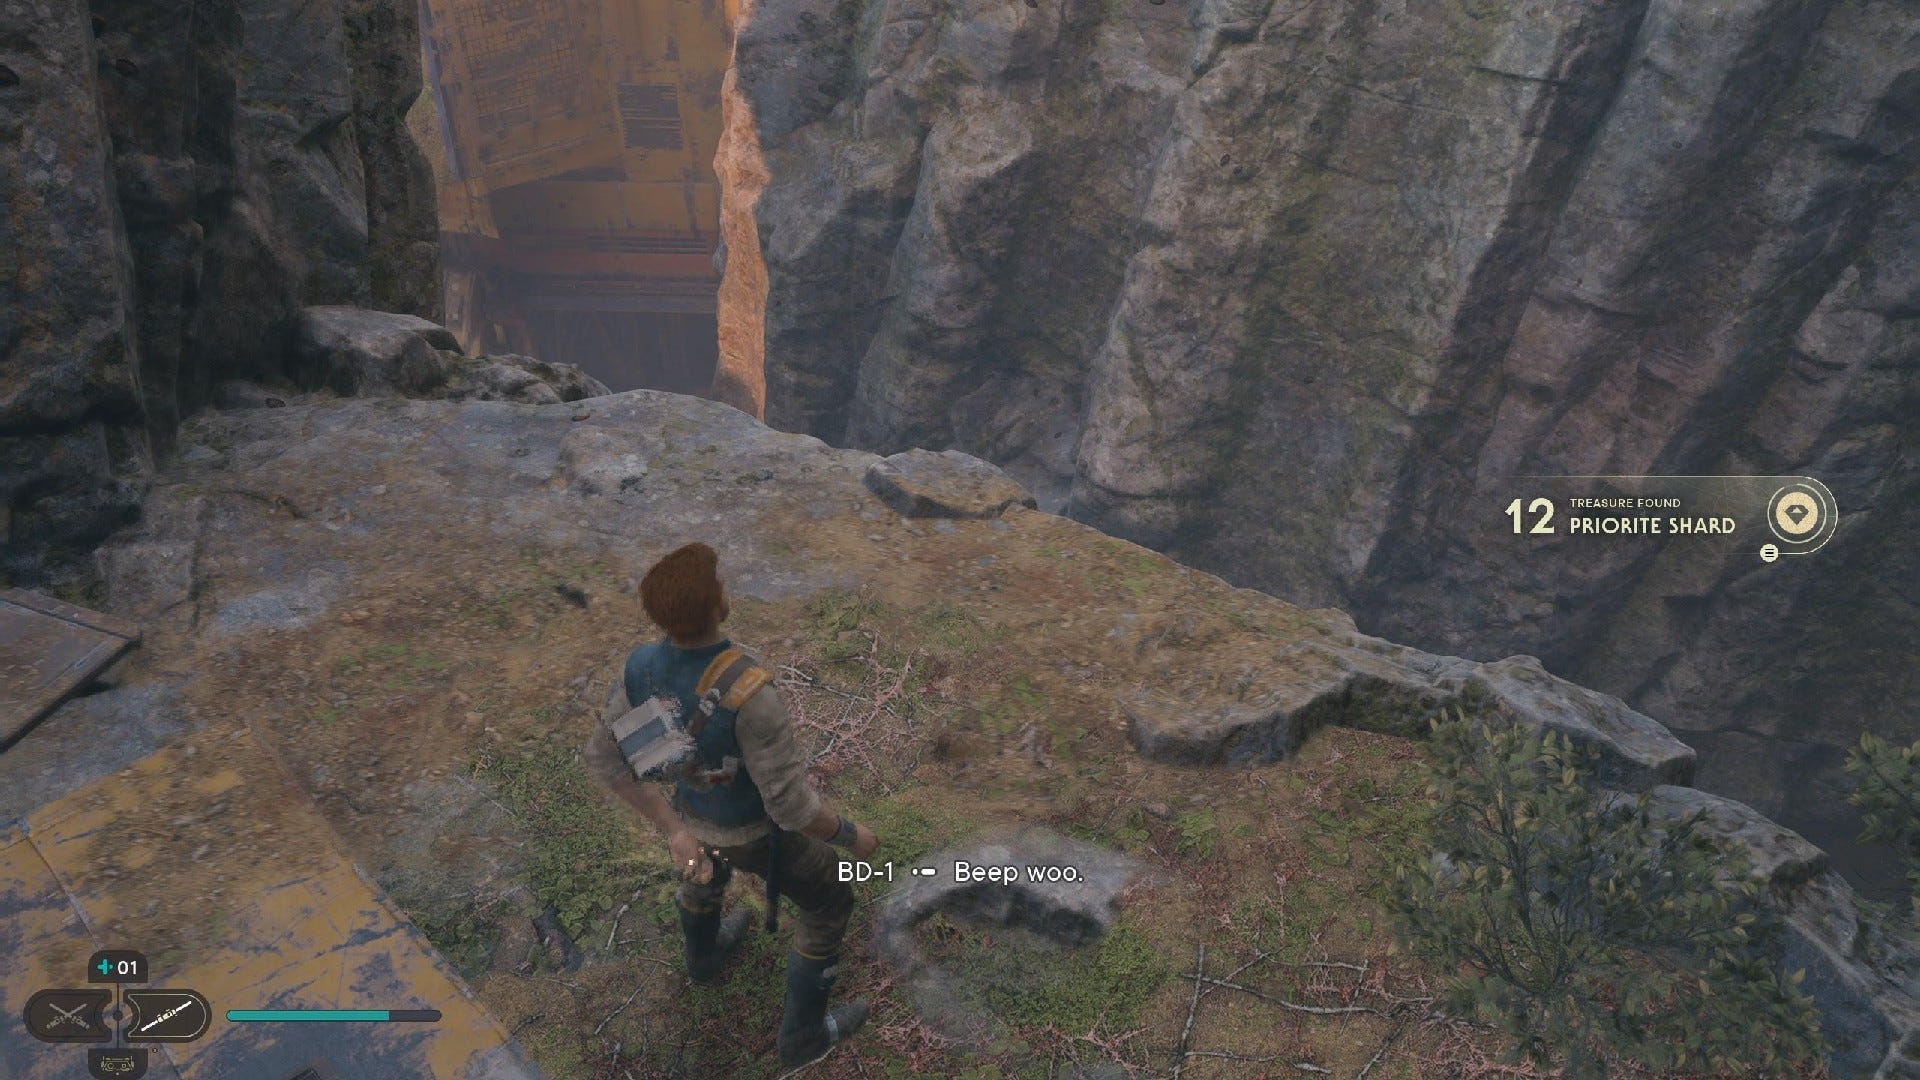
Priorite Shard #1: On the ledge below the Murdered Prospector near the start of the region. Hop off the edge to find it.
Priorite Shard #2: Drop down to the ledge beside the Derelict Dam Workbench.
Priorite Shard #3: Head to Vashtan Wolfe’s lair and inspect the left brazier in front of the door.
Priorite Shard #4: Climb to the top of the dam itself, then use the poles to reach the central ledge on the surface of the lake.
Priorite Shard #5: After scaling the two side-by-side walls (the one that the boglings show you how to do), turn back and climb it to the very top to reach a ledge with the shard.

Priorite Shard #6: Beyond the Gorocco Matriarch arena,. up the floating grapple points, just beyond the next Gorocco. Requires Force Lift to break open the gate leading to the arena, and also requires you to be able to launch yourself off floating grapple points.
Priorite Shard #7: Up the elevator from the Workbench, turn left and cross the bridge, then turn right and drop off the rigth side onto a pillar with the shard.
Priorite Shard #8: Destroy the scavenger droid at the top of the elevator nearest the Meditation Point. To reach the top for the first time, free the giant bird in Forest Array, then reach the end of Boiling Bluff and ride the bird across the map.
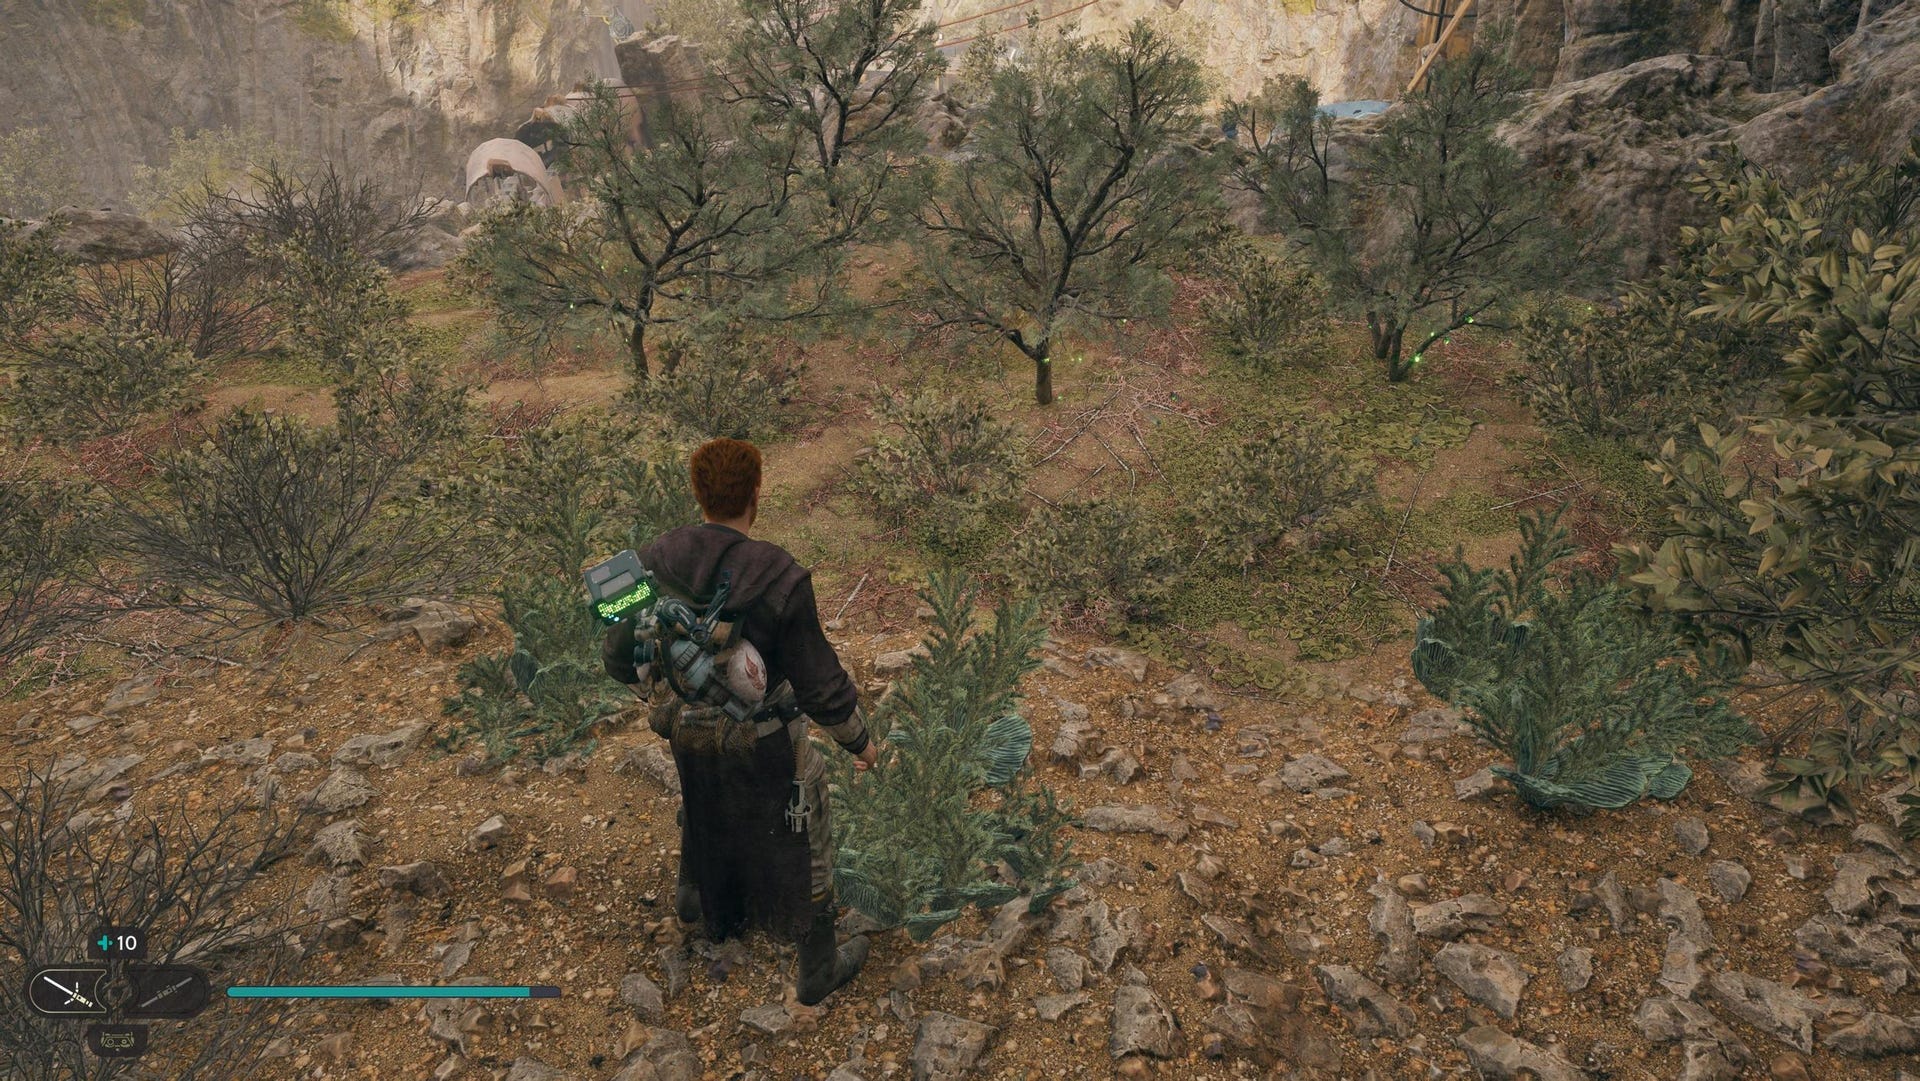
Derelict Dam Seed Pods:

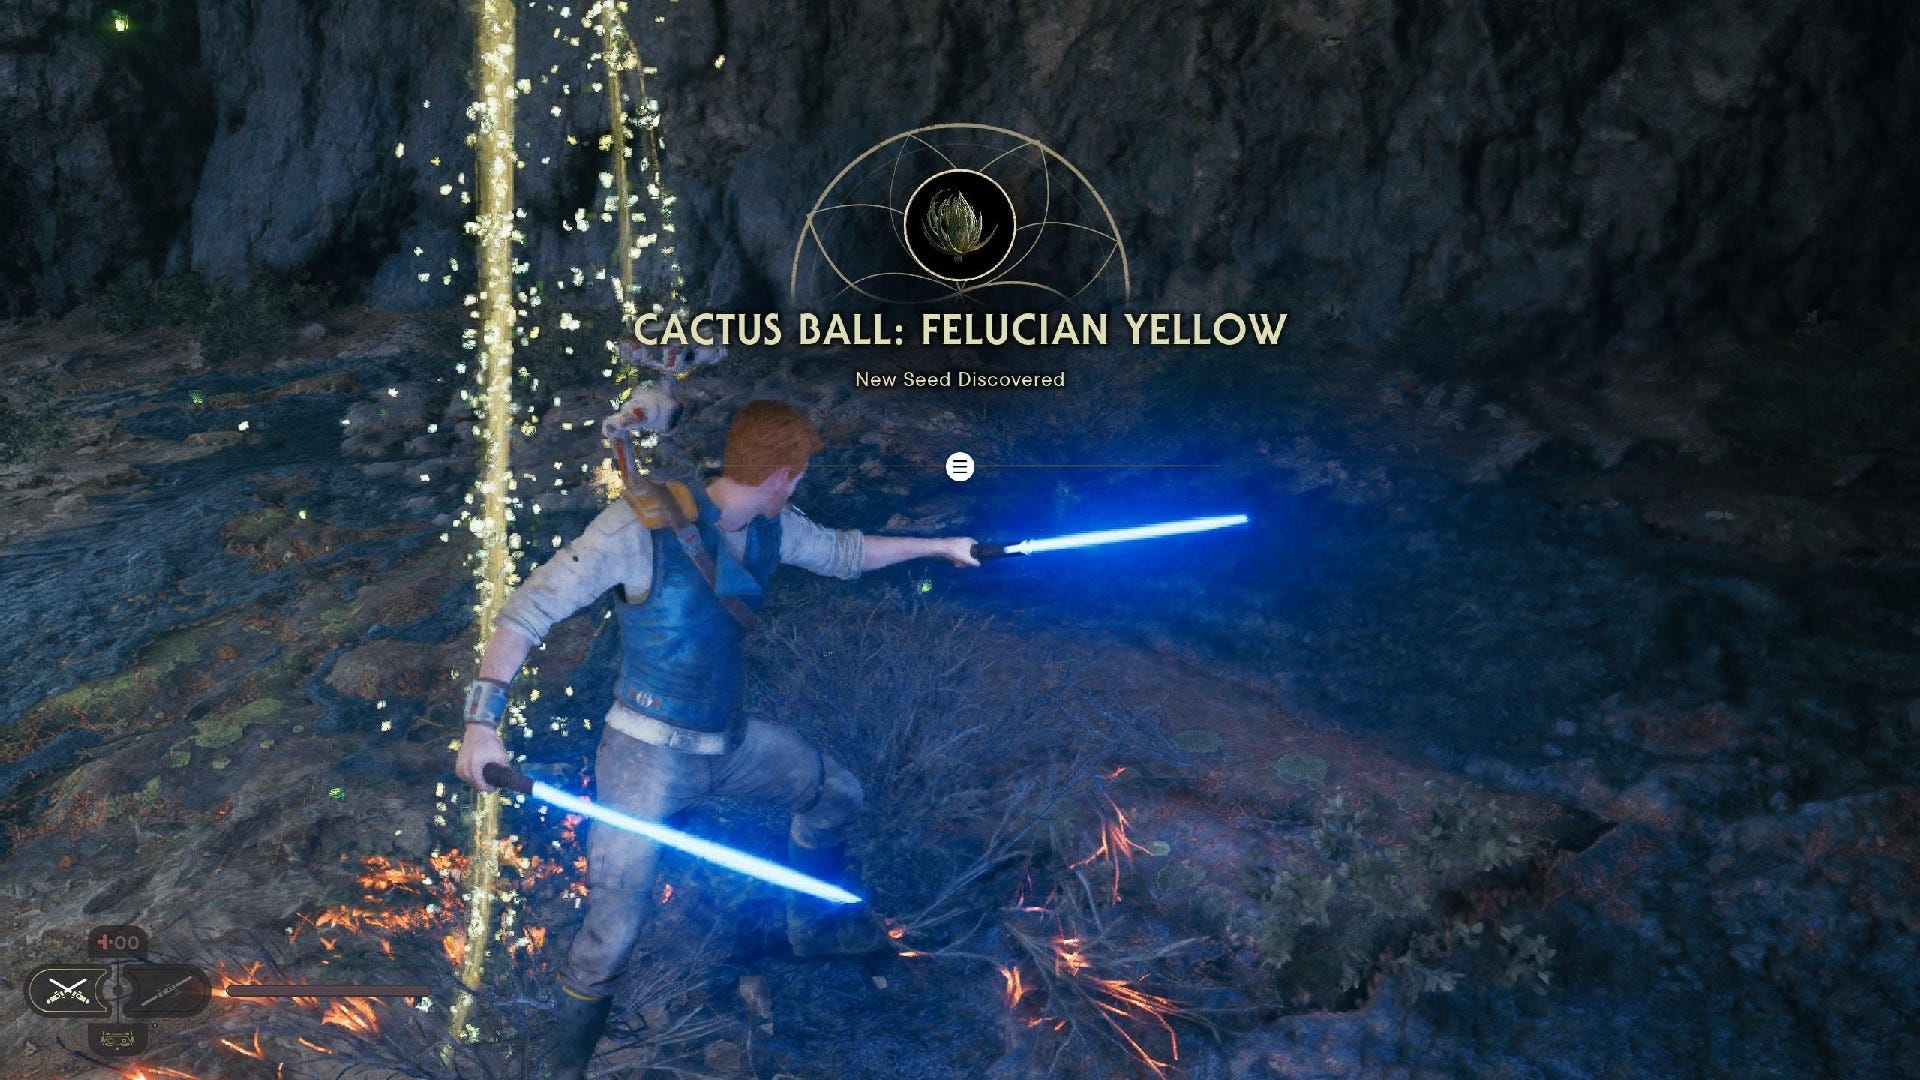
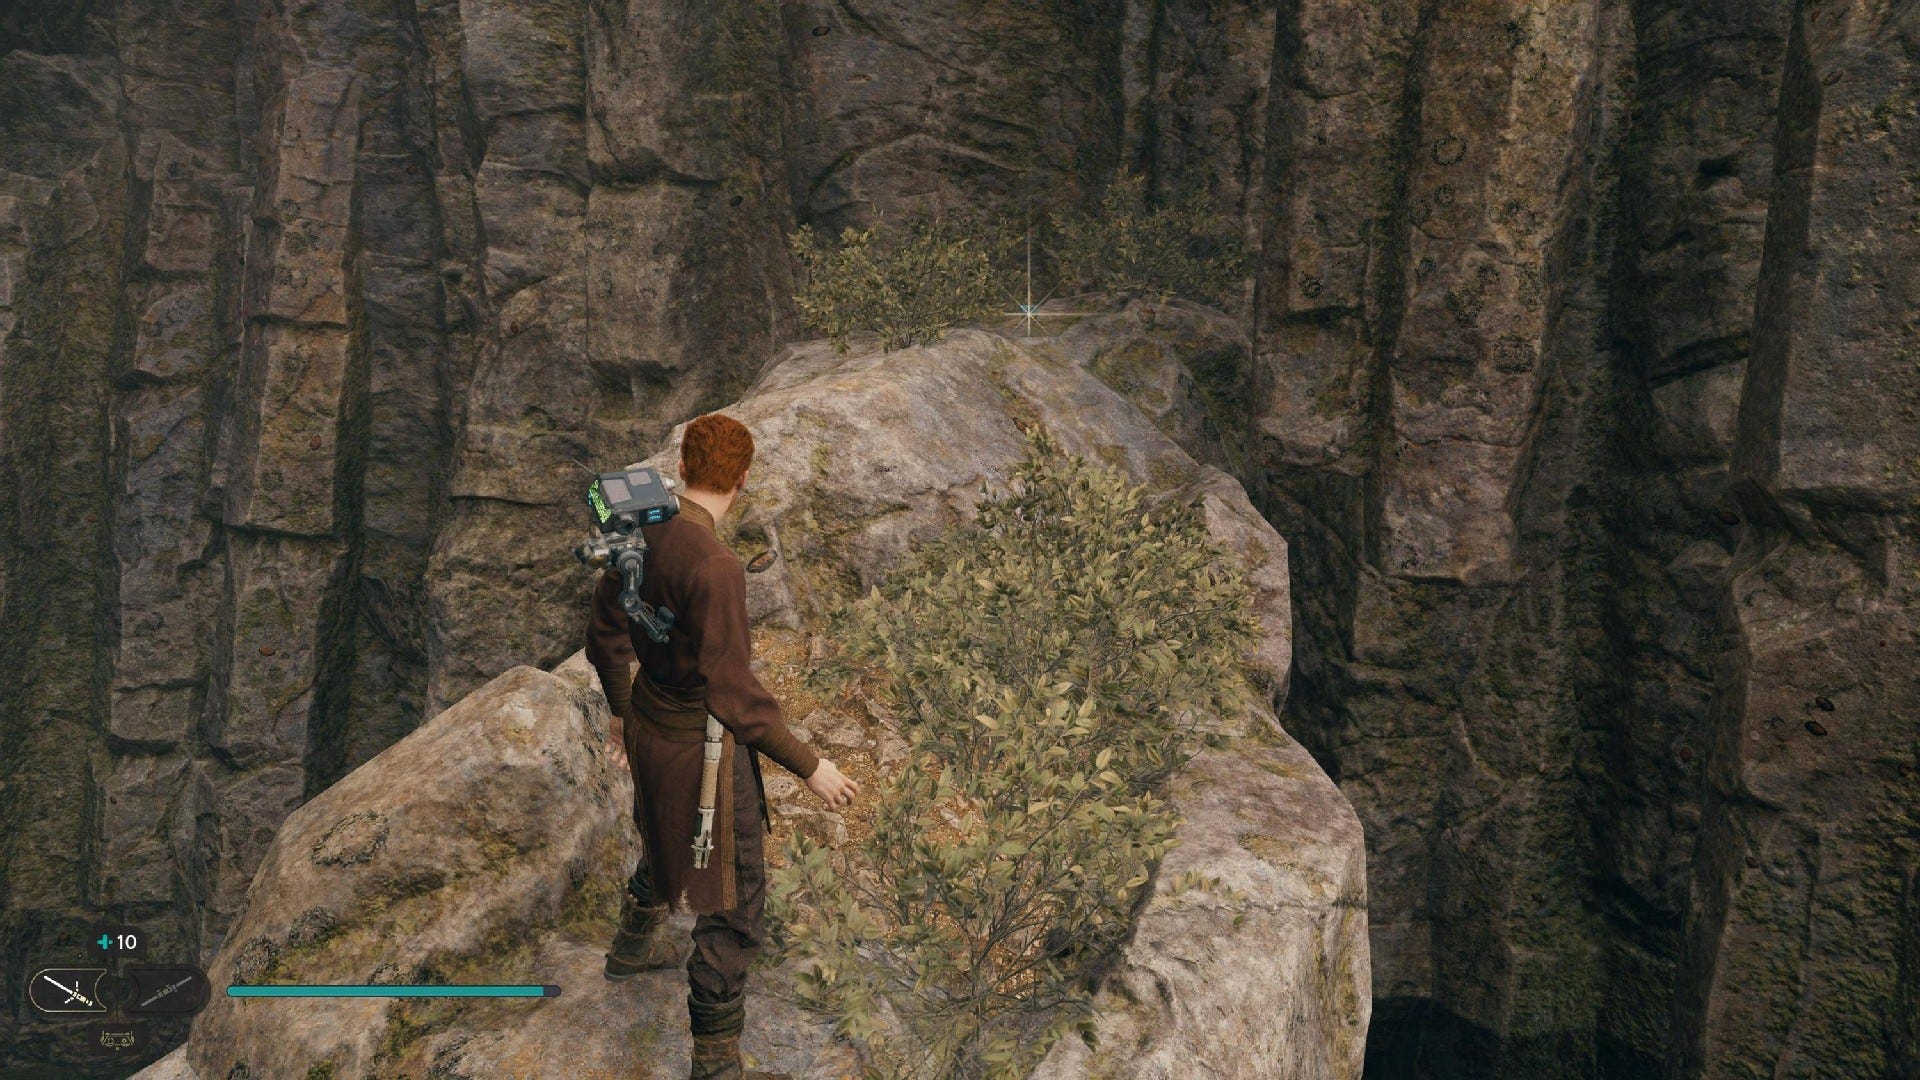
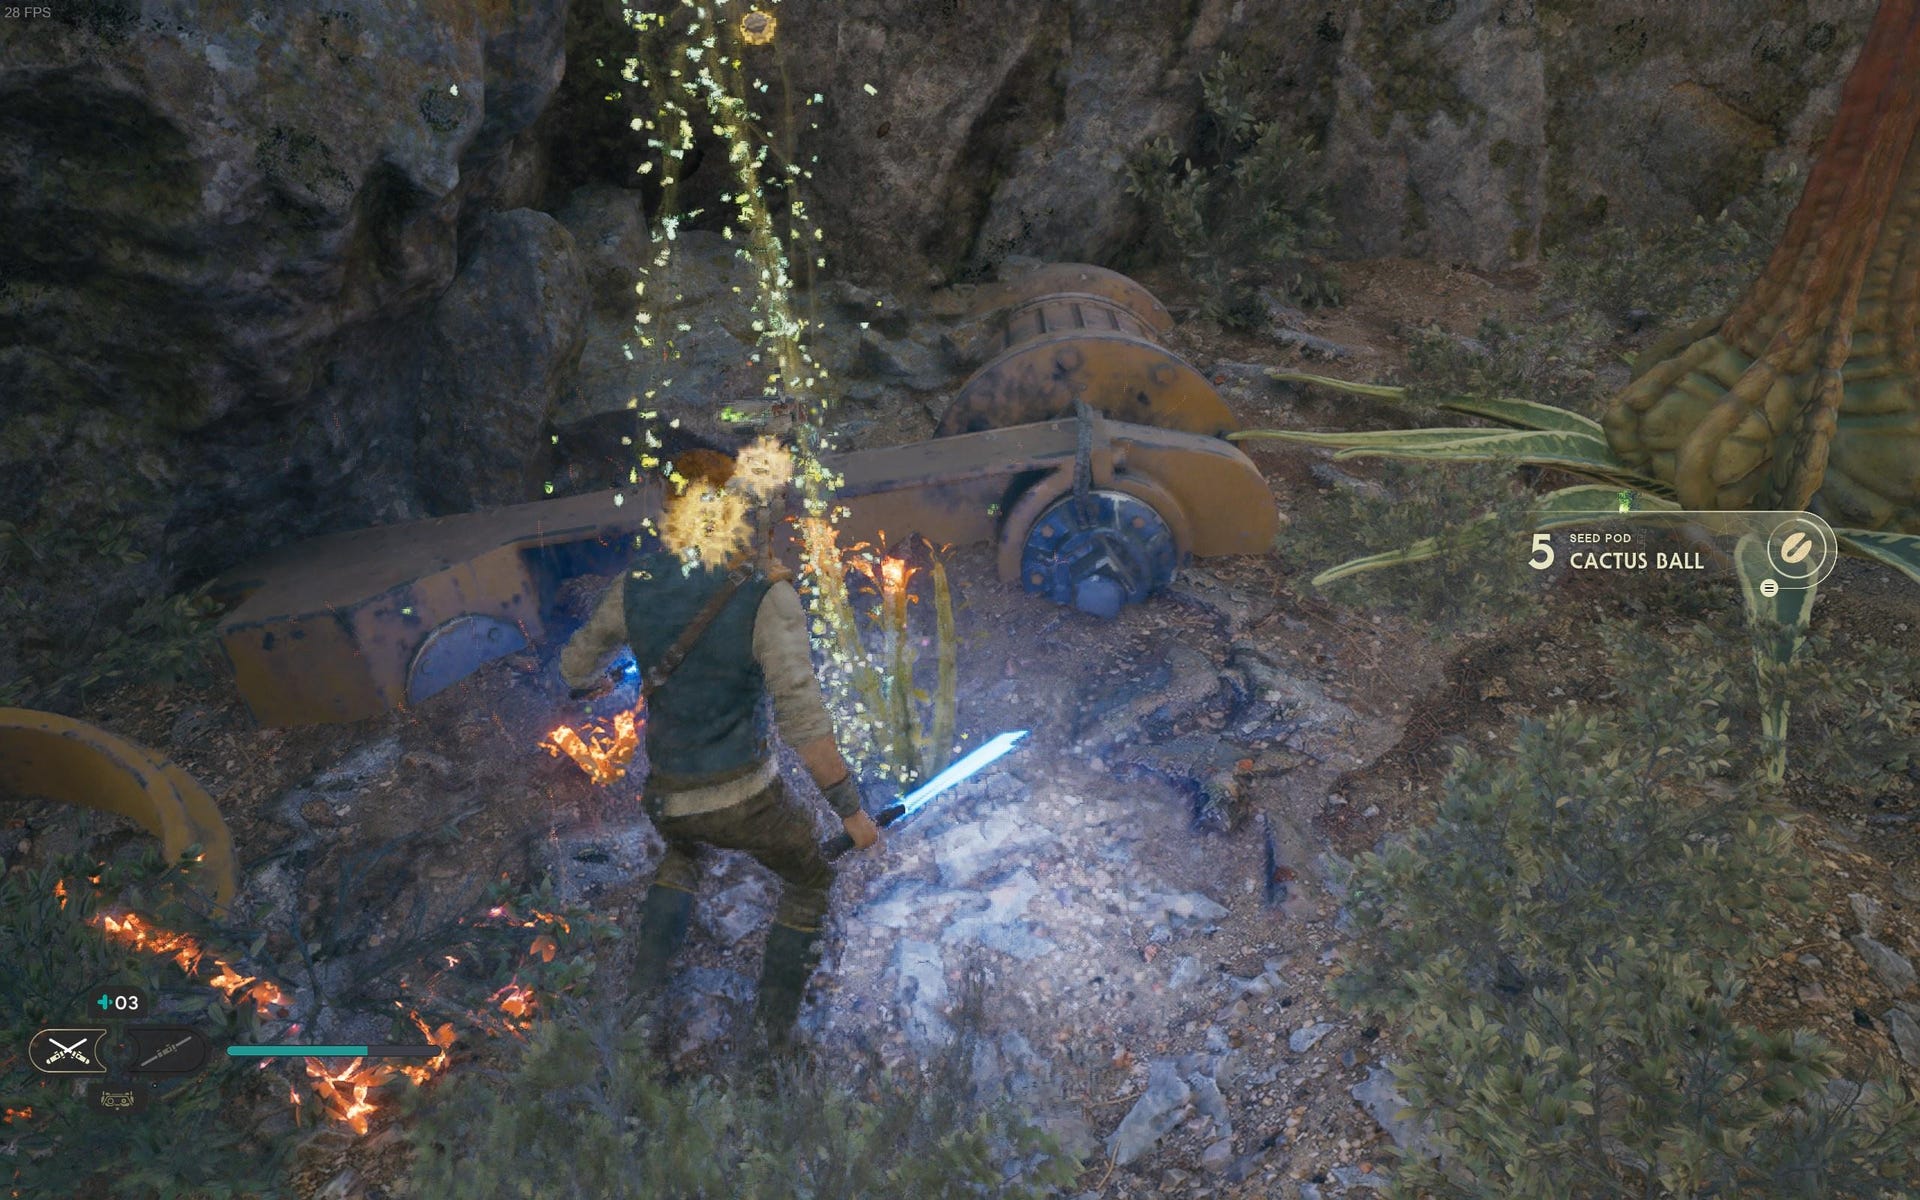
Cactus Ball (Felucian Yellow): Continue past the brown barrel next to the bog below the Meditation Point, and into the alcove ahead. Kill the enemies there, and slash the glowing plant.

Cactus Ball: Head downwards before the Meditation Point, reach the end of the bog where the animal skull is, and look towards the cliff edge for the plant.

Fire Pineapple (Felucian Yellow): Slash the glowing plant beneath the platform that connects the Meditation Point area to the dam area.
Cactus Ball: Slash the glowing plant near the Dead Bedlam Raider on the ledge below the Workbench.
Cactus Ball: Slash the glowing plant on the path sloping down from the Workbench.

Fire Pineapple: At the base of the Trontoshell, slash the glowing plant up ahead (it’s right after the Trontoshell cutscene).
3x Fire Pineapple (Rare): Beyond the Gorocco Matriarch arena,. up the floating grapple points, just beyond the next Gorocco. Requires Force Lift to break open the gate leading to the arena, and also requires you to be able to launch yourself off floating grapple points.
Cactus Ball: Beneath the machinery that’s right next to the Workbench, on the ledge below.

Fire Pineapple (Alderaanian Blue): Use Force Lift on the strange pommel-shaped elevator near the Trontoshell, then immediately turn left at the top. Plant is at the end.
3x Fire Pineapple (Dathomirian Red): Scattered in front of you as you arrive at the top of the elevator nearest the Meditation Point. To reach the top for the first time, free the giant bird in Forest Array, then reach the end of Boiling Bluff and ride the bird across the map.
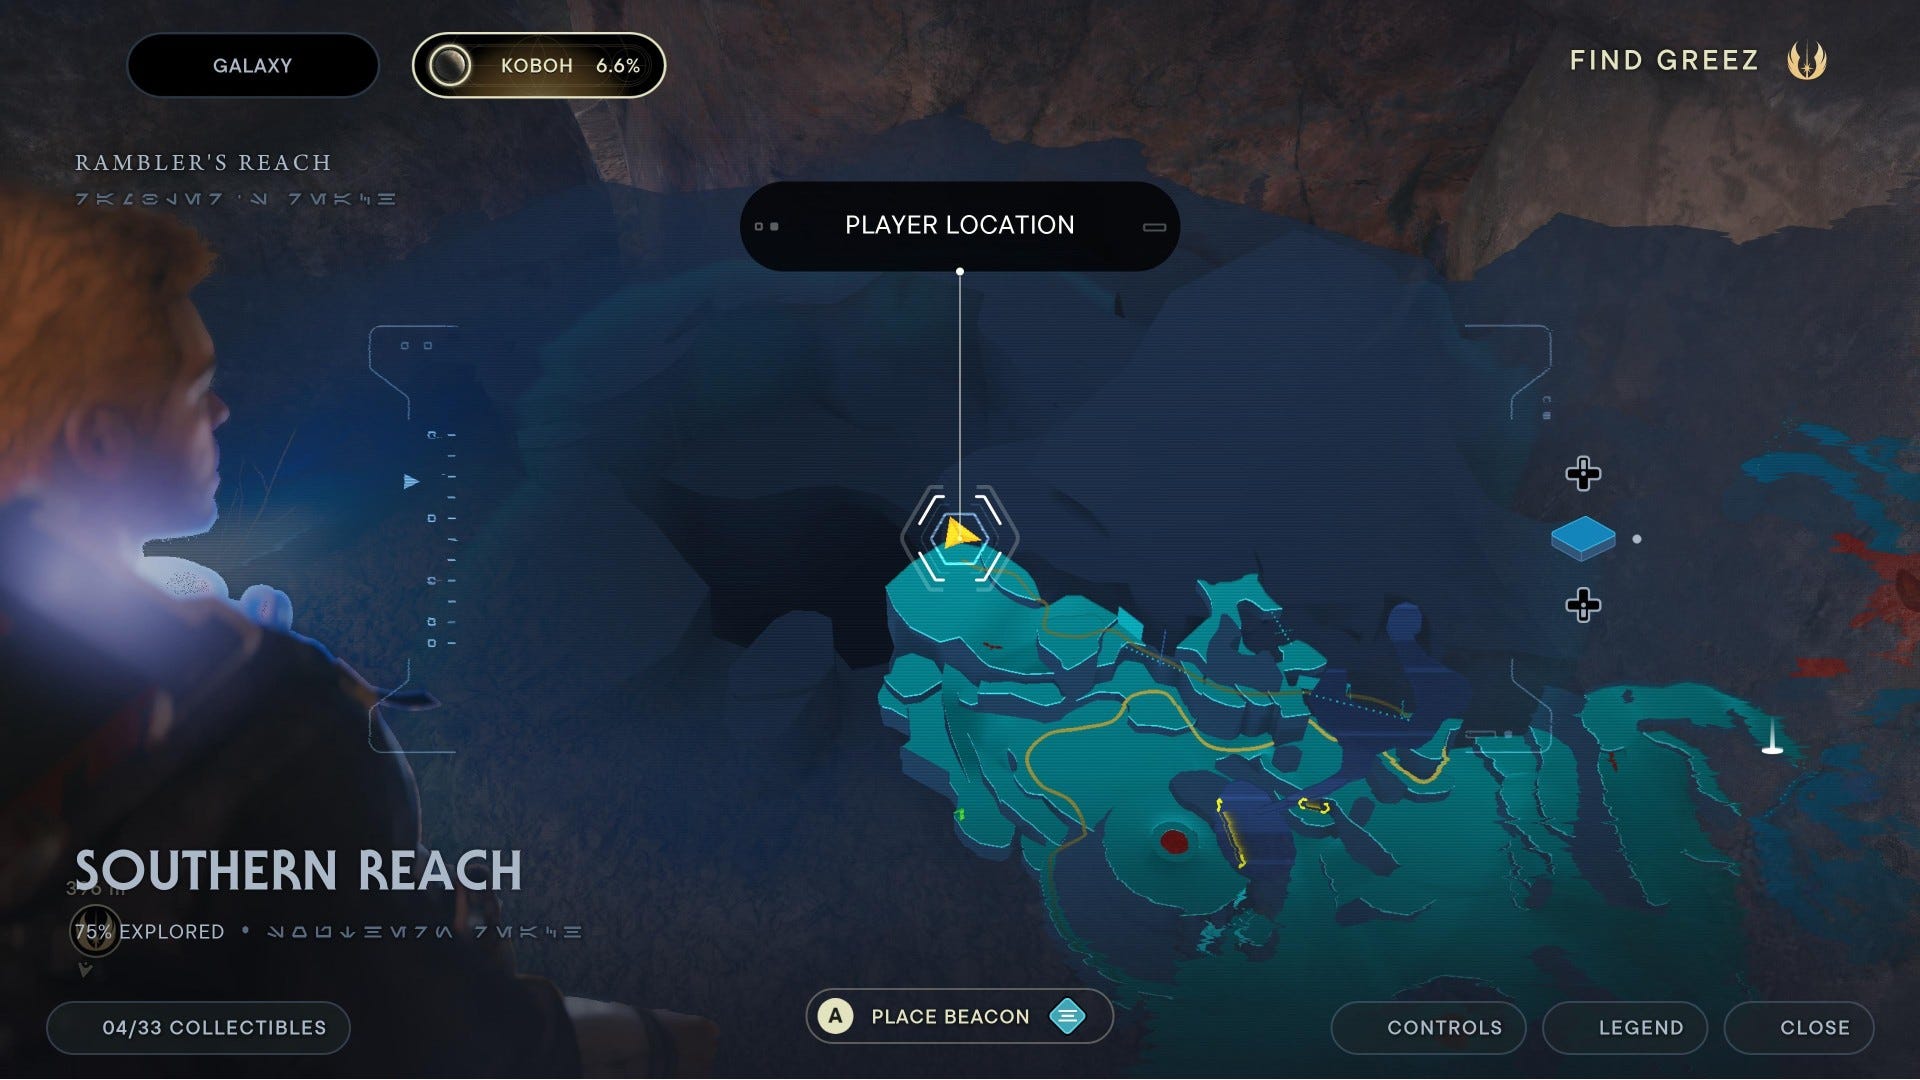
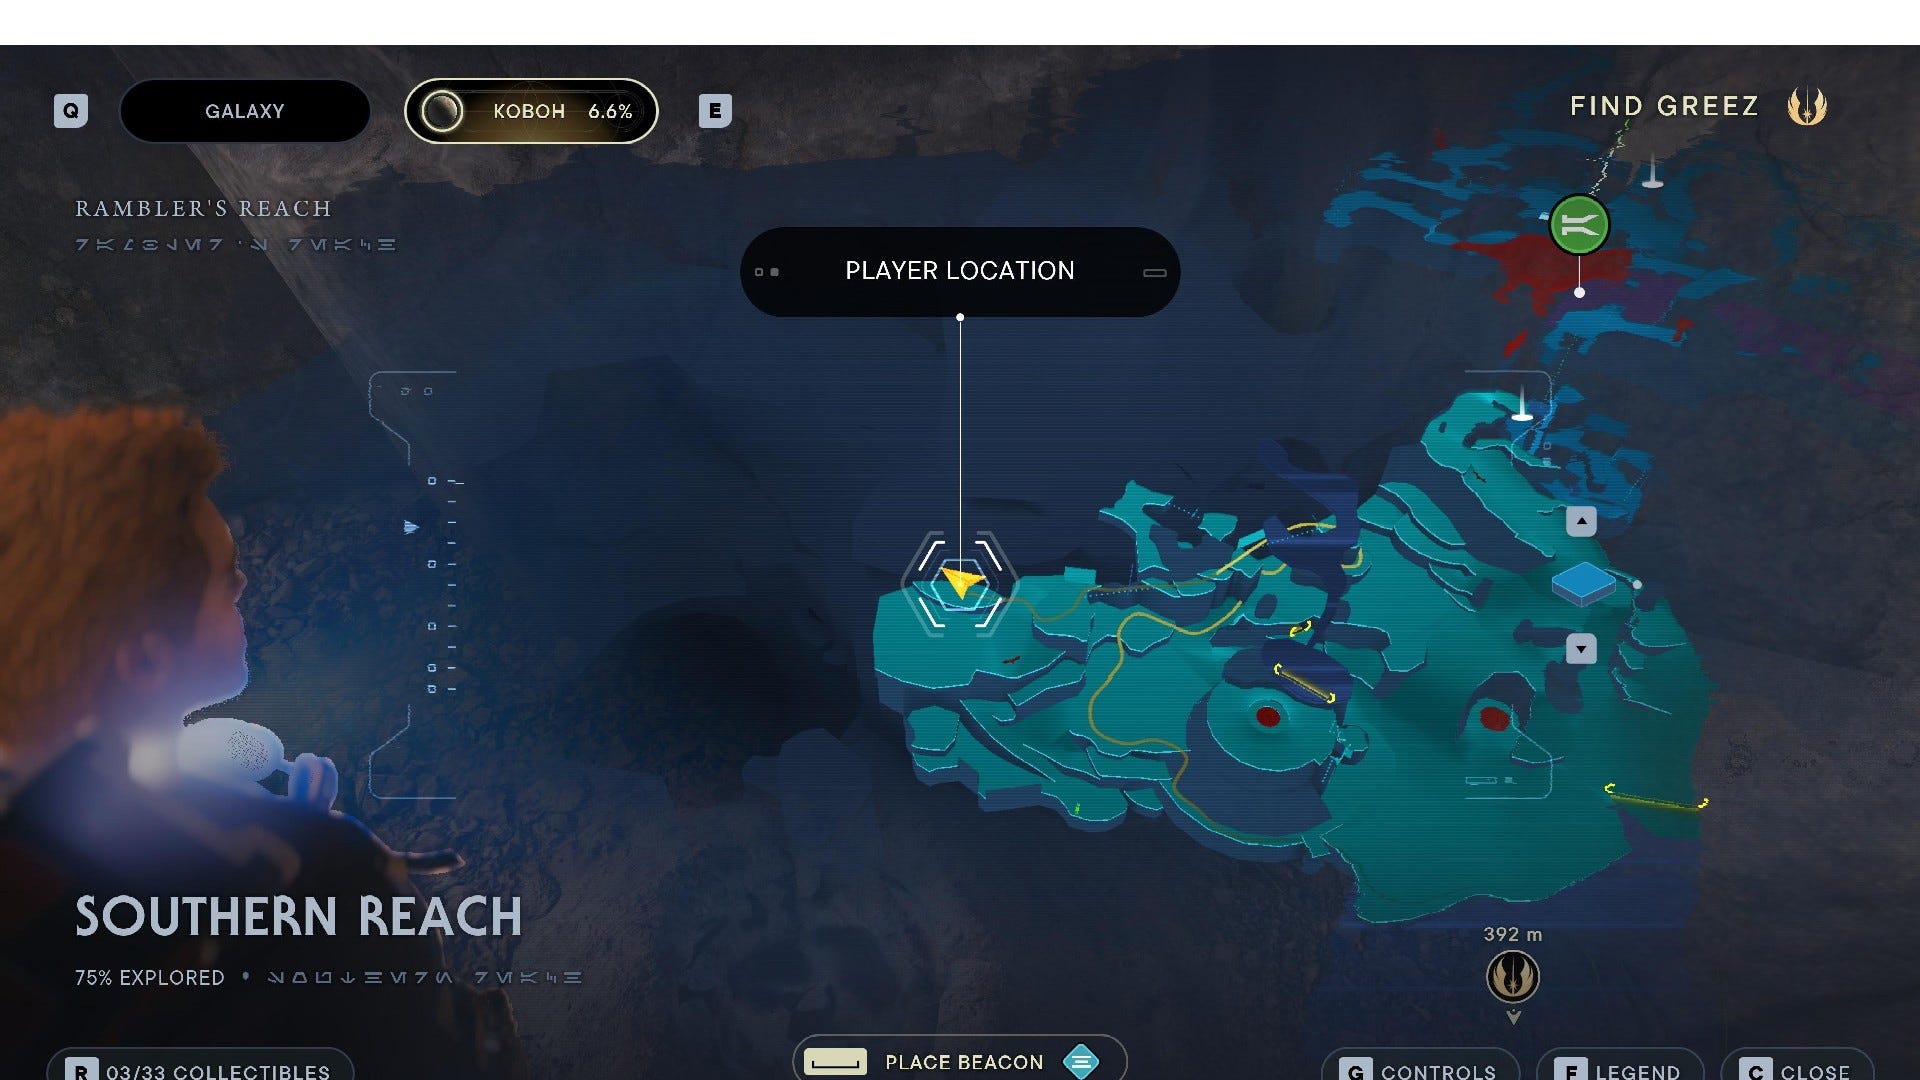
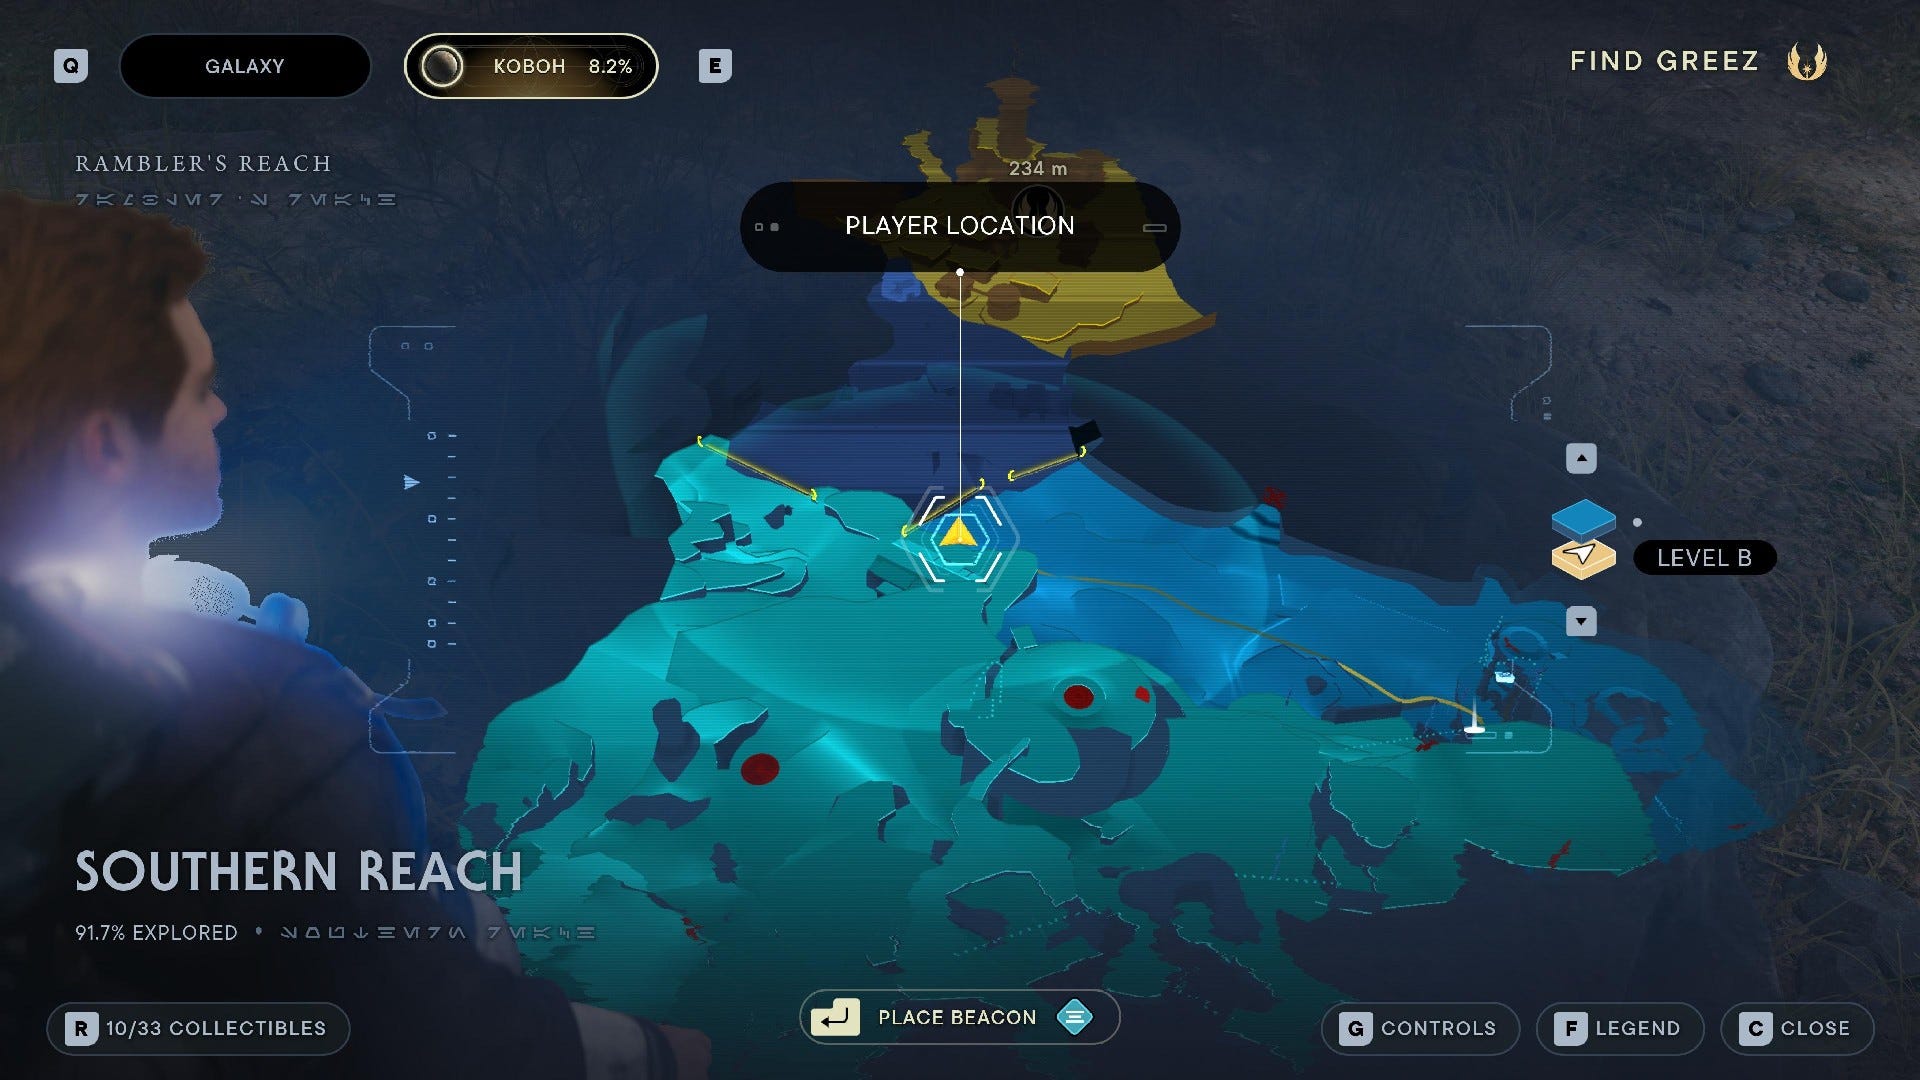
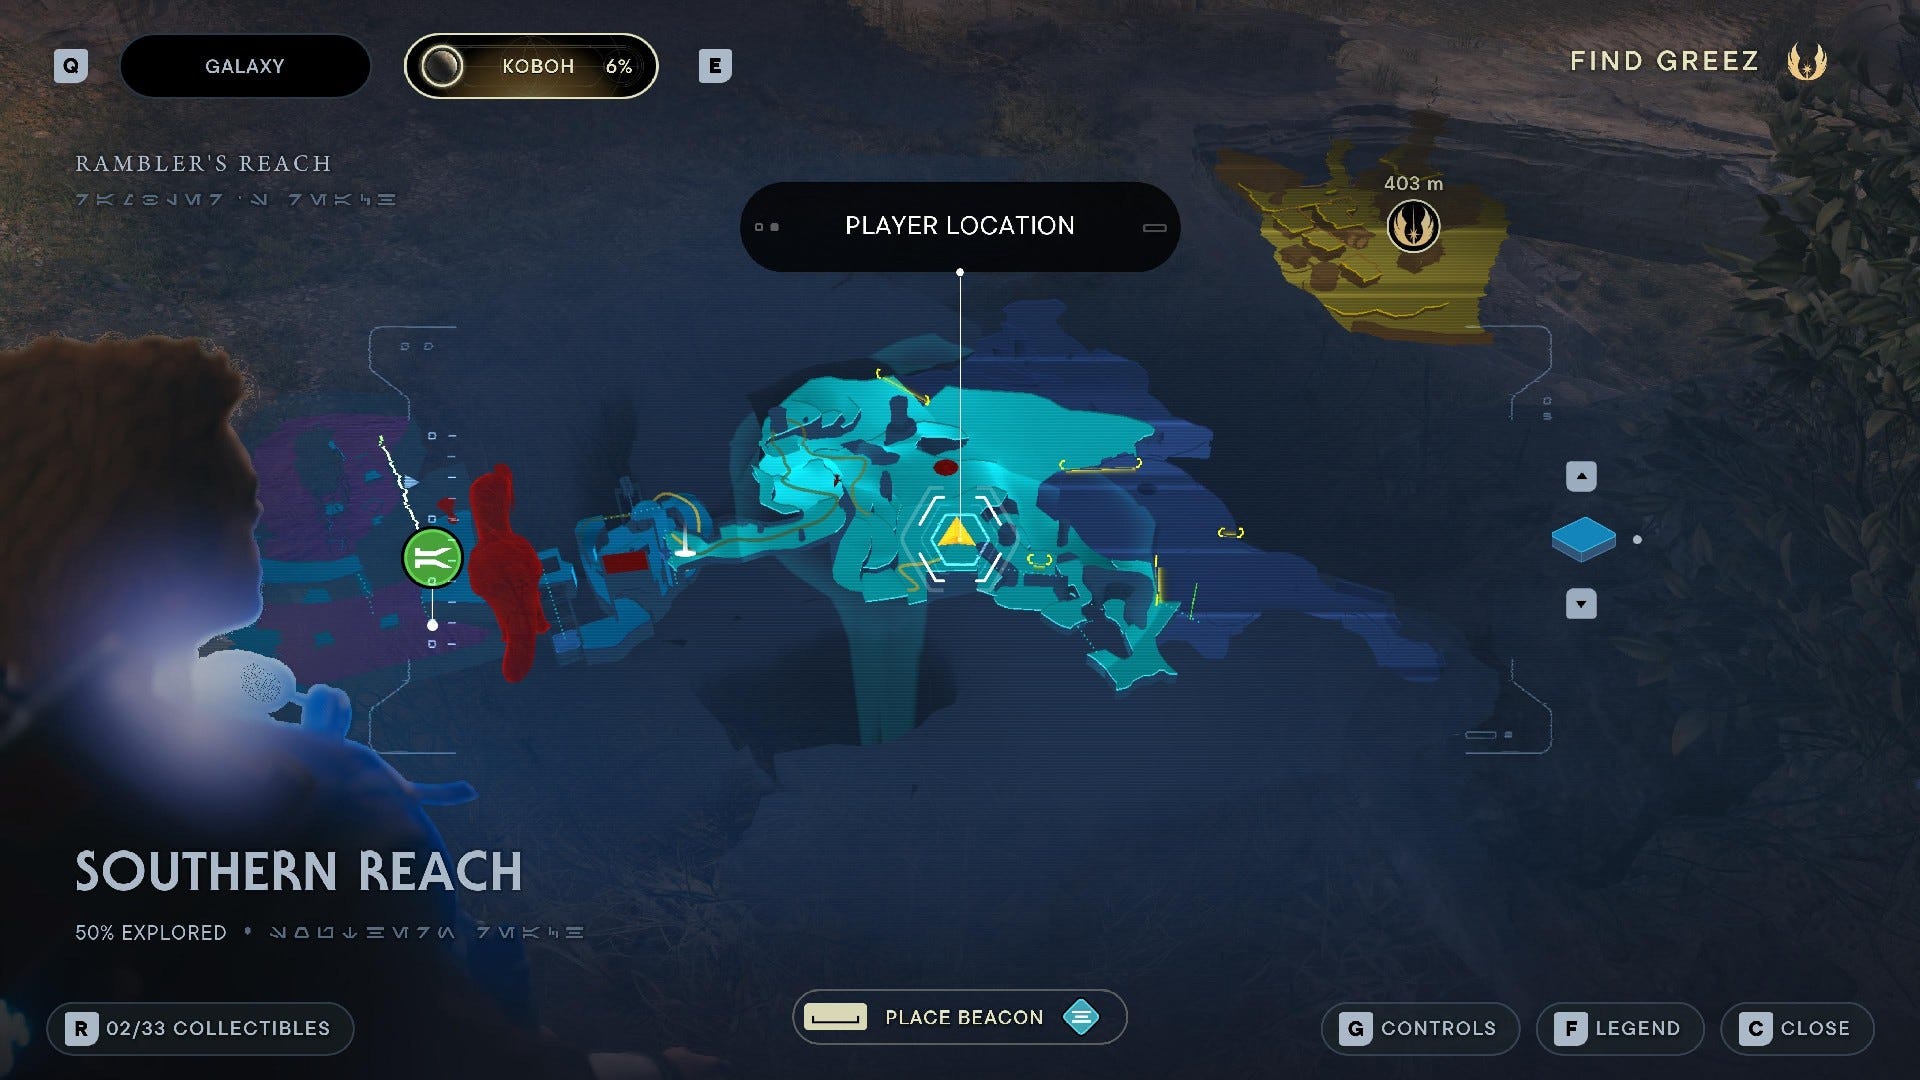
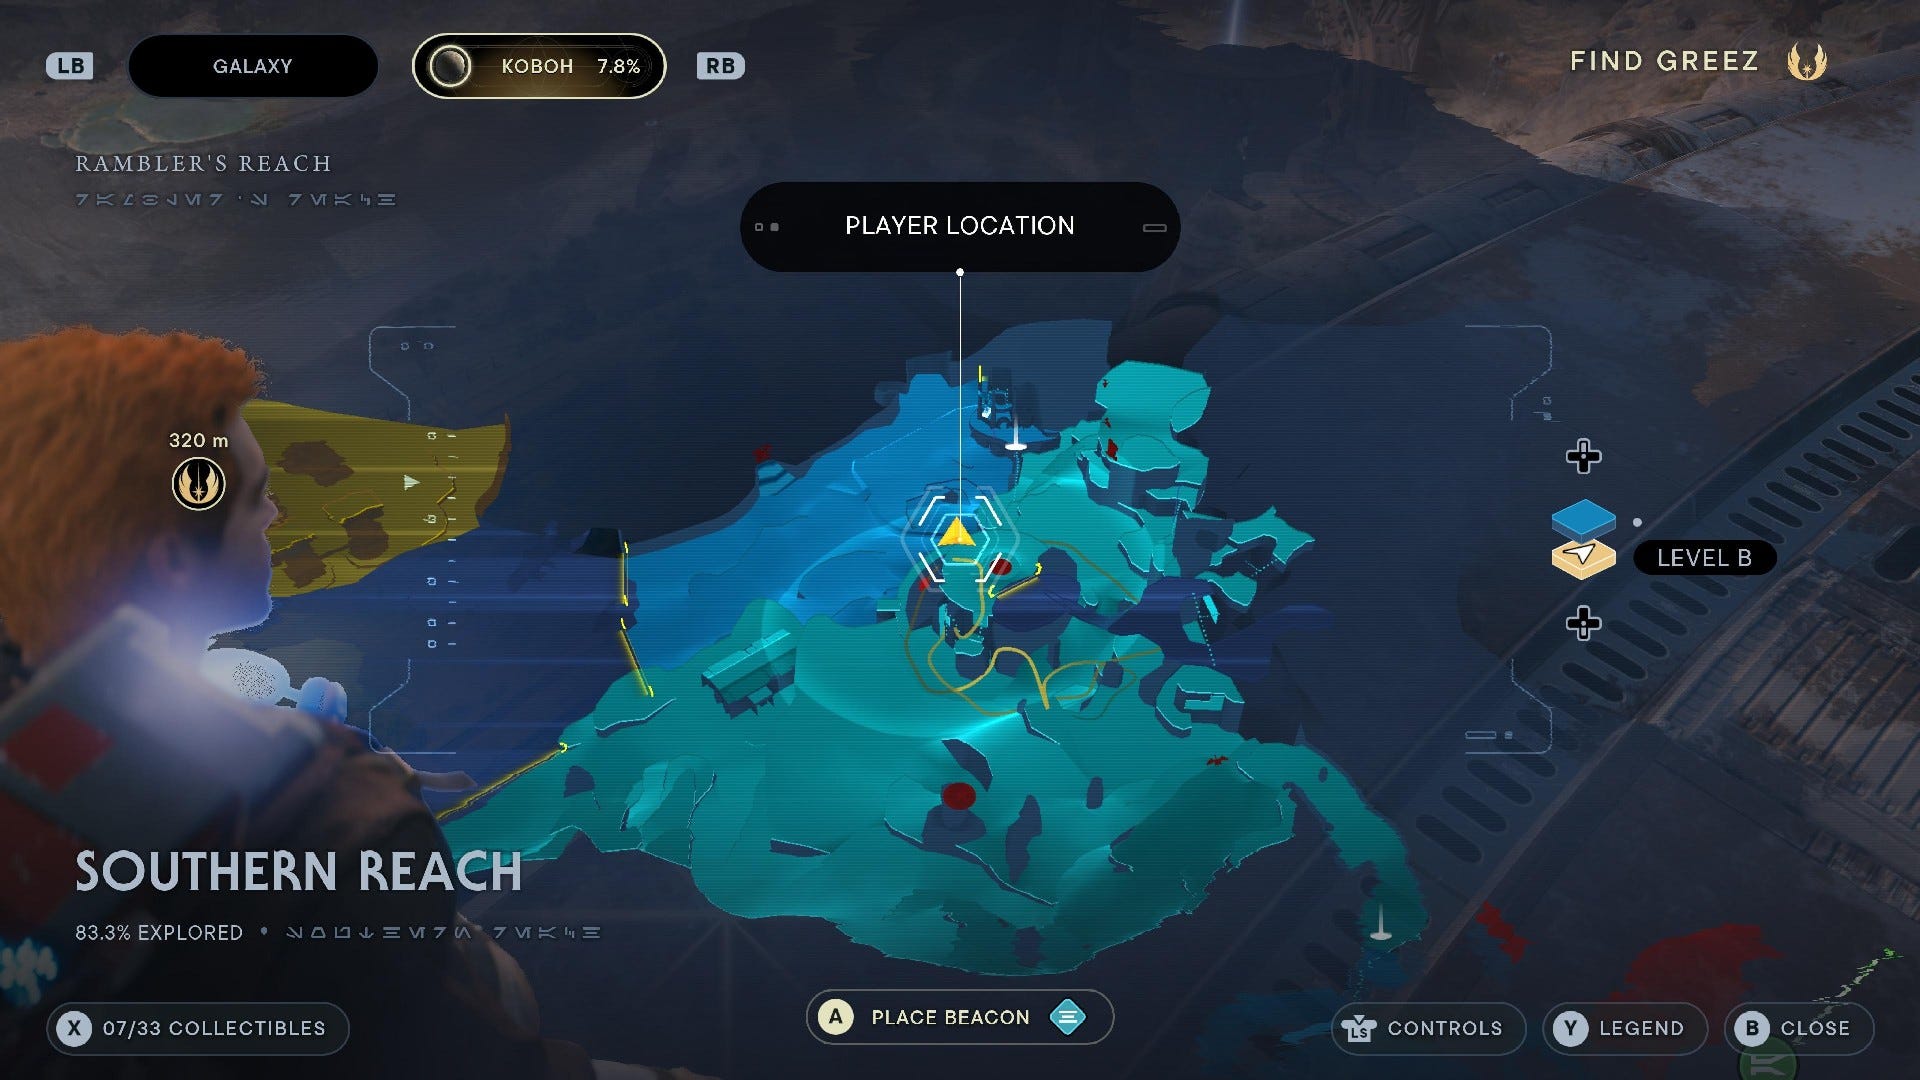
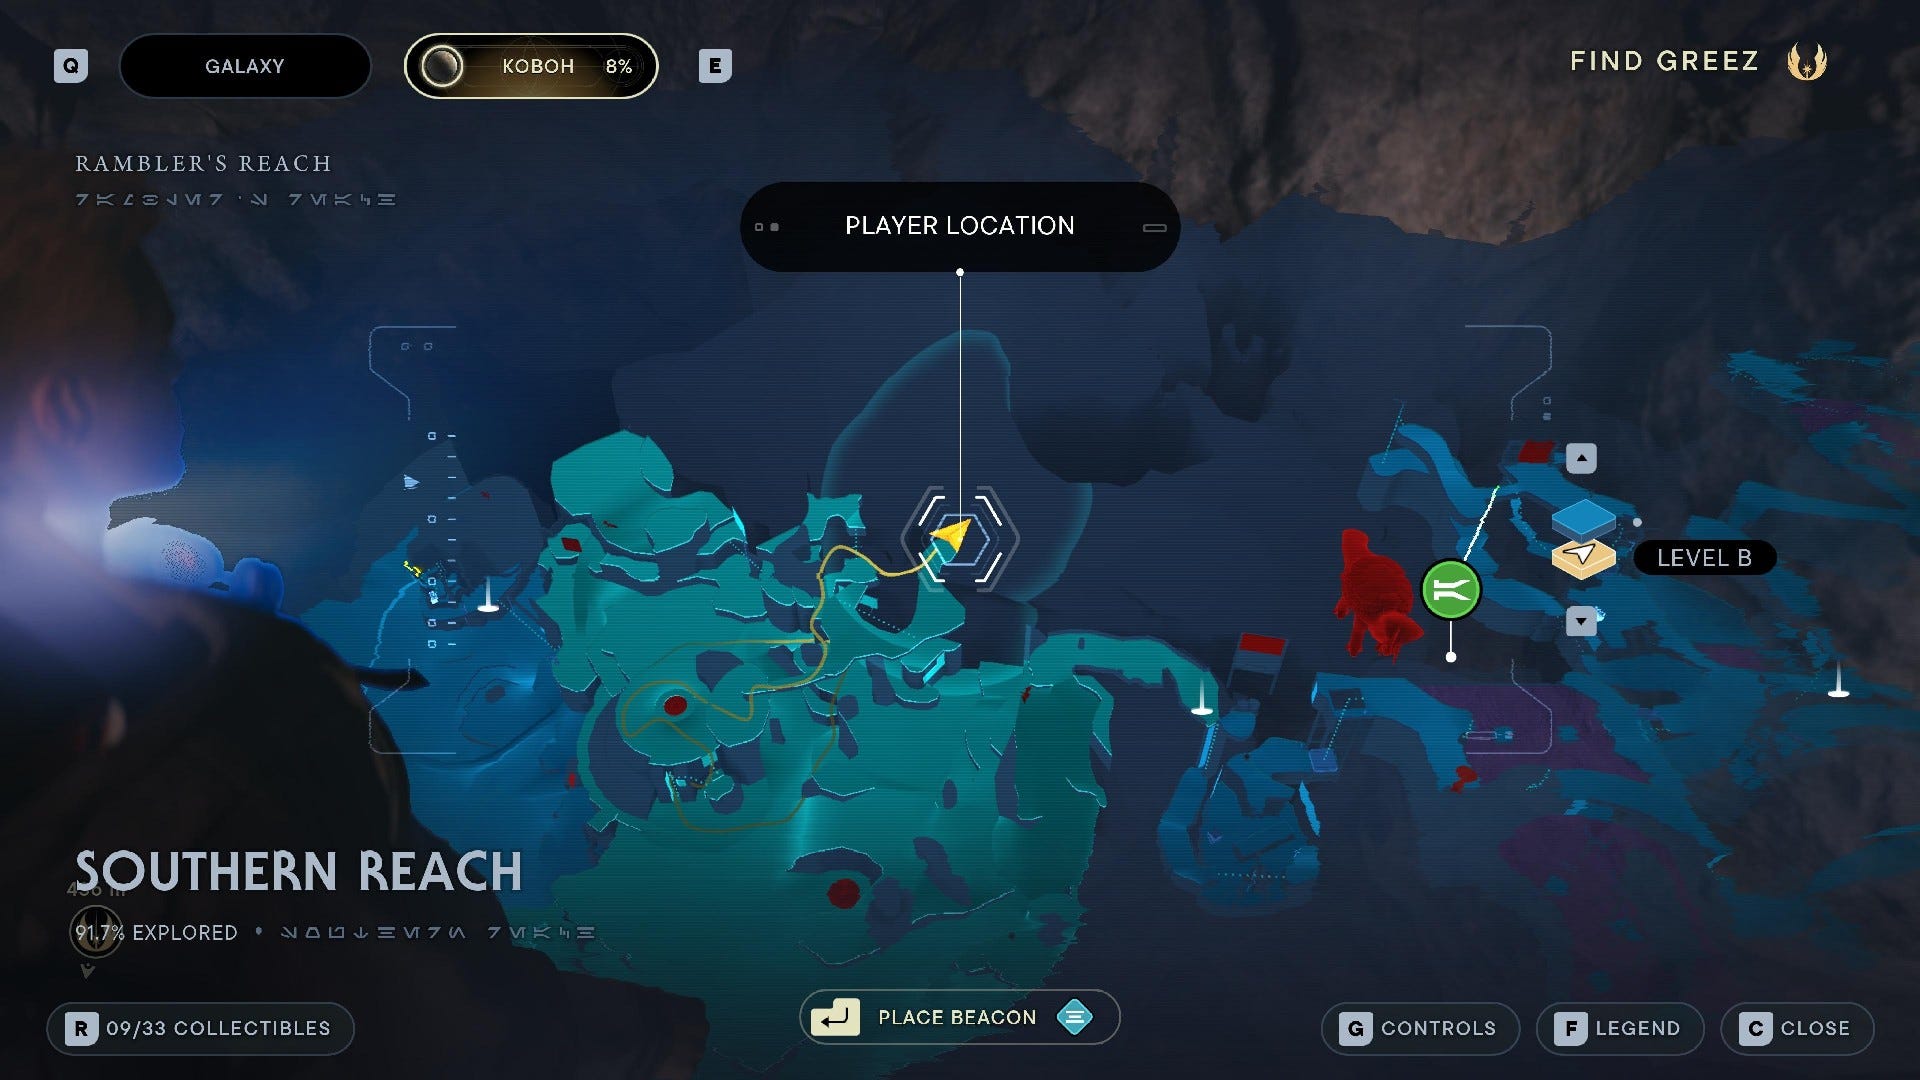
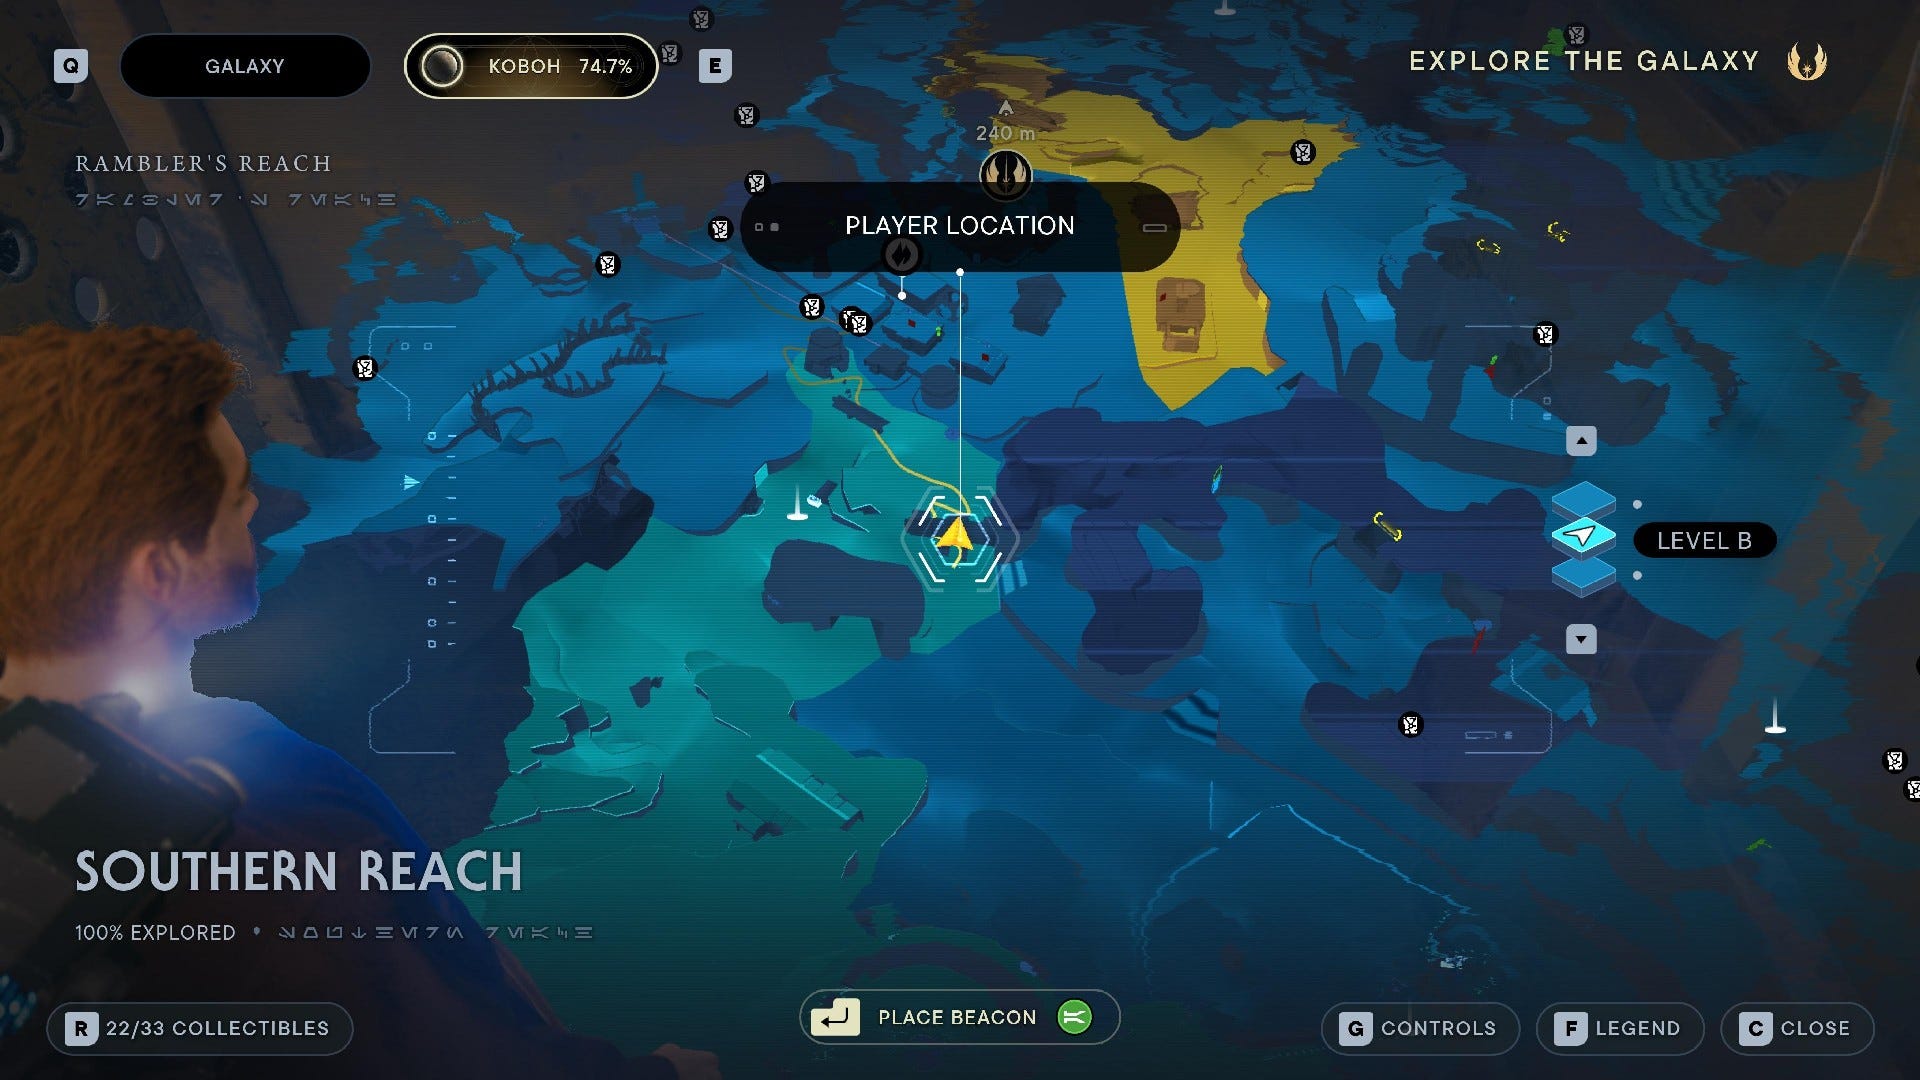
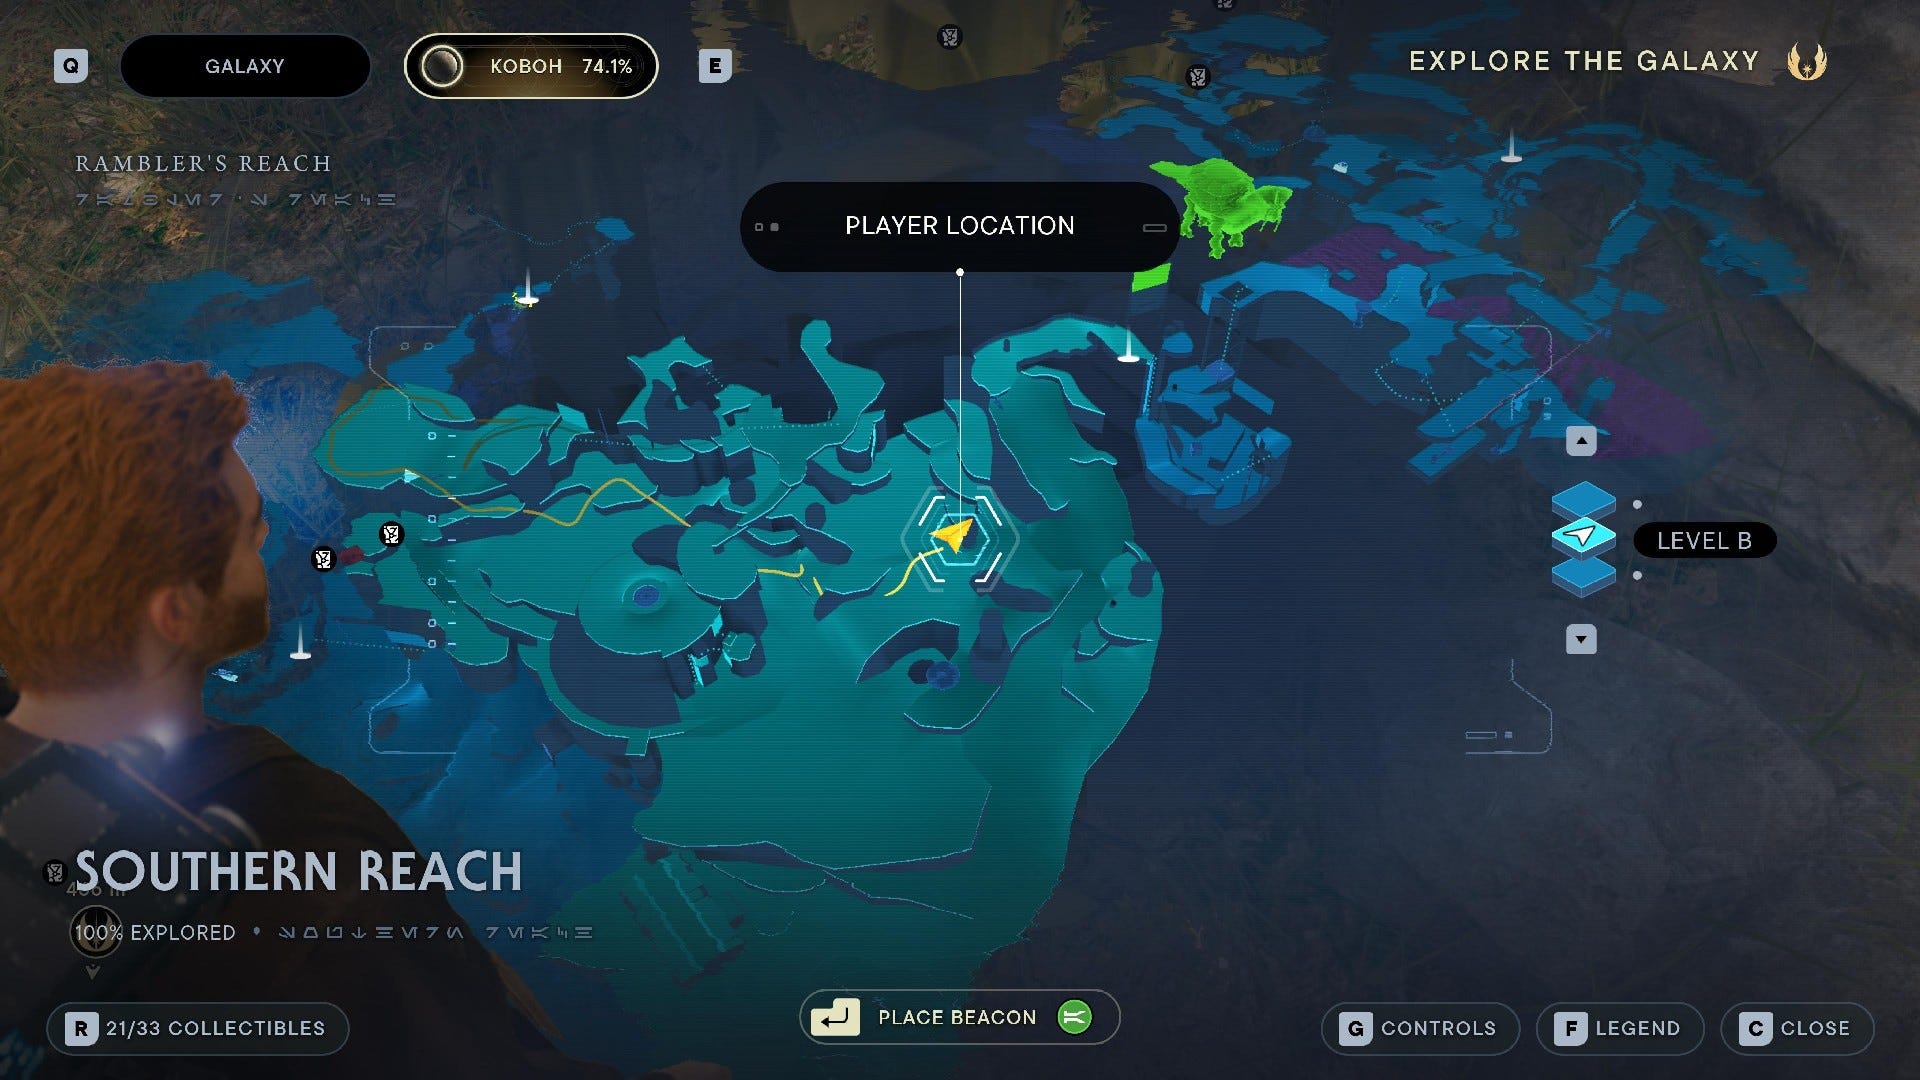
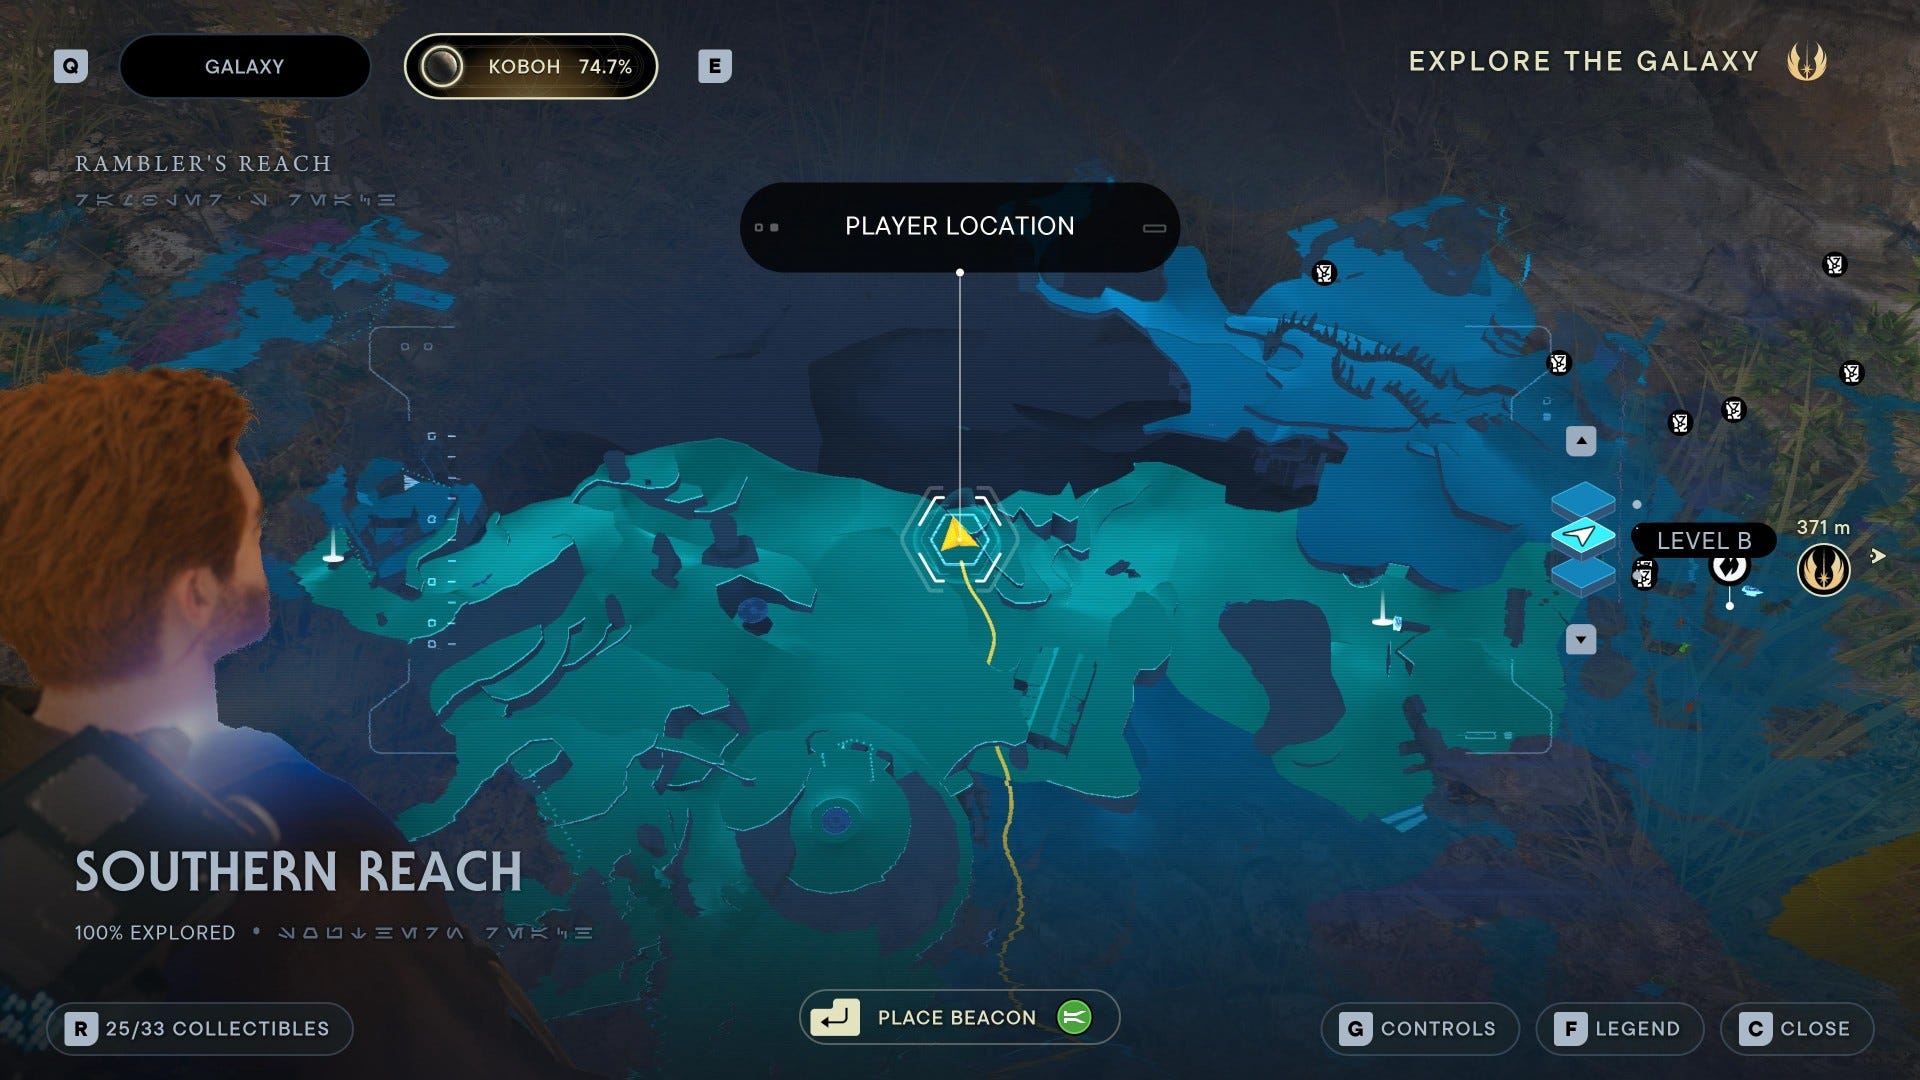
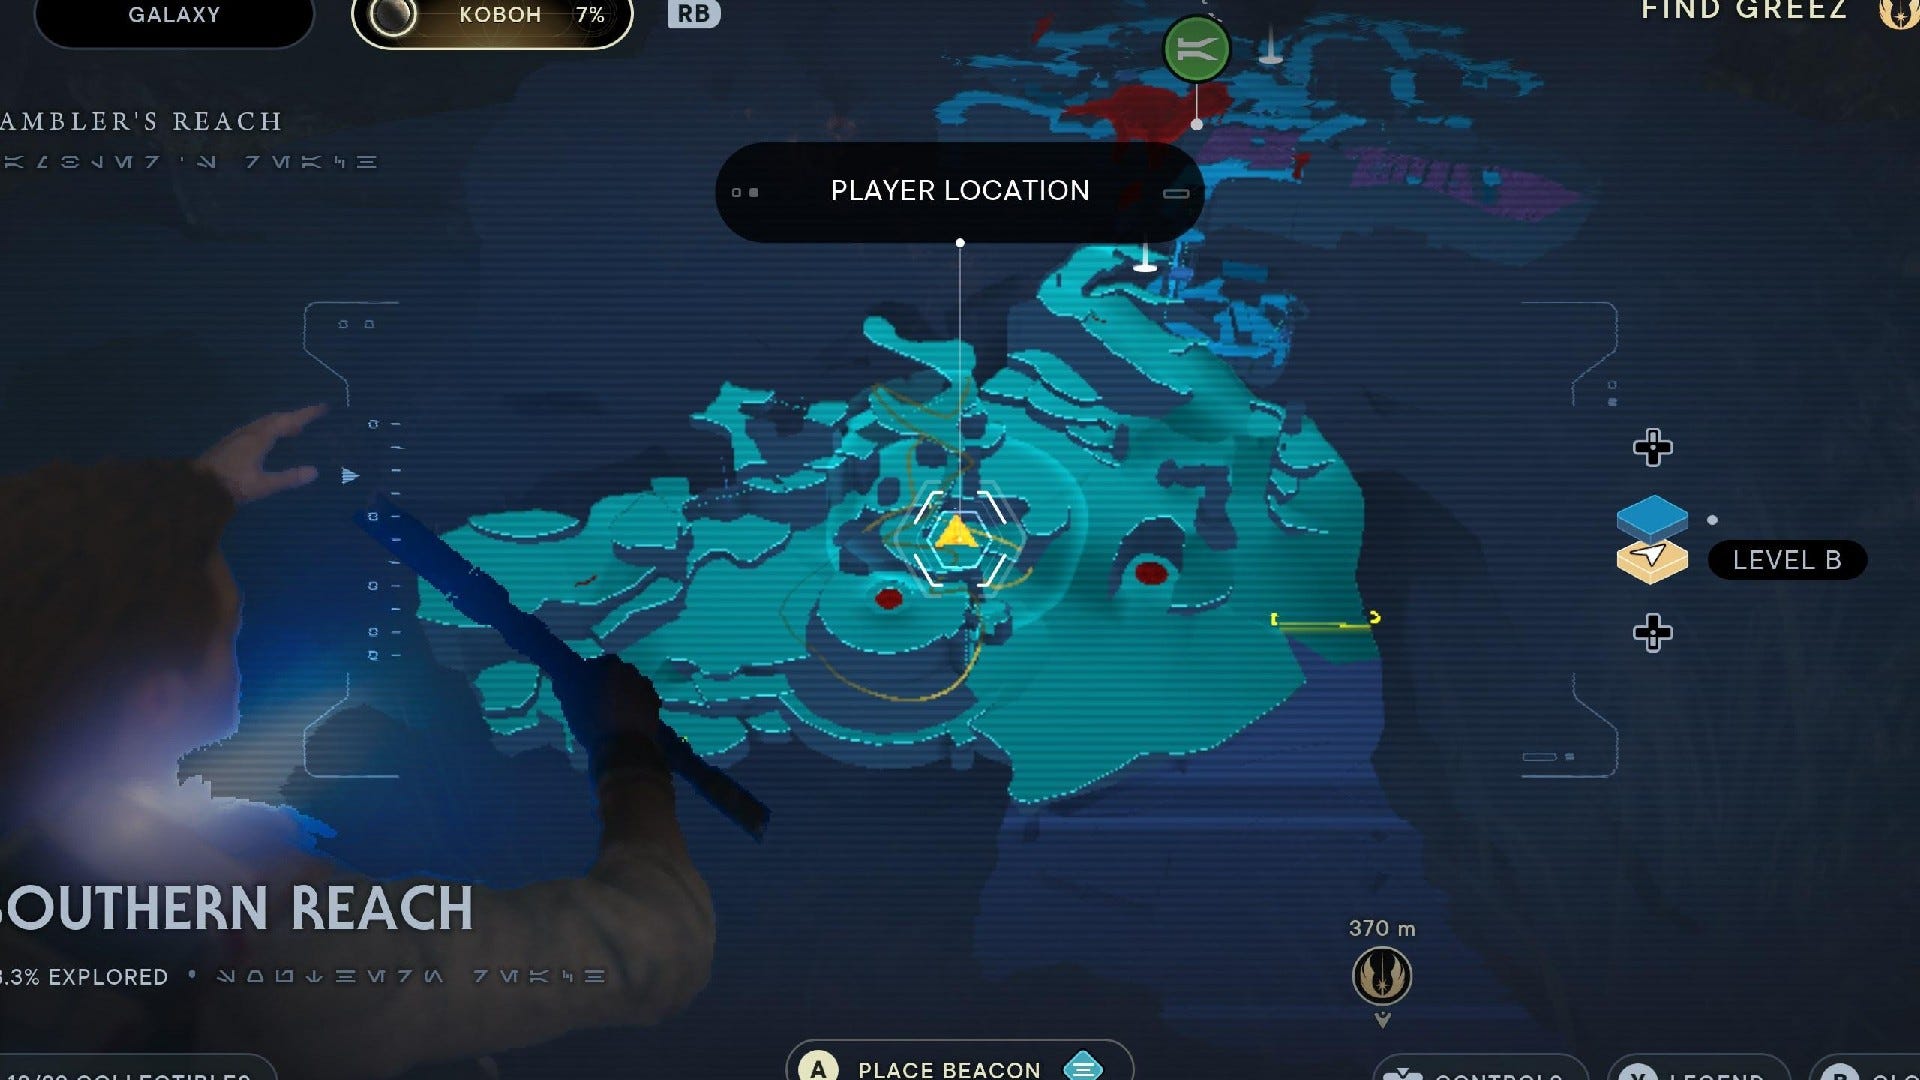
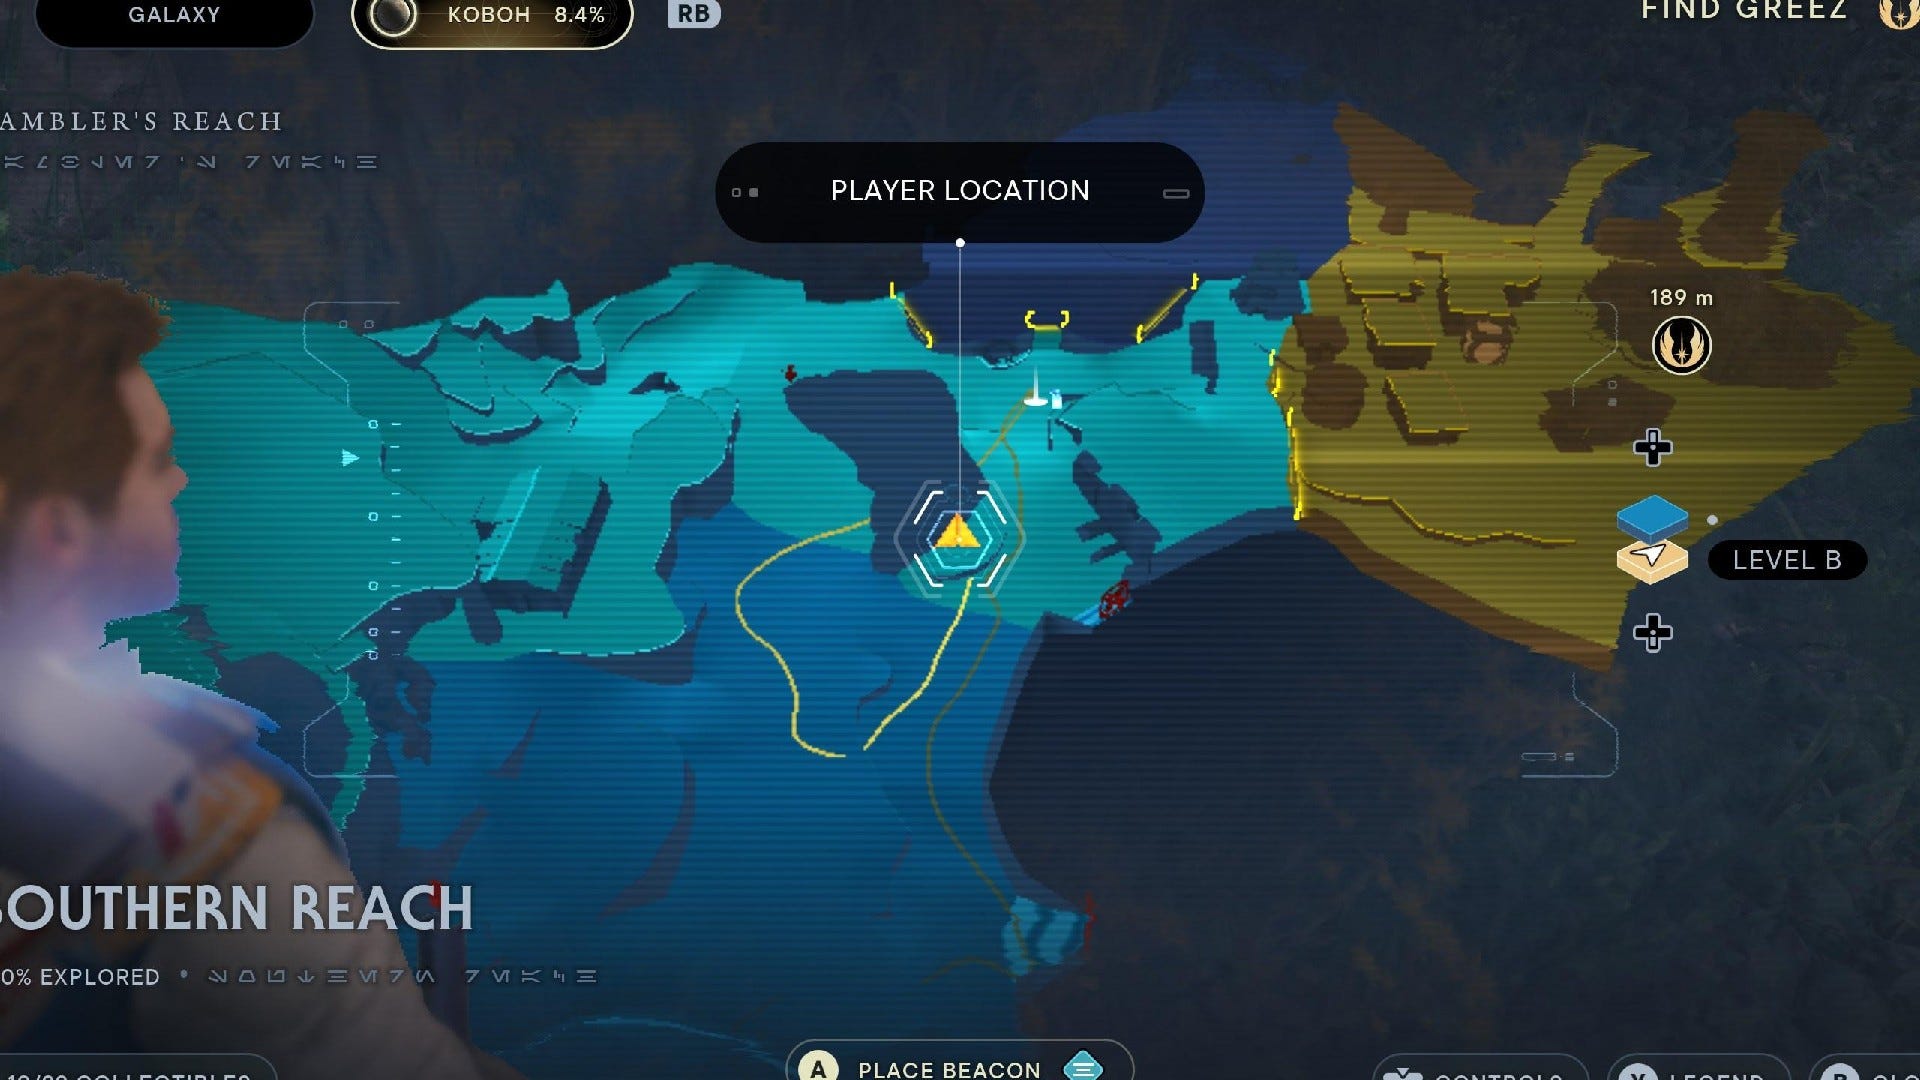
Southern Reach collectibles
Southern Reach Chests:
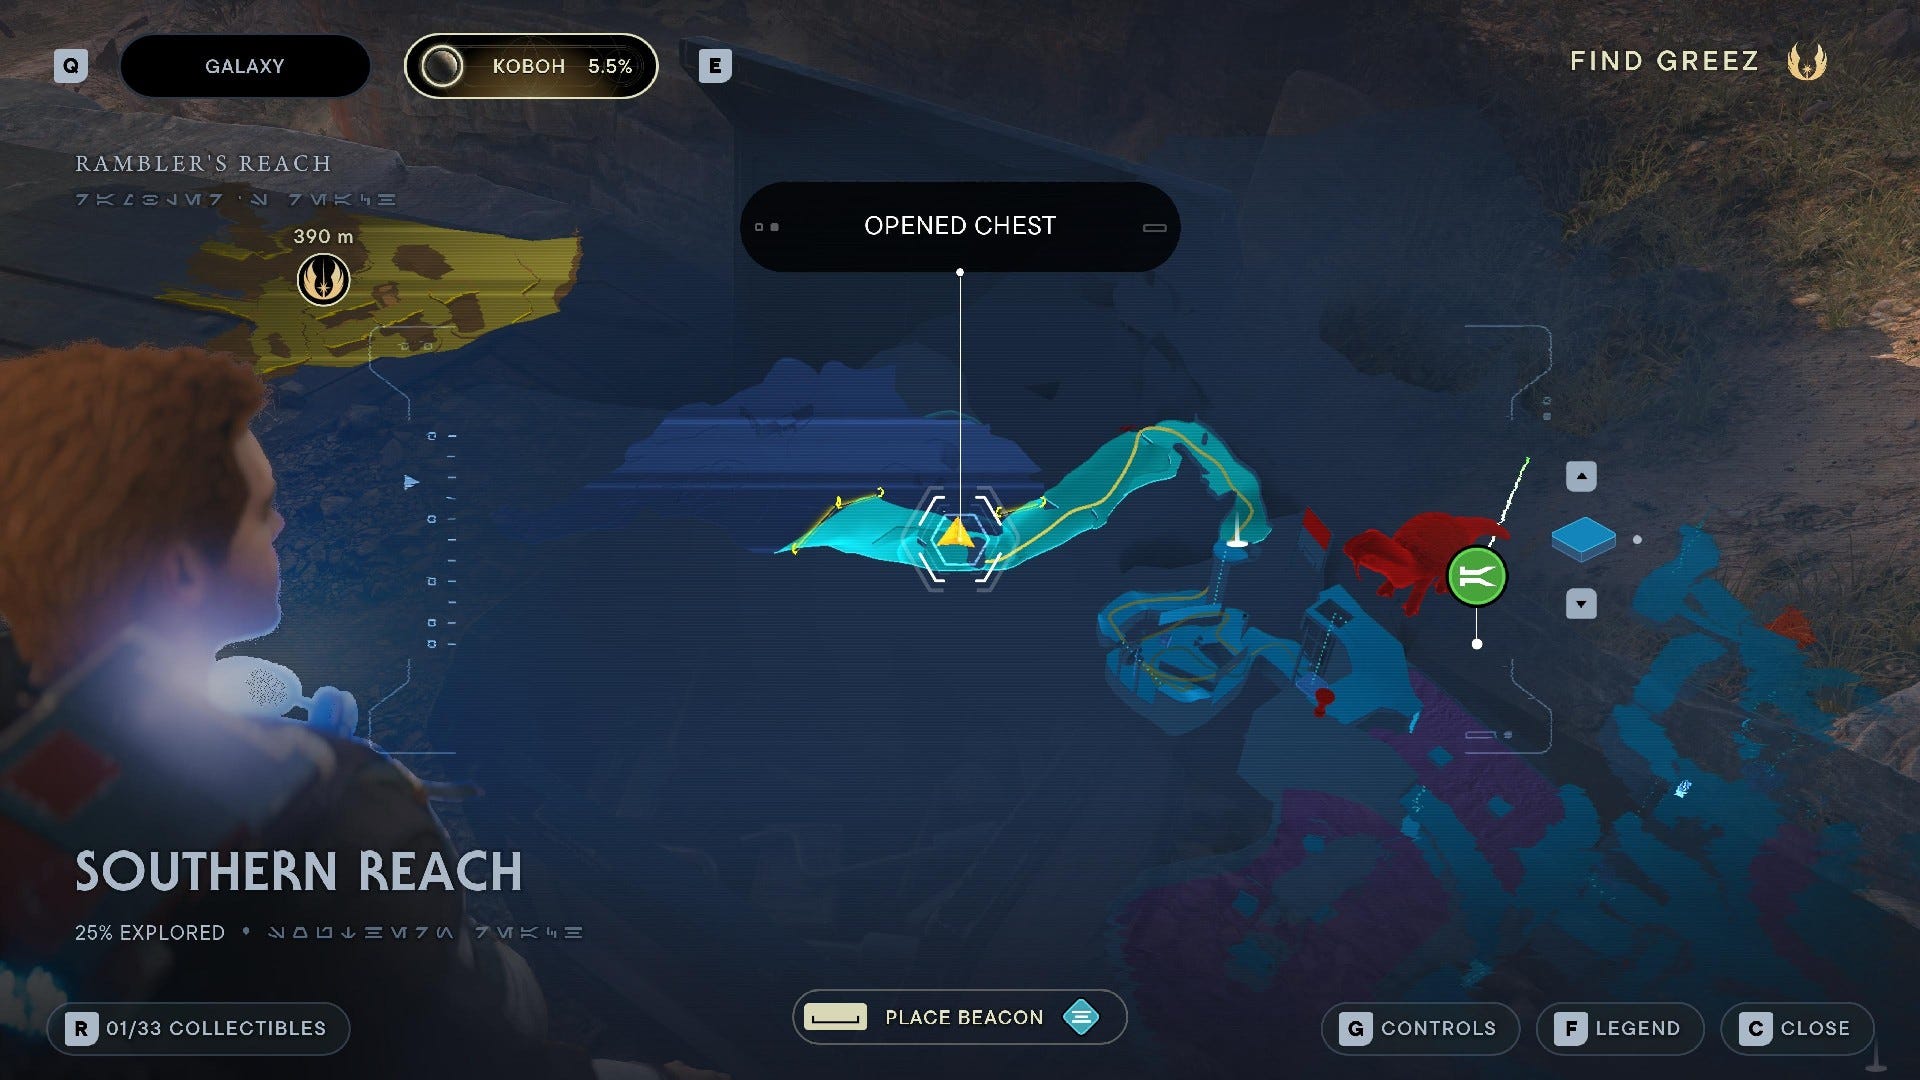
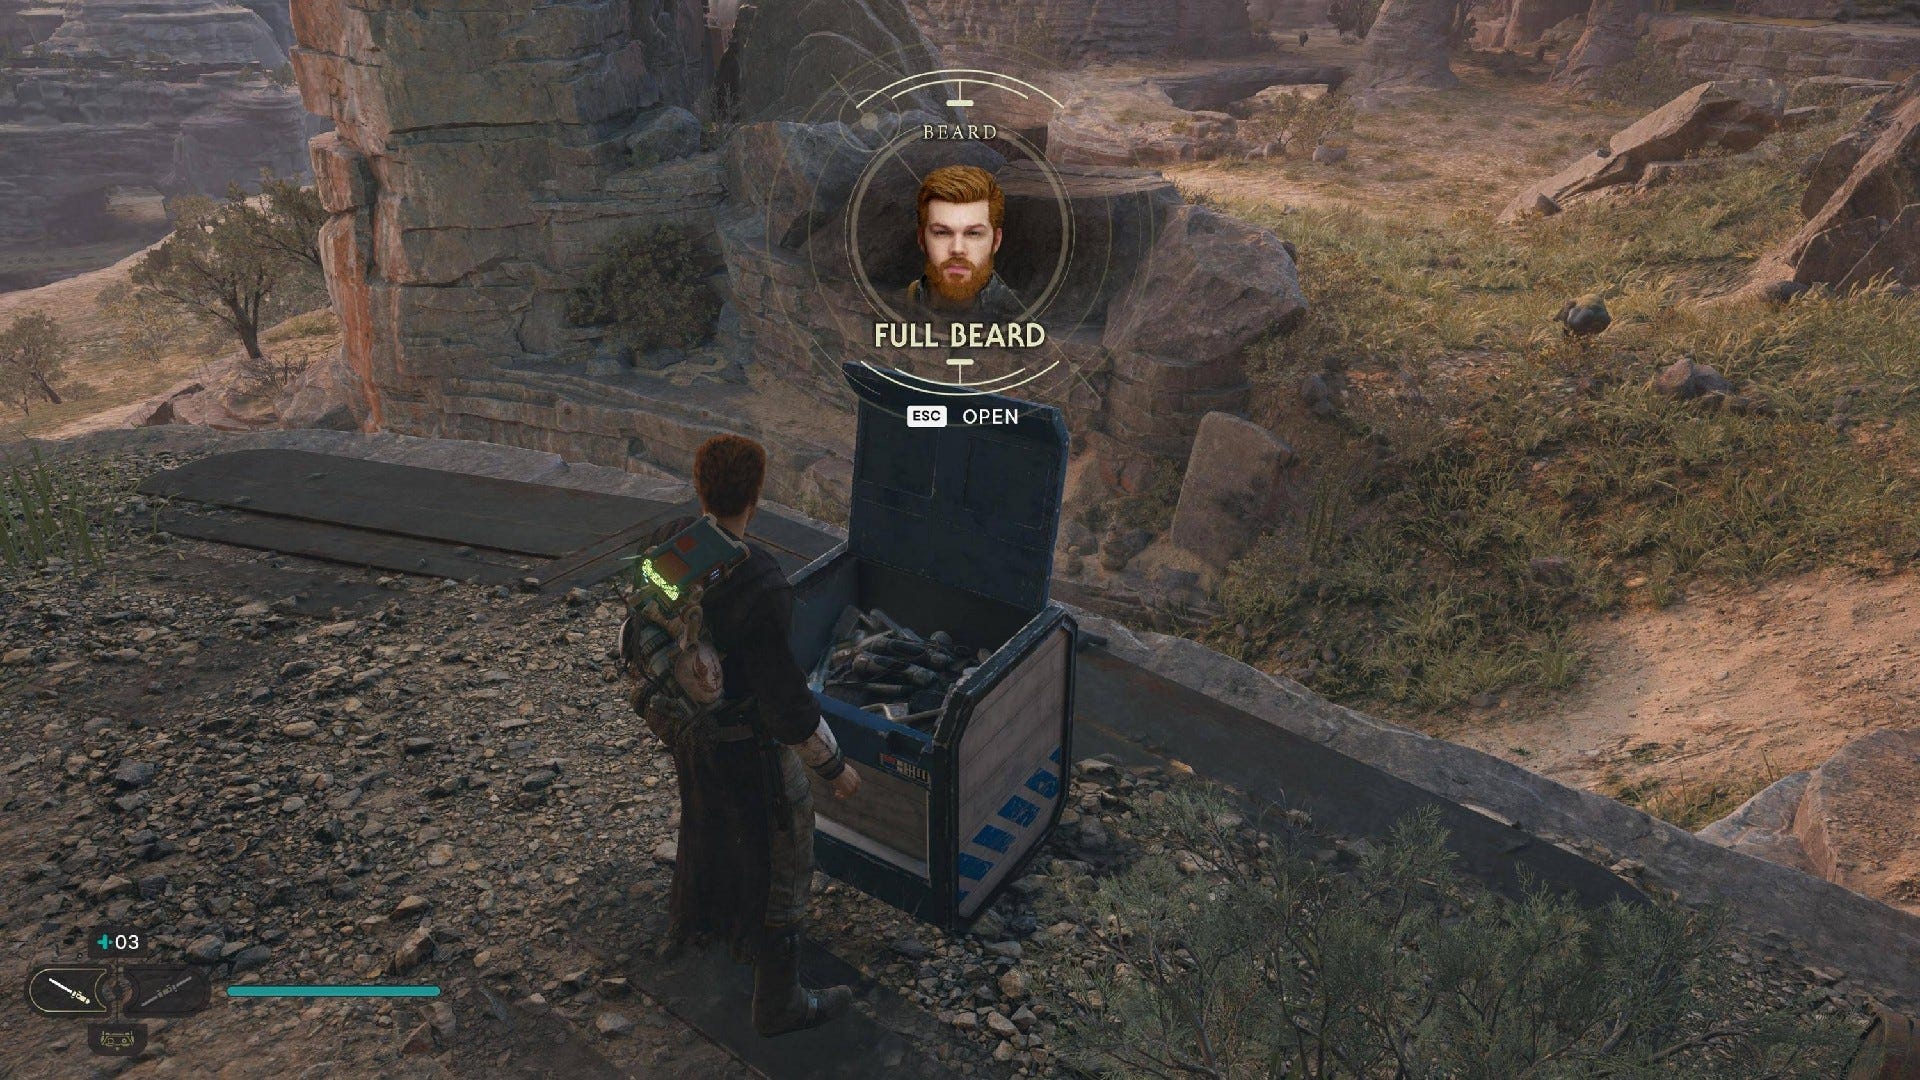
Chest #1 (Full Beard): On the upper ledge just behind where Mosey is first seen taking care of Brutus the Nekko.

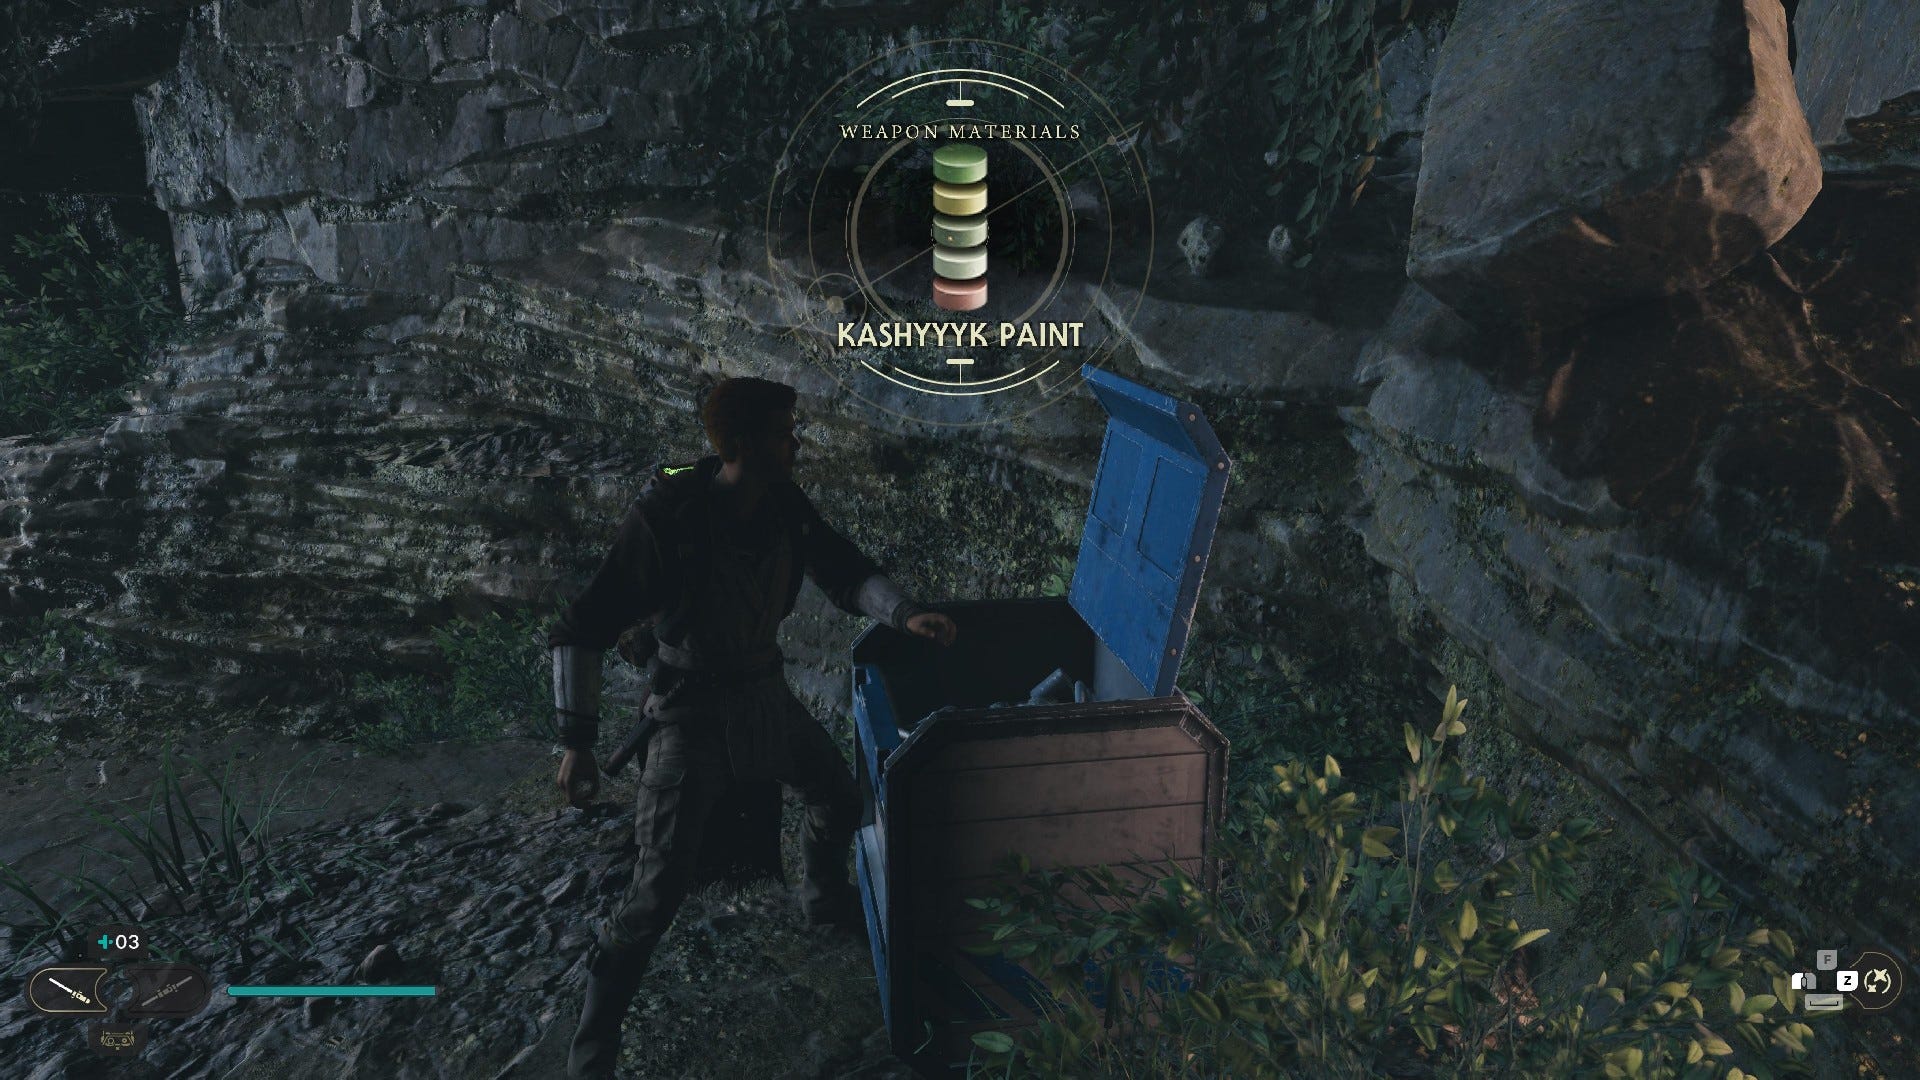
Chest #2 (Kashyyyk Paint weapon materials): Opposite Mosey and Brutus, past the two Gorgers, climb the vines to the top. Then swing across the poles, past the two Bramliks and the fnial pole, then check beneath the path you just came from.
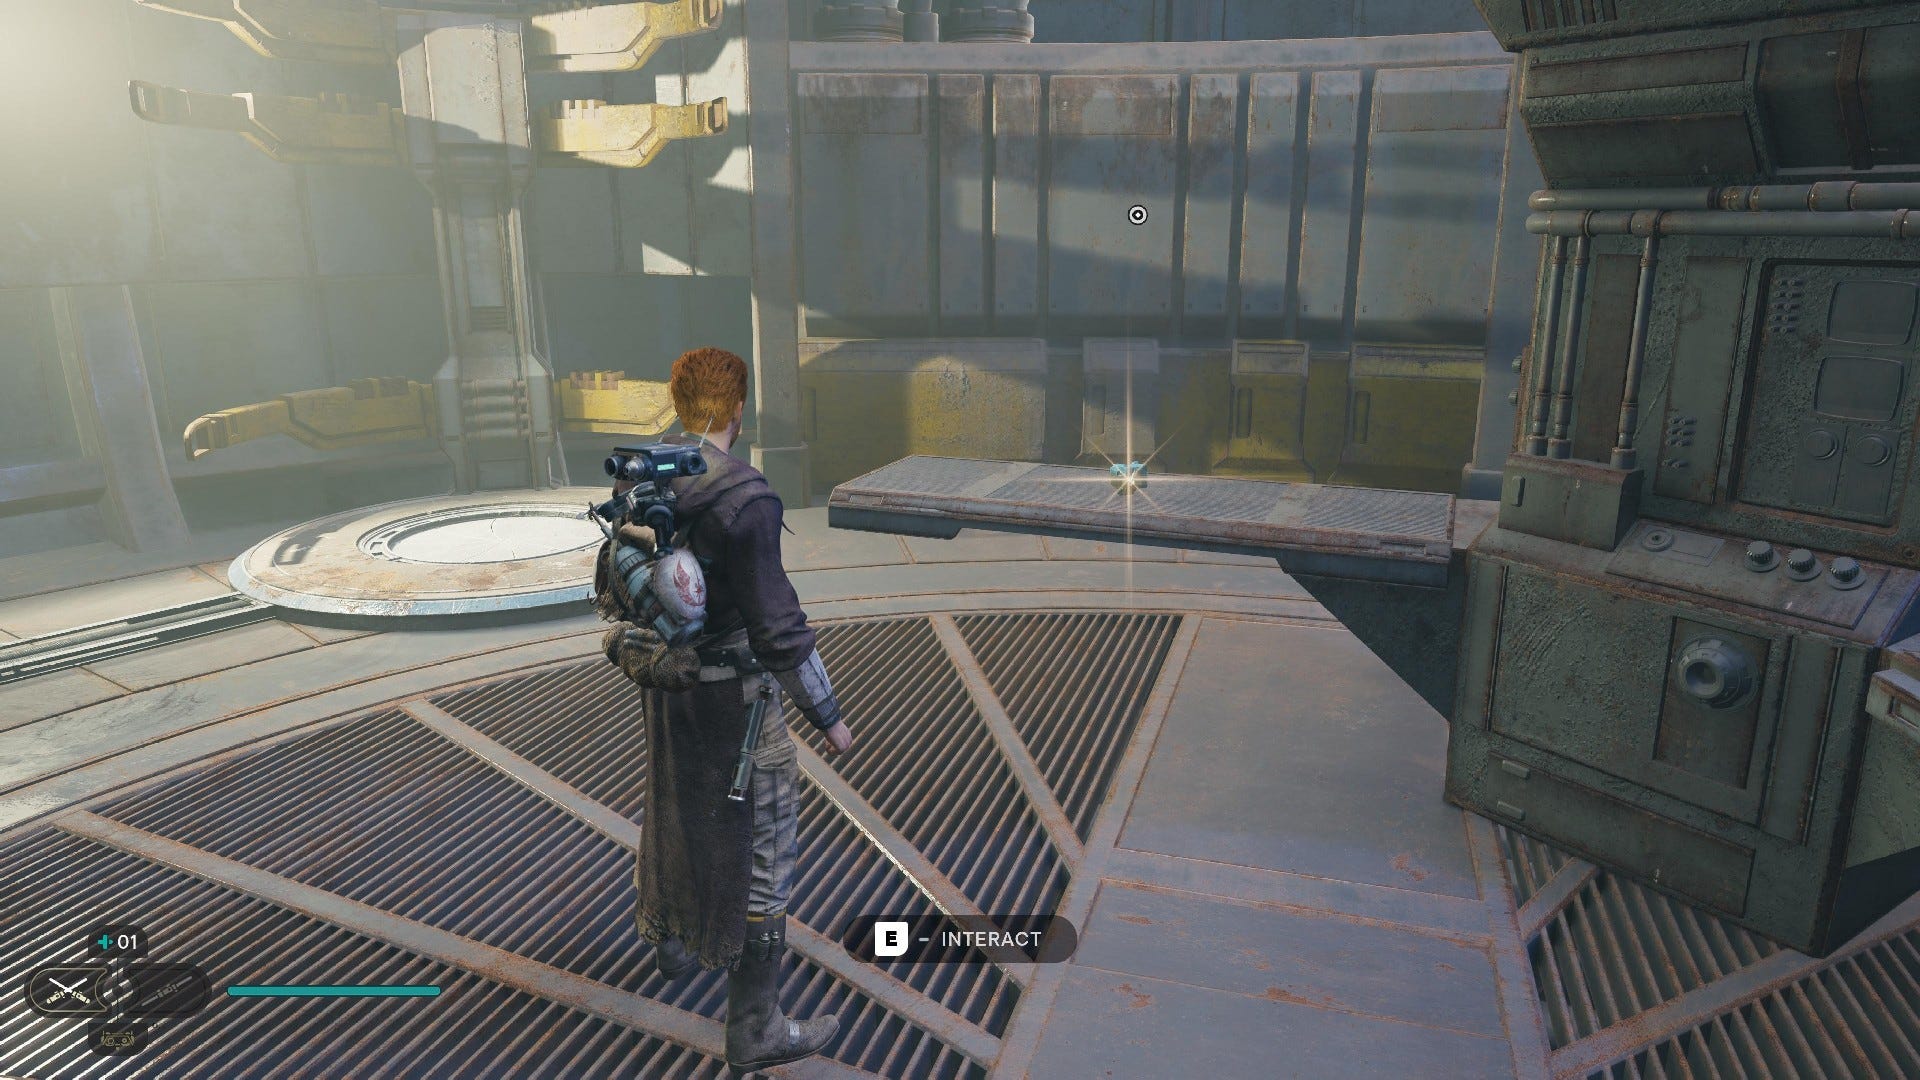
Chest #3 (Quickdraw Blaster): Force Lift the gate in Hunter’s Quarry up the ledge, complete part of the puzzle so that the beam hits one of the town’s buildings, and then use BD-1’s Koboh Grinder spray to lead the beam’s energy into the marked house, to clear up all the Koboh matter inside and make the chest accessible.
Southern Reach Essences:

Skill Point Essence: Use the vine to swing over the Gorocco below, then move a little further on and look towards the cliff wall on your right for the essence.
Southern Reach Databanks:
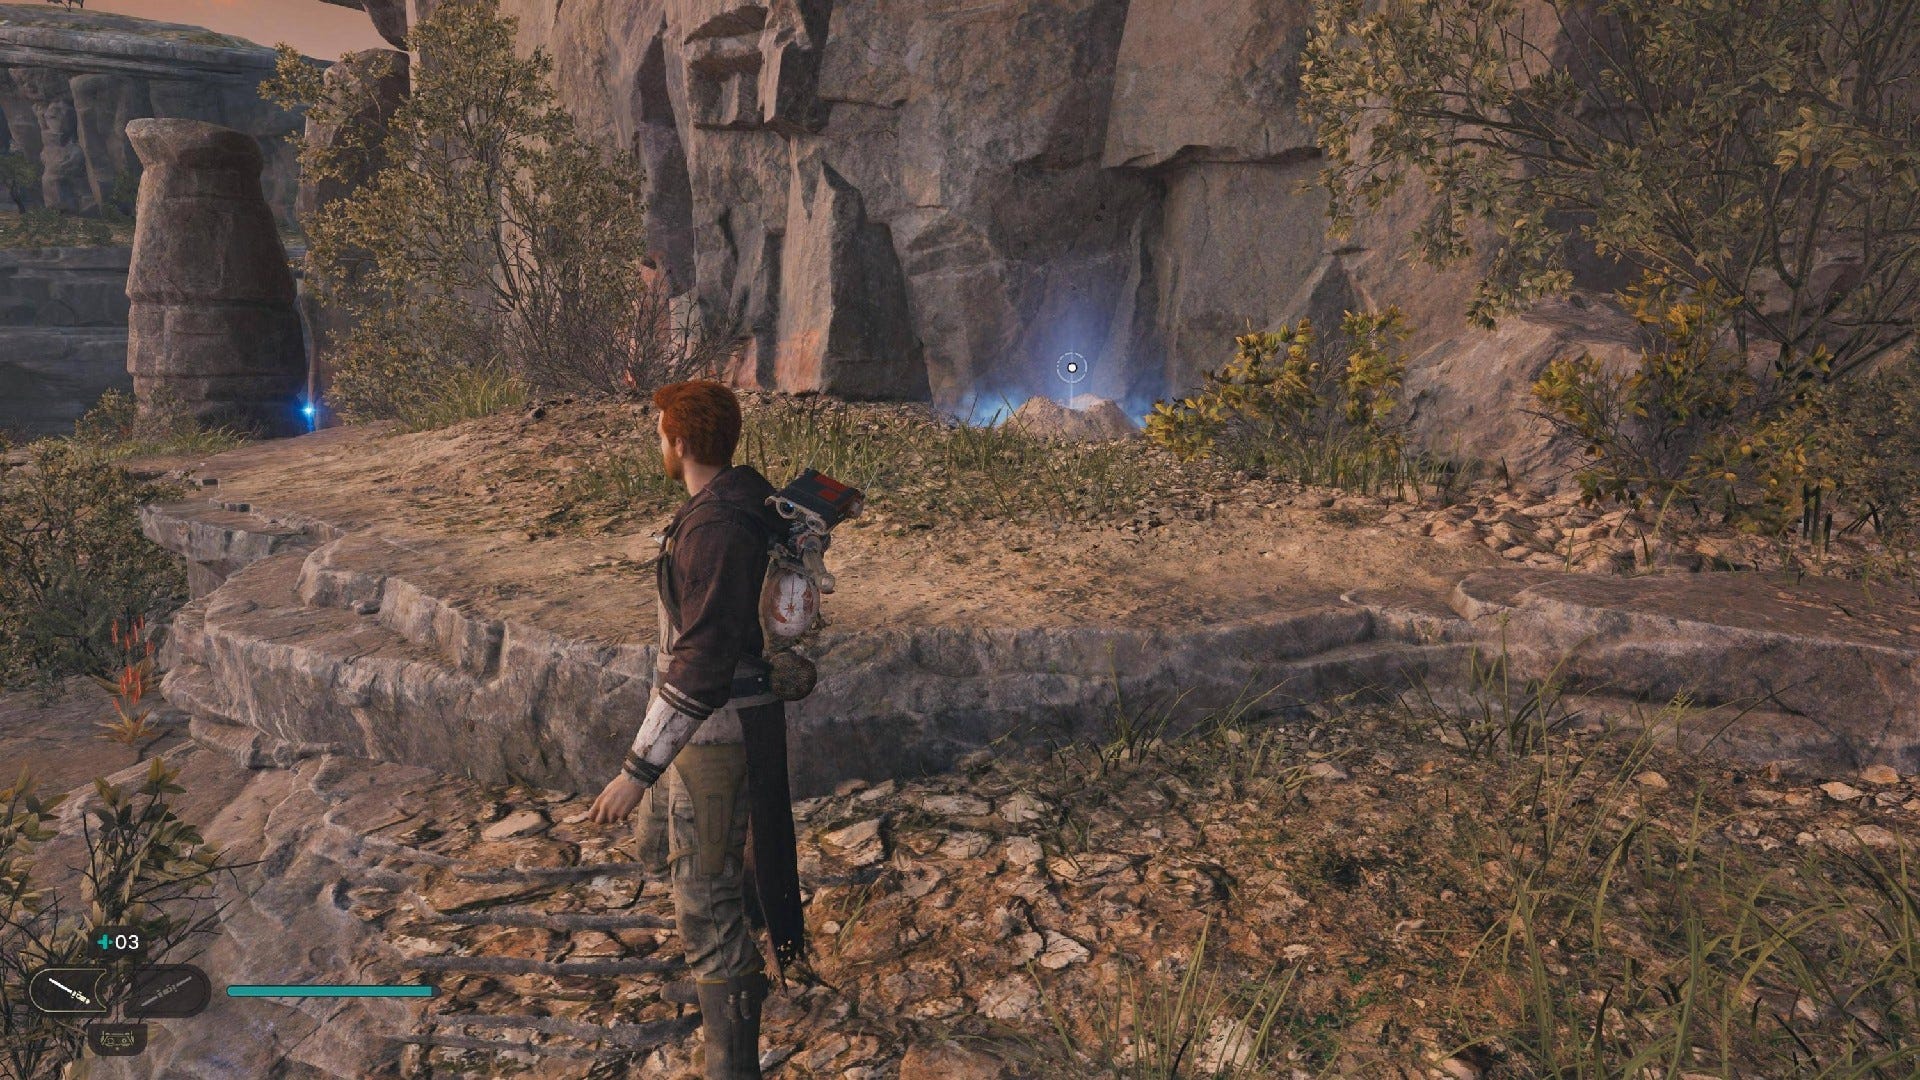
Force Echo (Besotted): Use the vine to swing over the Gorocco below, and look towards the cliff edge.
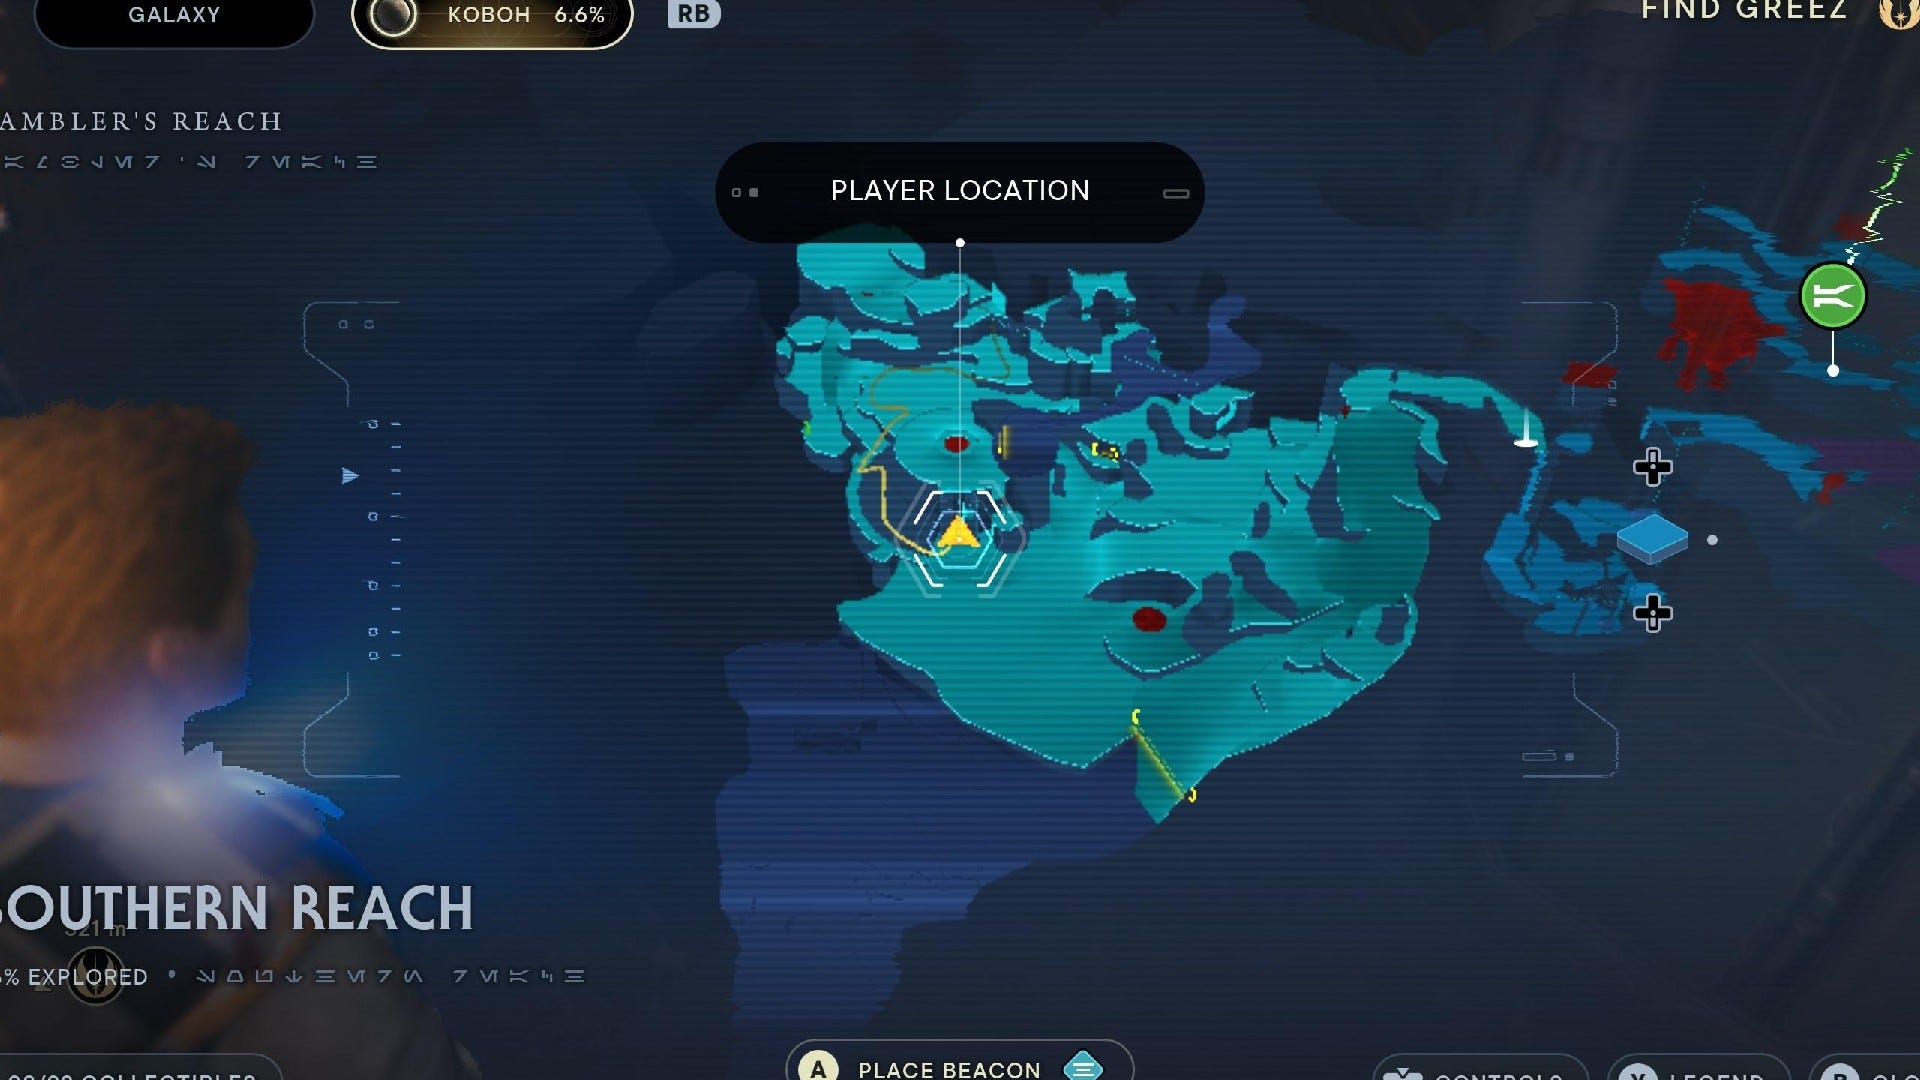
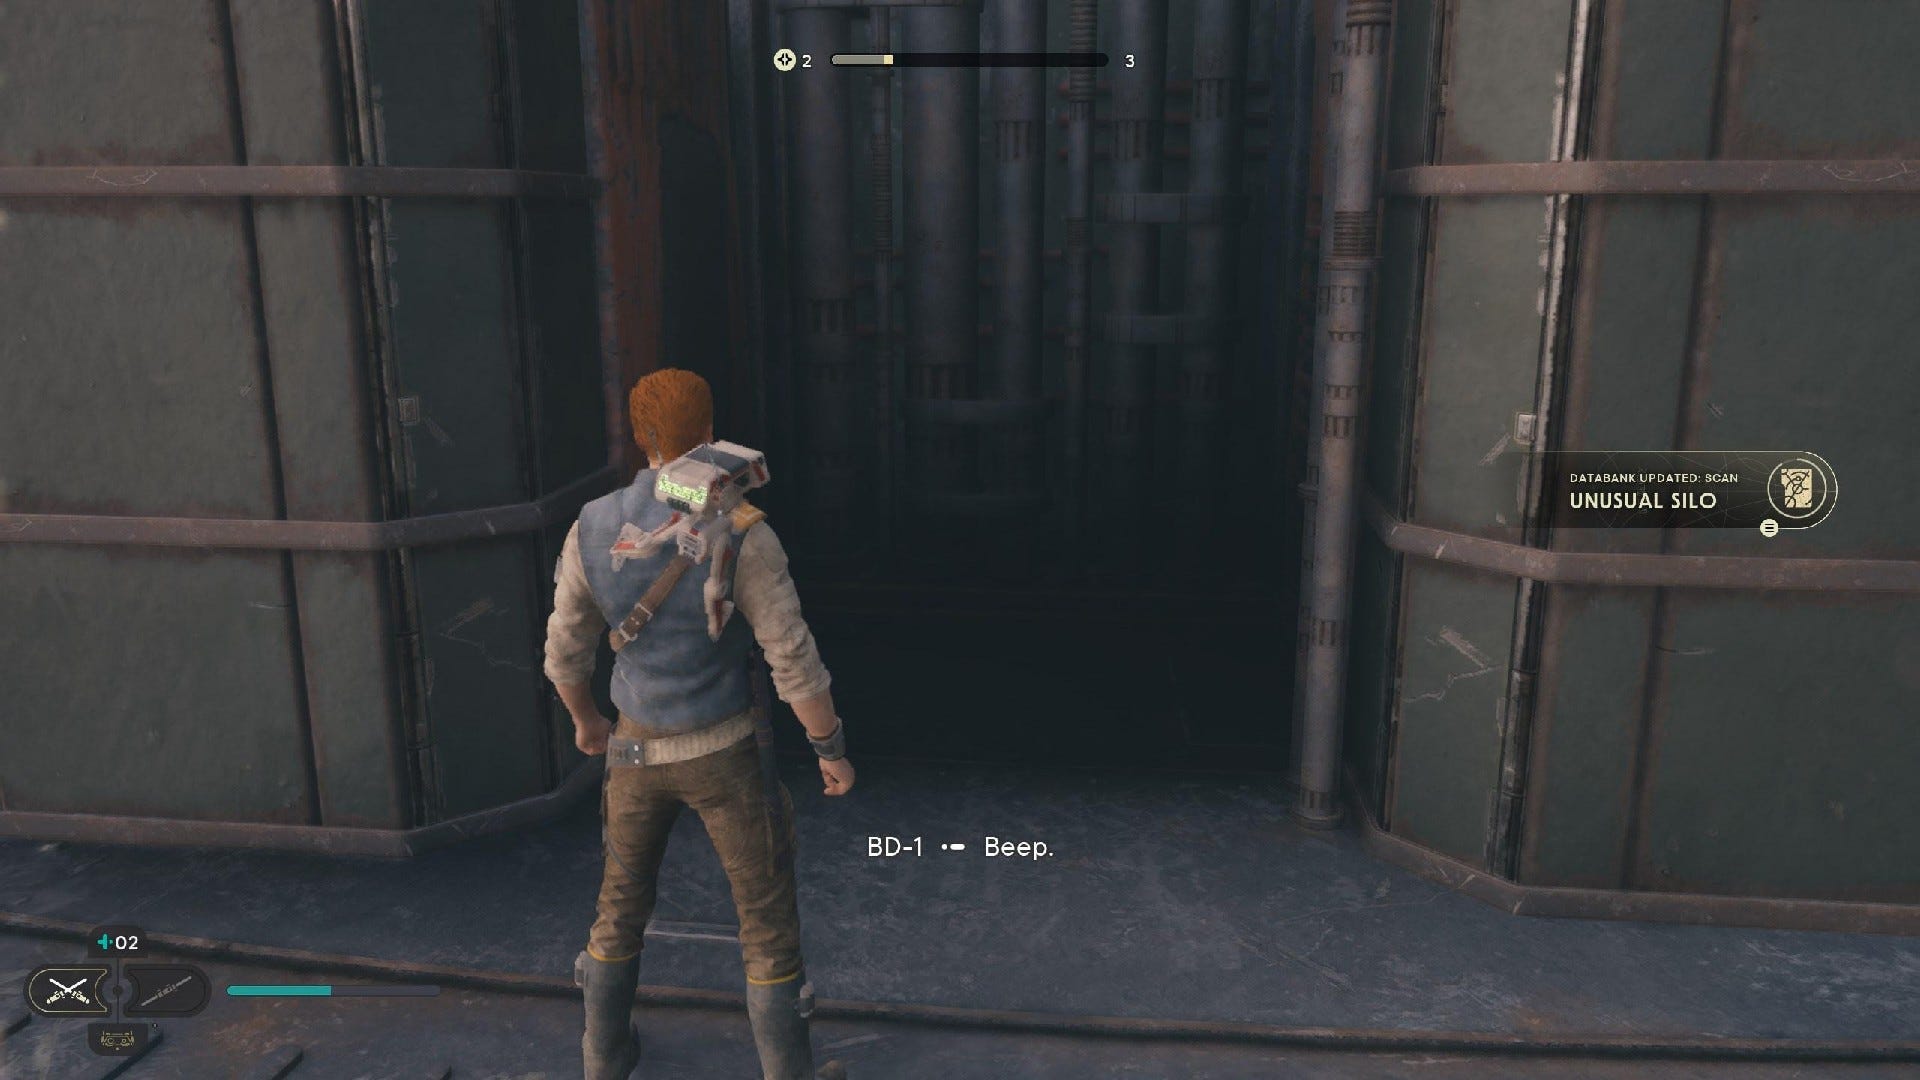
Databank (Unusual Silo): Drop from the hanging vine to where you find the Gorocco, and follow the curved metal path around the silo.
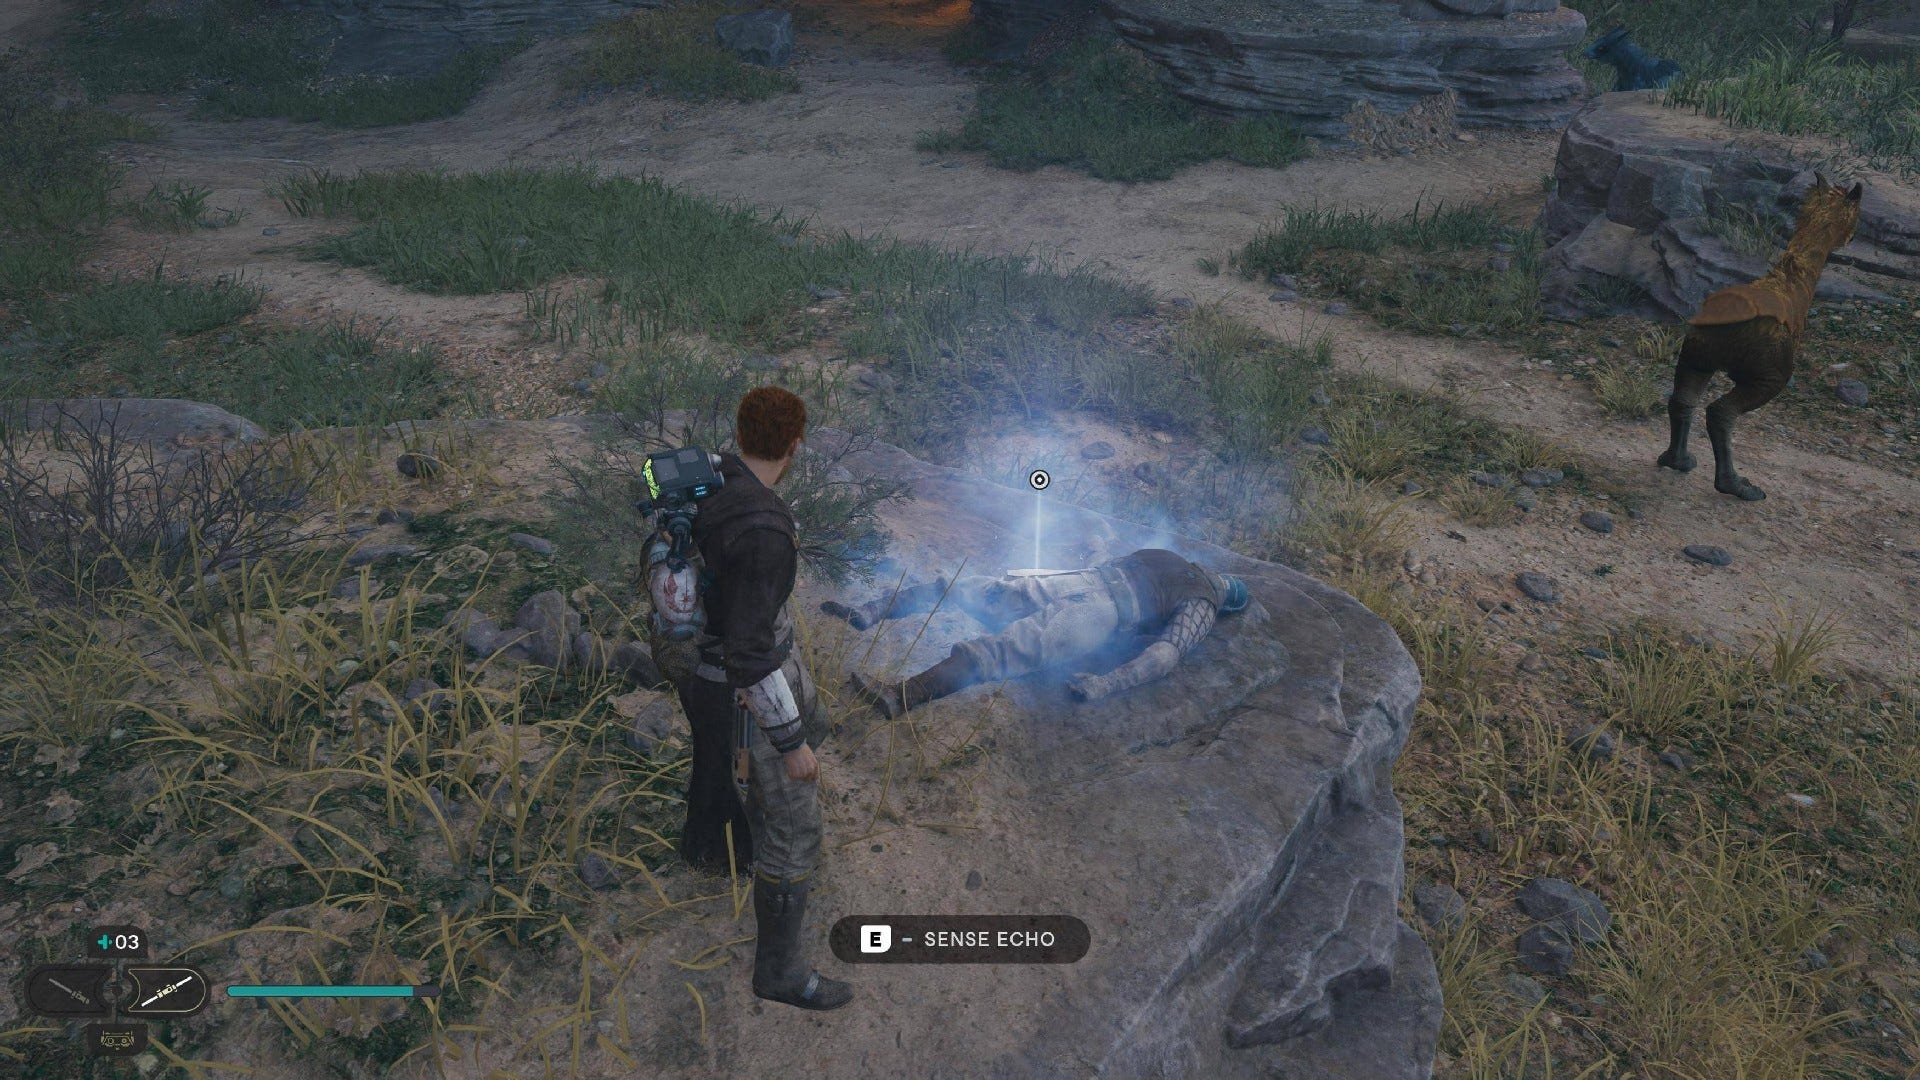
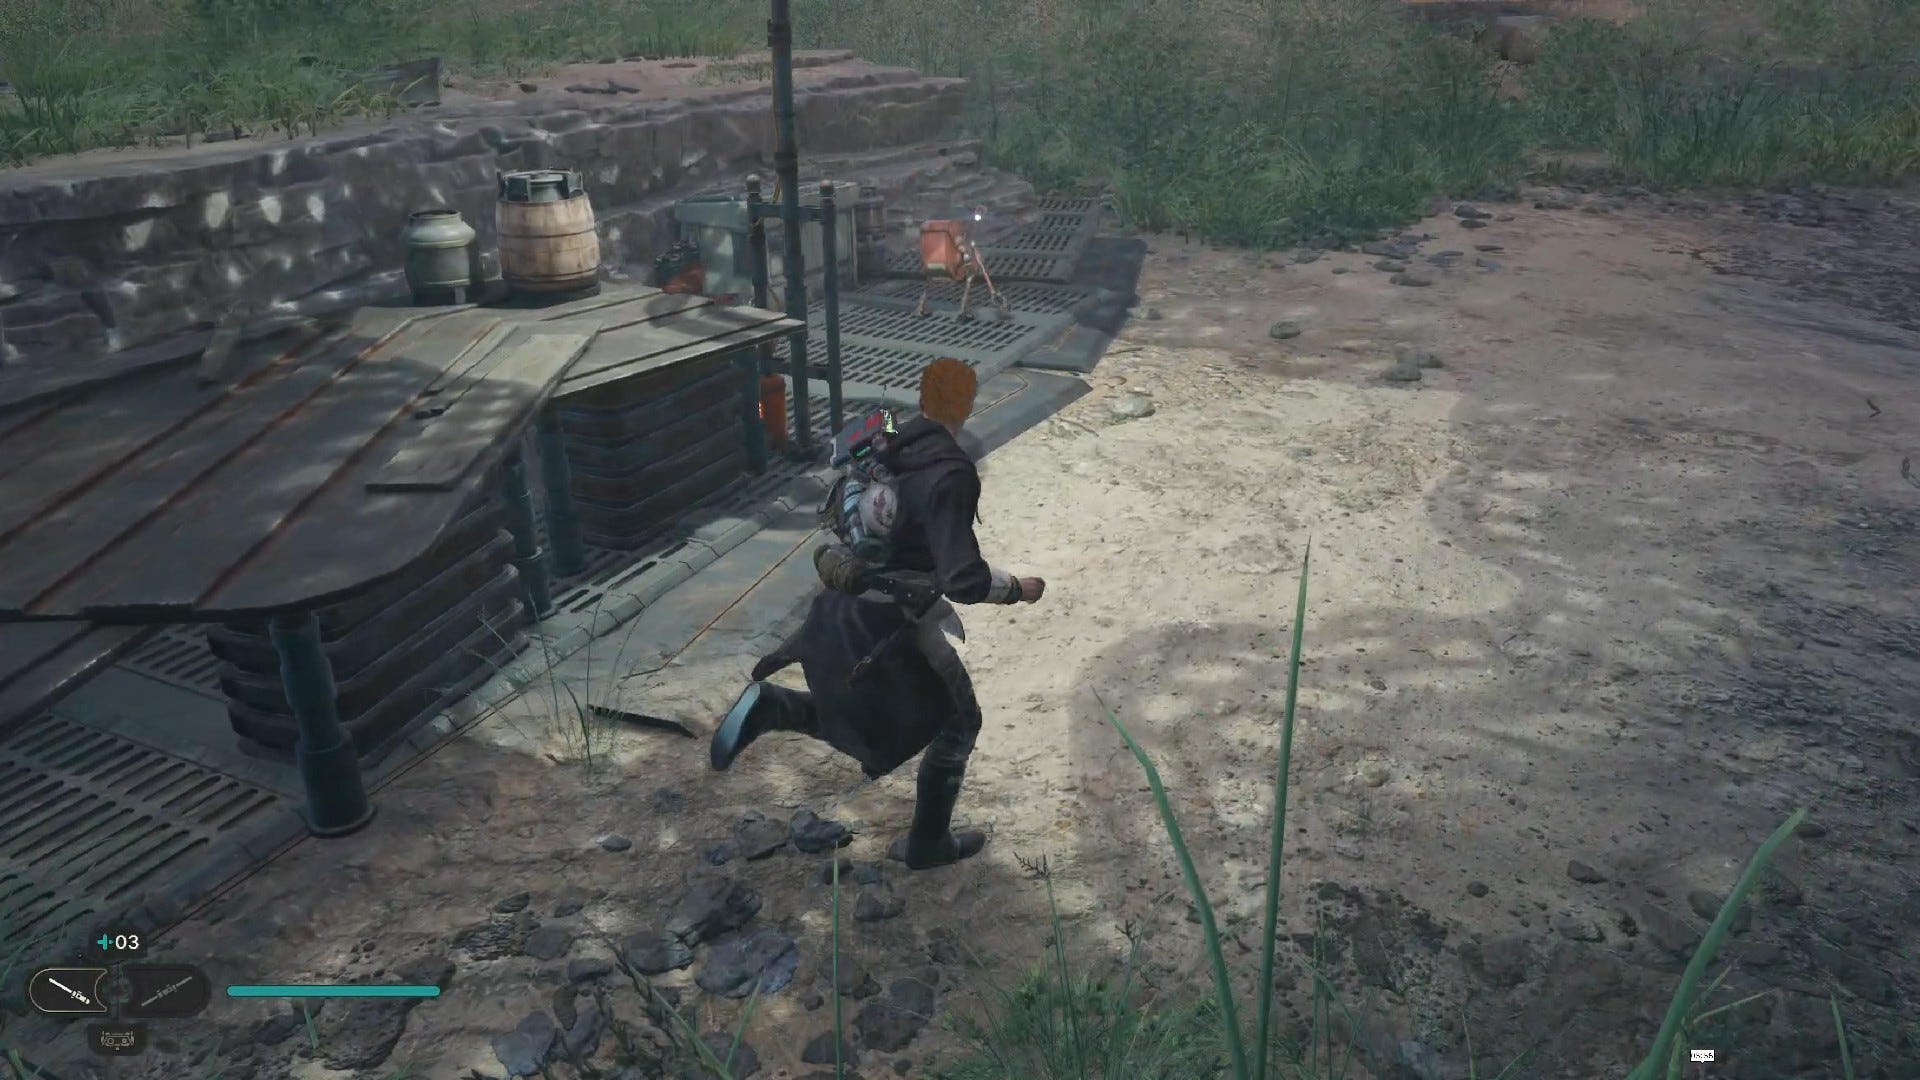
Force Echo (Doma, Unbowed): Found on a dead body down the main path of Riverbed Watch.
Southern Reach Treasures:
Priorite Shard #1: Opposite Mosey and Brutus, past the two Gorgers, climb the vines to the upper ledge.

Datadisc: Dropped by a scavenger droid behind the silo, in the area where all the Gorgers and Bramliks are fighting each other.
Priorite Shard #2: On top of the giant circular silo building that you need to parkour up using the two parallel walls.
Priorite Shard #3: Follow the path onward from the top of the giant silo in Rambler’s Reach.

Priorite Shard #4: Use Force Lift on the centre of the small dam in the river, and look underneath.
Southern Reach Seed Pods:


Bluebell Squish (Nabooan Green): On the path leading down the hill to Mosey after cutscene.
Cactus Ball: When you see Mosey, turn right and hug the right-hand side. Halfway between Mosey and the waterfall is a plant to cut.
Cactus Ball (Alderaanian Blue): On the left as you head down the hill path towards the bunker.
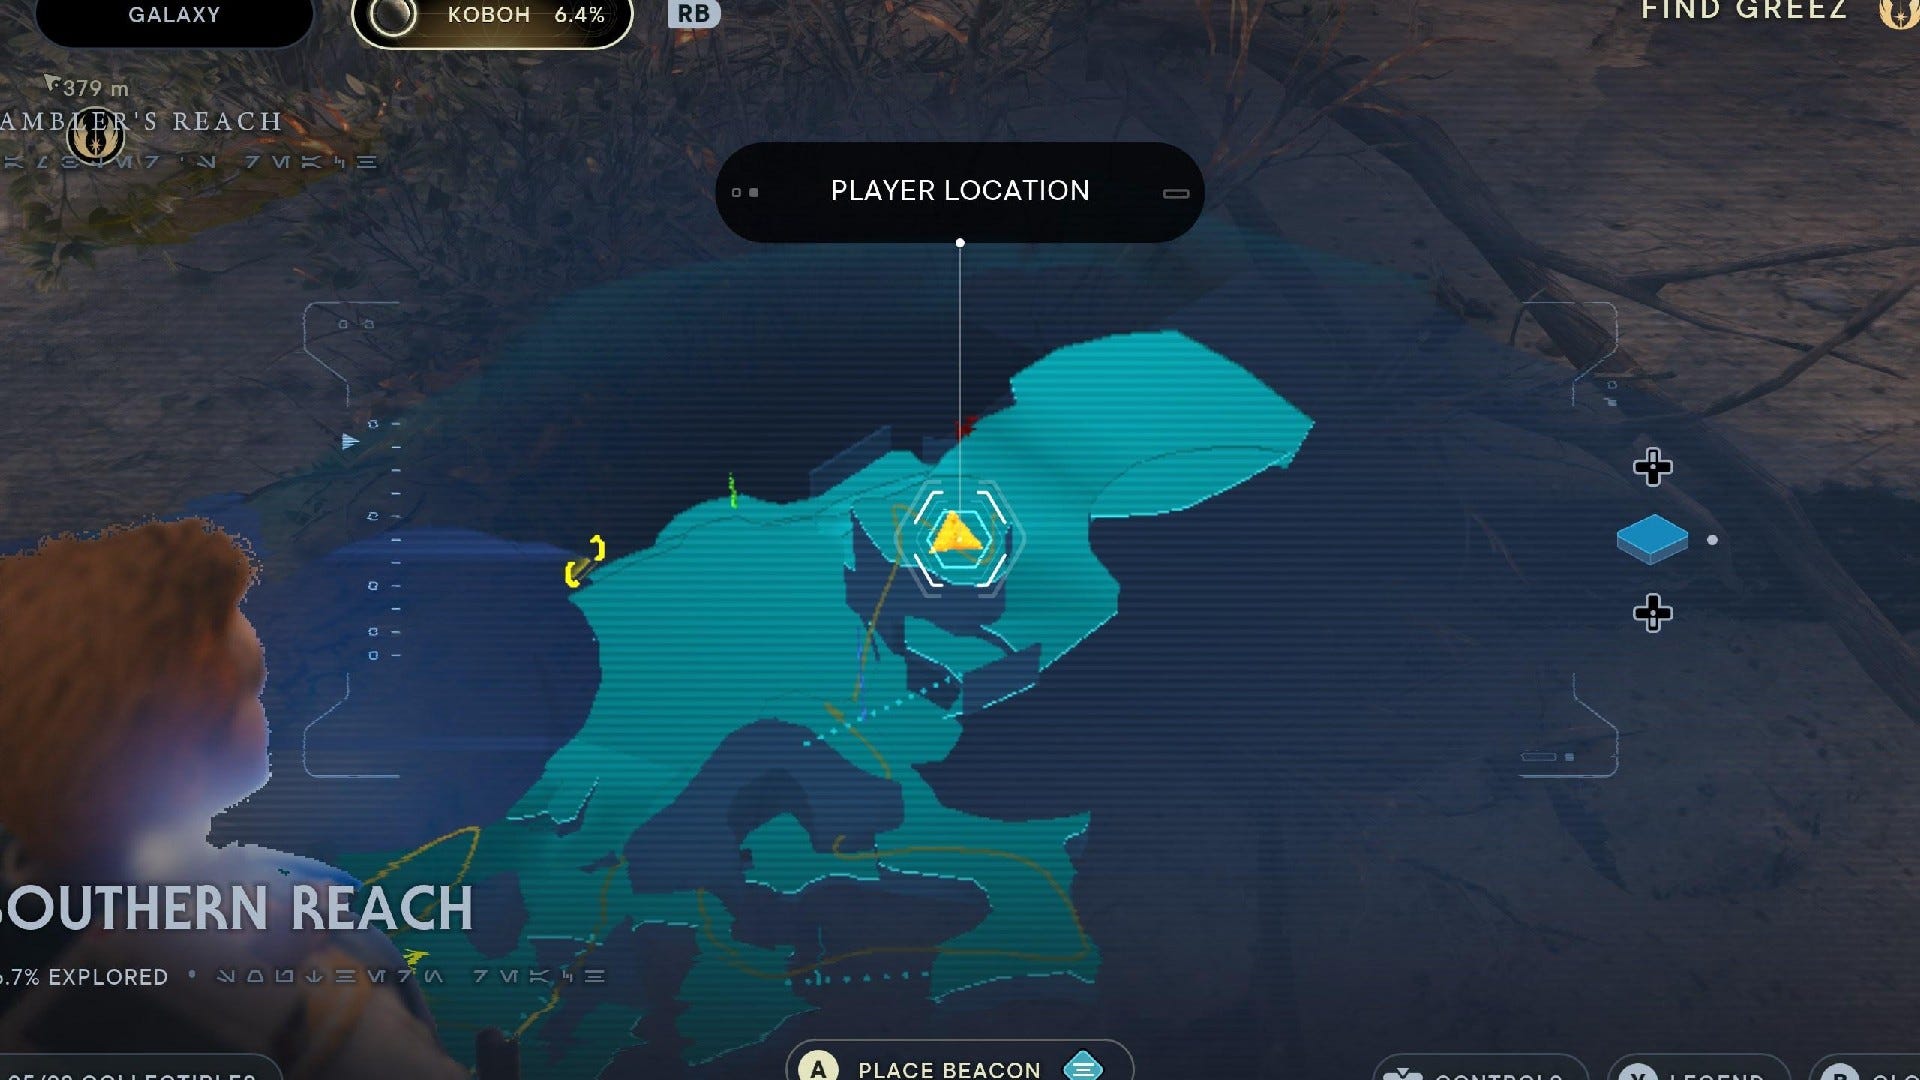
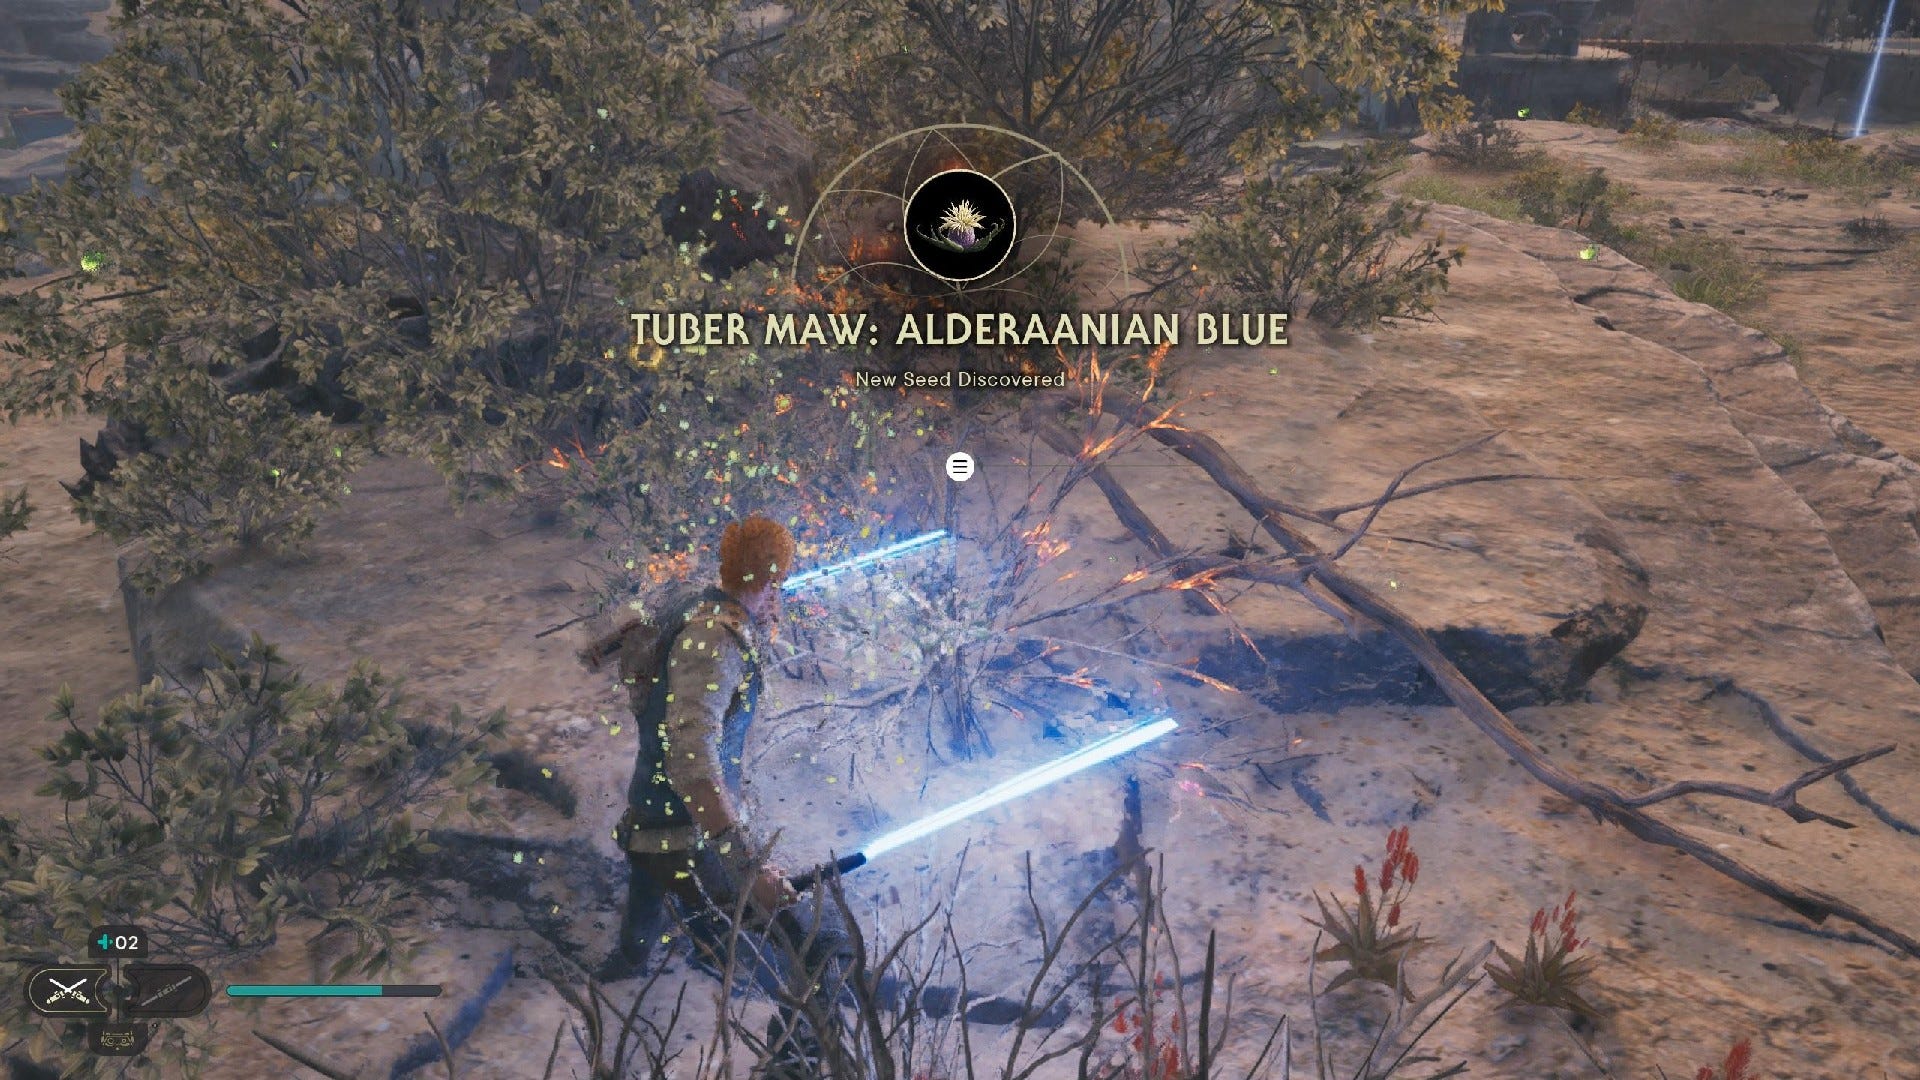
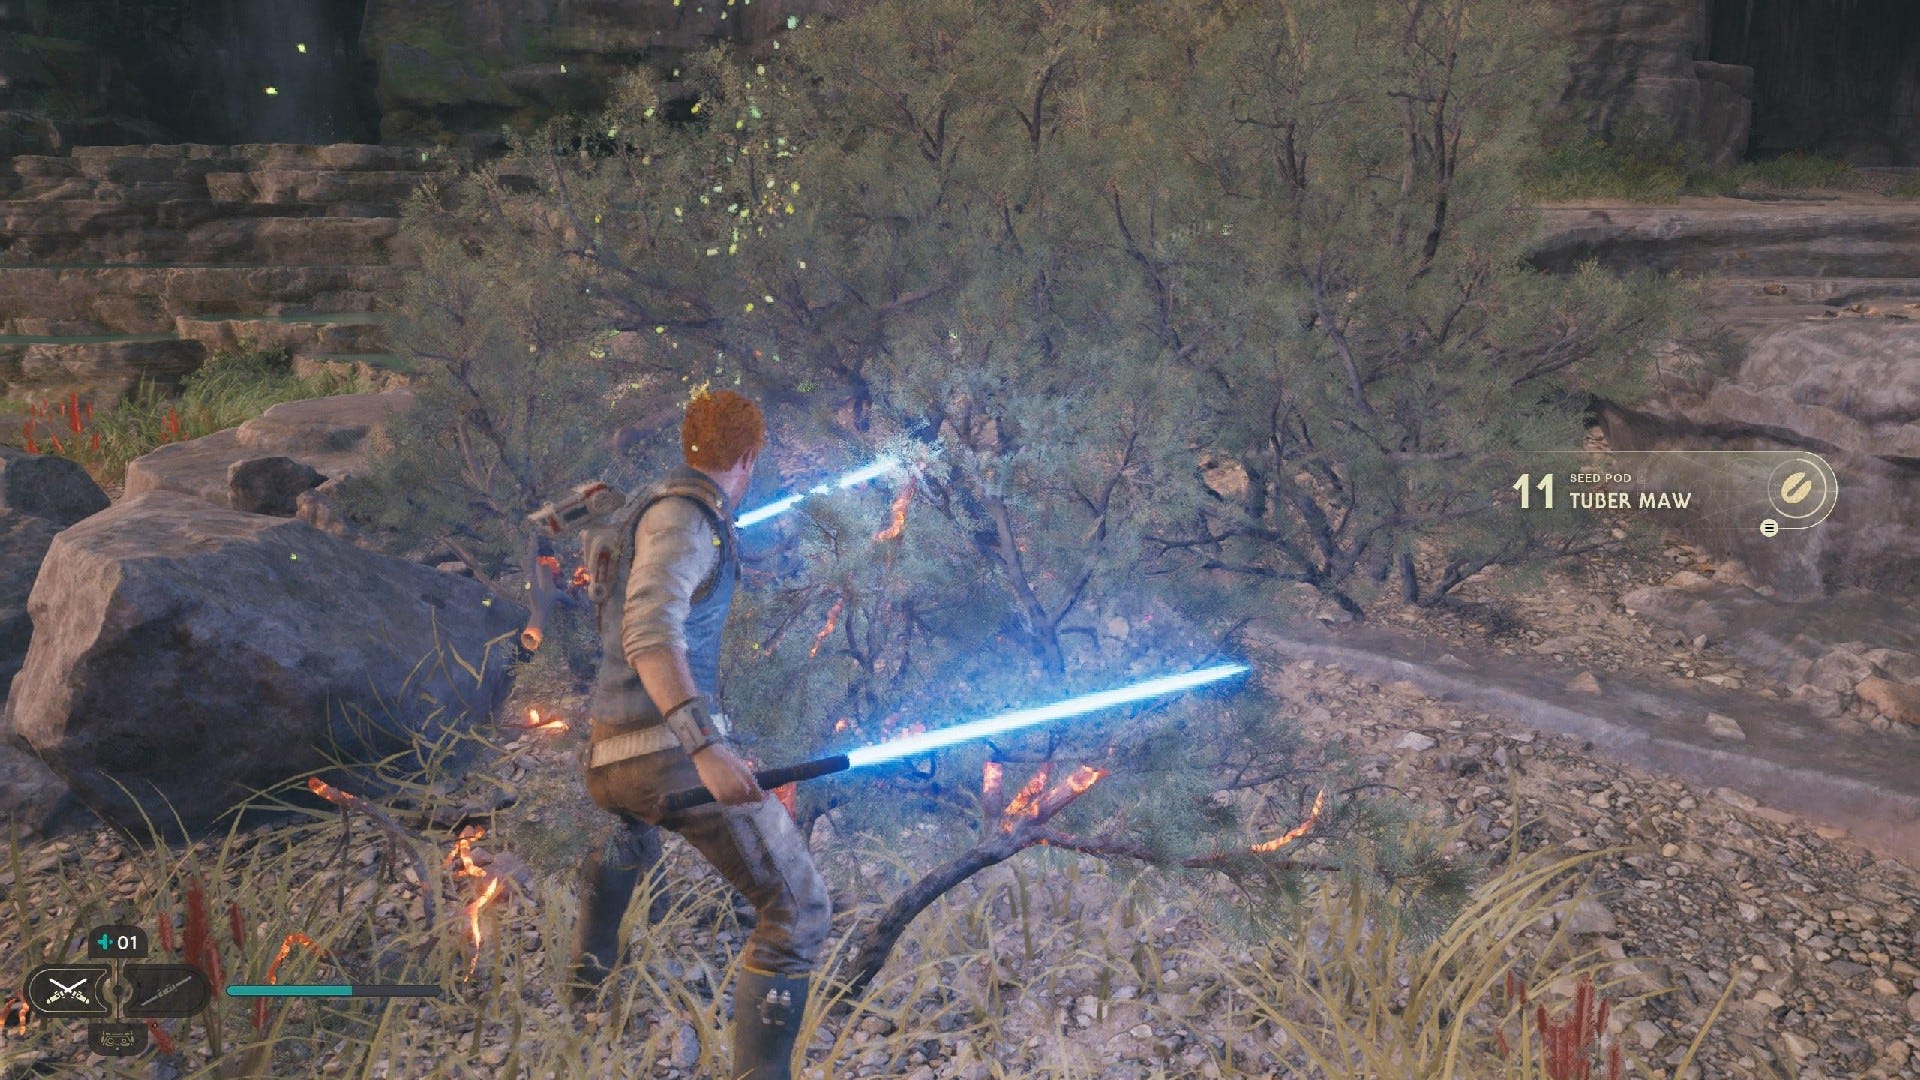
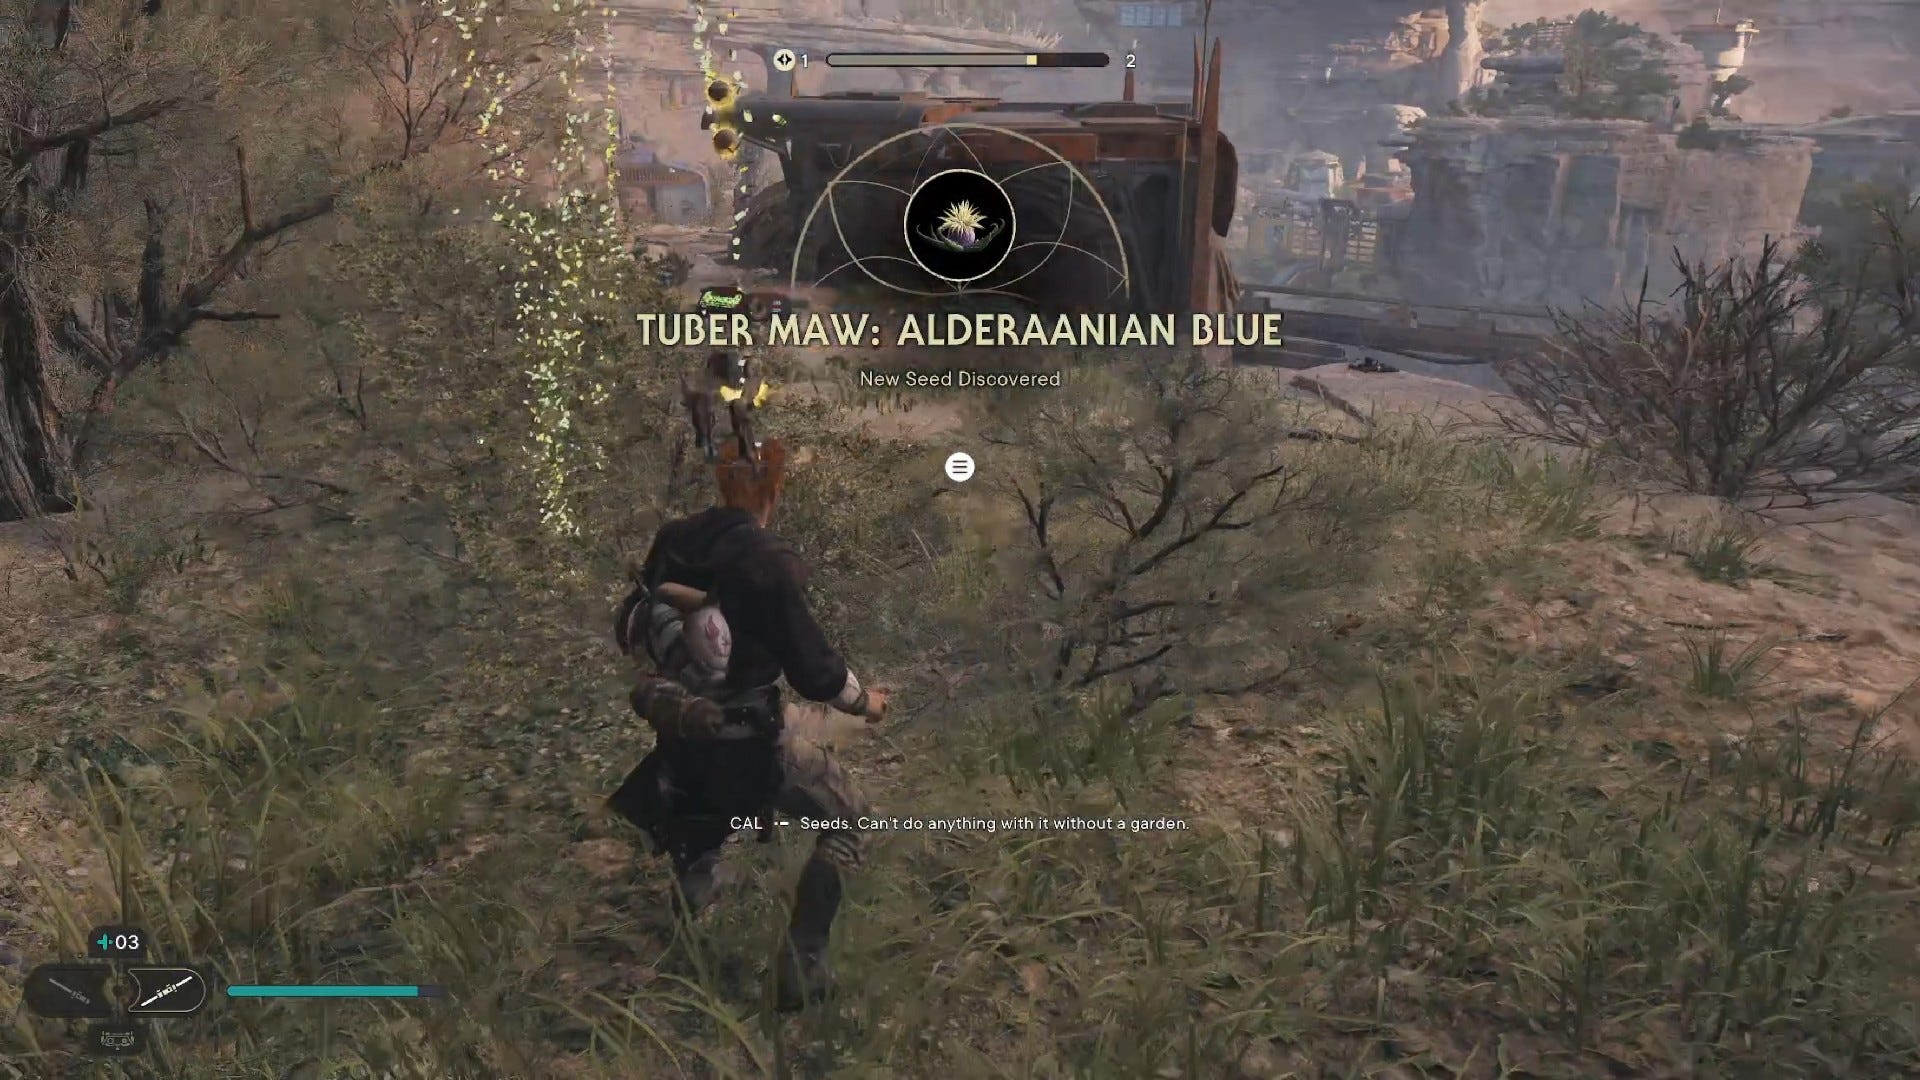
Tuber Maw (Alderaanian Blue): Swing over Gorocco using vine to reach the high ledge. The plant is on this ledge.
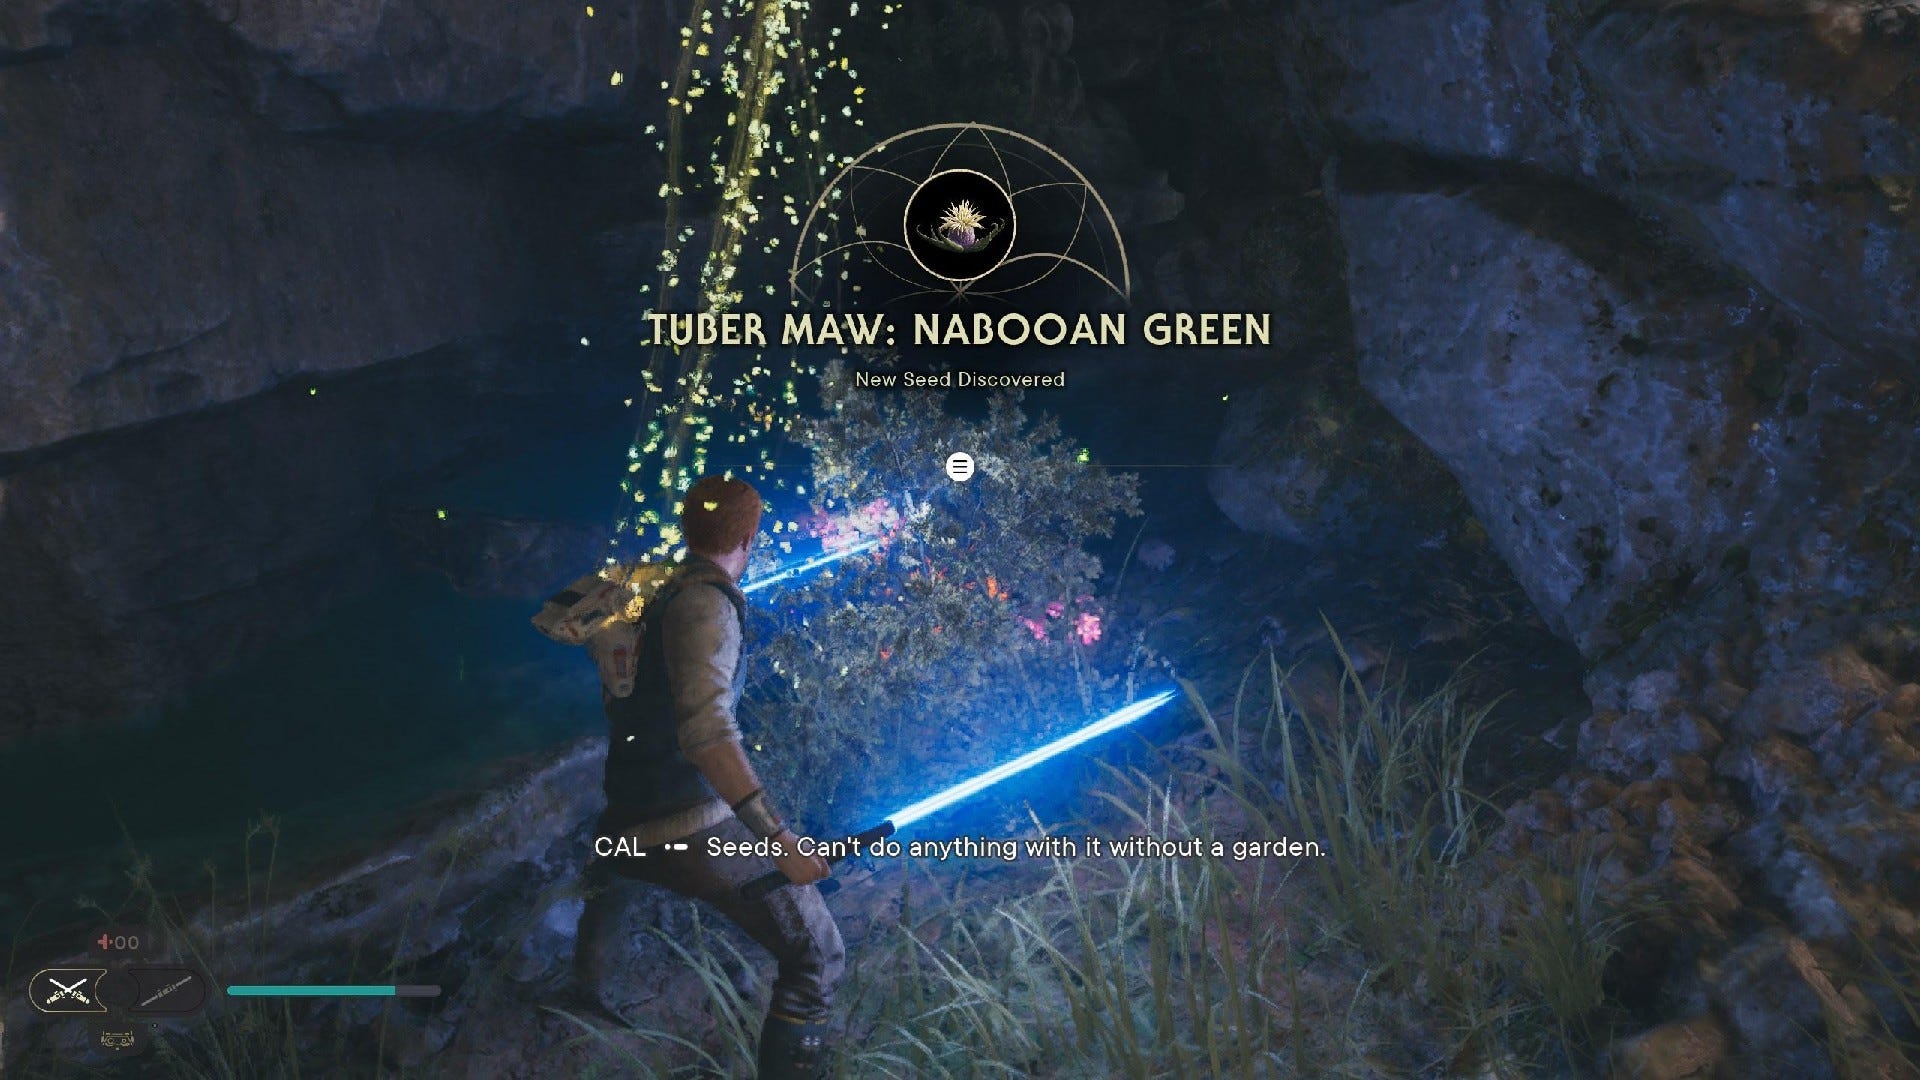
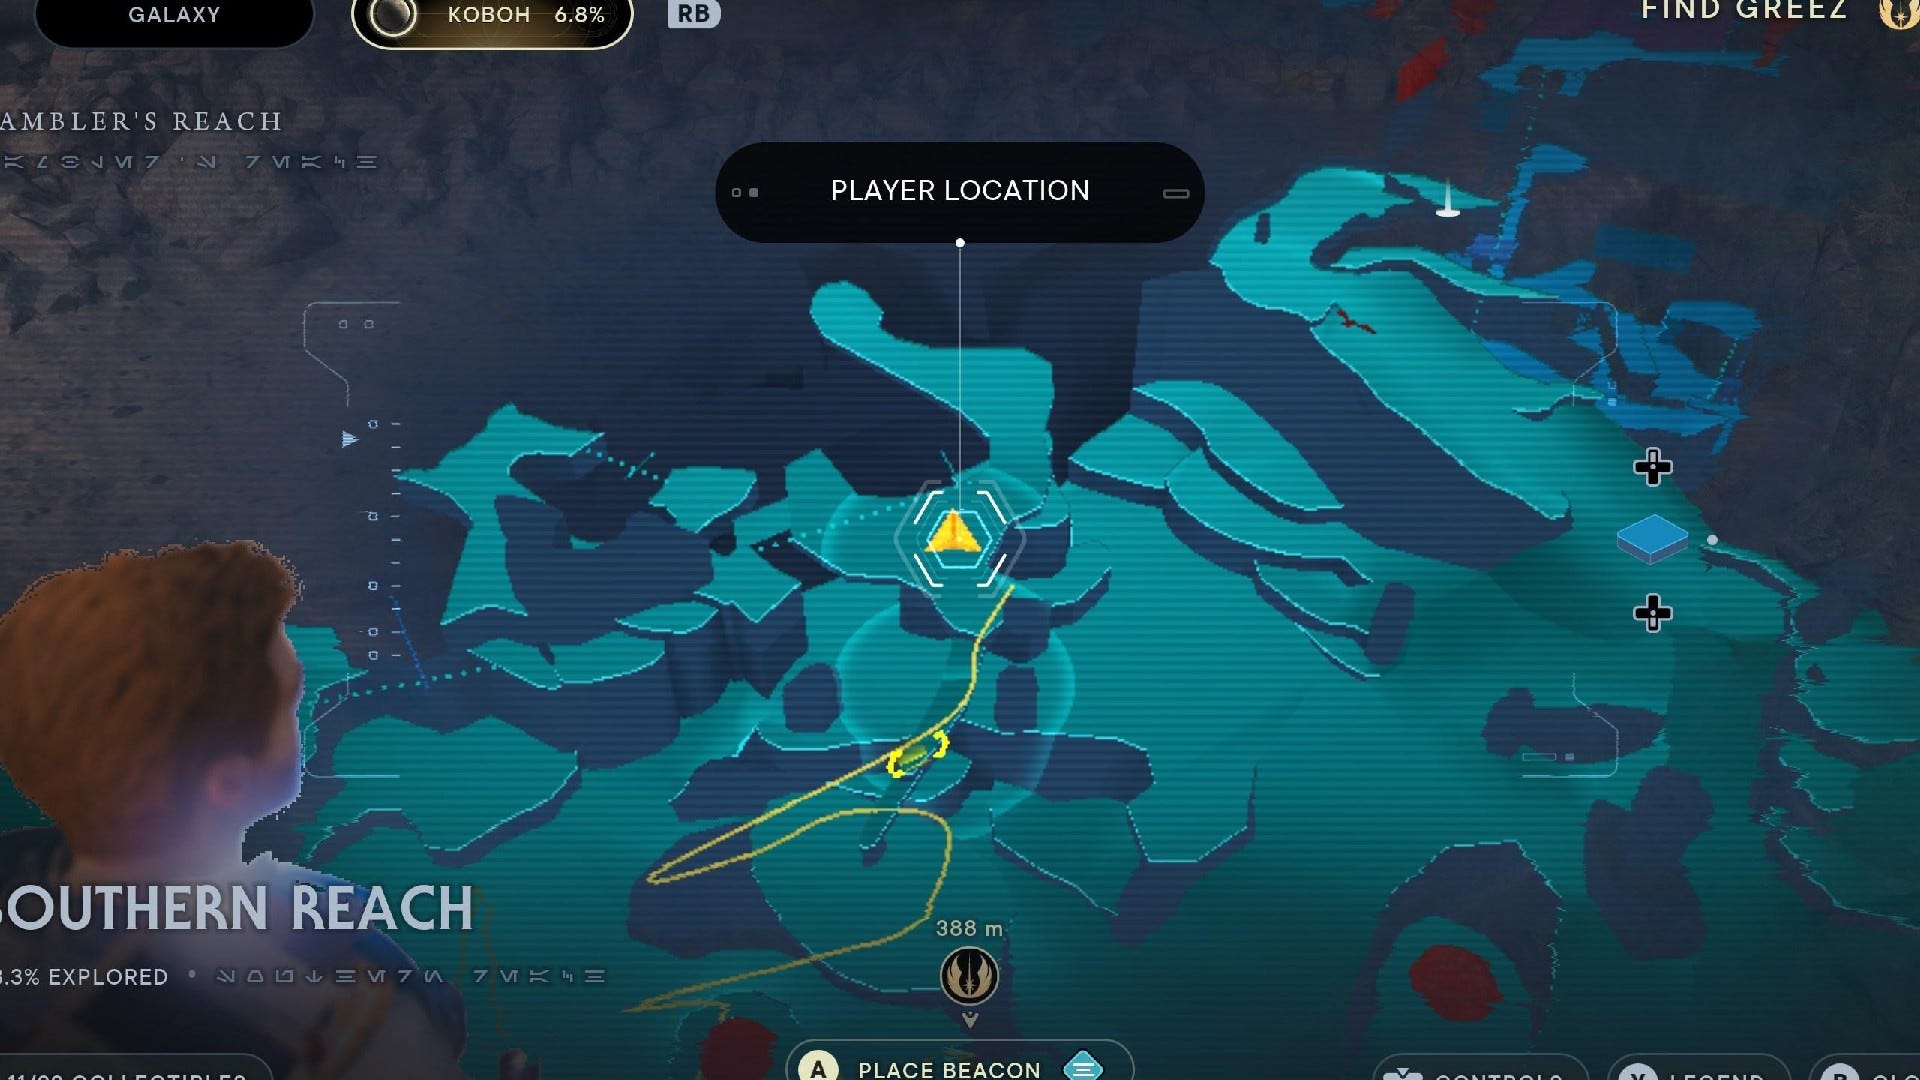
Tuber Maw (Nabooan Green): In the cave below the bridge next to the Datadisc Scav Droid, slash glowing plant in small alcove beneath the ledge leading to the tunnel.
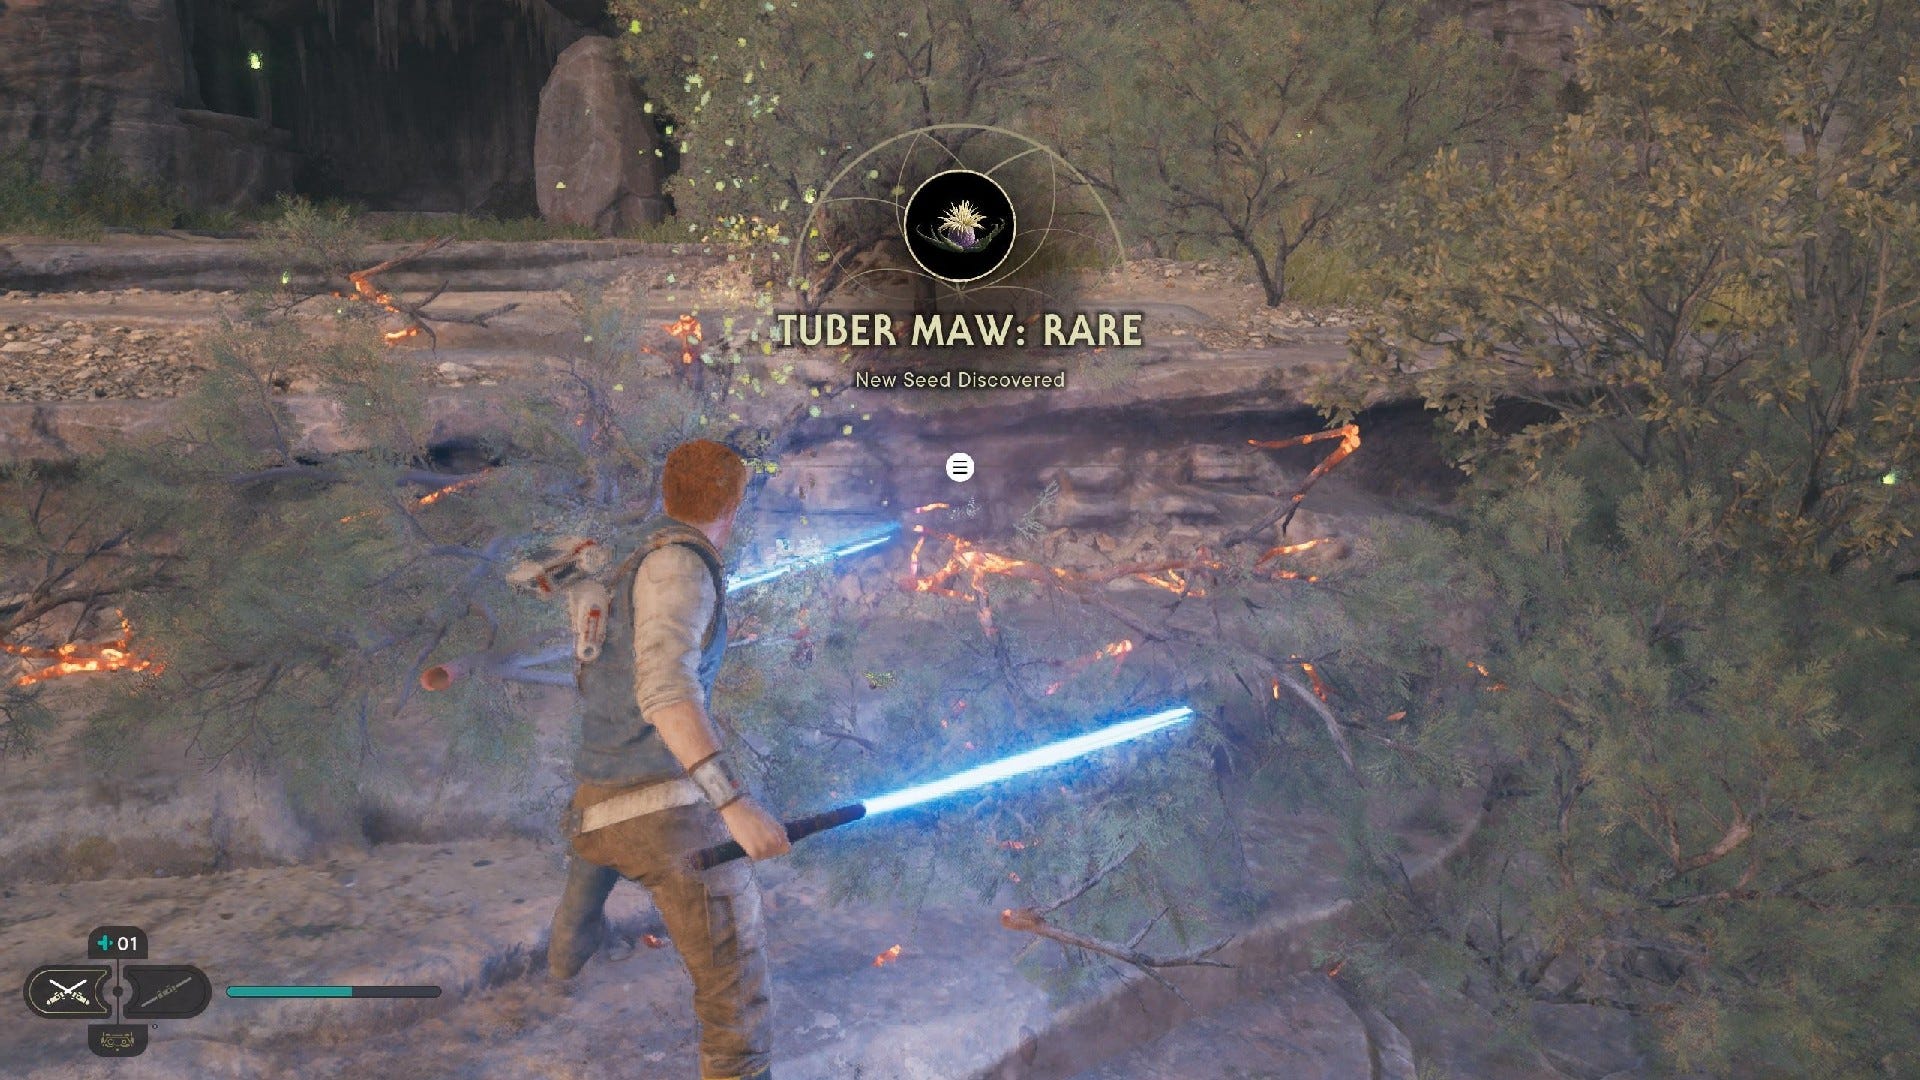
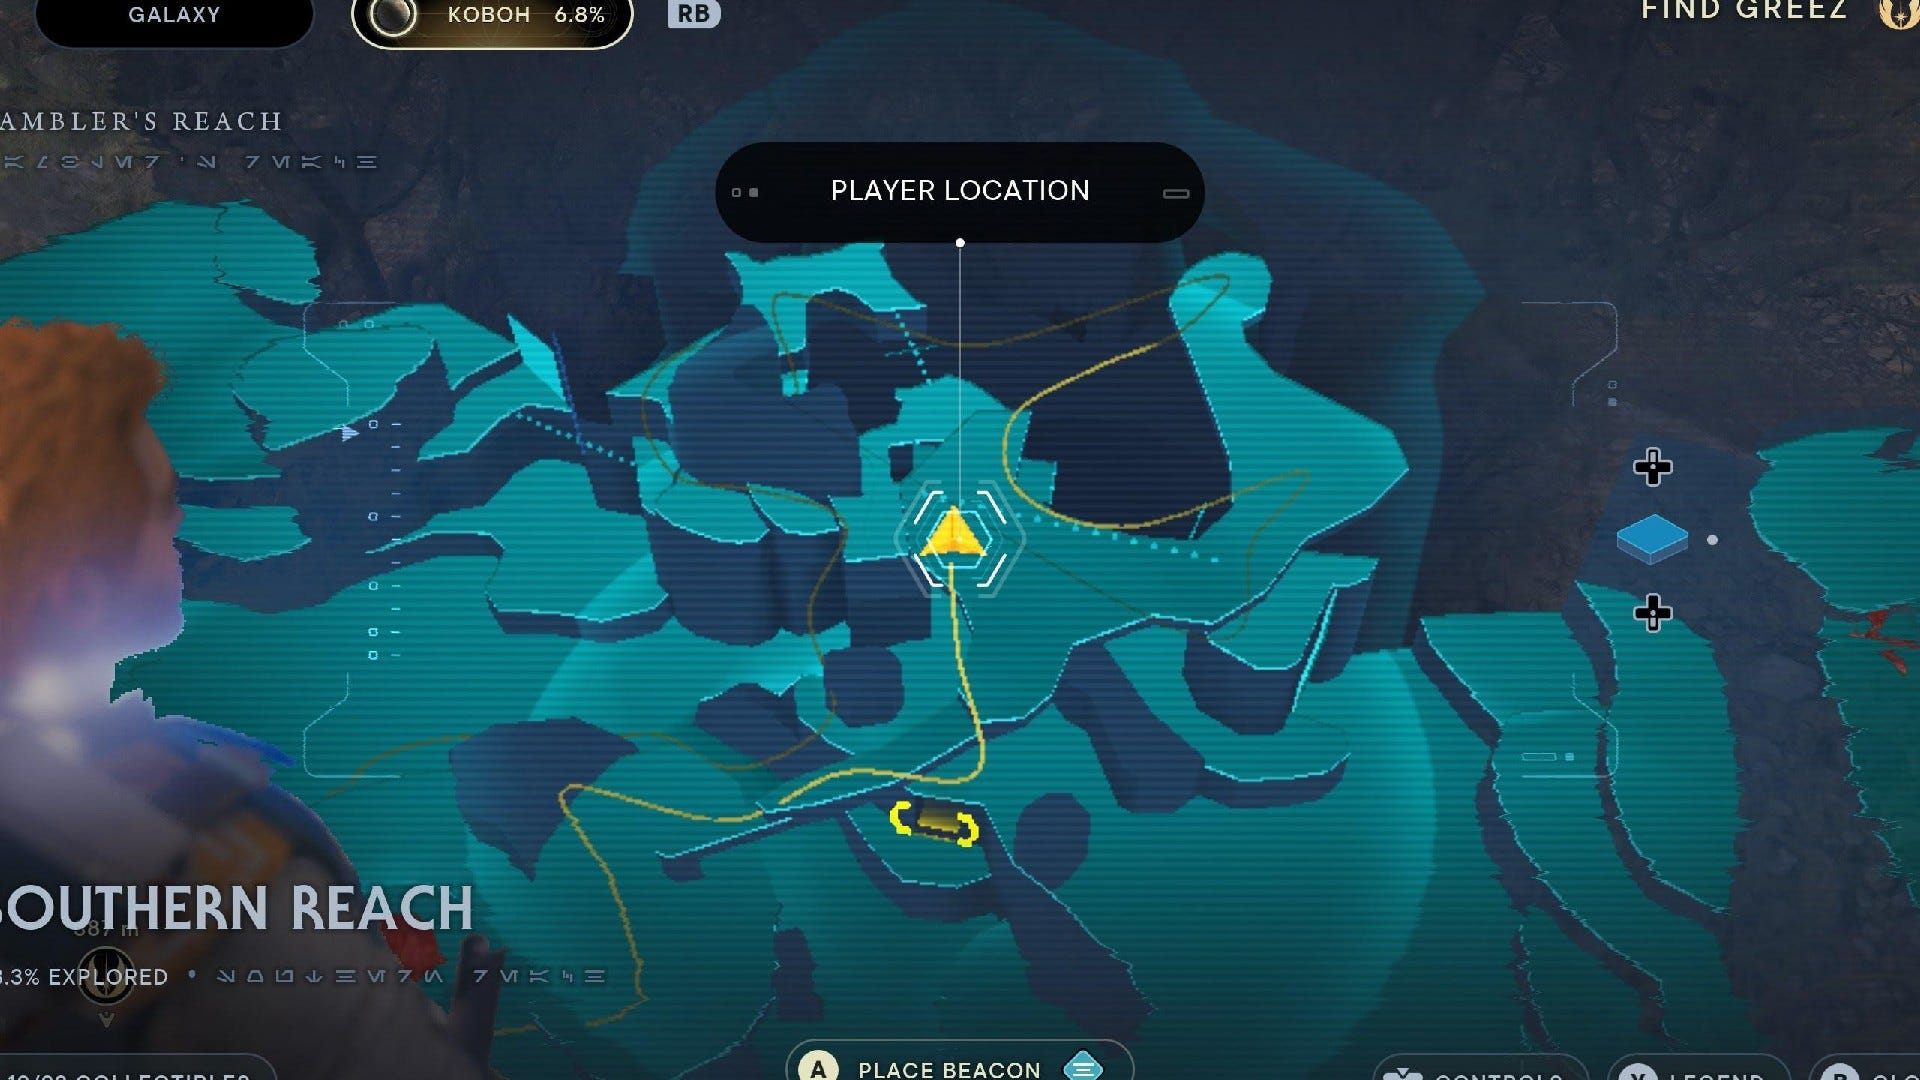
6x Tuber Maw (Rare): On grassy path between the two Priorite Shards.
2x Tuber Maw: Two more plants near the cliff edge.

Tuber Maw: On the ledge with the two BX rifle droids, overlooking the Riverbed Watch Meditation Point.
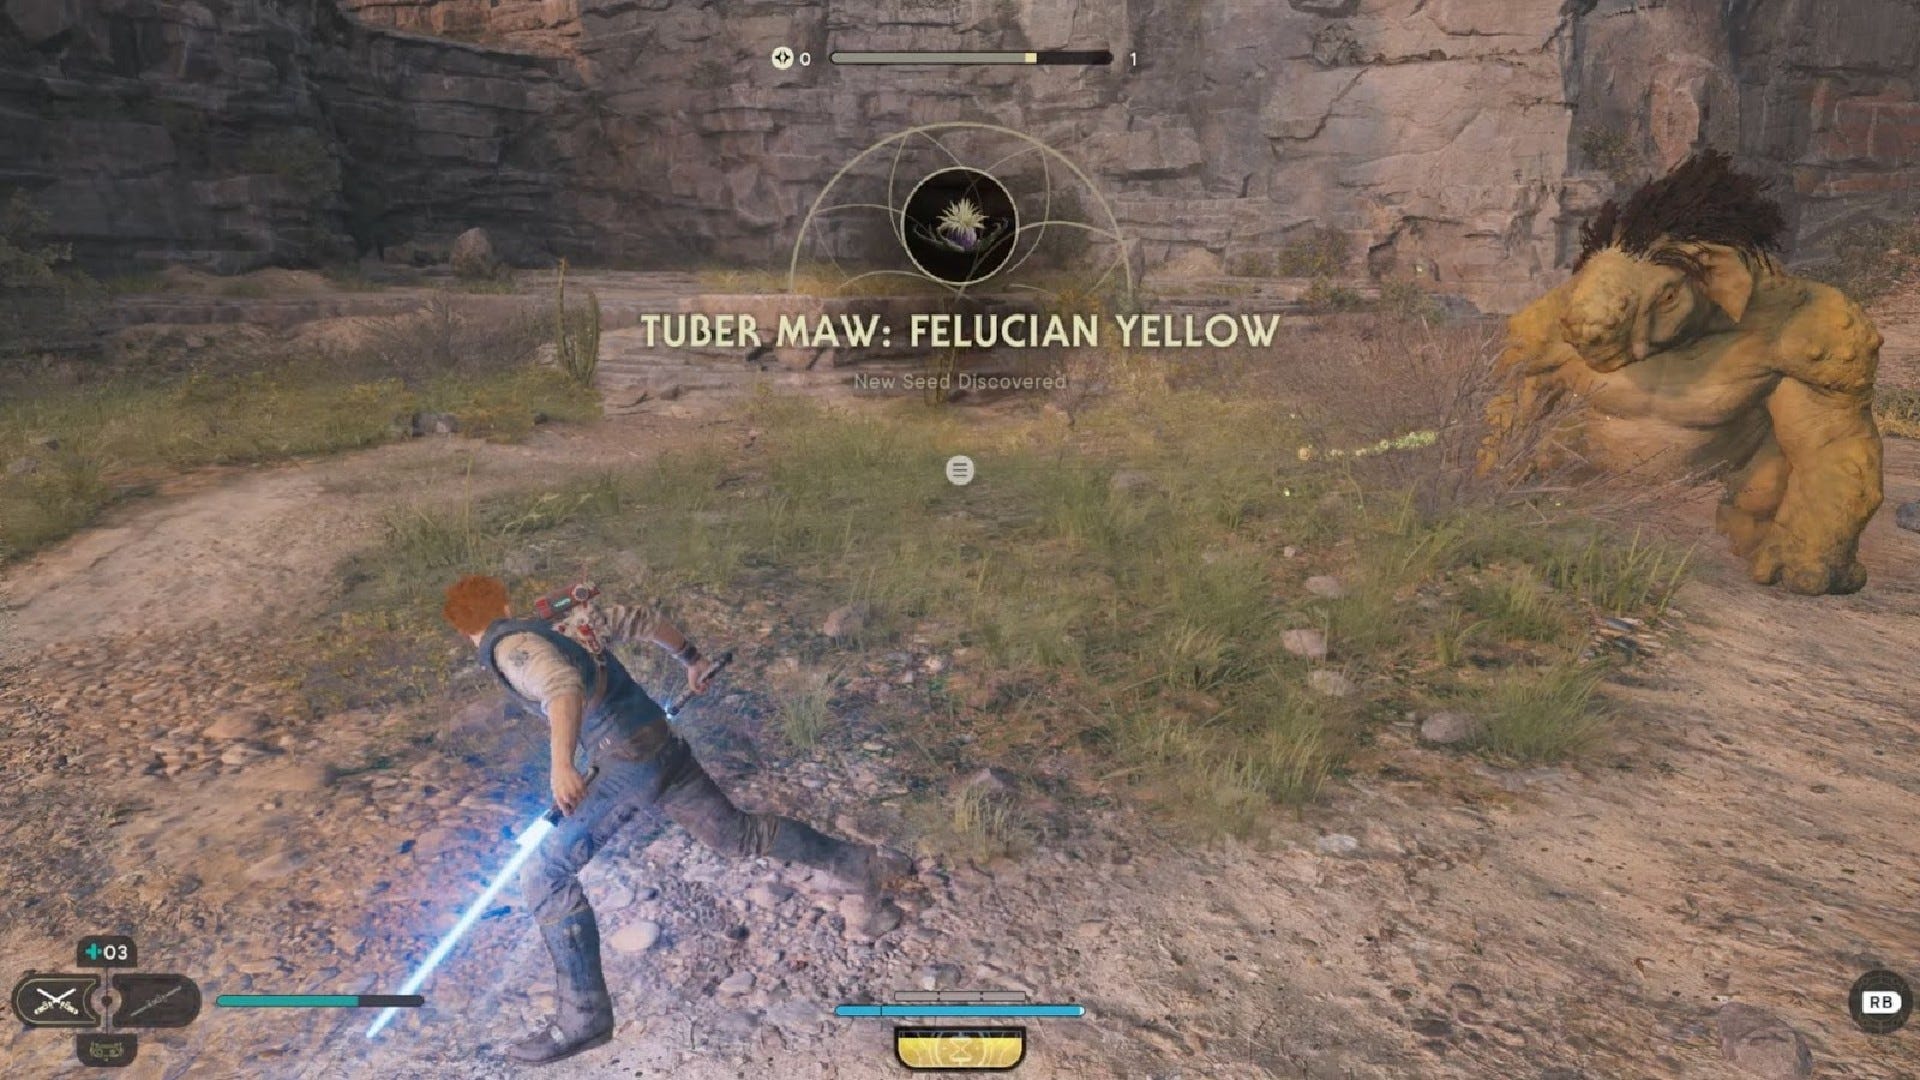
Tuber Maw (Felucian Yellow): Along the mountain, near the Gorocco.
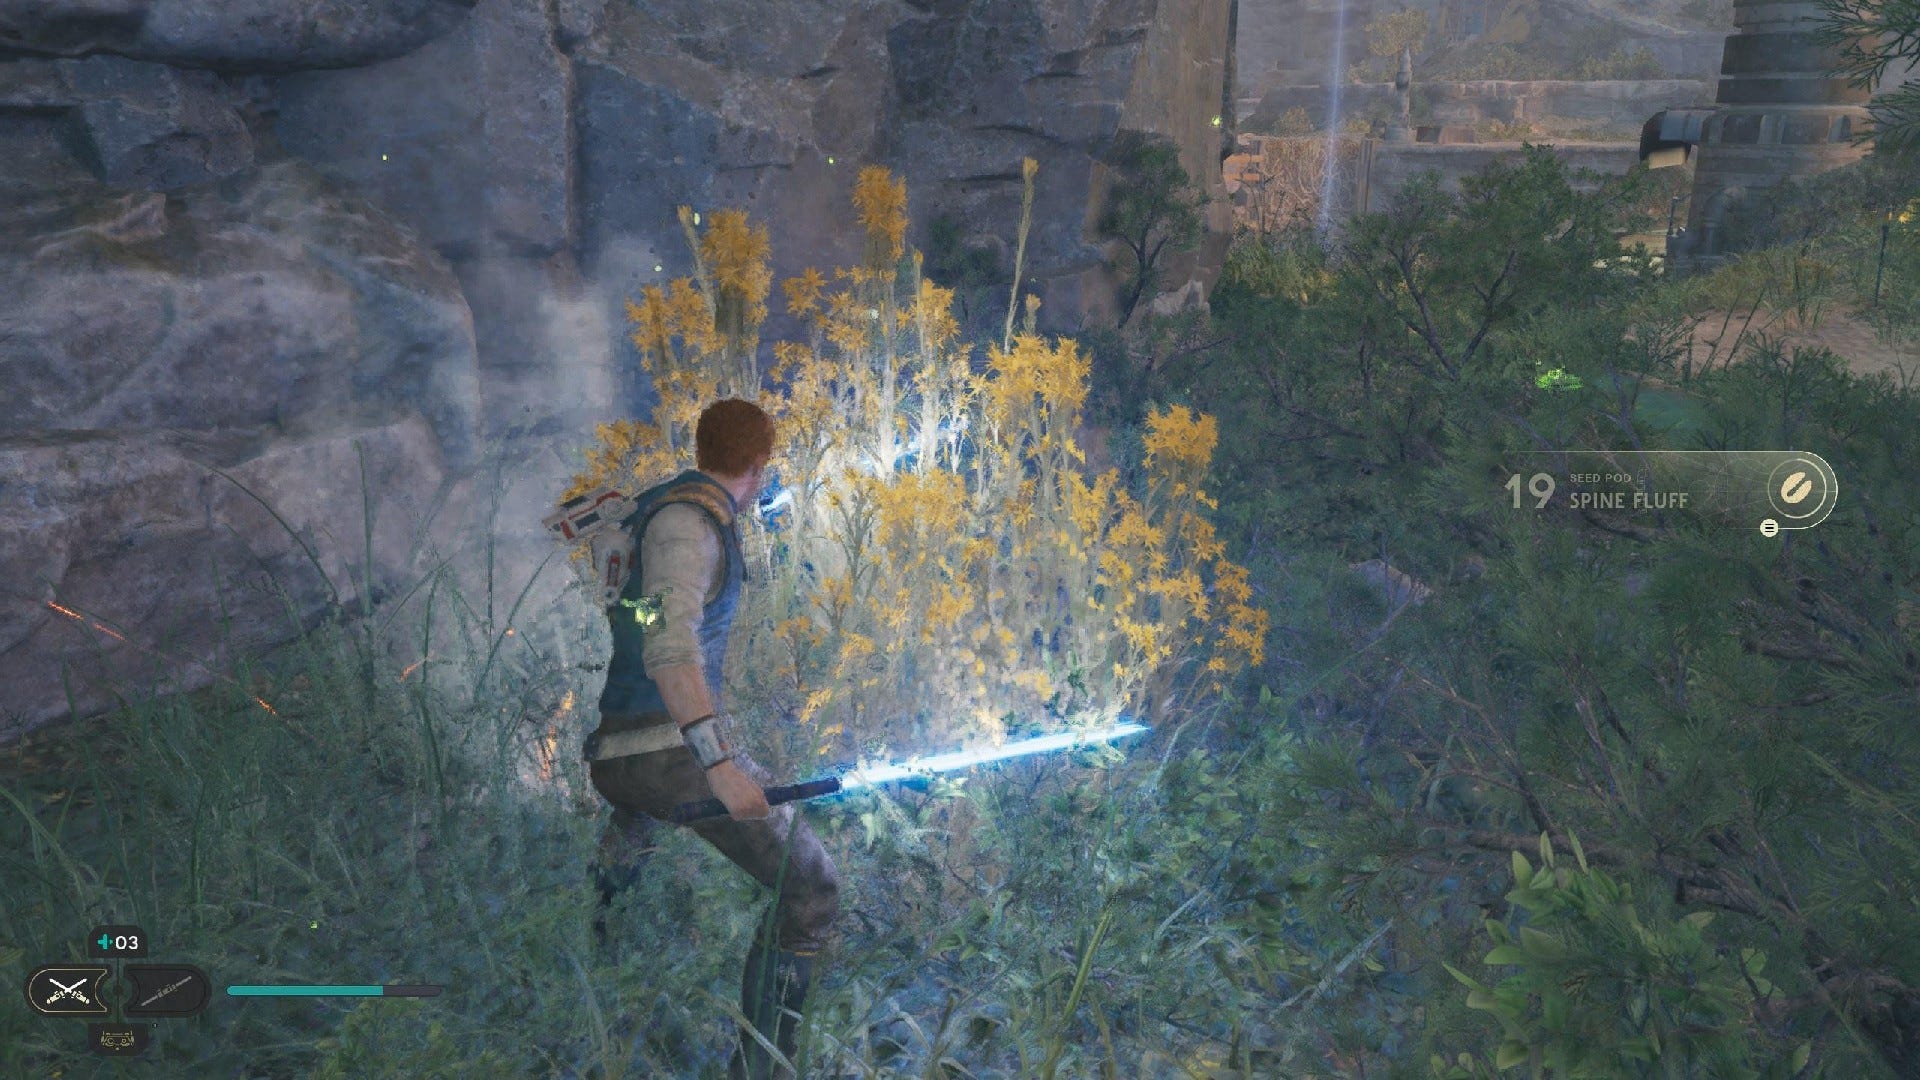
Spine Fluff: Near the border between Southern Reach and Riverbed Watch, hugging the rock near the gate to Rambler’s Reach Outpost.

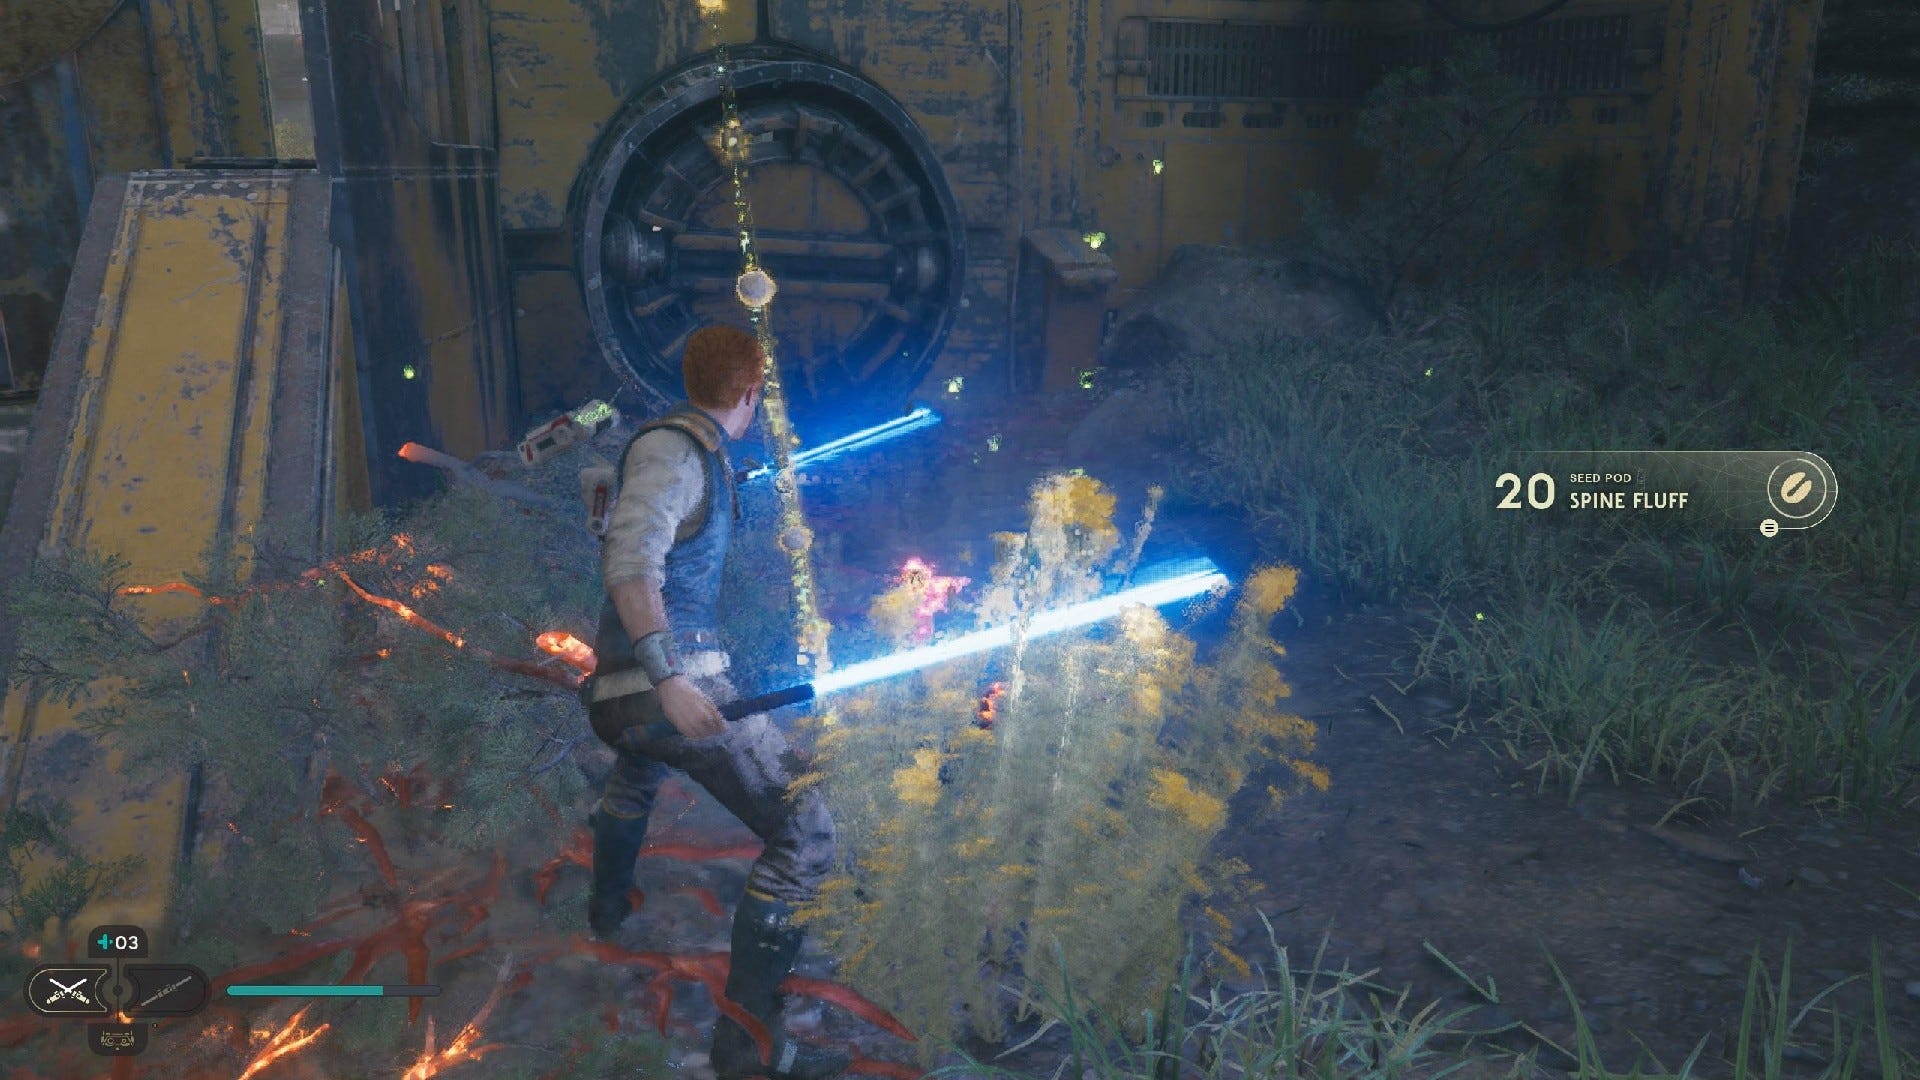
Spine Fluff: Opposite the previous seed, in a corner between the slippery slope and the yellow dam structure.
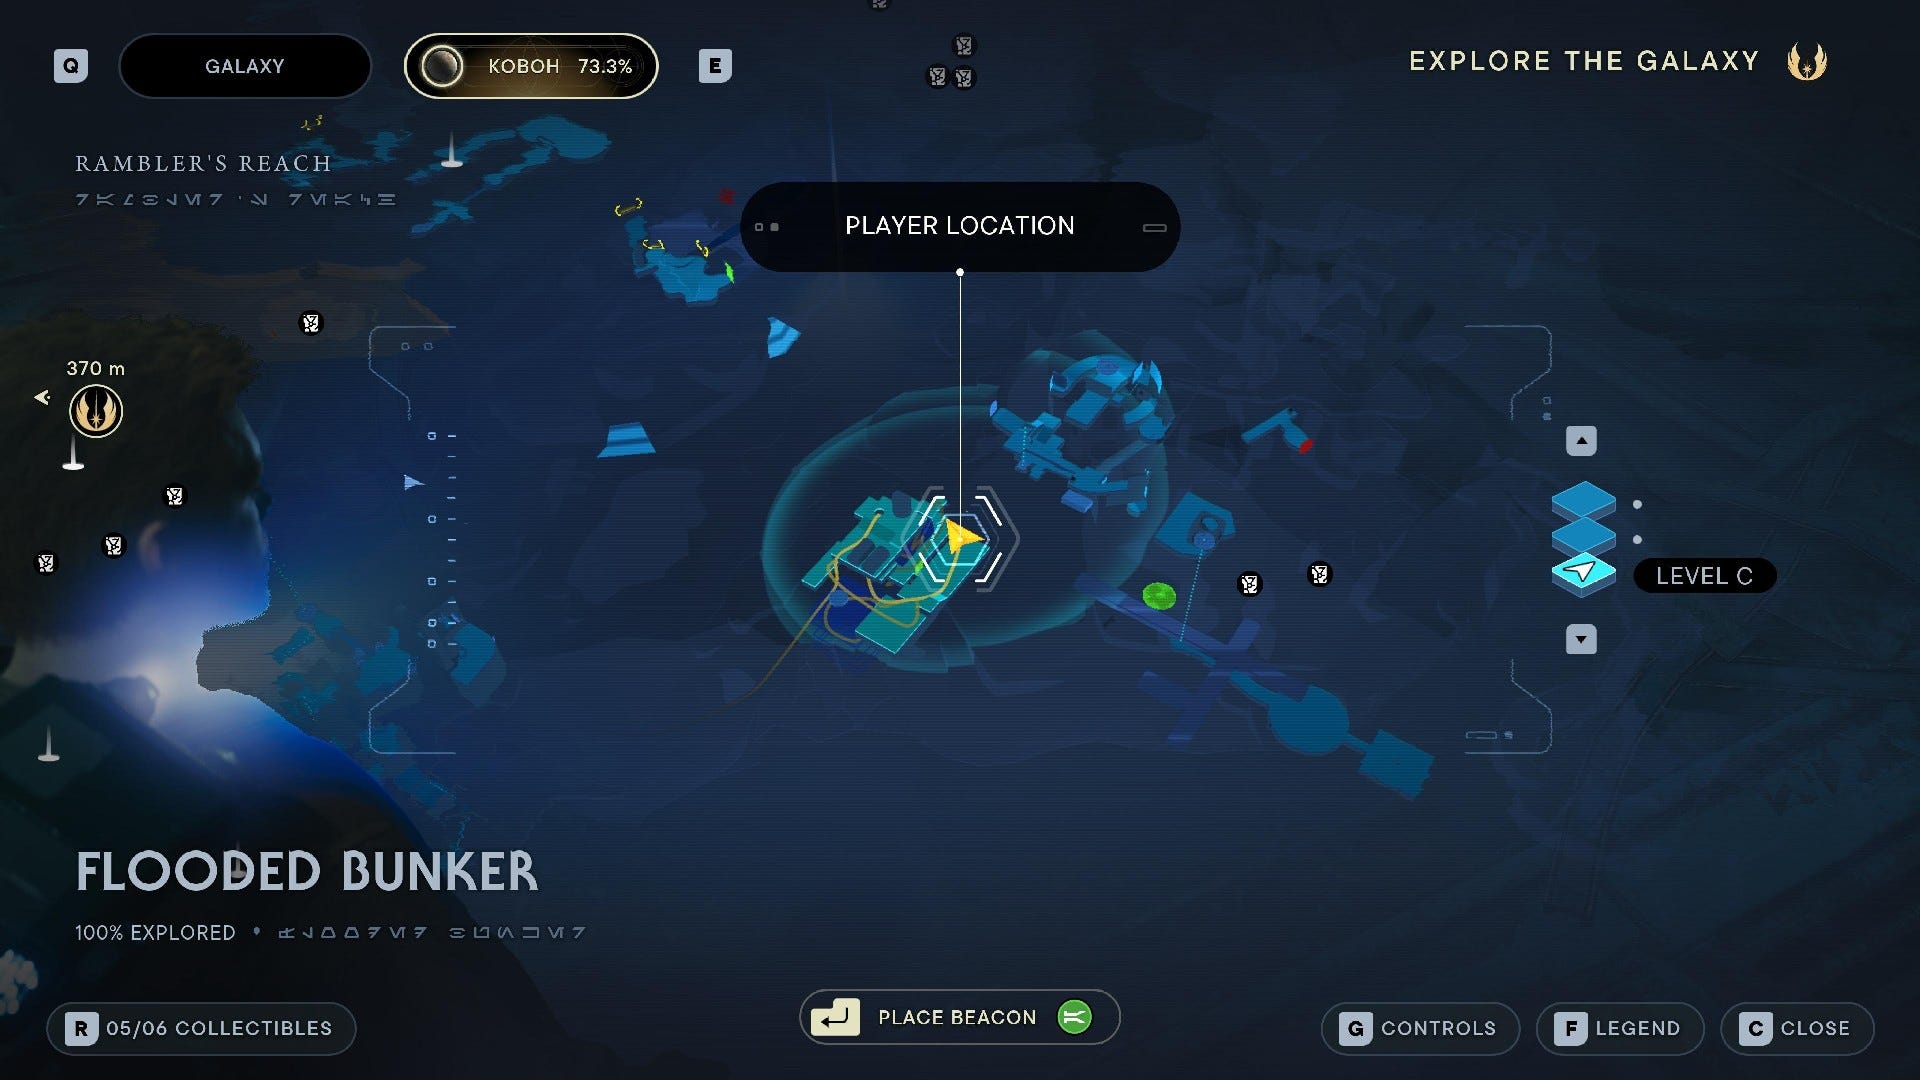
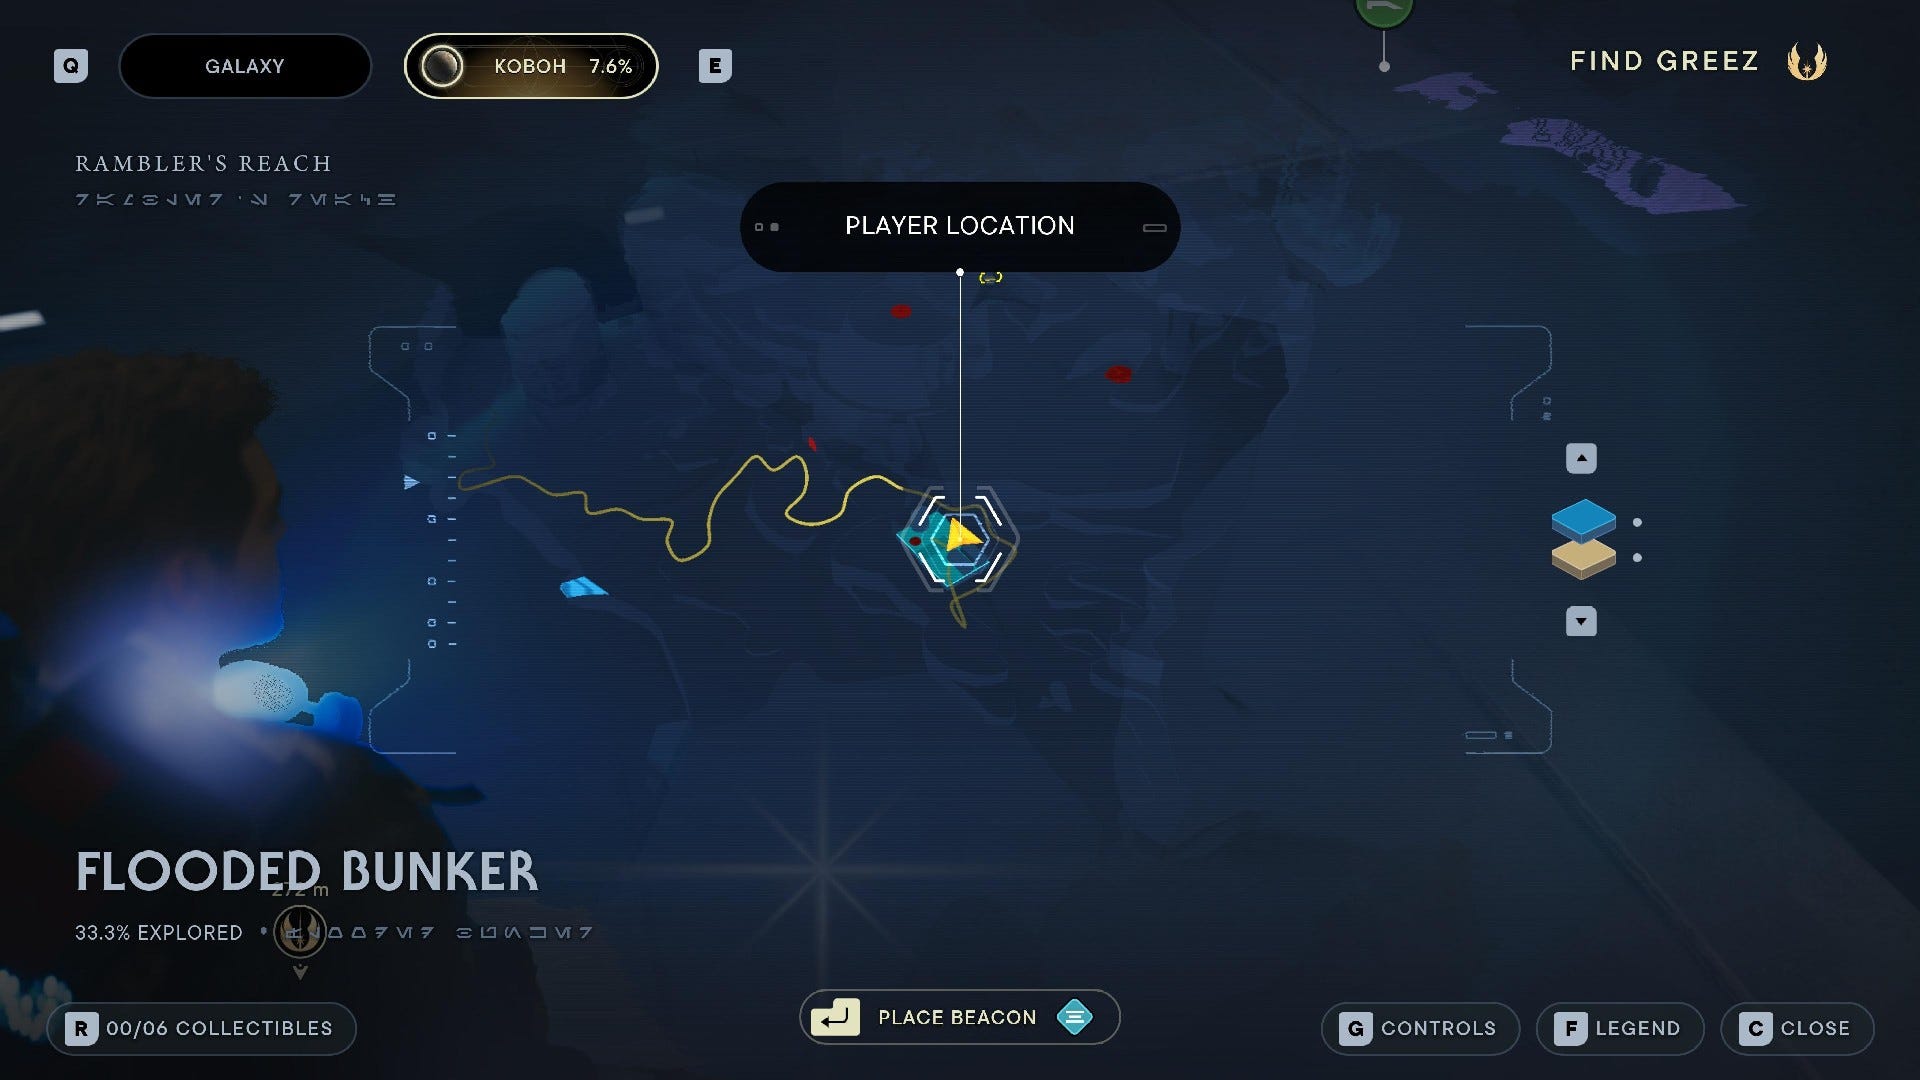
Flooded Bunker collectibles
Flooded Bunker Chests:
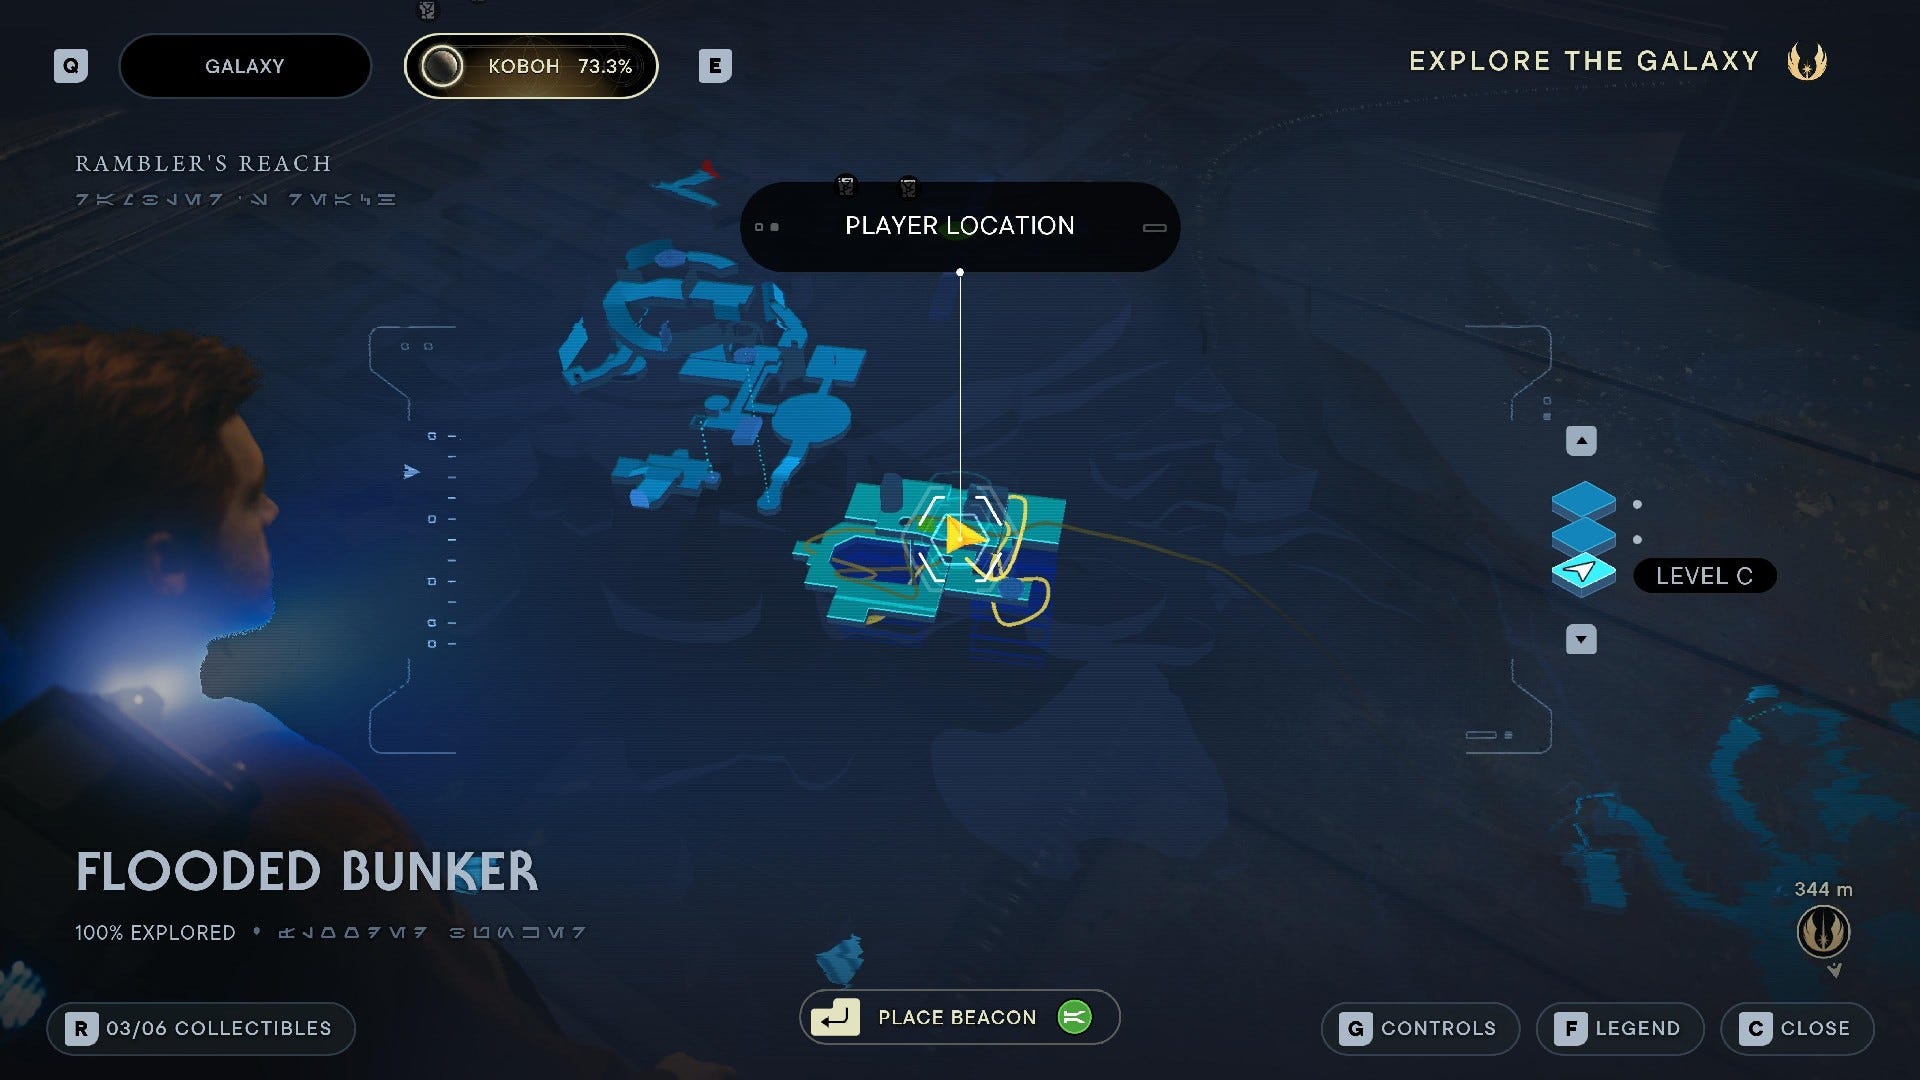
2x Chest (Coated Metal weapon/BD-1 materials): After following the underwater path and resurfacing, use Force Lift to lift up the circular pedestal in the water and reach the upper level.
Flooded Bunker Essences:

Health Essence: After following the underwater path and resurfacing, turn left into the next room and look behind the generator at the end.
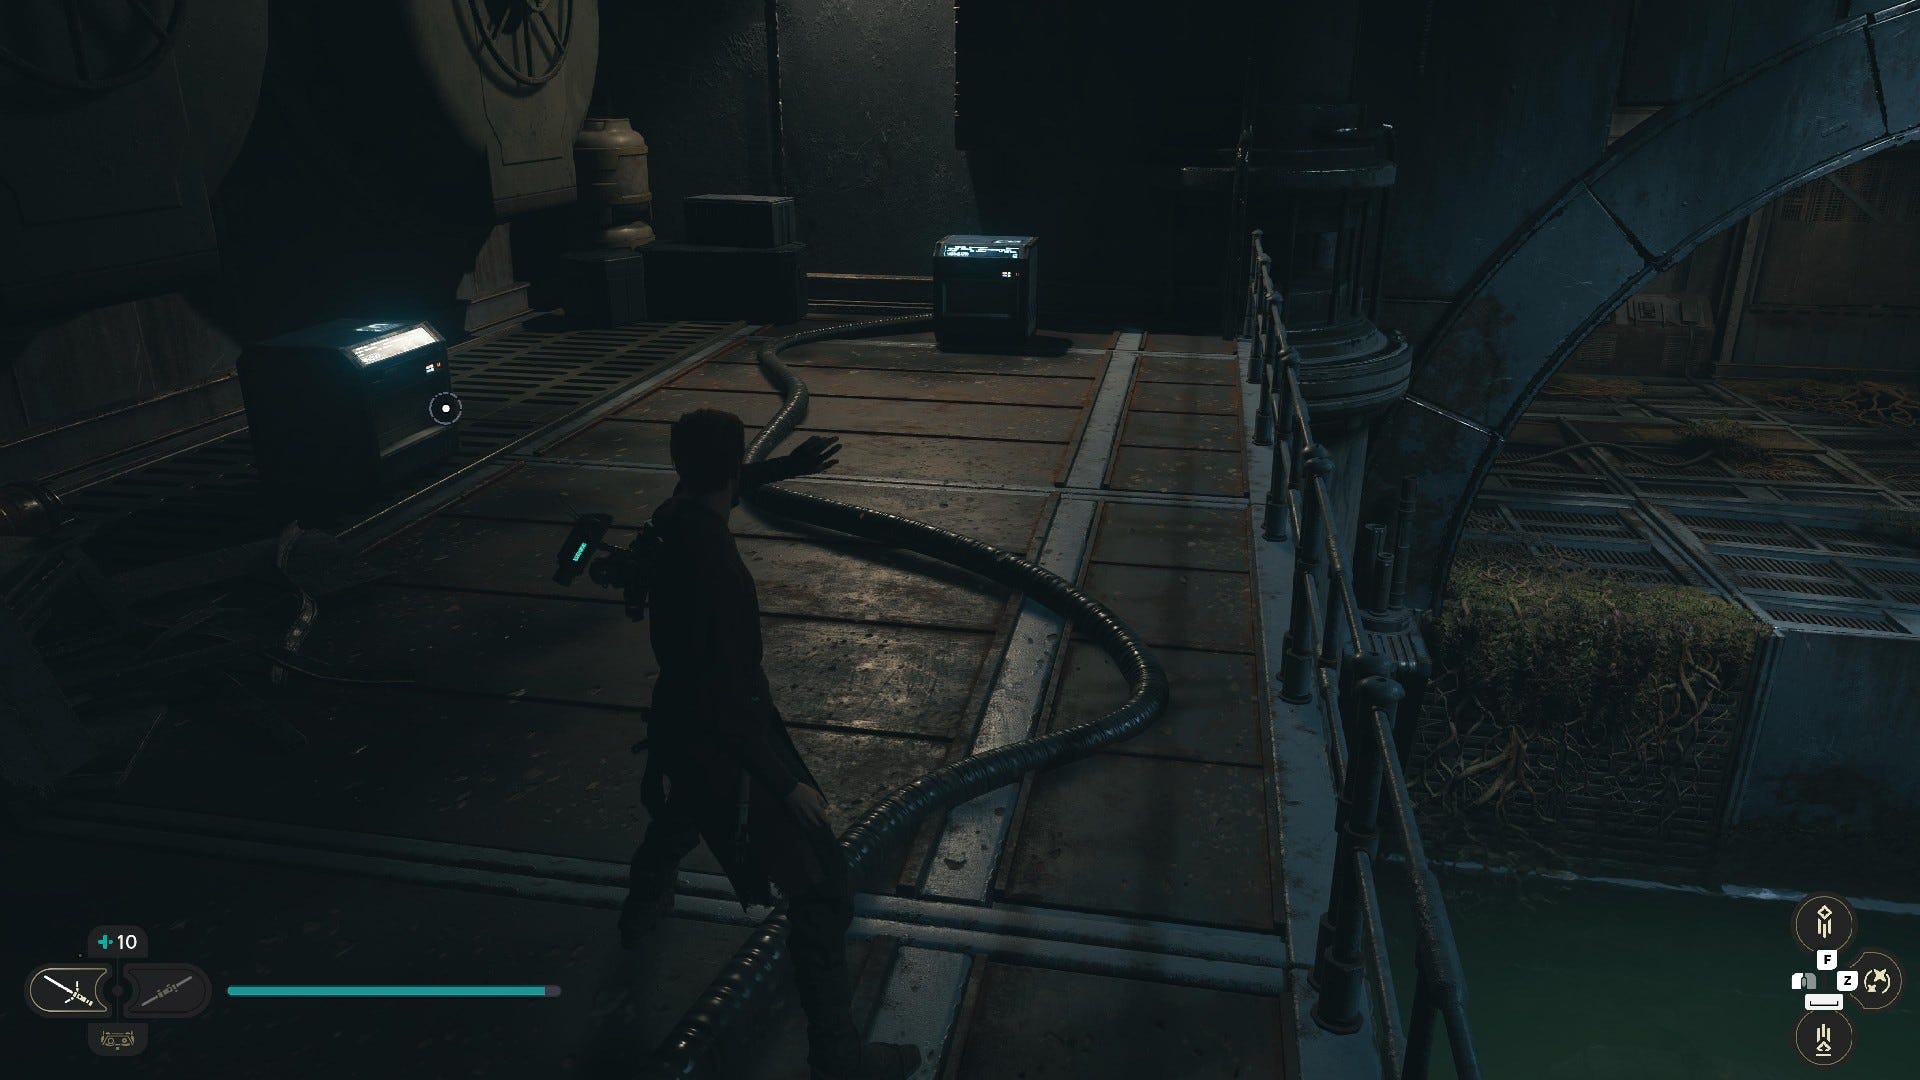
Flooded Bunker Databanks:

Databank (Damage Assessment): Next to the pool, in the dark alcove bit.

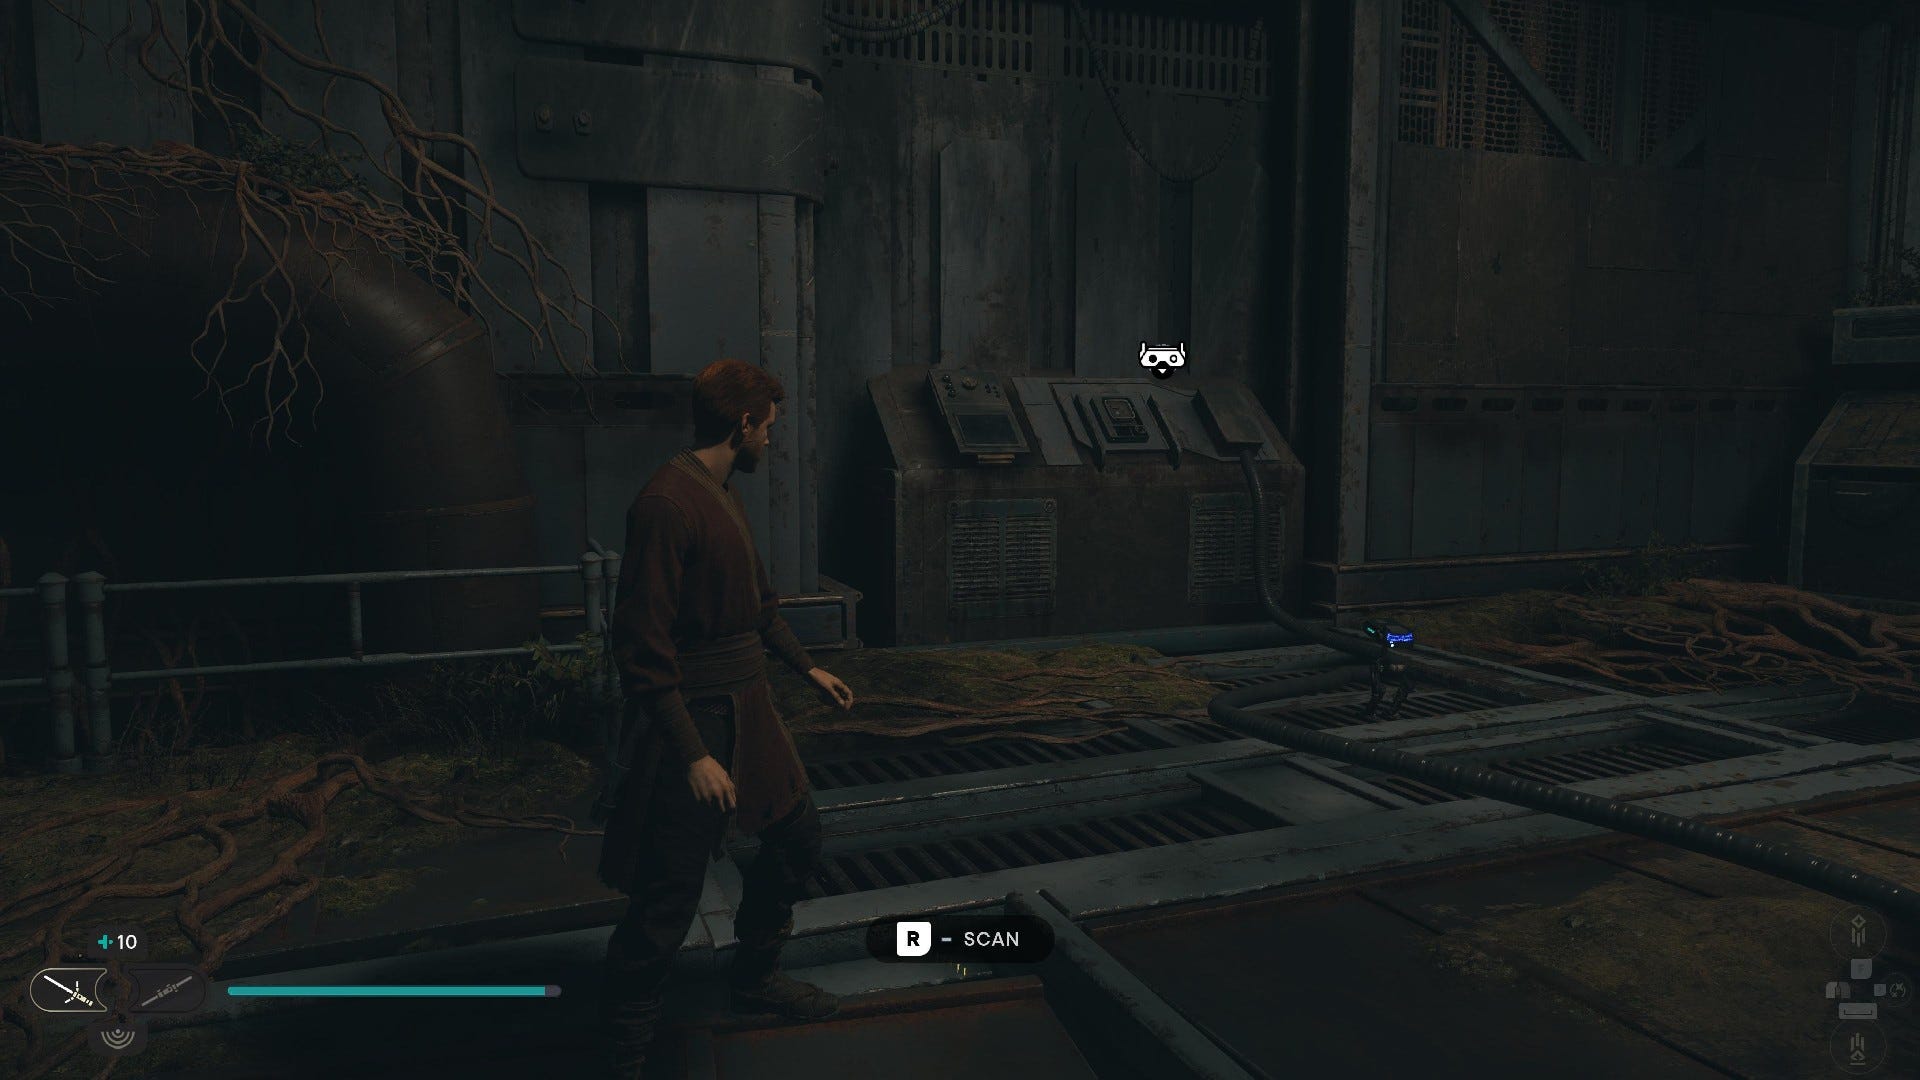
Databank (Abandoned Water Filtration System): After following the underwater path, scan the control console in front of you when you resurface.
Flooded Bunker Treasures:
Priorite Shard: In the surface-level room guarded by the shielded wall turret.
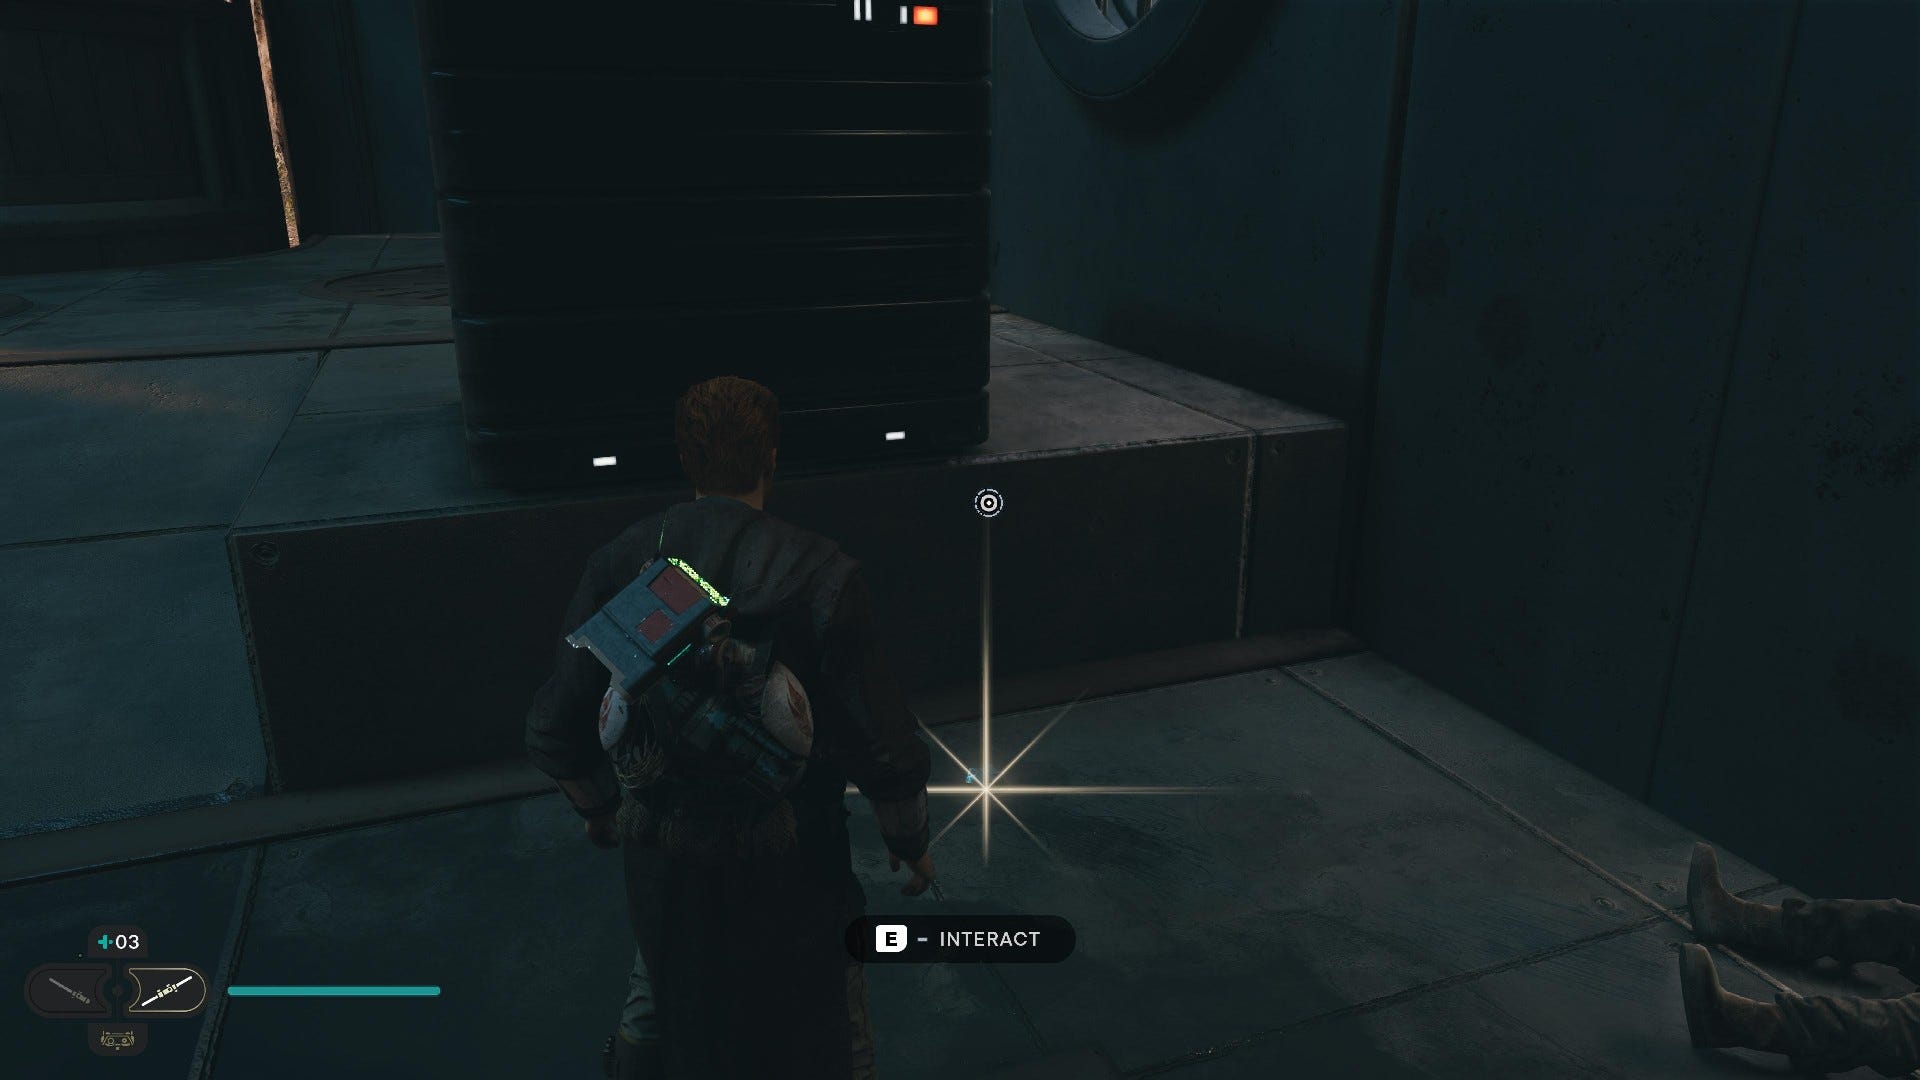
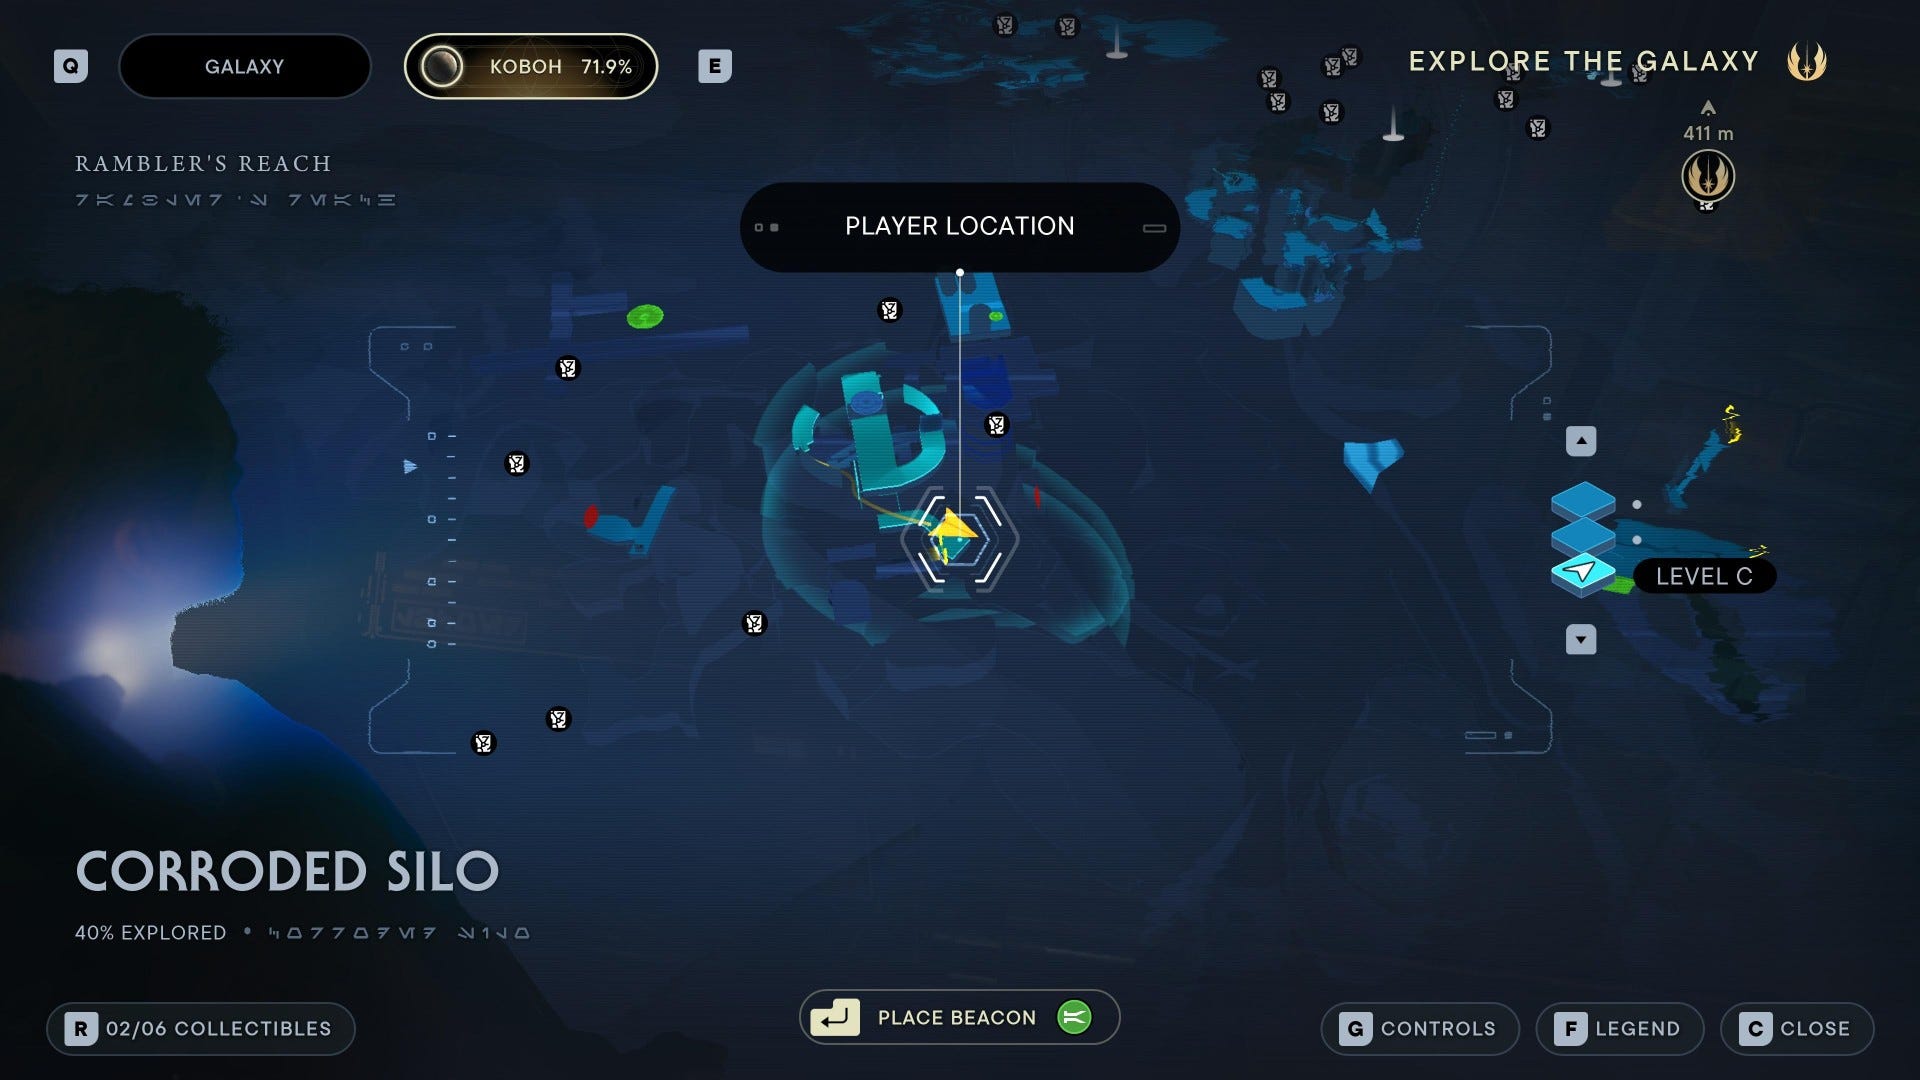
Corroded Silo collectibles
Corroded Silo Chests:

Chest #1 (Goatee and Mustache): Continue along the path from the top until you slide down the wall and jump onto a platform with a B1 droid. The chest is at the end.
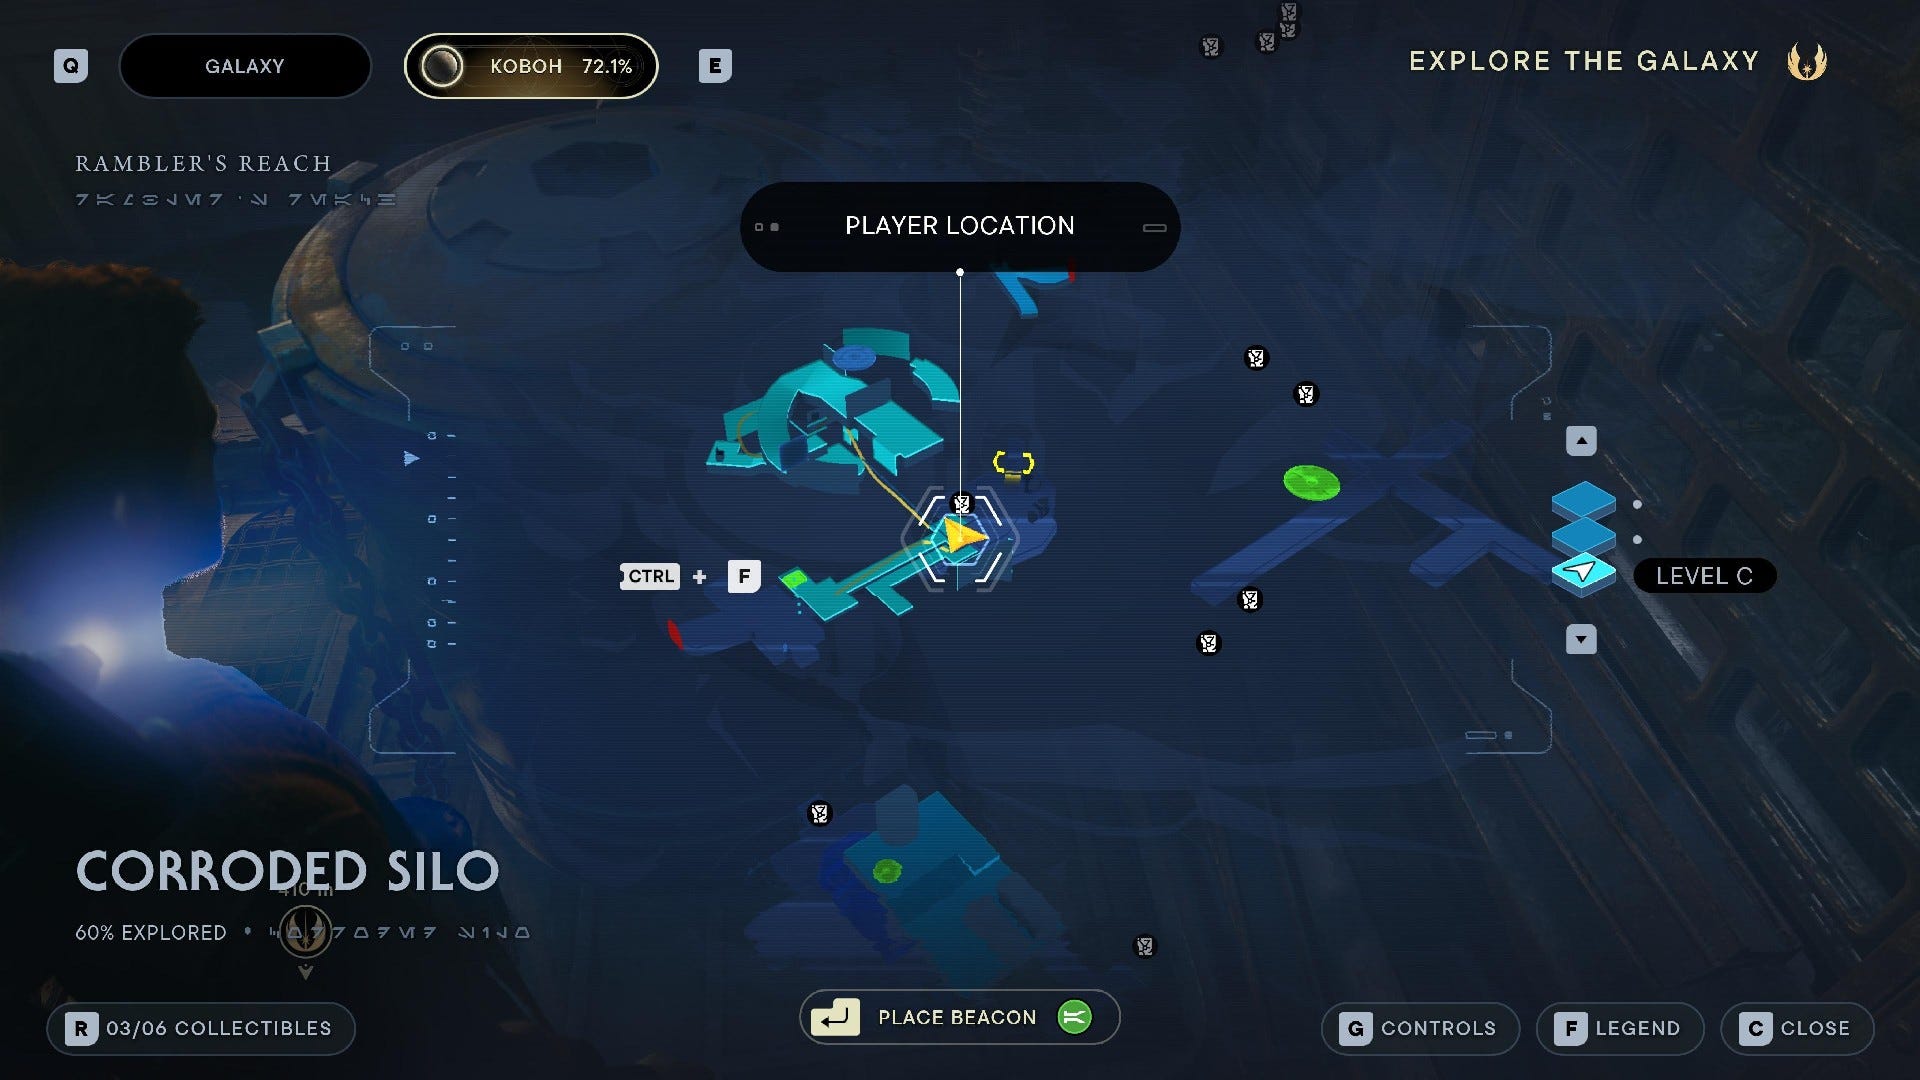

Chest #2 (Bumpy Rubber weapon material): This chest requires you to Force Lift and then Force Slam it. Follow the main path down the silo, but stop before you reach the elevator. Head down on the lower platform with the patrolling B1 droid, then Force Push the wall at the end and collect the chest behind.
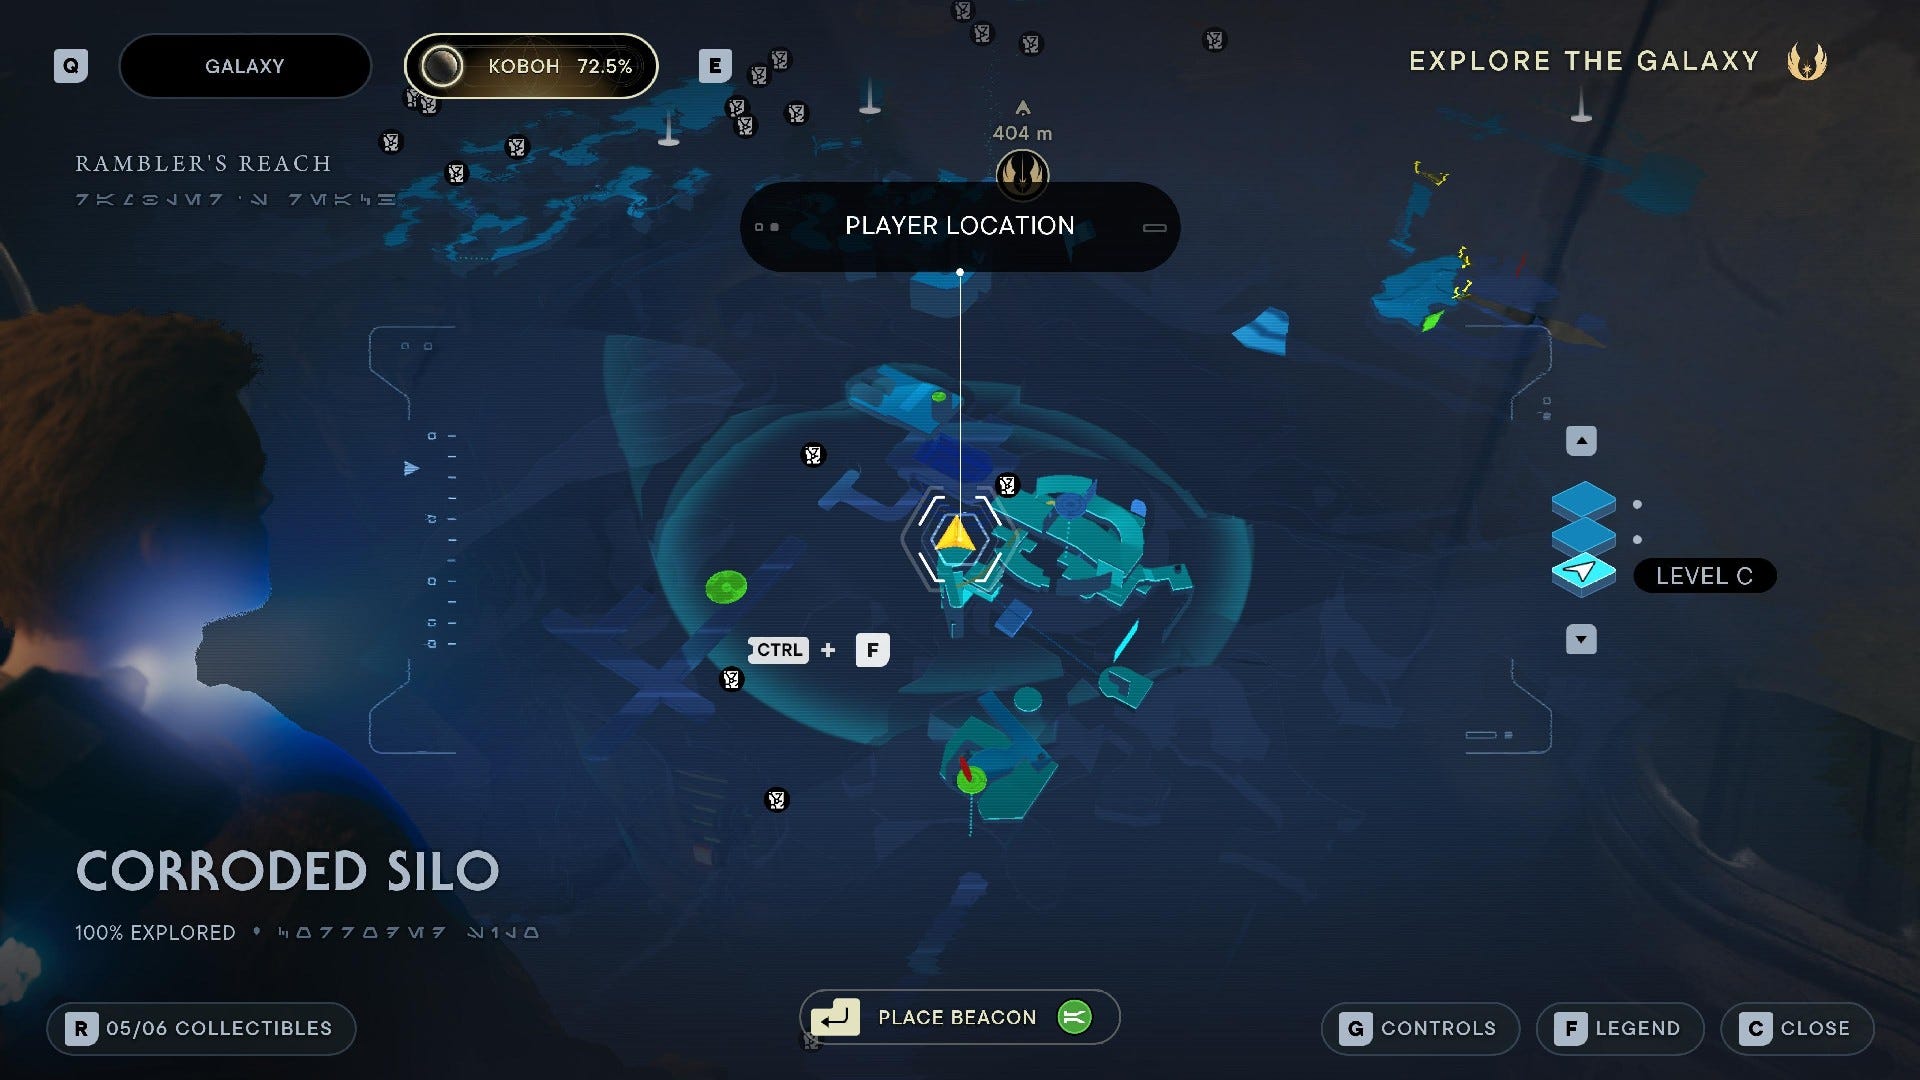
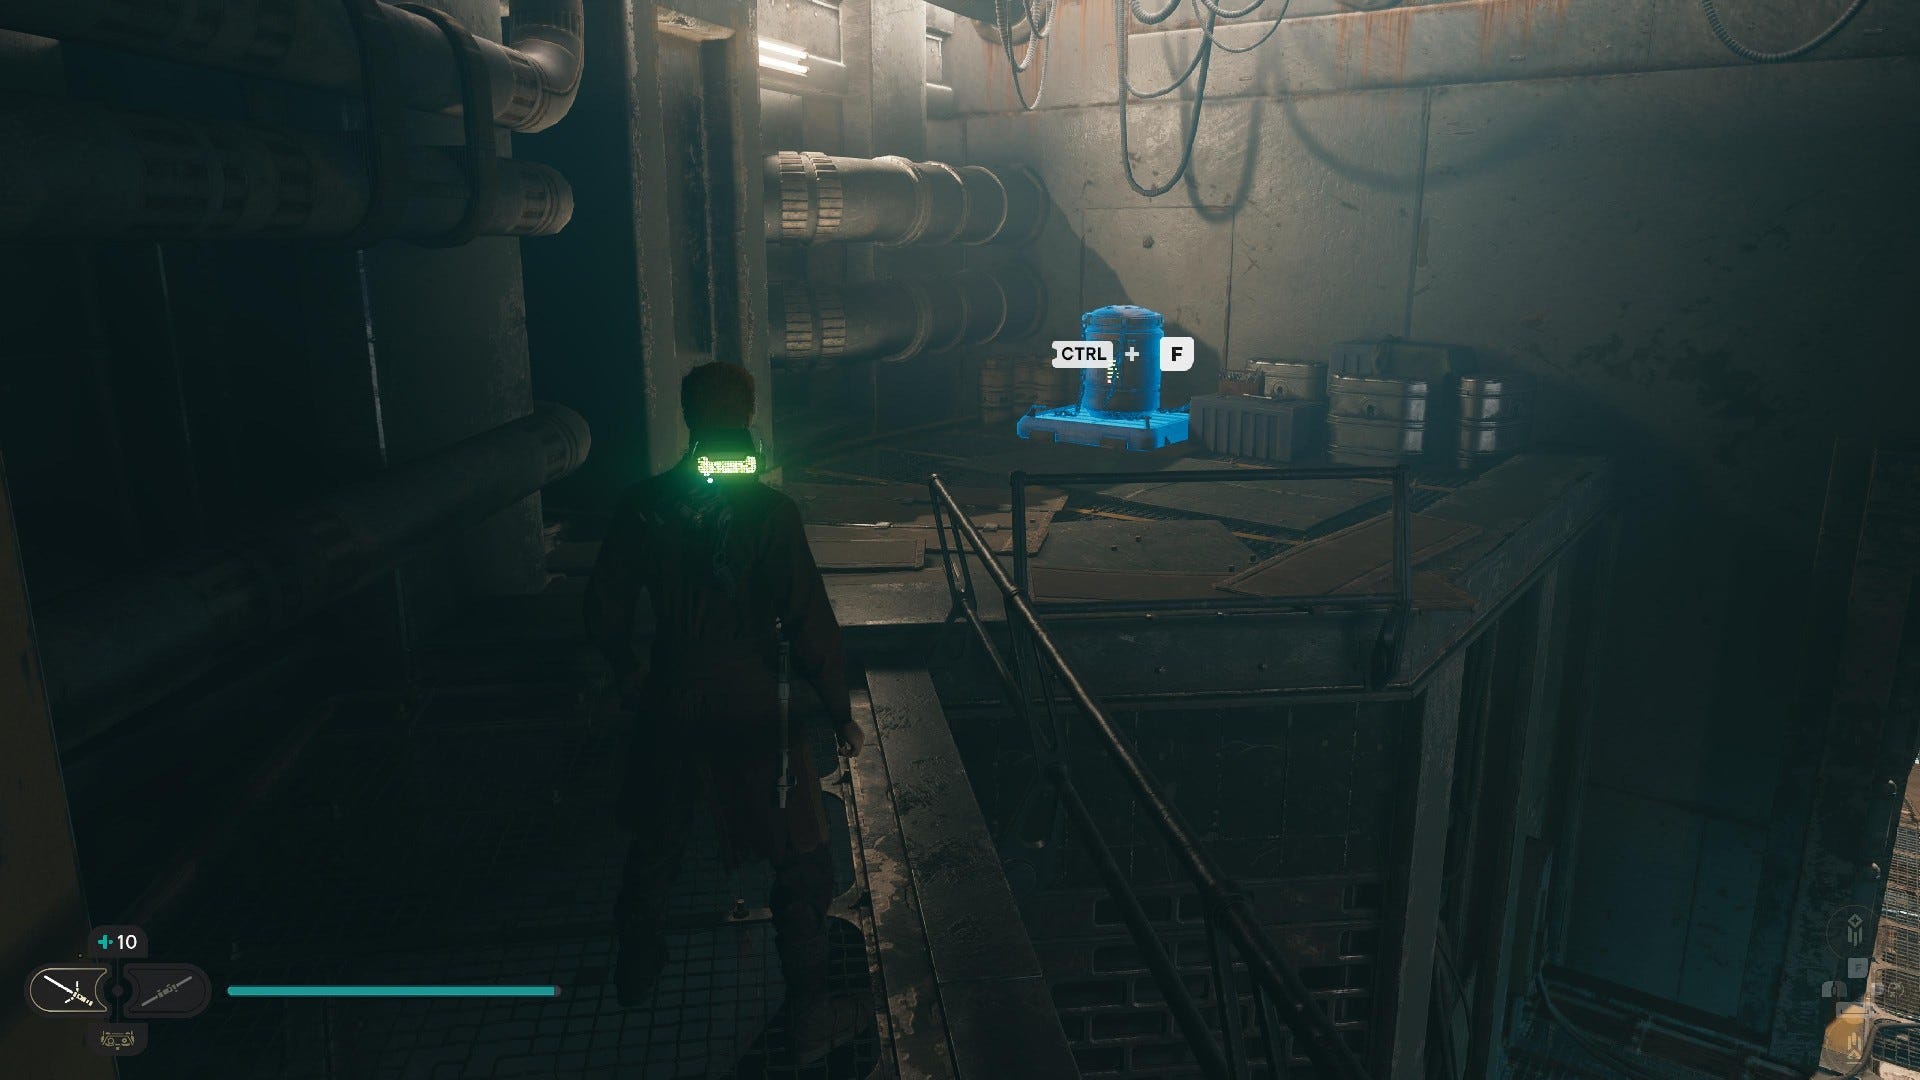
Chest #3 (Arakyd Heavy body): This chest requires you to Force Lift and then Force Slam it. Turn backwards once you’re on the platform with the elevator, and wall-run over to the climbing section to reach a higher ledge with the chest.
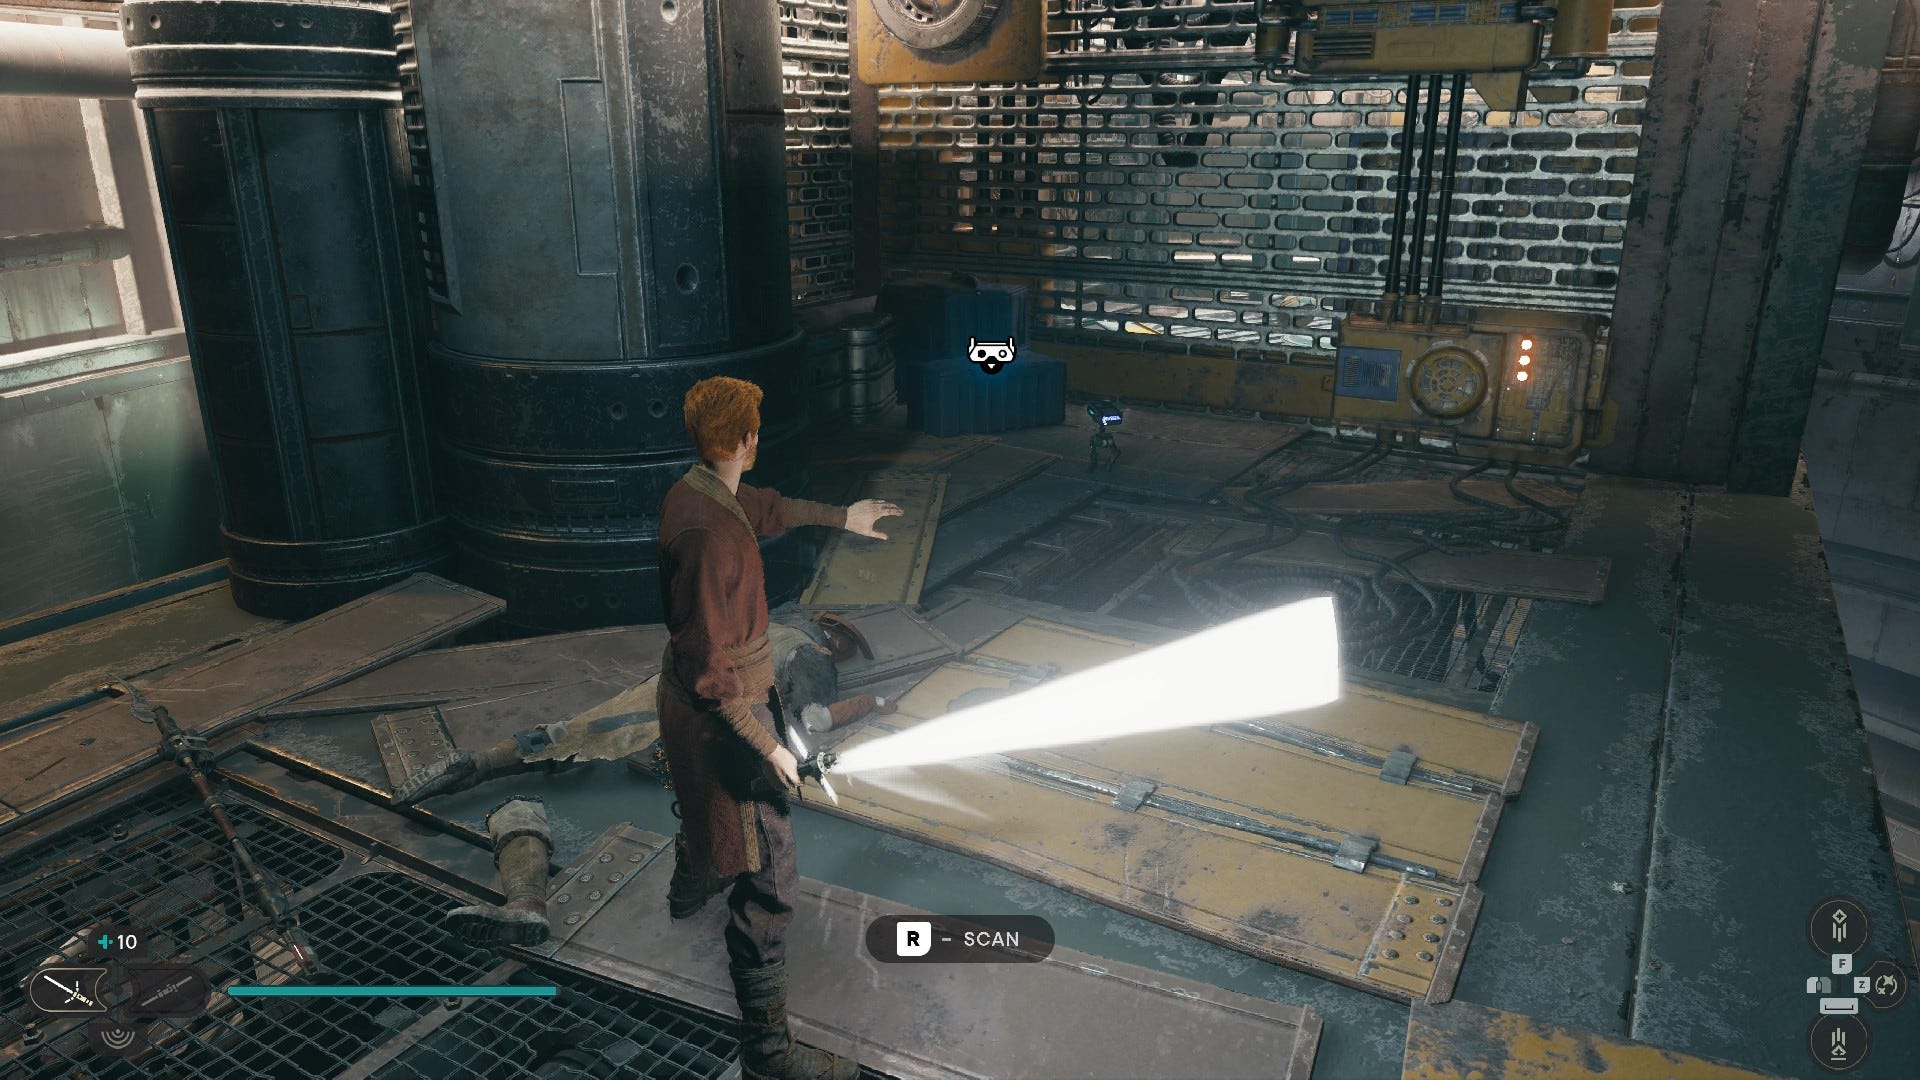
Corroded Silo Databanks:
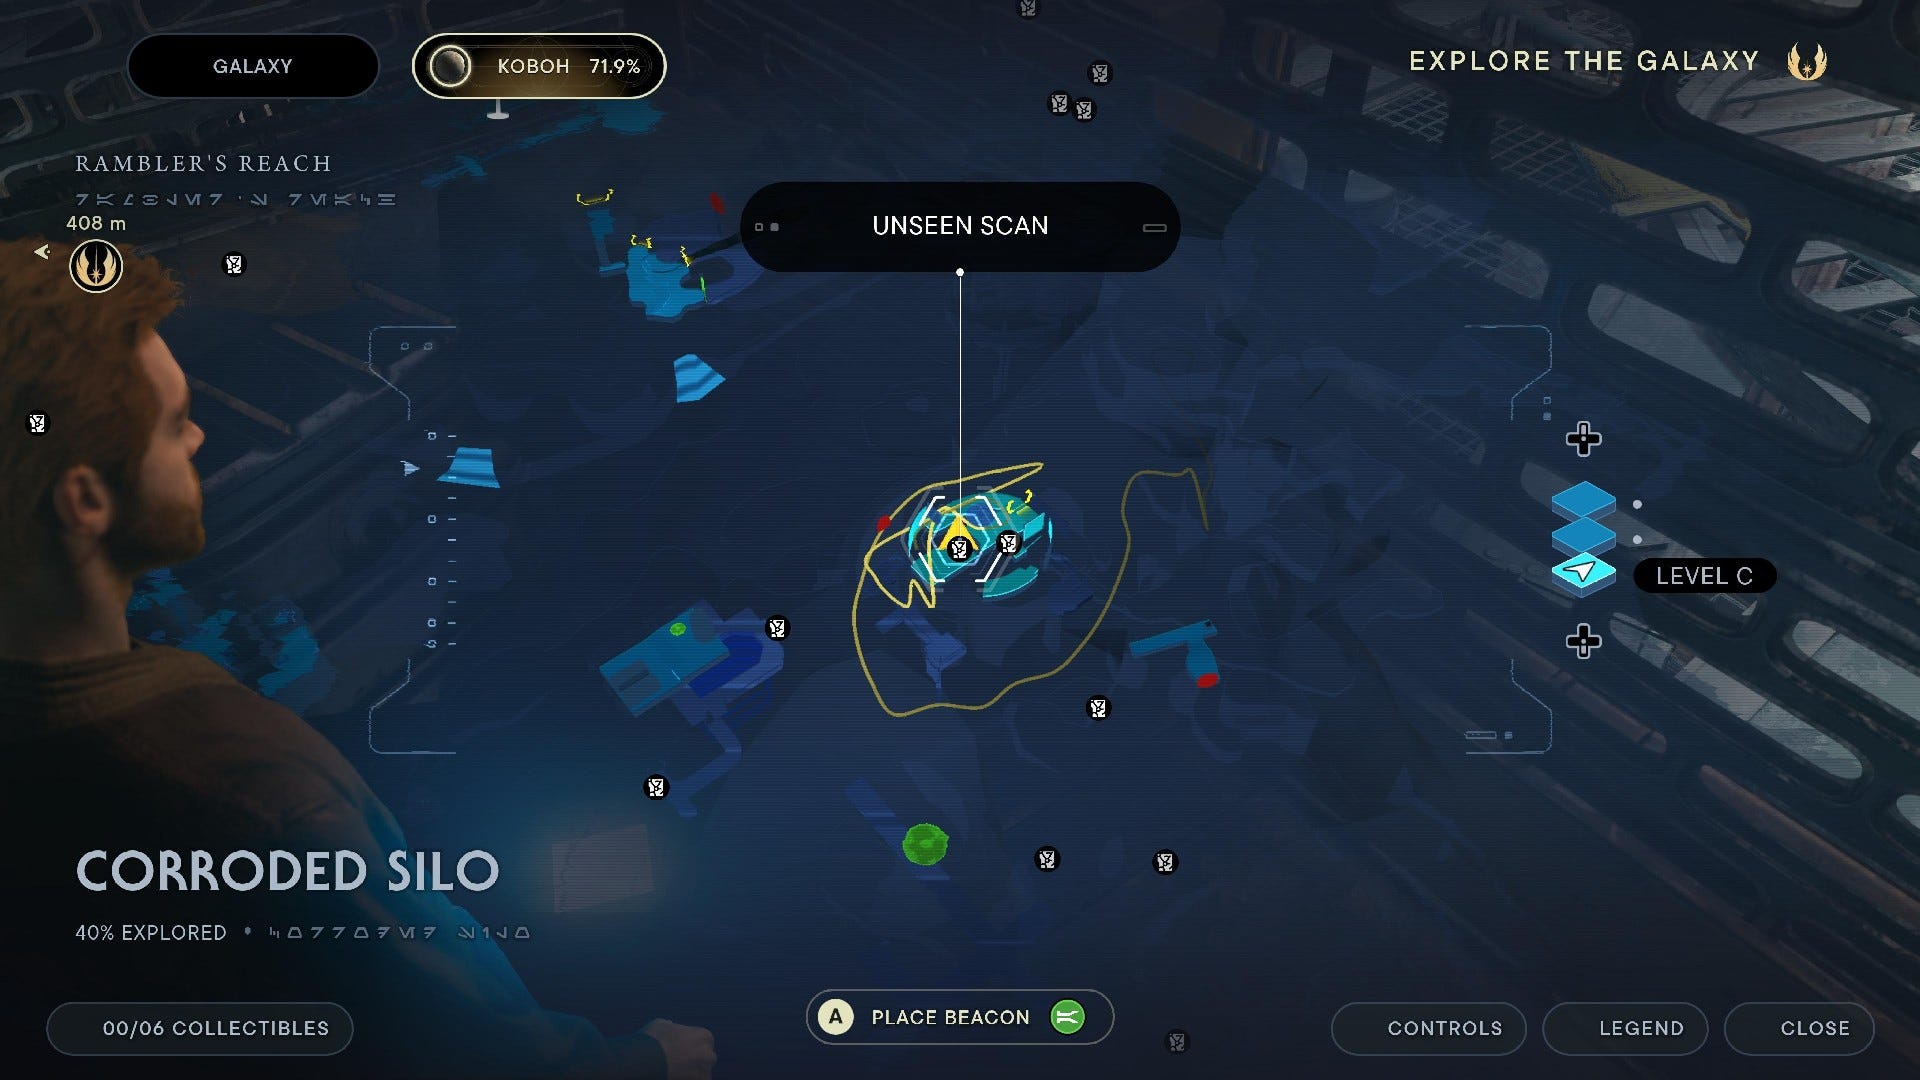
Databank (Curiosity Sours): Drop down into Corroded Silo from the roof in Southern Reach. You need Force Lift to get inside. Follow the path onto the ledge with the two guards. There’s a glowing datapad on a crate to be scanned.
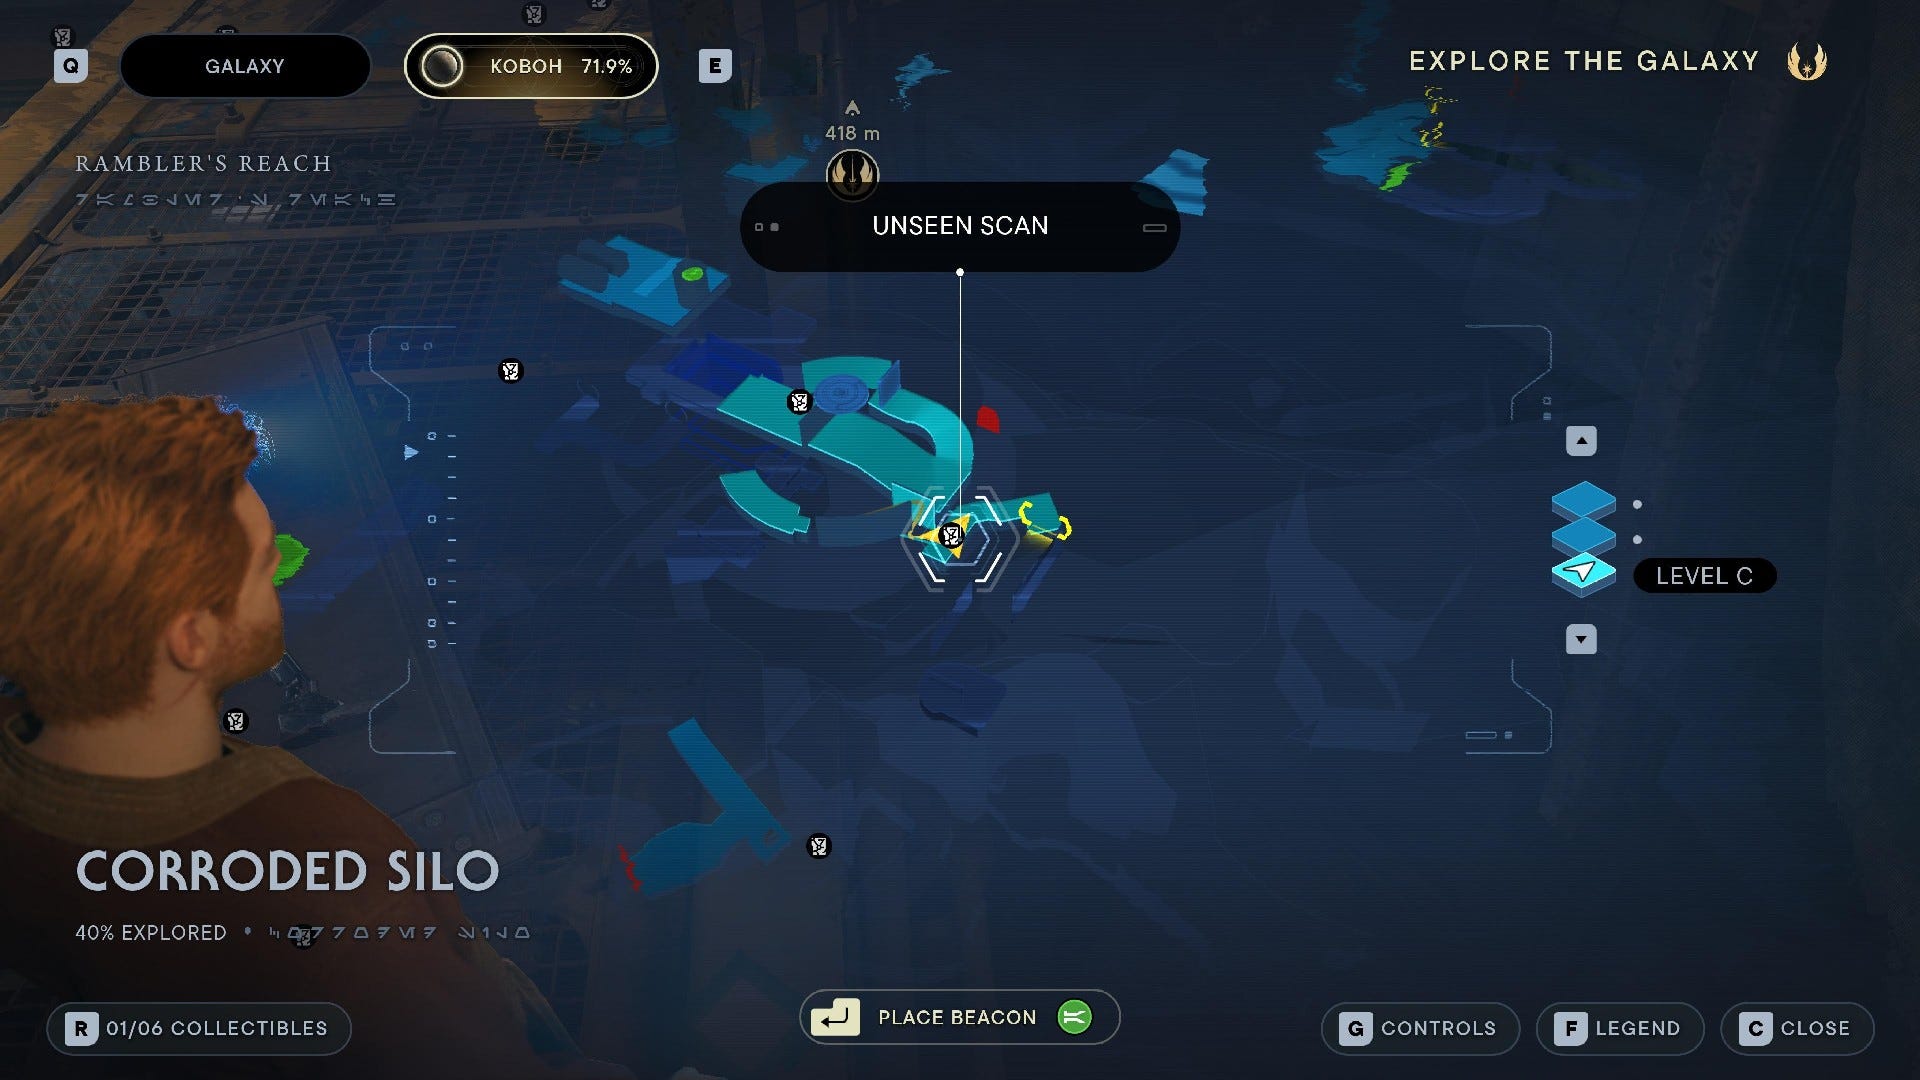
Databank (New Acquisitions): Continue along the path from the top until you slide down the wall and jump onto a platform with a B1 droid. Another datapad is on the floor of this ledge.

Force Echo (Whispered Words): At the end of the silo, opposite the gate out into Riverbed Watch, use Force Slam on the wall to the right and reach the other side. To the left of the Meditation Chamber entrance is the Force Echo.
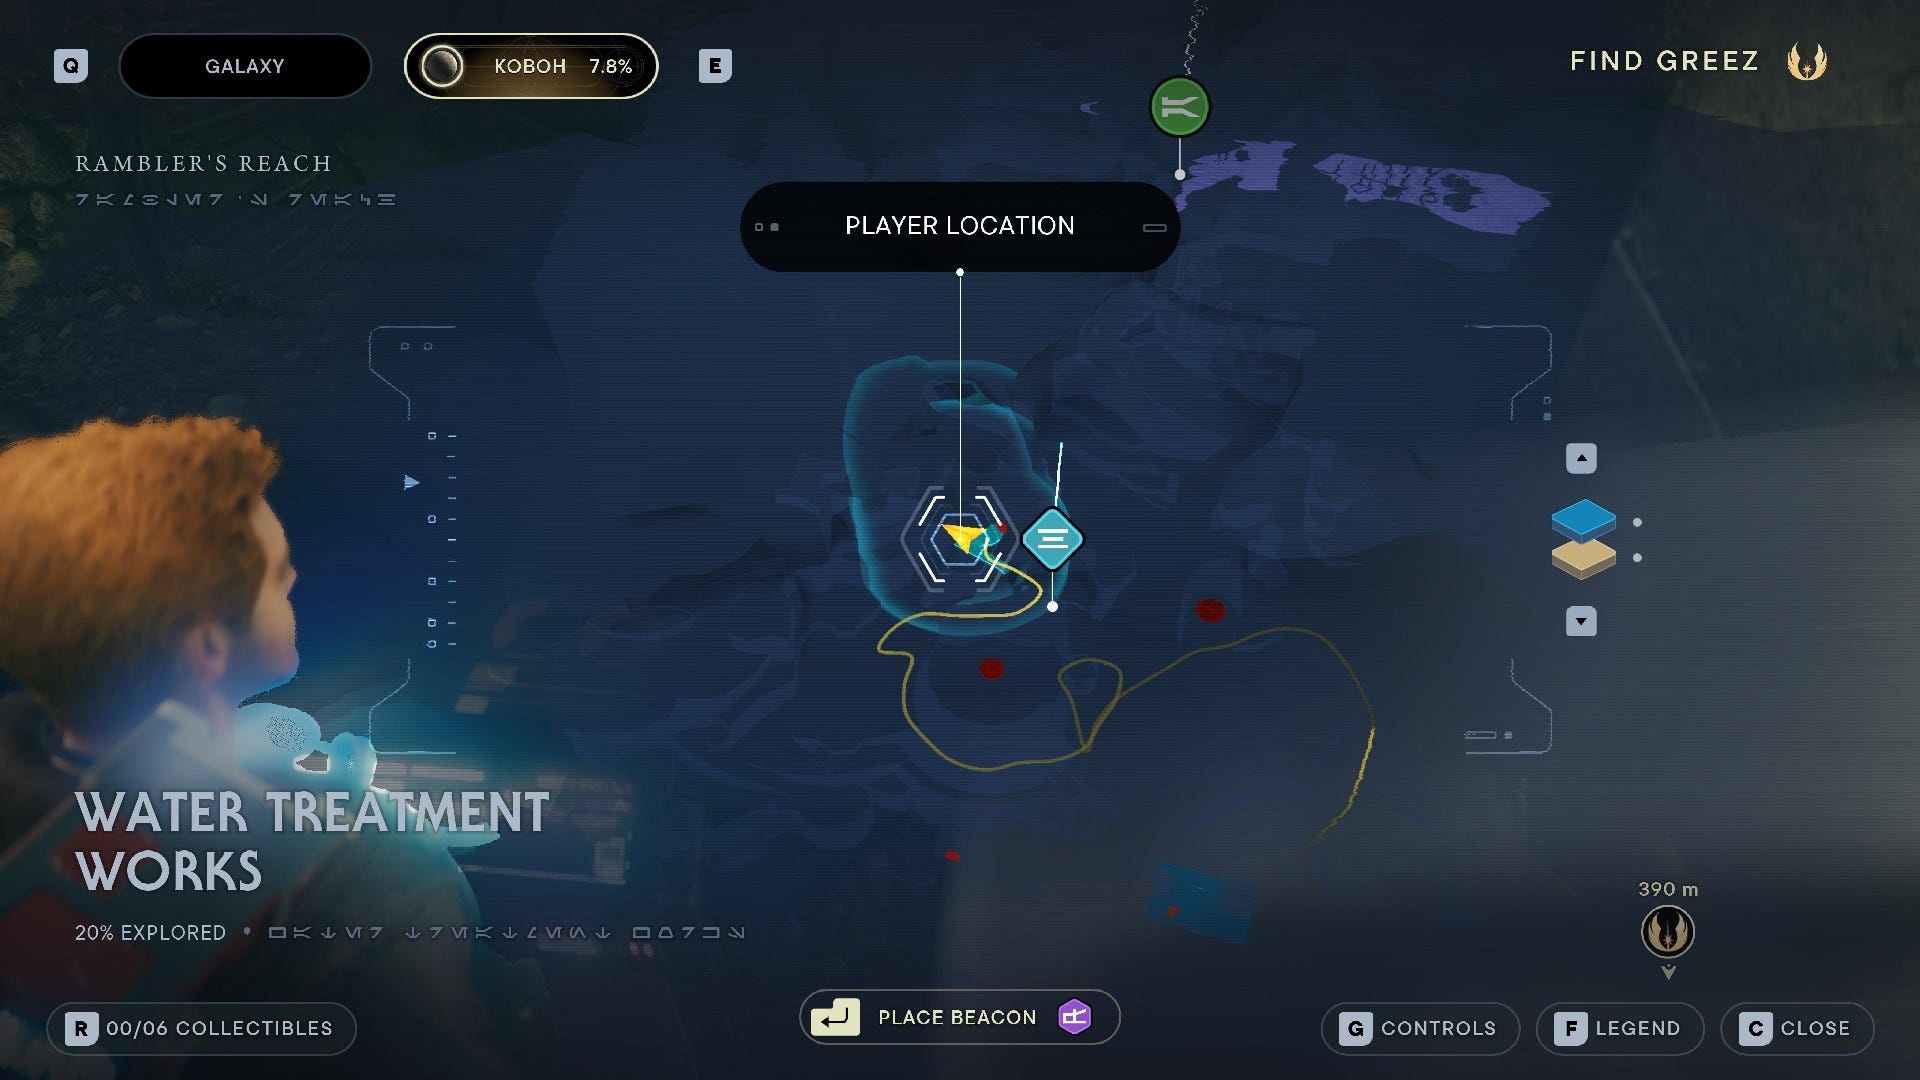
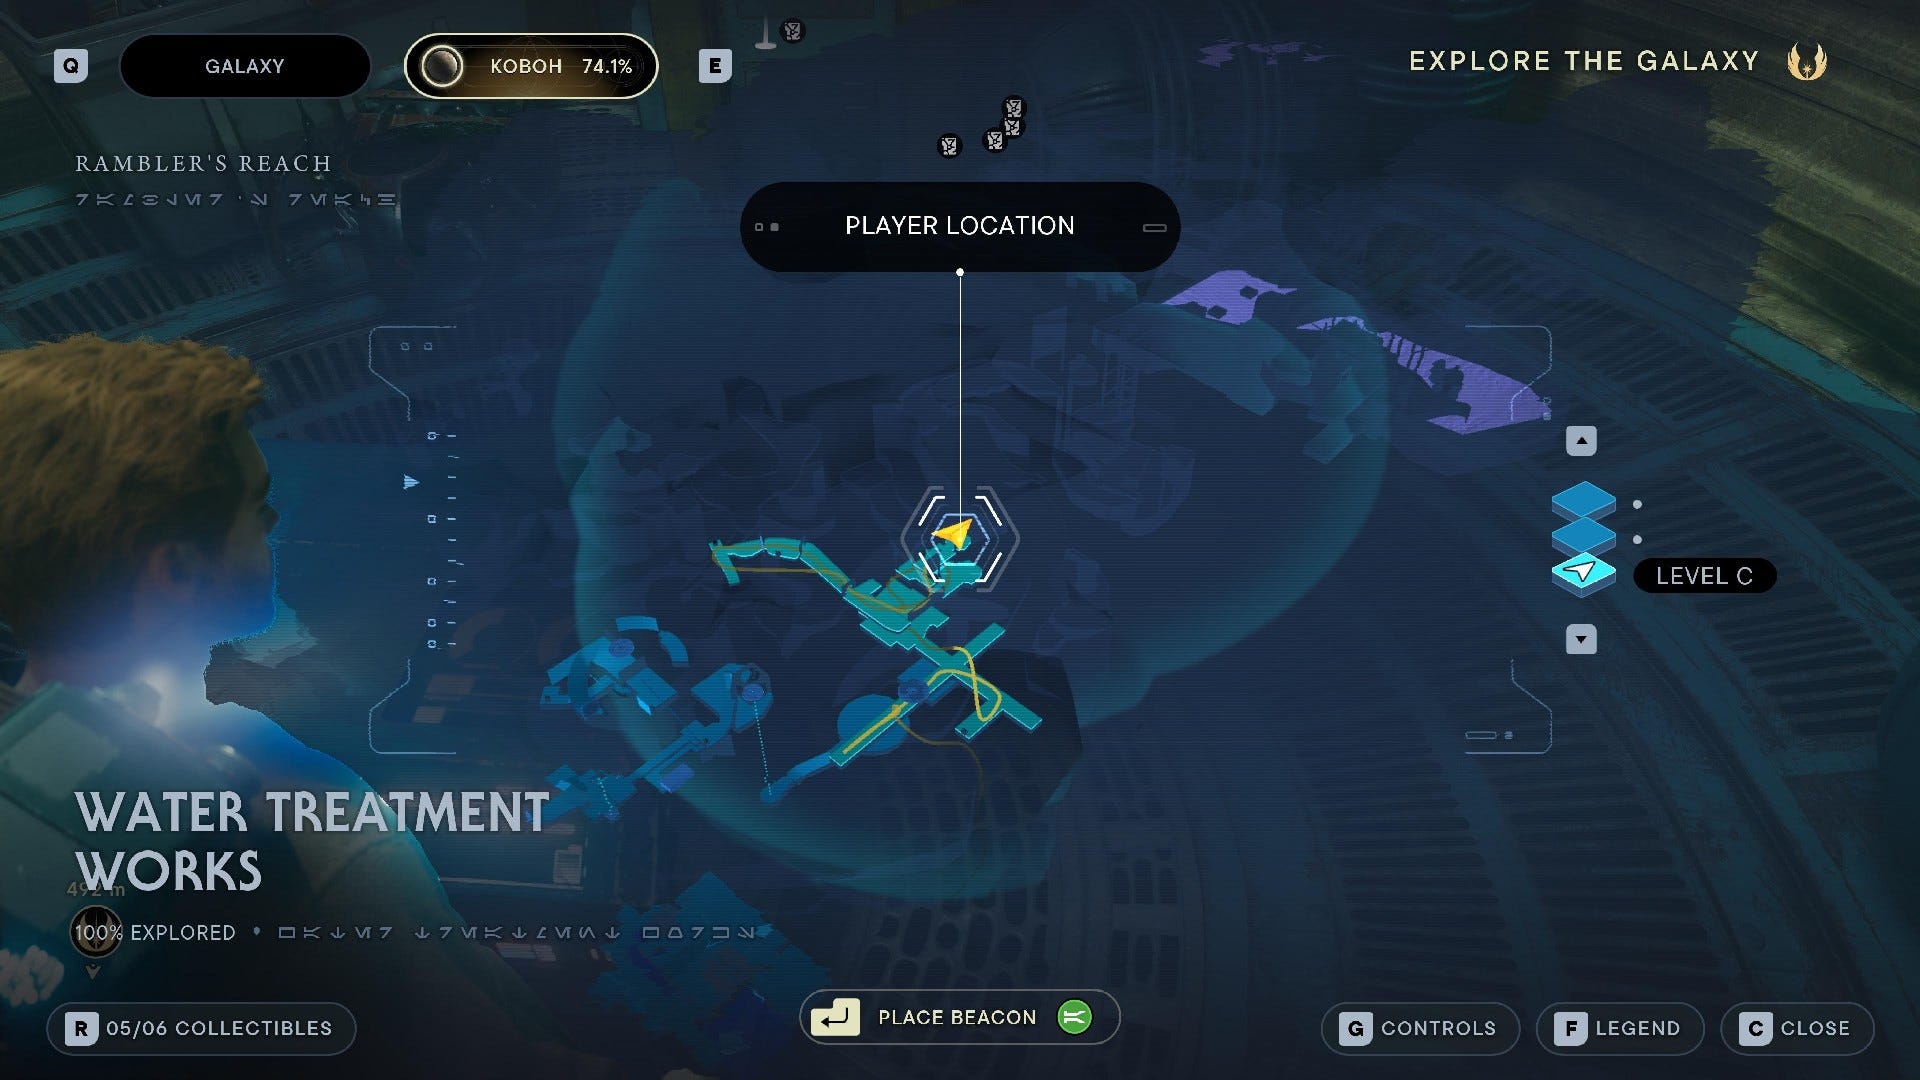
Water Treatment Works collectibles
Water Treatment Works Chests:

Chest #1 (Scrapper hair): At the end of the short tunnel in the cave below the bridge next to the Datadisc scavenger droid.

Chest #2 (Edgehawk Switch): At the end of the side path with the Rawka and Shiverpede.


Chest #3 (Edgehawk Grip): Once you reach the upper level, Force Push the rocks out of the way and look for the chest on the left.

Chest #4 (Edgehawk Emitter): Once you reach the upper level, look back above where you came and you’ll see a platform you can reach with the chest at the end.
Water Treatment Works Databanks:
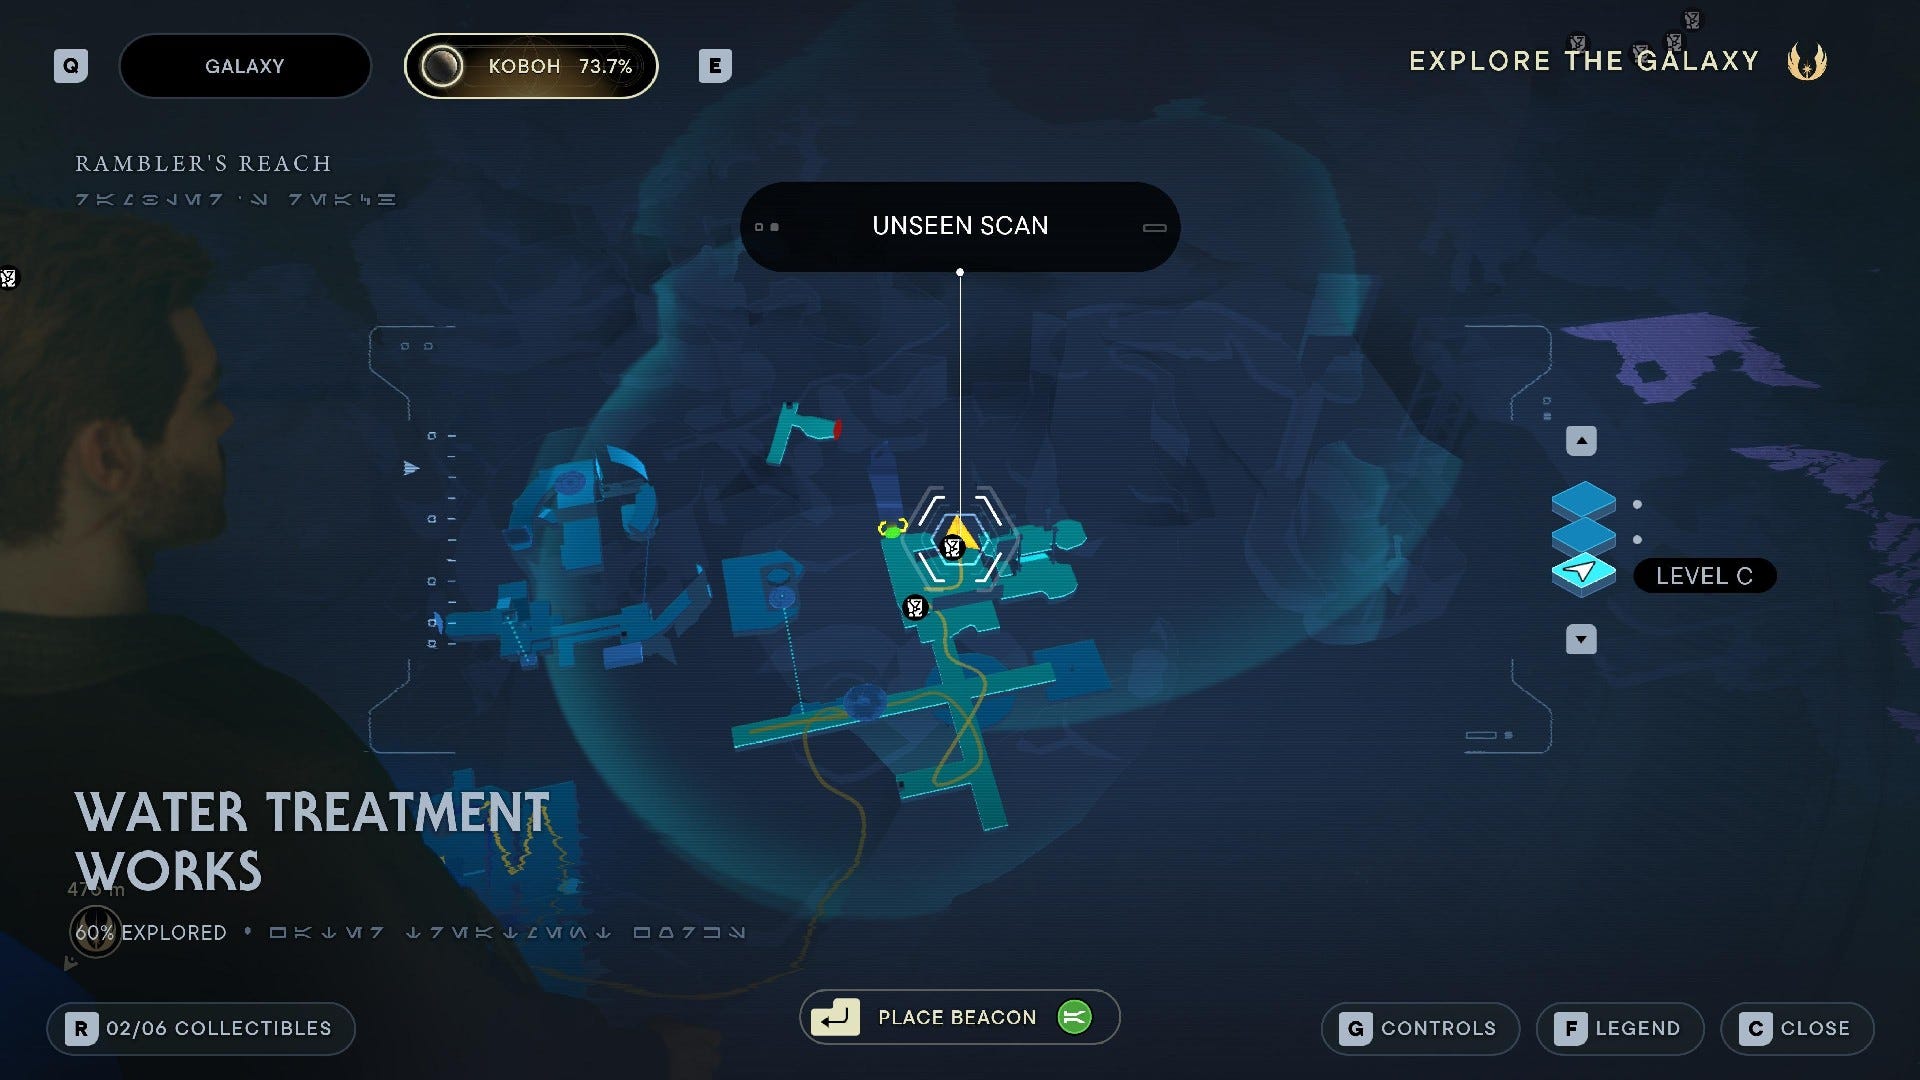
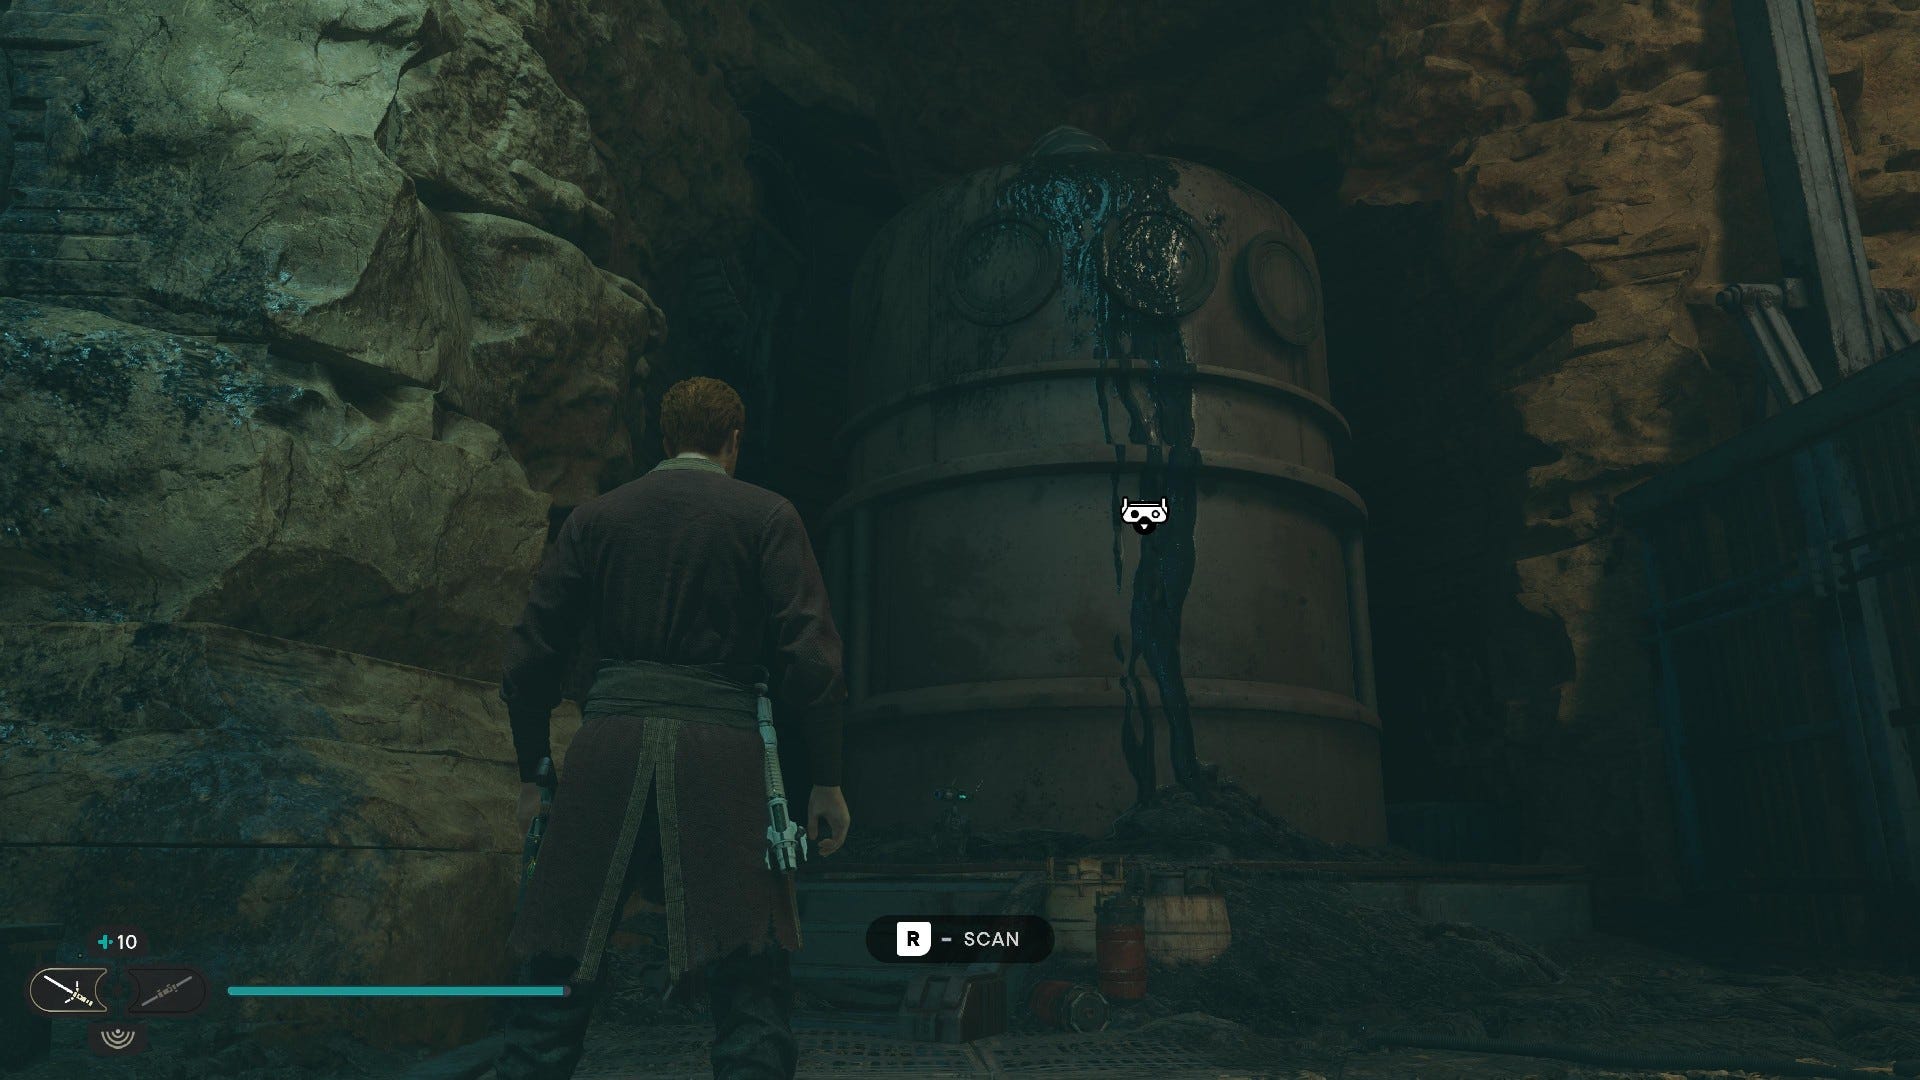
Databank (Leaking Water Storage): Scan the big storage tank in the main room.
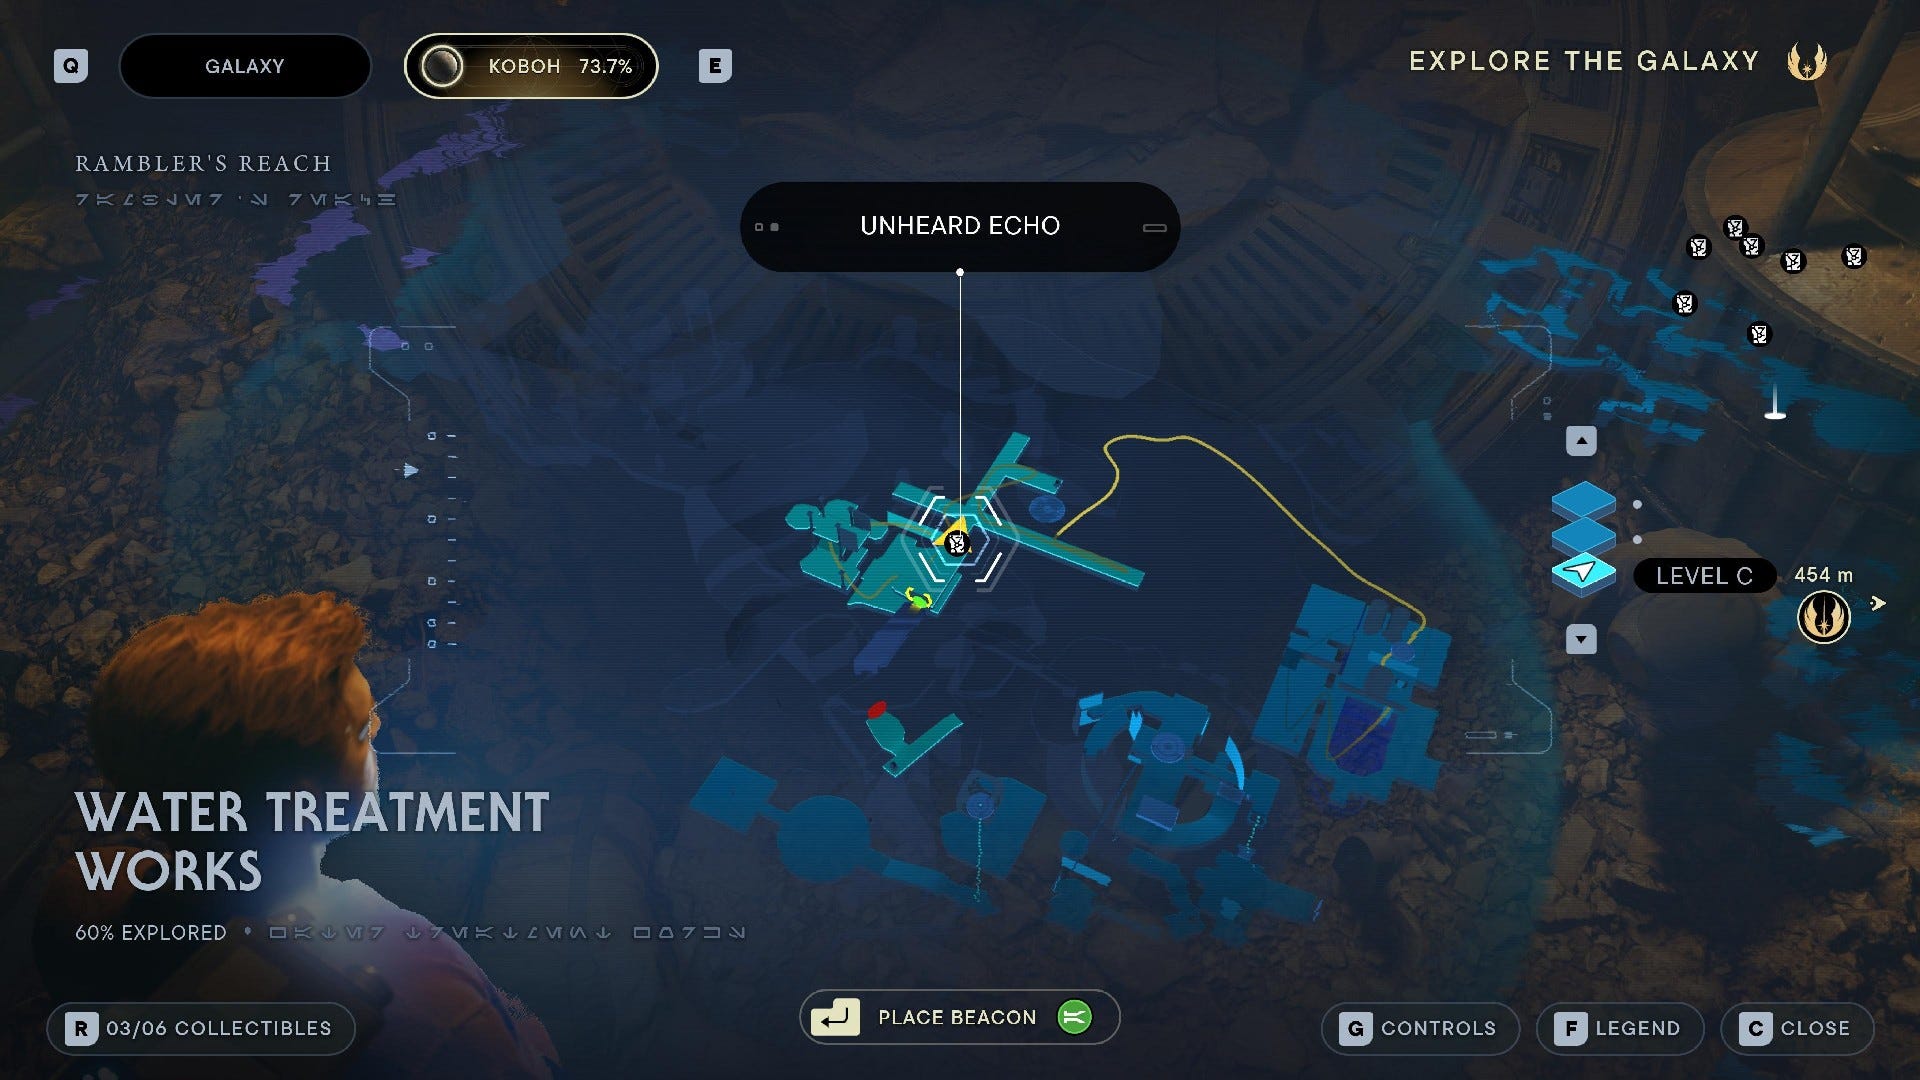
Force Echo (Lawful Good): Found on dead body after the wall-run section to the upper part of the main room.
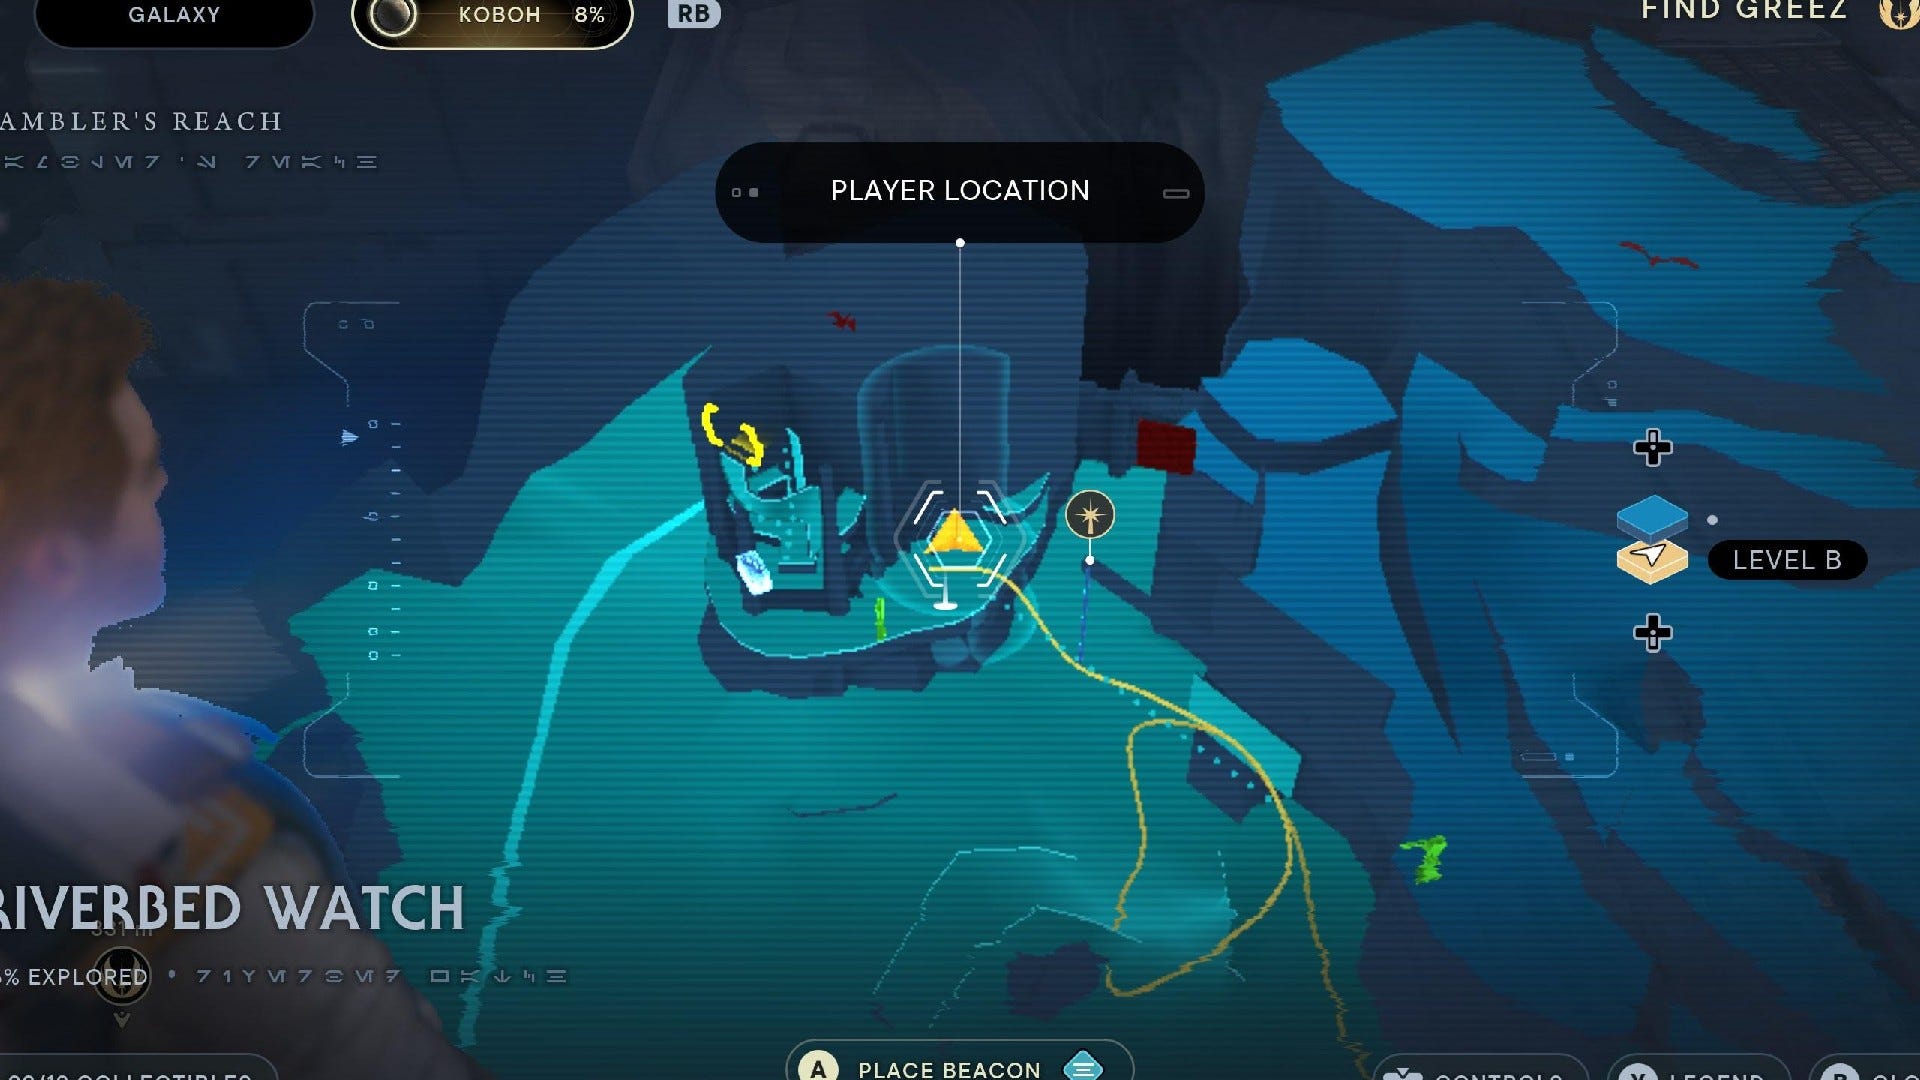
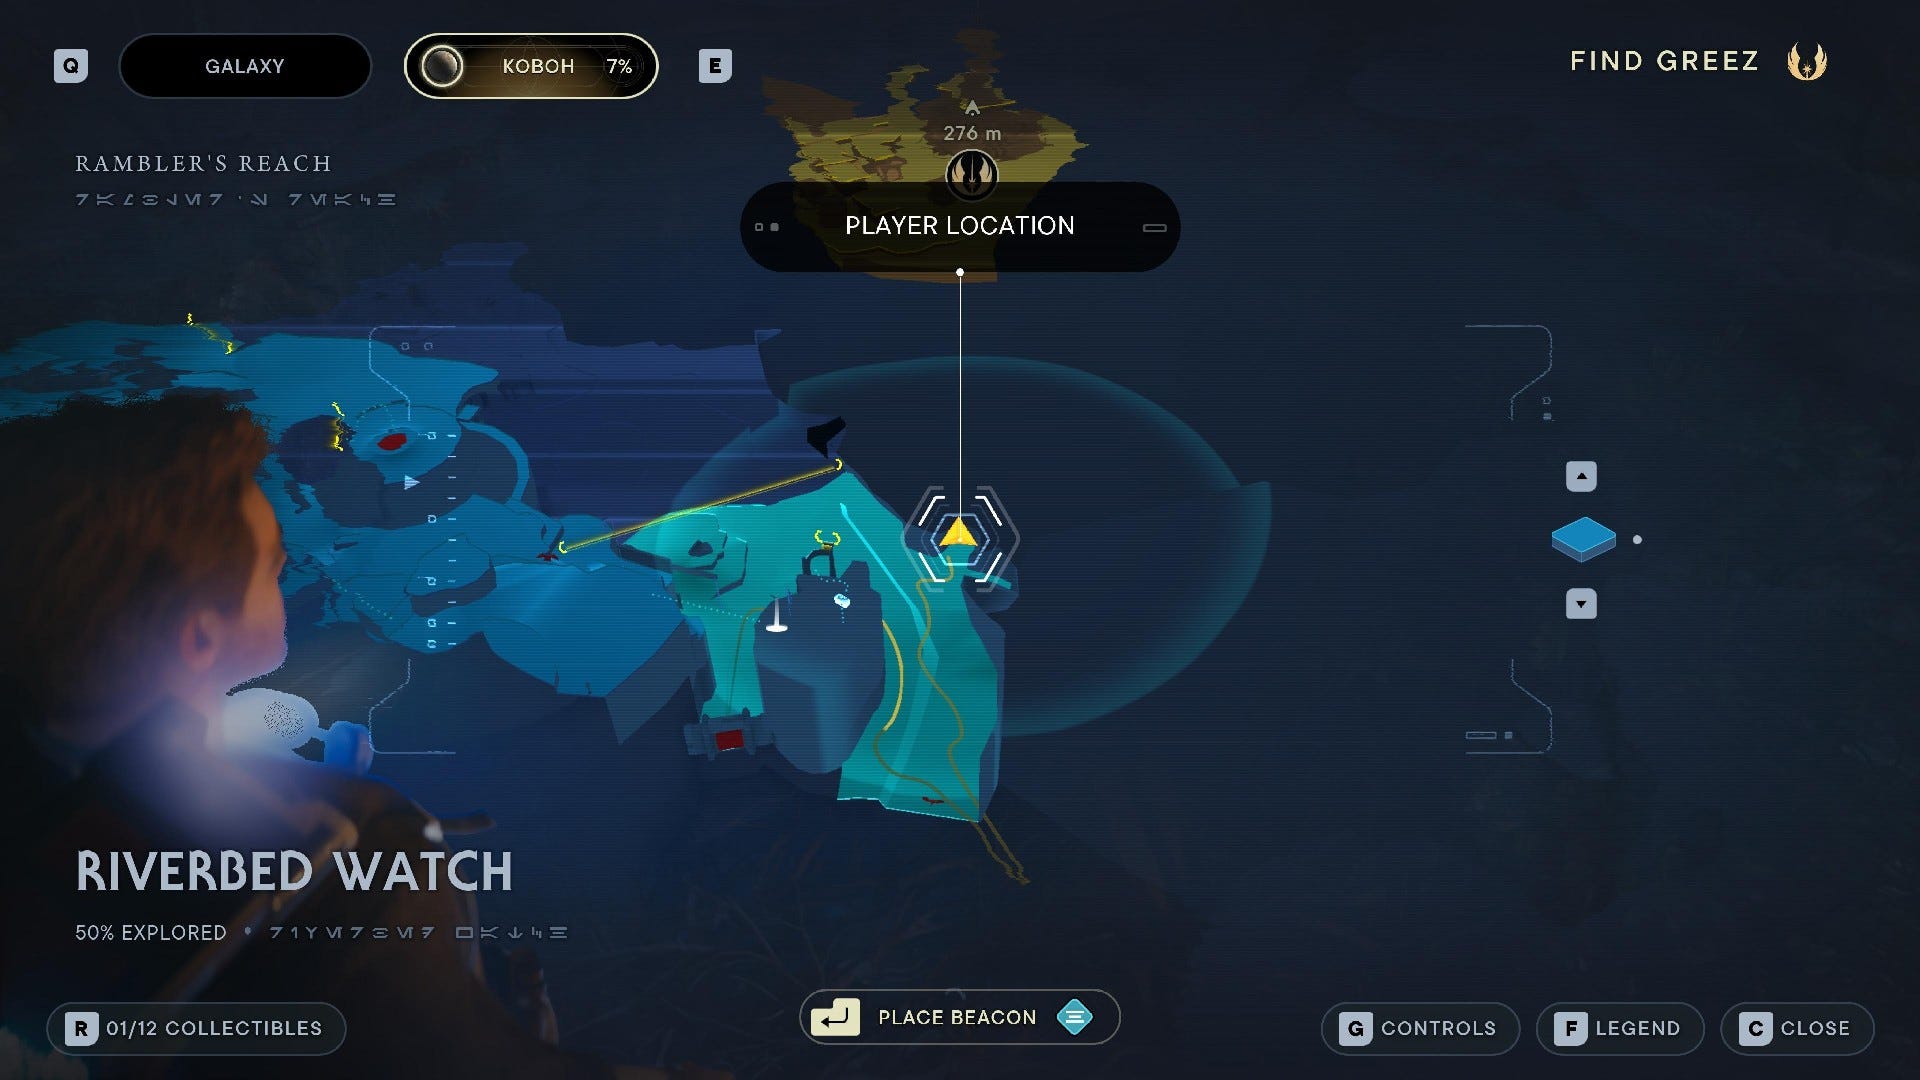
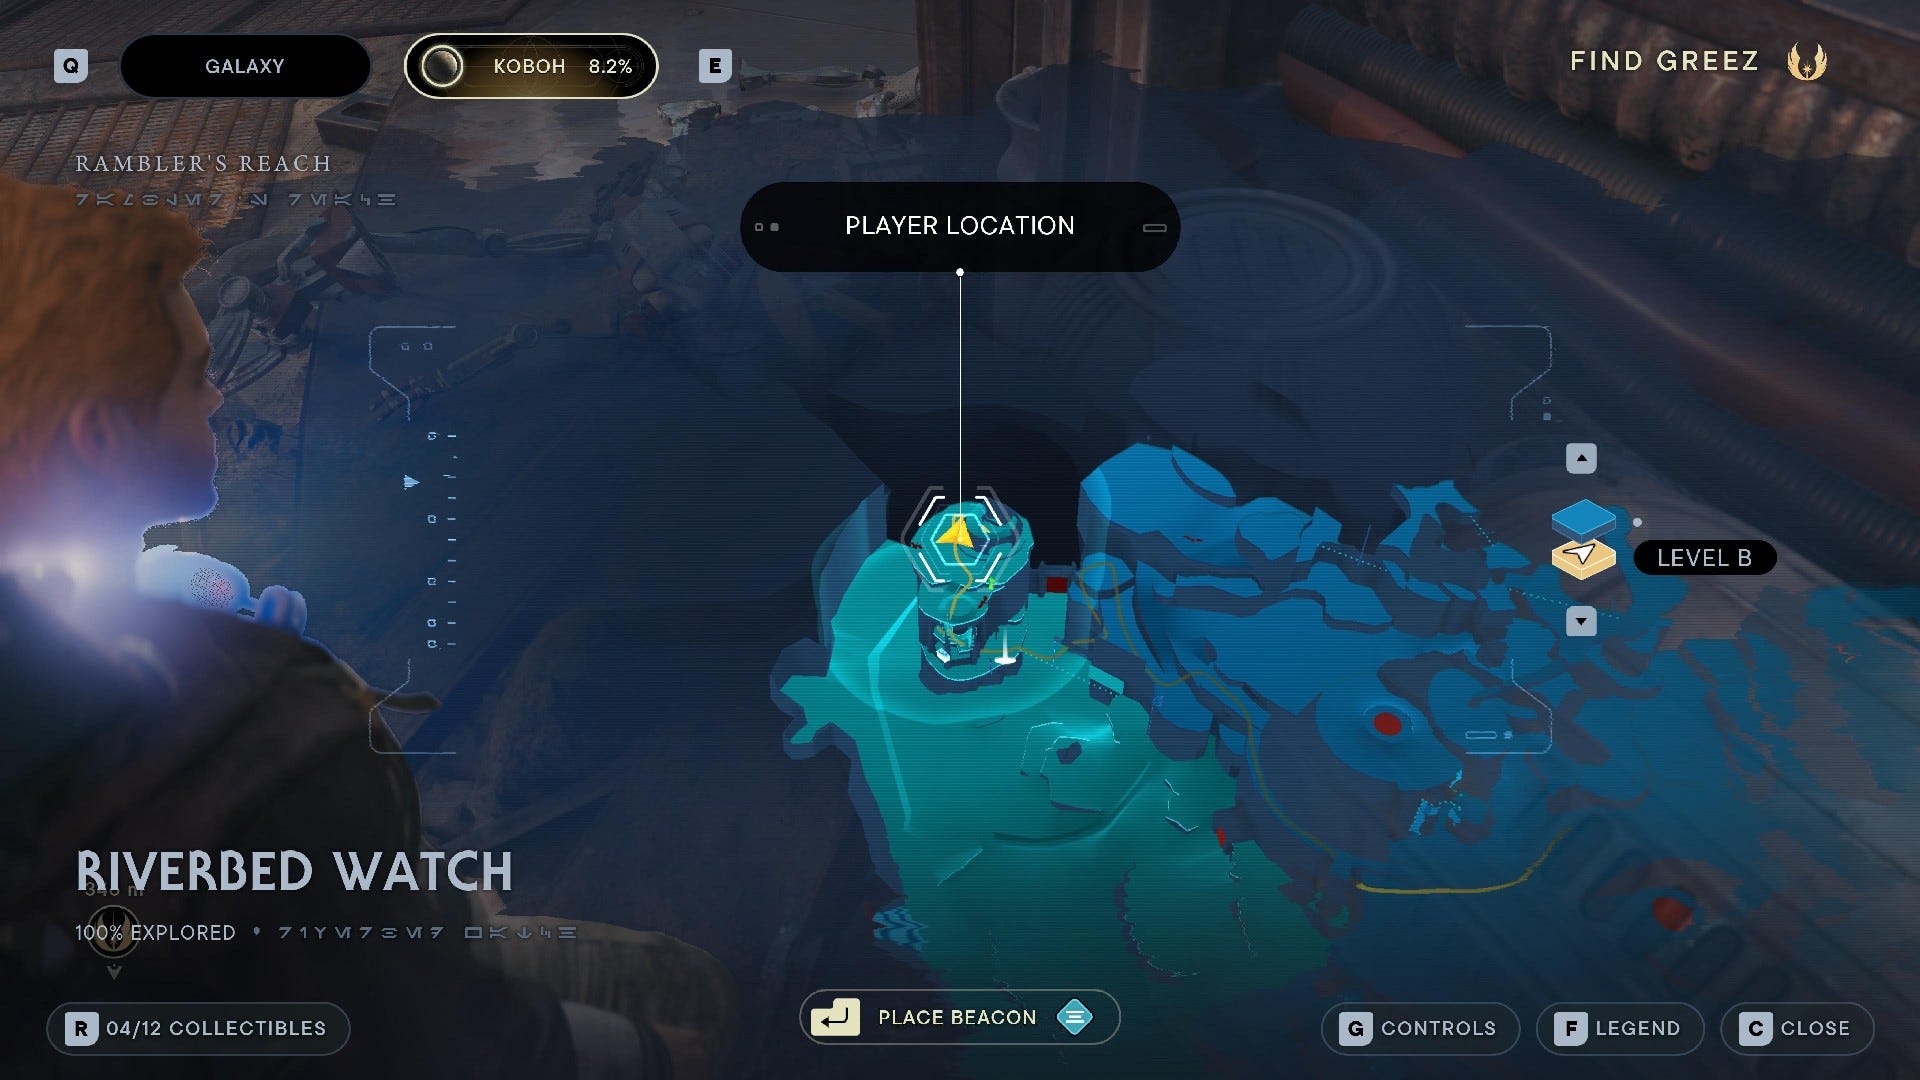
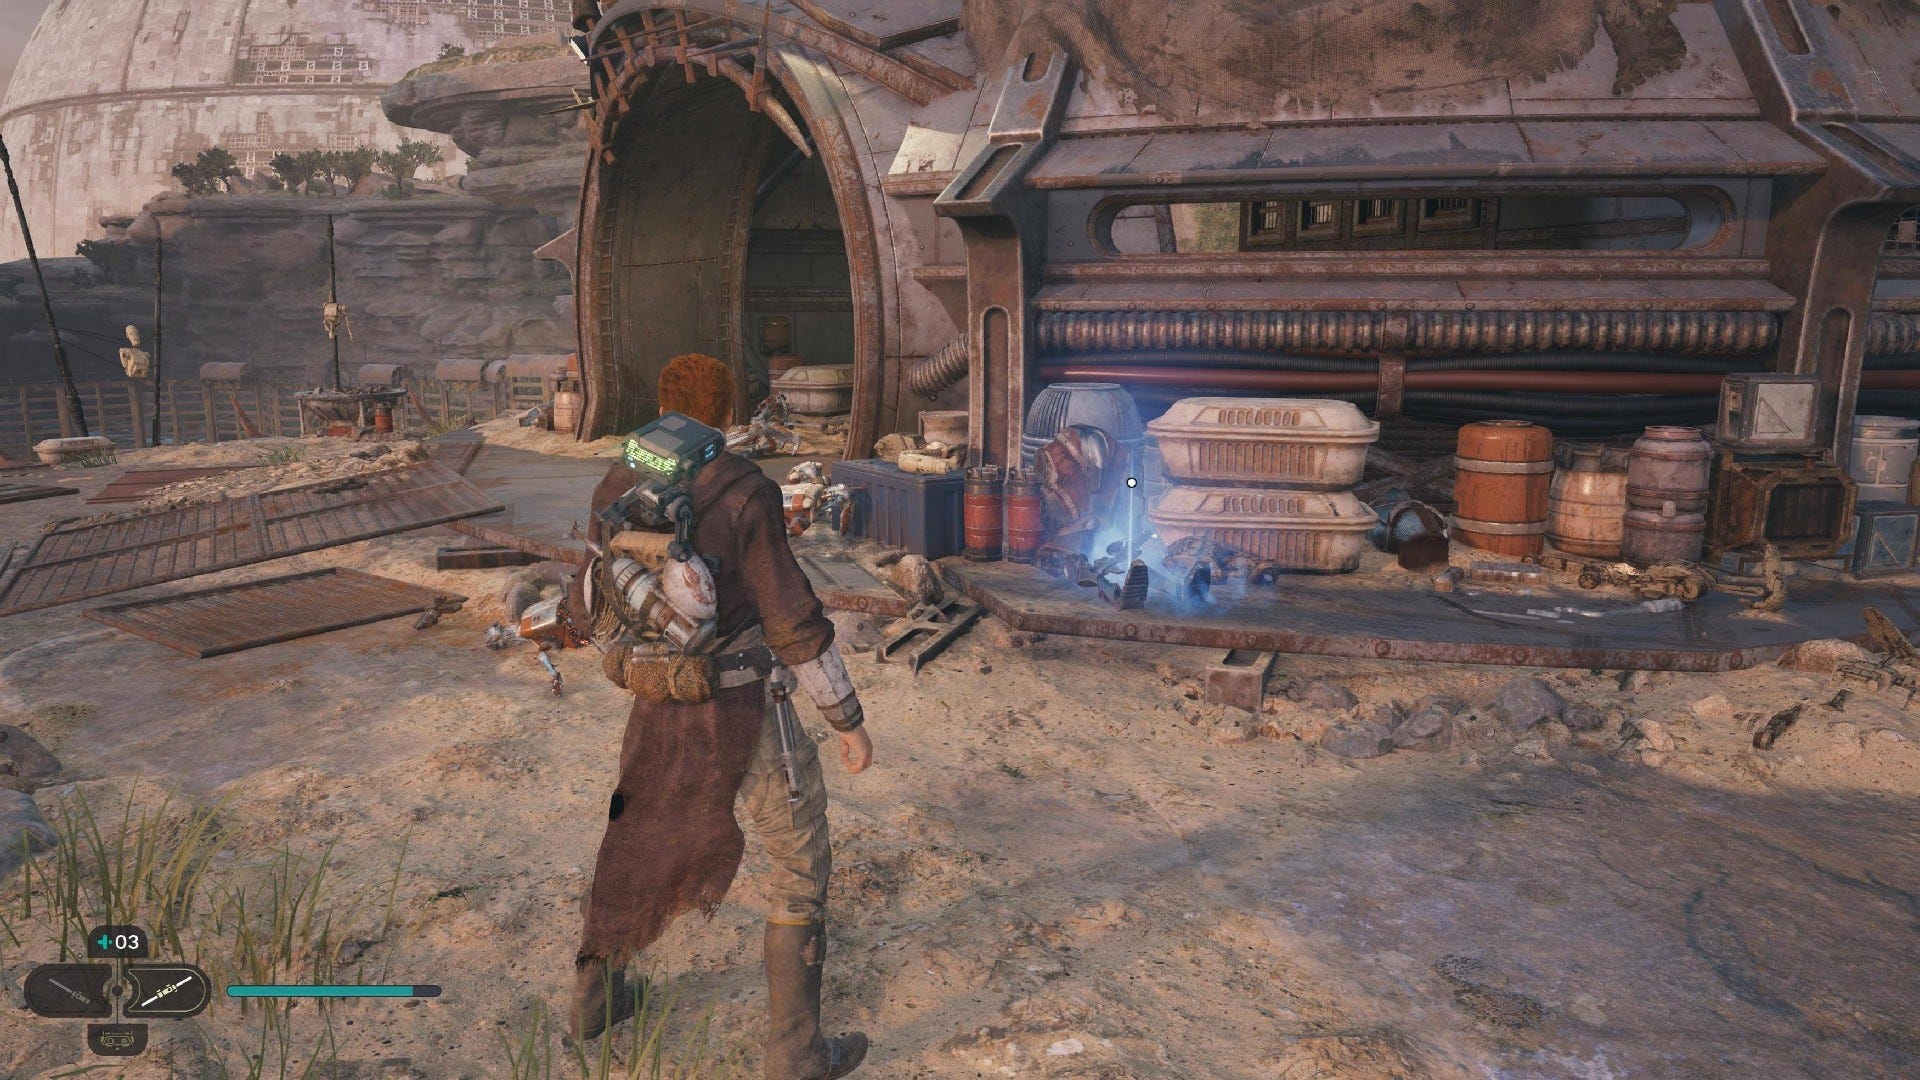
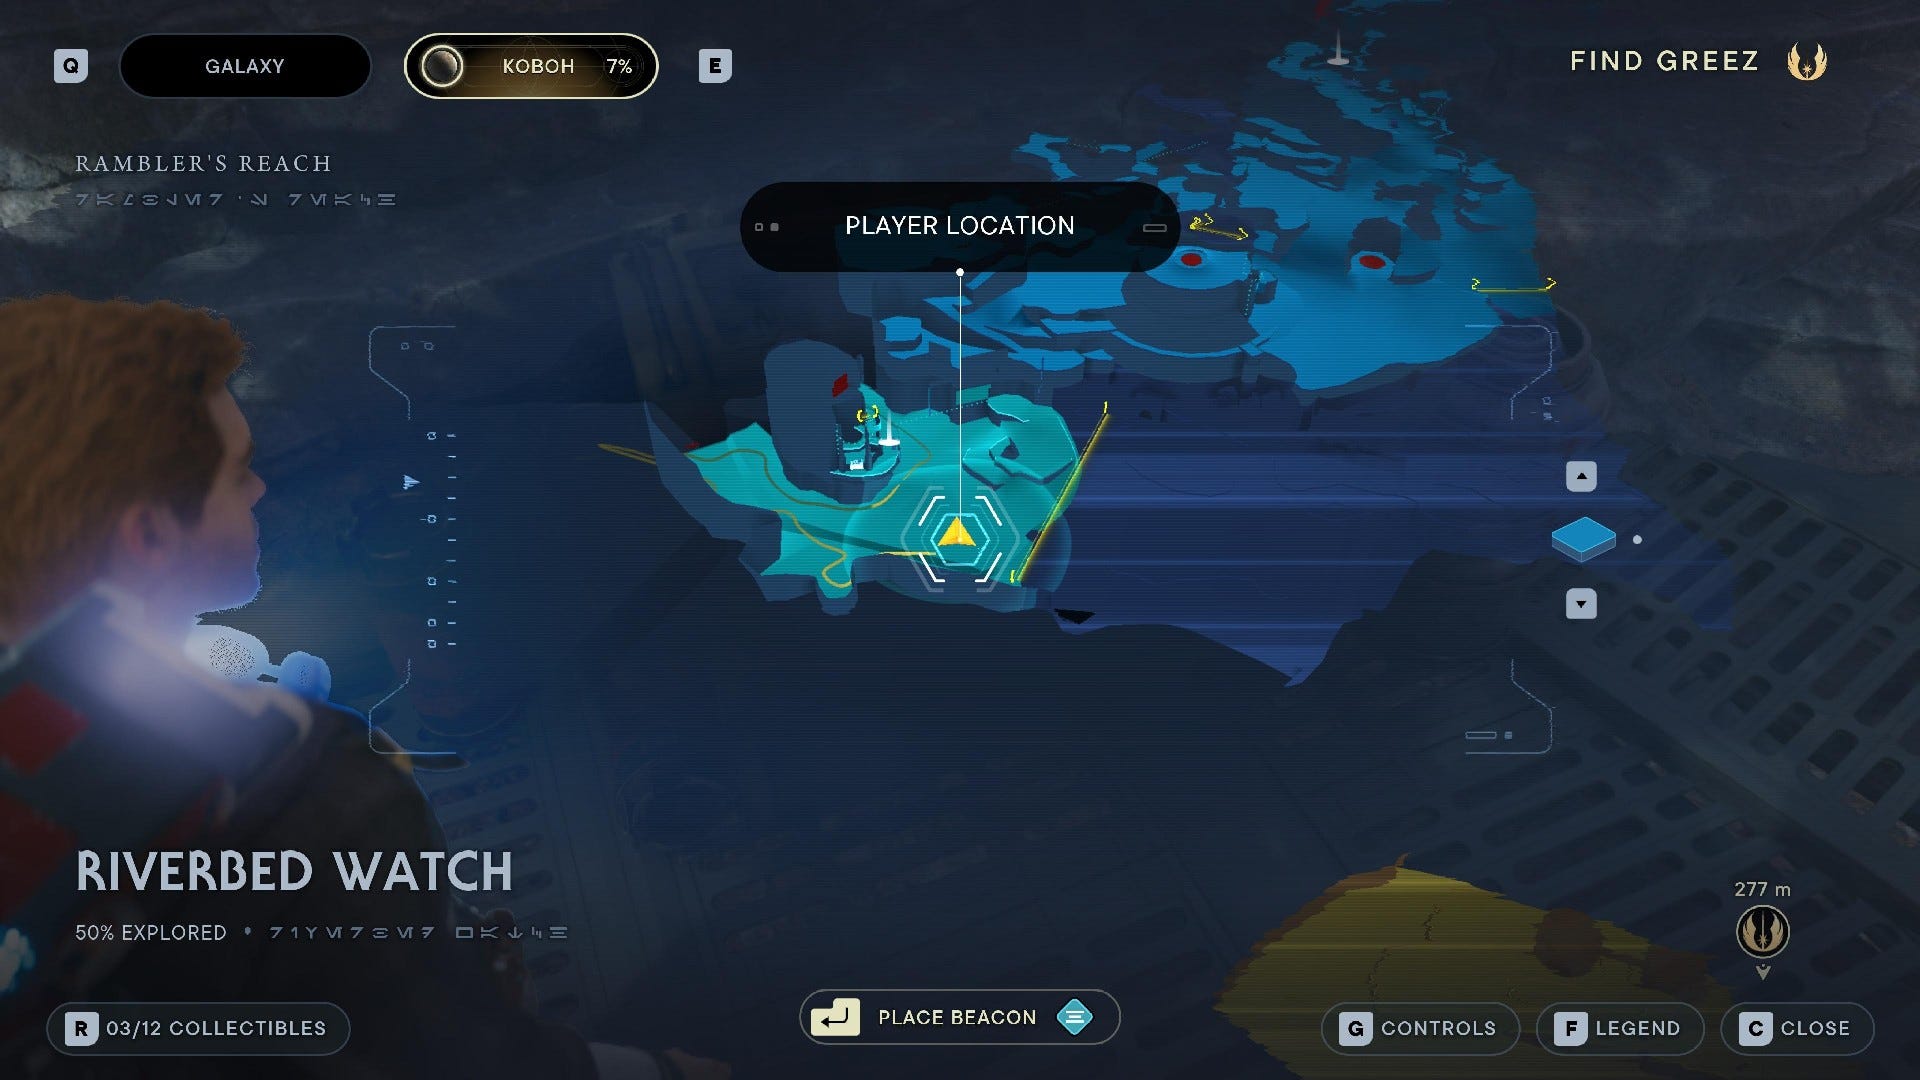
Riverbed Watch collectibles
Riverbed Watch Chests:
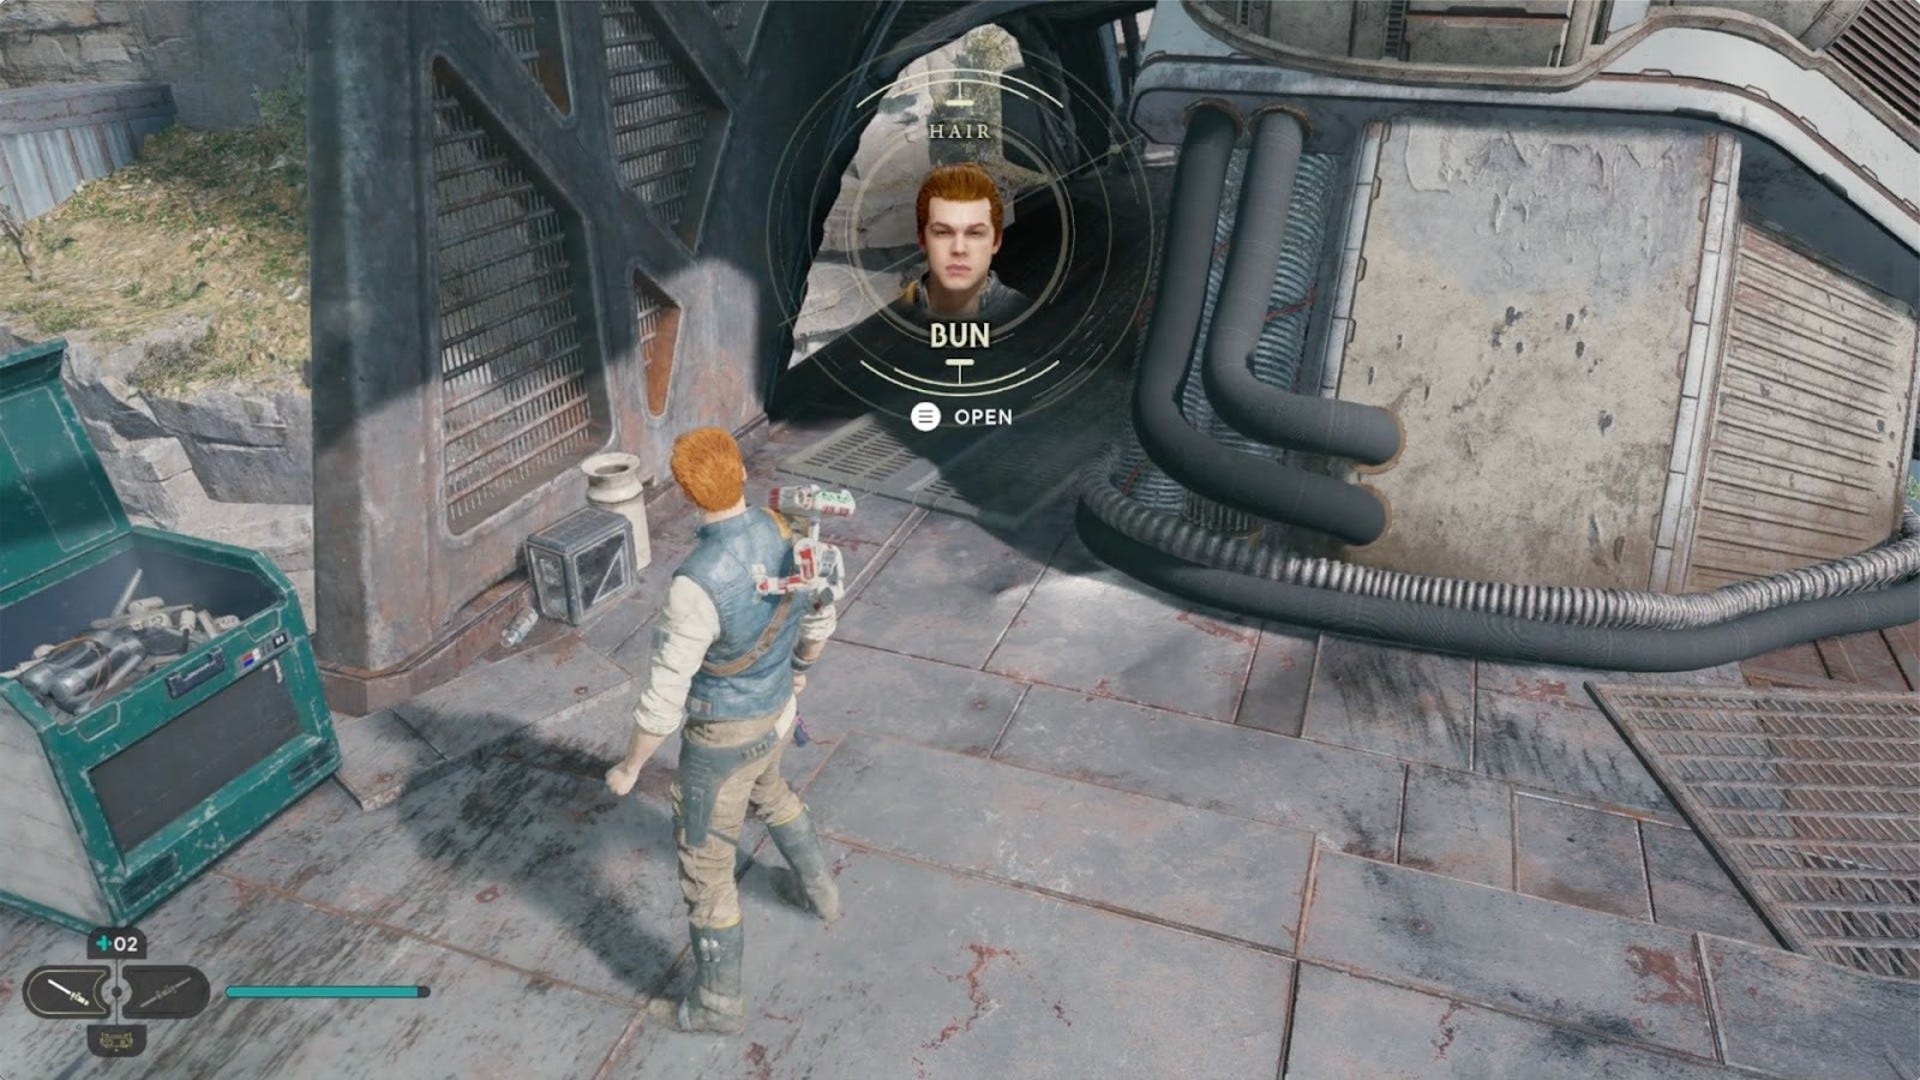
Chest (Bun hair): On the rooftop, almost directly above the Priorite Shard.
Riverbed Watch Essences:
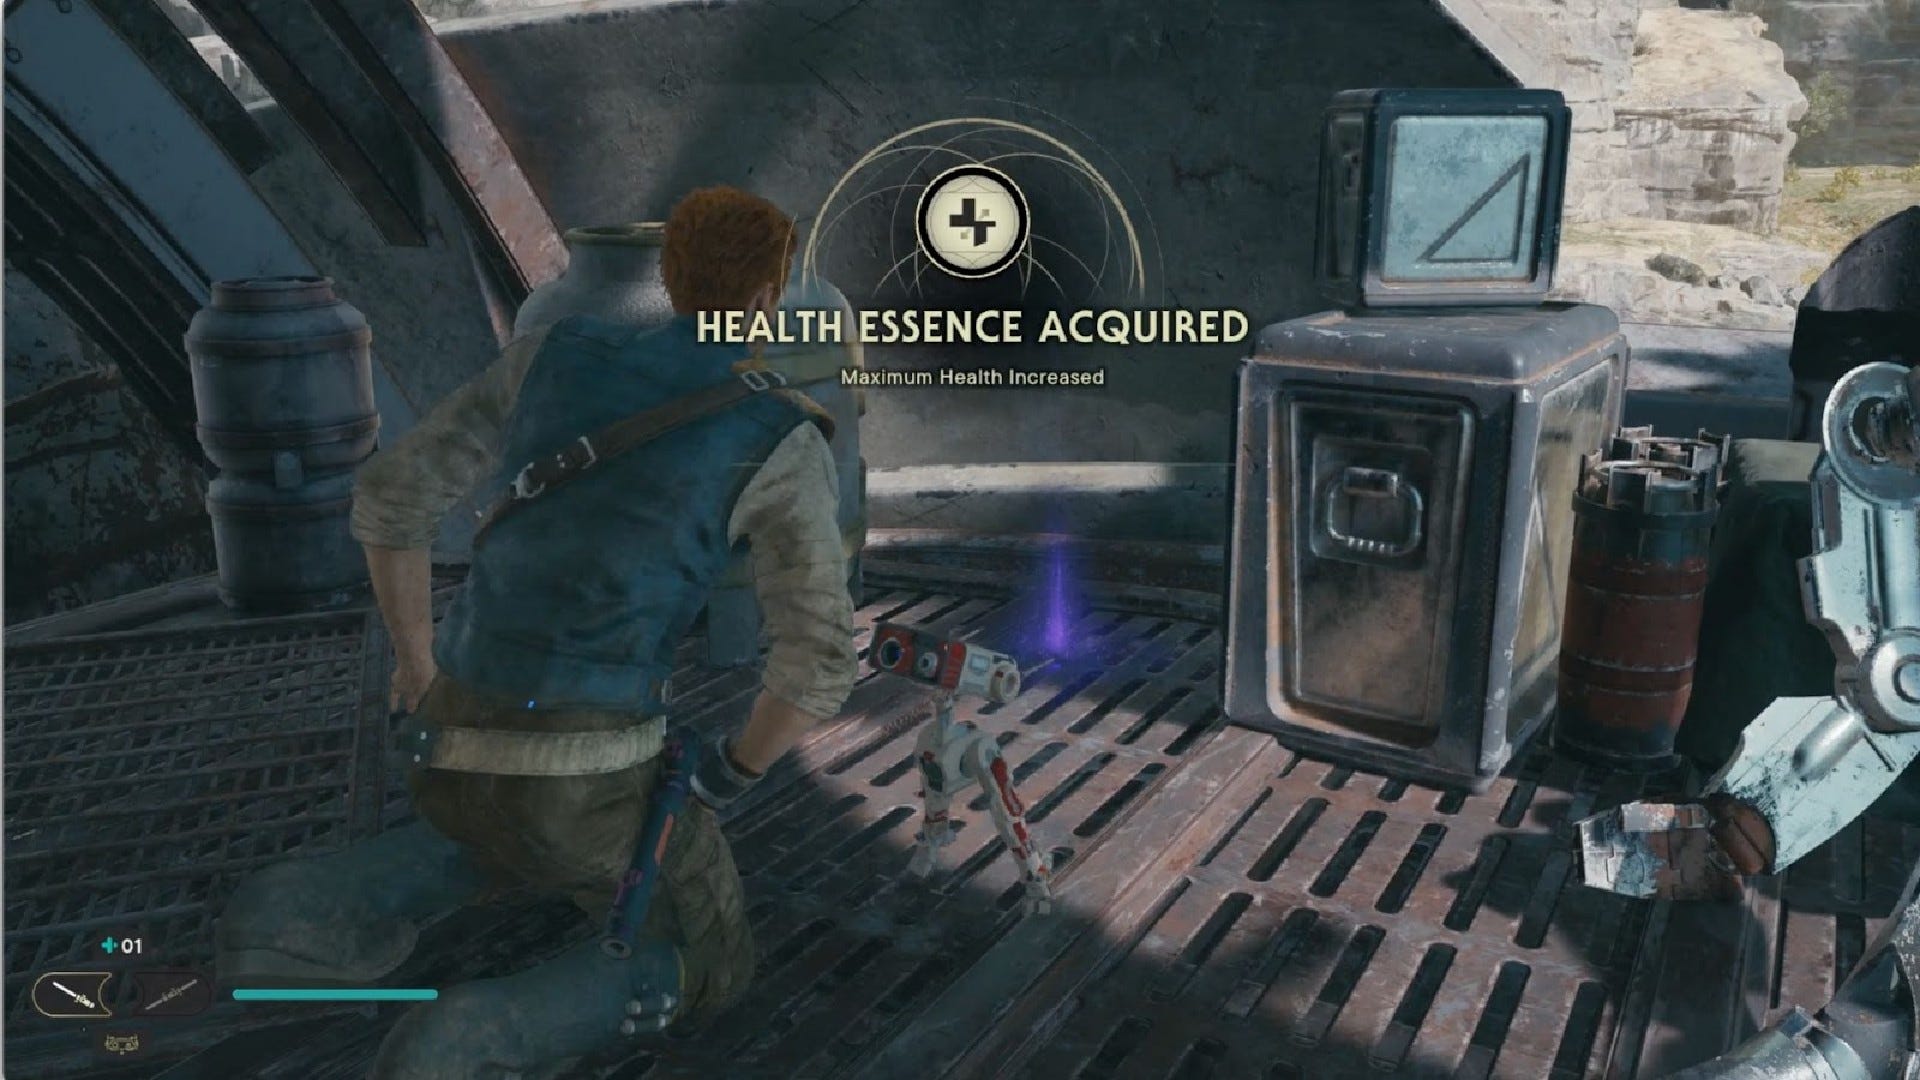
Health Essence: Inside the raider tower.
Riverbed Watch Databanks:

Databank (Warlord’s Standard): Scan the item to the side of the Riverbed Watch Meditation Point.

Force Echo (Battle Droid Blues): Up the waterfall at Riverbed Watch, in the cave guarded by Rawka.
Force Echo (A Brokered Alliance): Above the Riverbed Watch Meditation Point, on the roof with all the B1 droids.
Riverbed Watch Treasures:
Priorite Shard #1: Dropped by Scavenger Droid in the river.

Priorite Shard #2: Around the back side of the building with all the B1 droids, on the roof of the Riverbed Watch Meditation Point building.
Riverbed Watch Seed Pods:
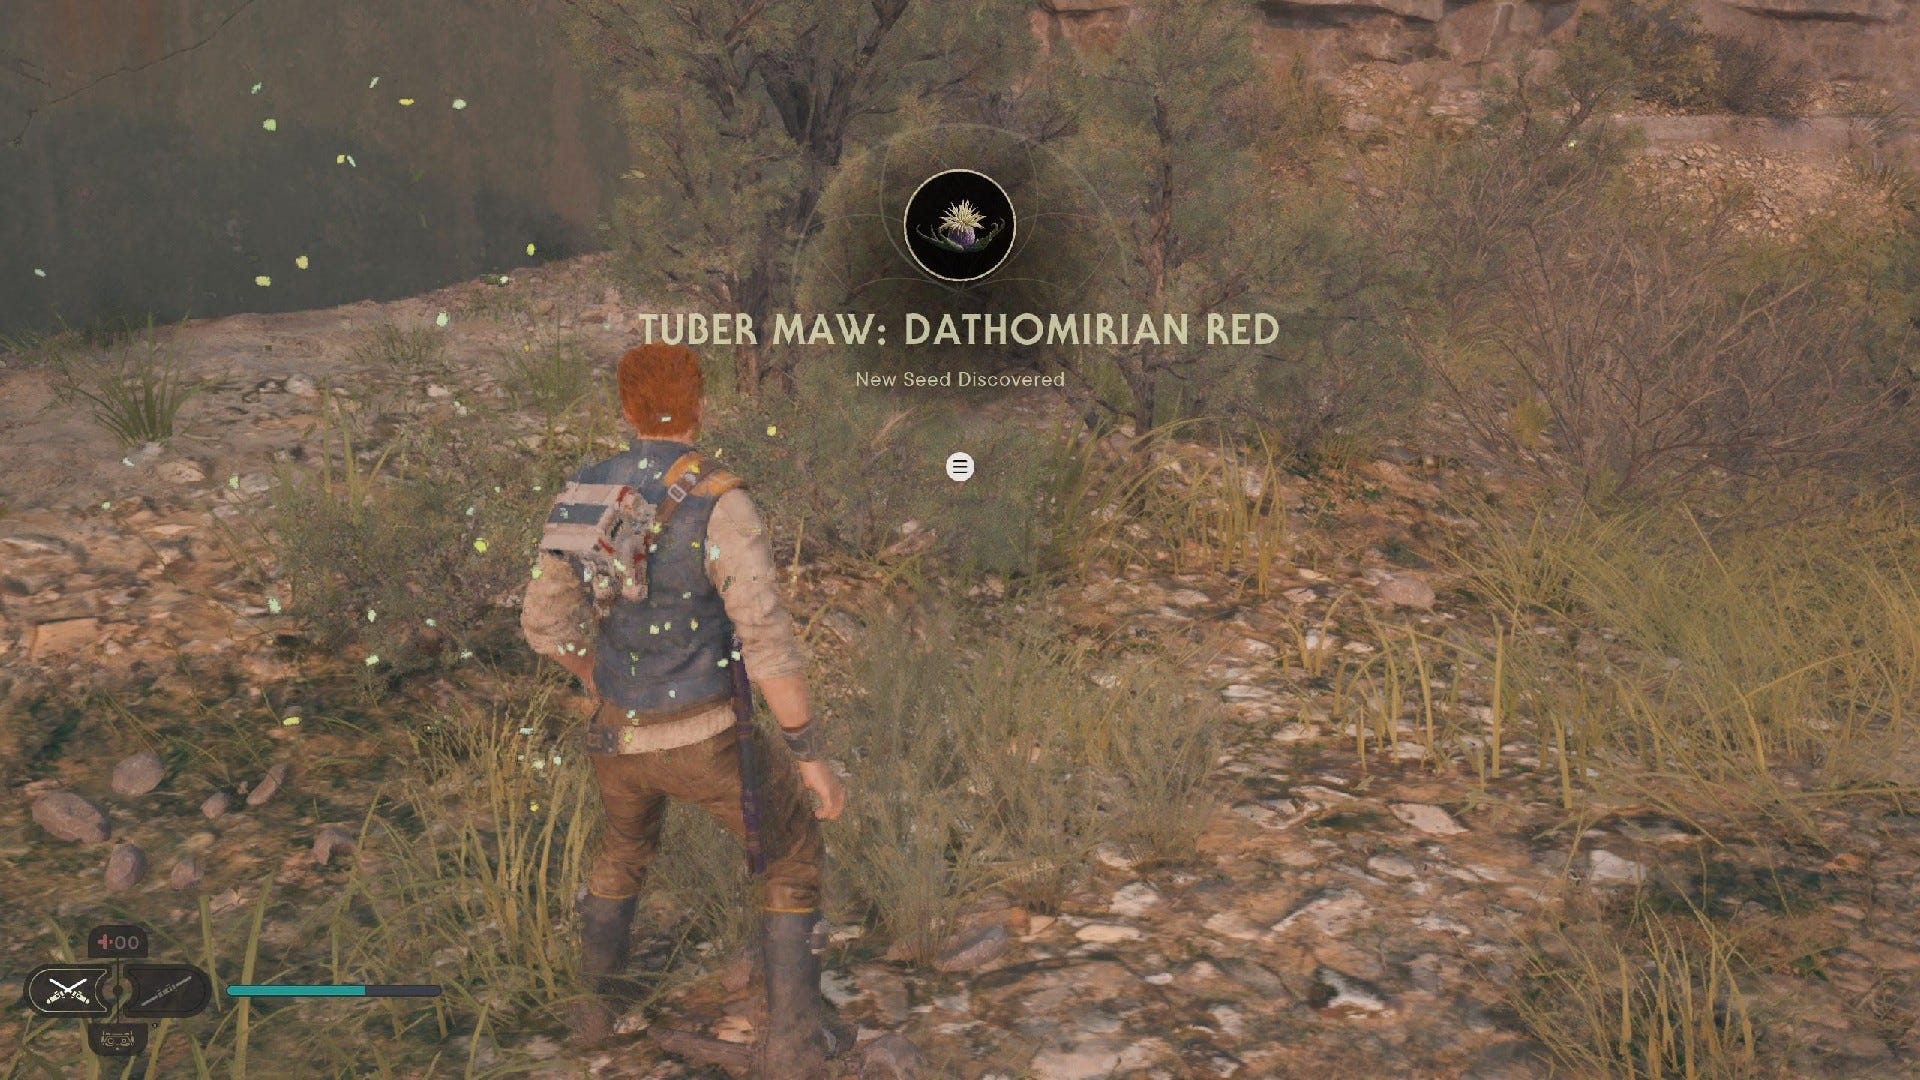
Tuber Maw (Dathomirian Red): Continue behind shield turret building and head to base of silo aup ahead. Plant is found in amongst the grass.
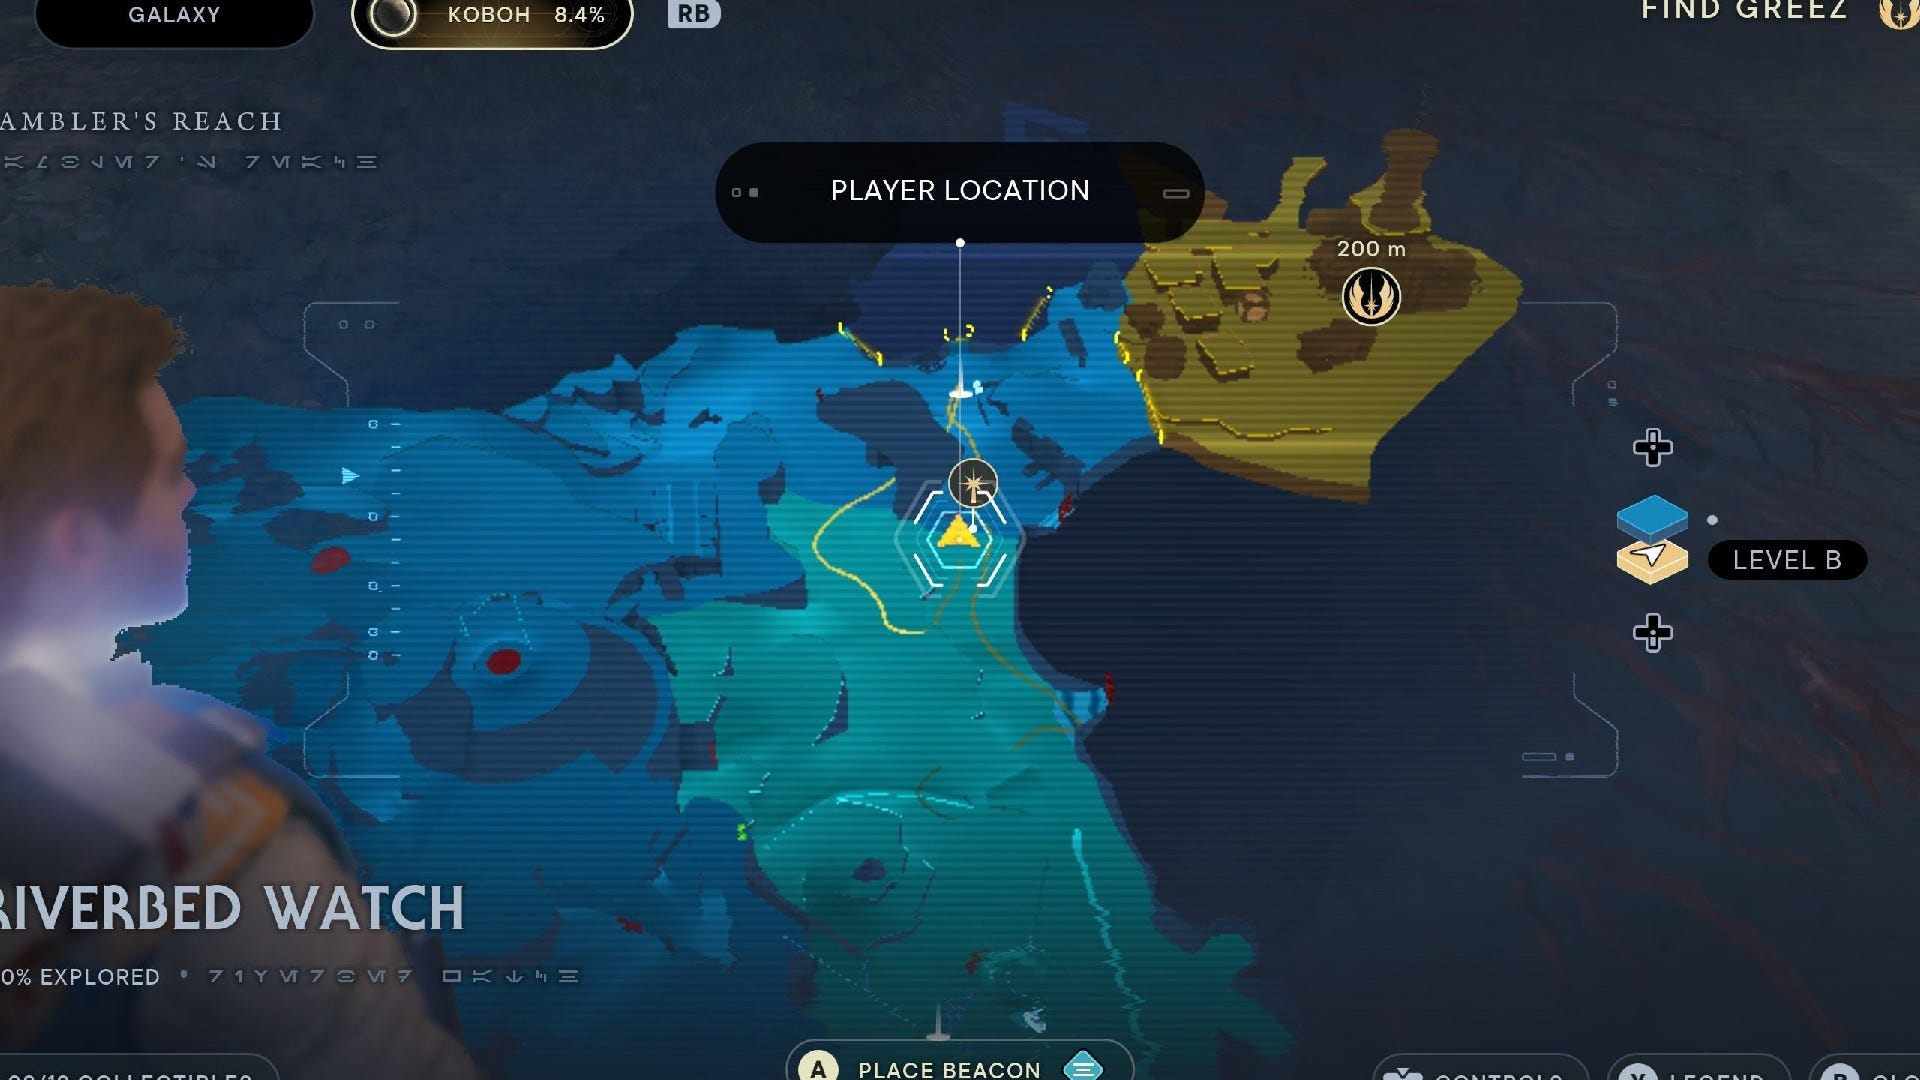
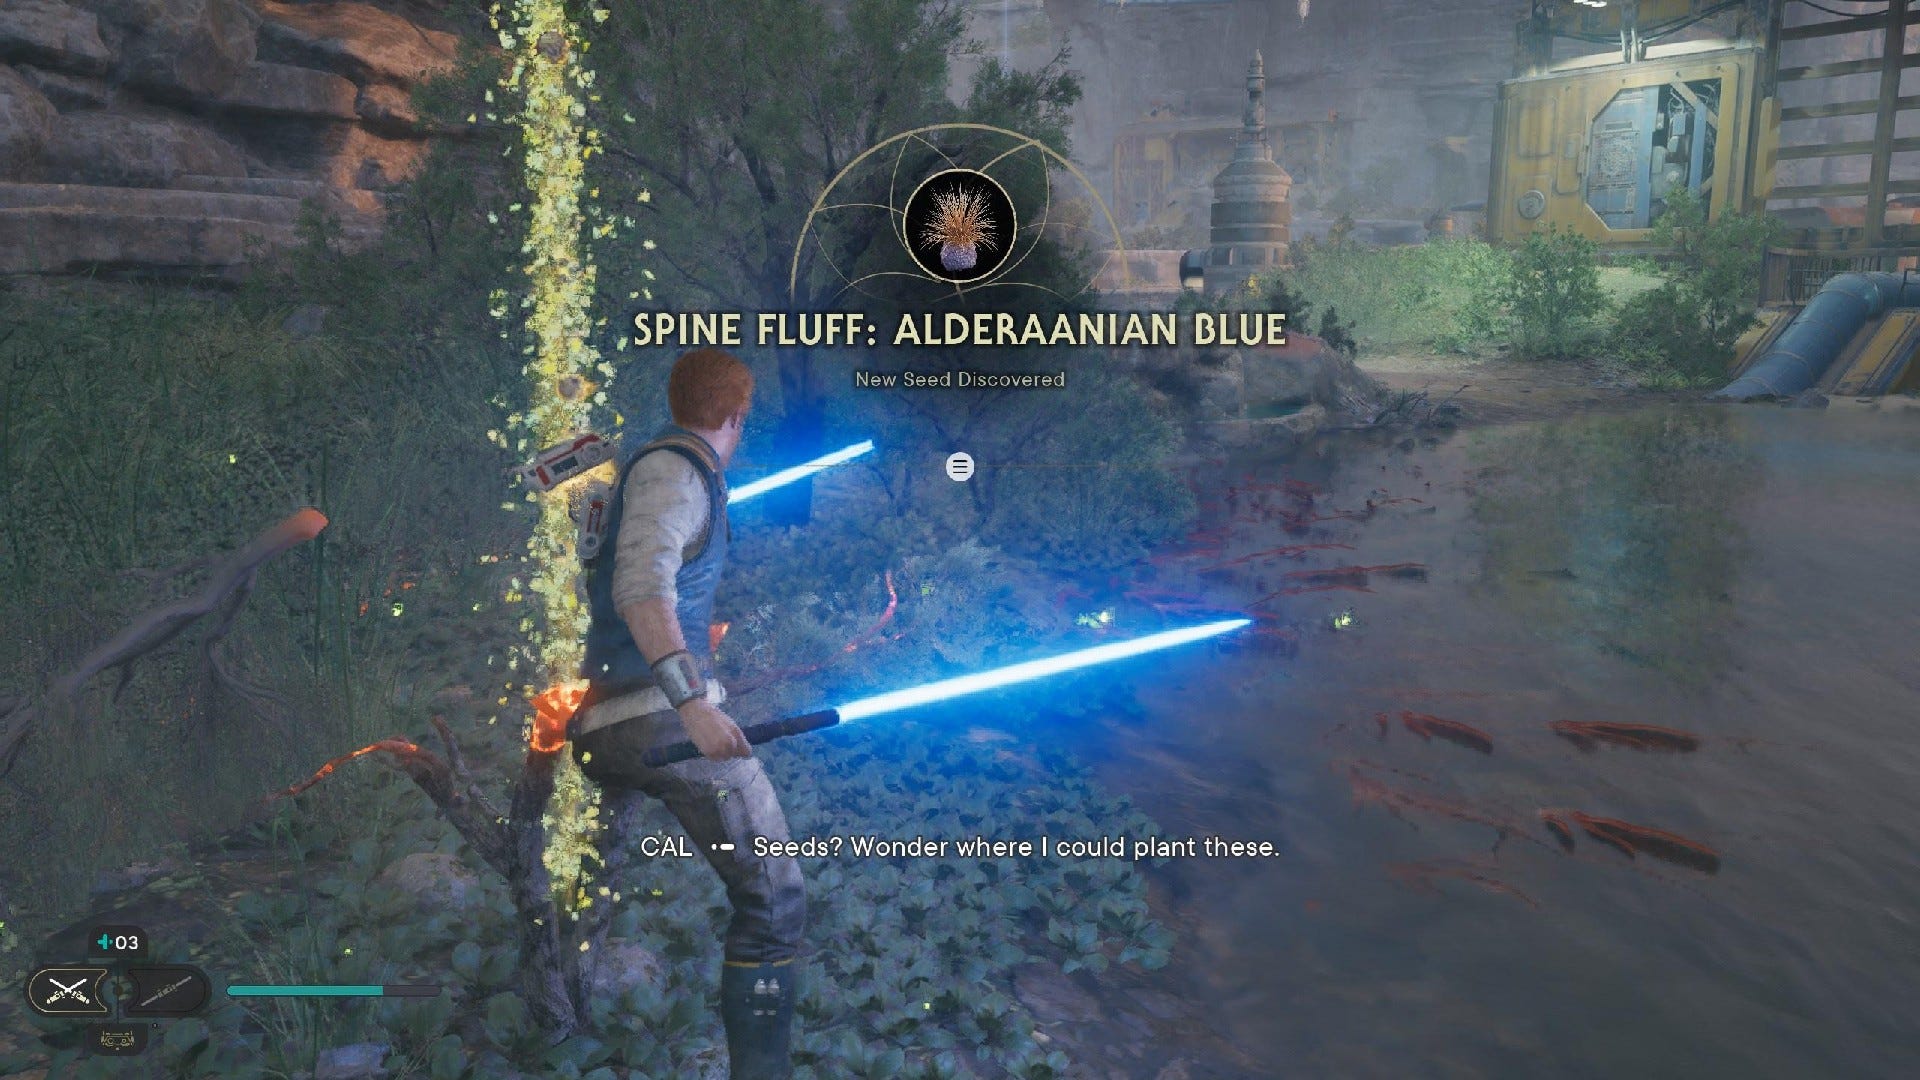
Spine Fluff (Alderaanian Blue): On the riverside path between the Riverbed Watch Meditation Point and the Rambler’s Reach Outpost Meditation Point.
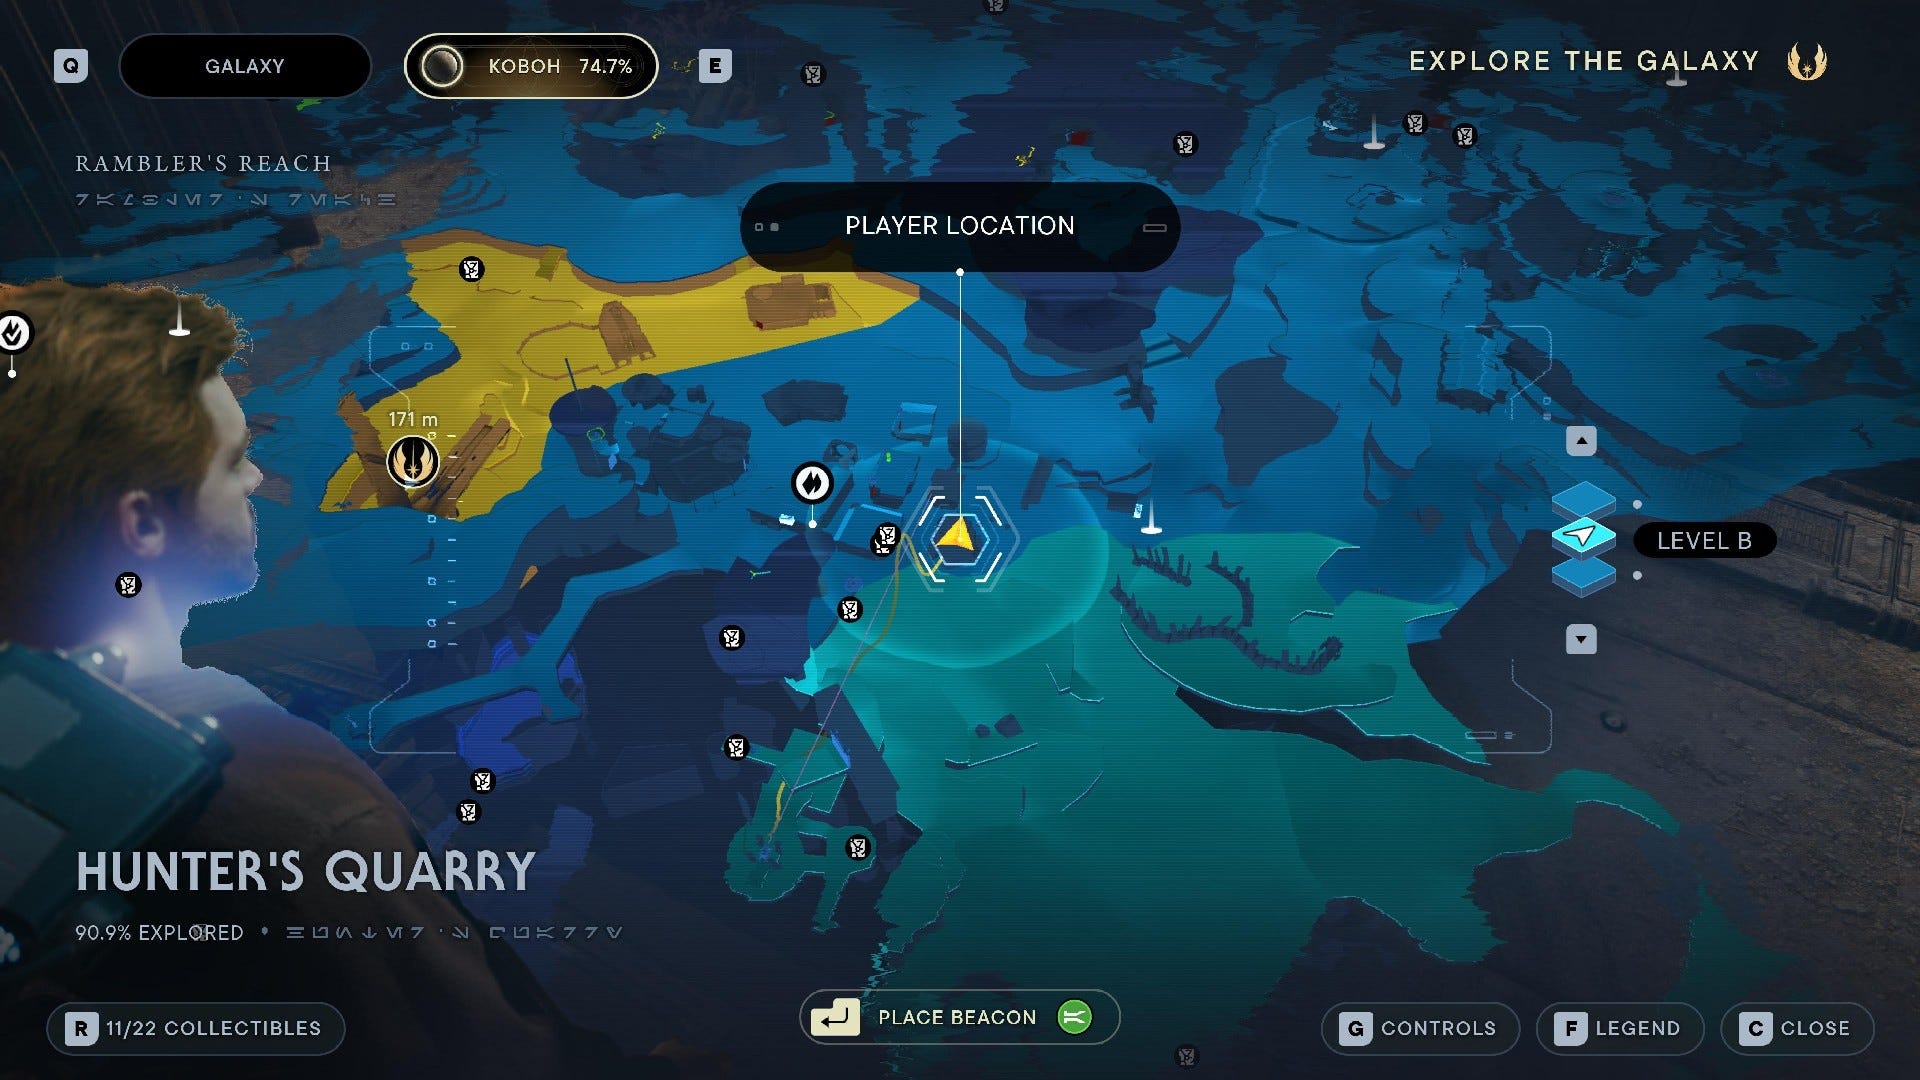
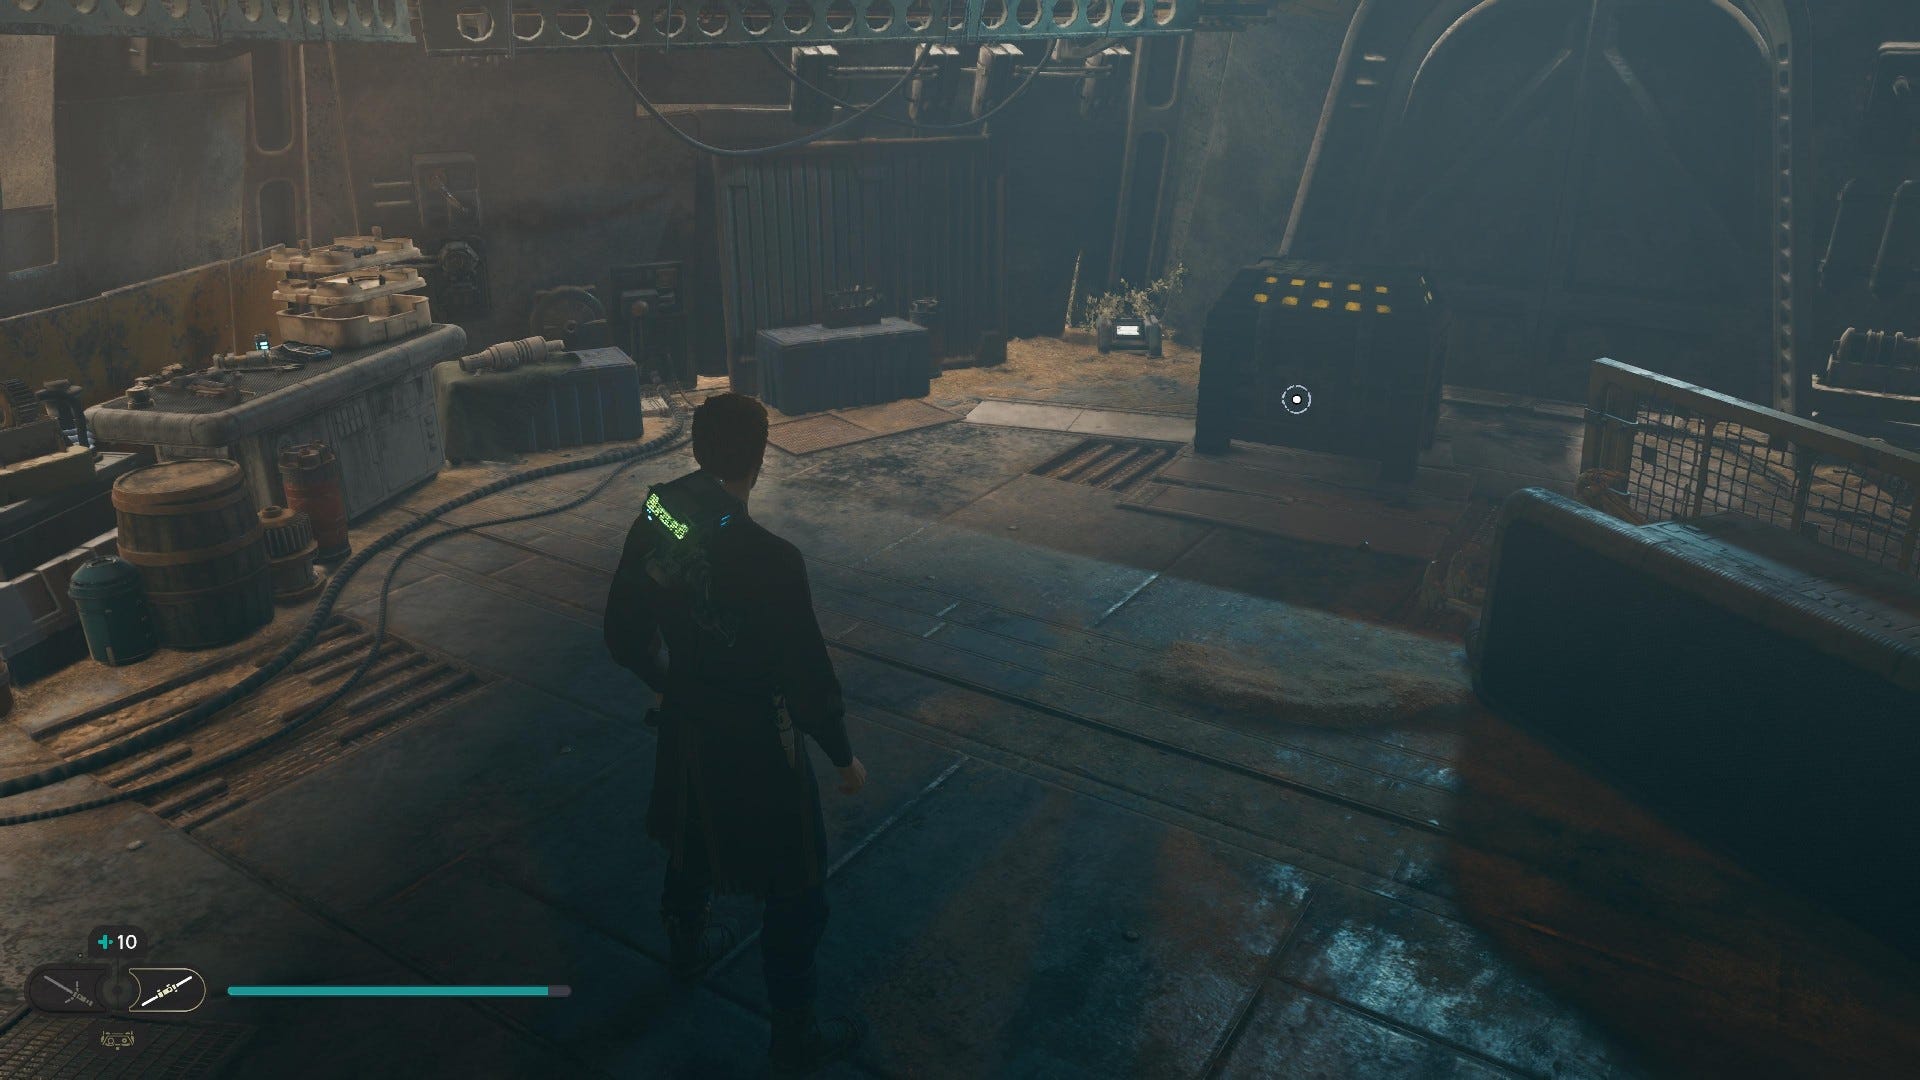
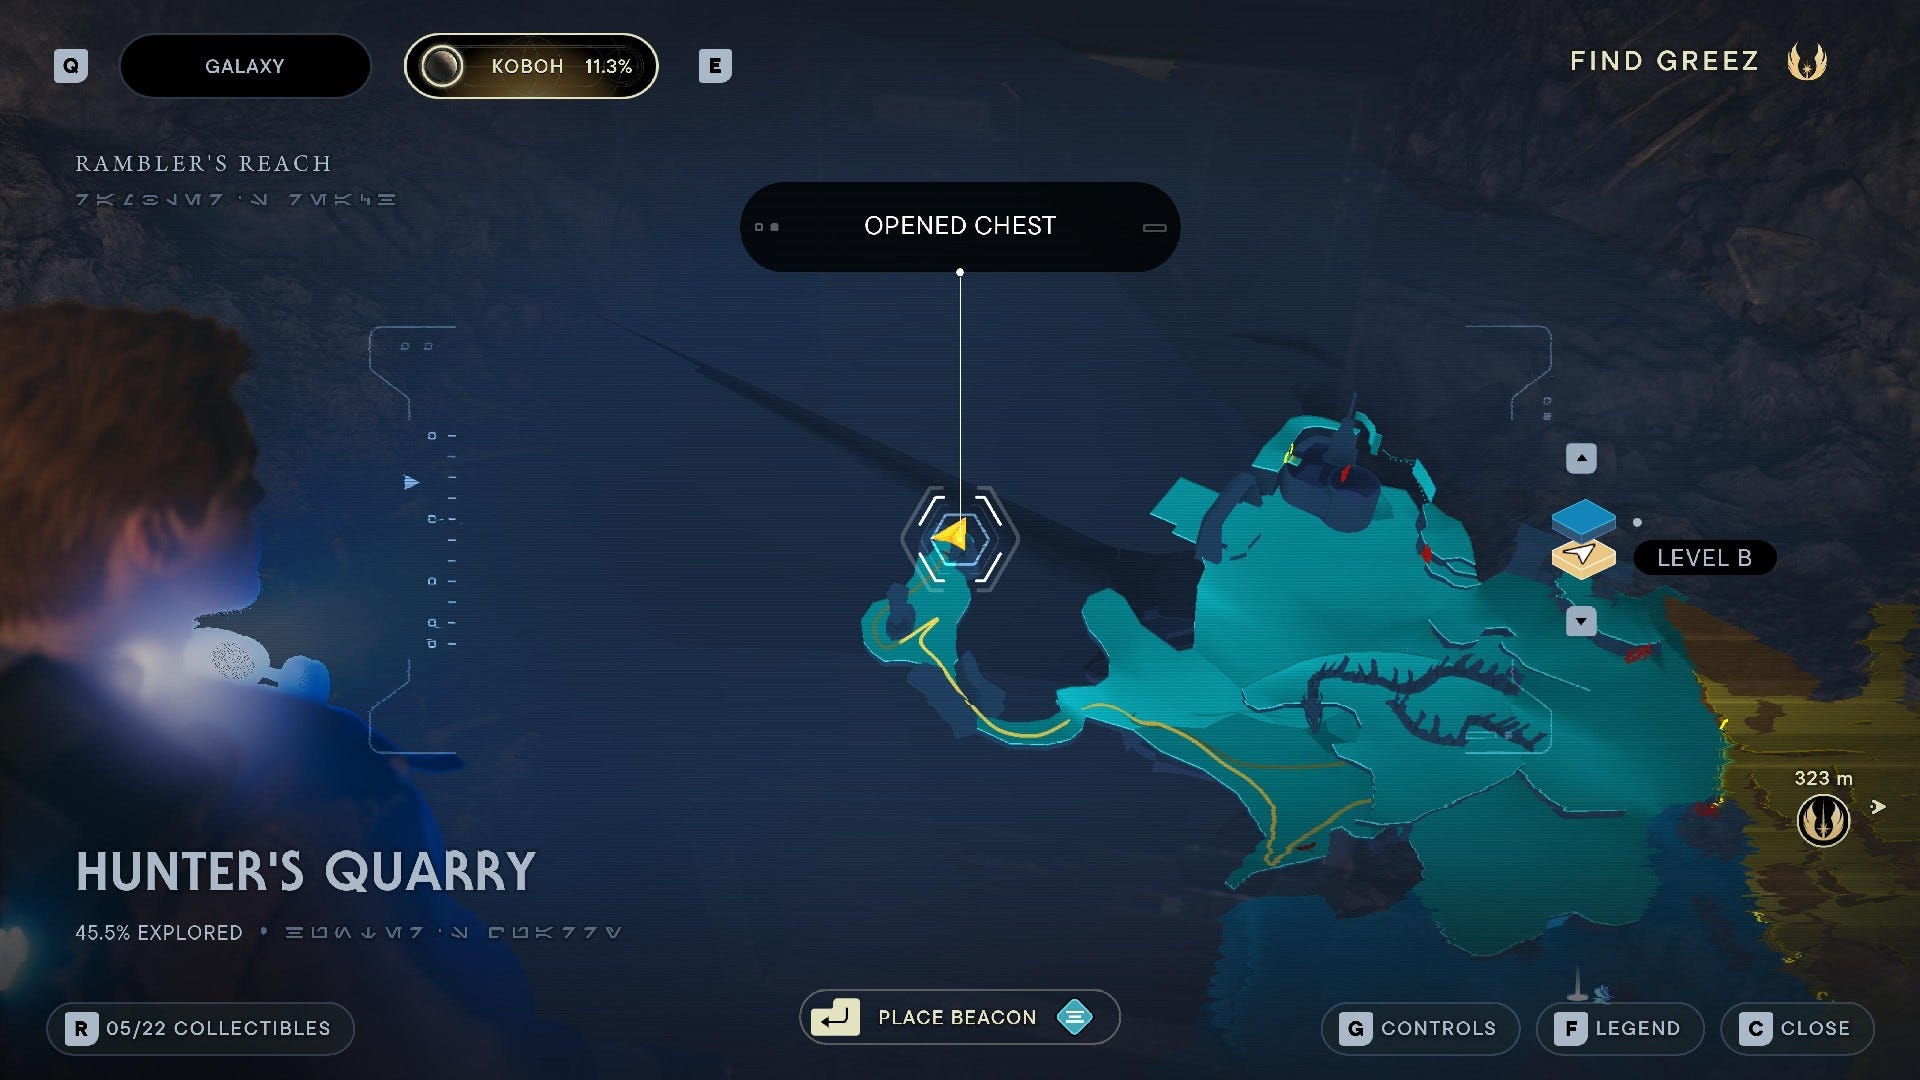
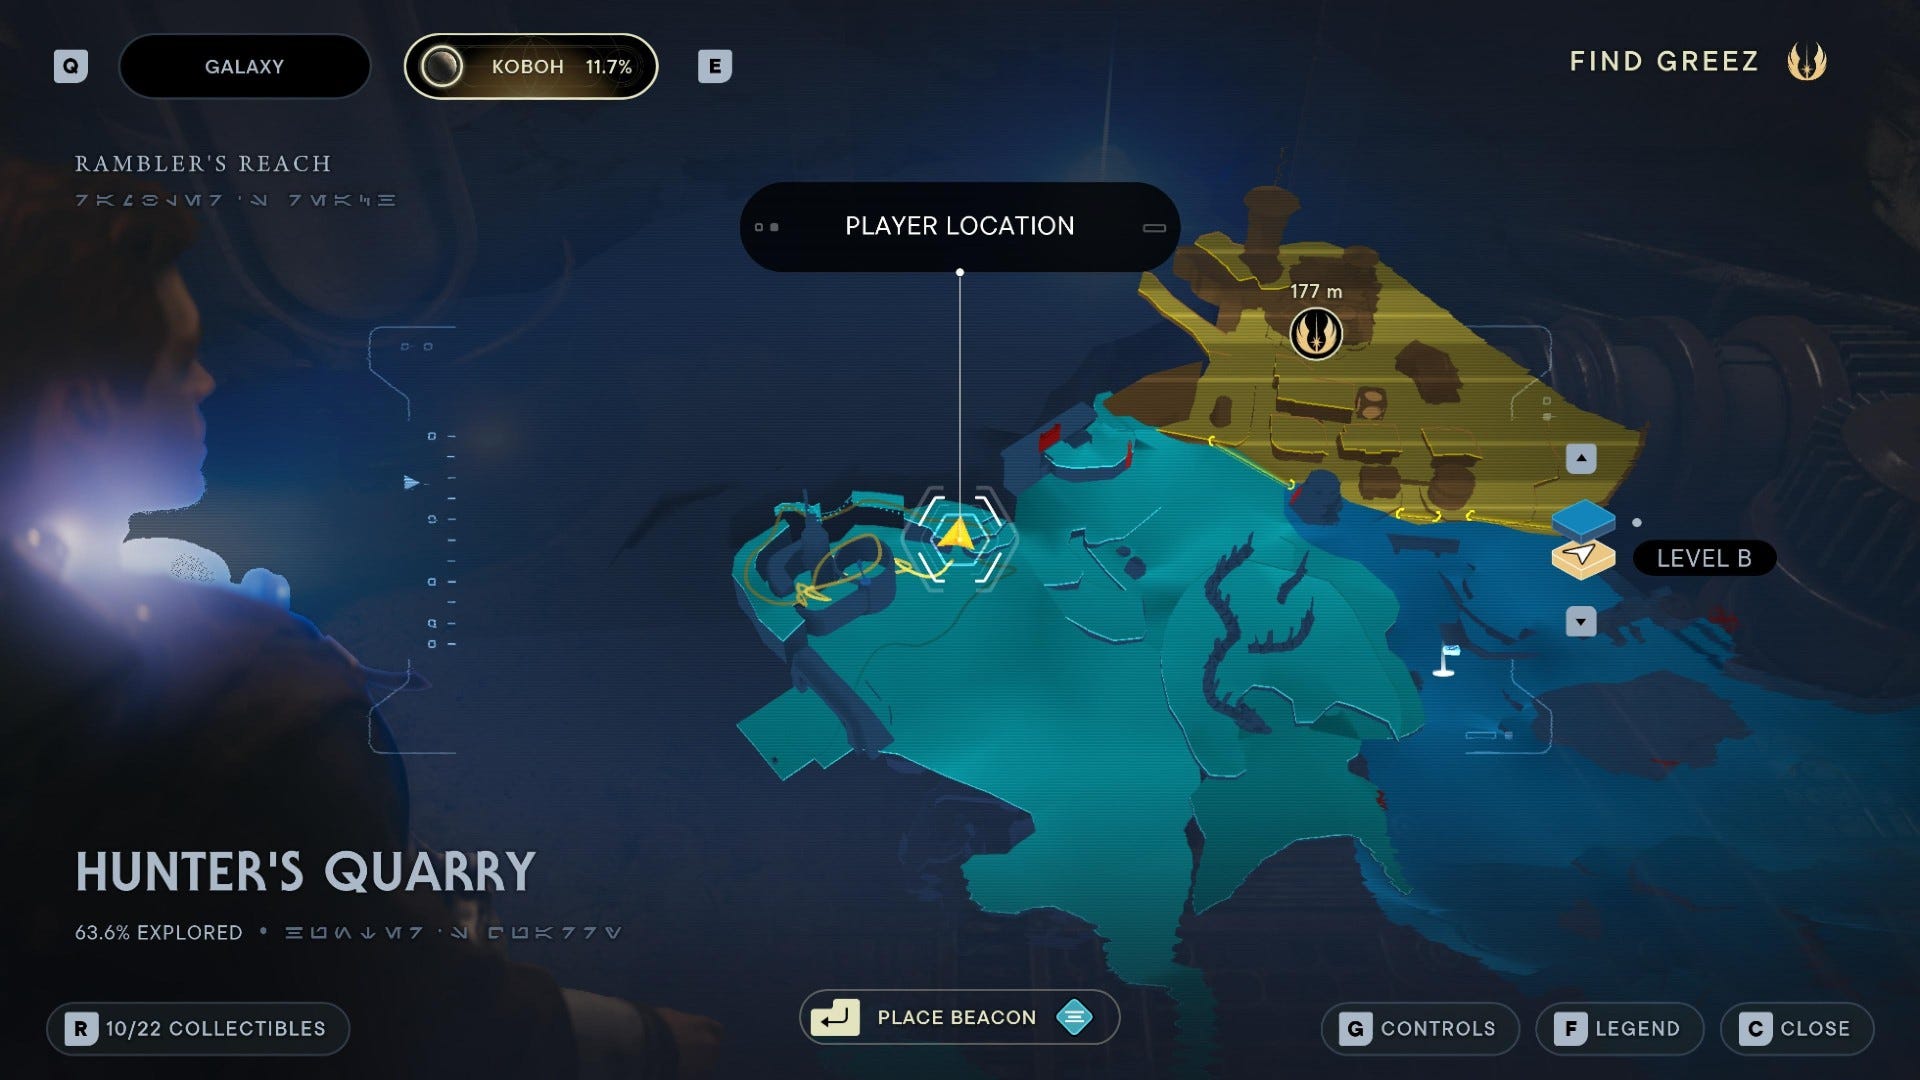
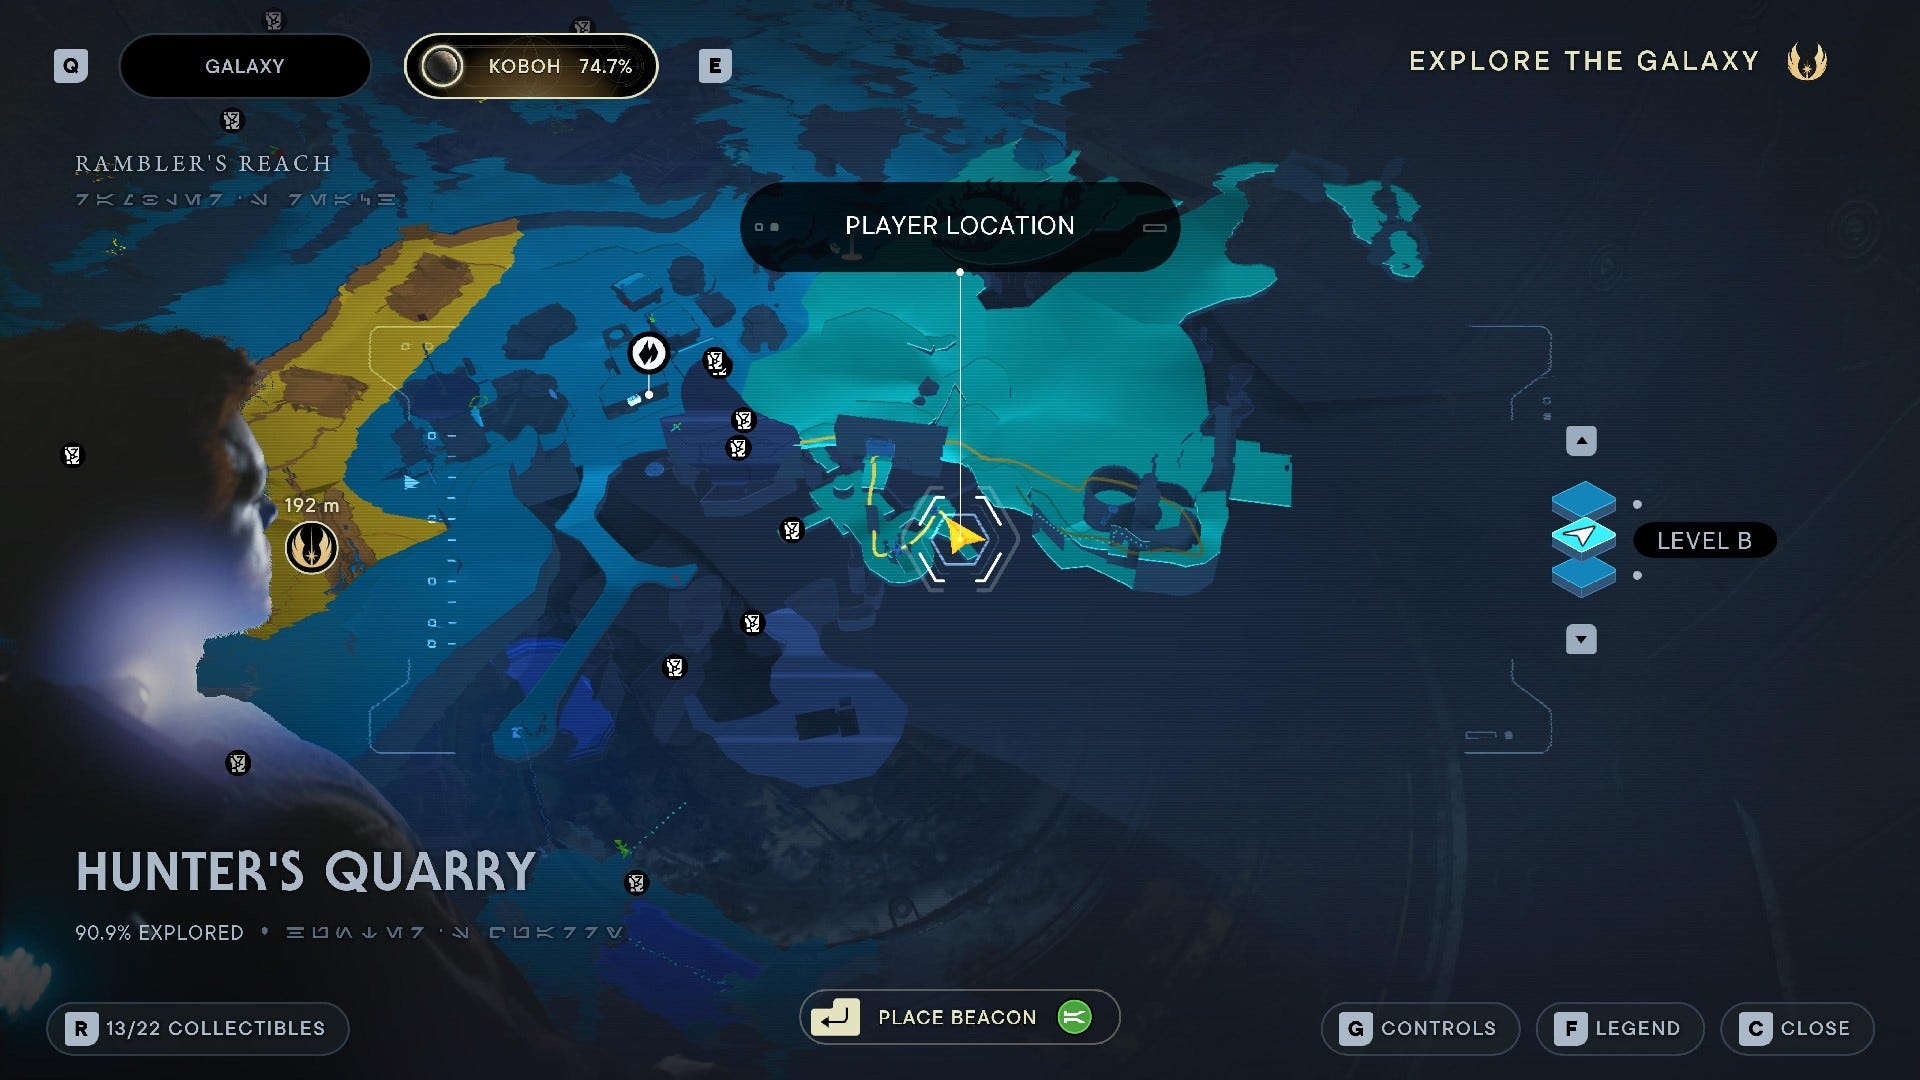
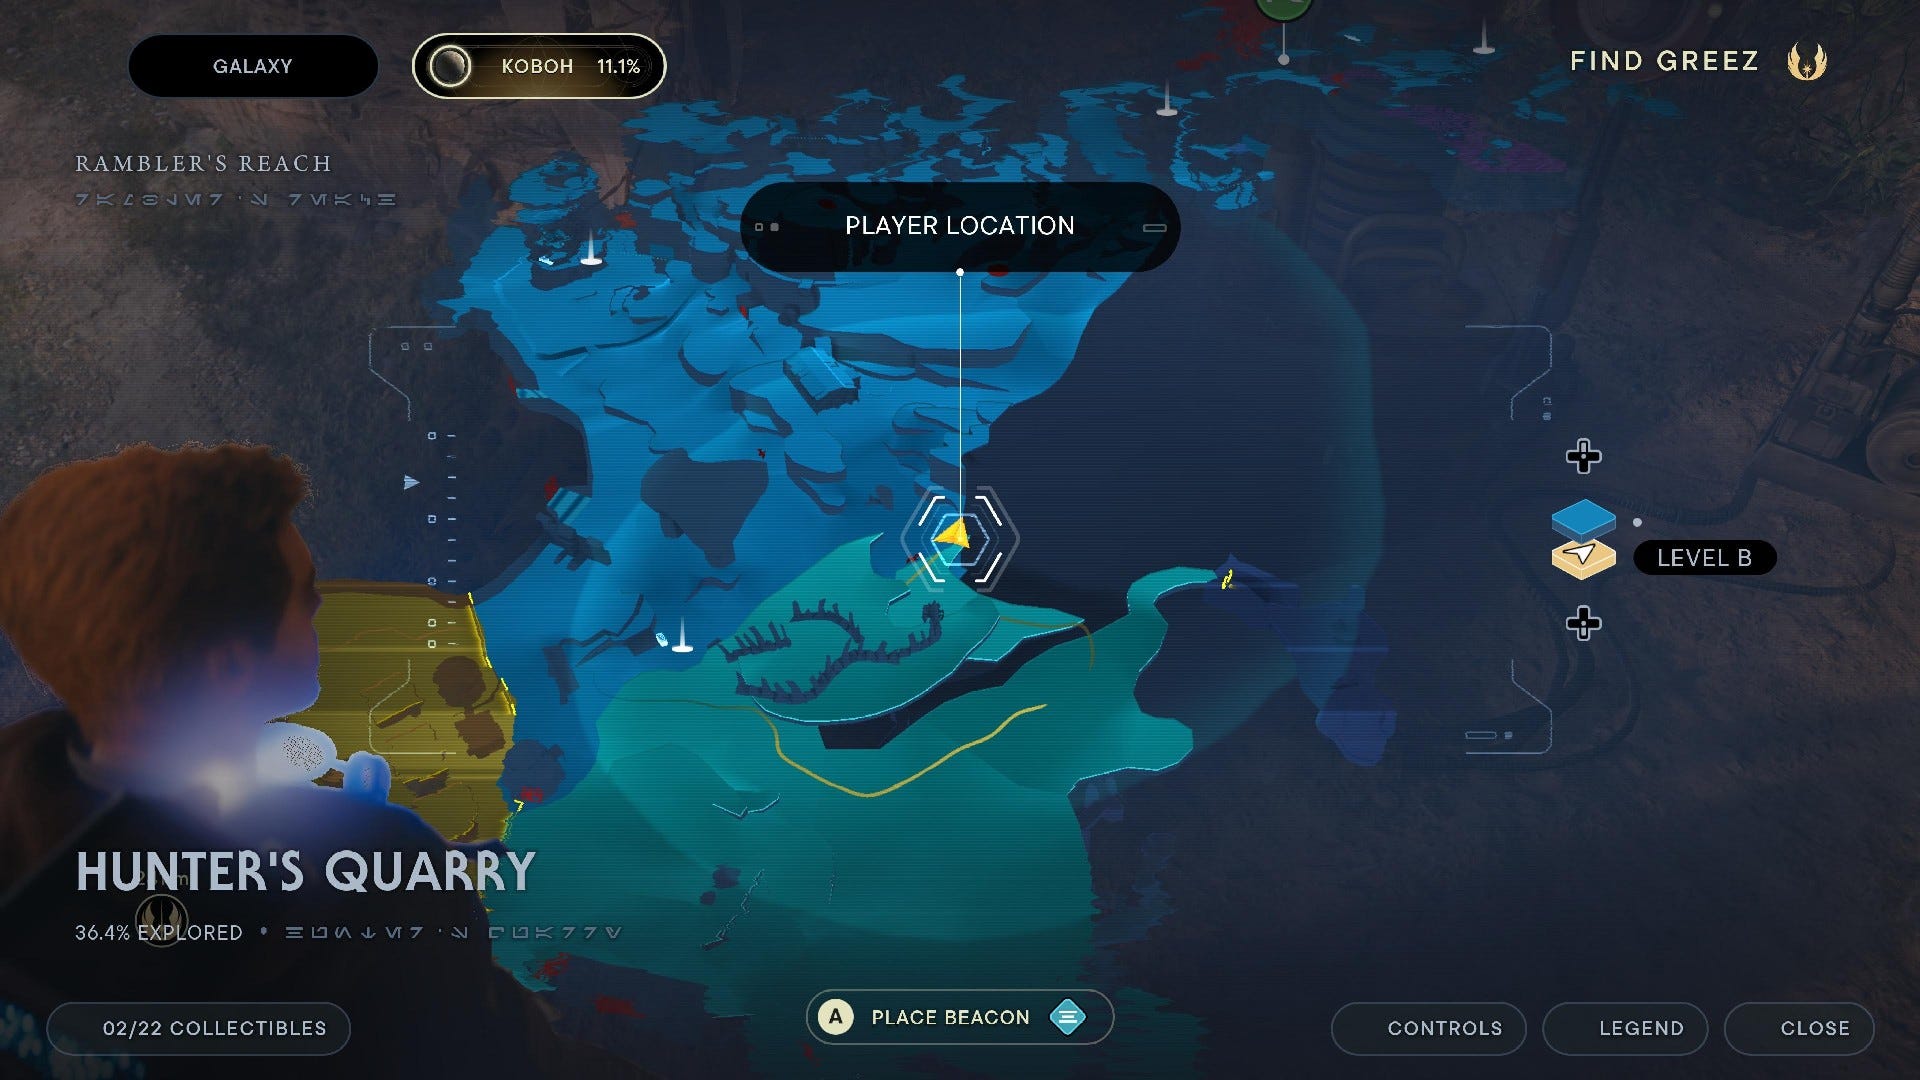
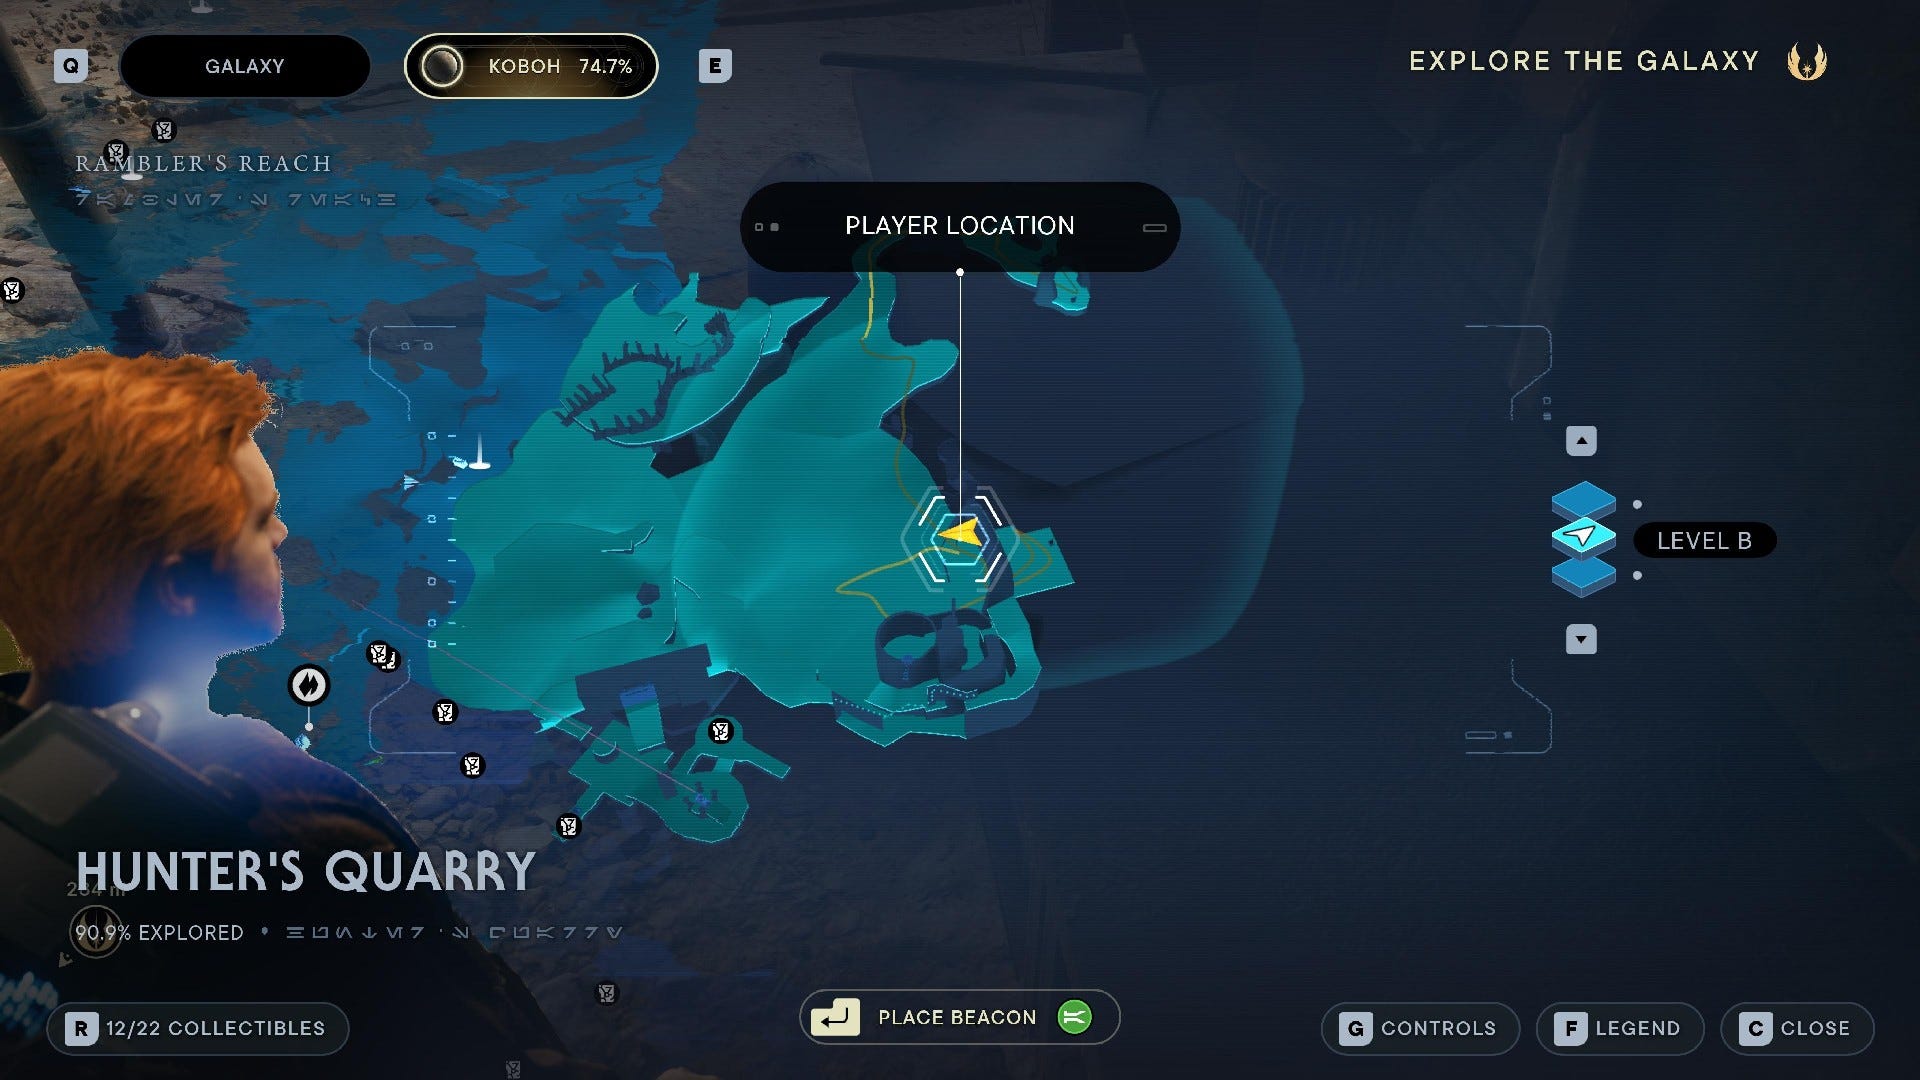
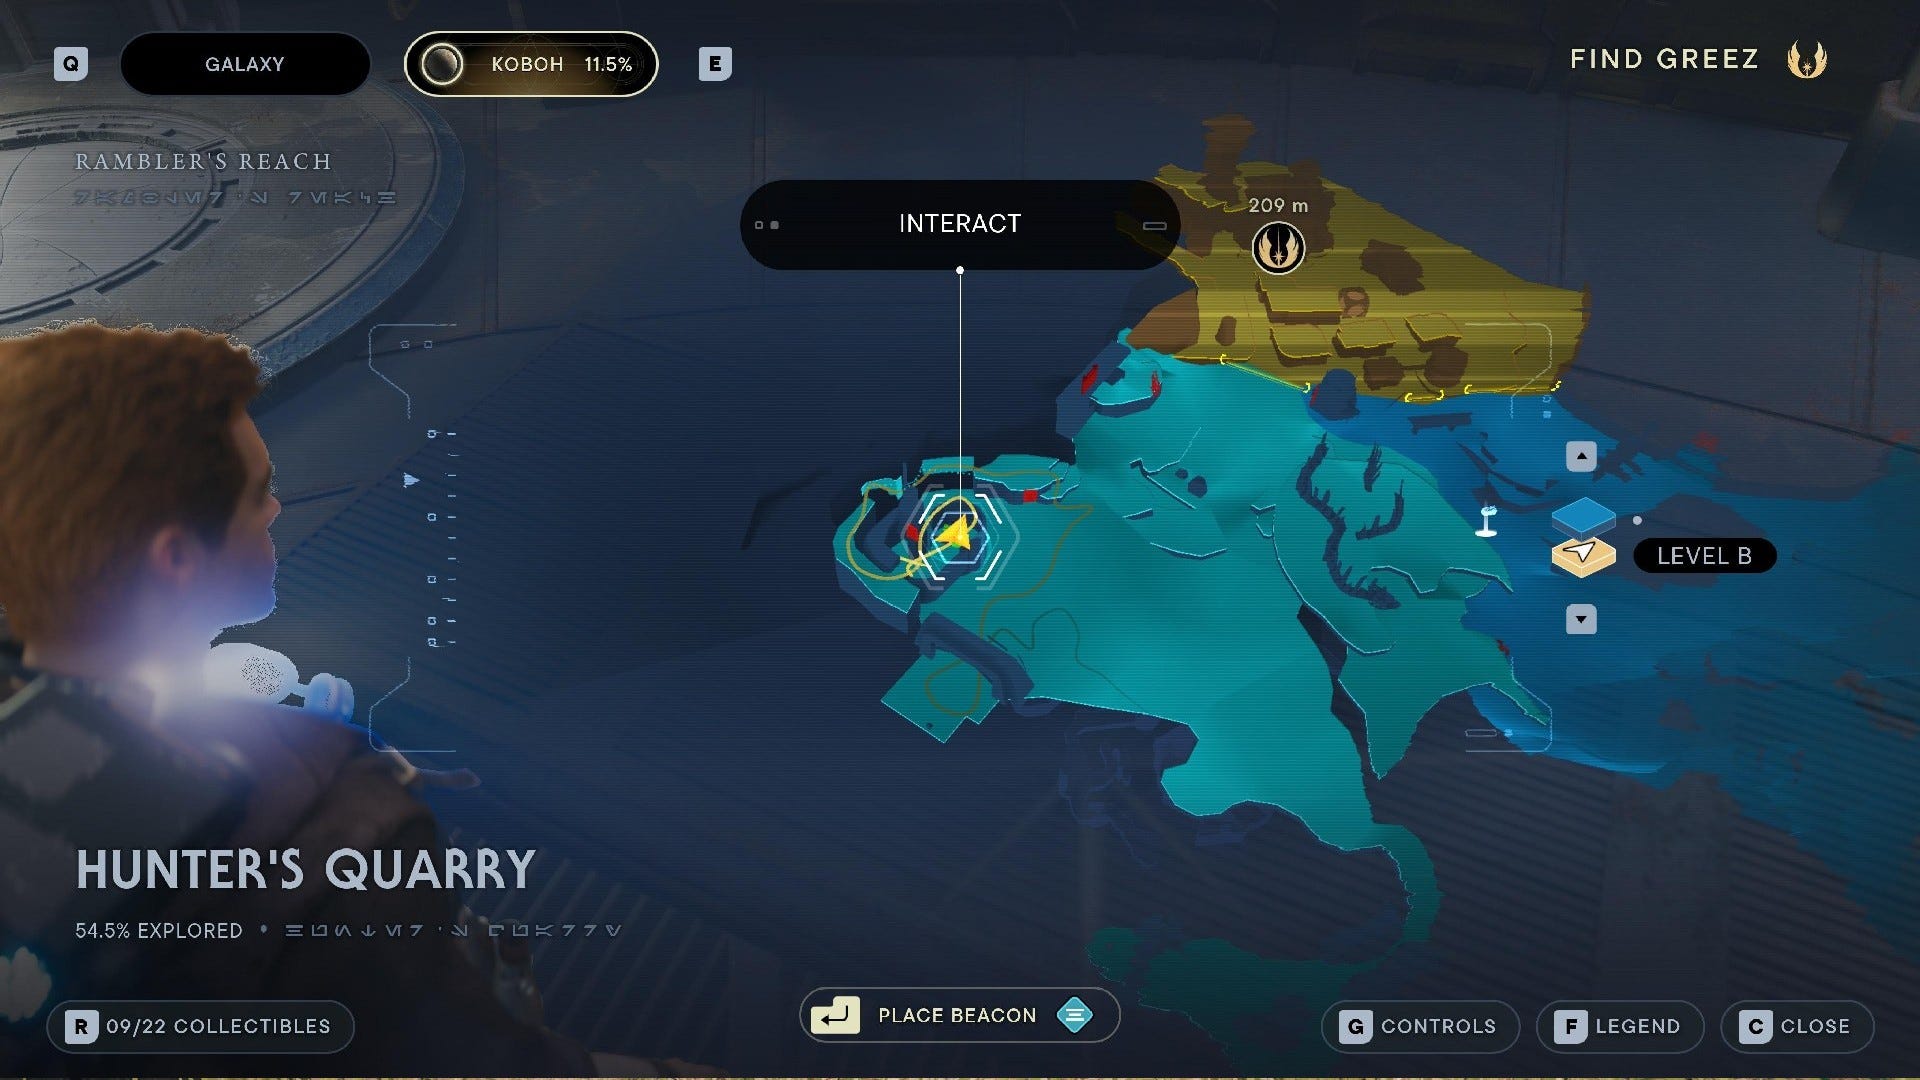
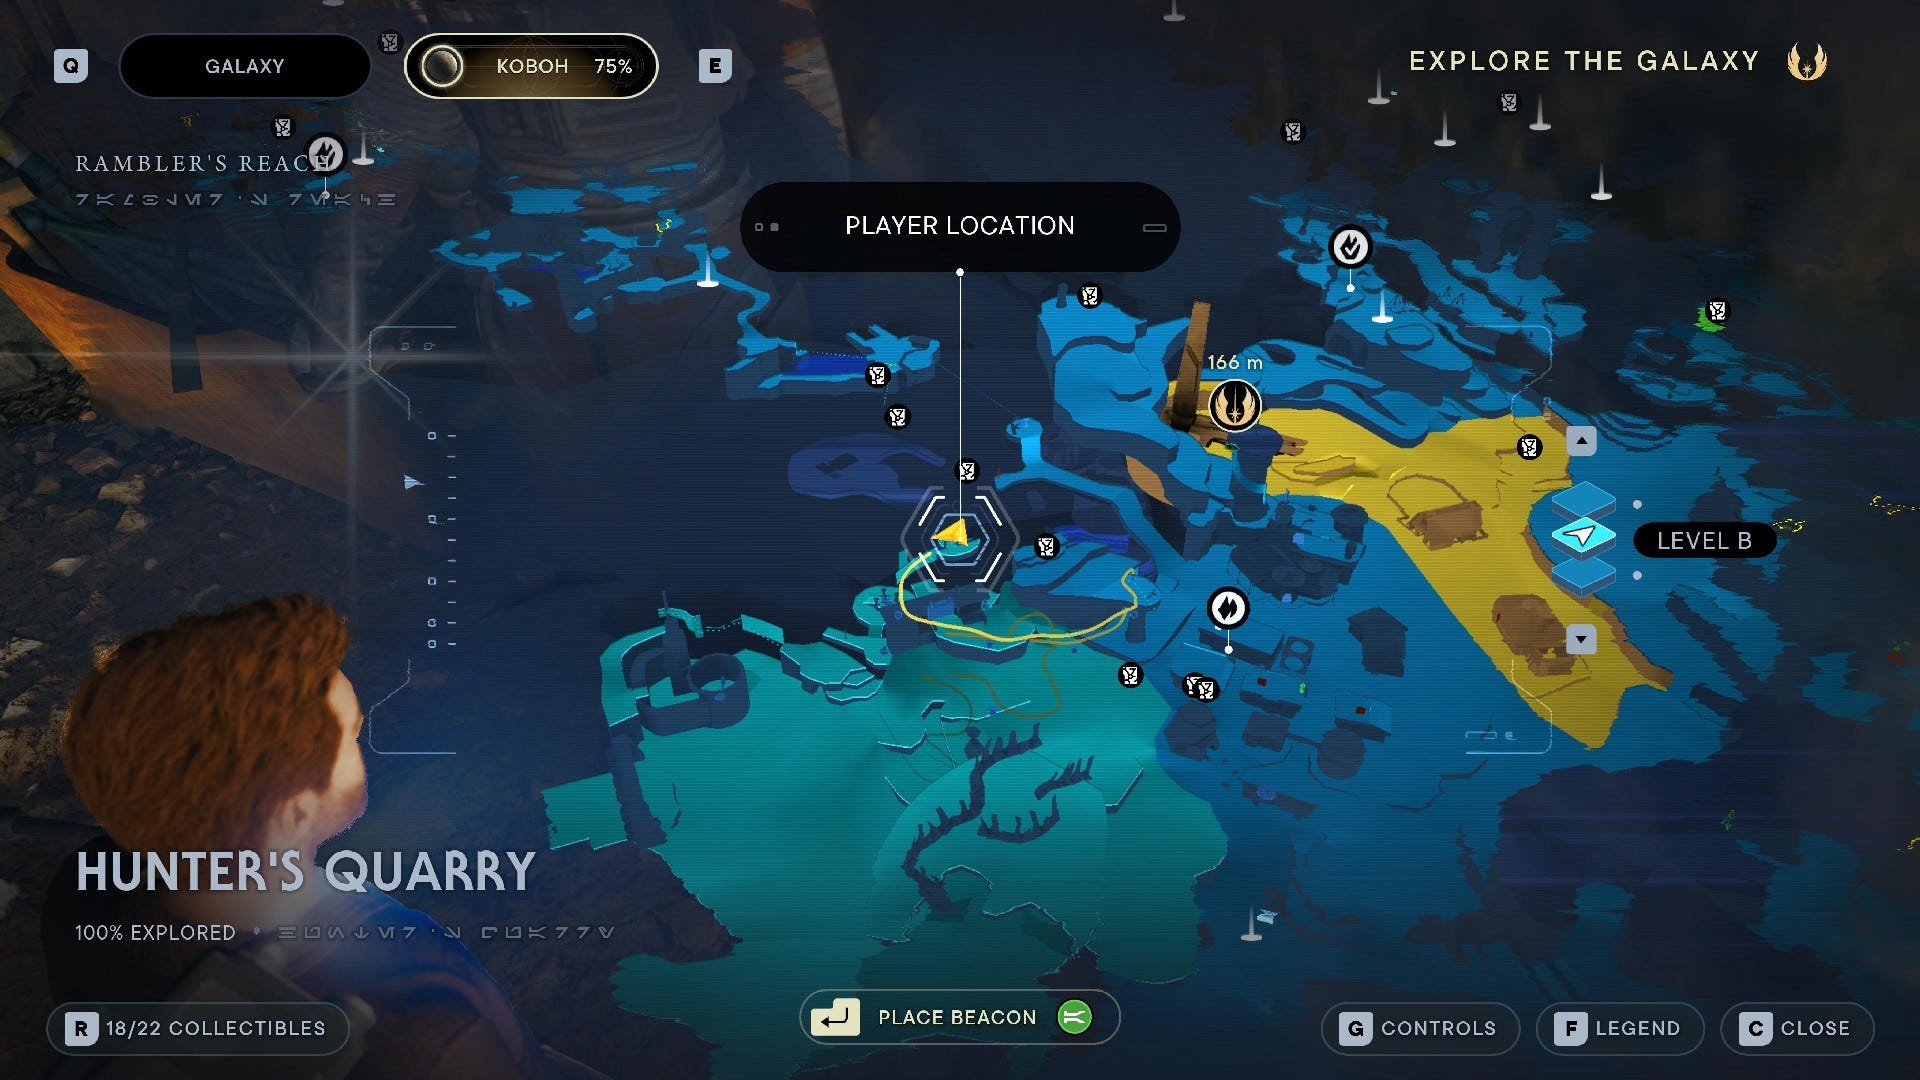
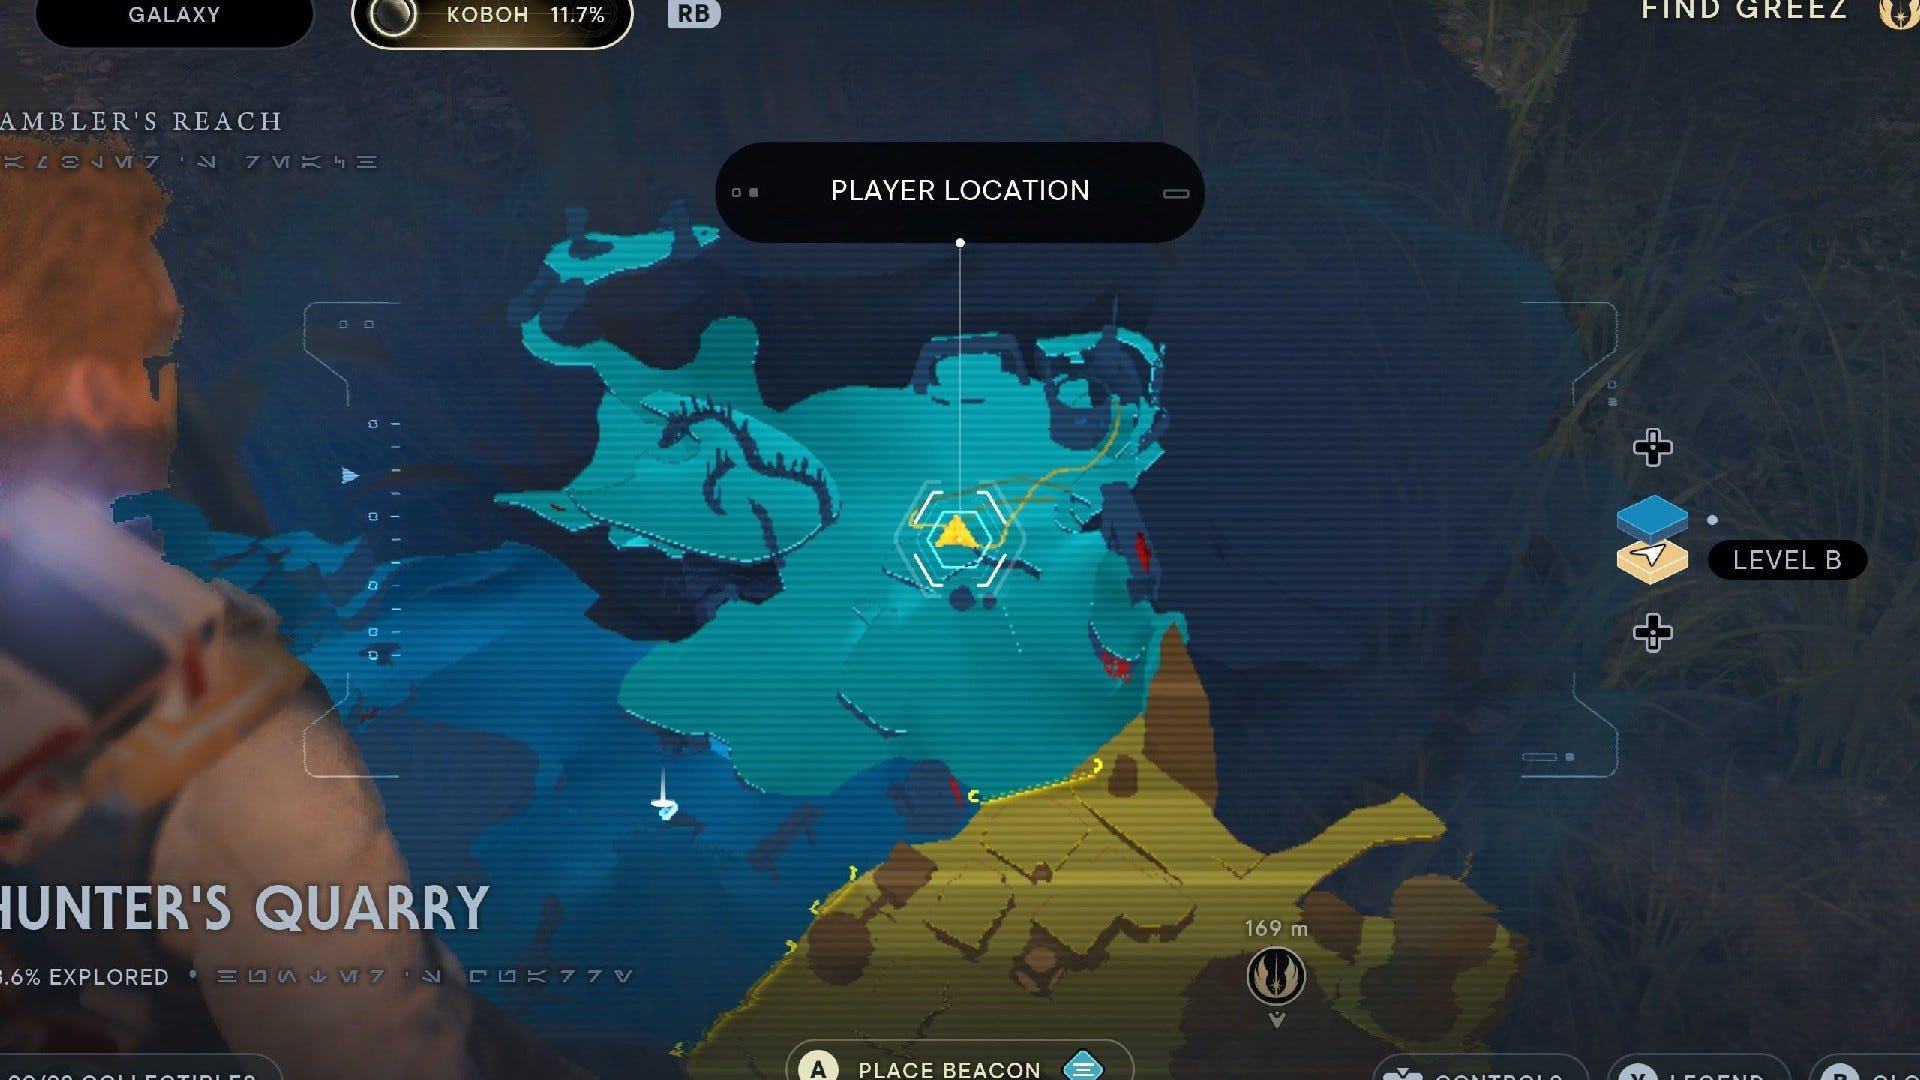
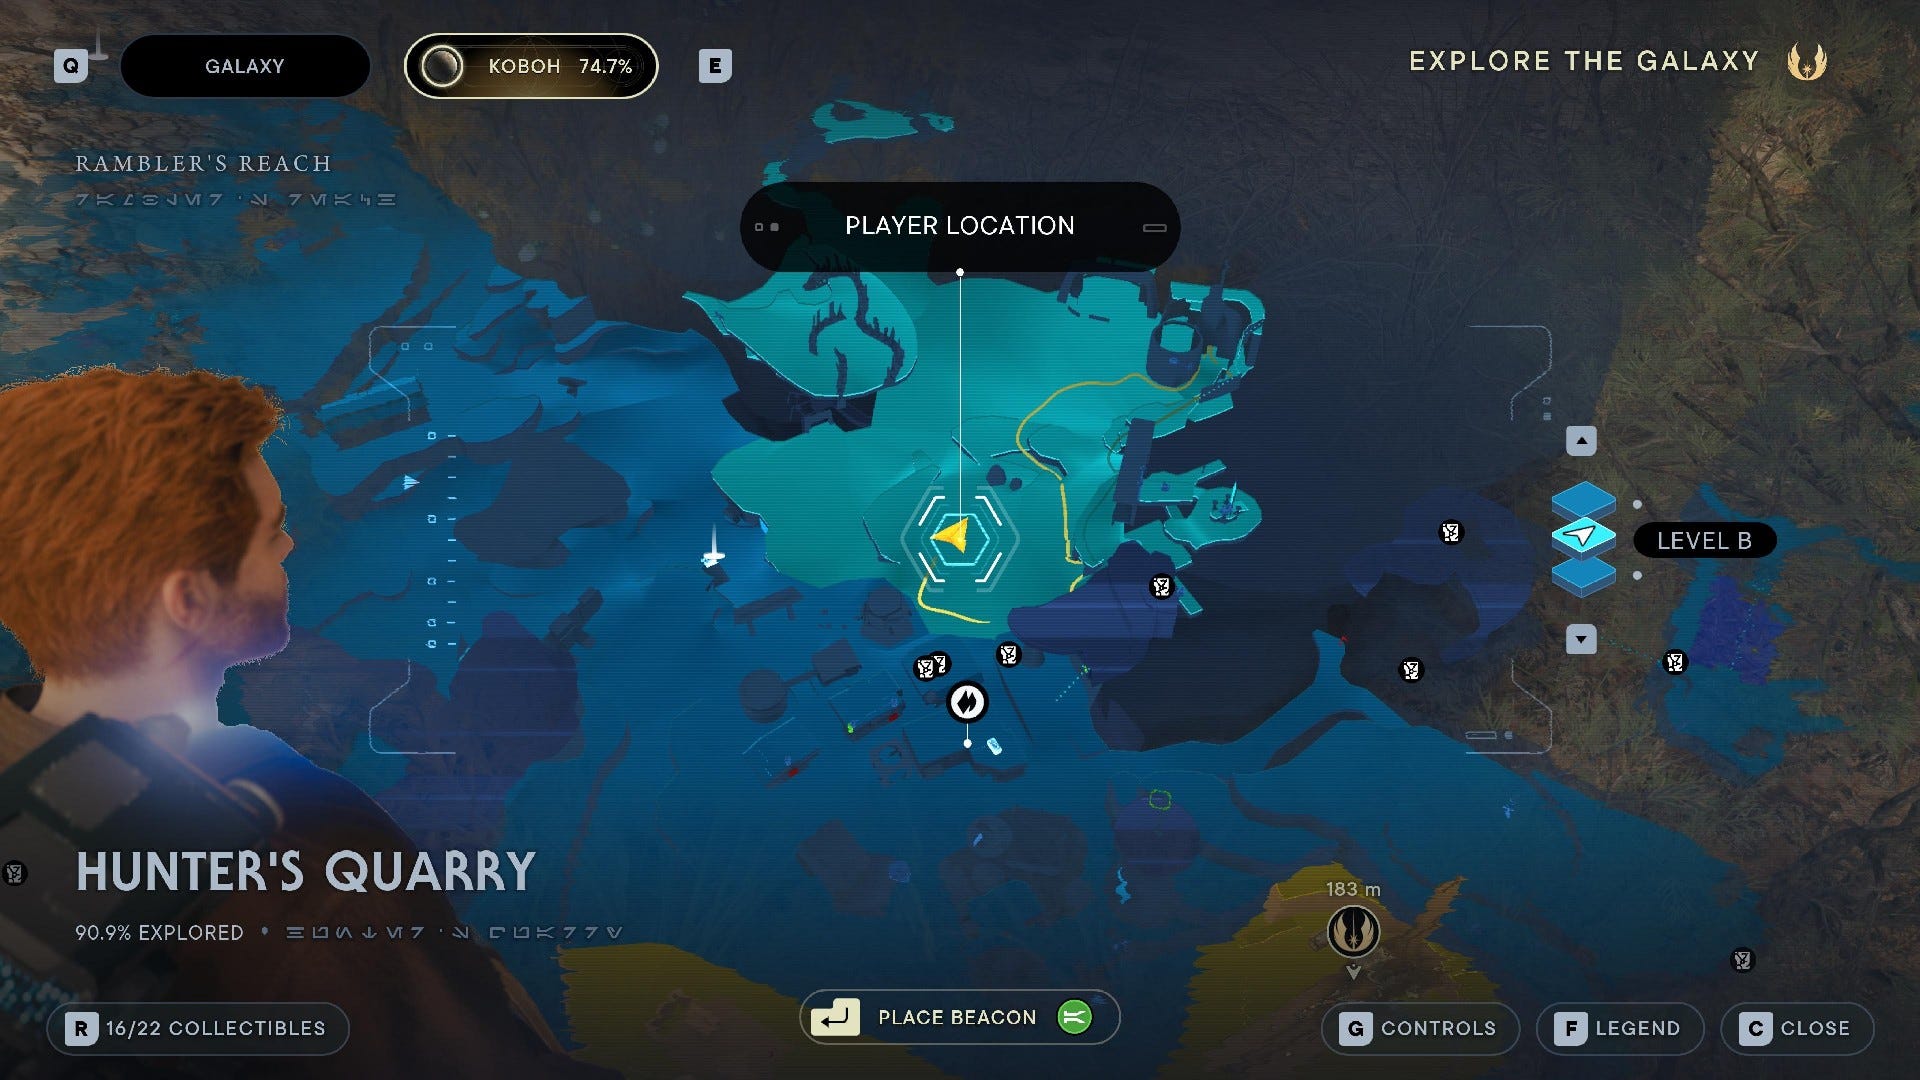
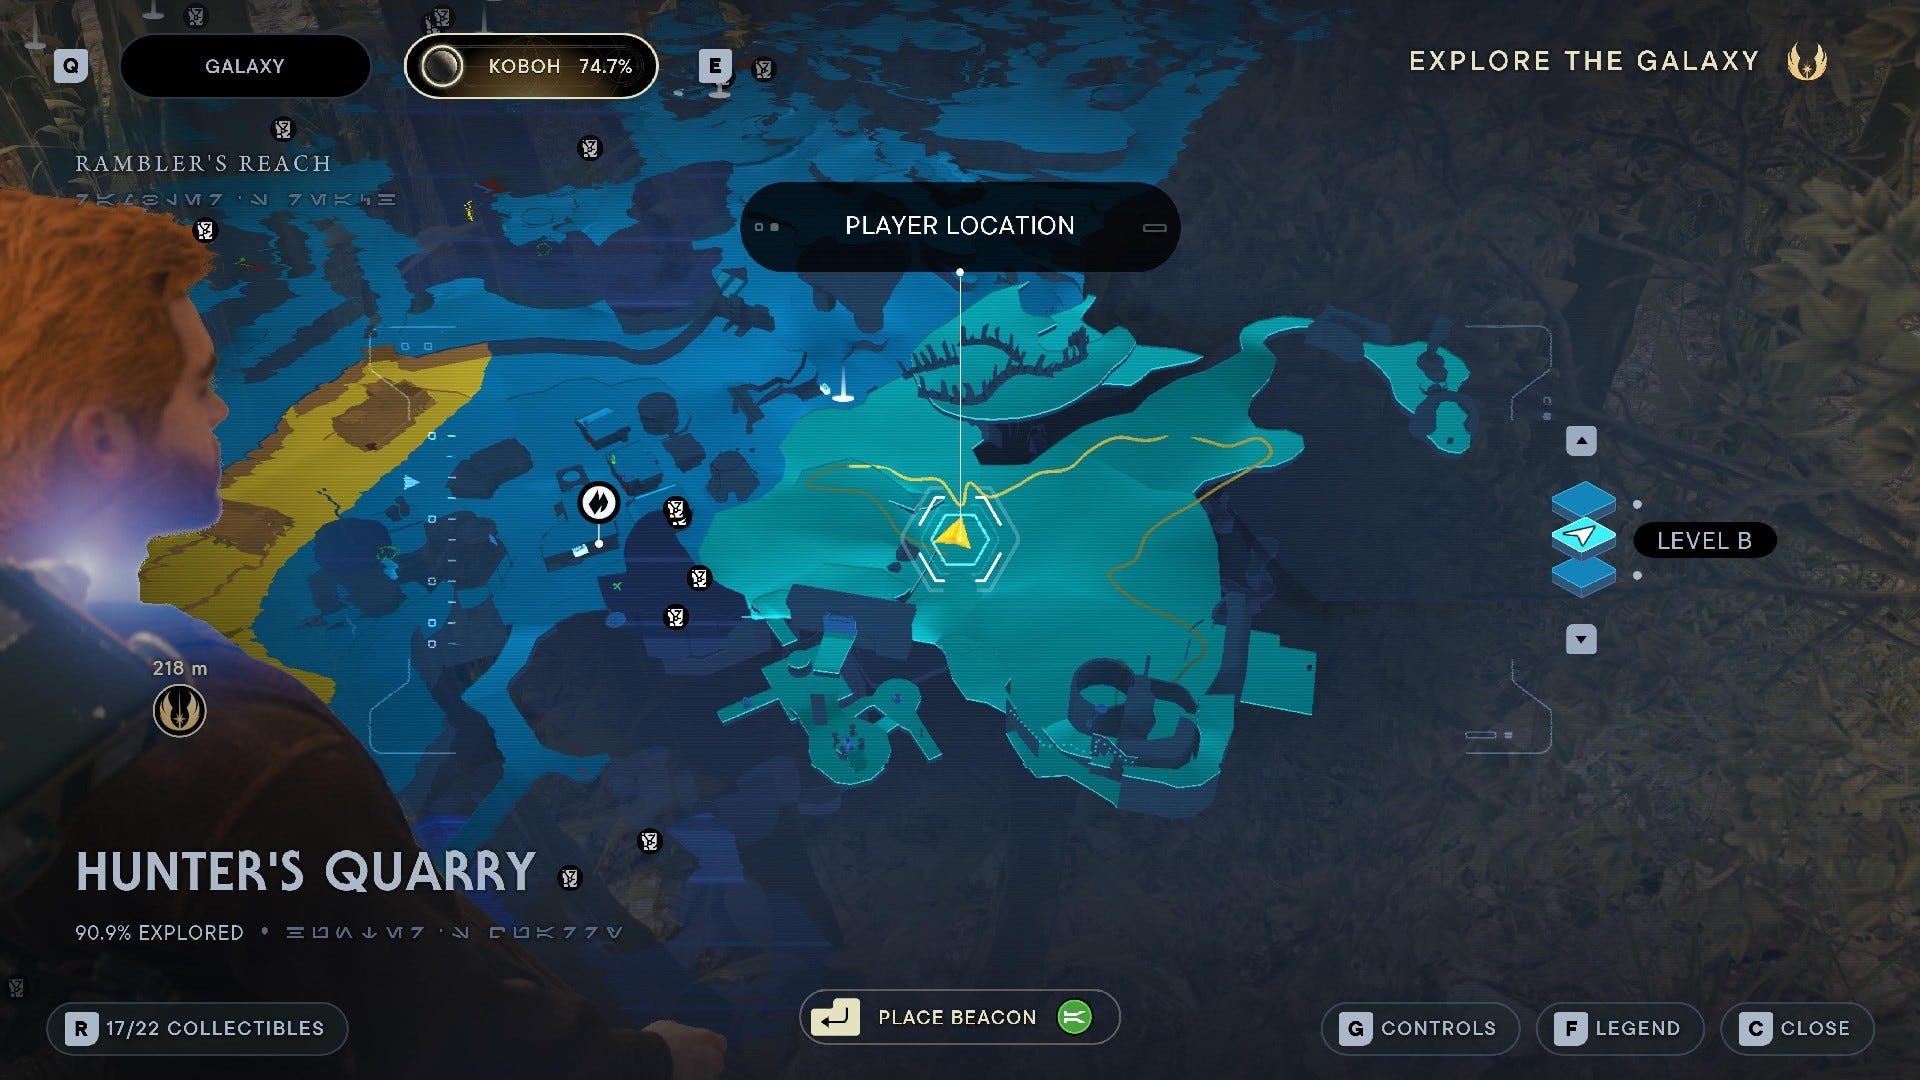
Hunter’s Quarry collectibles
Hunter’s Quarry Chests:

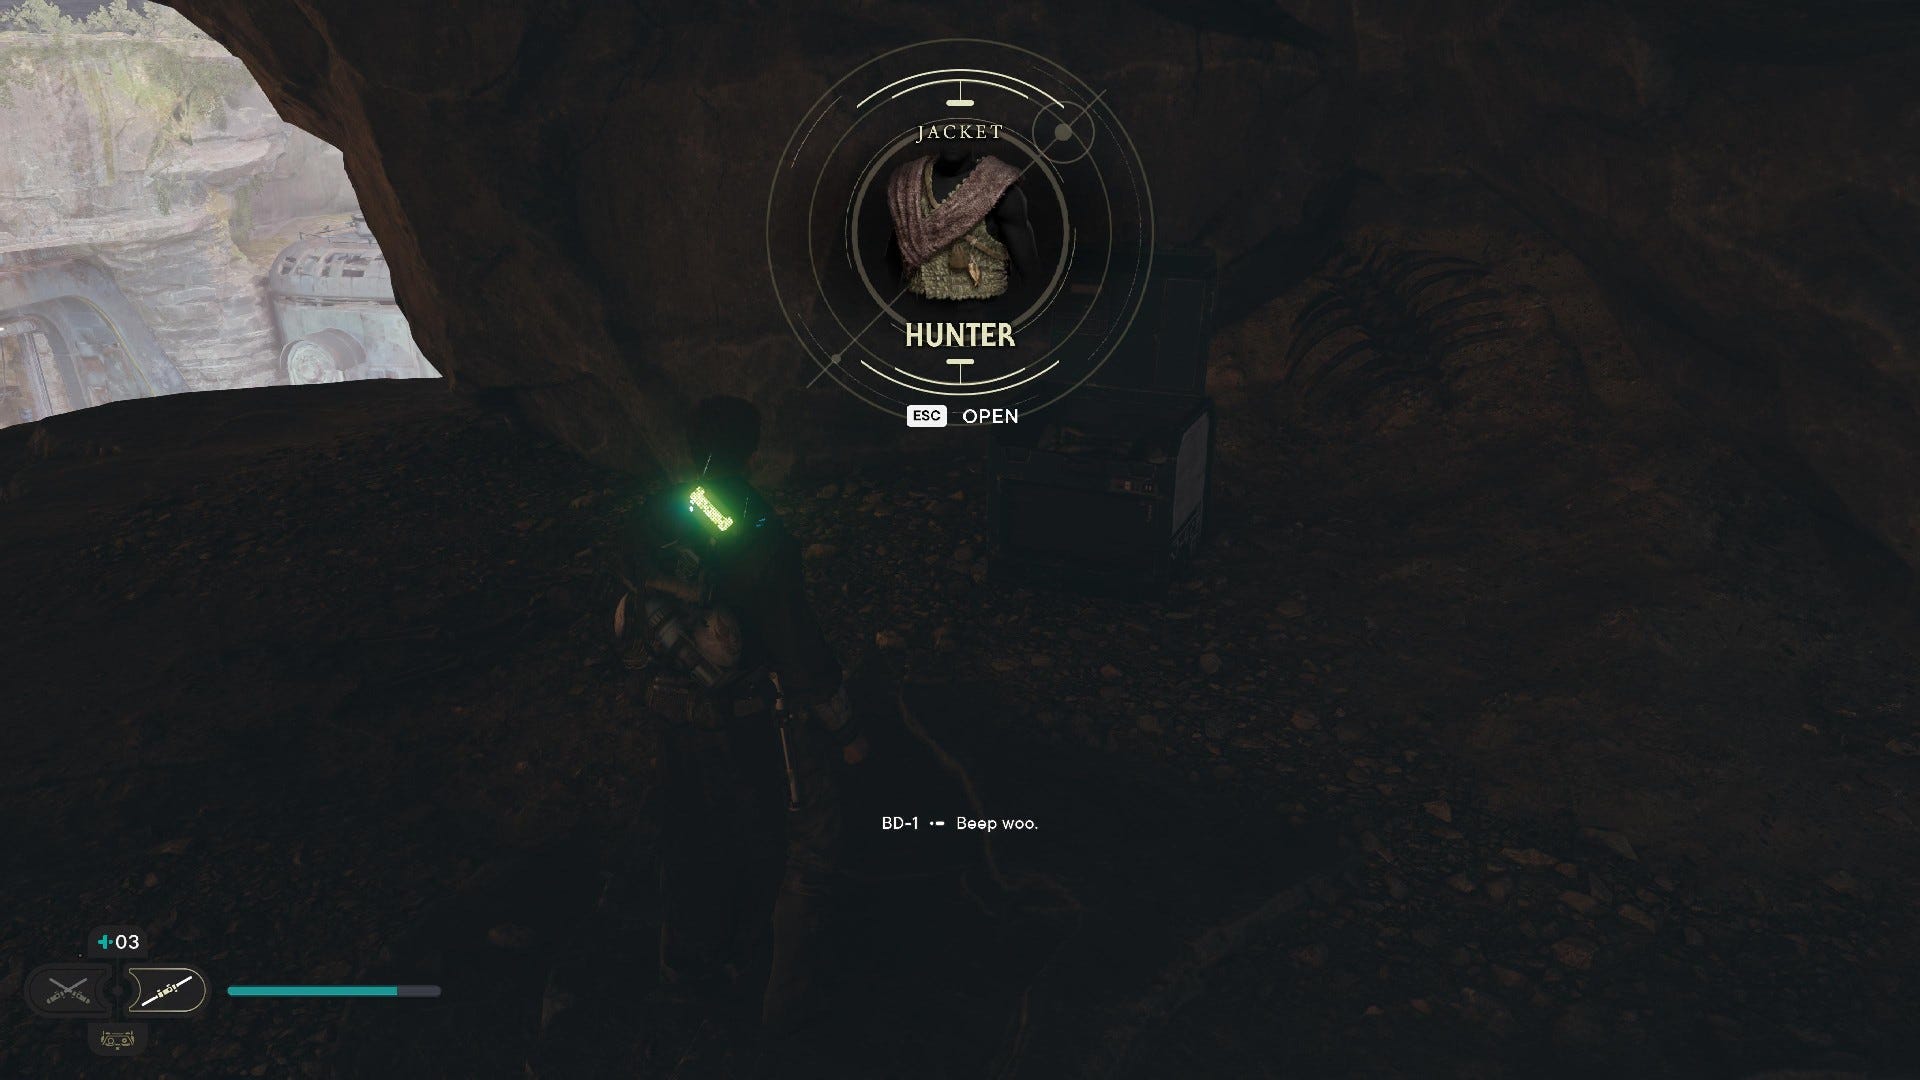
Chest #1 (Hunter Jacket): Up the left-hand ledge in Hunter’s Quarry. Guarded by Gorocco.

Chest #2 (Bomber Jacket): Up the slope in Hunter’s Quarry, past all the Gorgers.
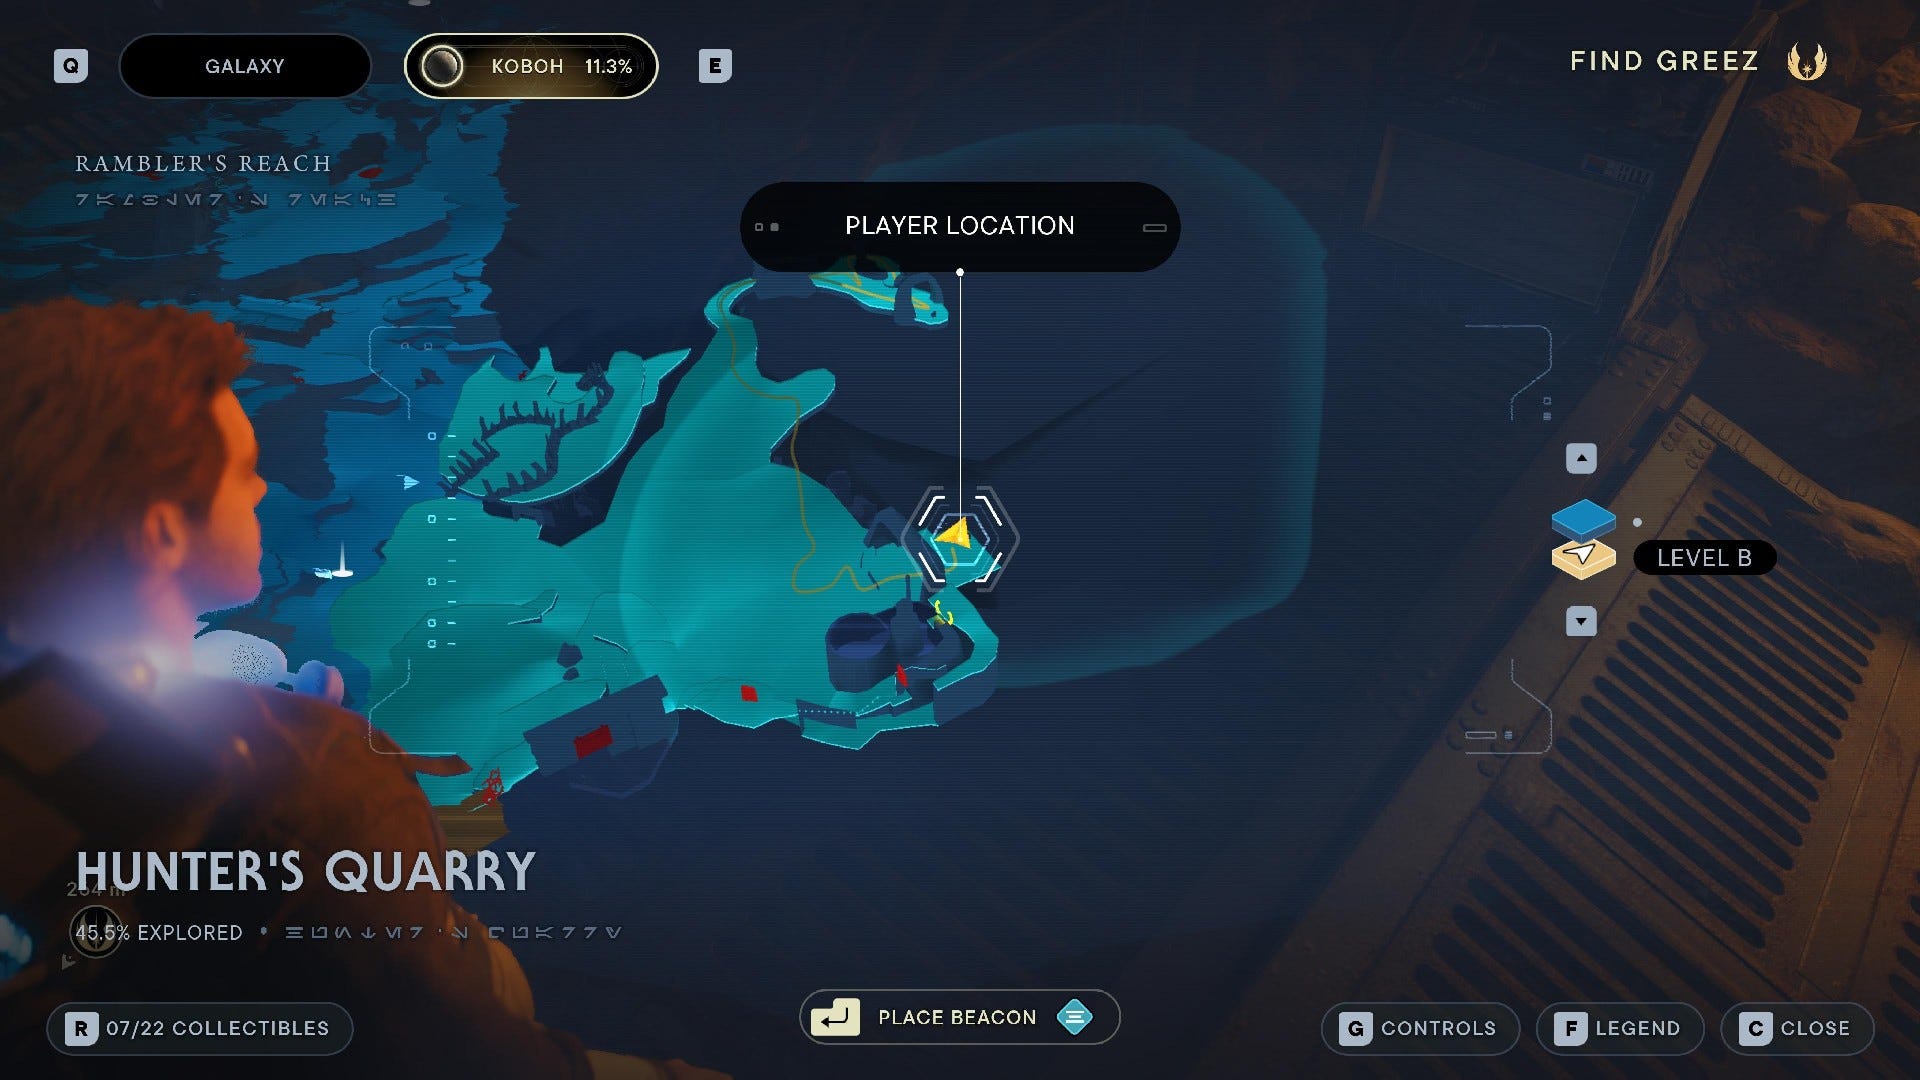
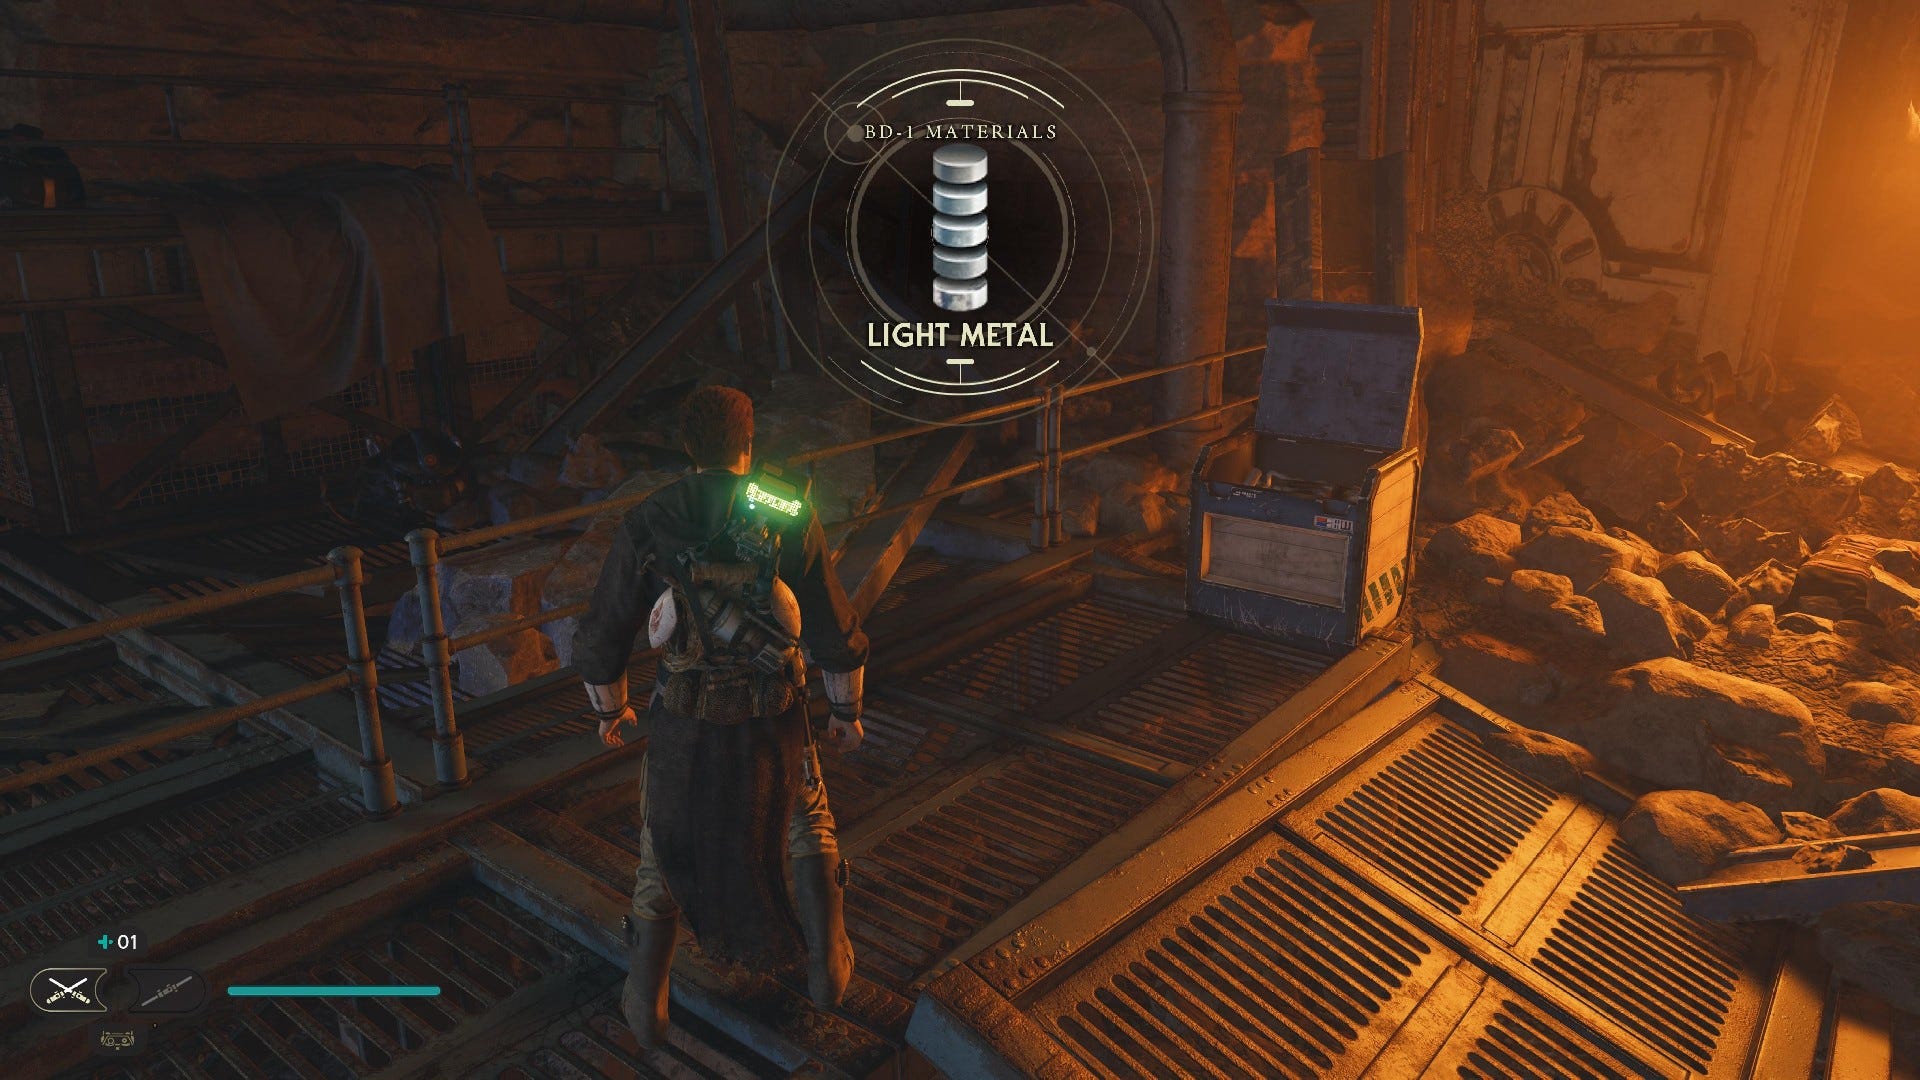
Chest #3 (Light Metals BD-1 materials): At the back of the bunker where teh droids are fighting the Gorgers.
Hunter’s Quarry Essences:
Force Essence: There’s a breakable wall next to the Hunter’s Quarry building; use a Roller Mine from inside the building to break it.
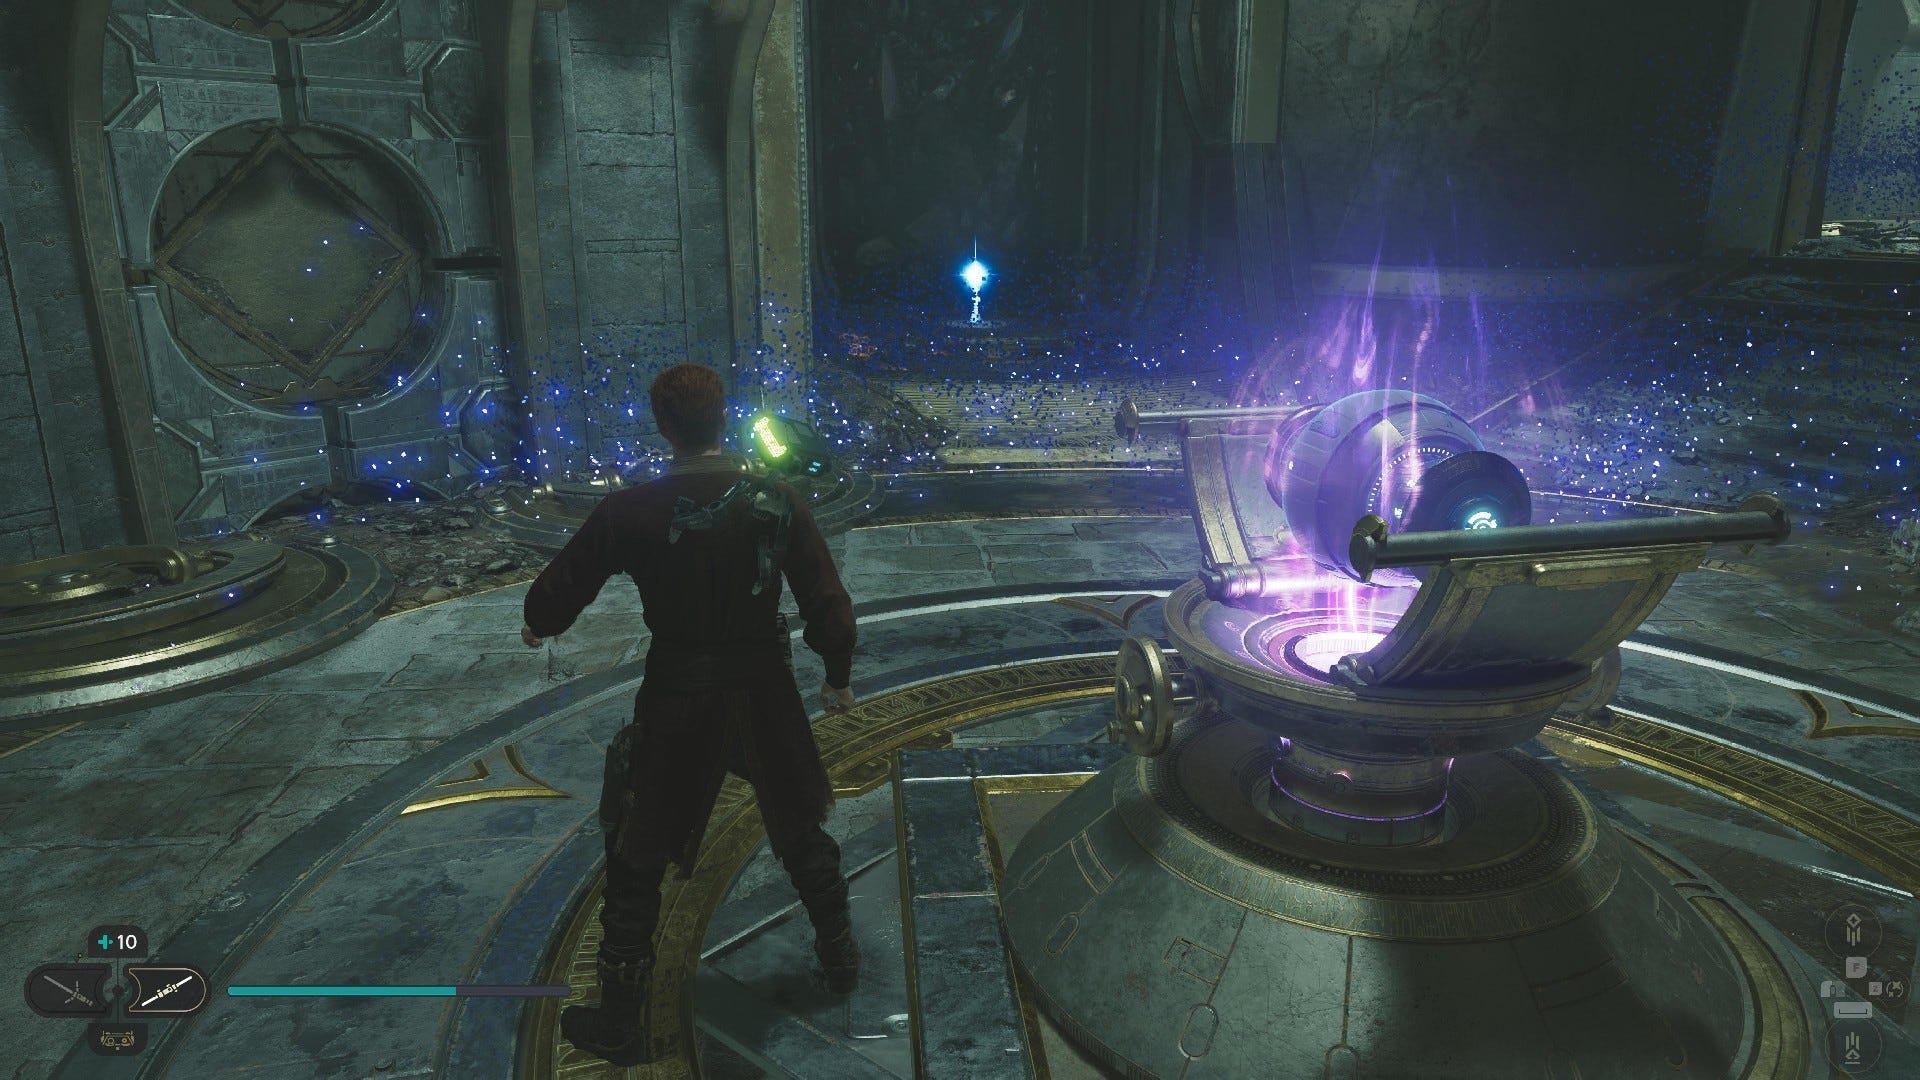
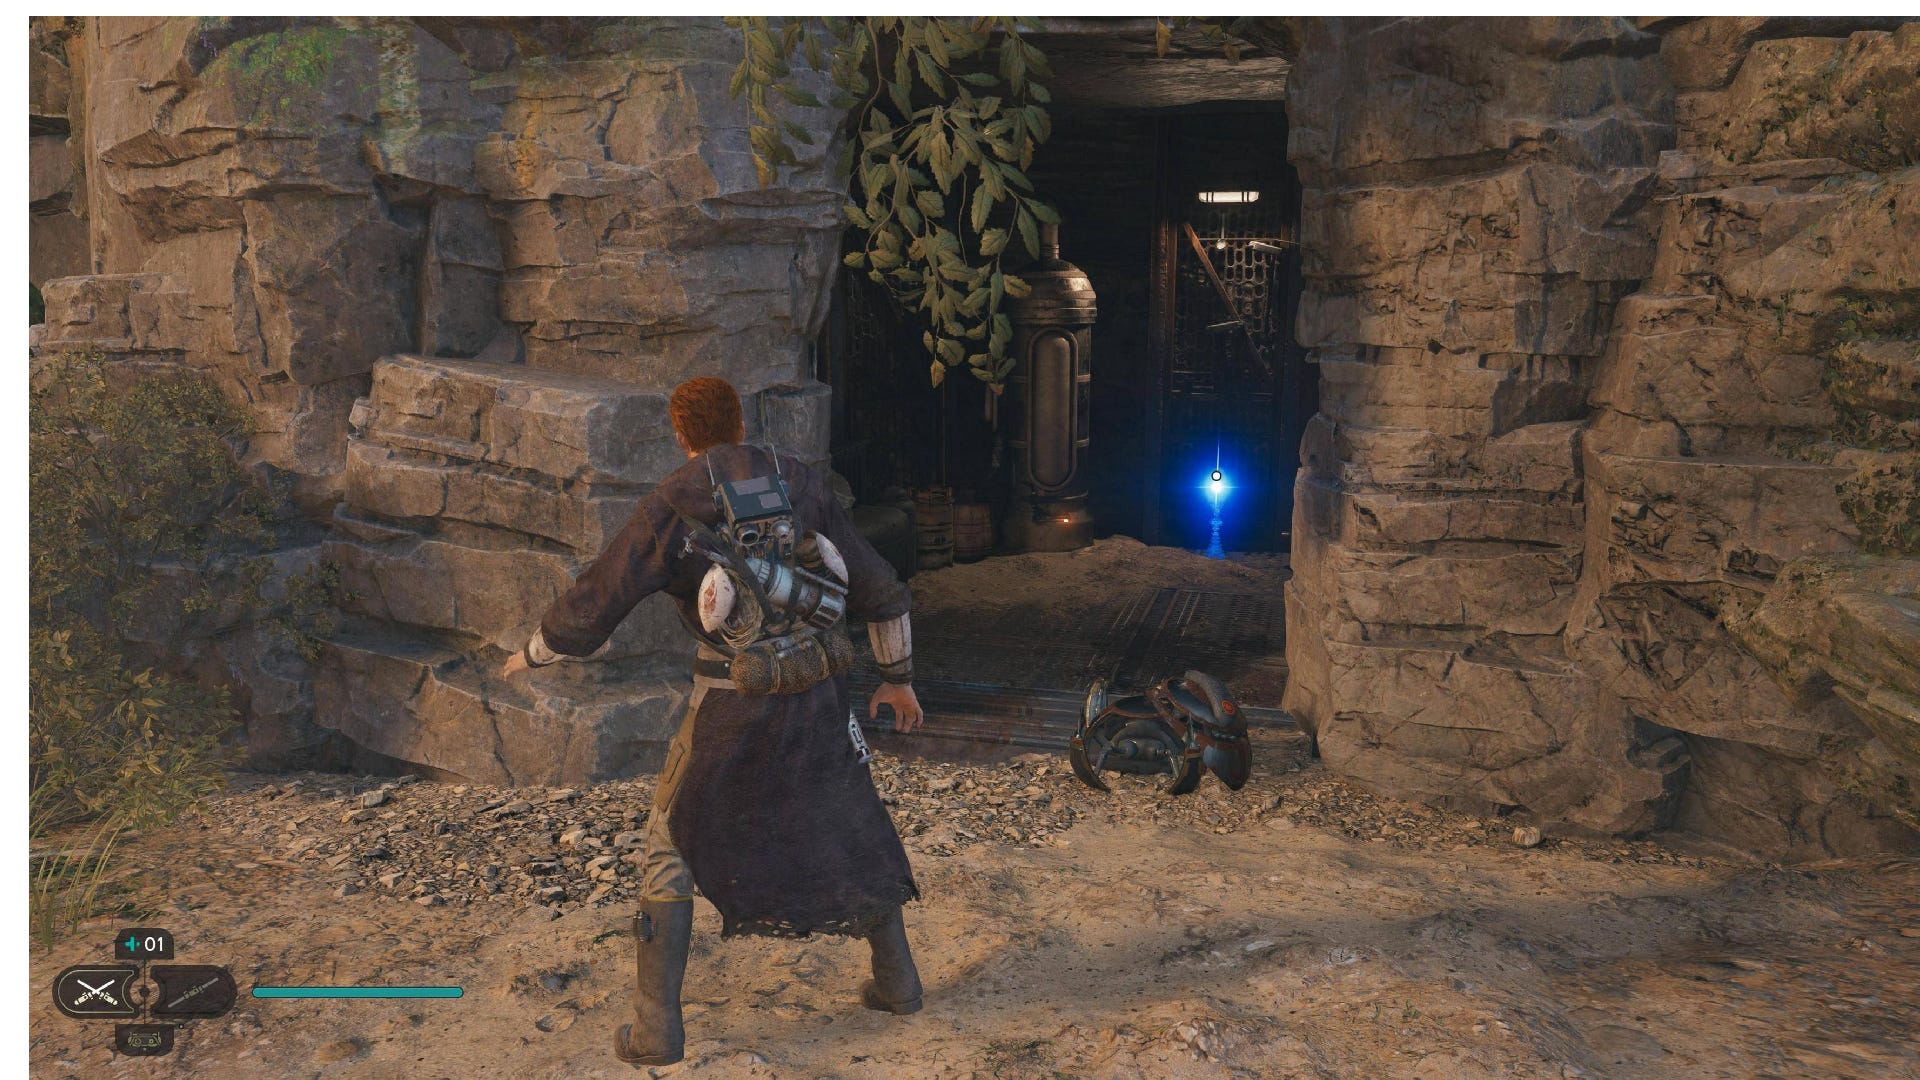
Skill Point Essence: In the Koboh matter puzzle cave (requires you to Force Lift the gate on the far end of Hunter’s Quarry). Once you’re in, just pull the orb to you, and hold it while you walk through the matter to the essence.
Hunter’s Quarry Databanks:
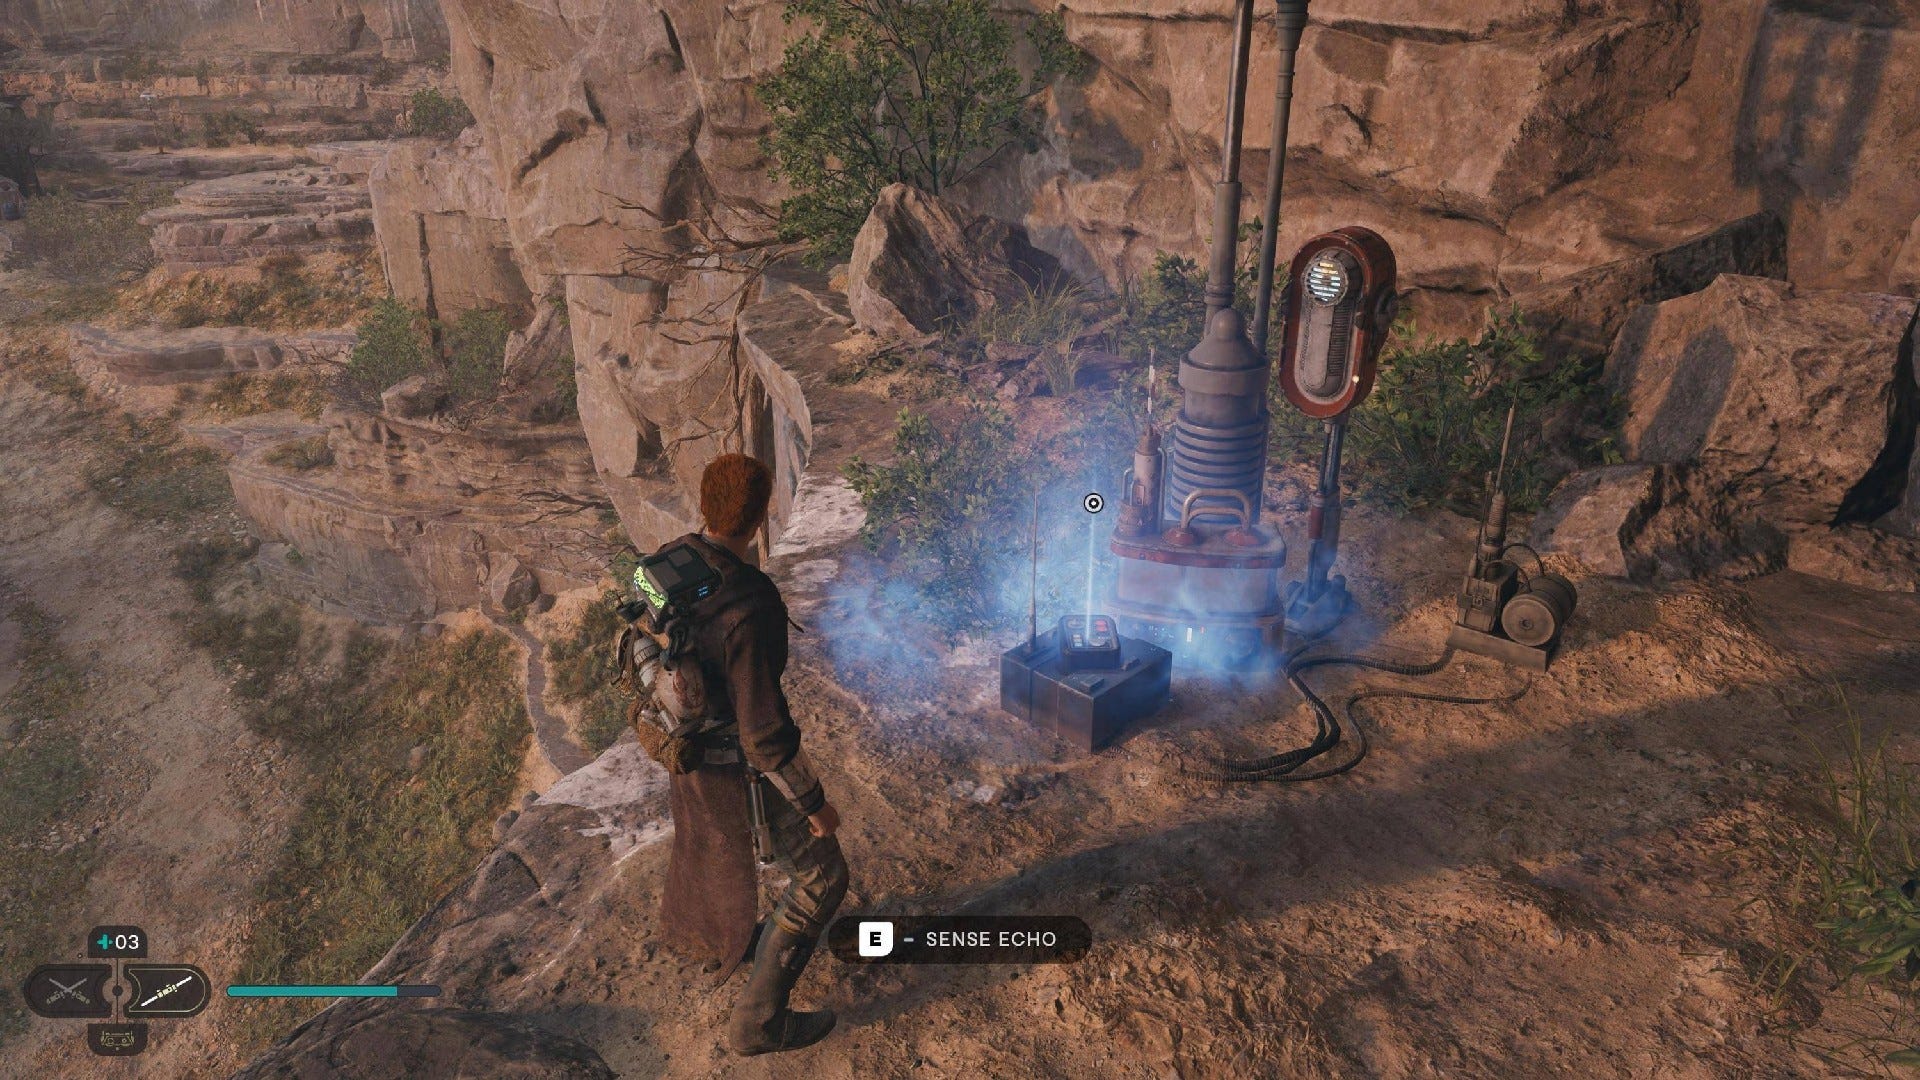
Force Echo (Free Sample): On the edge of the platform where the Hunter Jacket chest is found, overlooking the Outpost Meditation Point.
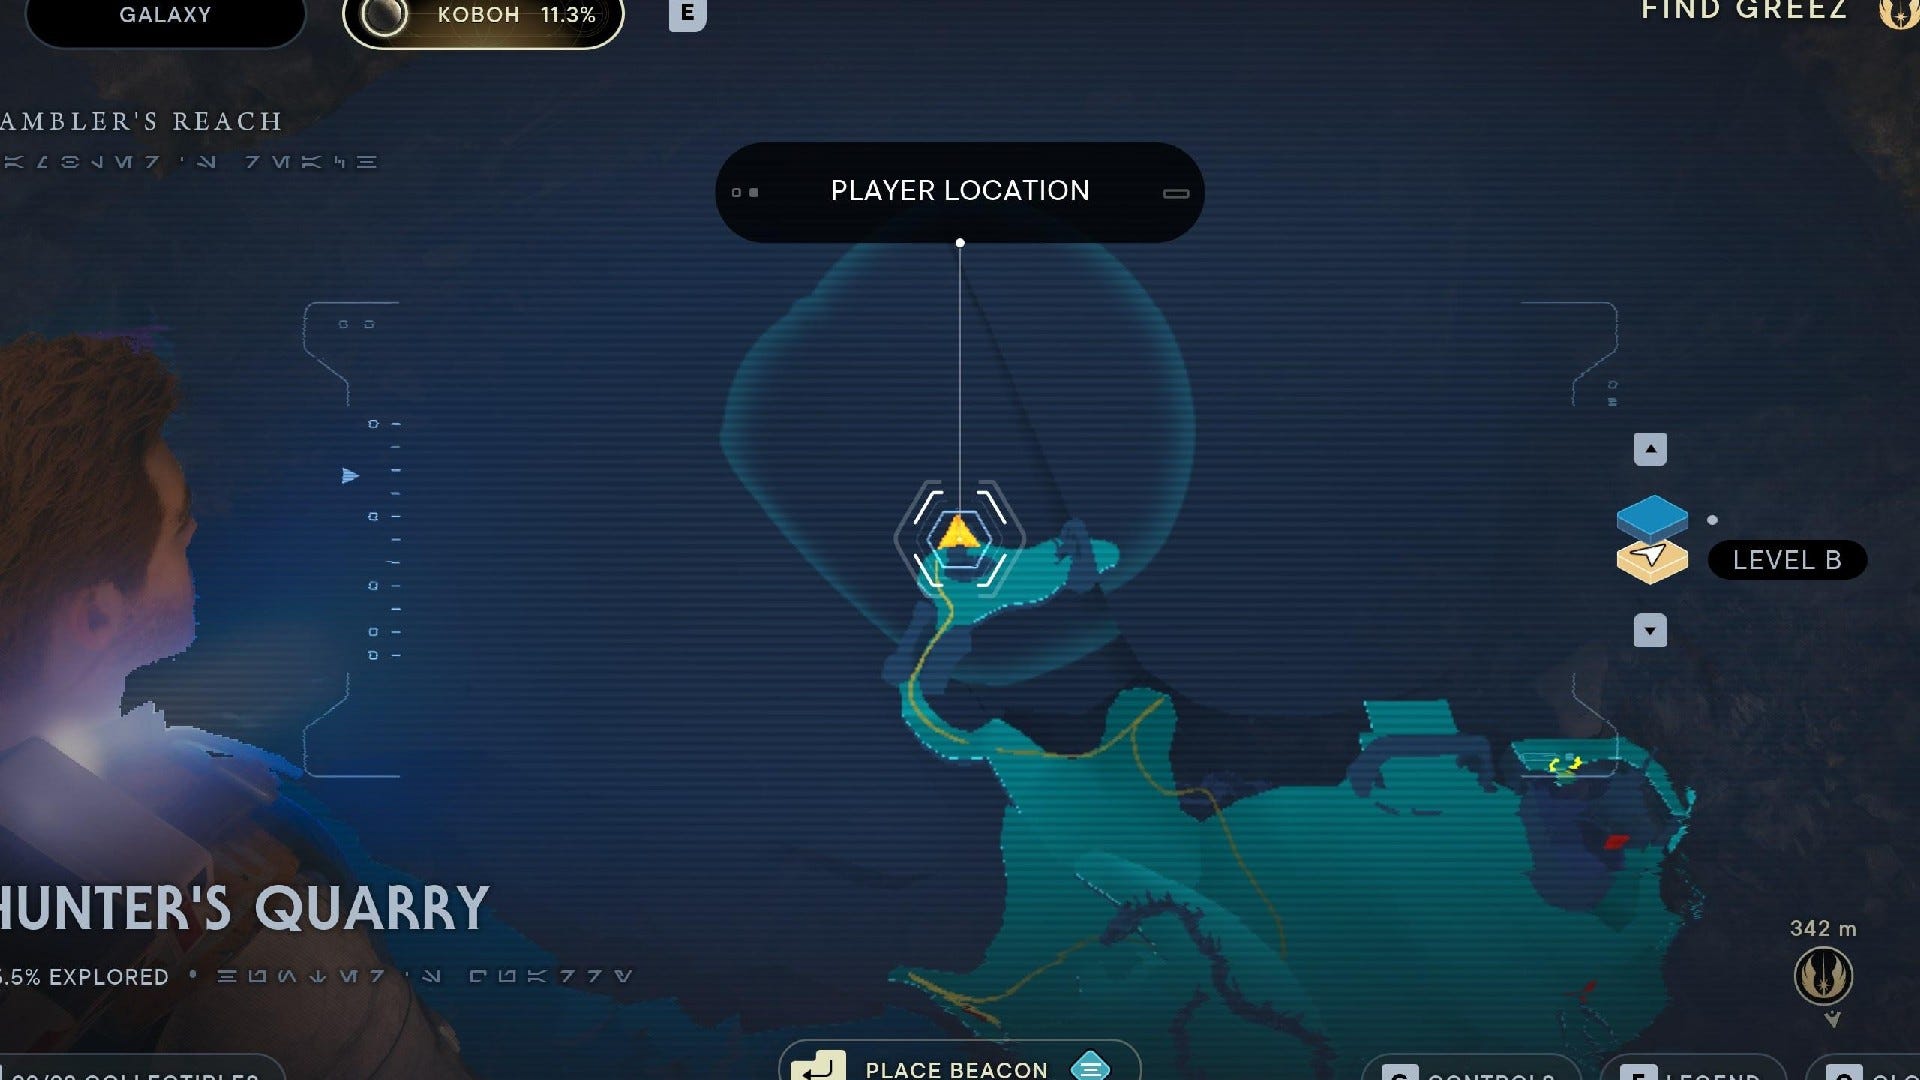
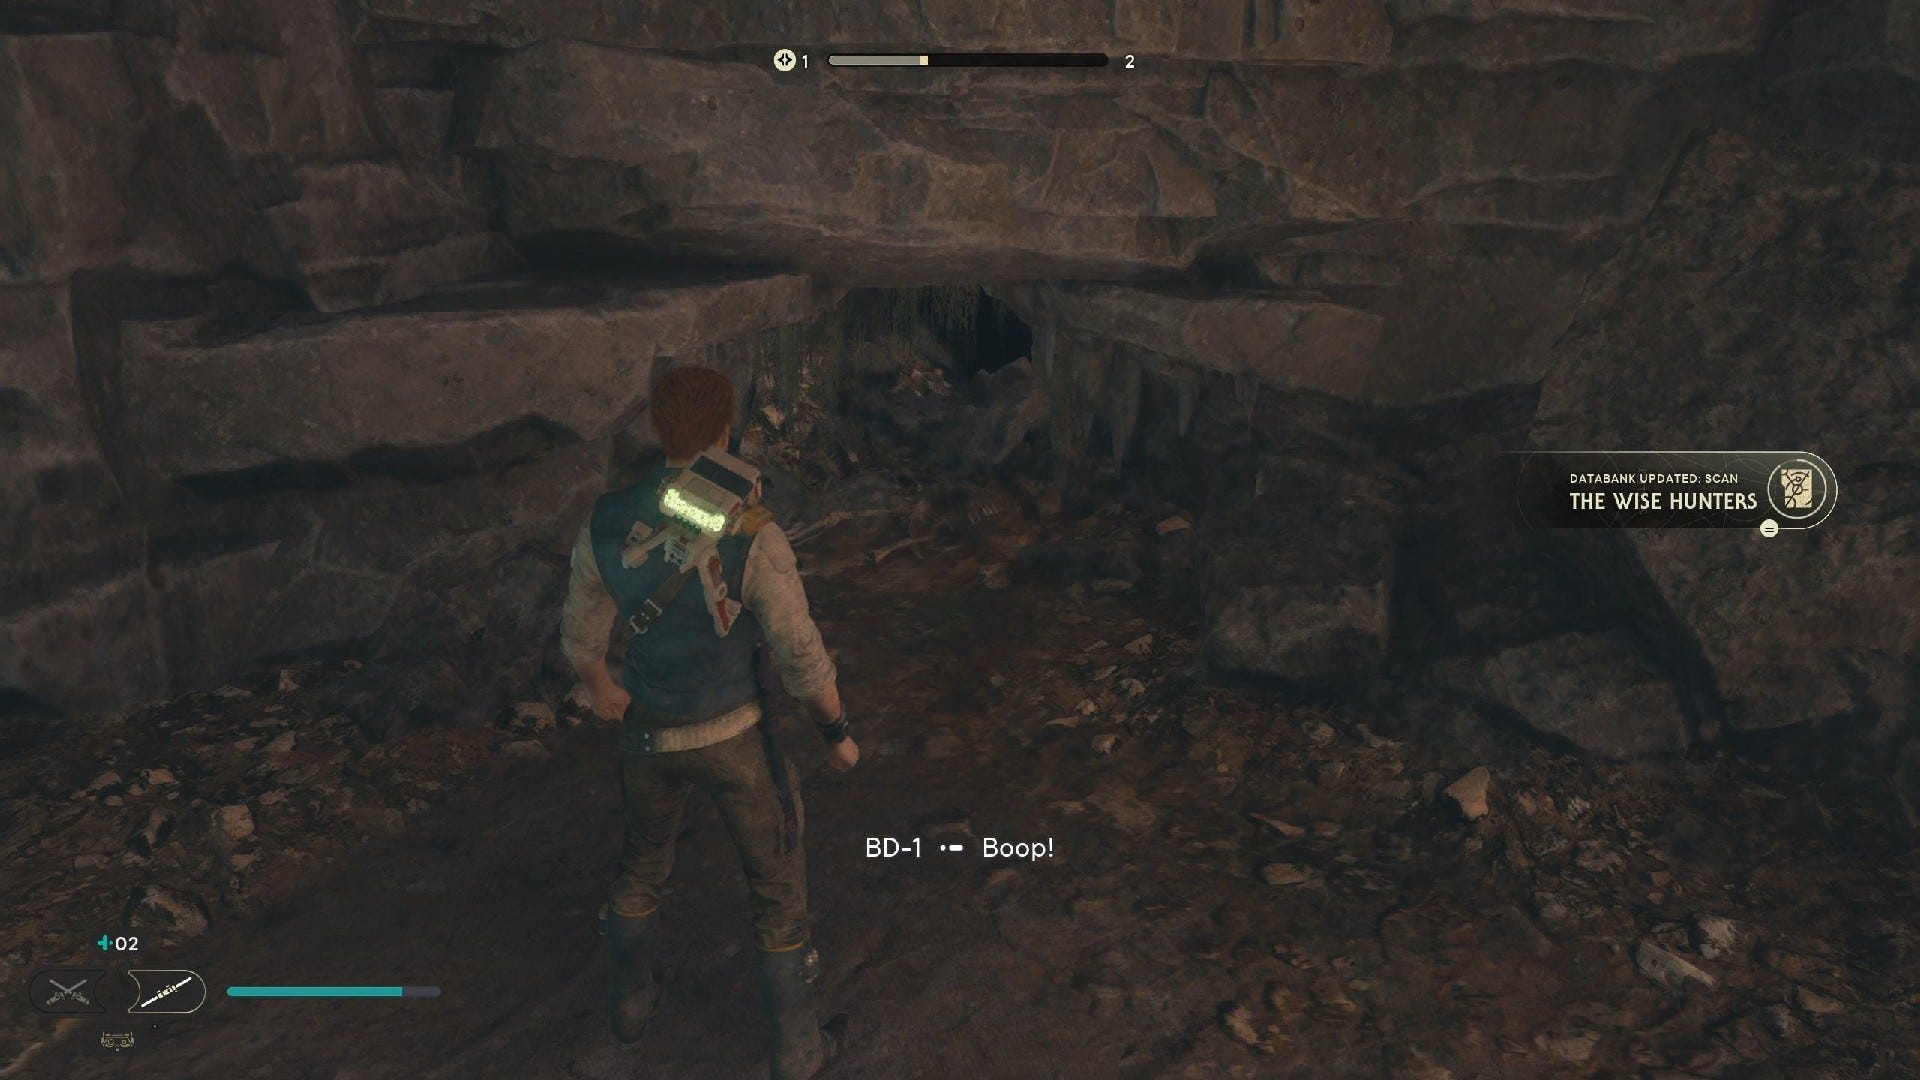
Databank (The Wise Hunters): Up the slope and past the Gorgers, look on the left side of the room.


Force Echo (A Task Too Far): At the back of the bunker where the droids are fighting the Gorgers.
Databank (A New Beginning): On the left immediately as you enter the bunker area where the droids are fighting the Gorgers.
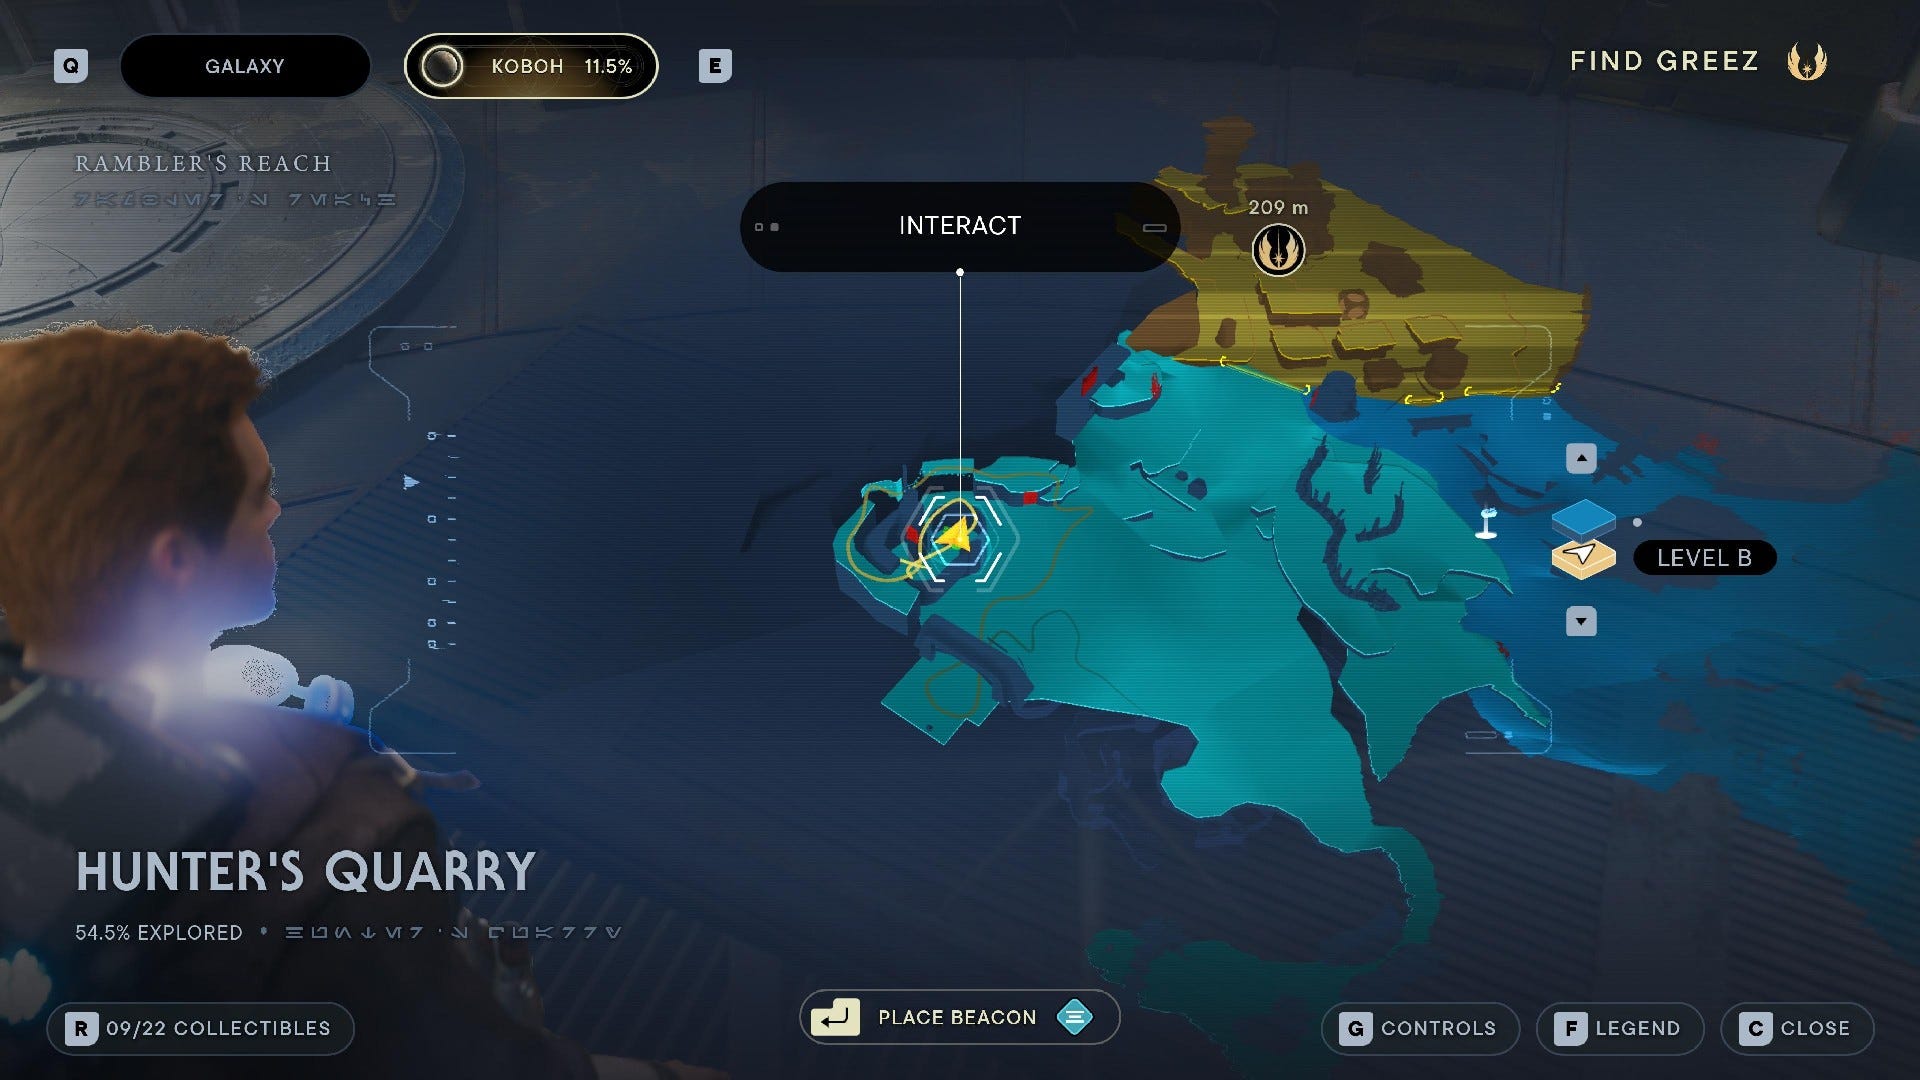
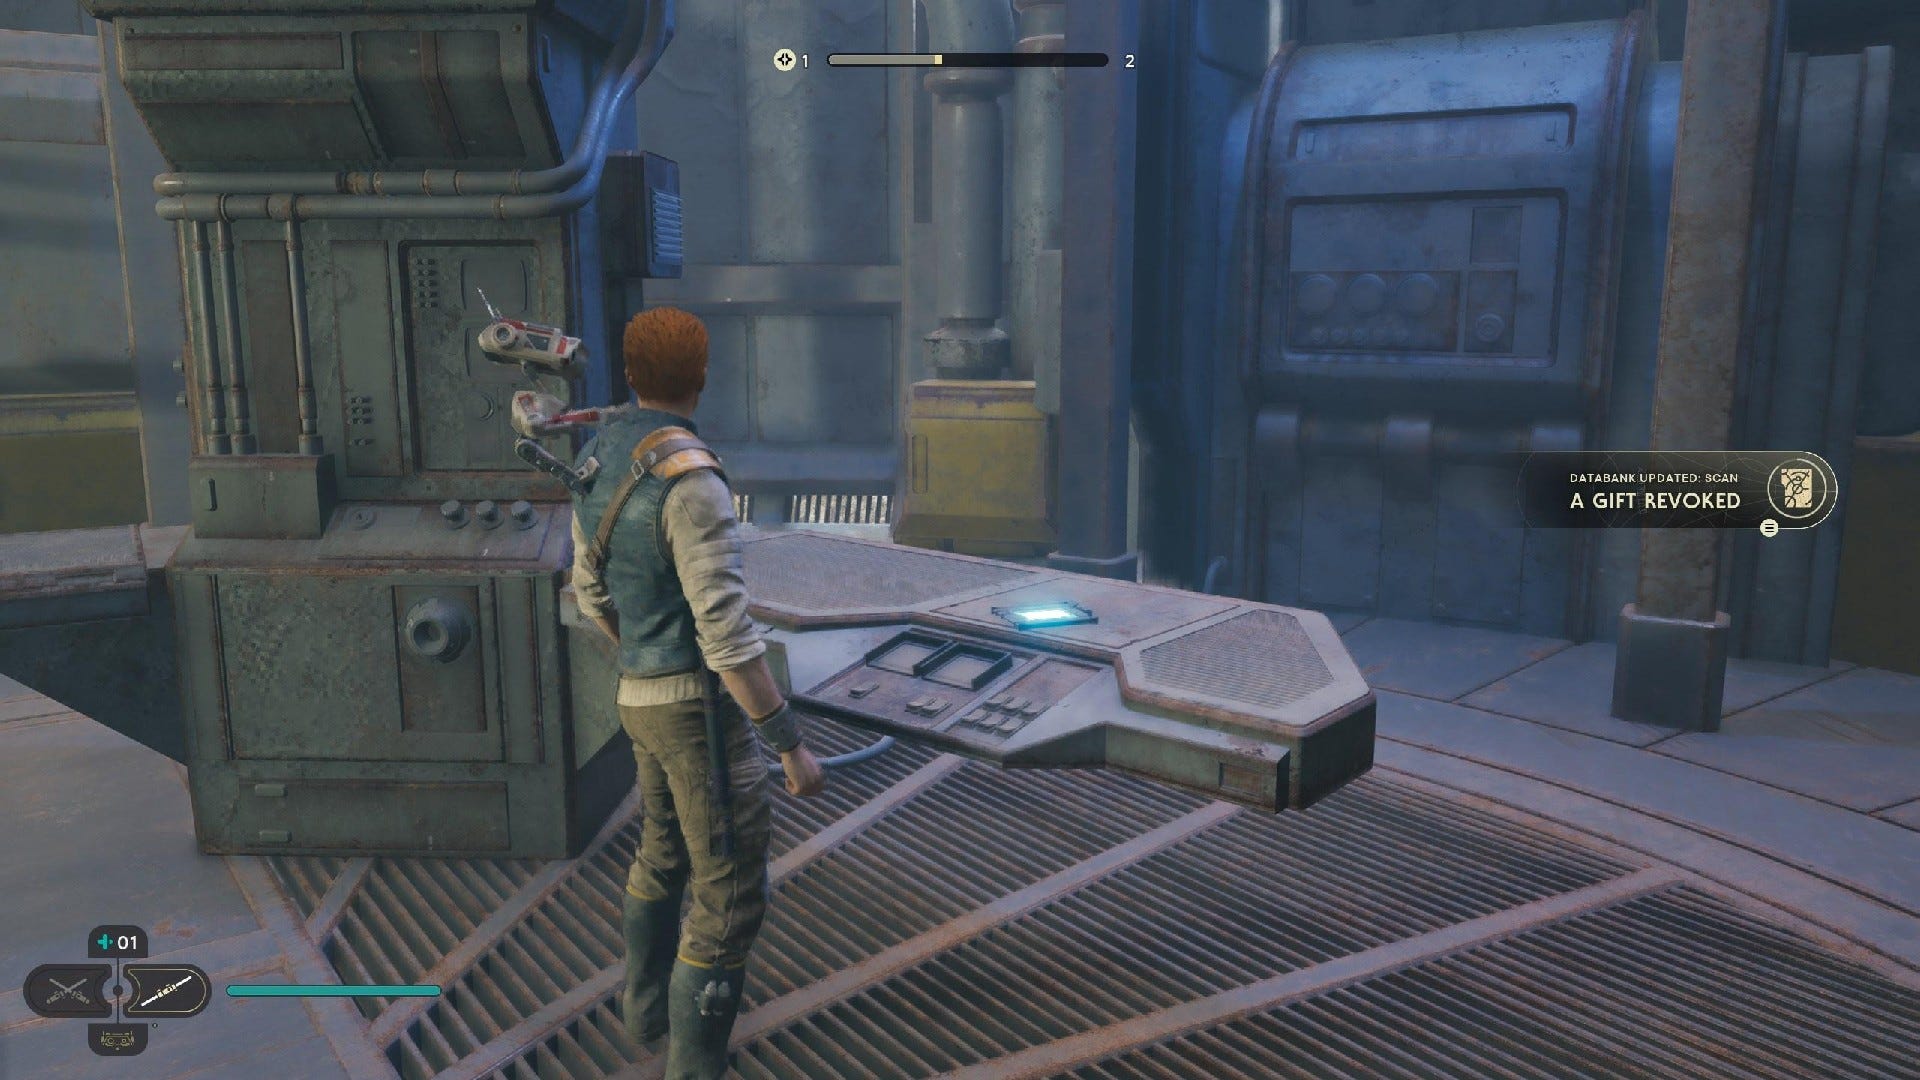
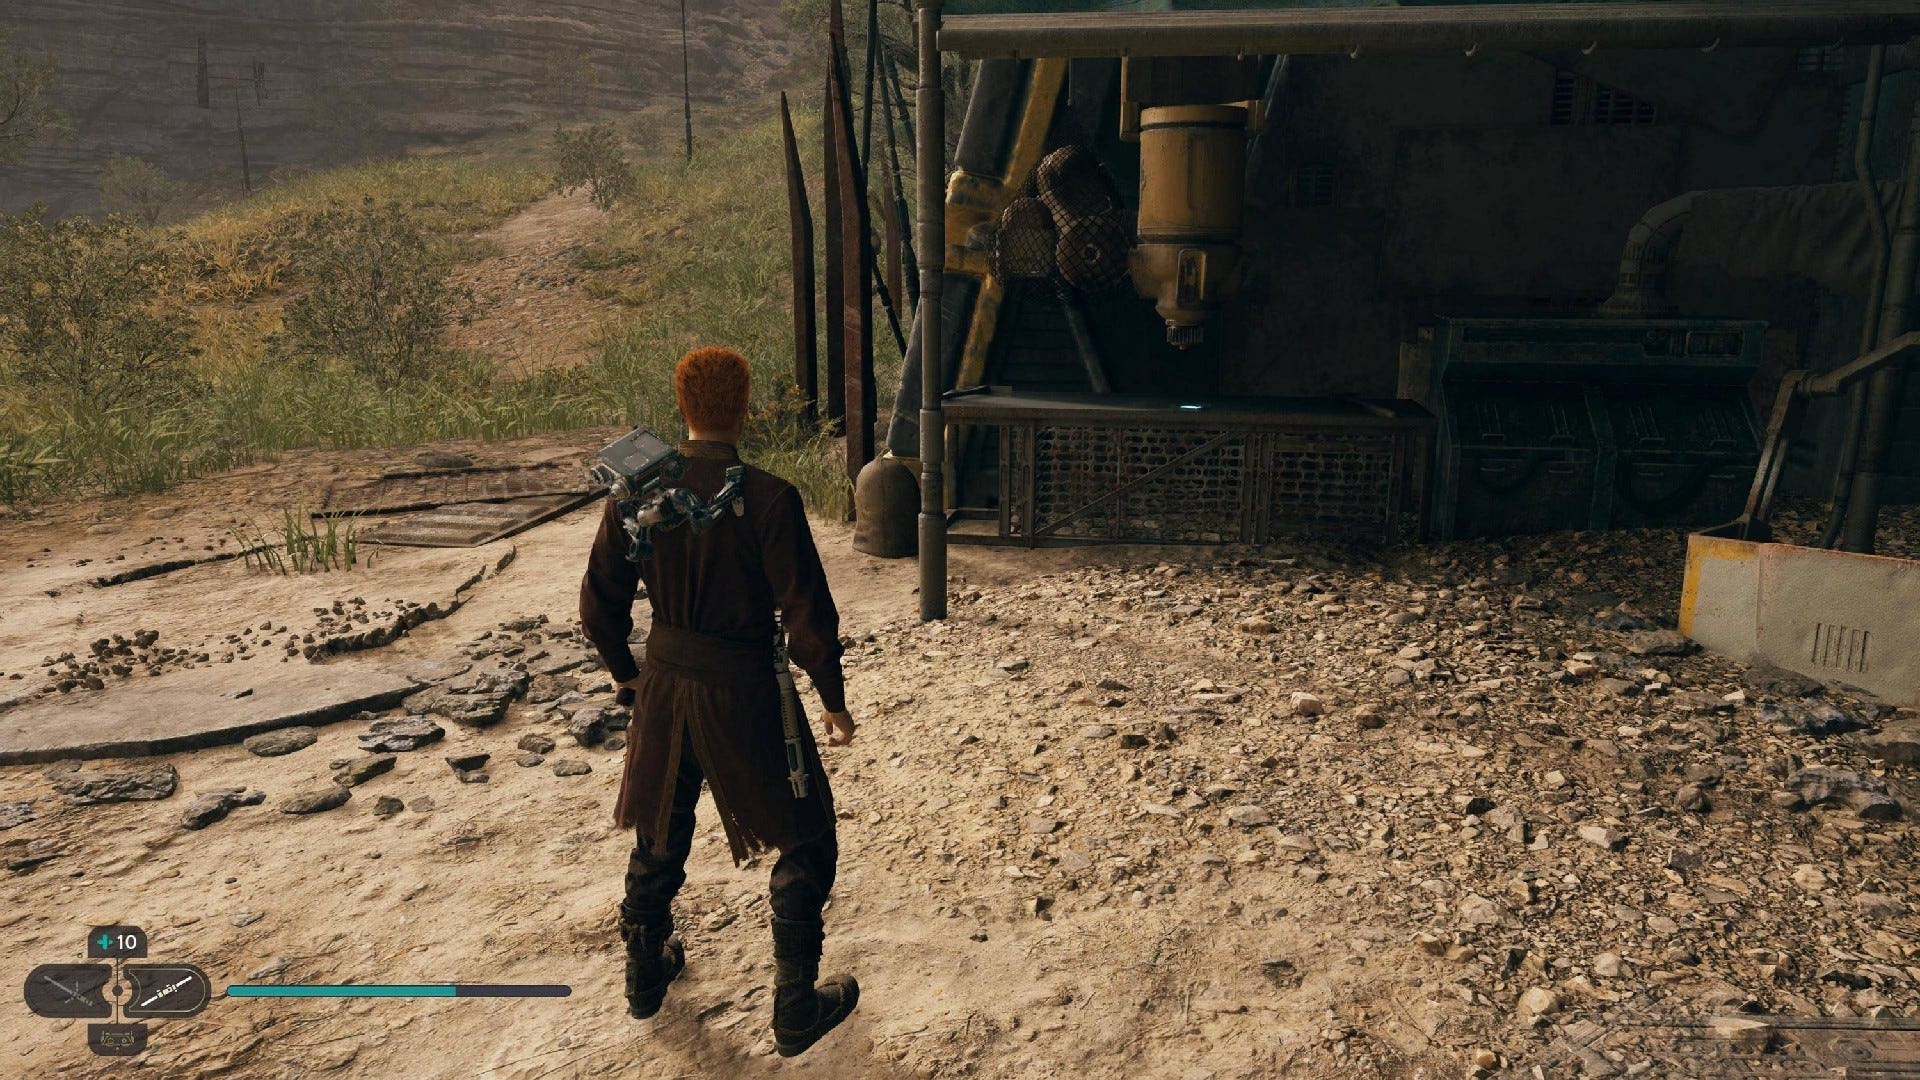
Databank (A Gift Revoked): On the table in the Hunter’s Quarry building, accessible from the roof.
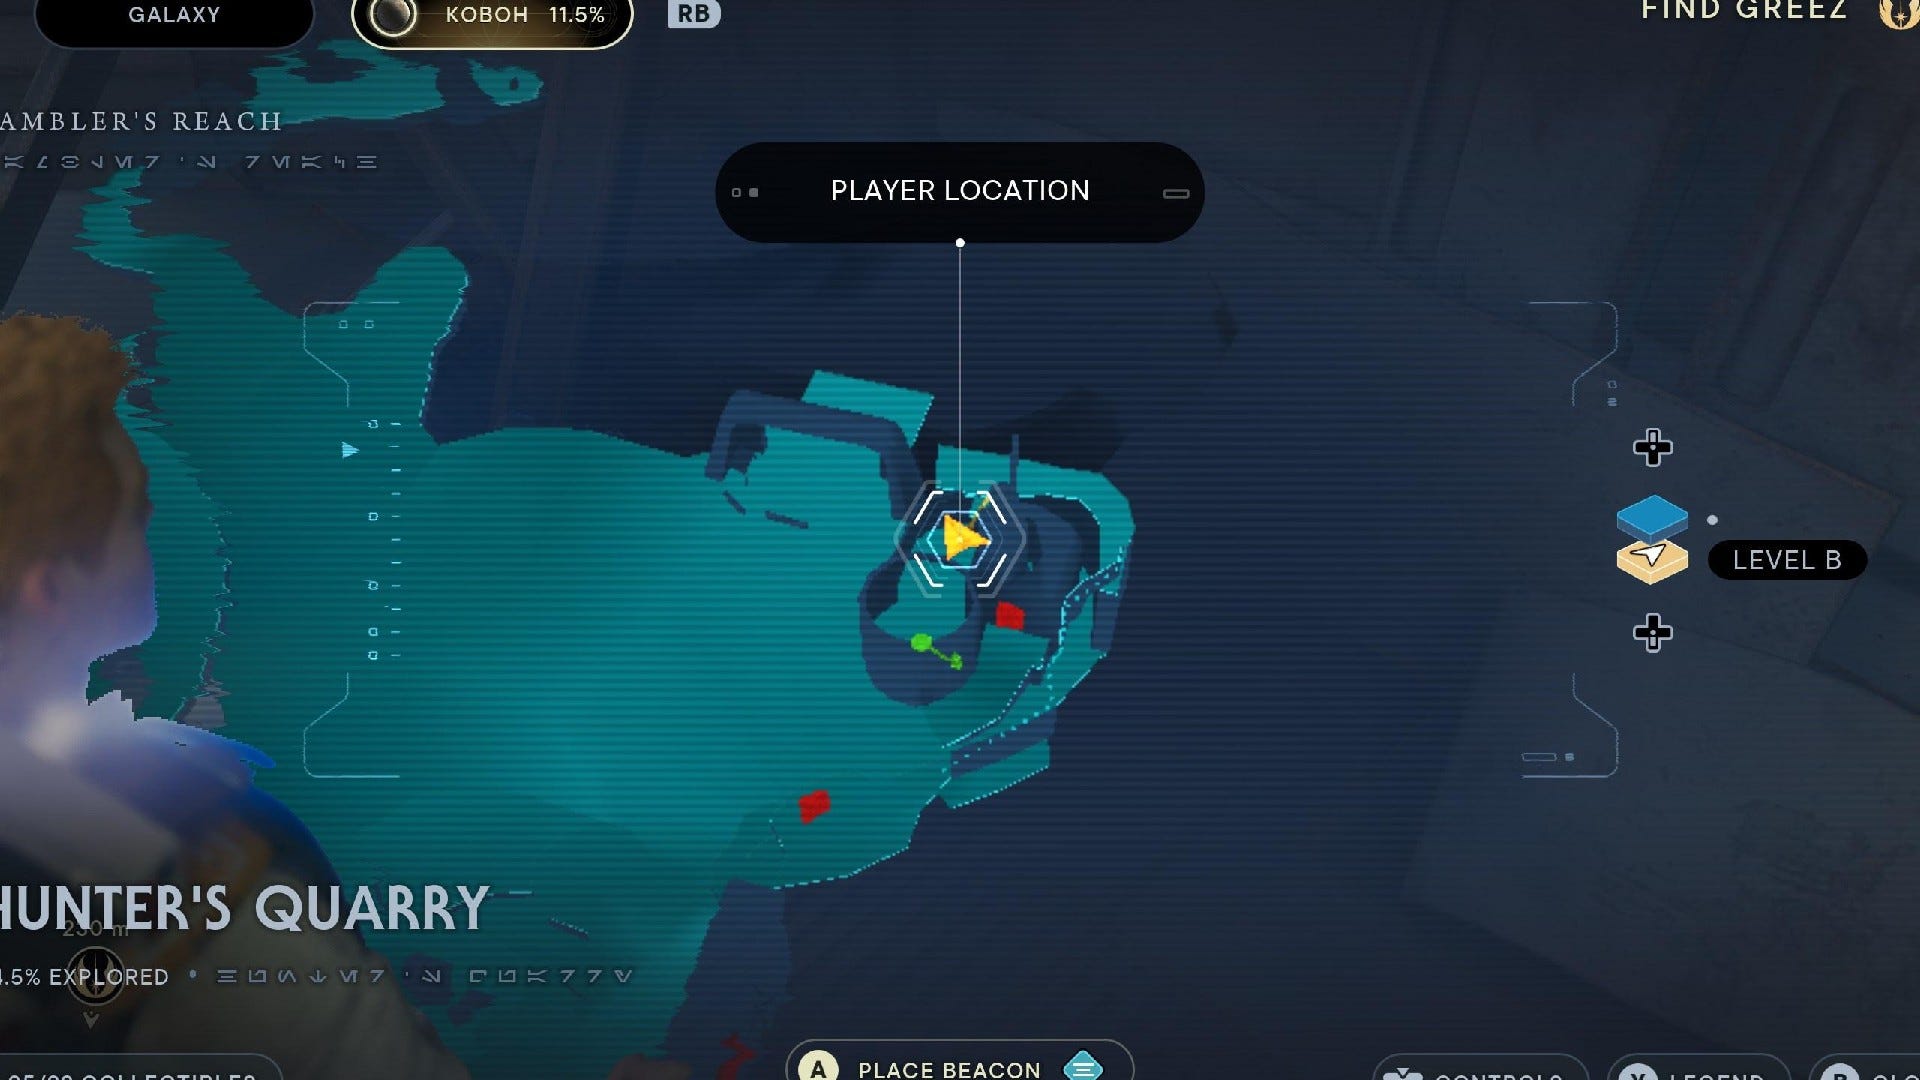
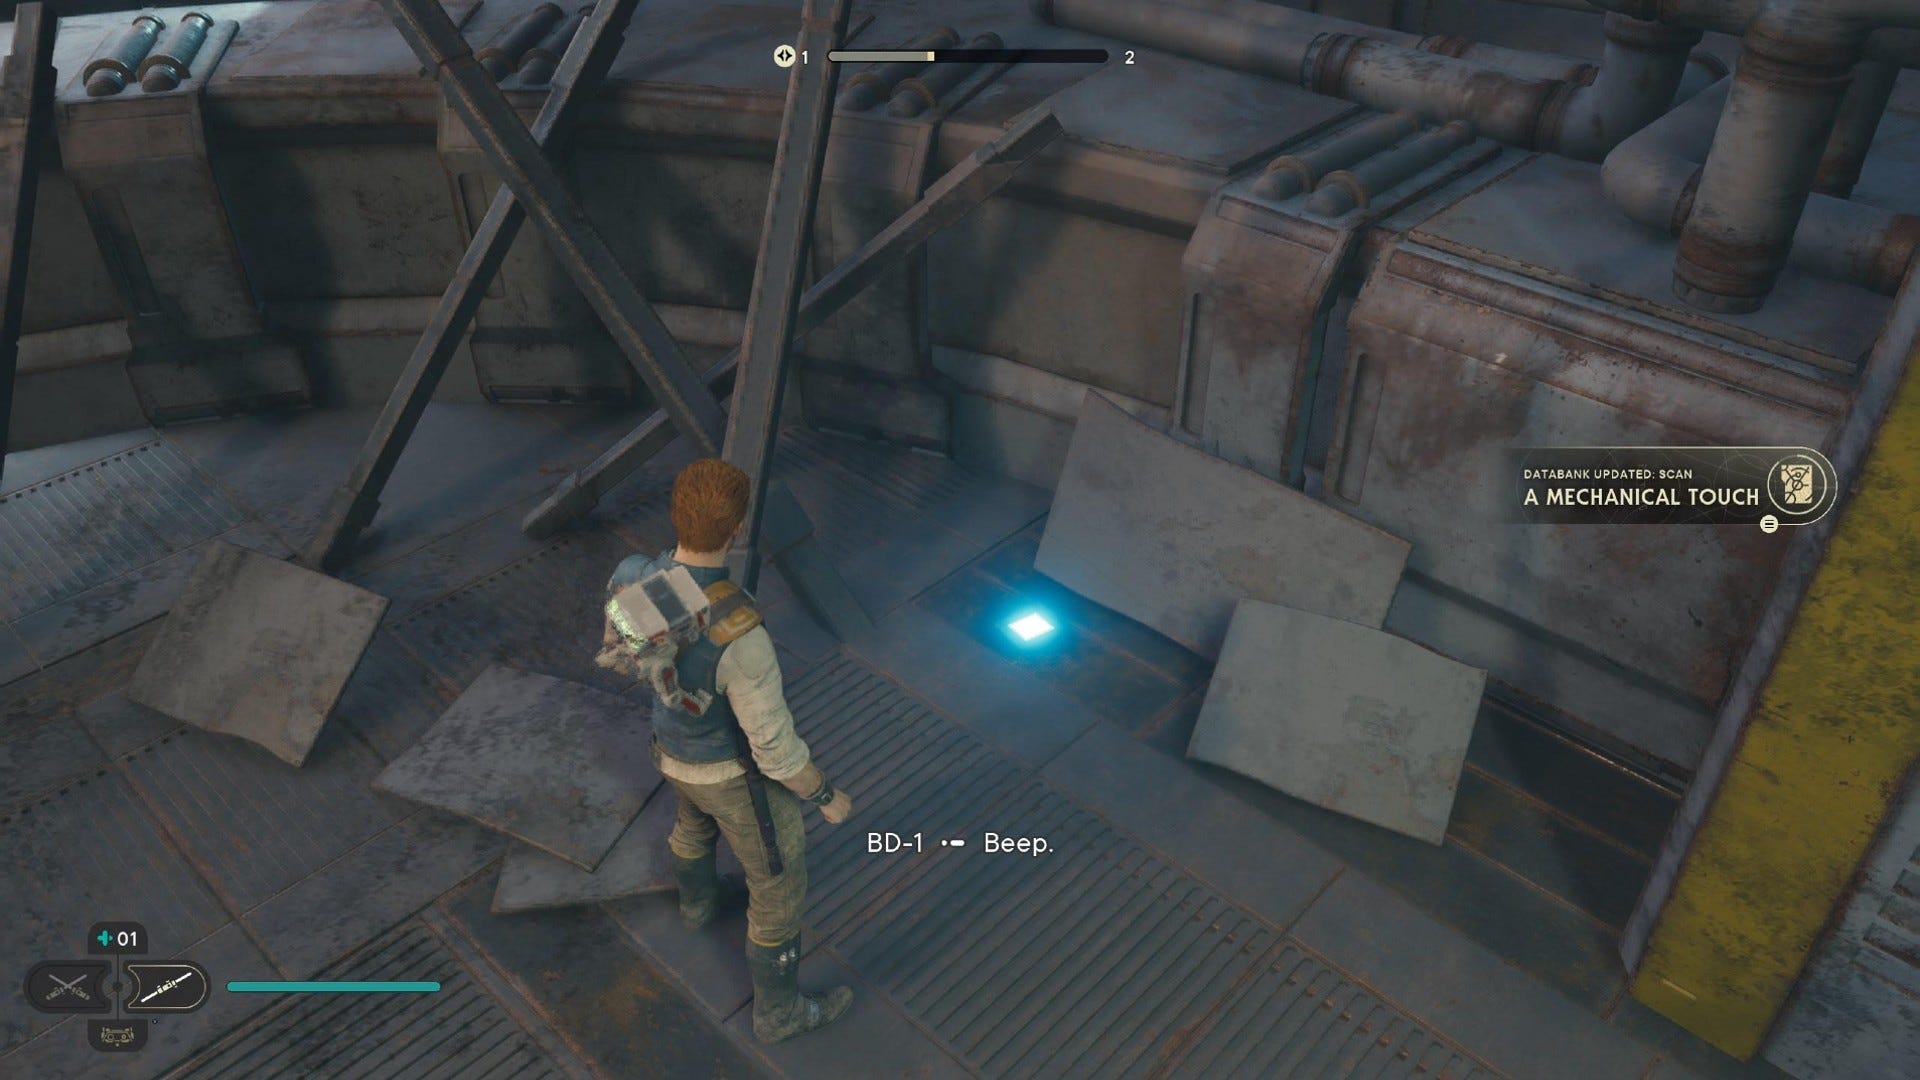
Databank (A Mechanical Touch): On the floor in the Hunter’s Quarry building, accessible from the roof.
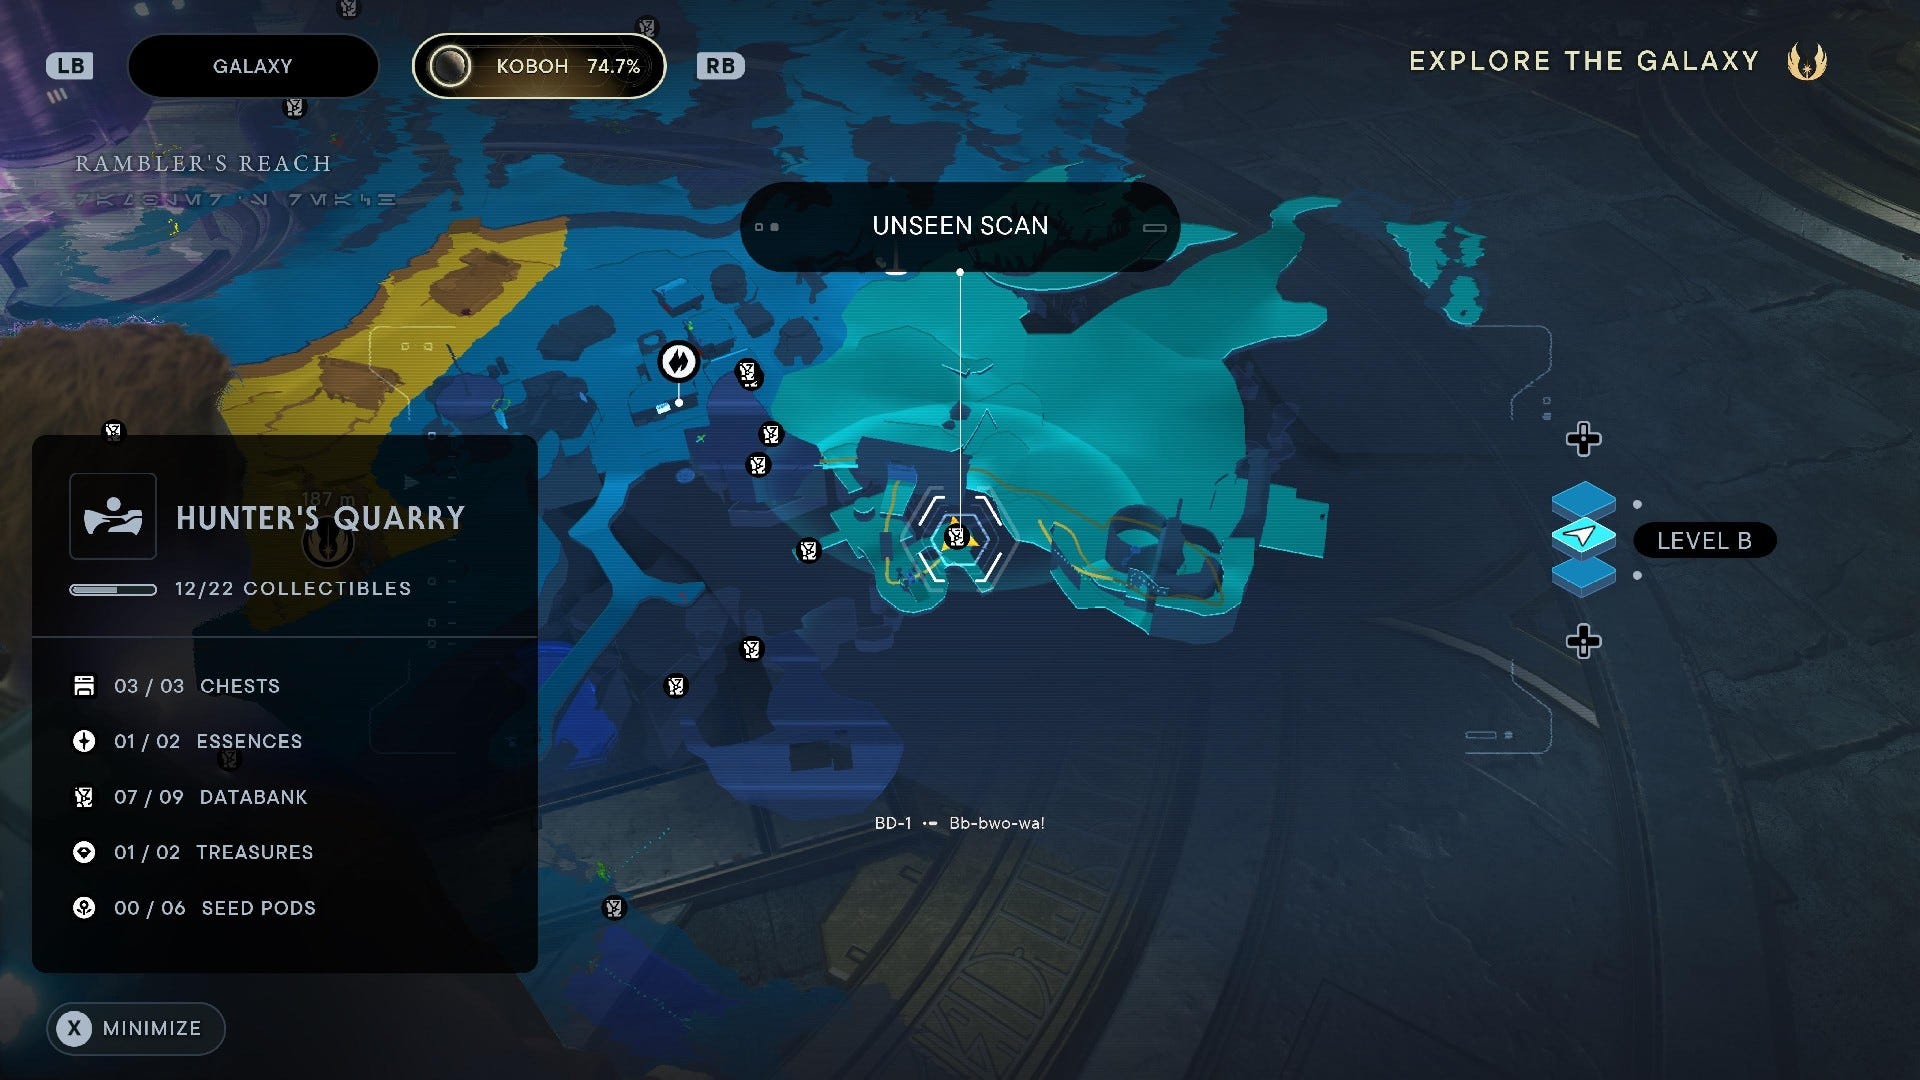
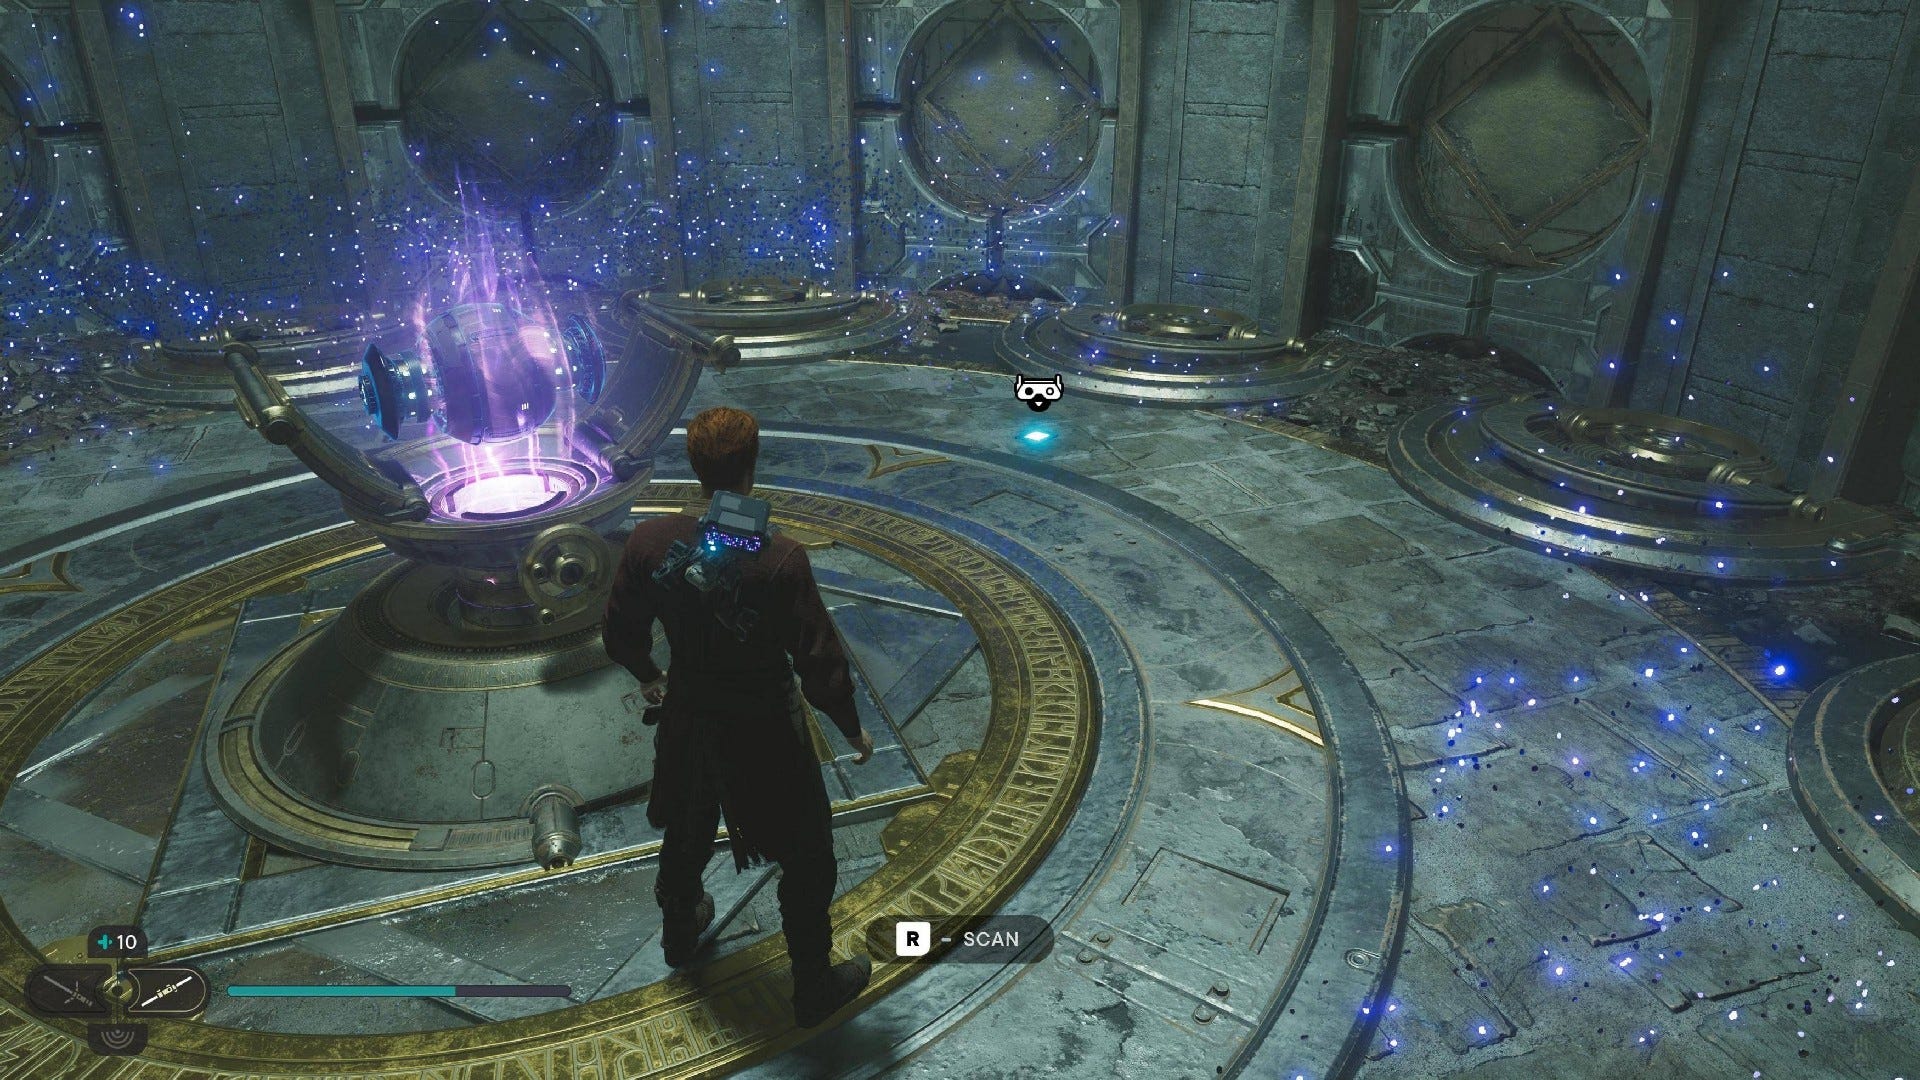
Databank (The Koboh Emergence): Inside the Koboh matter puzzle cave (which requires Force Lift to get through the big gate). Datapad to scan is in the side room – you need to send the orb in there first.

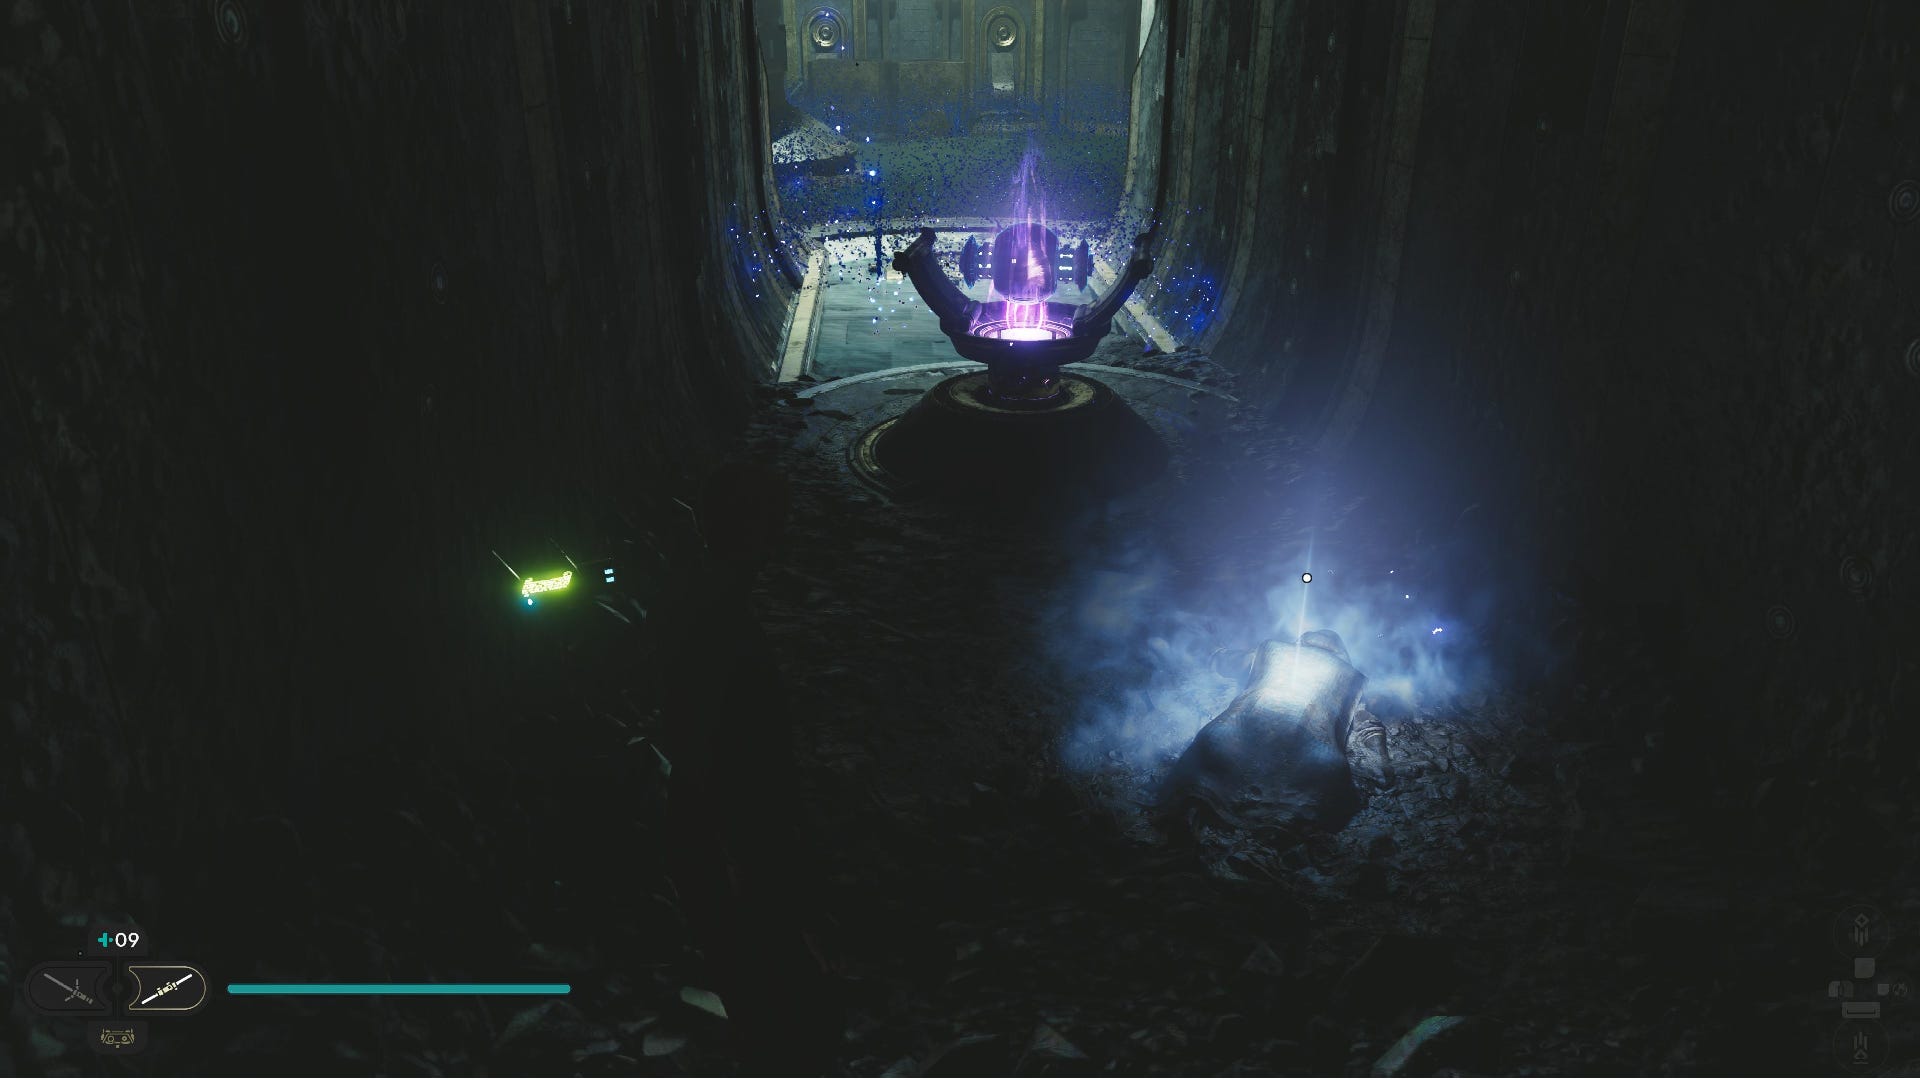
Force Echo (An Honest Appraisal): In the Koboh matter puzzle cave (which requ ires Force Lift to get through the big gate). Just hold the orb and walk to where you first found it.
Hunter’s Quarry Treasures:
Priorite Shard: On the table in the Hunter’s Quarry building, accessible from the roof.

Datadisc: Grapple up to the cliff area in Rambler’s Reach Outpost, right on the border of Hunter’s Quarry near the edge of the map. Then follow the grapple balloons to the right and wall-run along to the top ledge. Requires the ability to launch from grapple points.
Hunter’s Quarry Seed Pods:
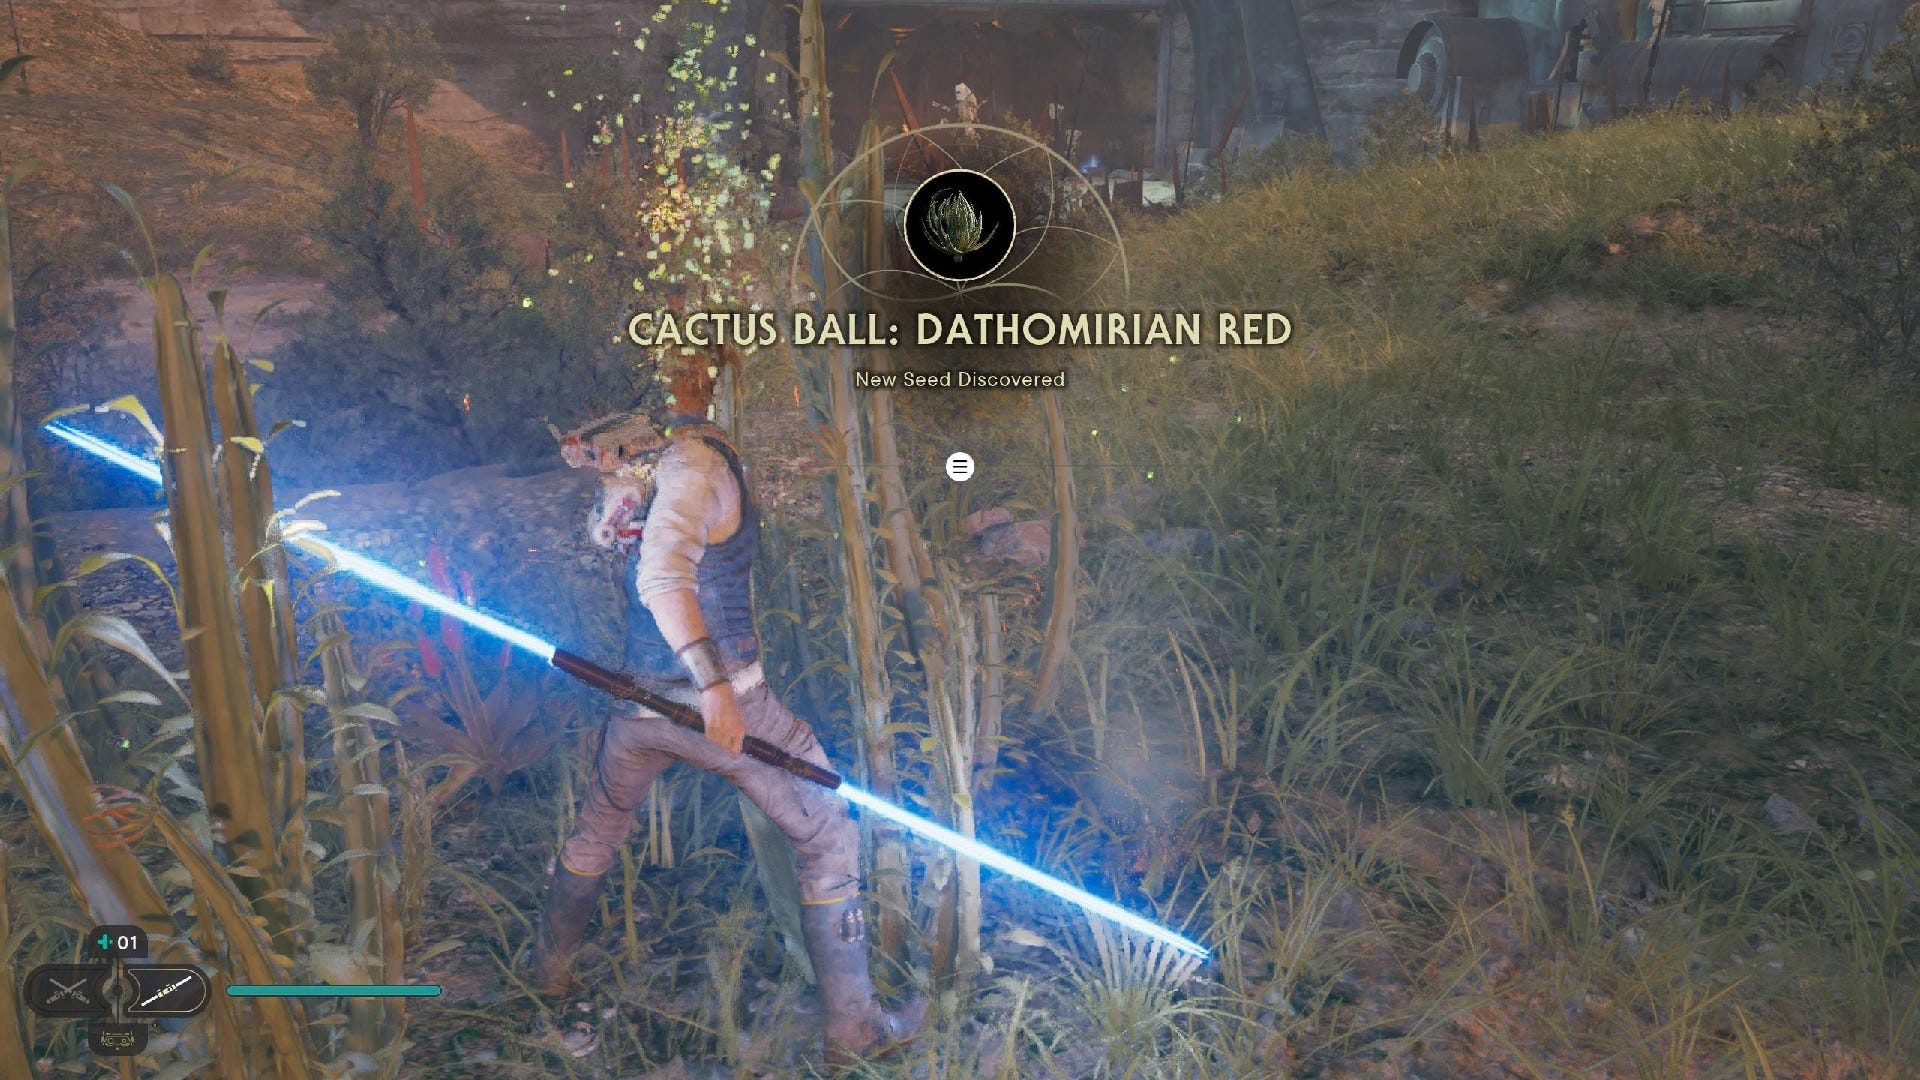
Cactus Ball (Dathomirian Red): On the grassy plains leading to the area where droids are fighting the Gorgers.
Pine Fern: A few steps into Hunter’s Quarry from the Koboh’d up building on the outskirts of the outpost.
Cactus Ball: In the centre of the open area of Hunter’s Quarry.

3x Pine Fern (Rare): To the right of the giant skeleton’s skull. You can get up to this high point of Hunter’s Quarry by using the grapple balloons (if you have the ability to use them).
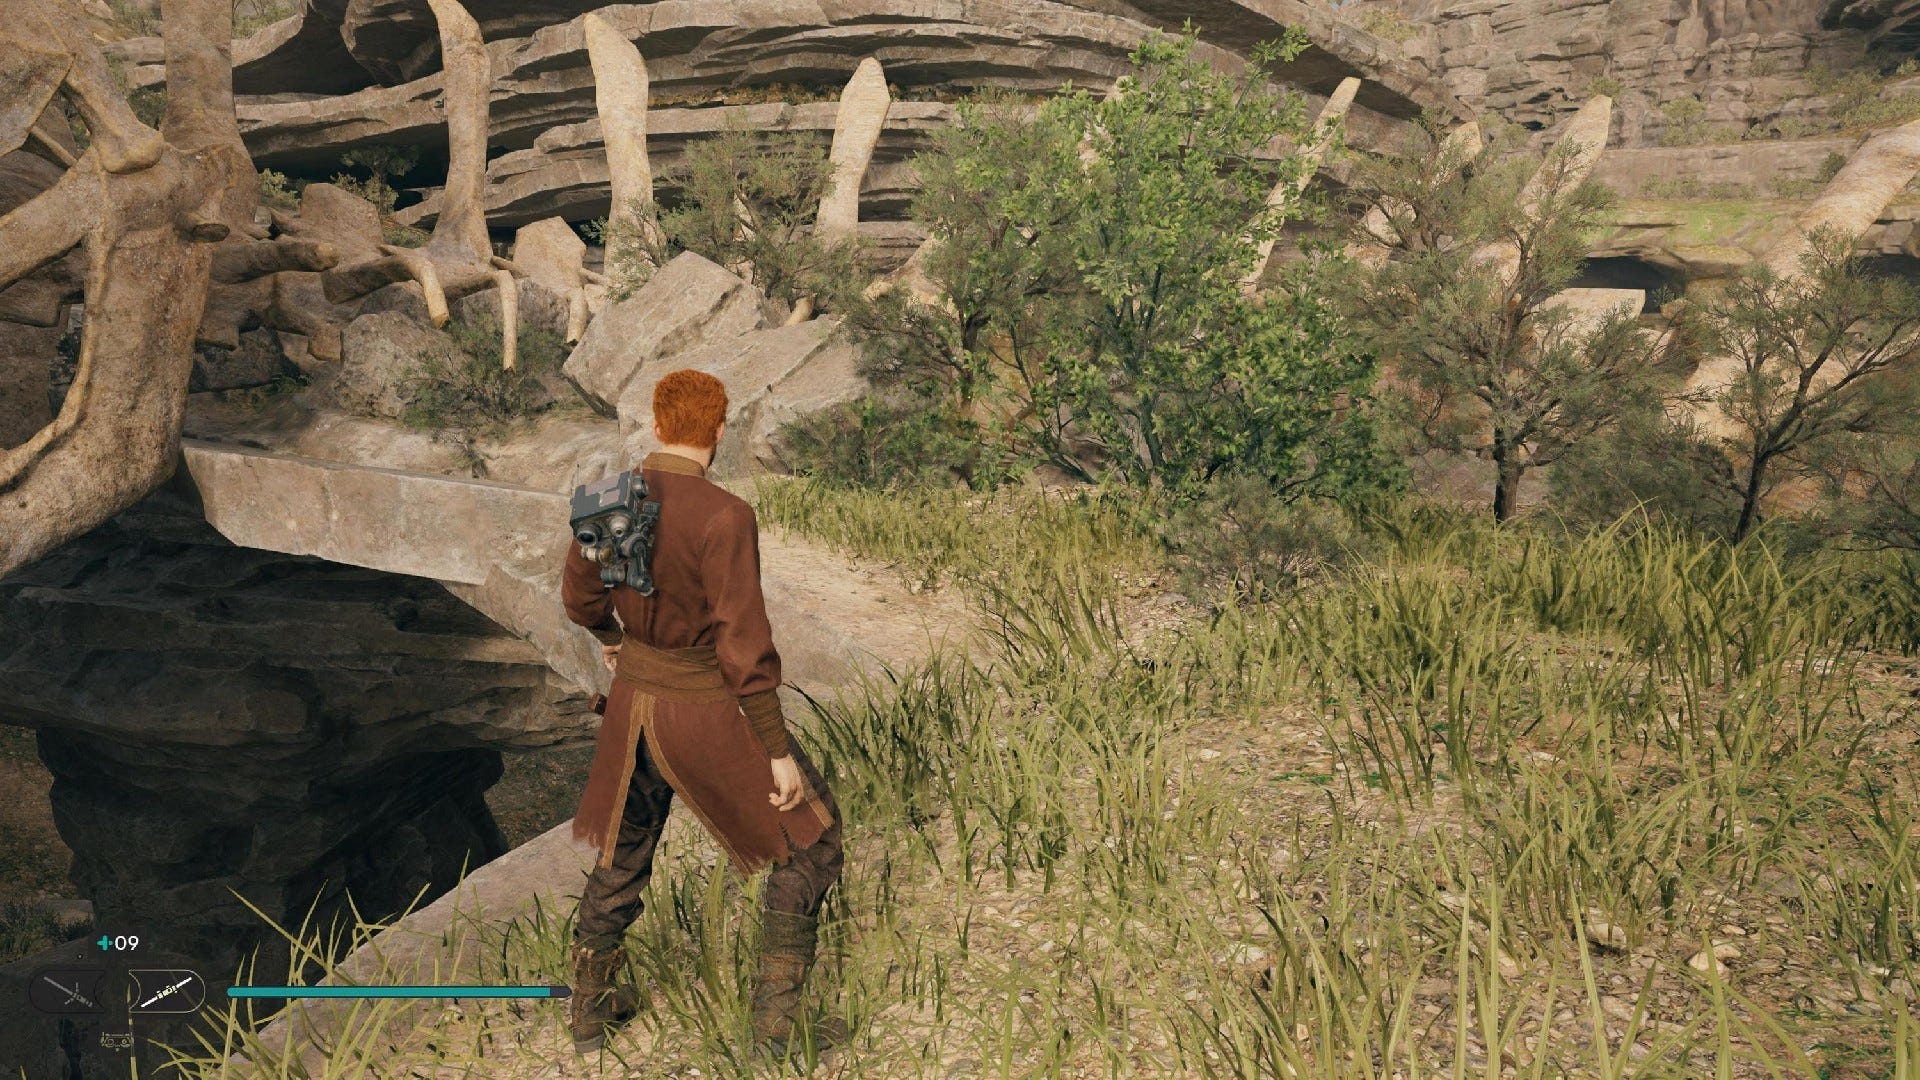
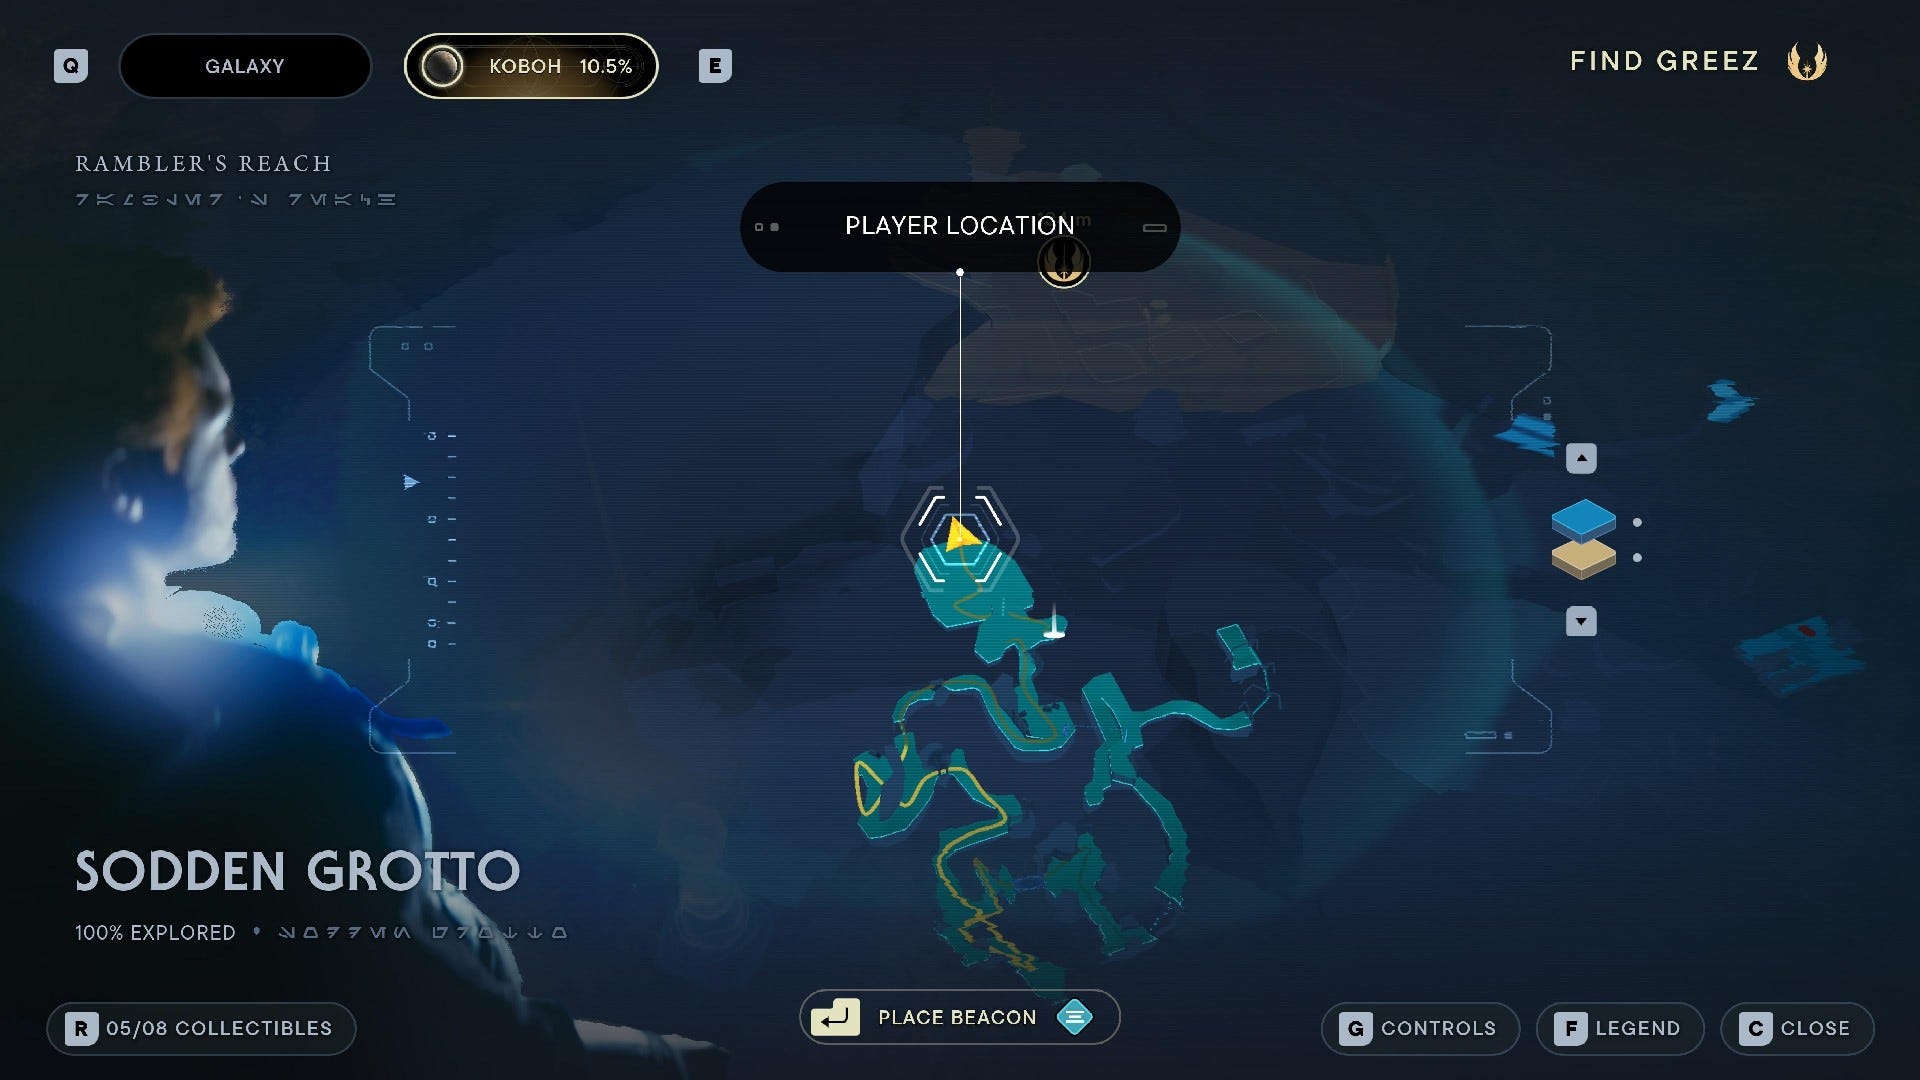
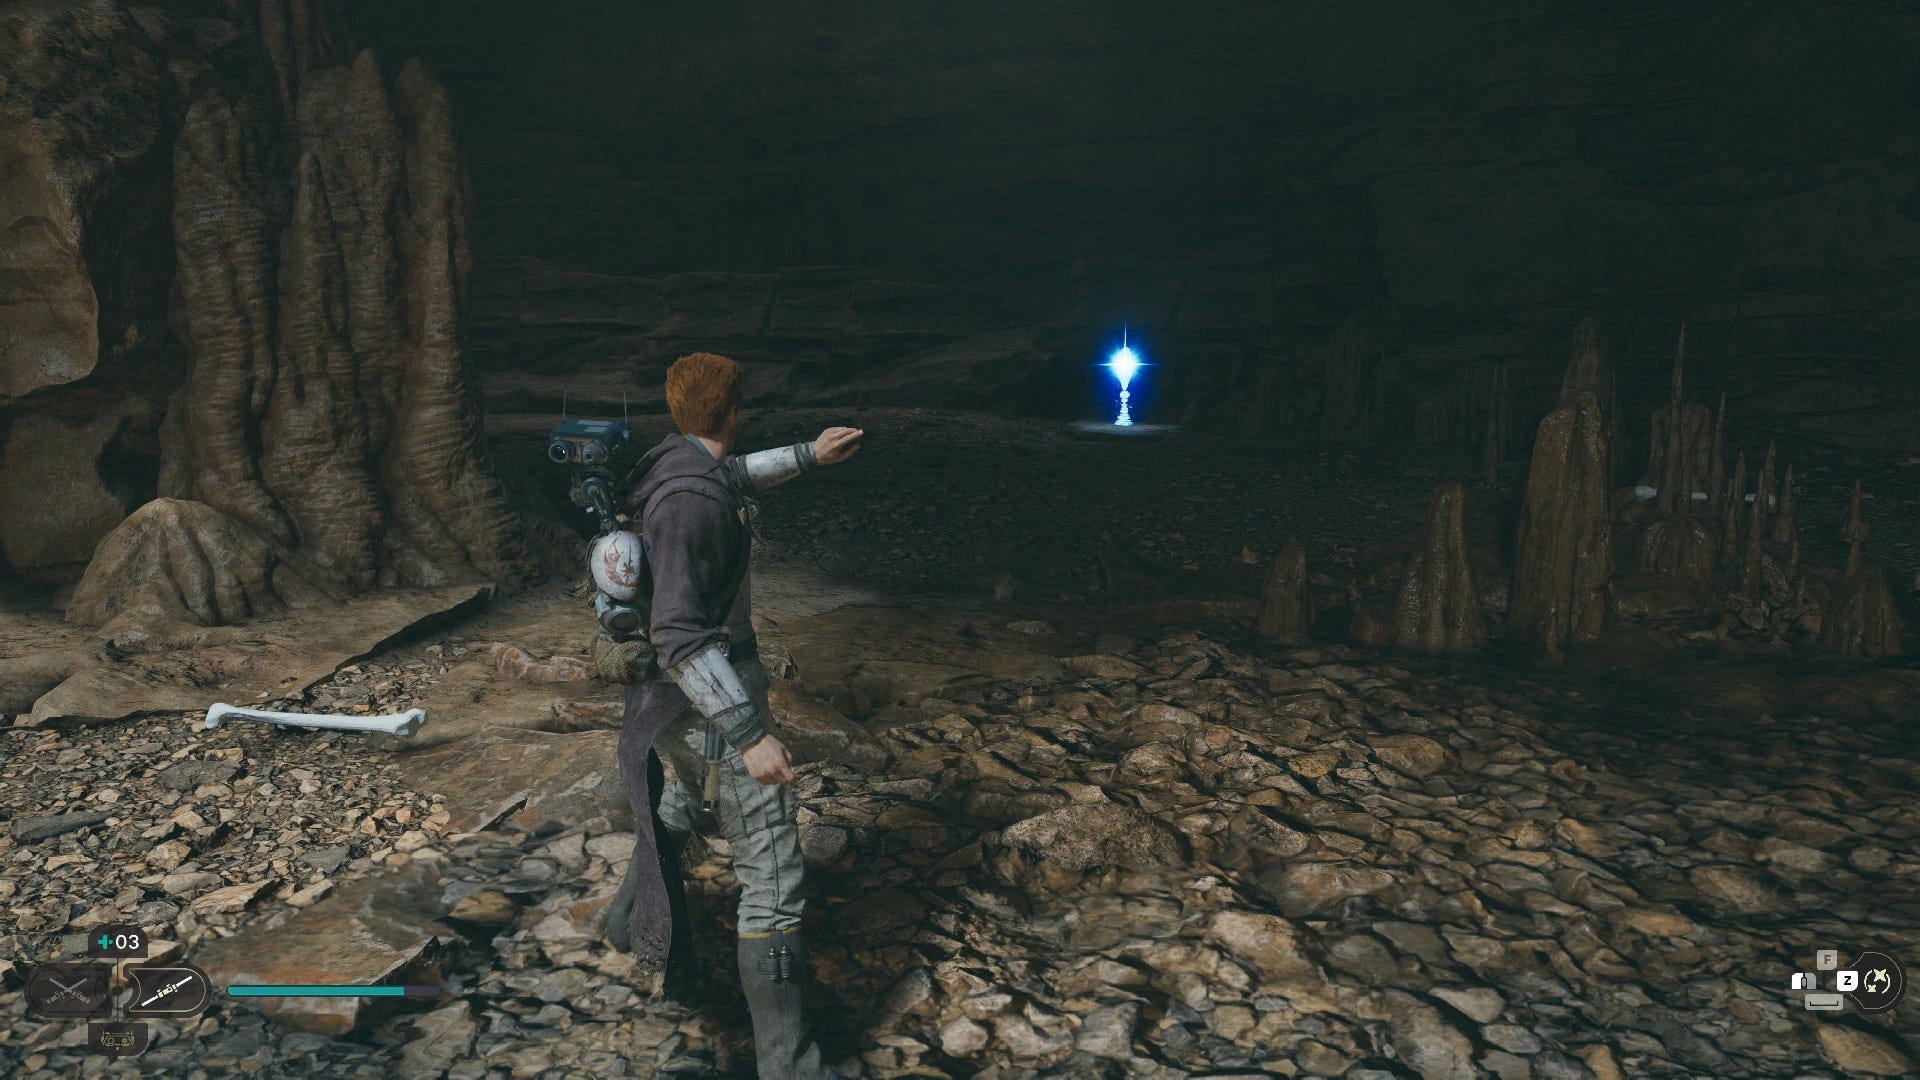
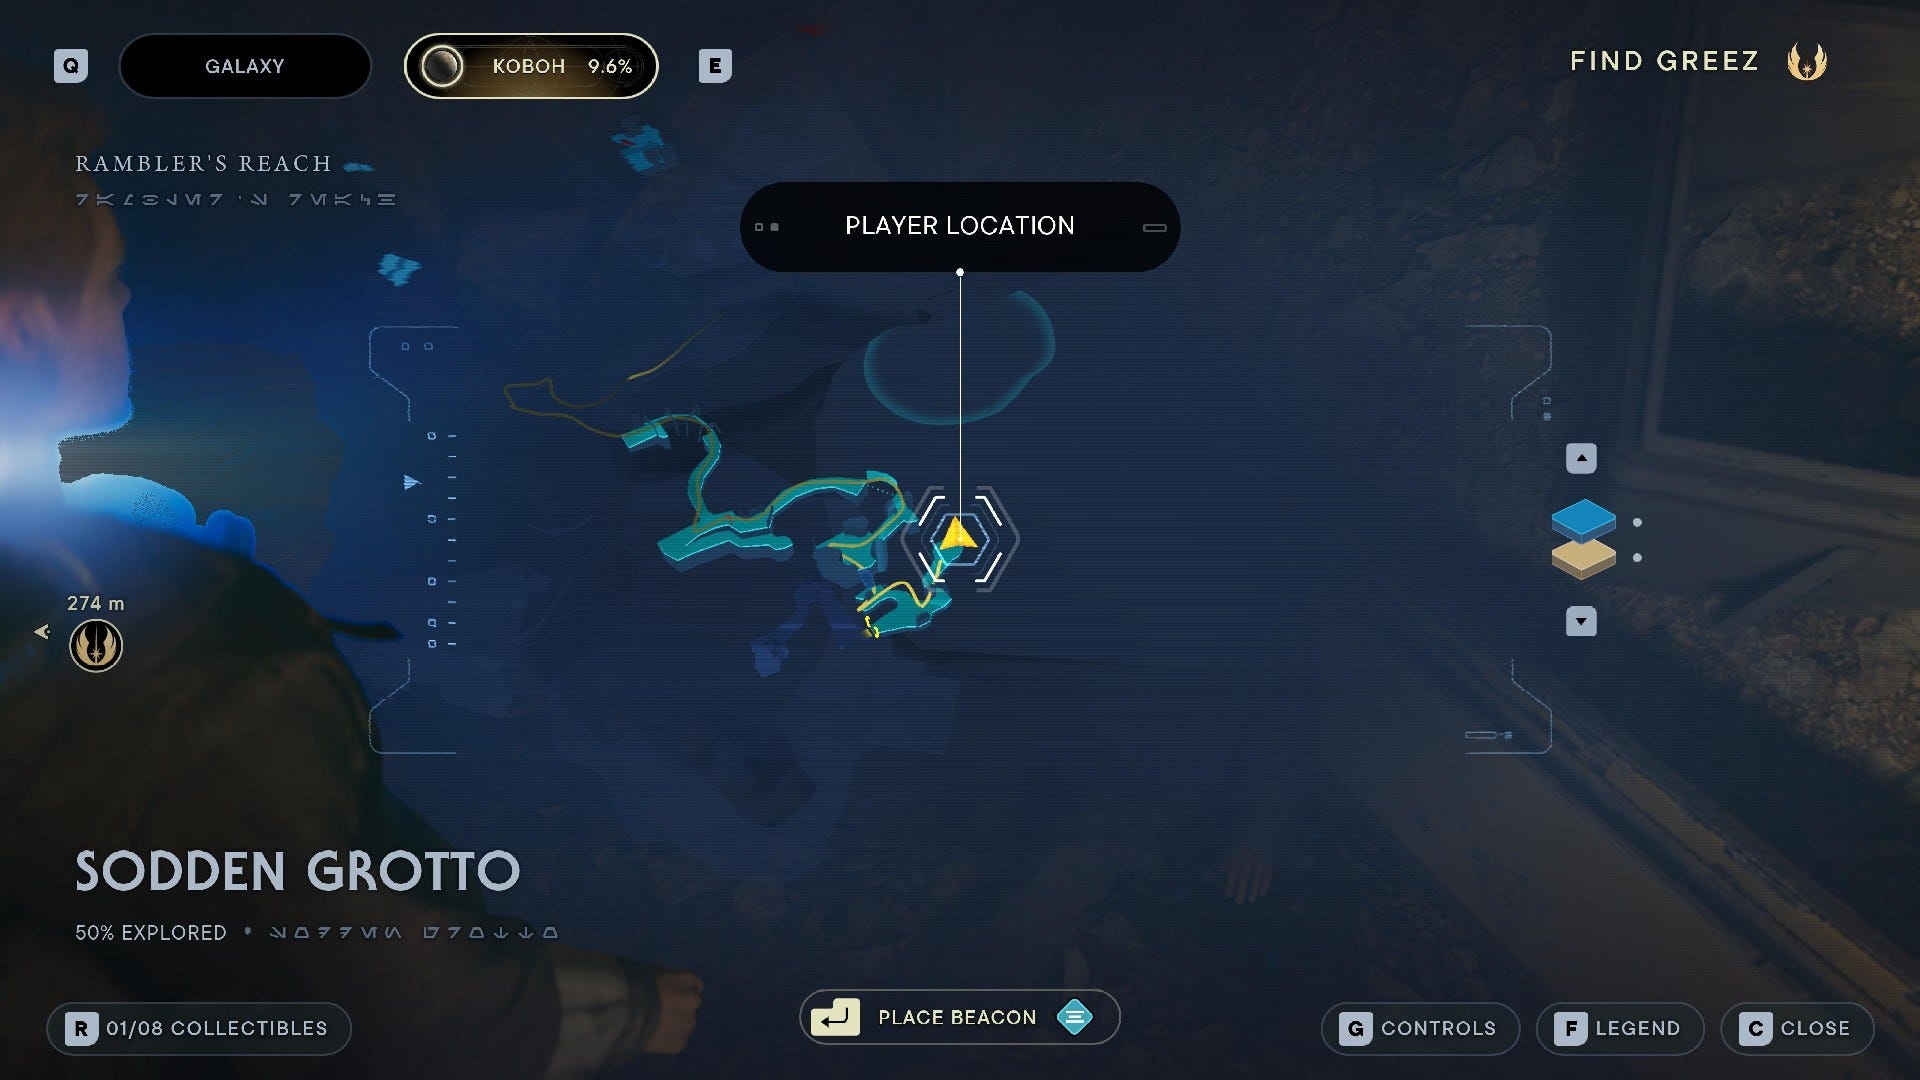
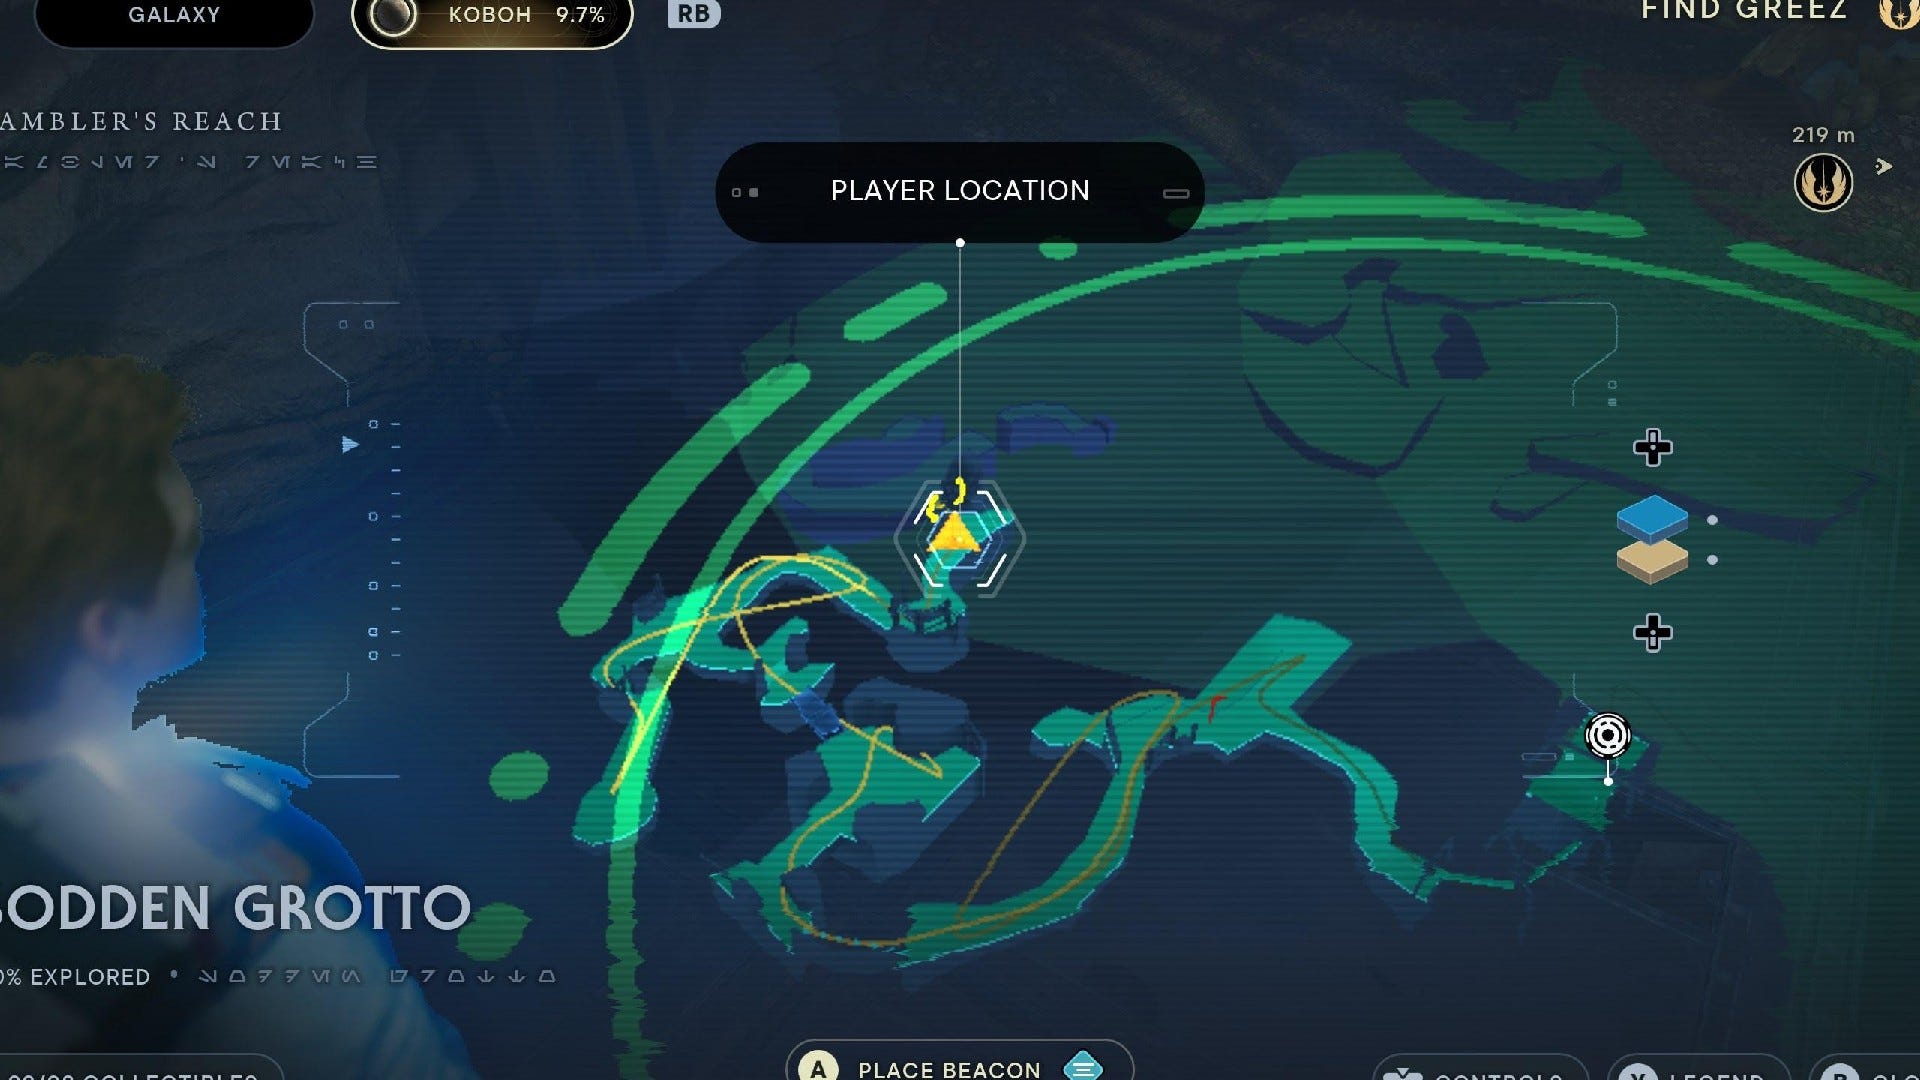
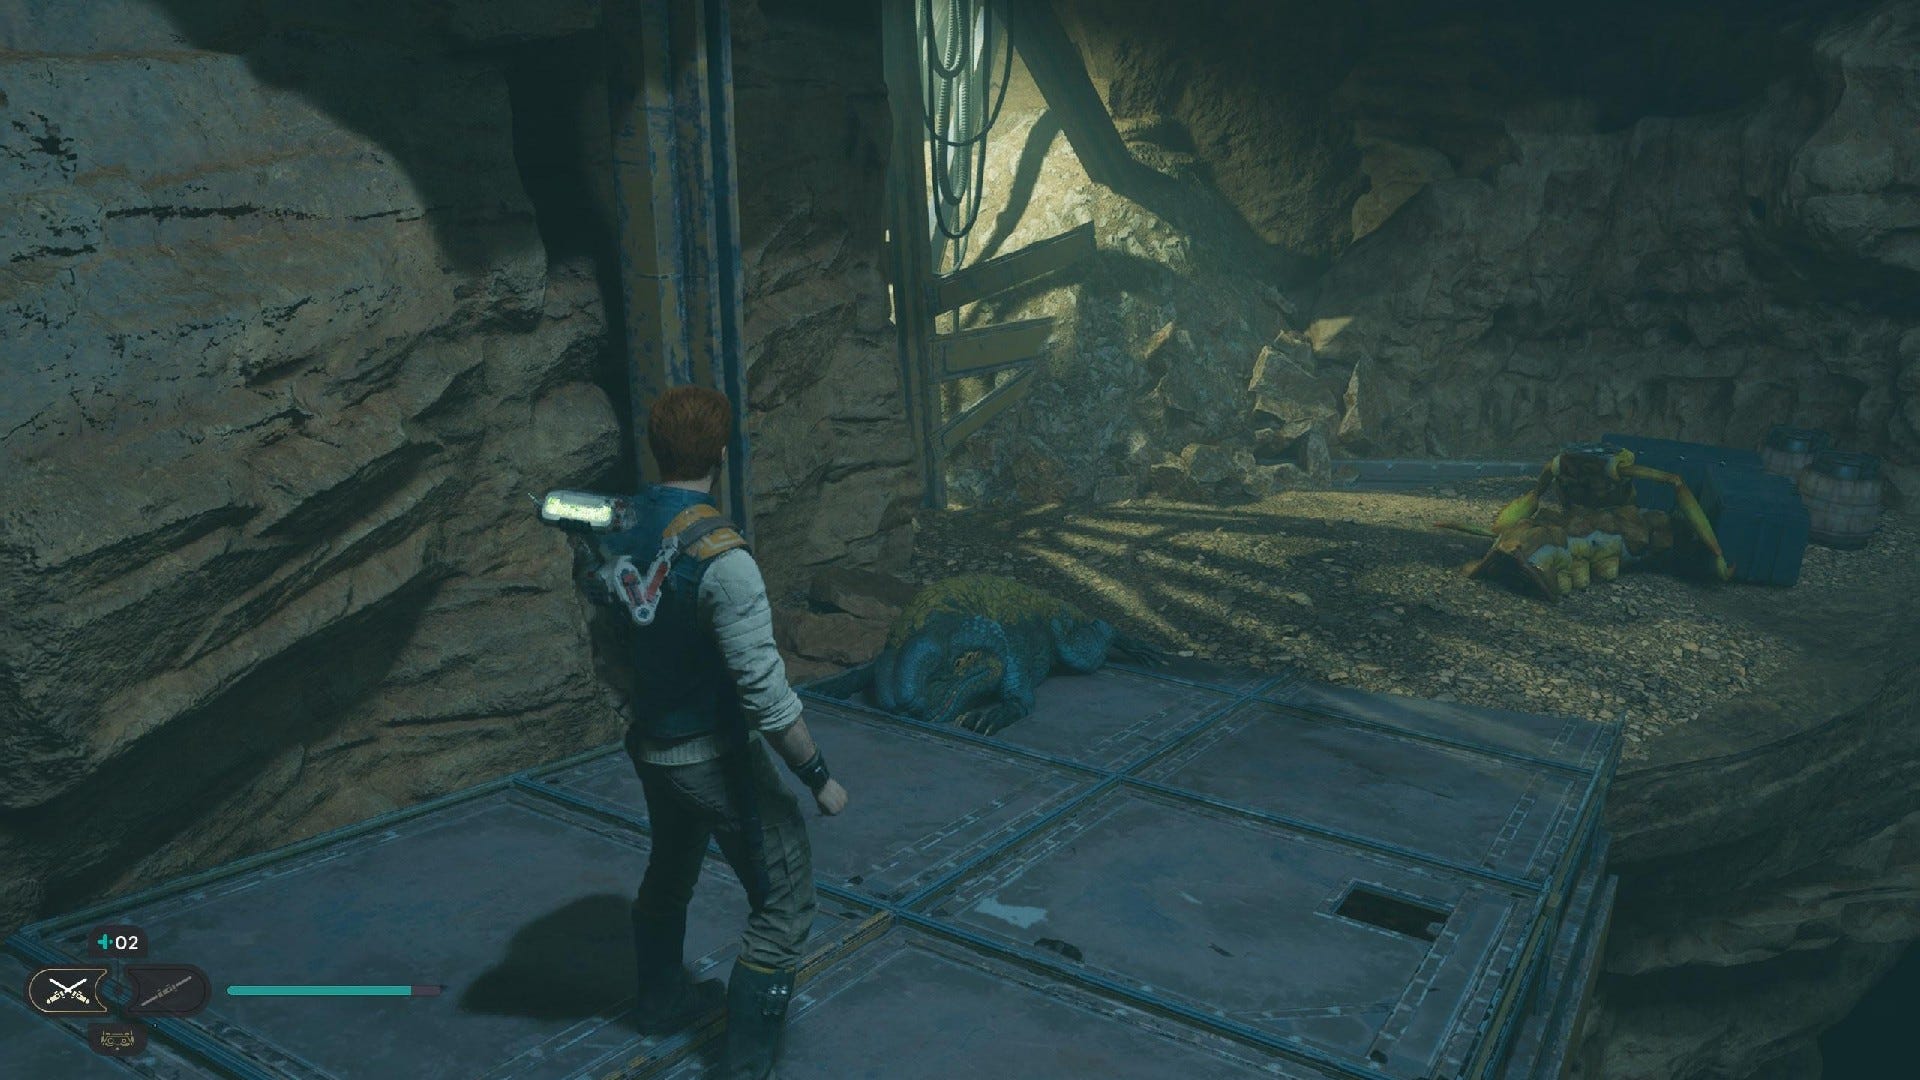
Sodden Grotto collectibles
Sodden Grotto Chests:
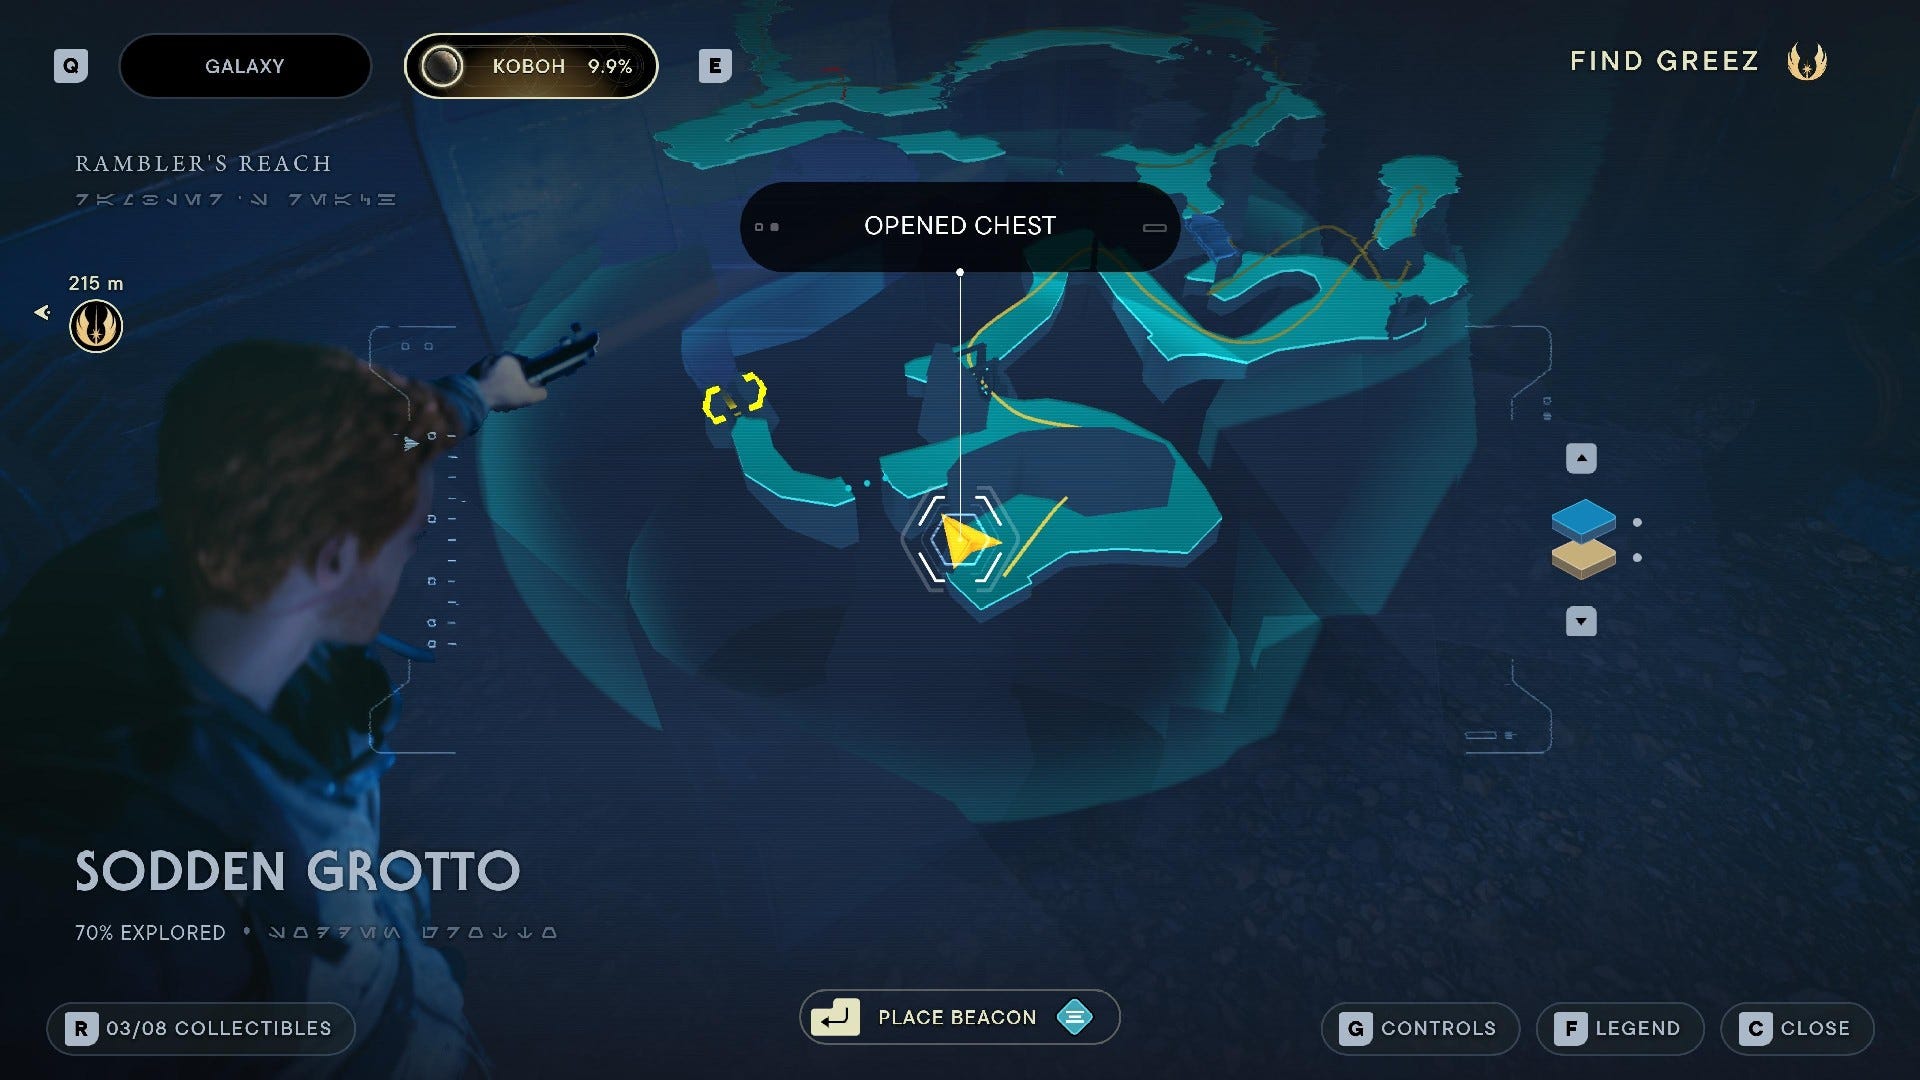
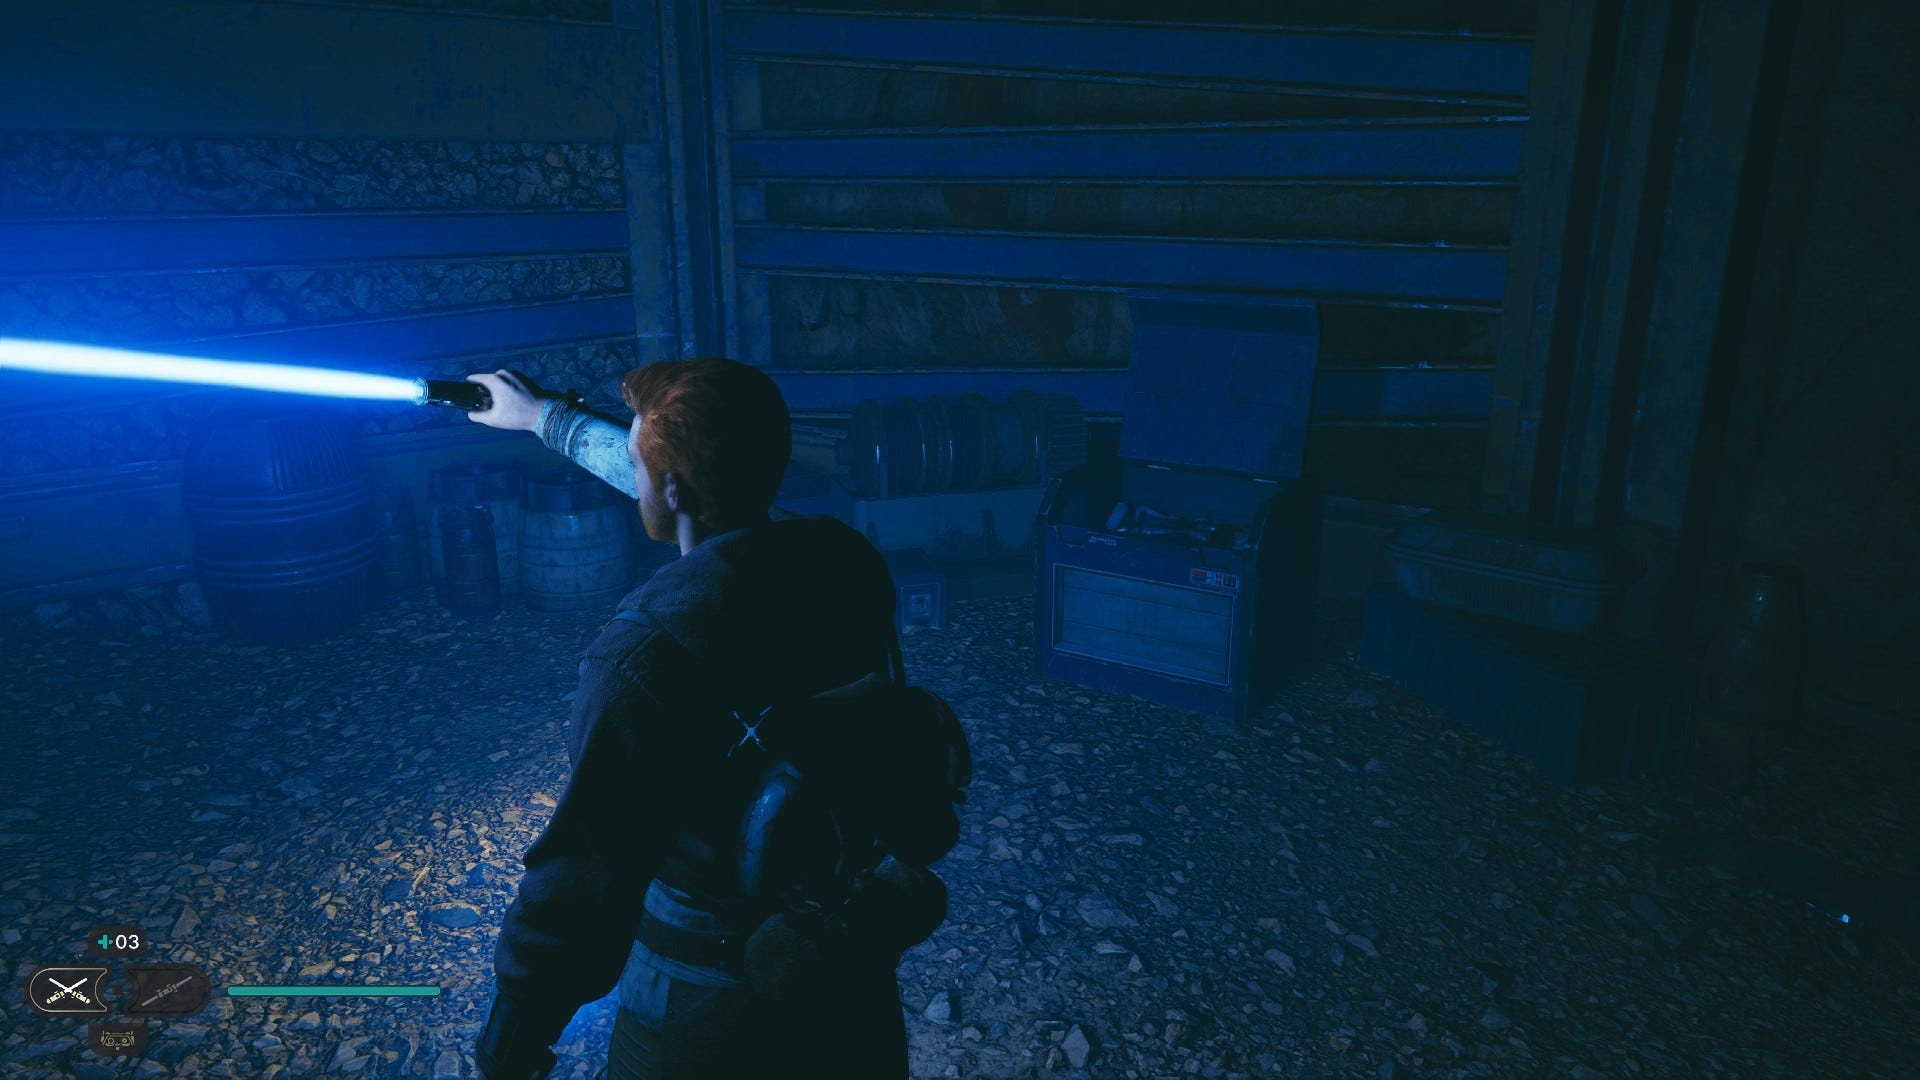
Chest (Scrapyard legs): Take the left path from where the sassy scavenger droid moons you. Yes, really.
Sodden Grotto Essences:
New Perk (Shatter): Found in the Rancor room, towards the back.
Sodden Grotto Databanks:
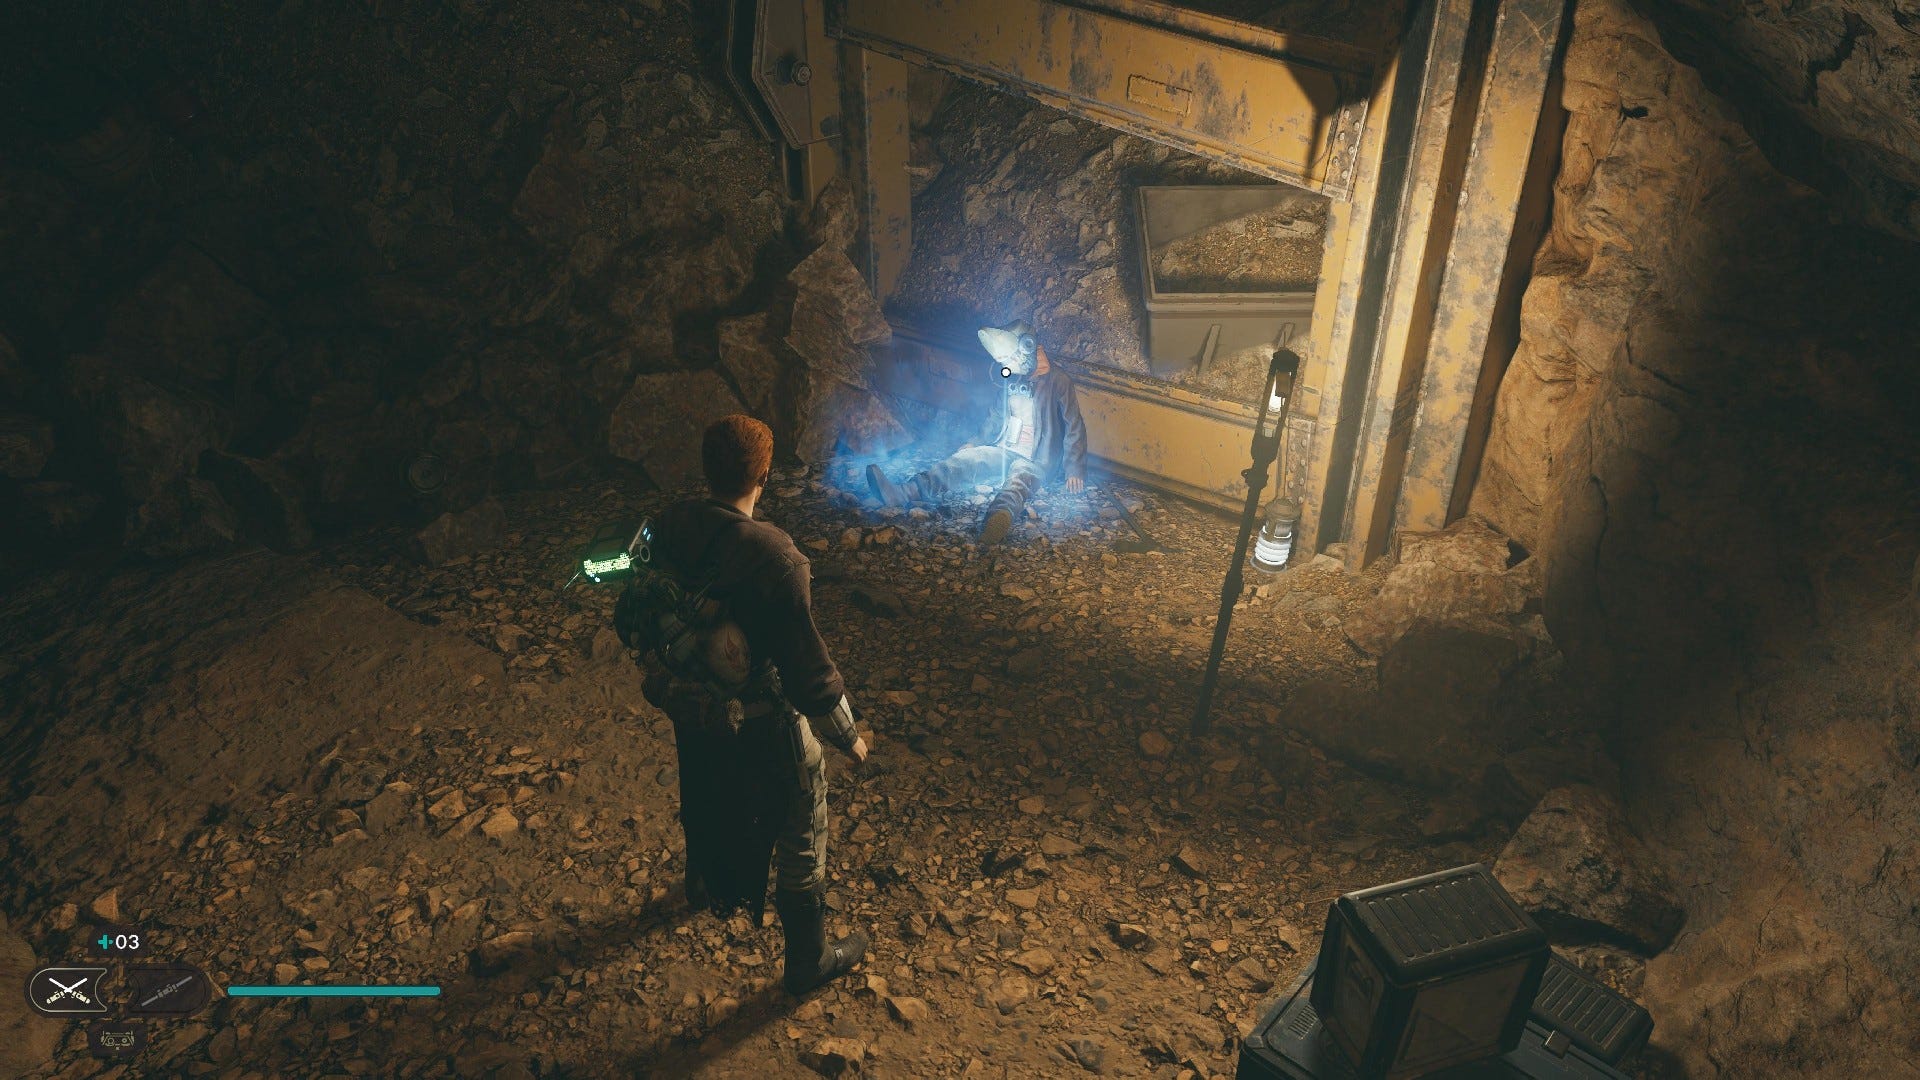
Force Echo (Dead Researcher): On a corpse against the wall.
Databank (Dead Gorgers): Found just before squeezing through the gap to the scavenger droid.
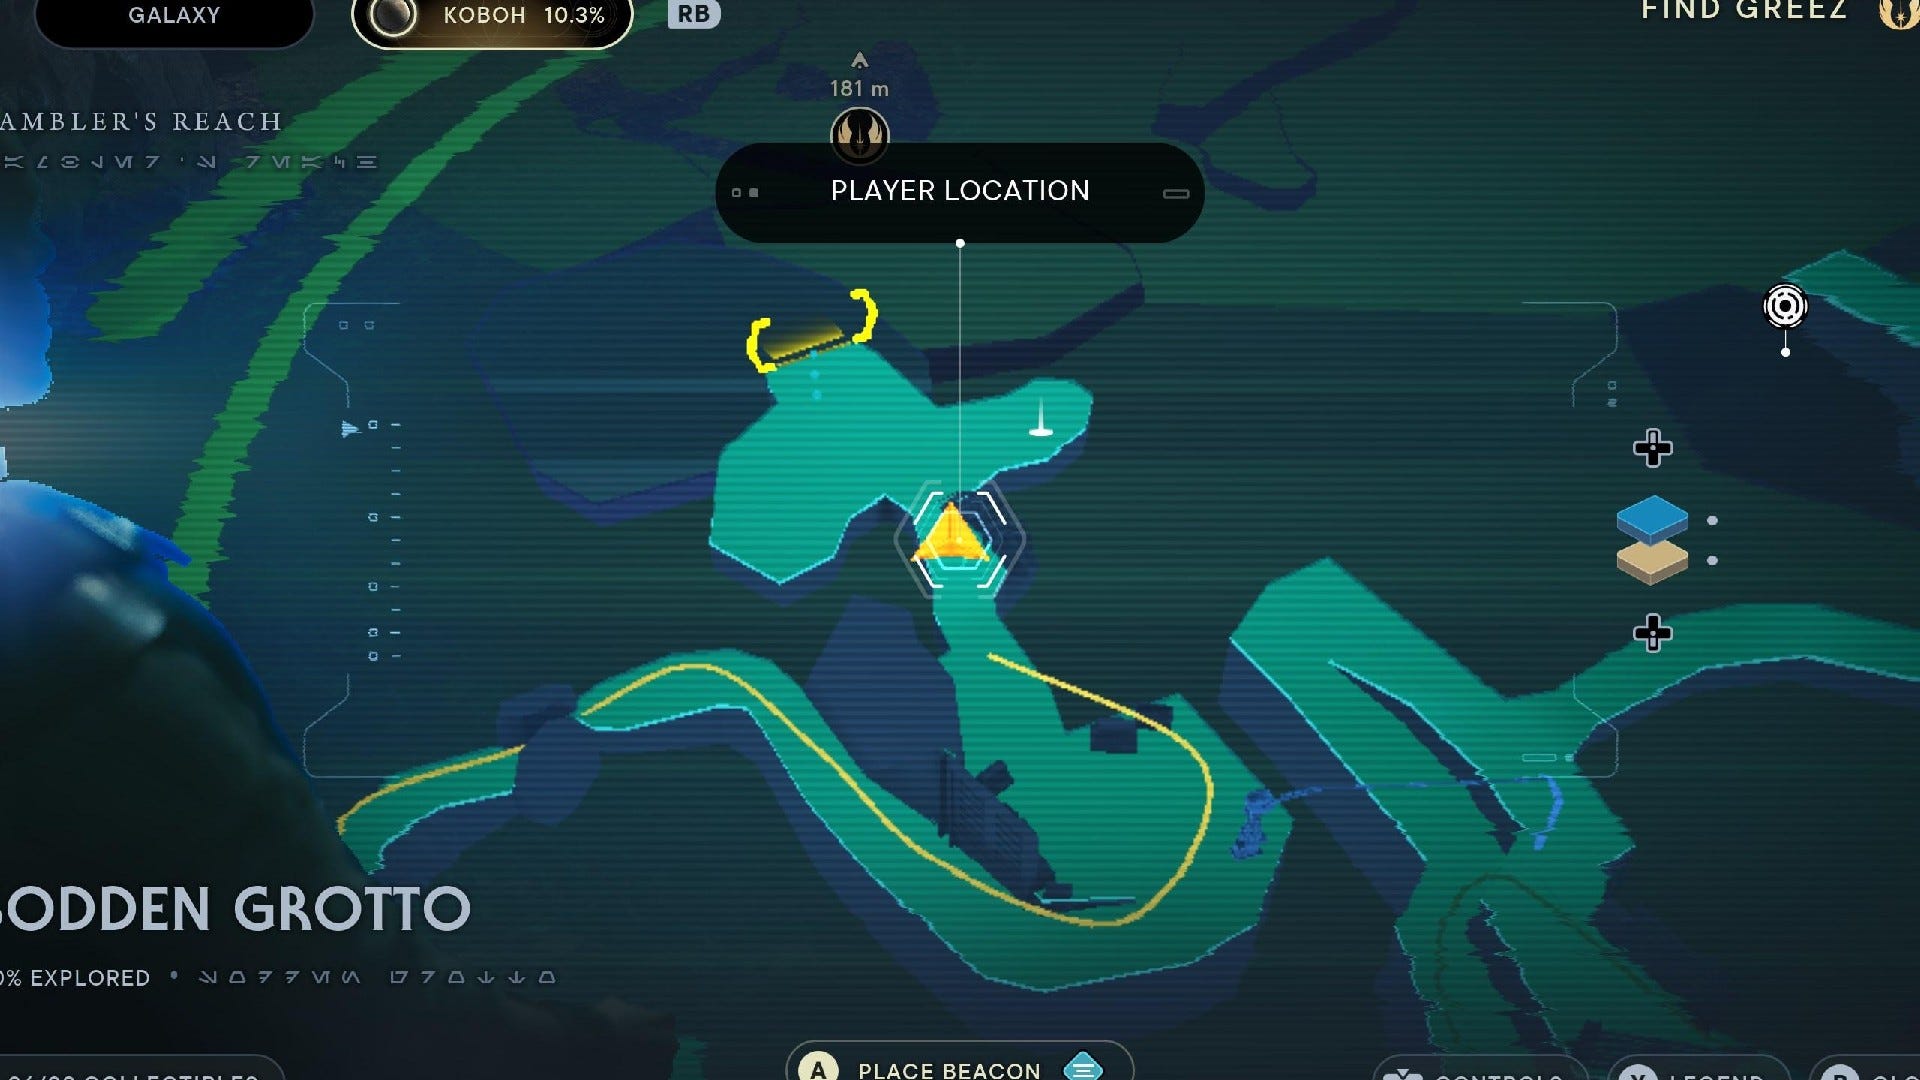
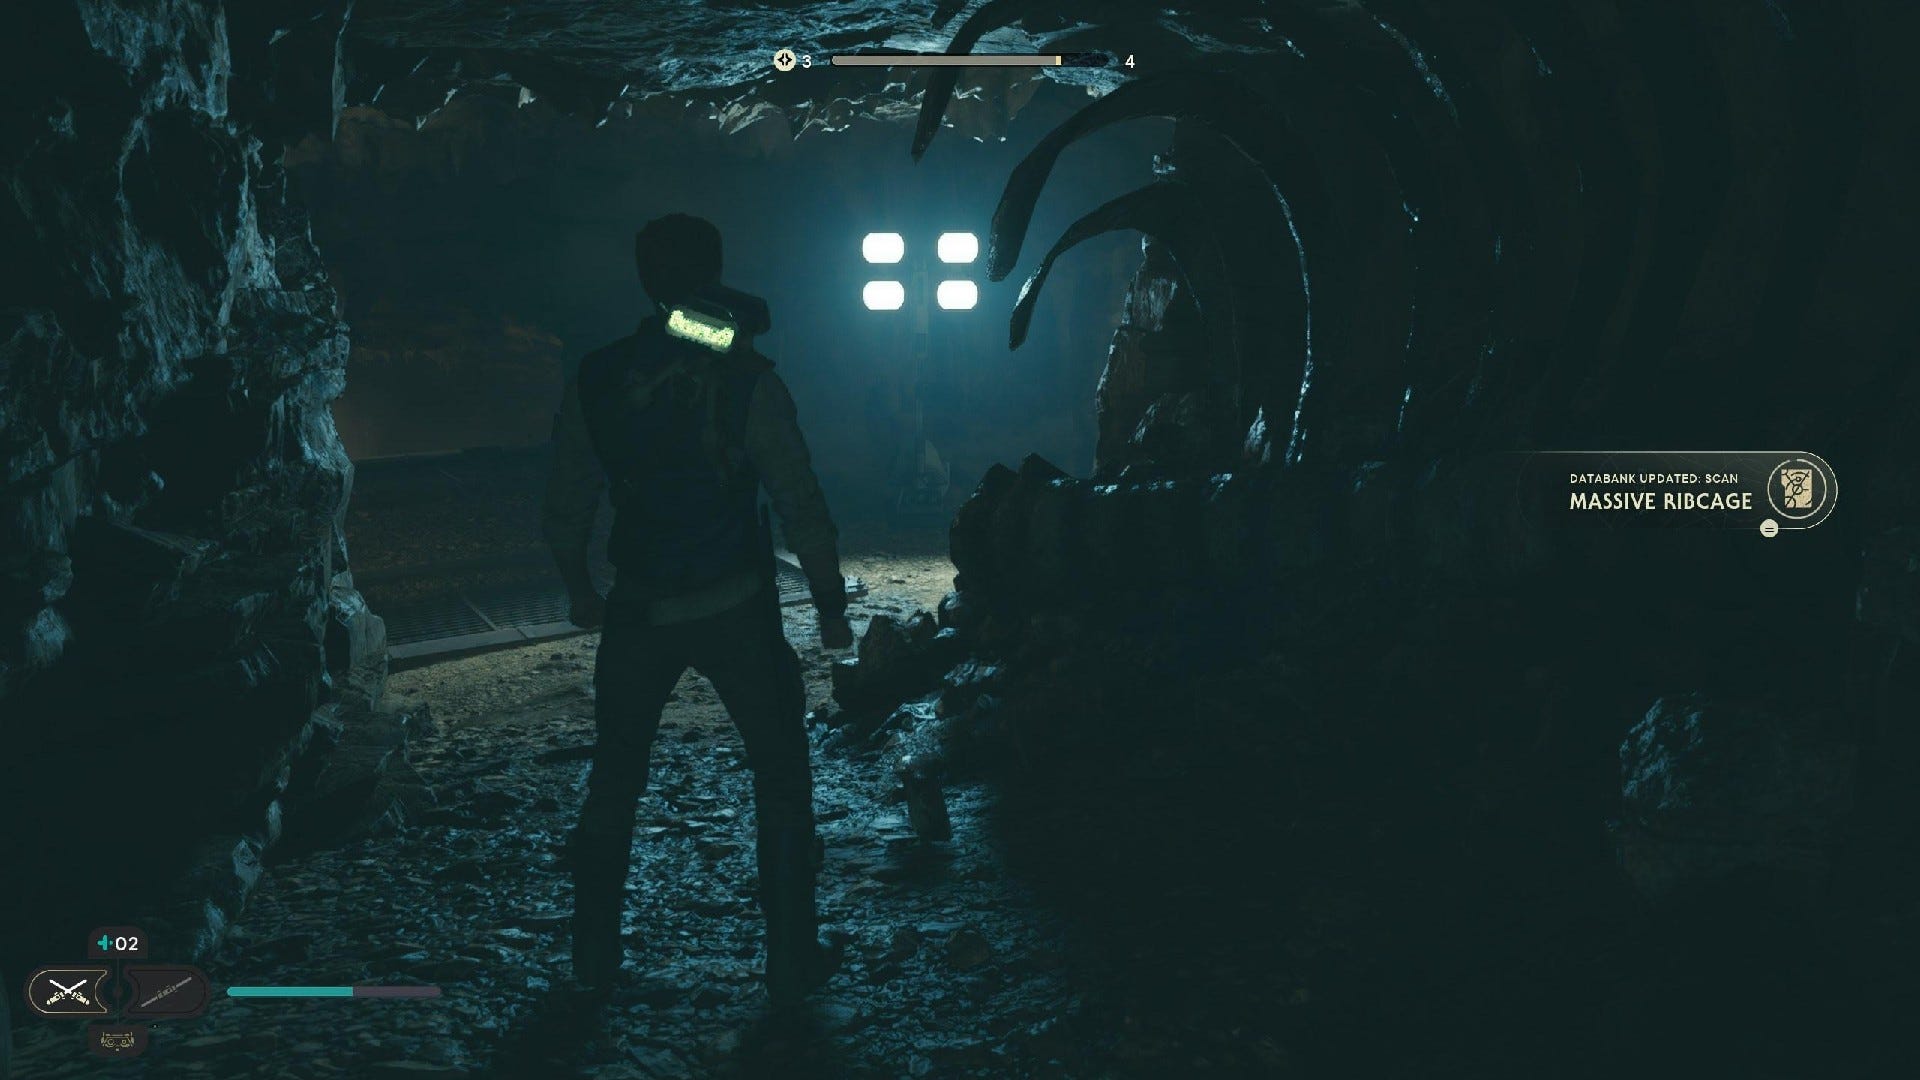
Databank (Massive Ribcage): Found on the main Sodden Grotto path, just before the Meditation Point.

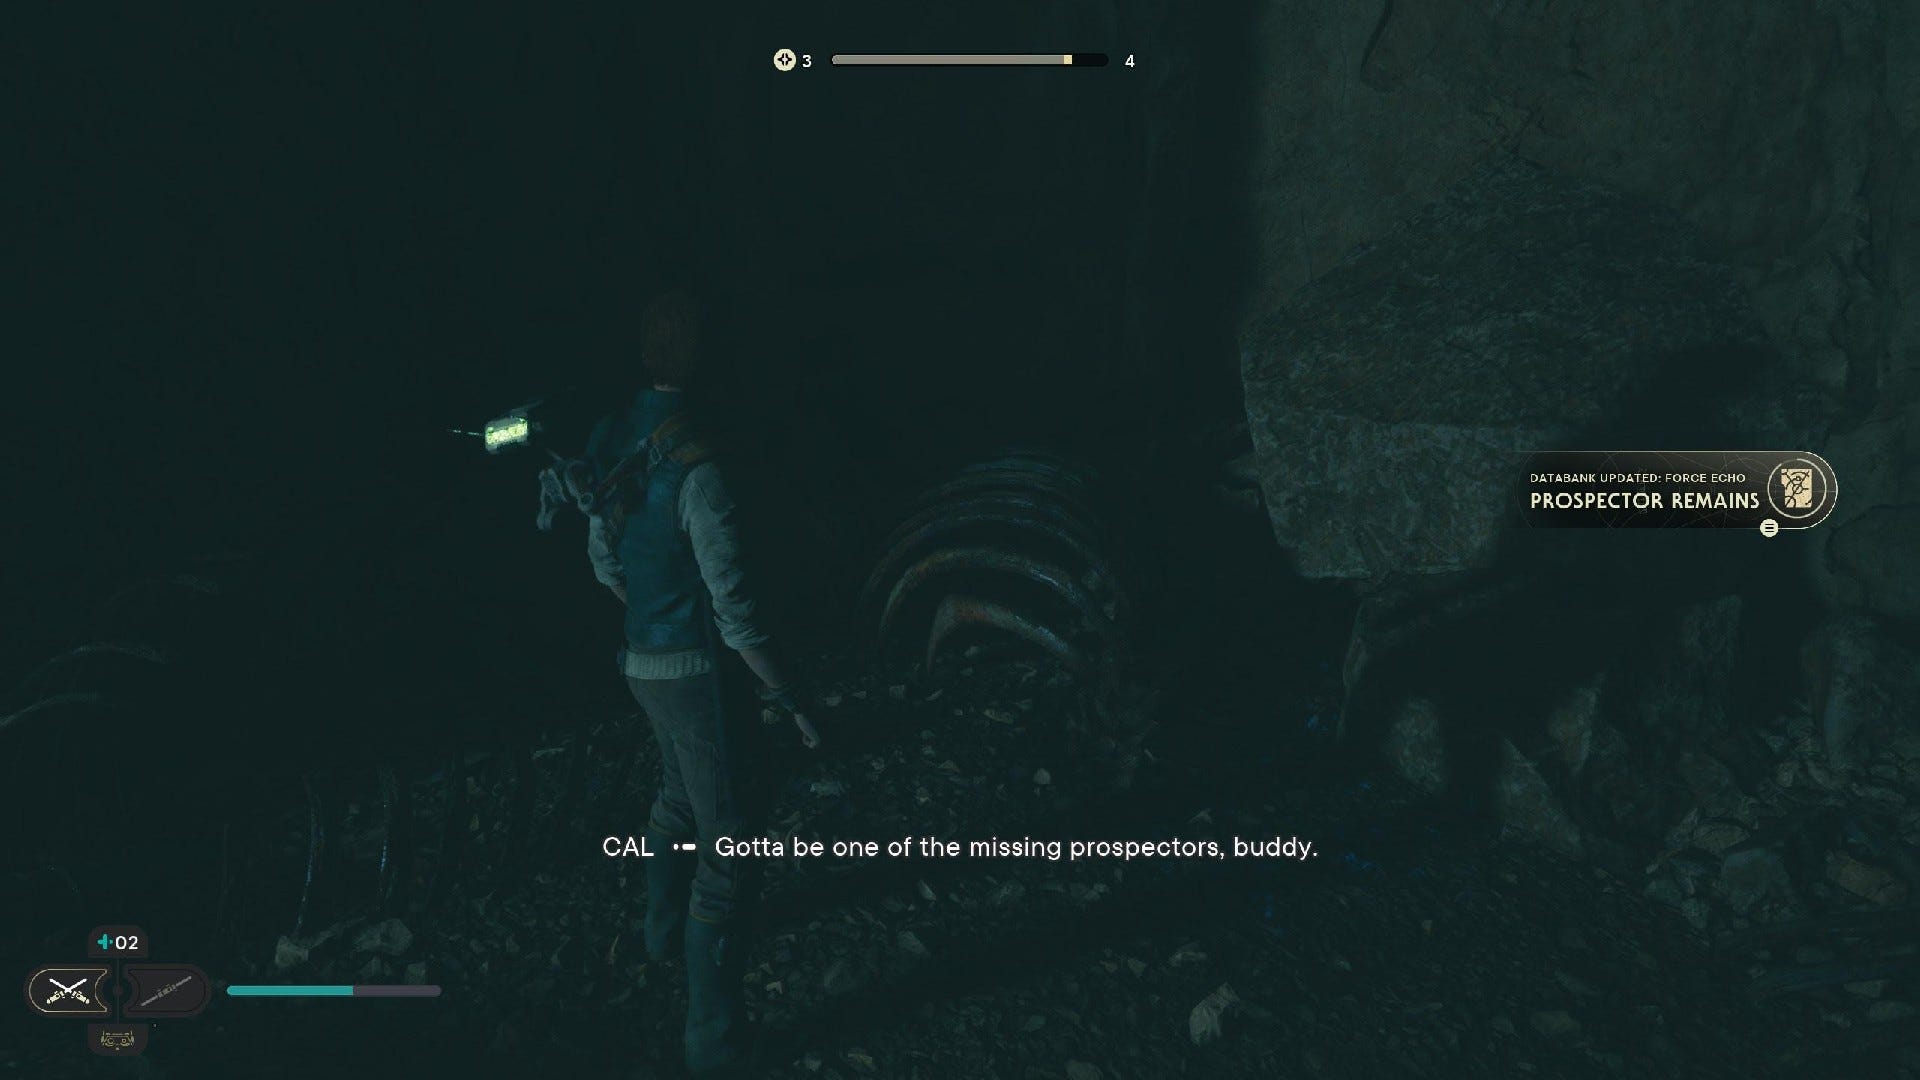
Force Echo (Prospector Remains): On the opposite side of the Sodden Grotto Meditation Point room.
Sodden Grotto Treasures:
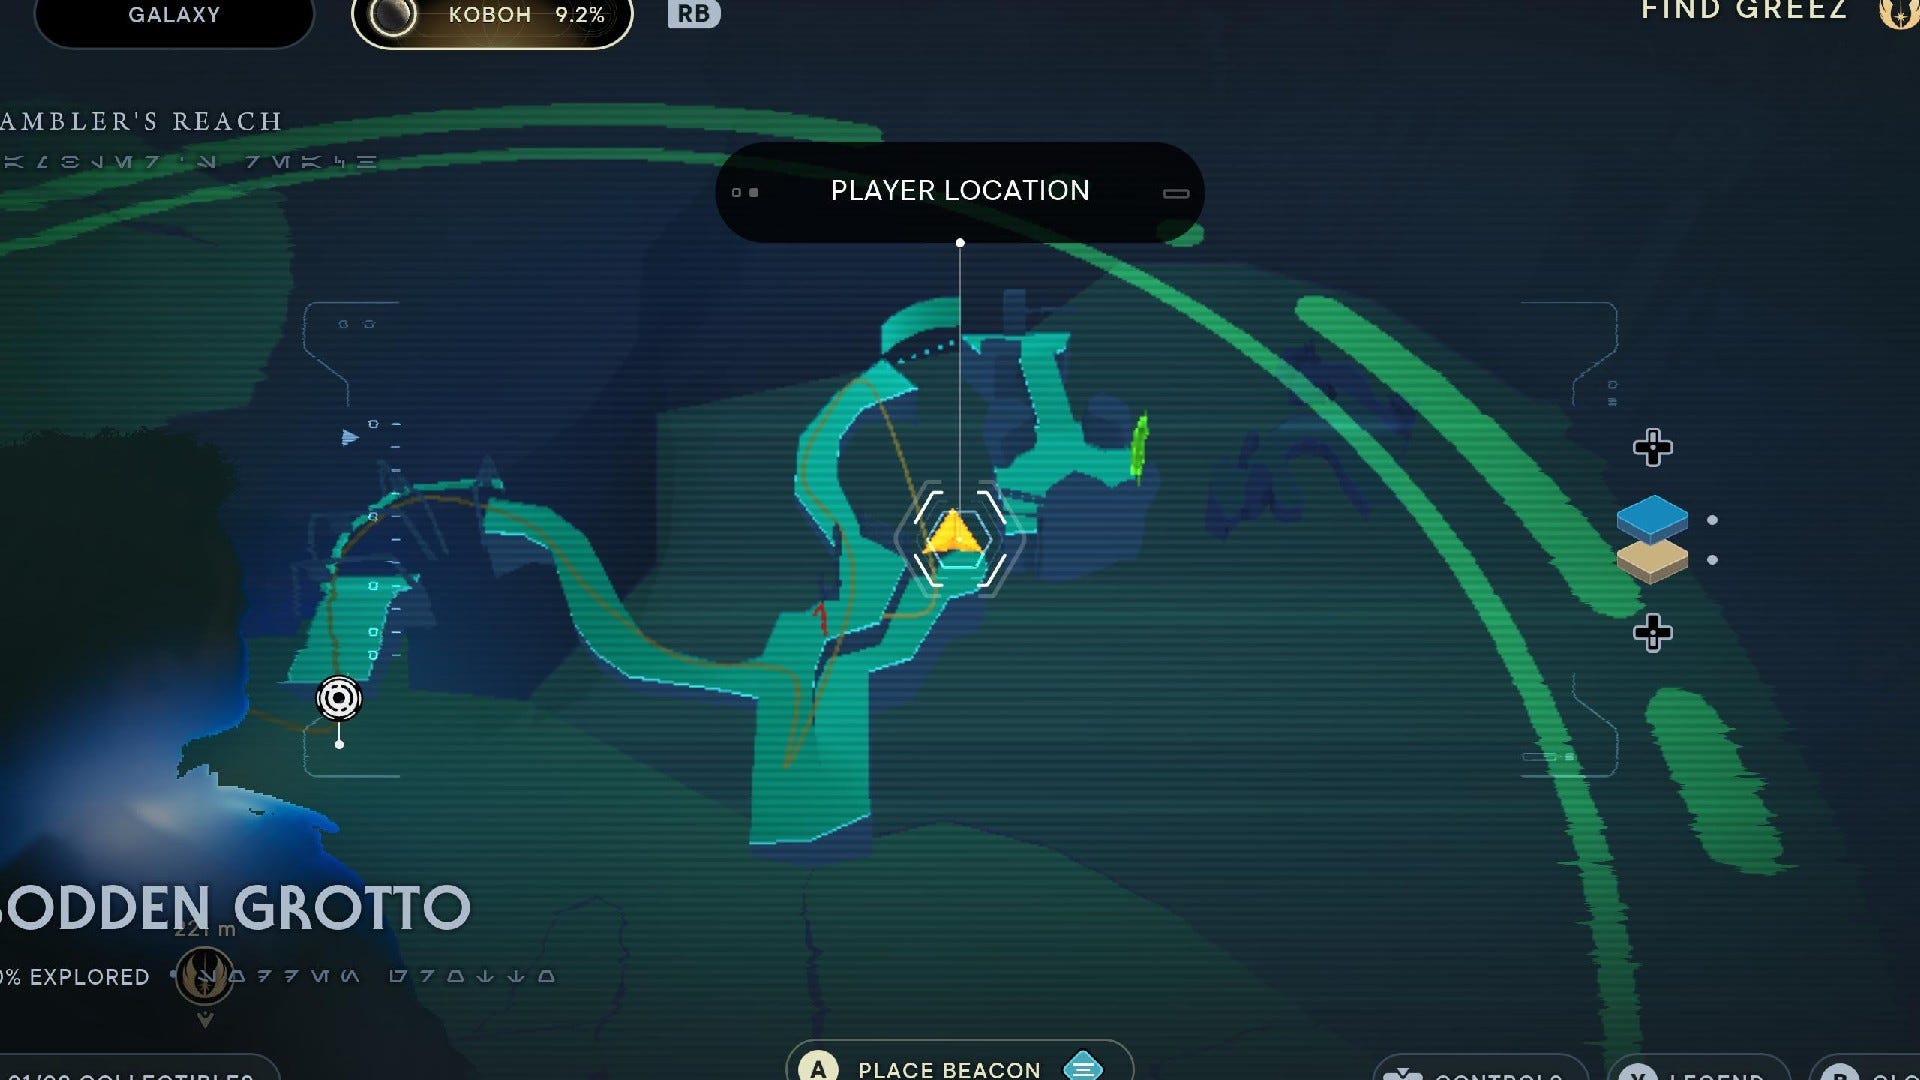
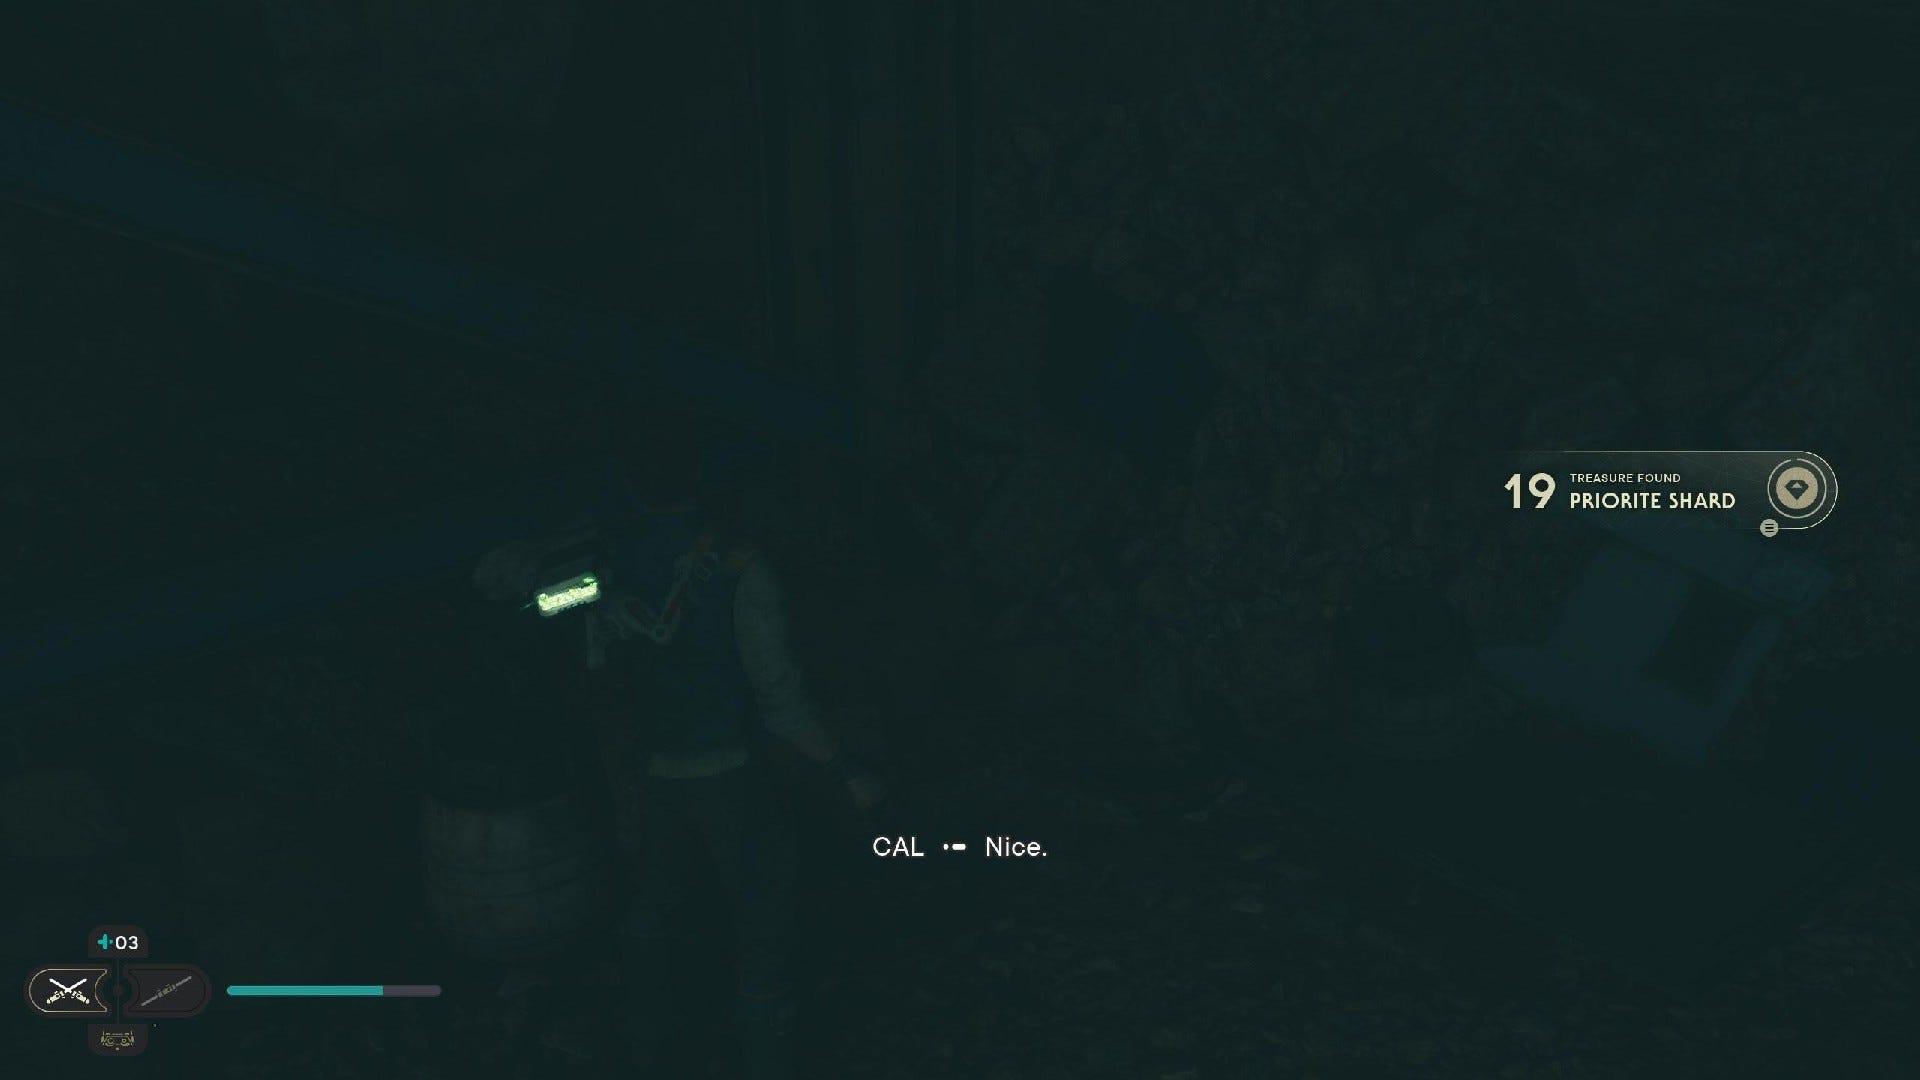
Priorite Shard #1: Turn left after entering the Grotto, and drop down the ledge on the right.

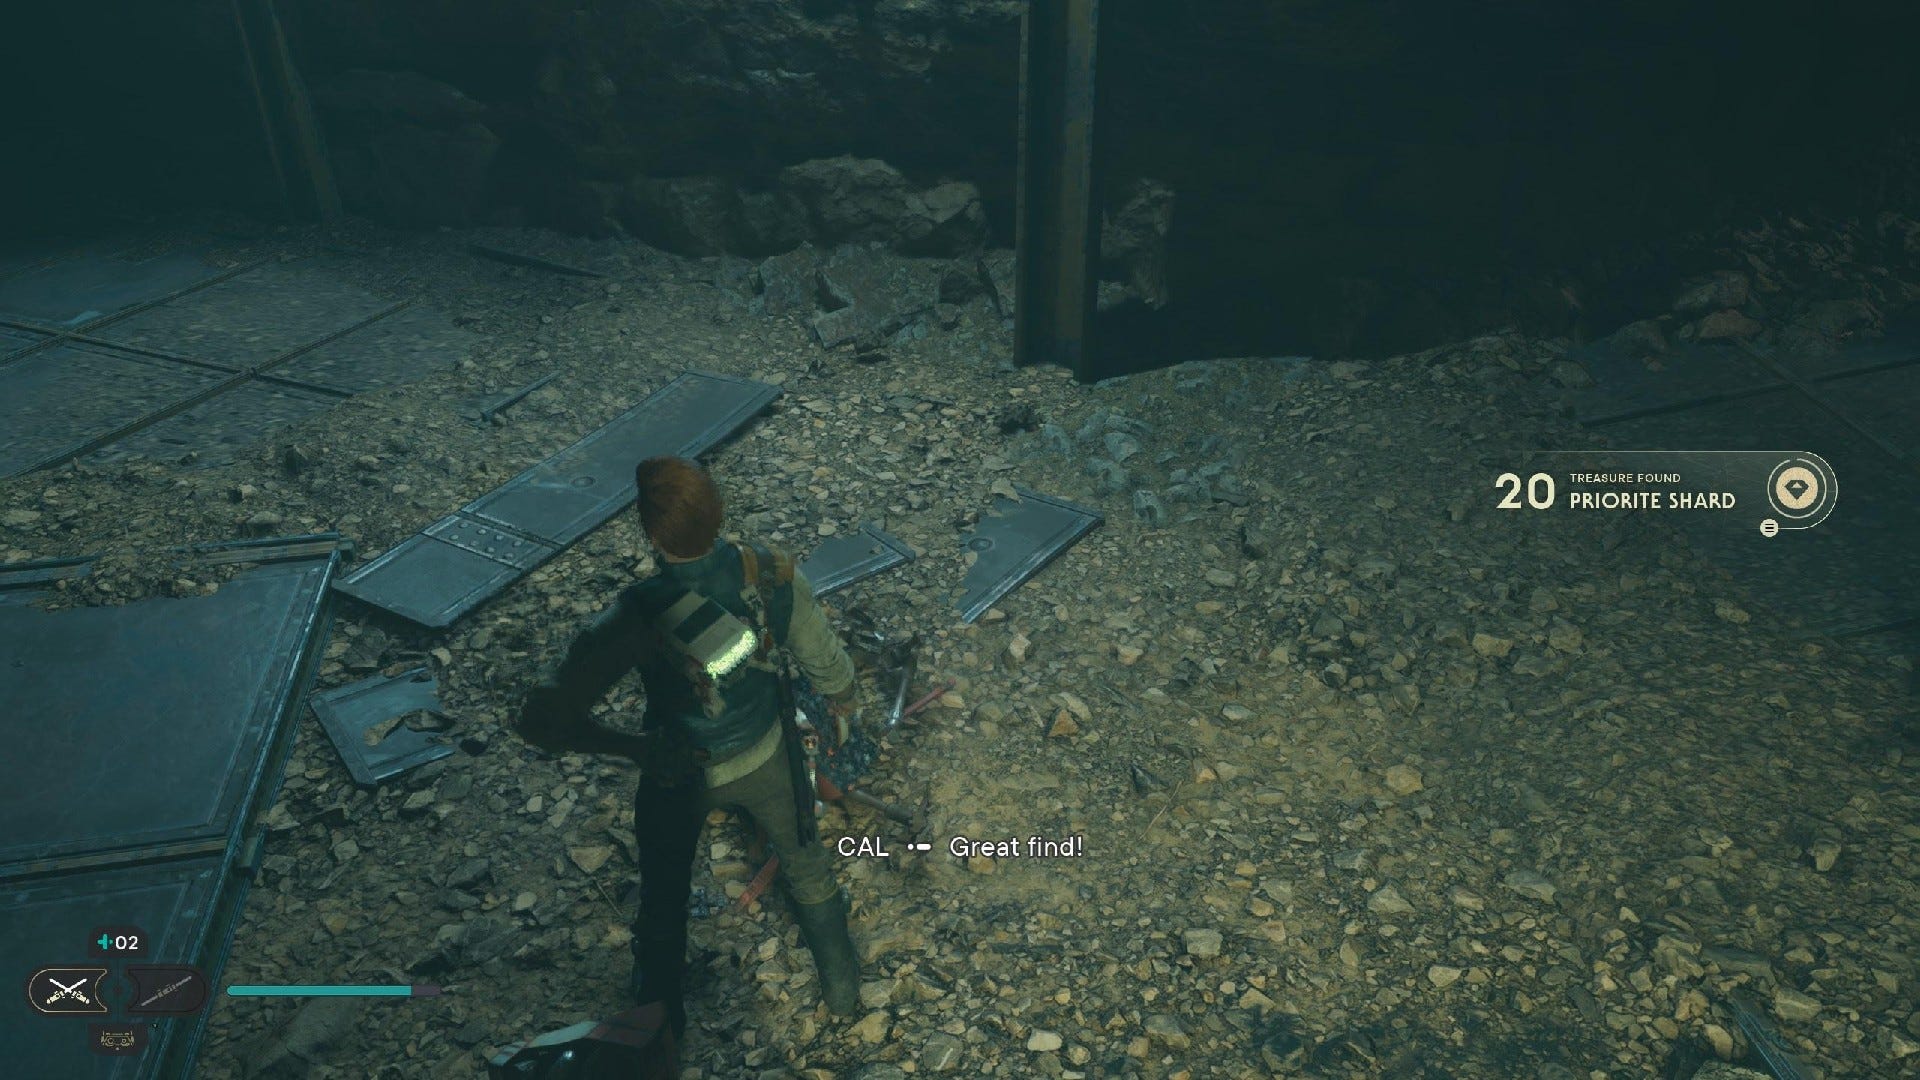
Priorite Shard #2: Dropped by the scavenger droid that moons you.
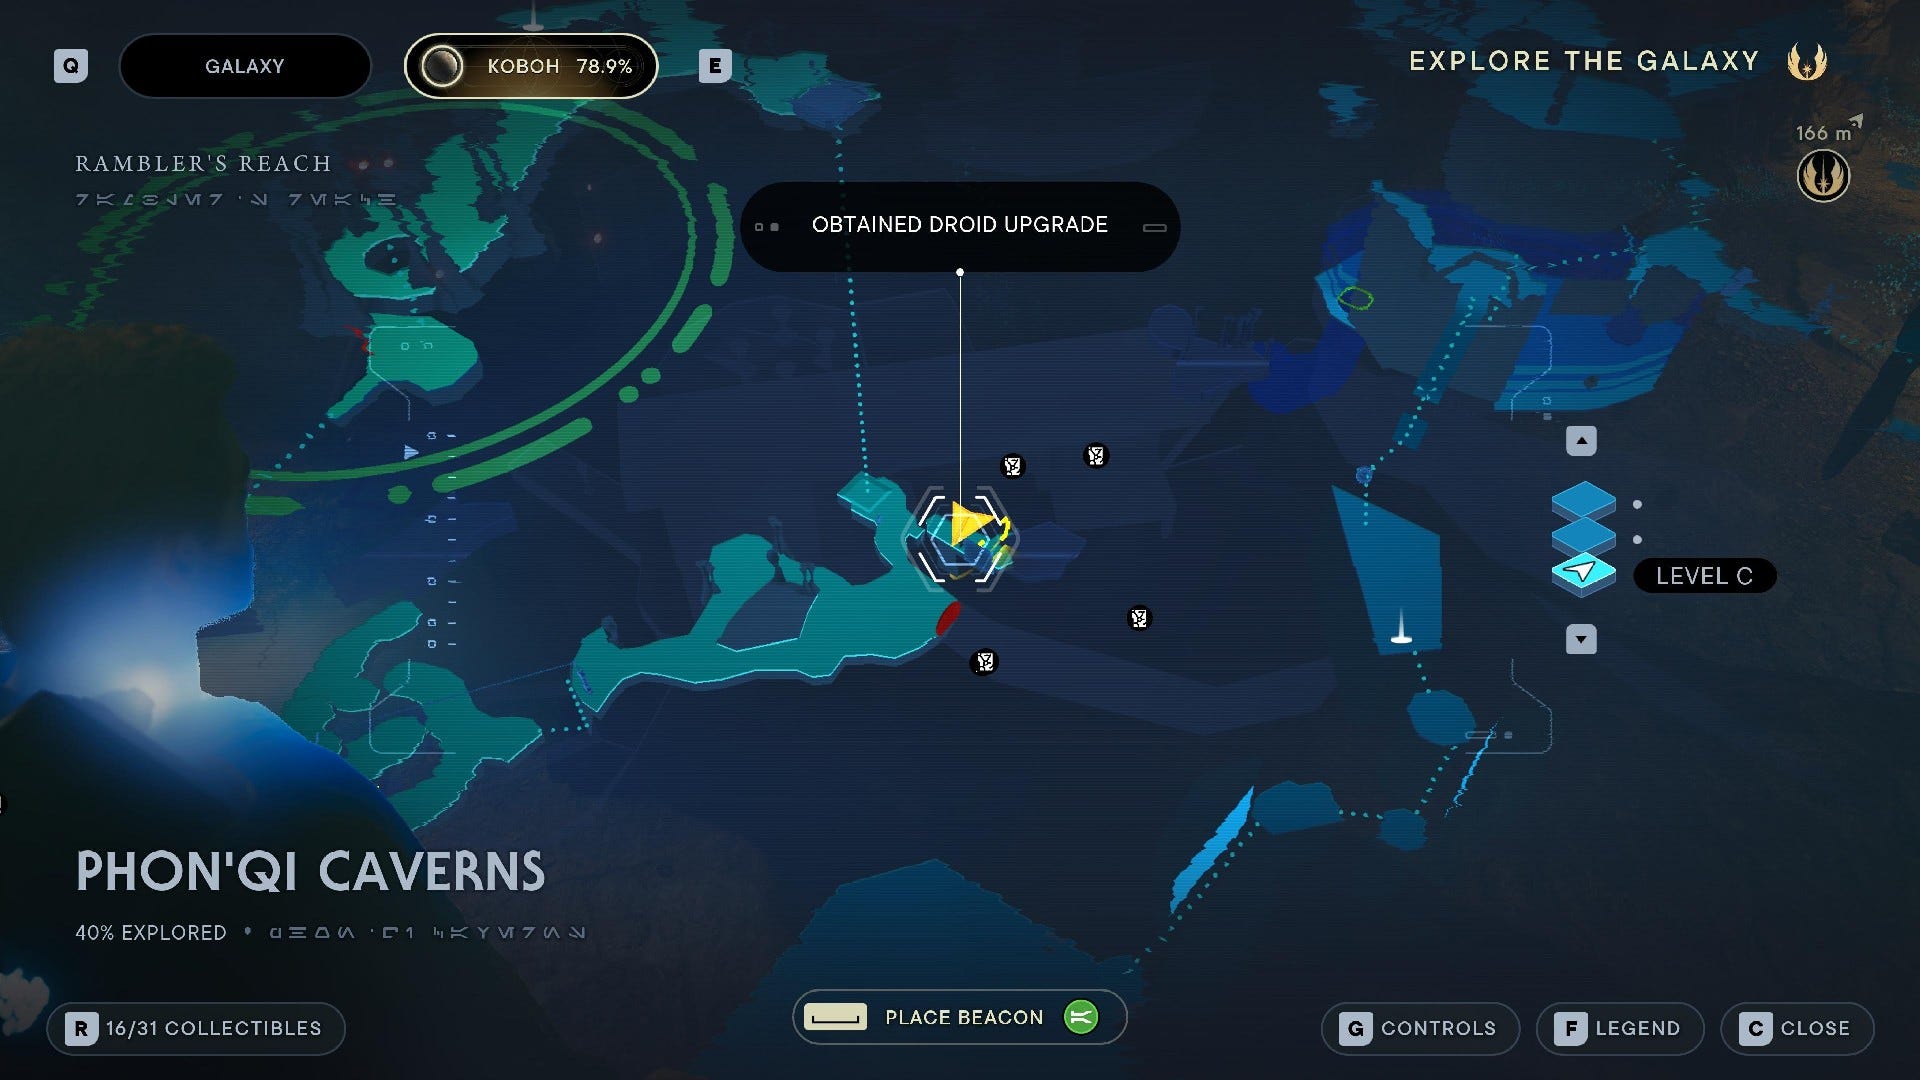
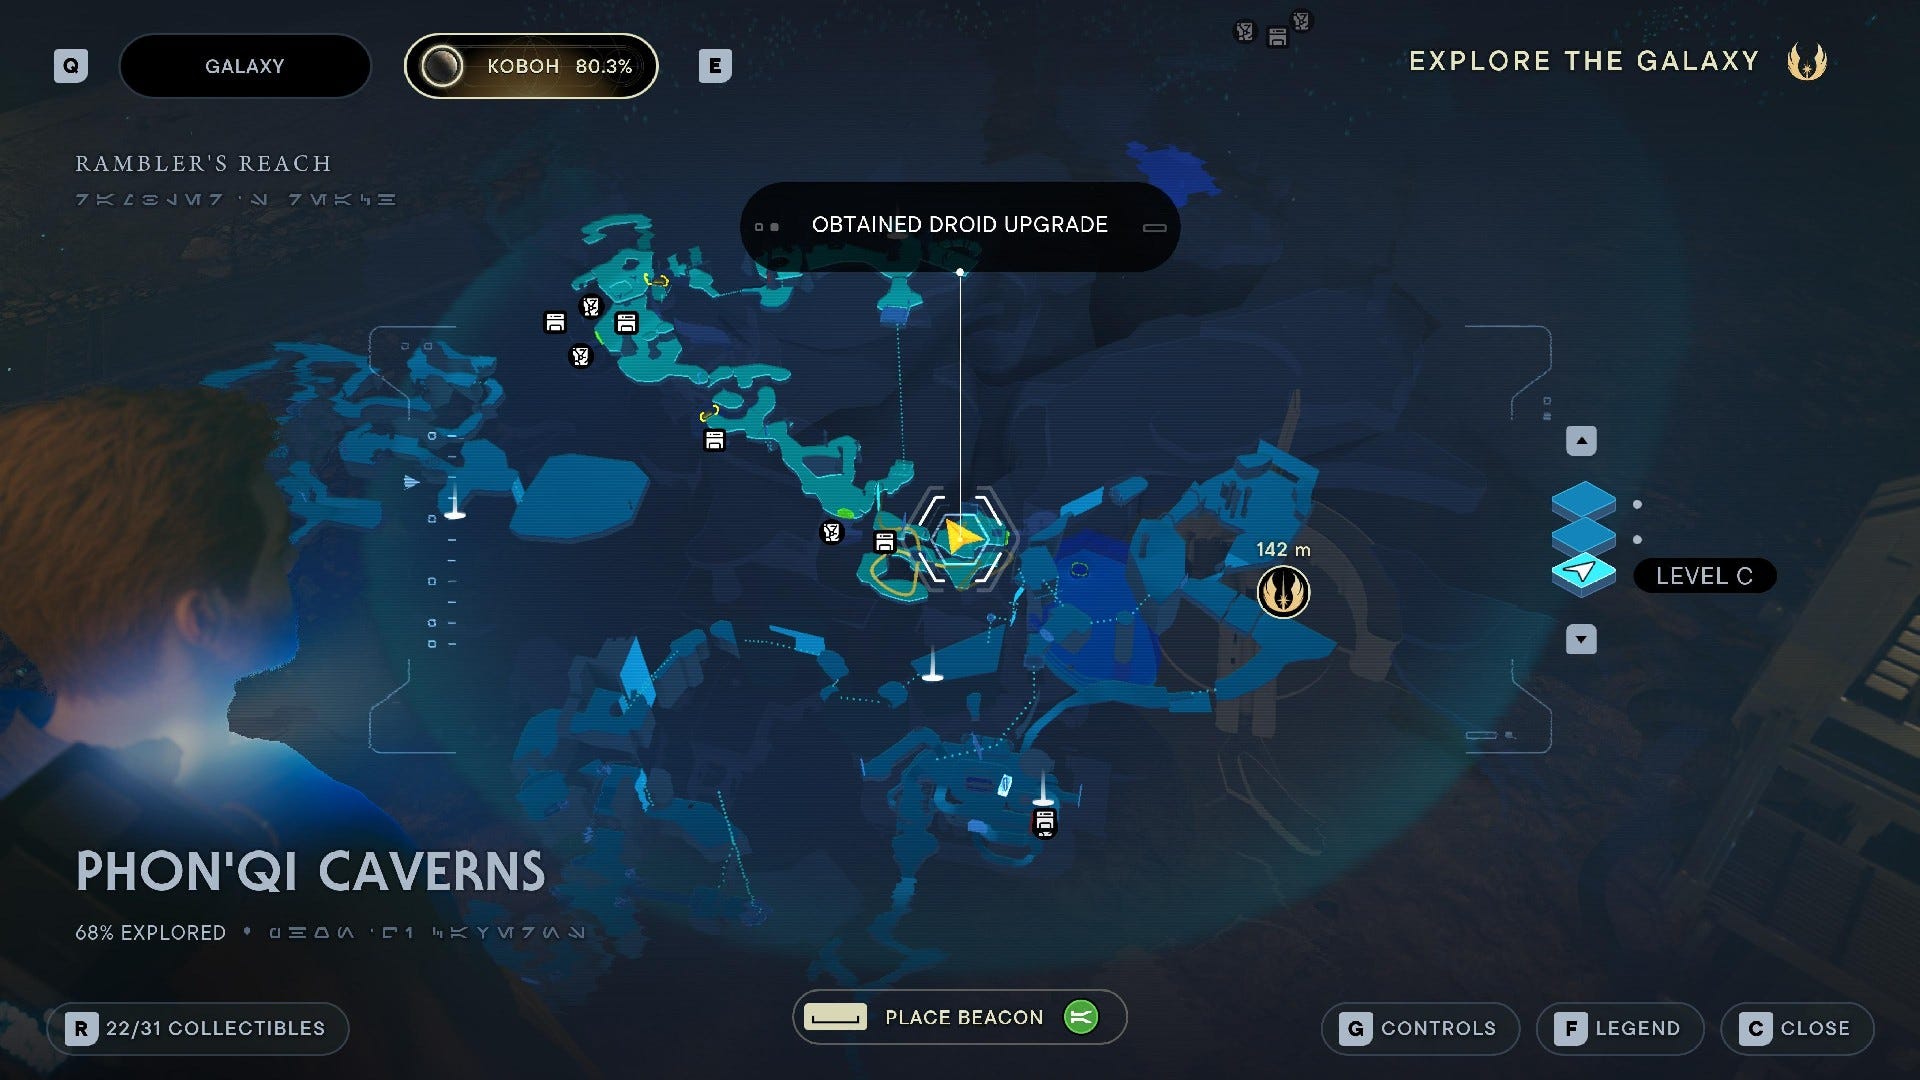
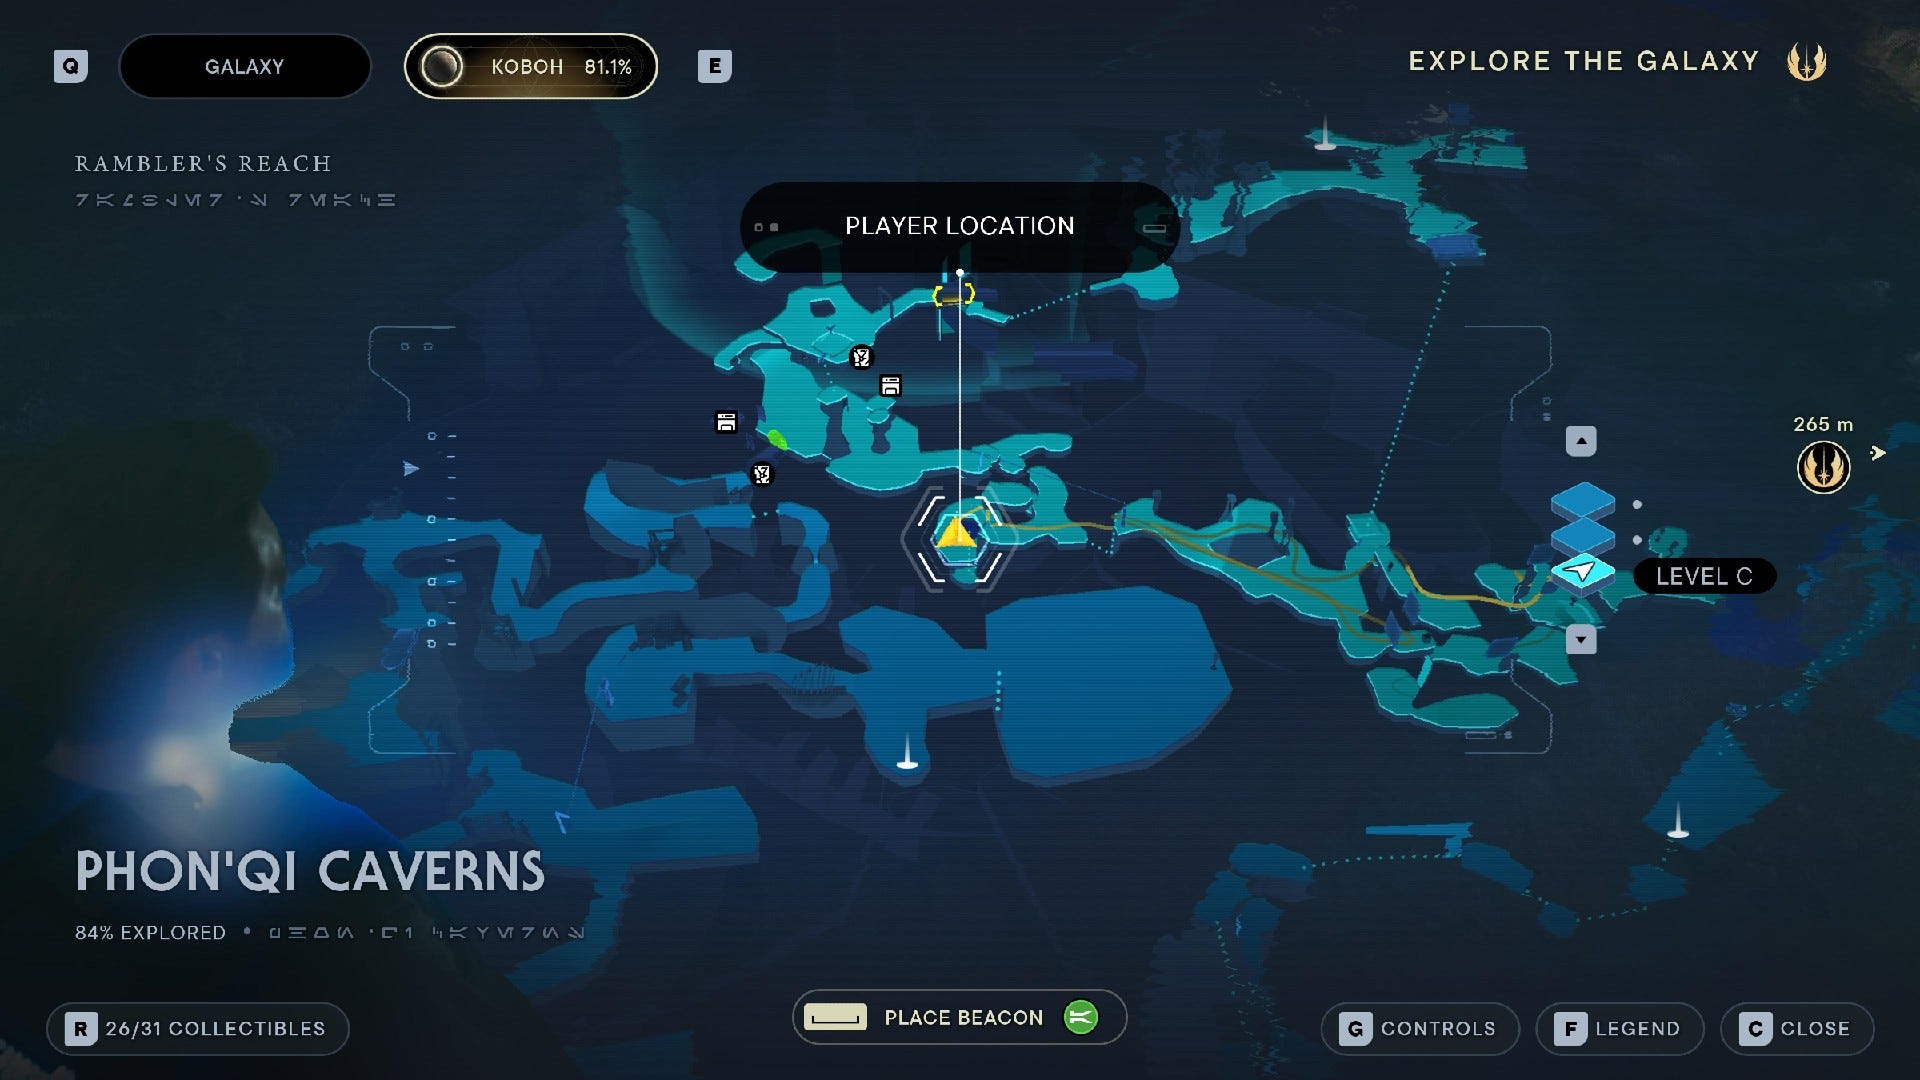
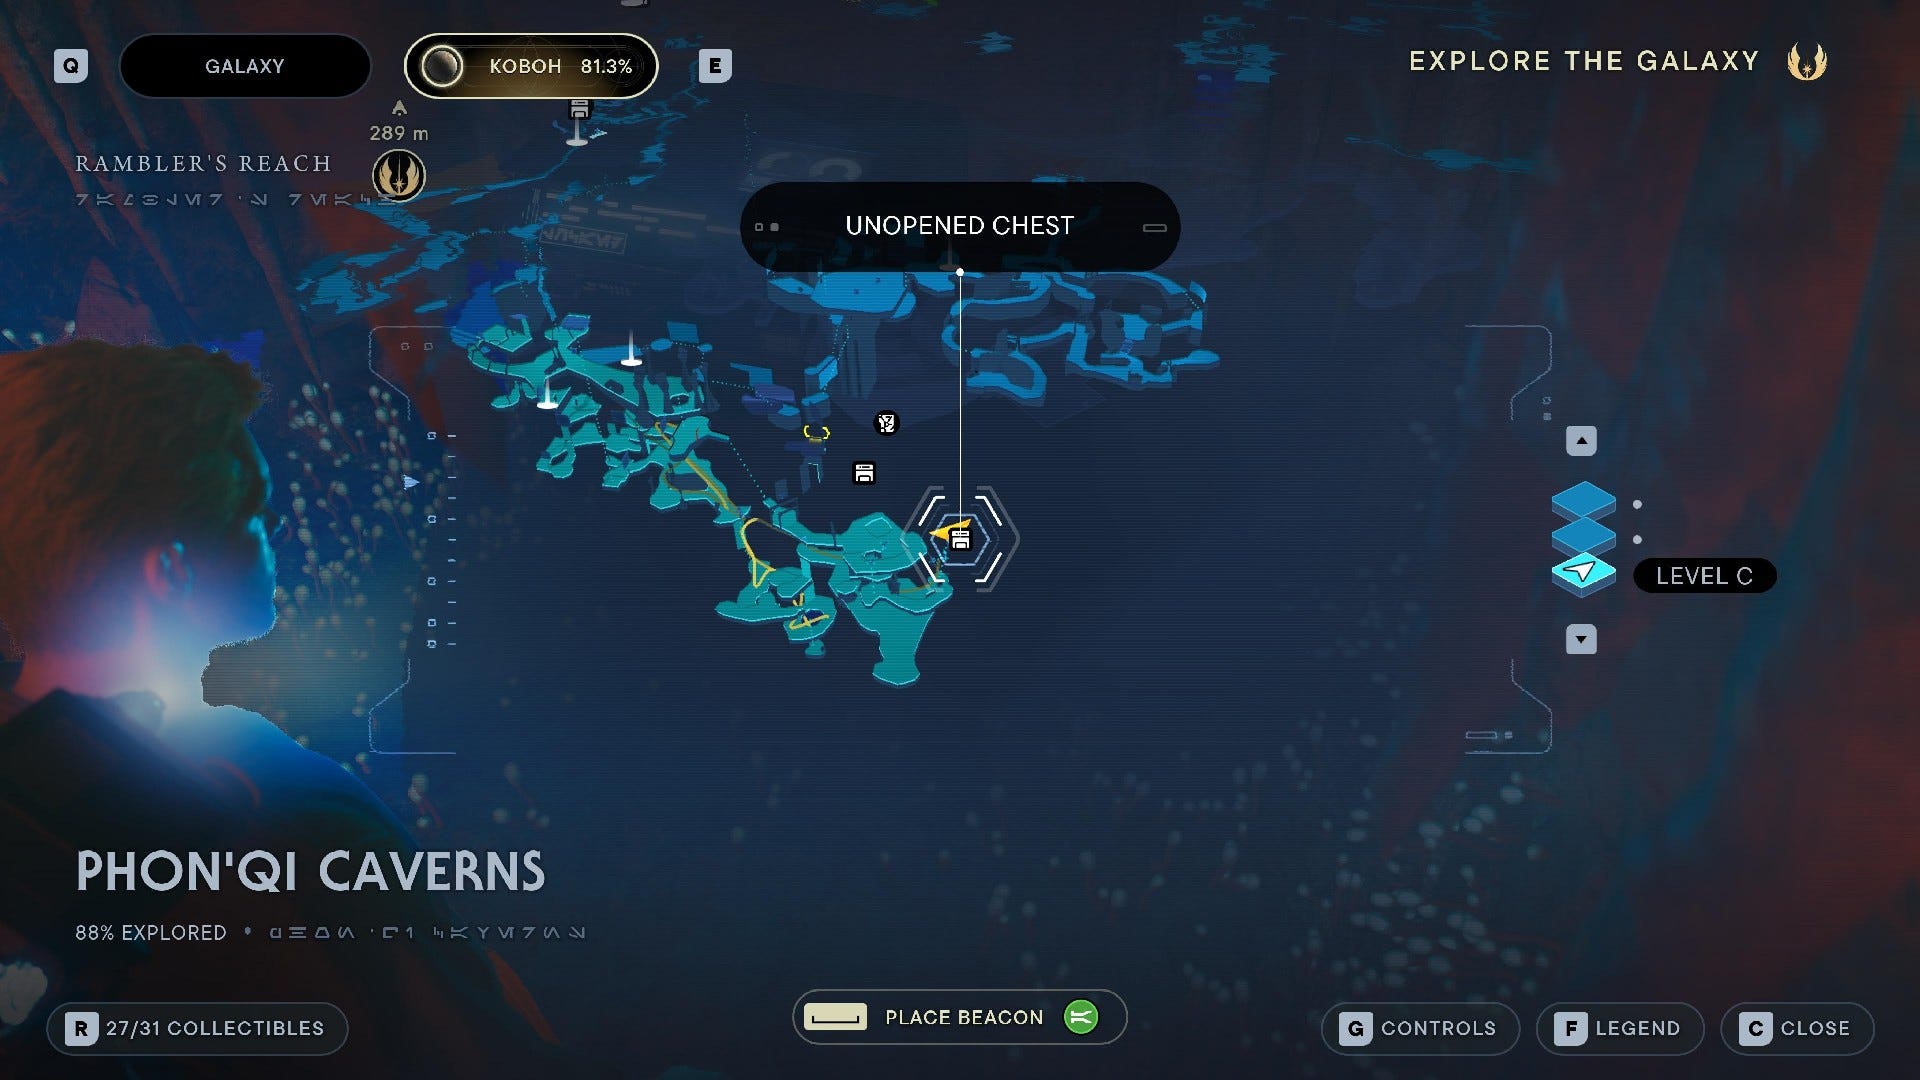
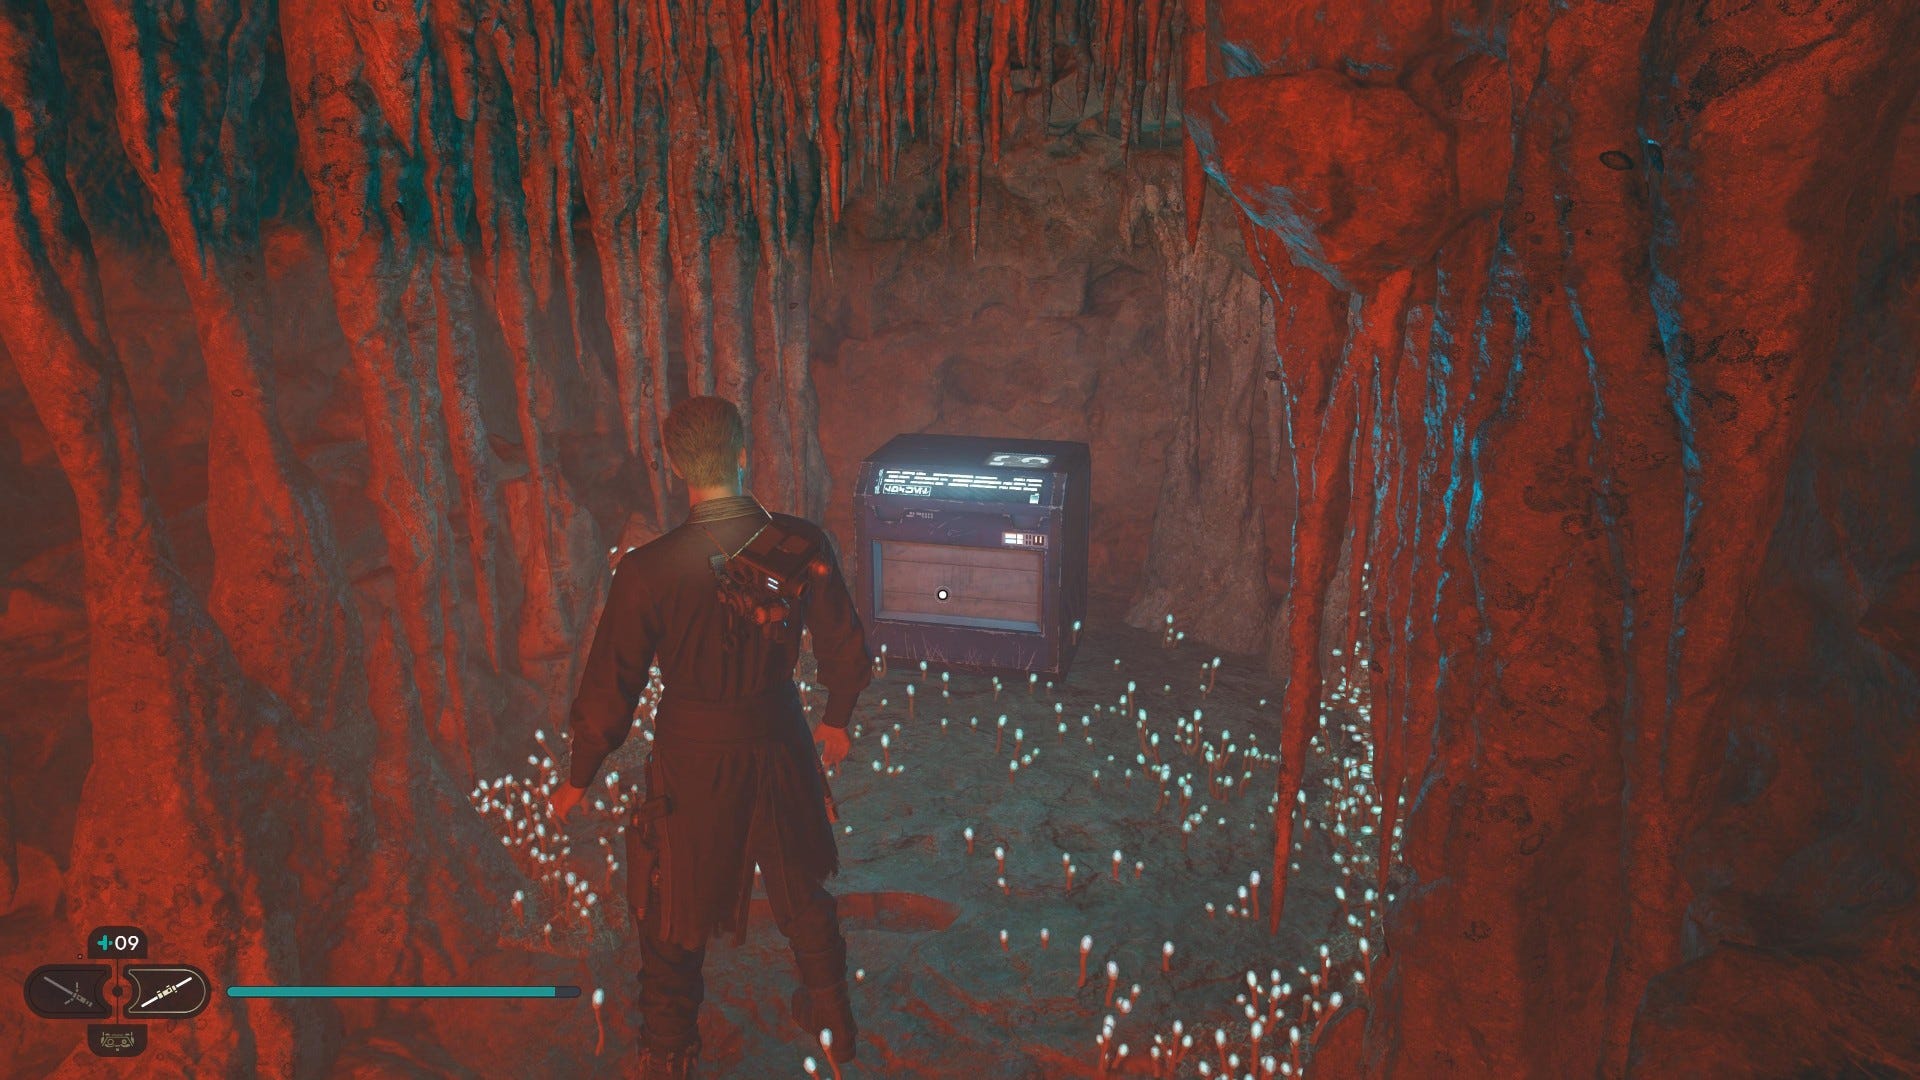
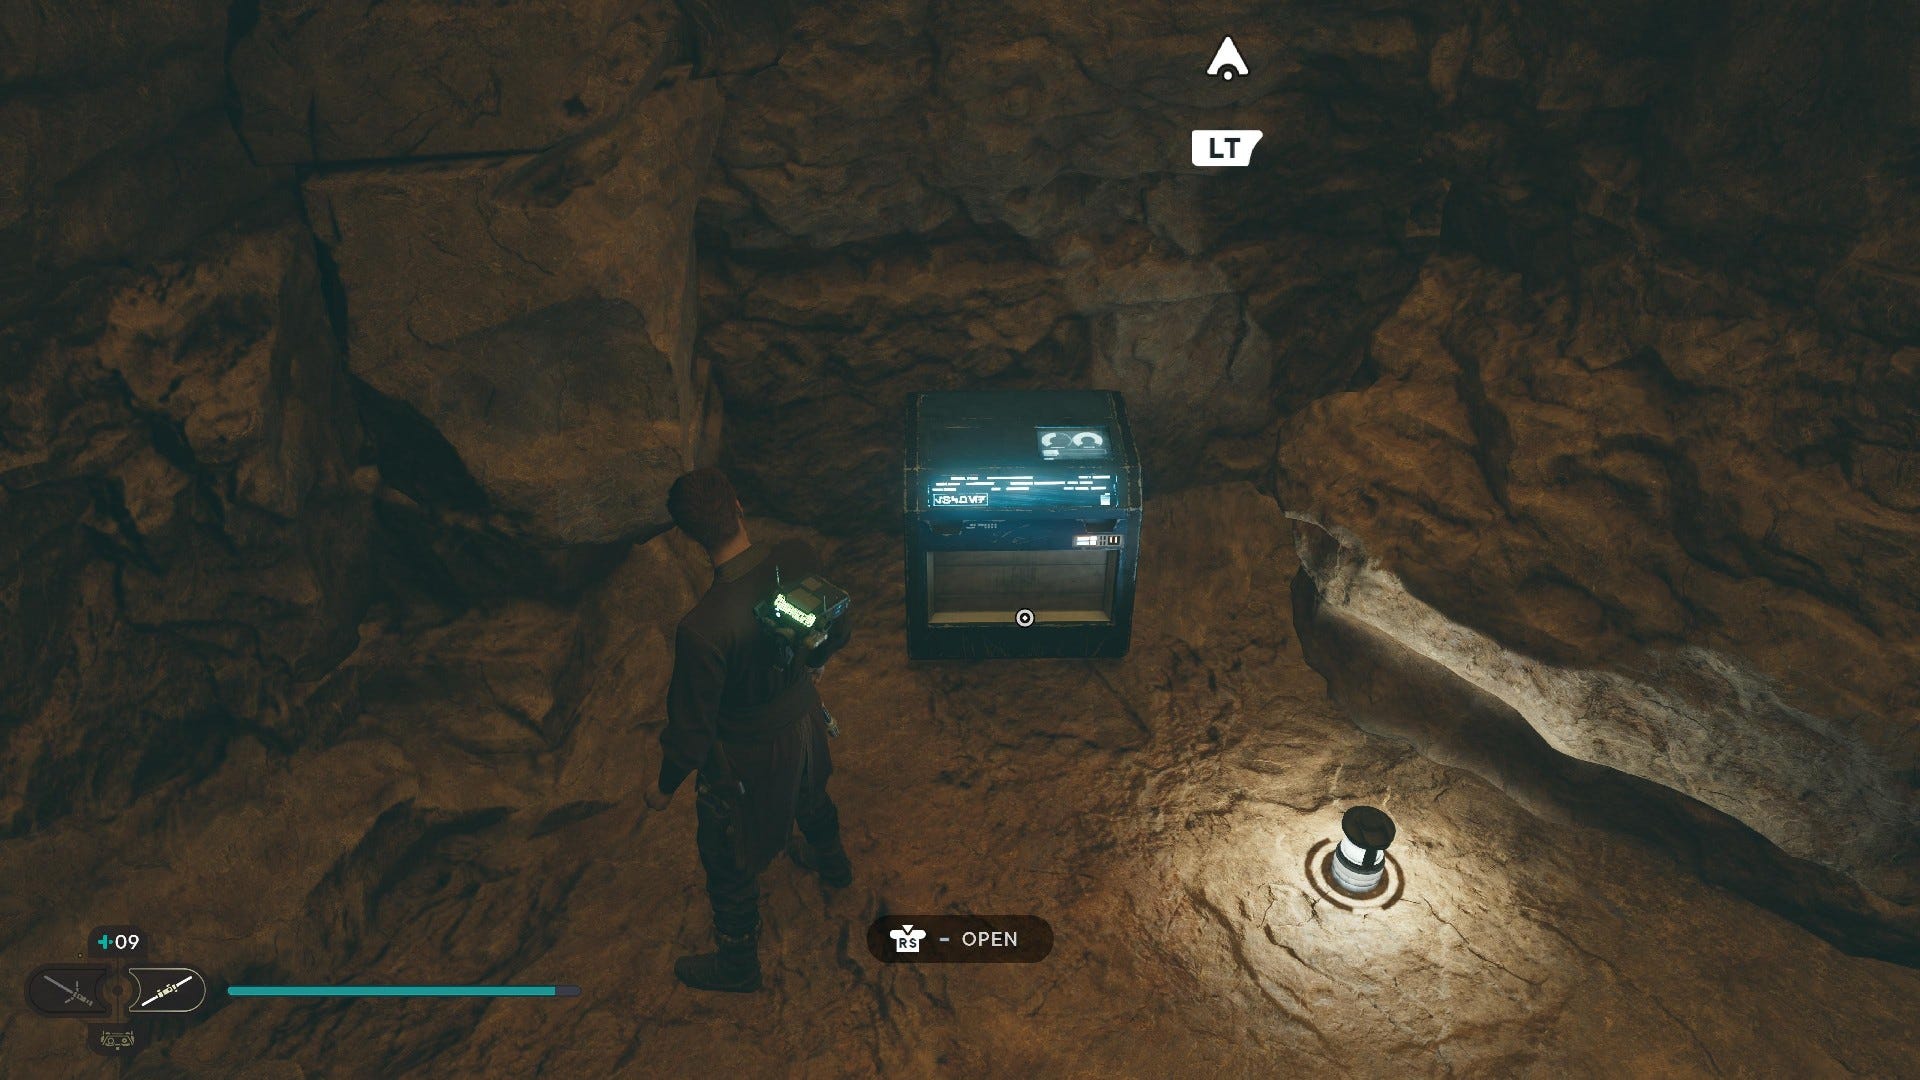
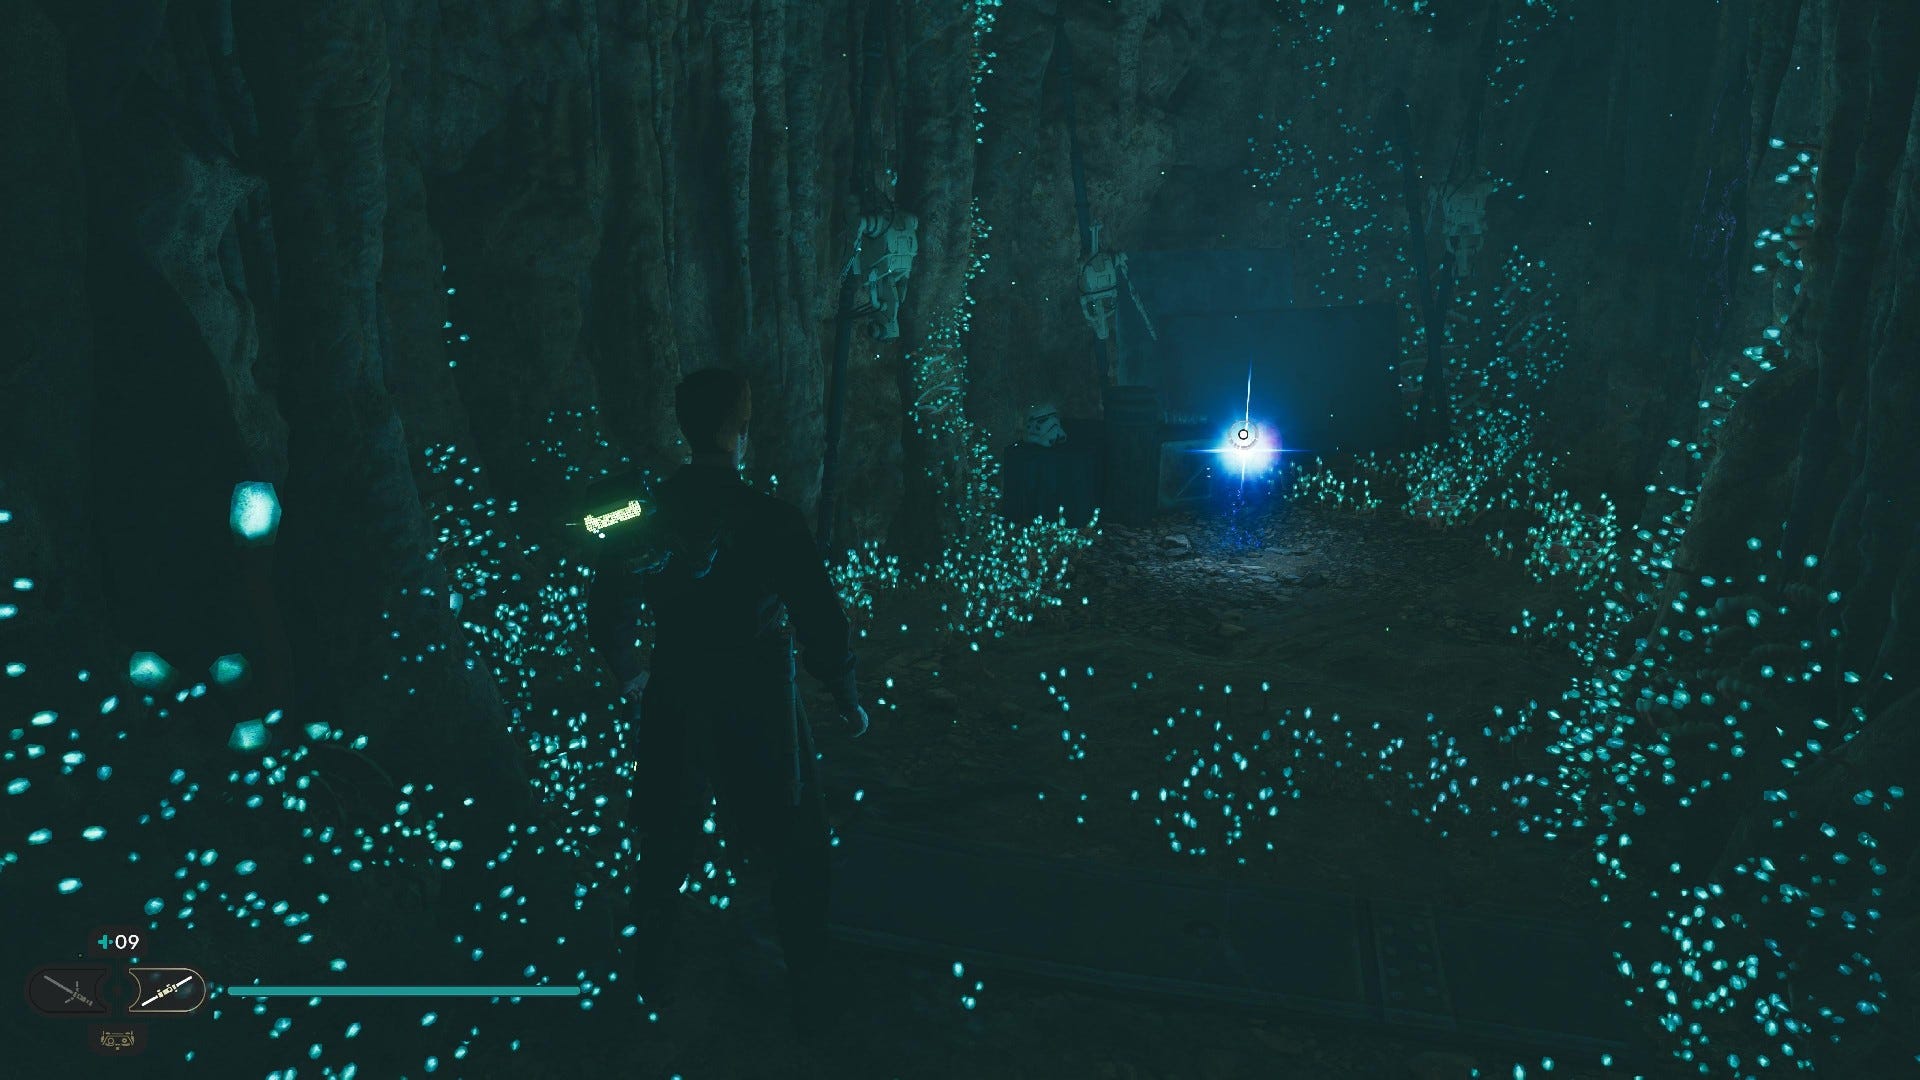
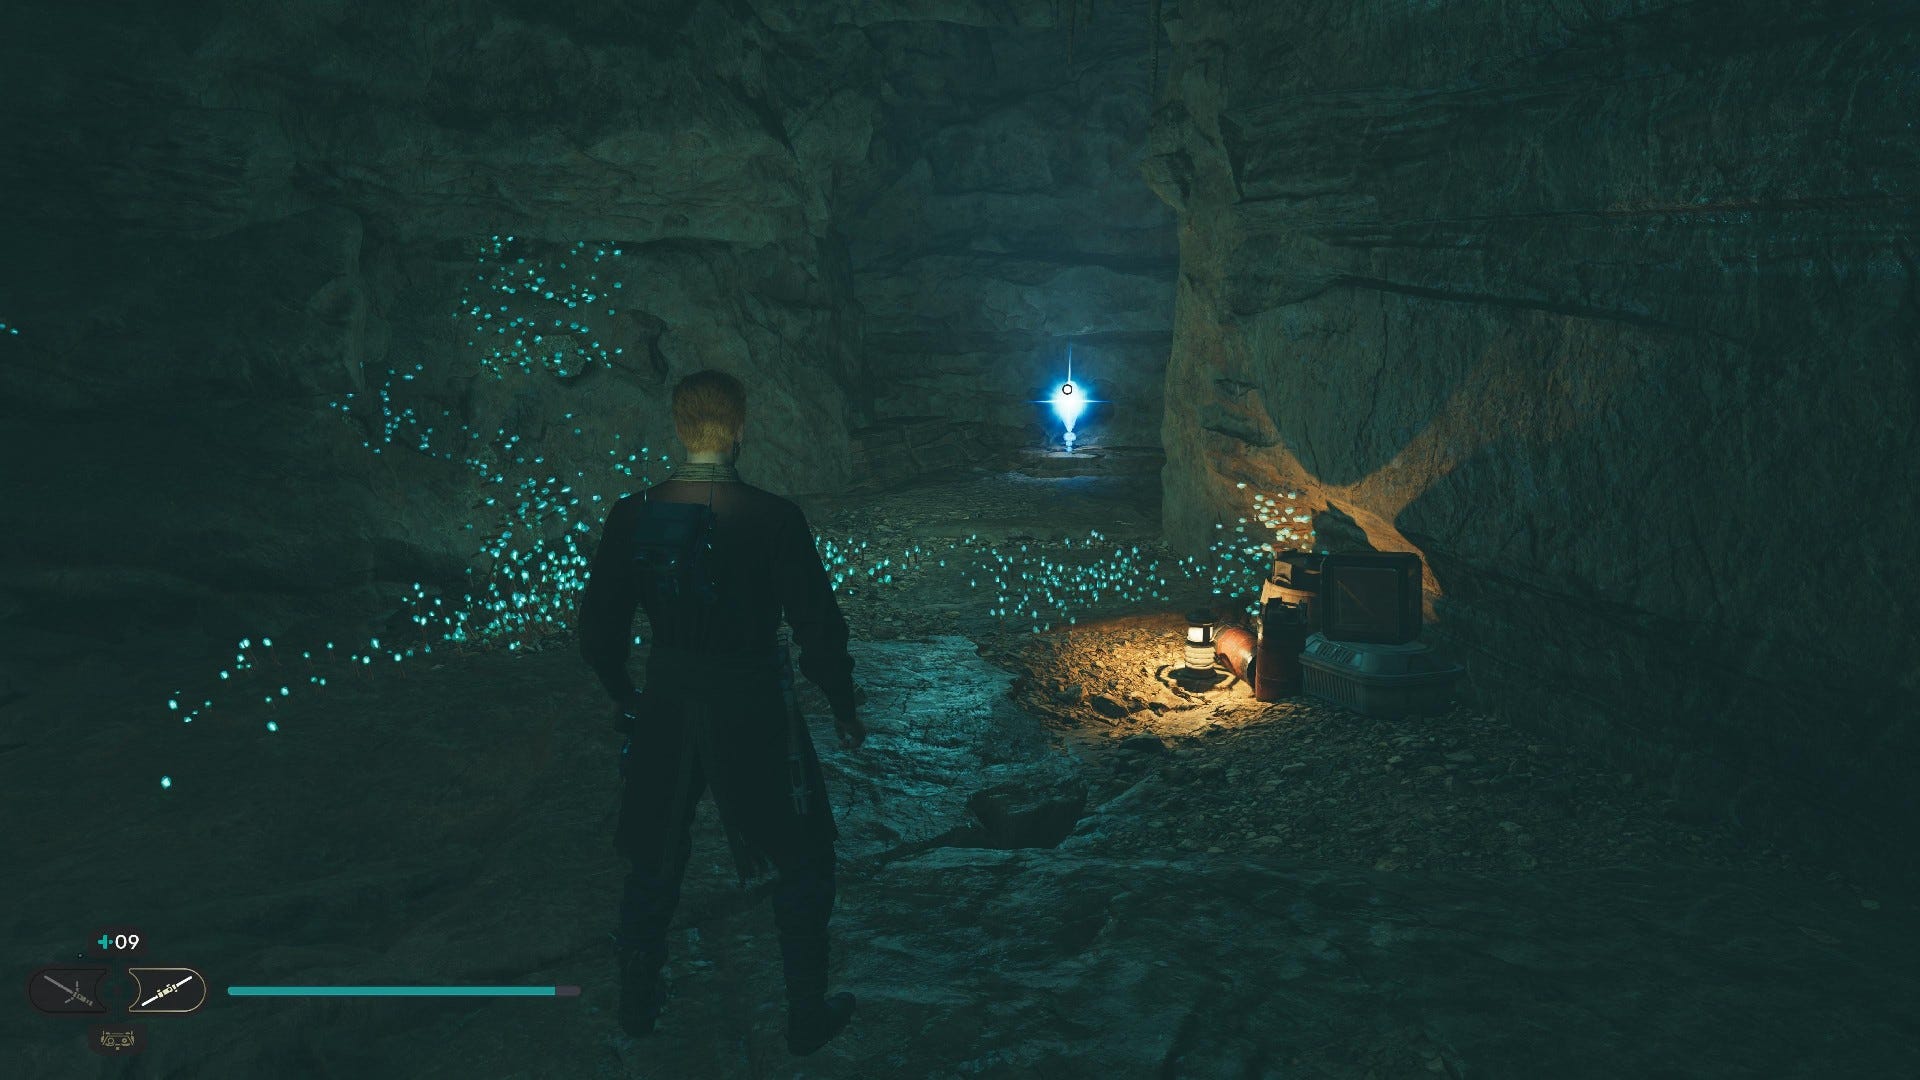
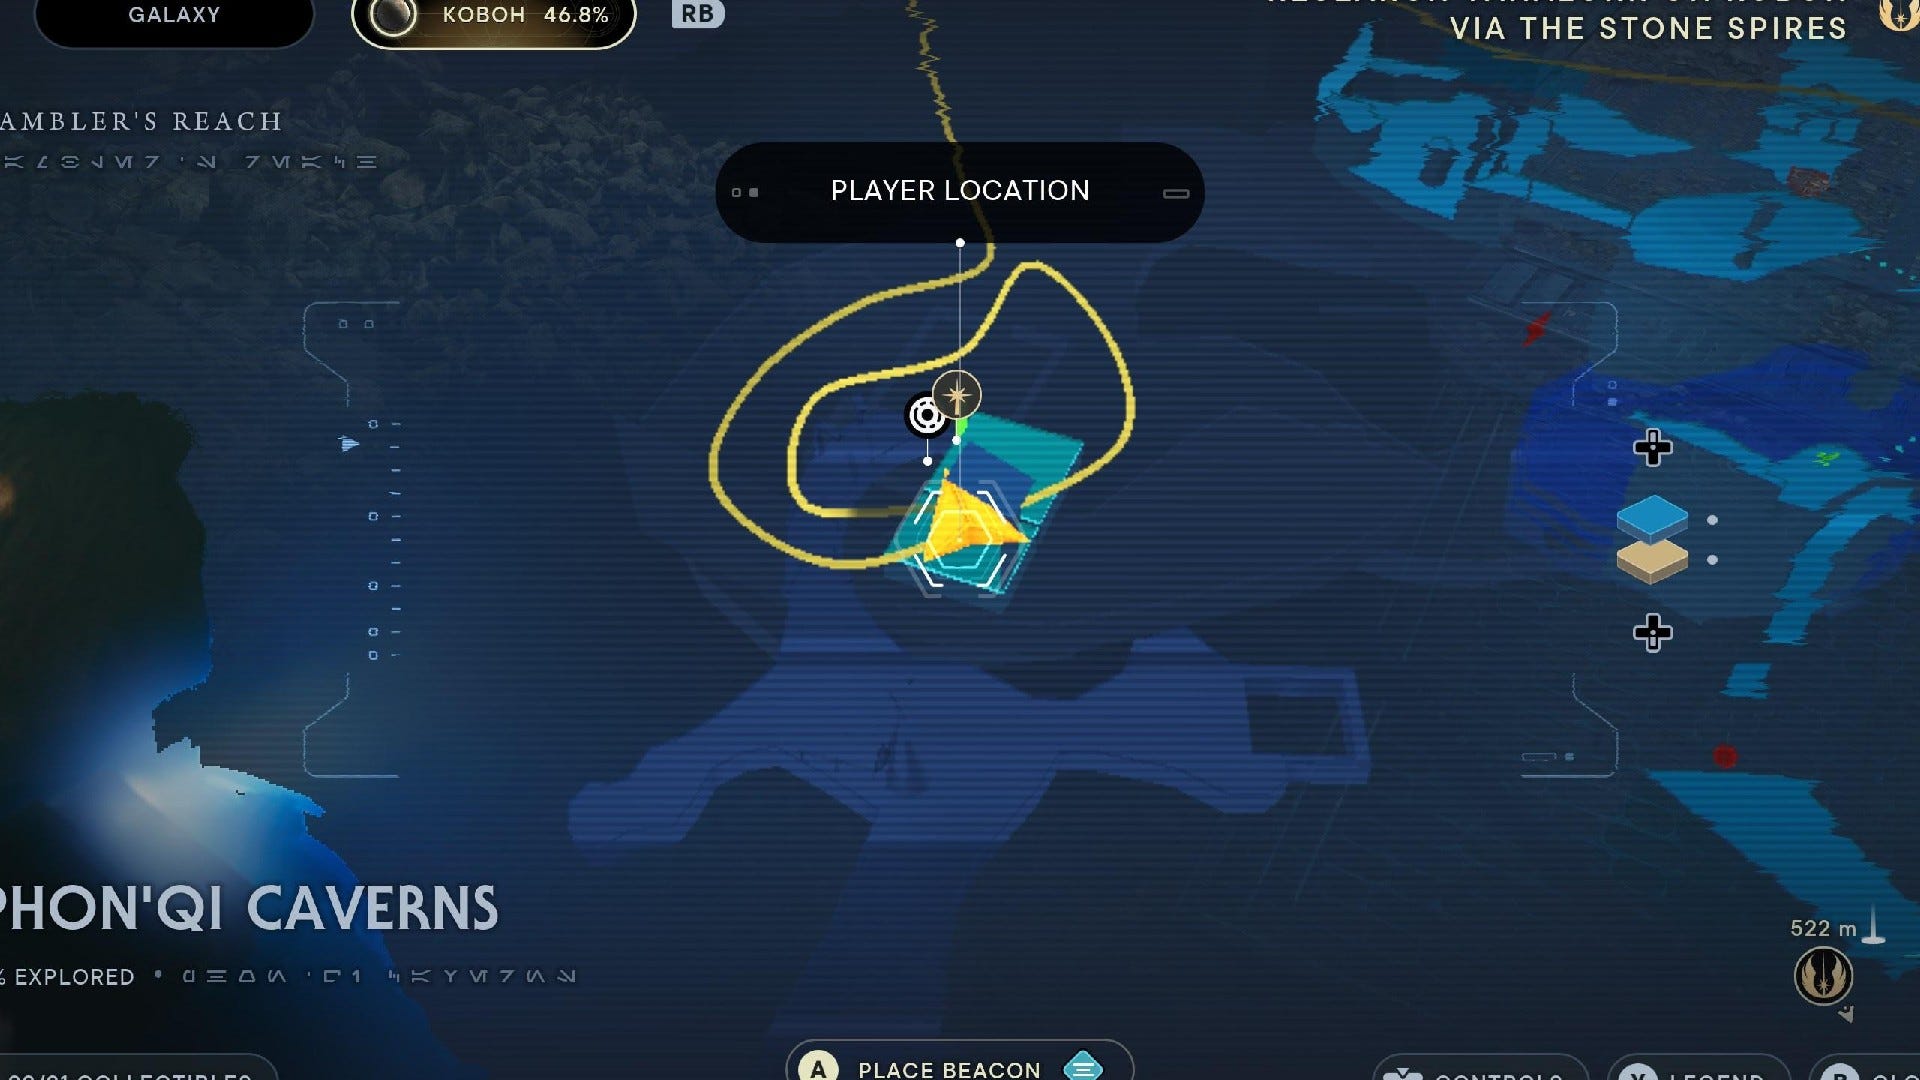
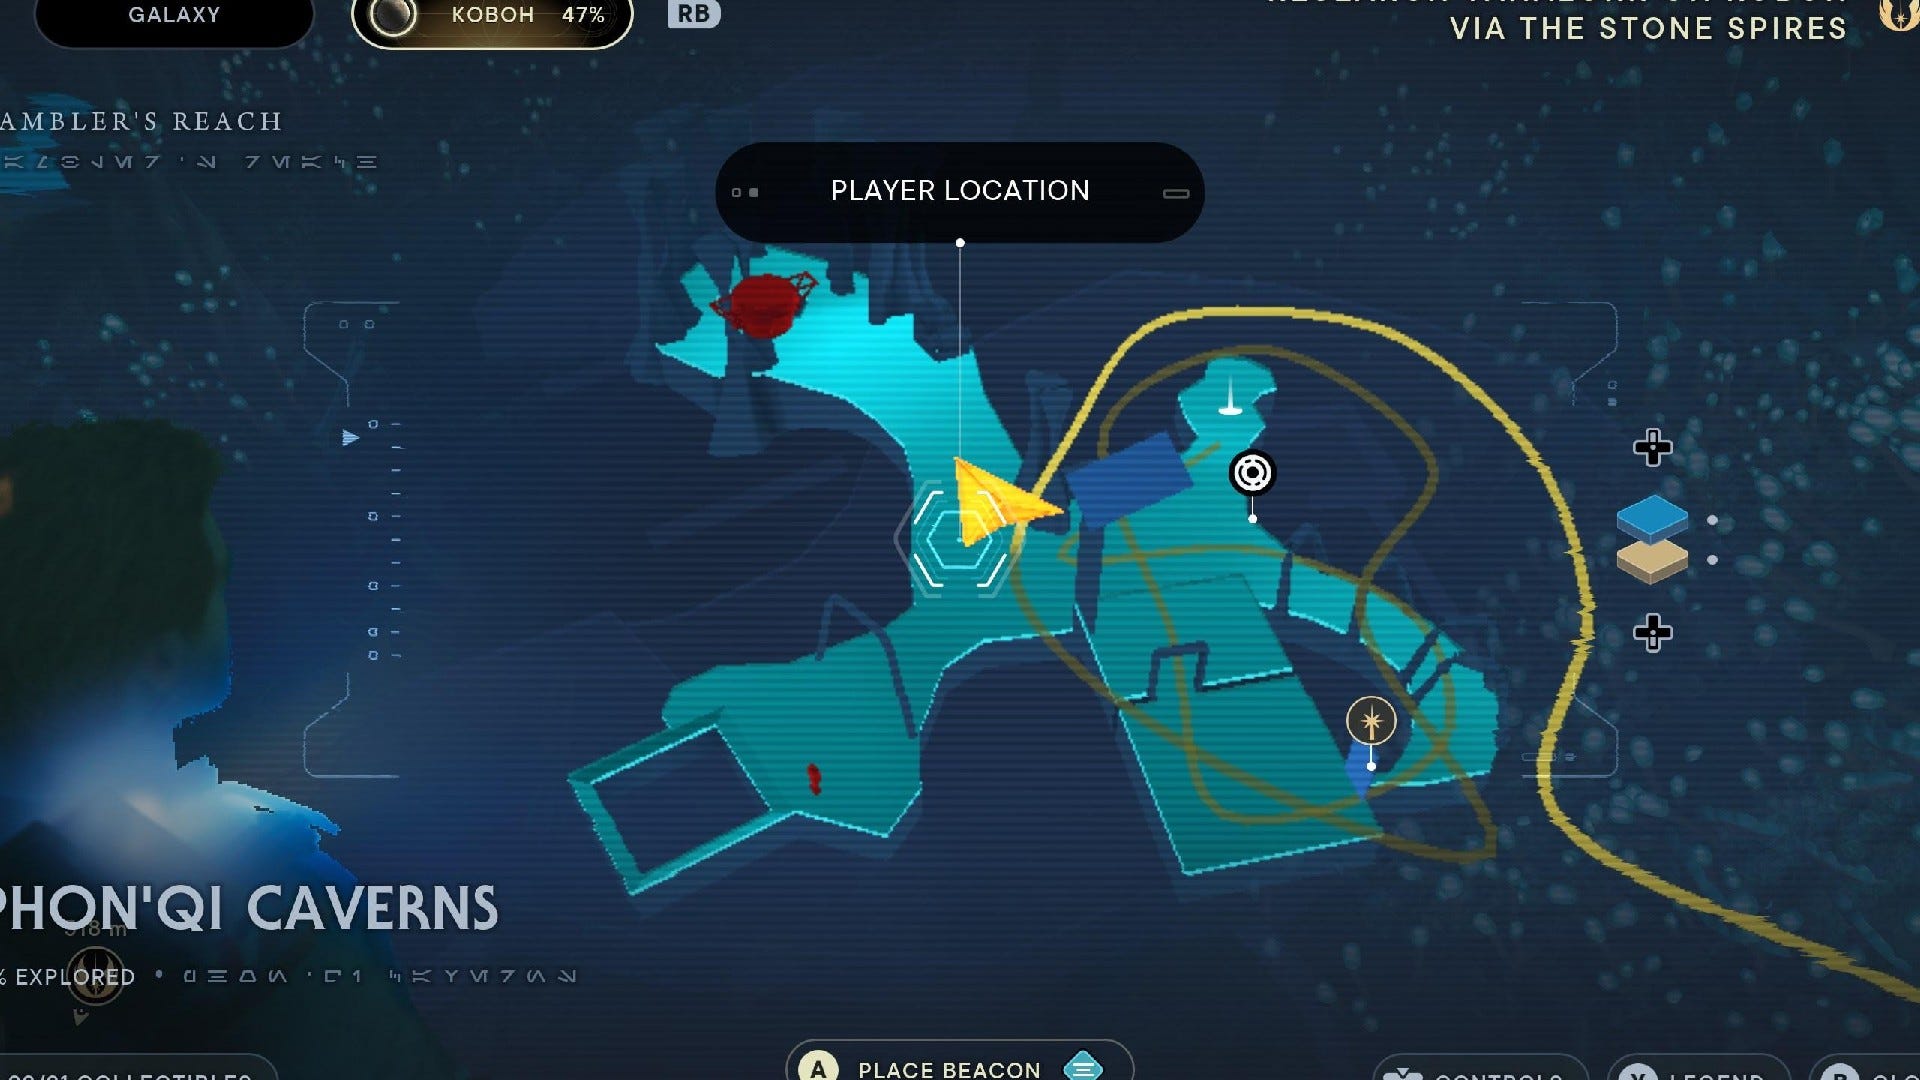
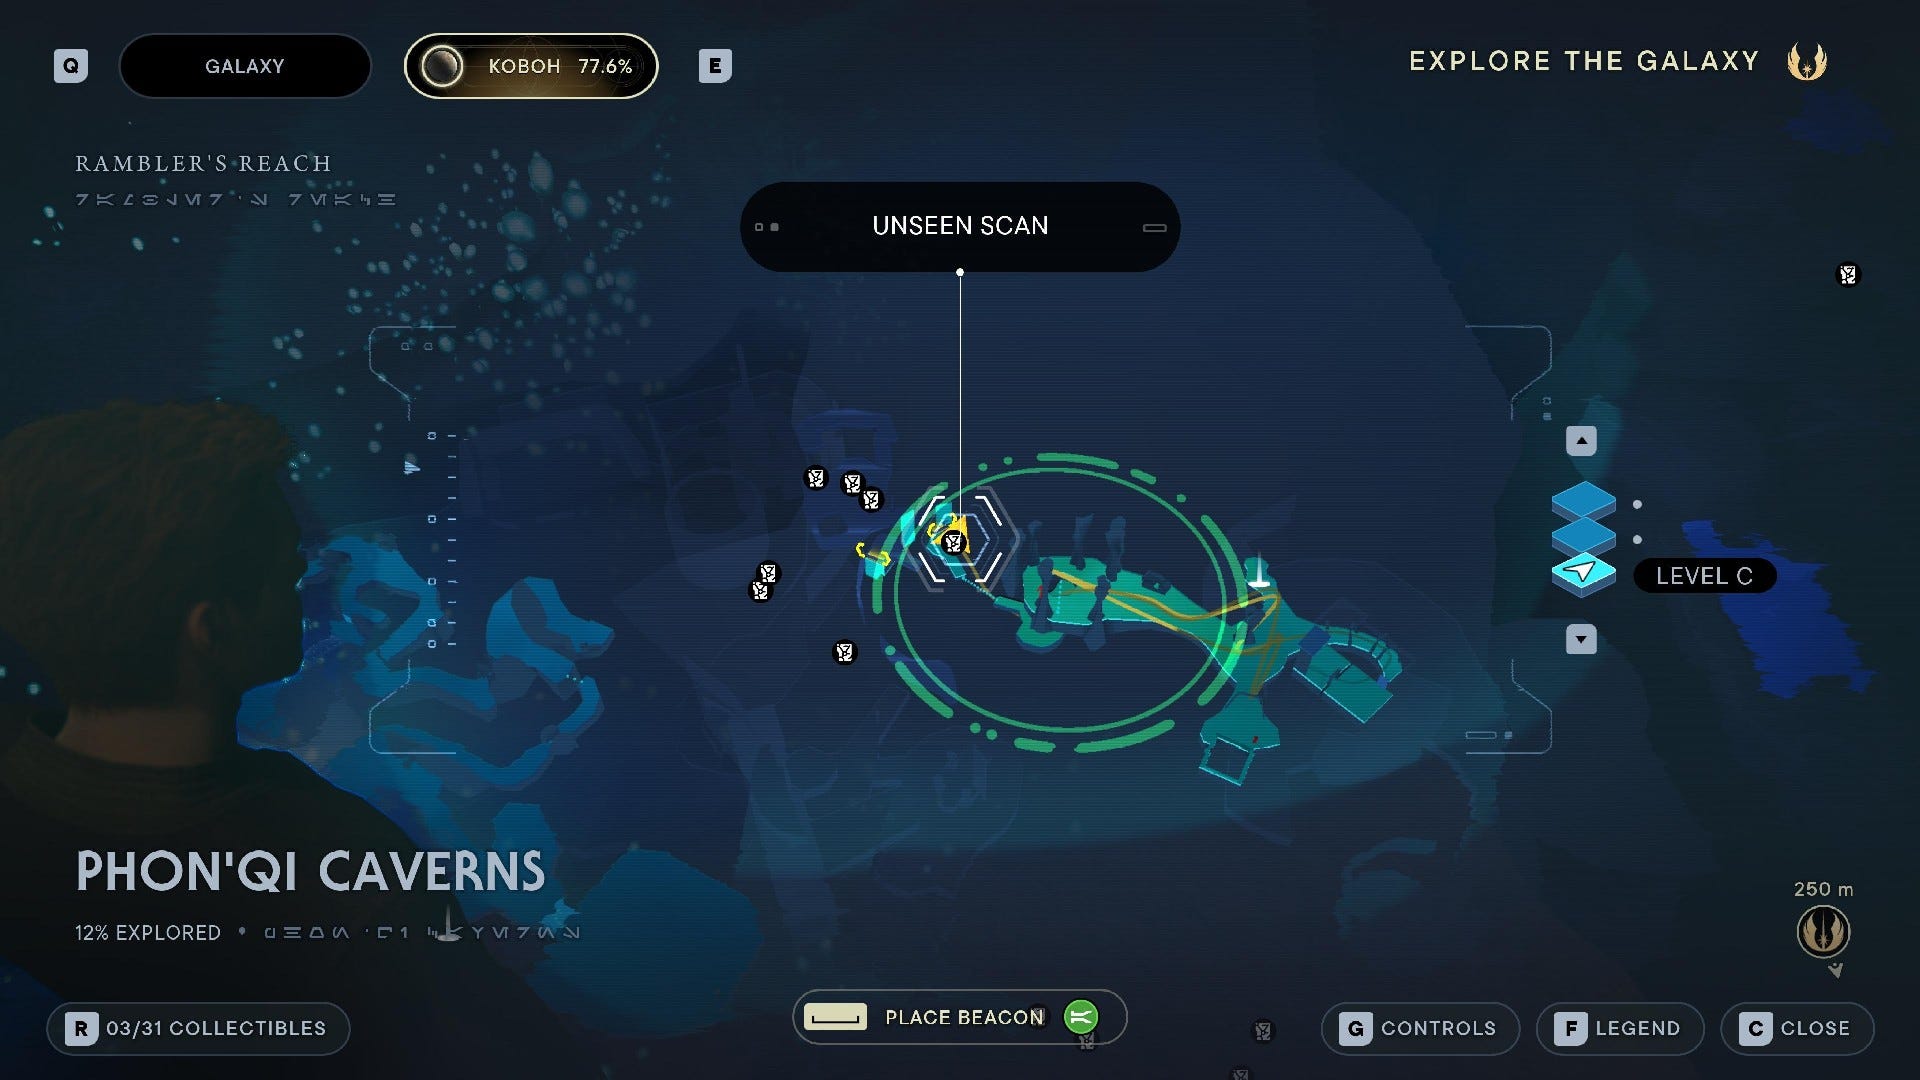
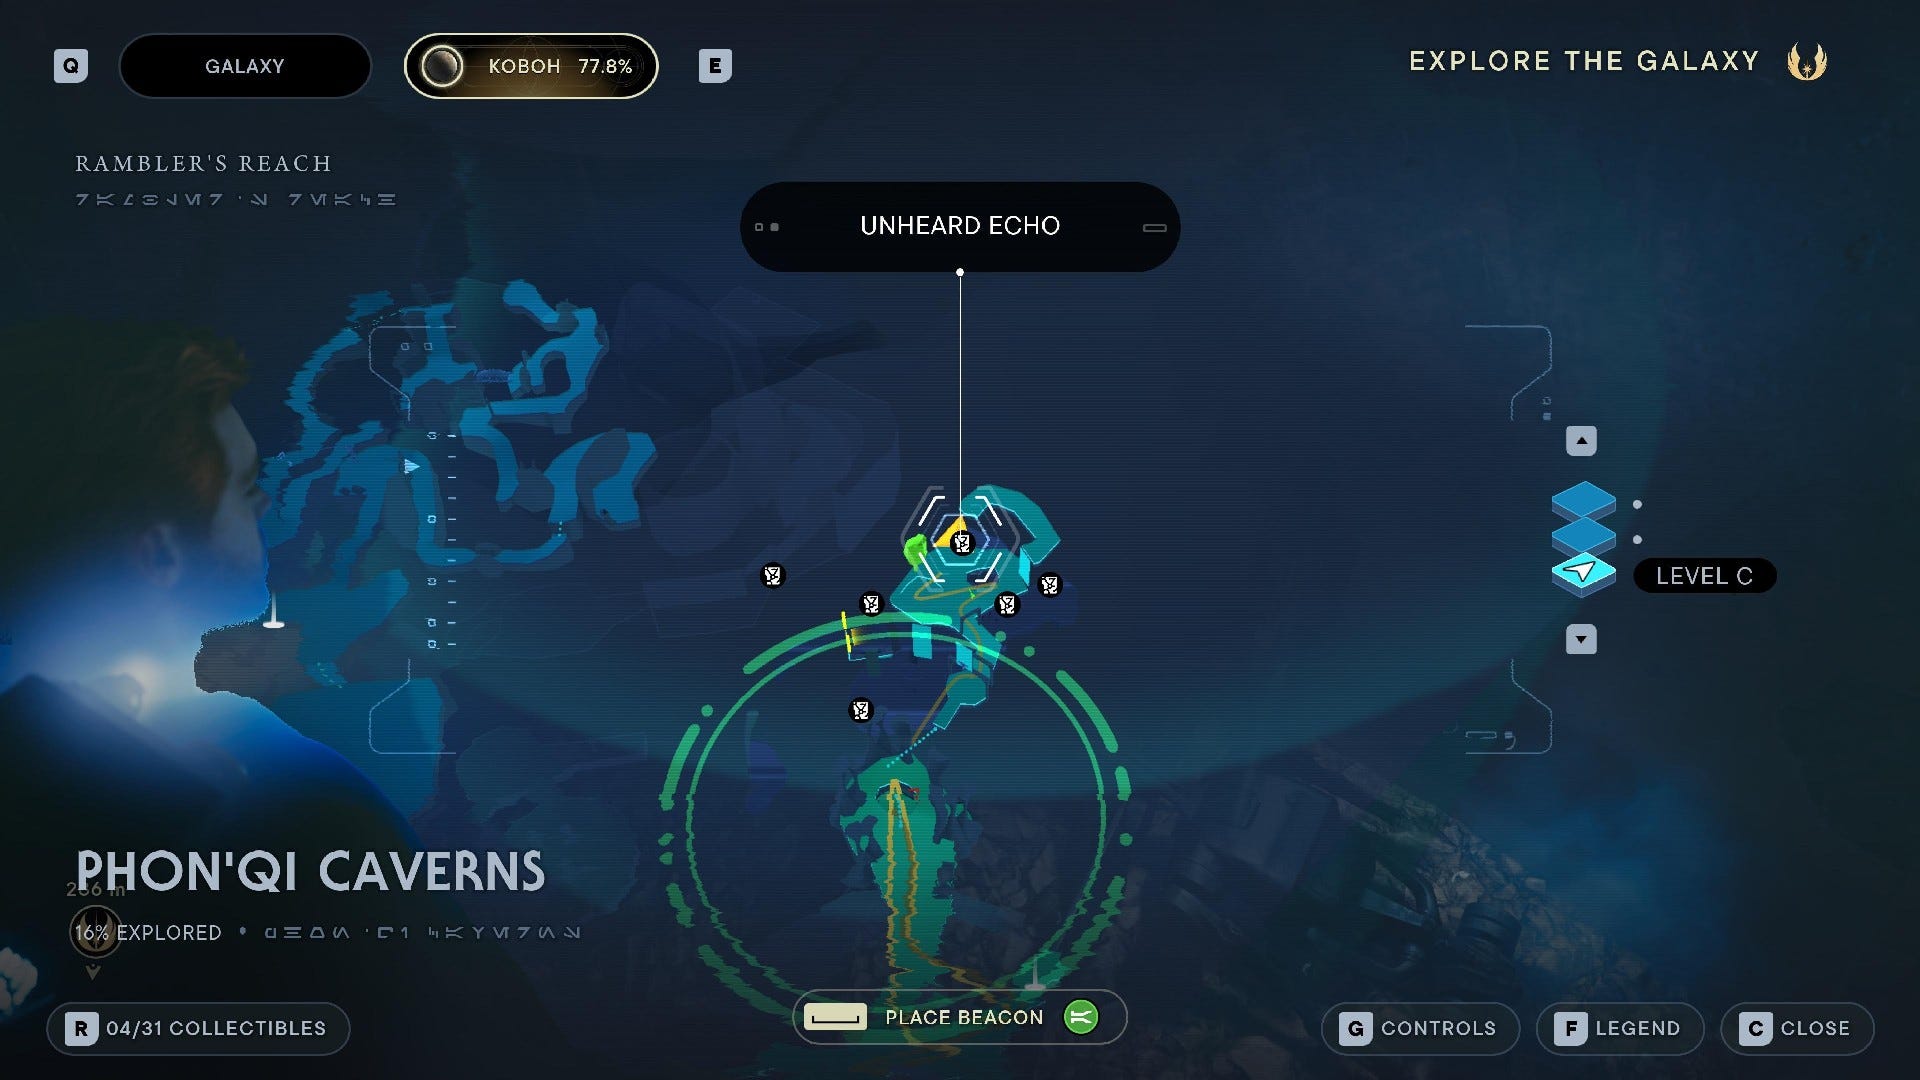
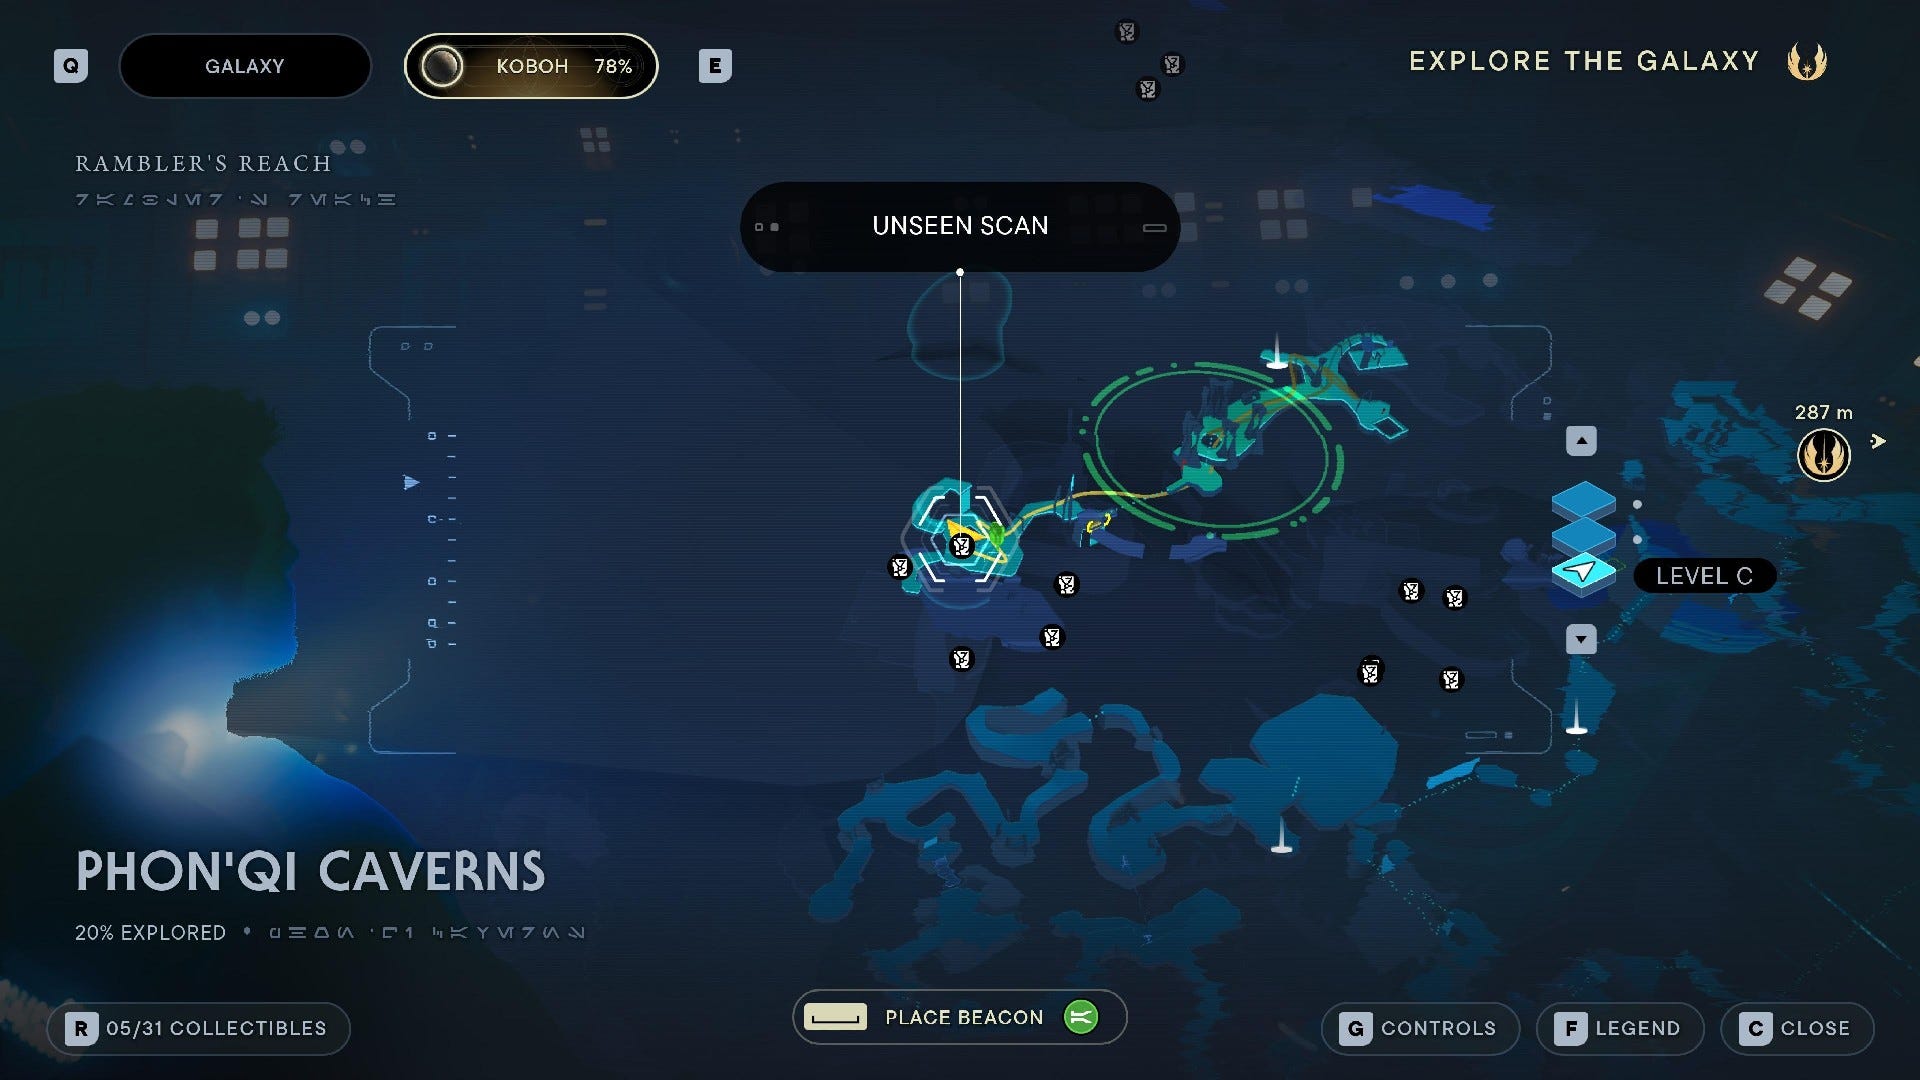
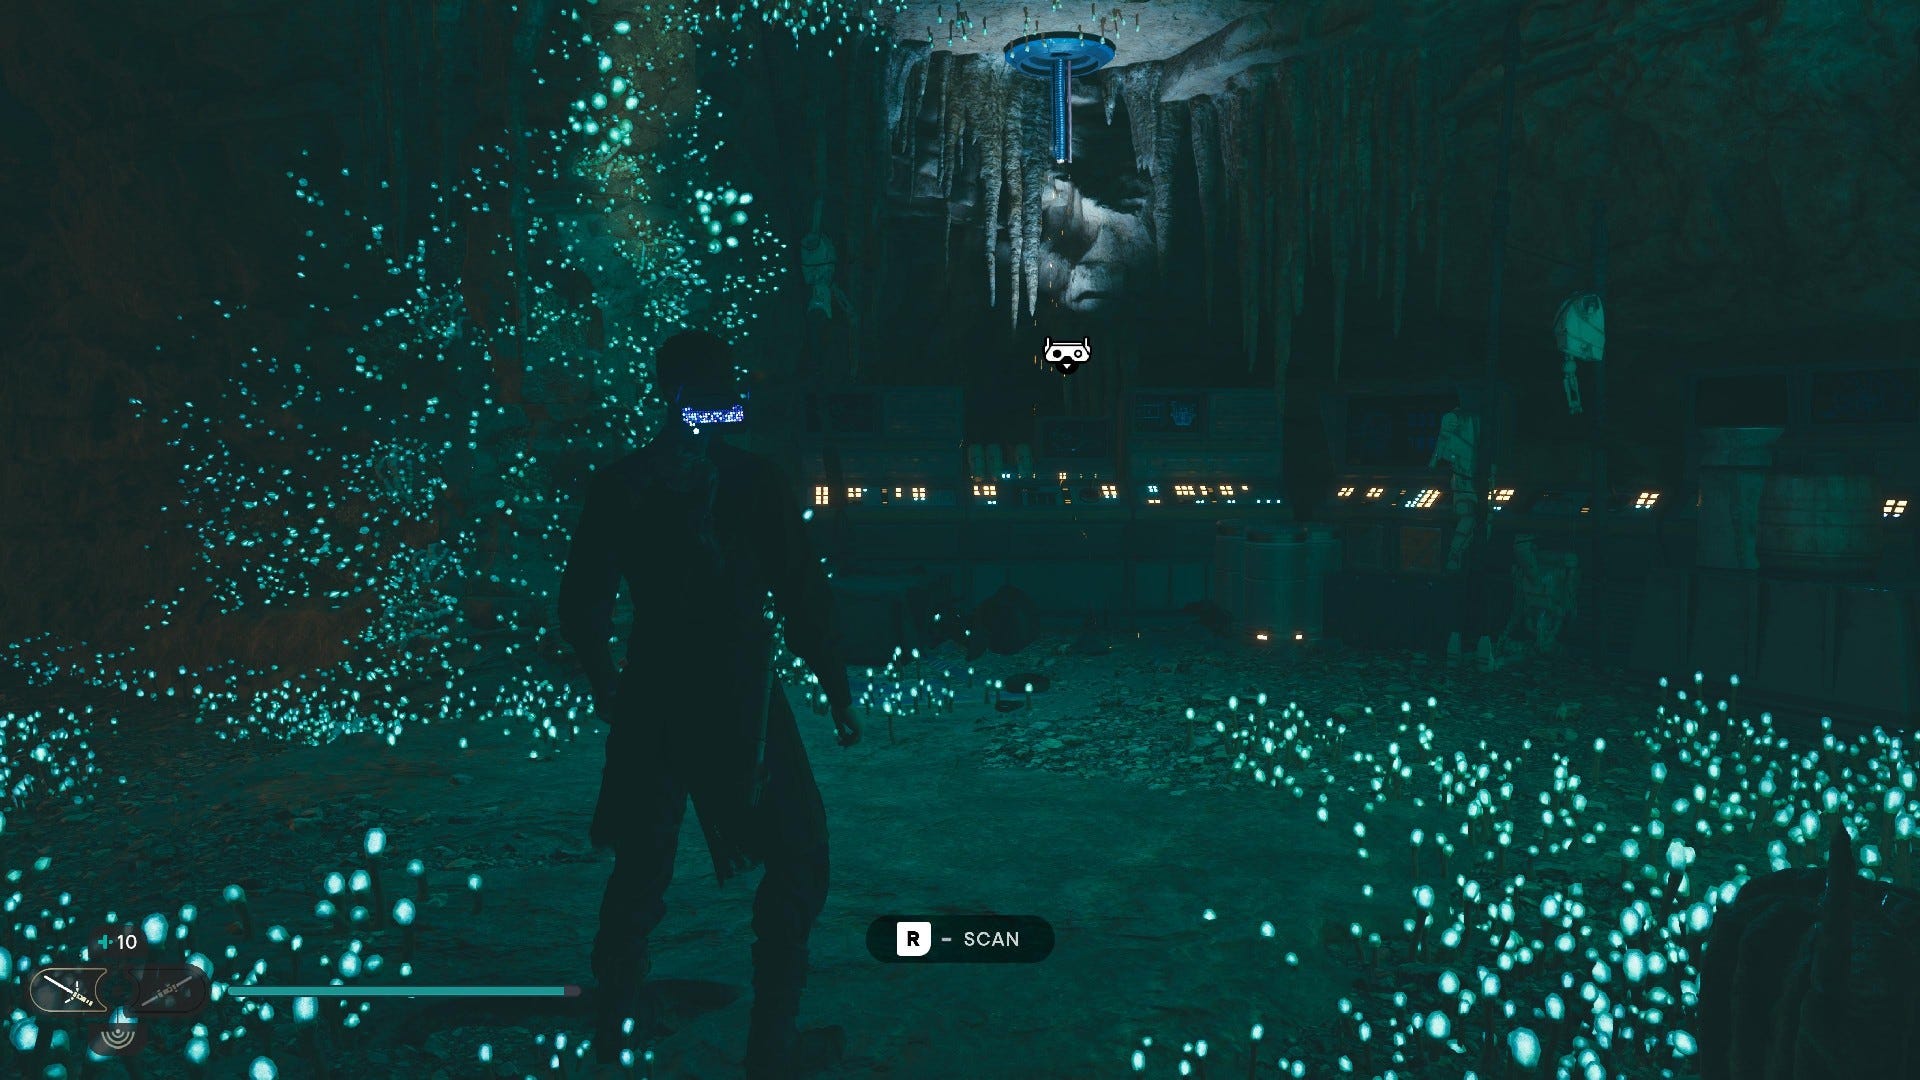
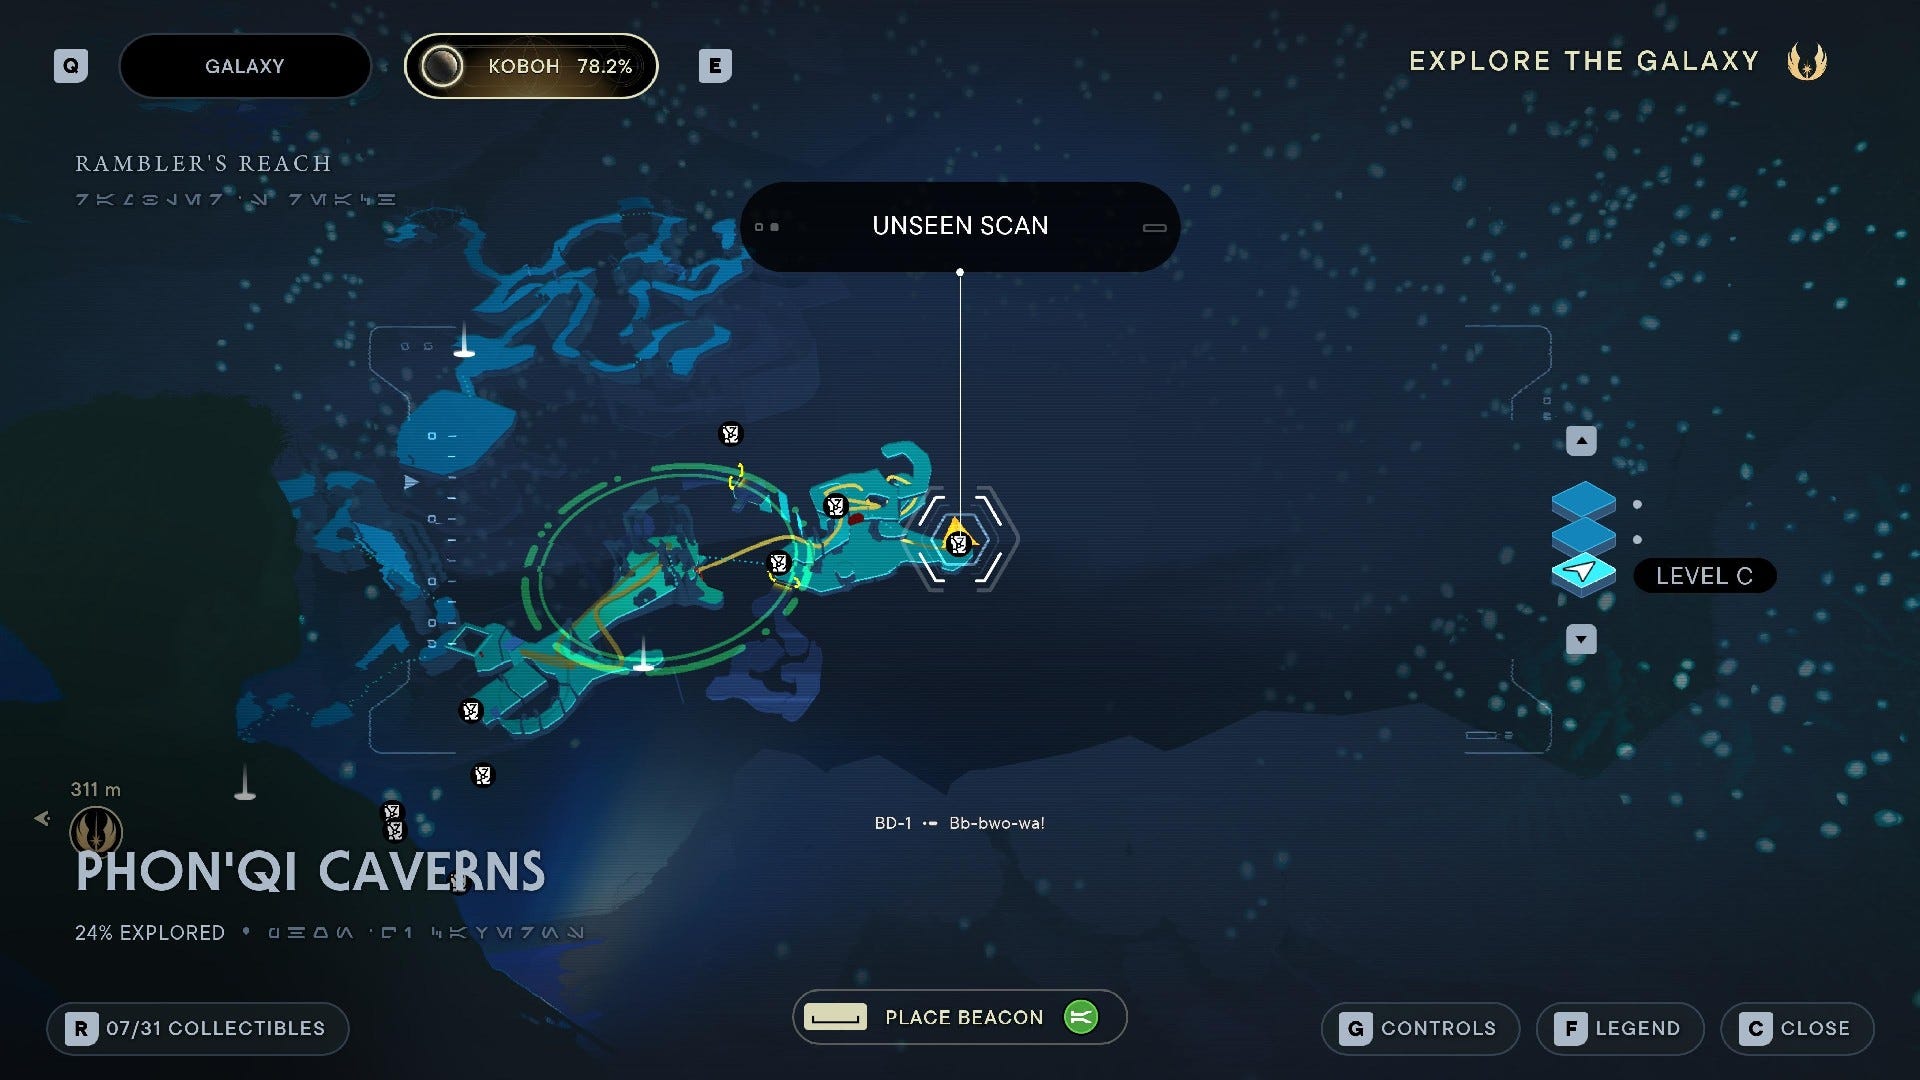
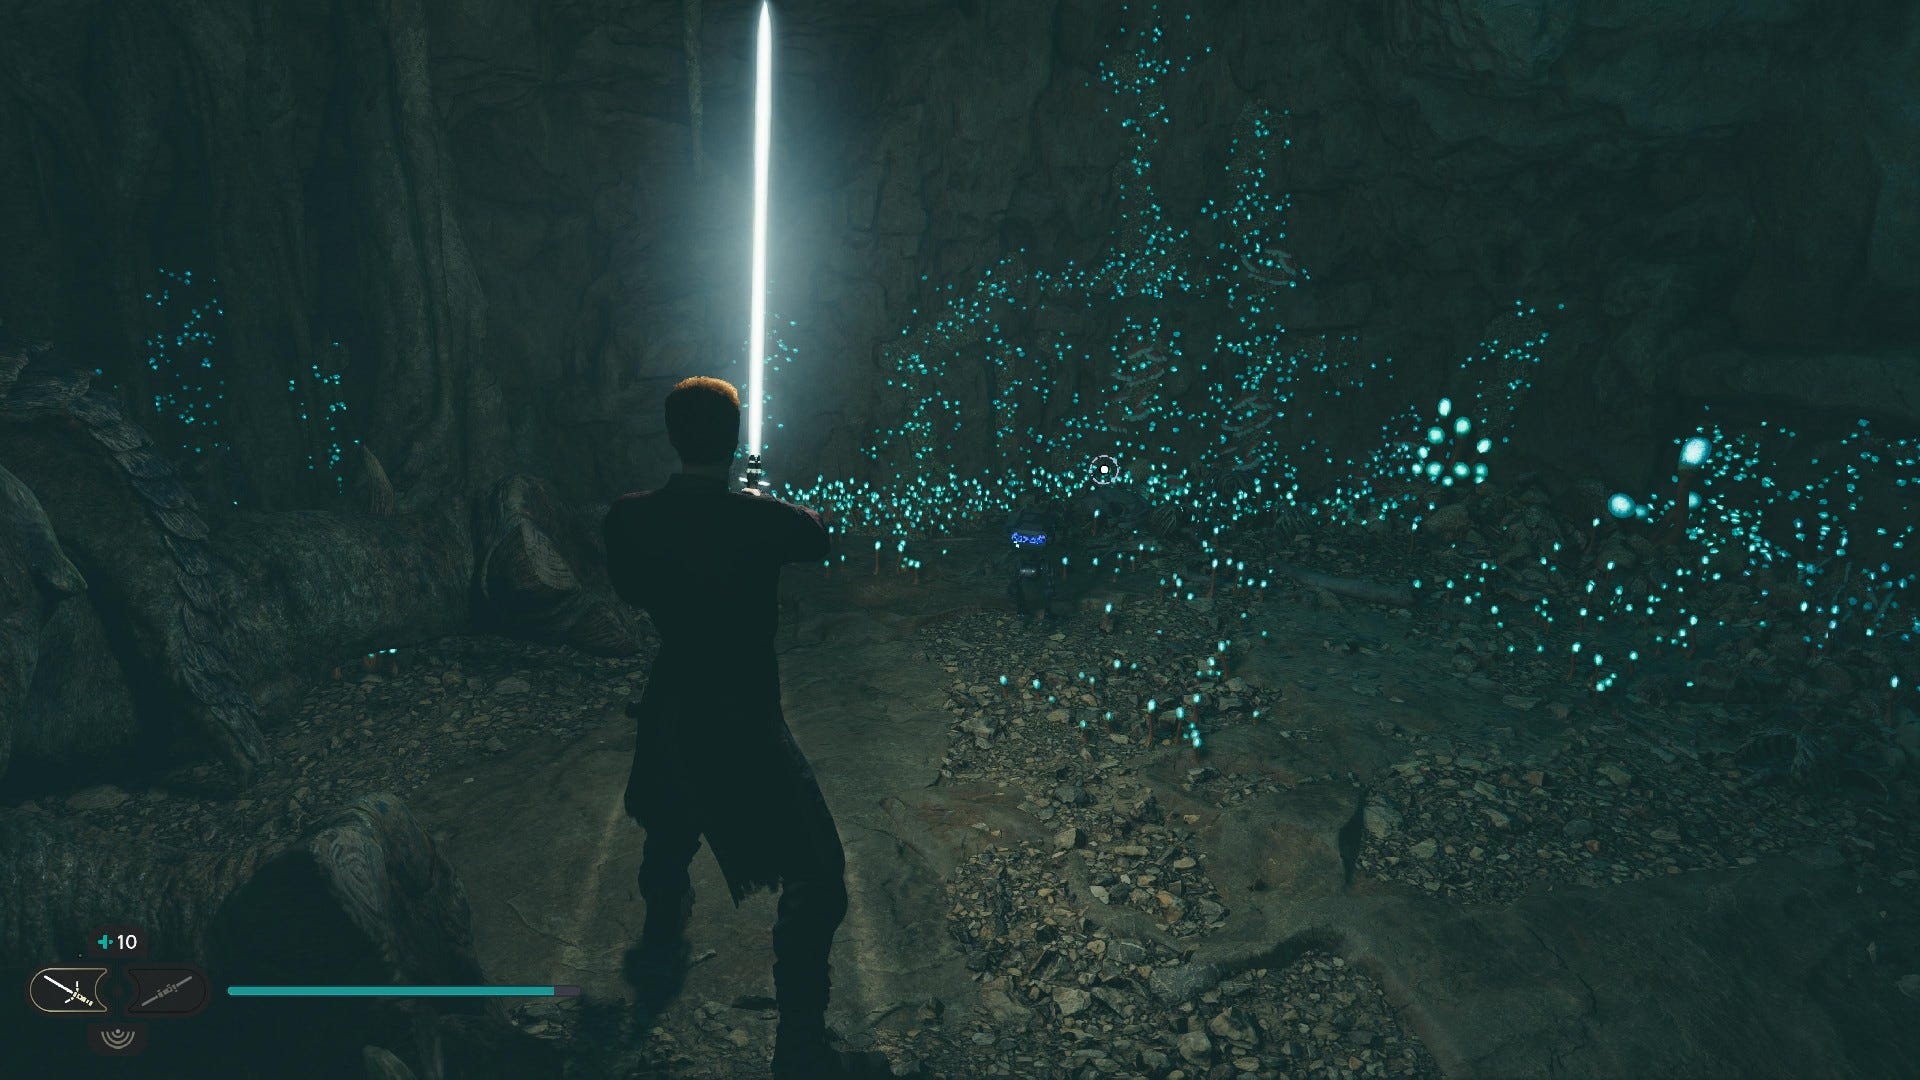
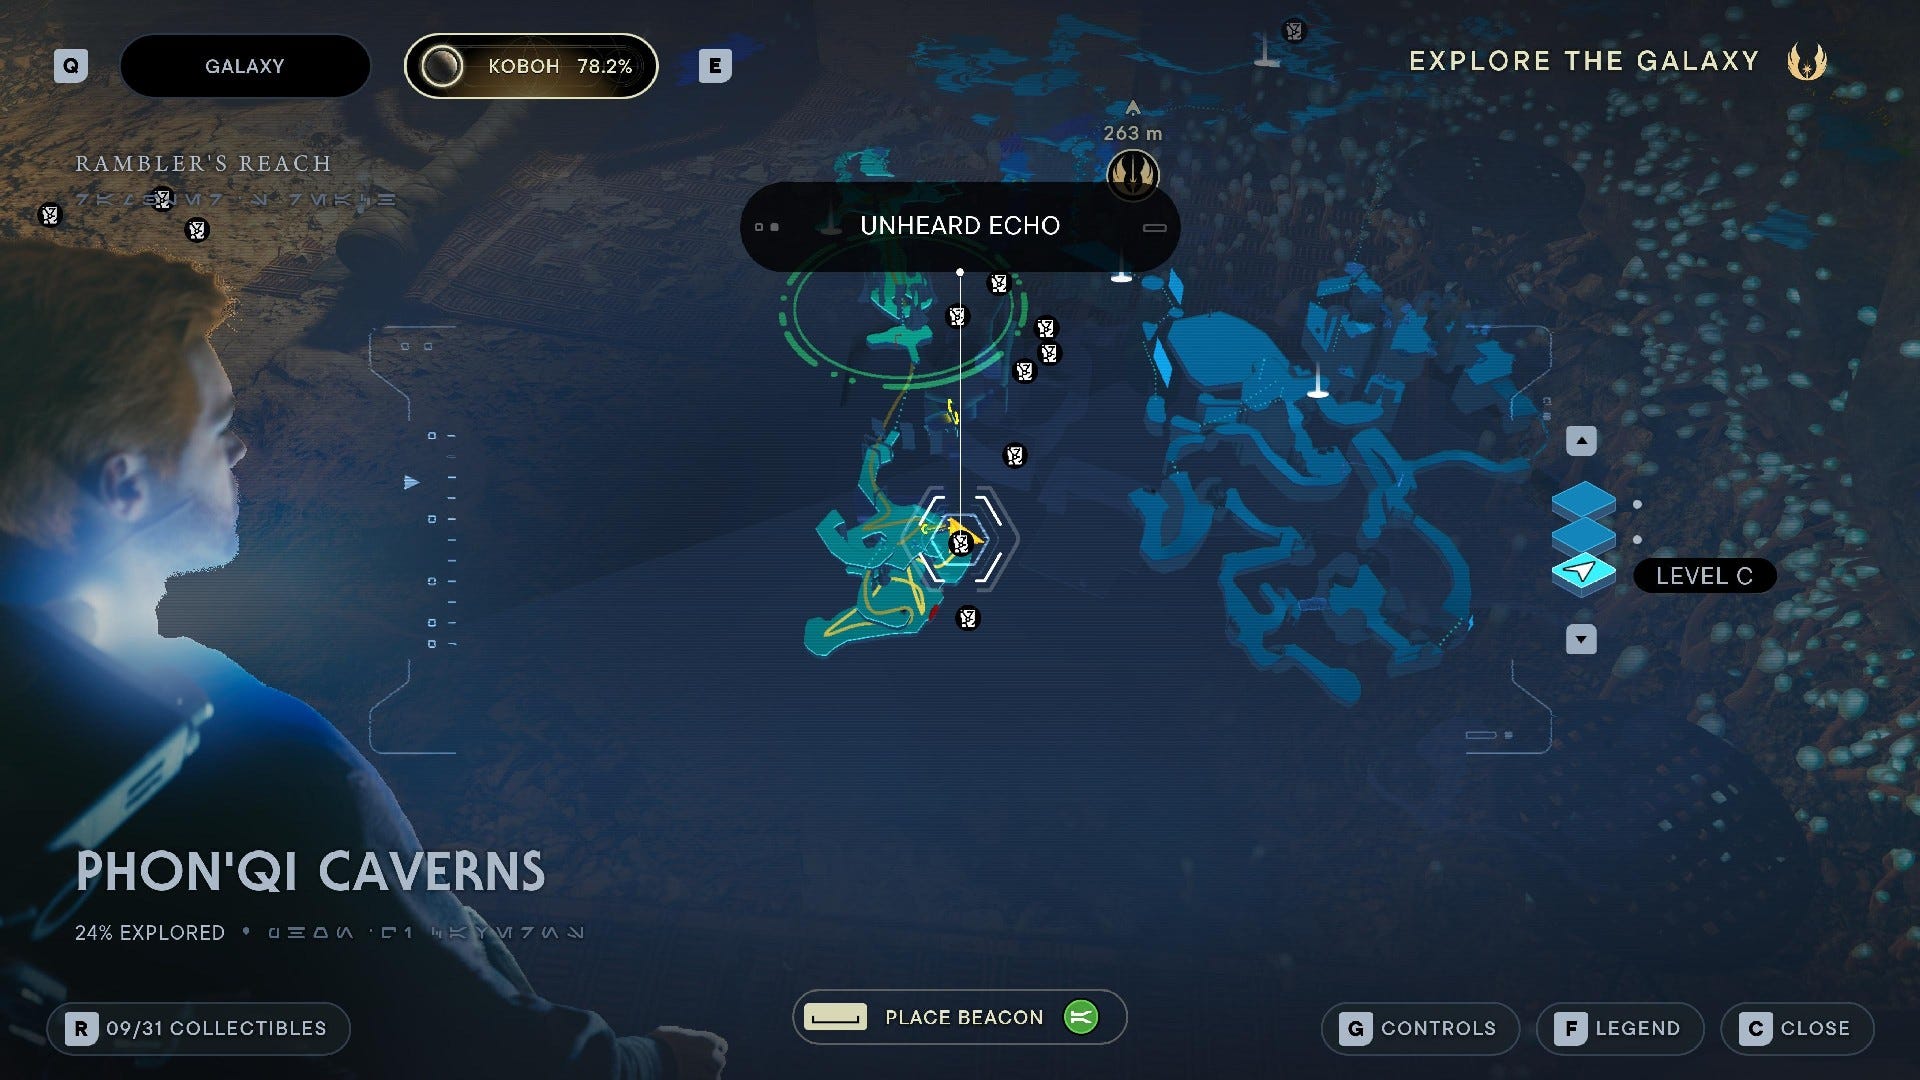
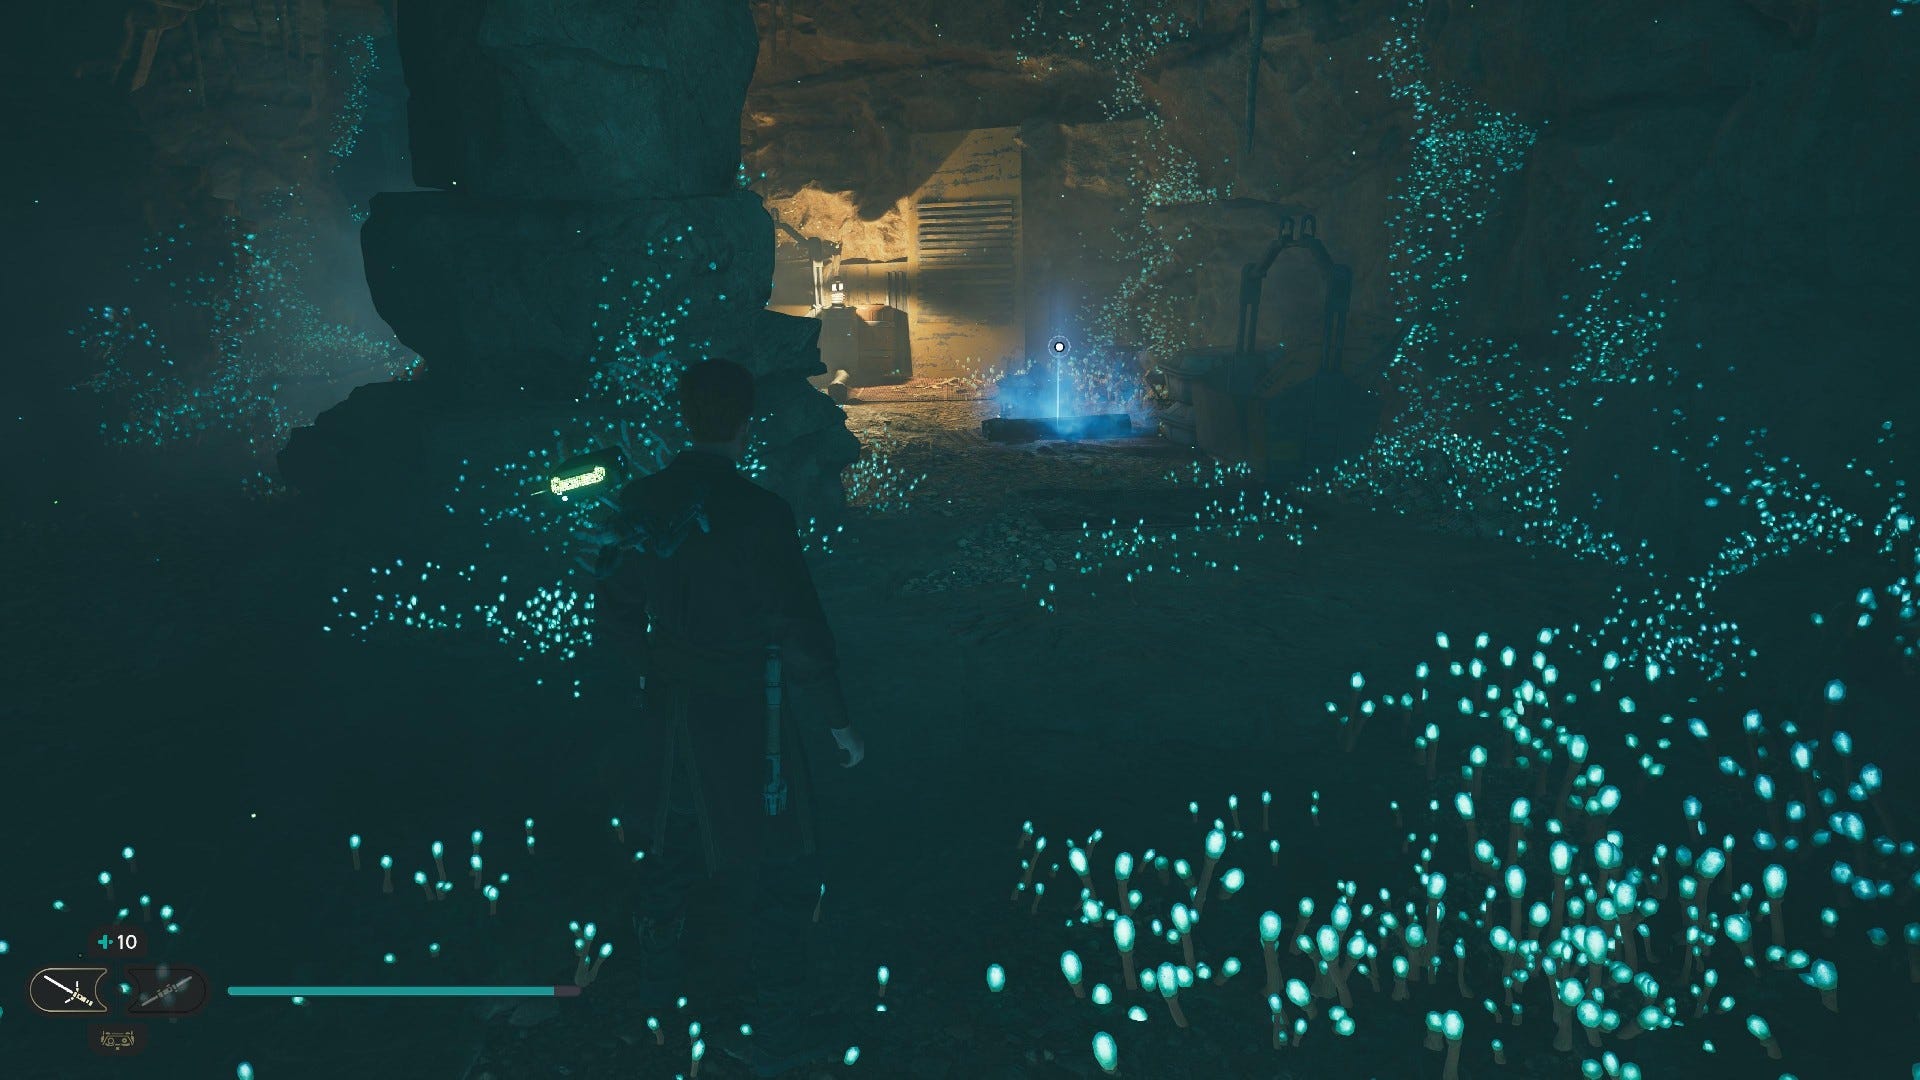
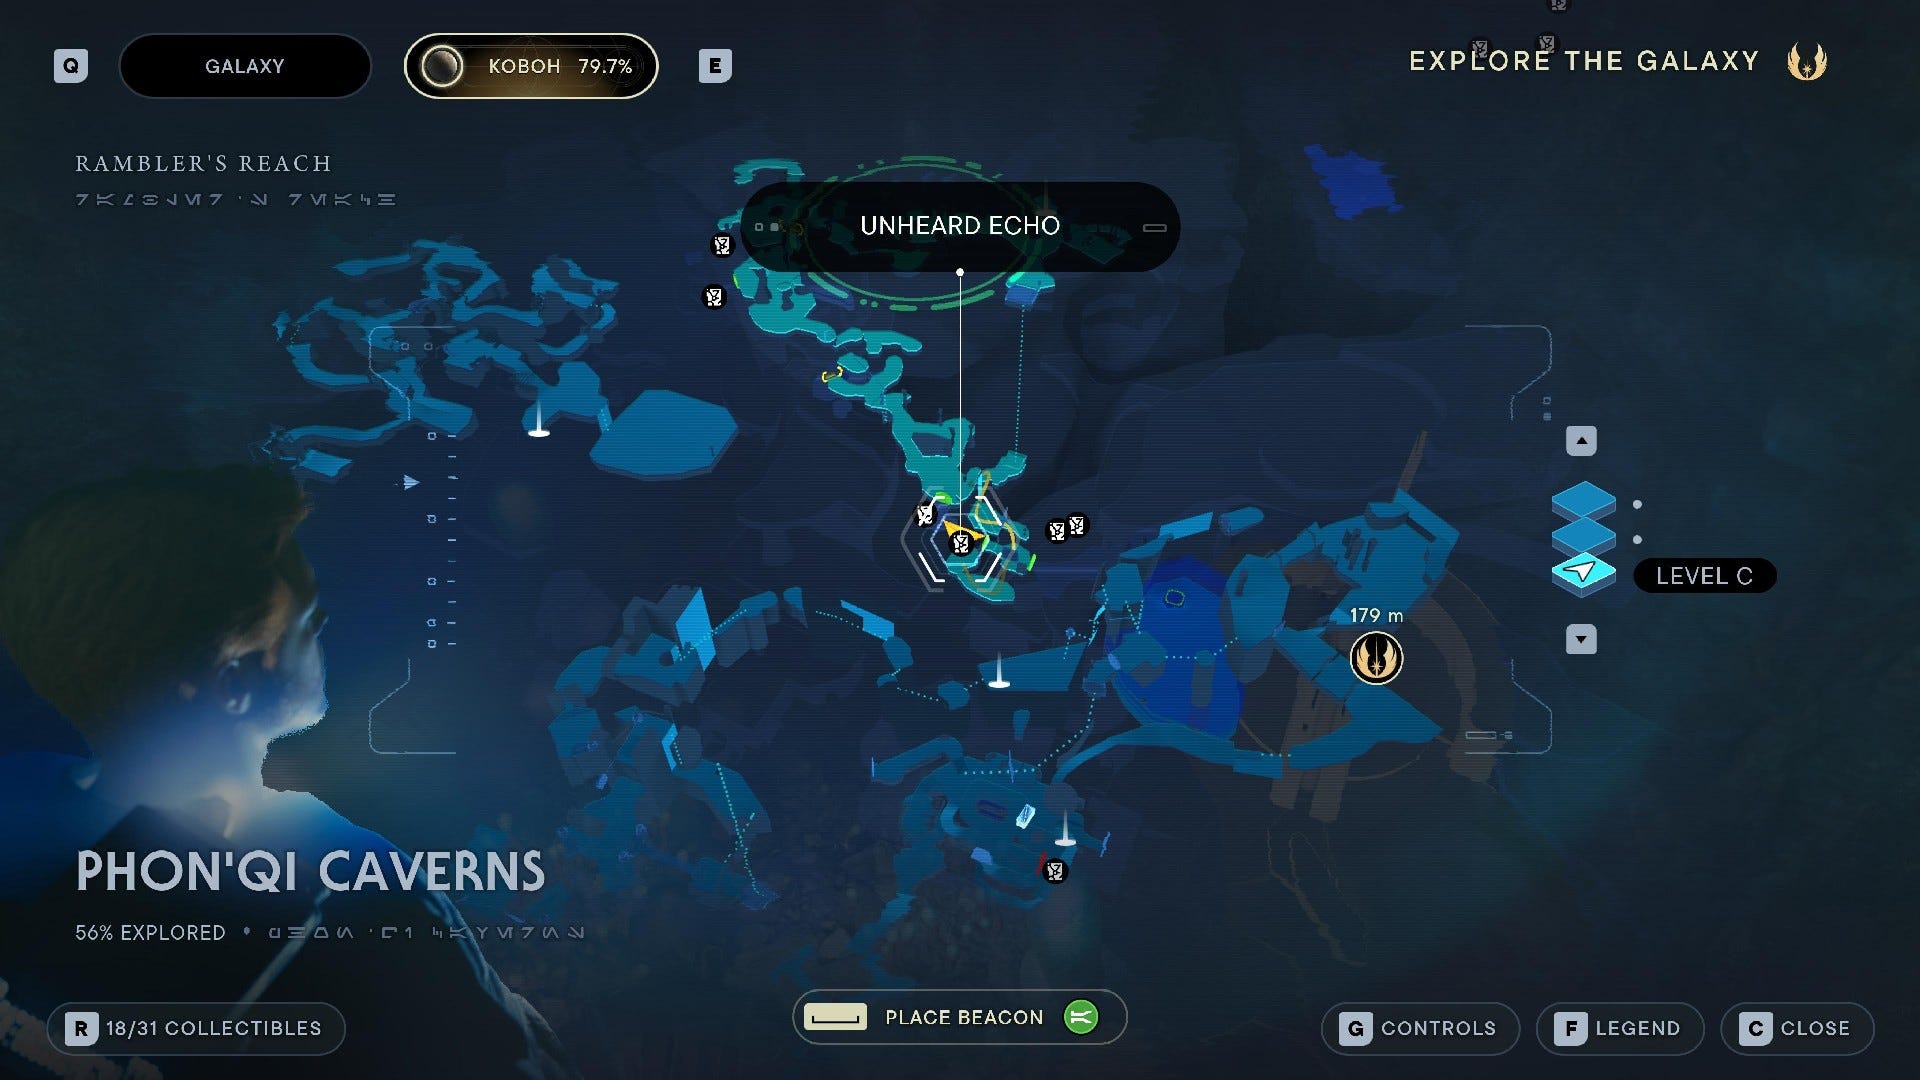
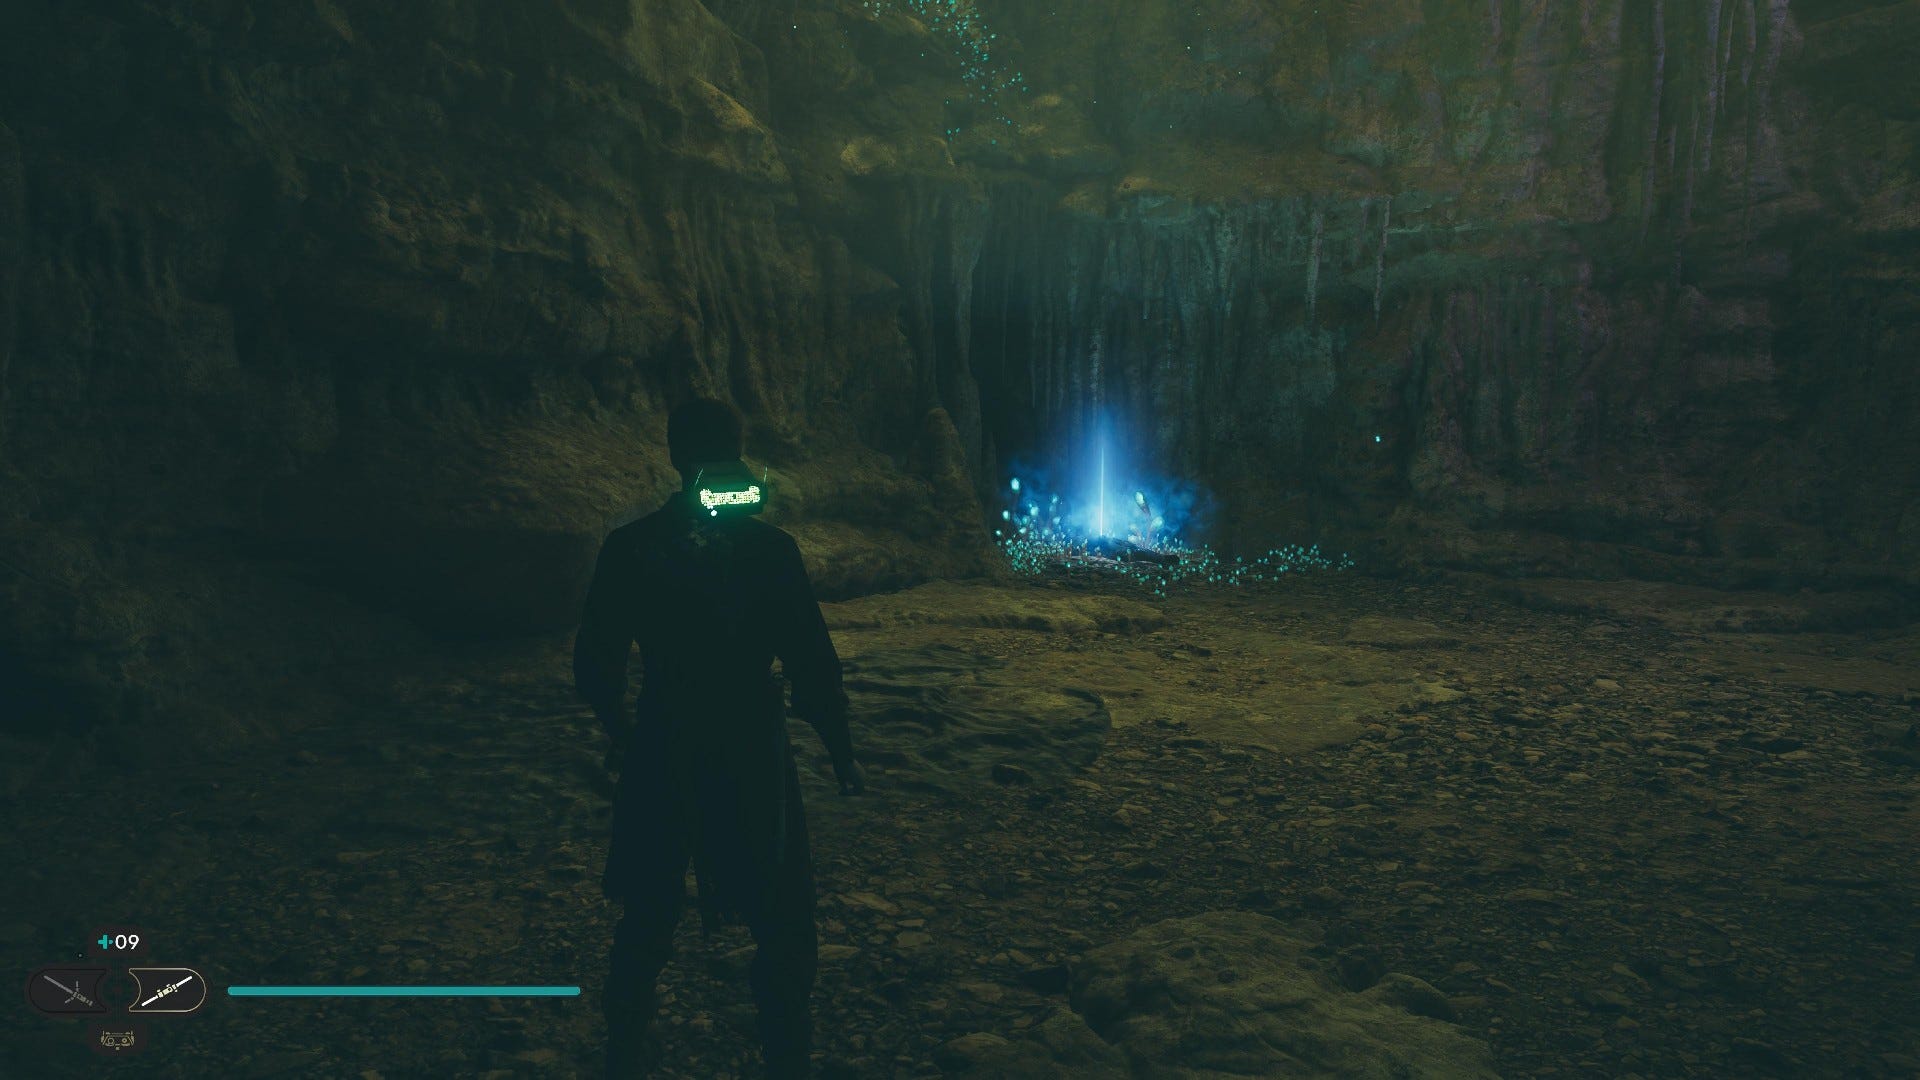
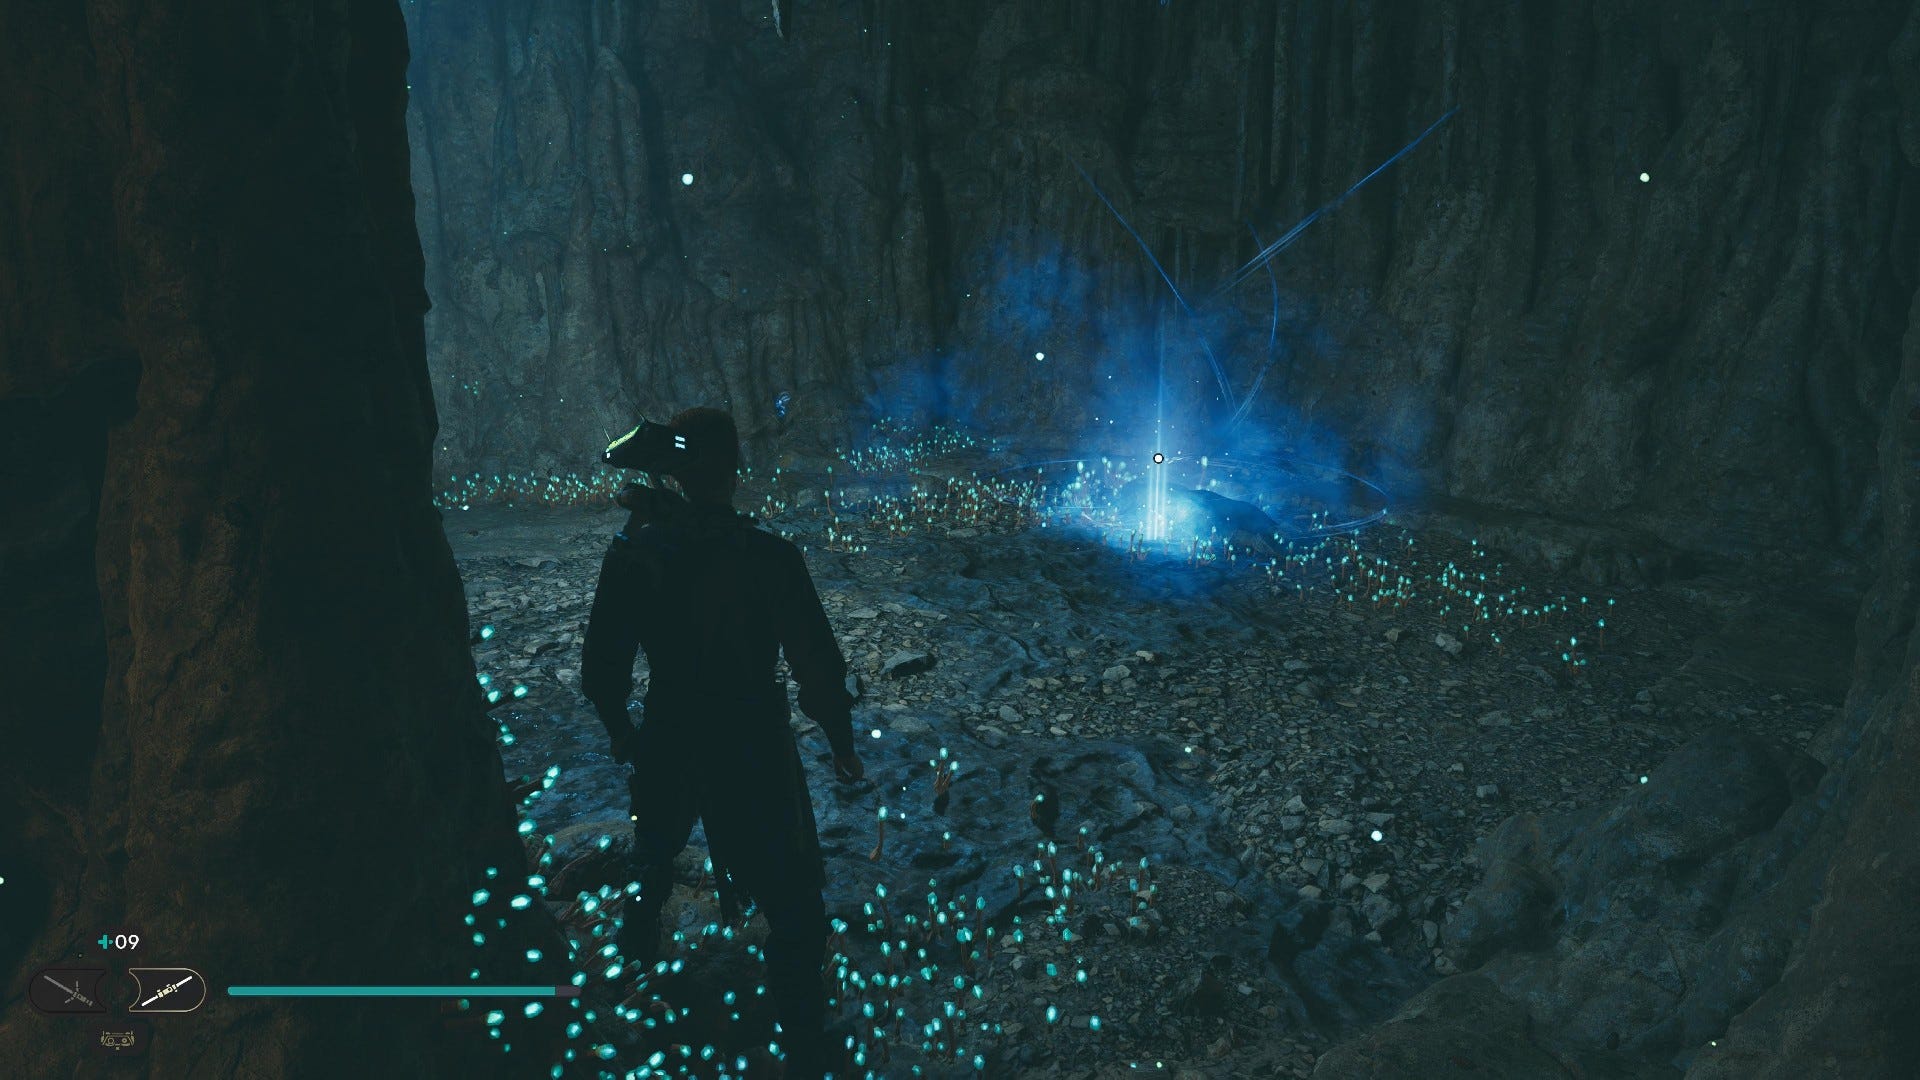
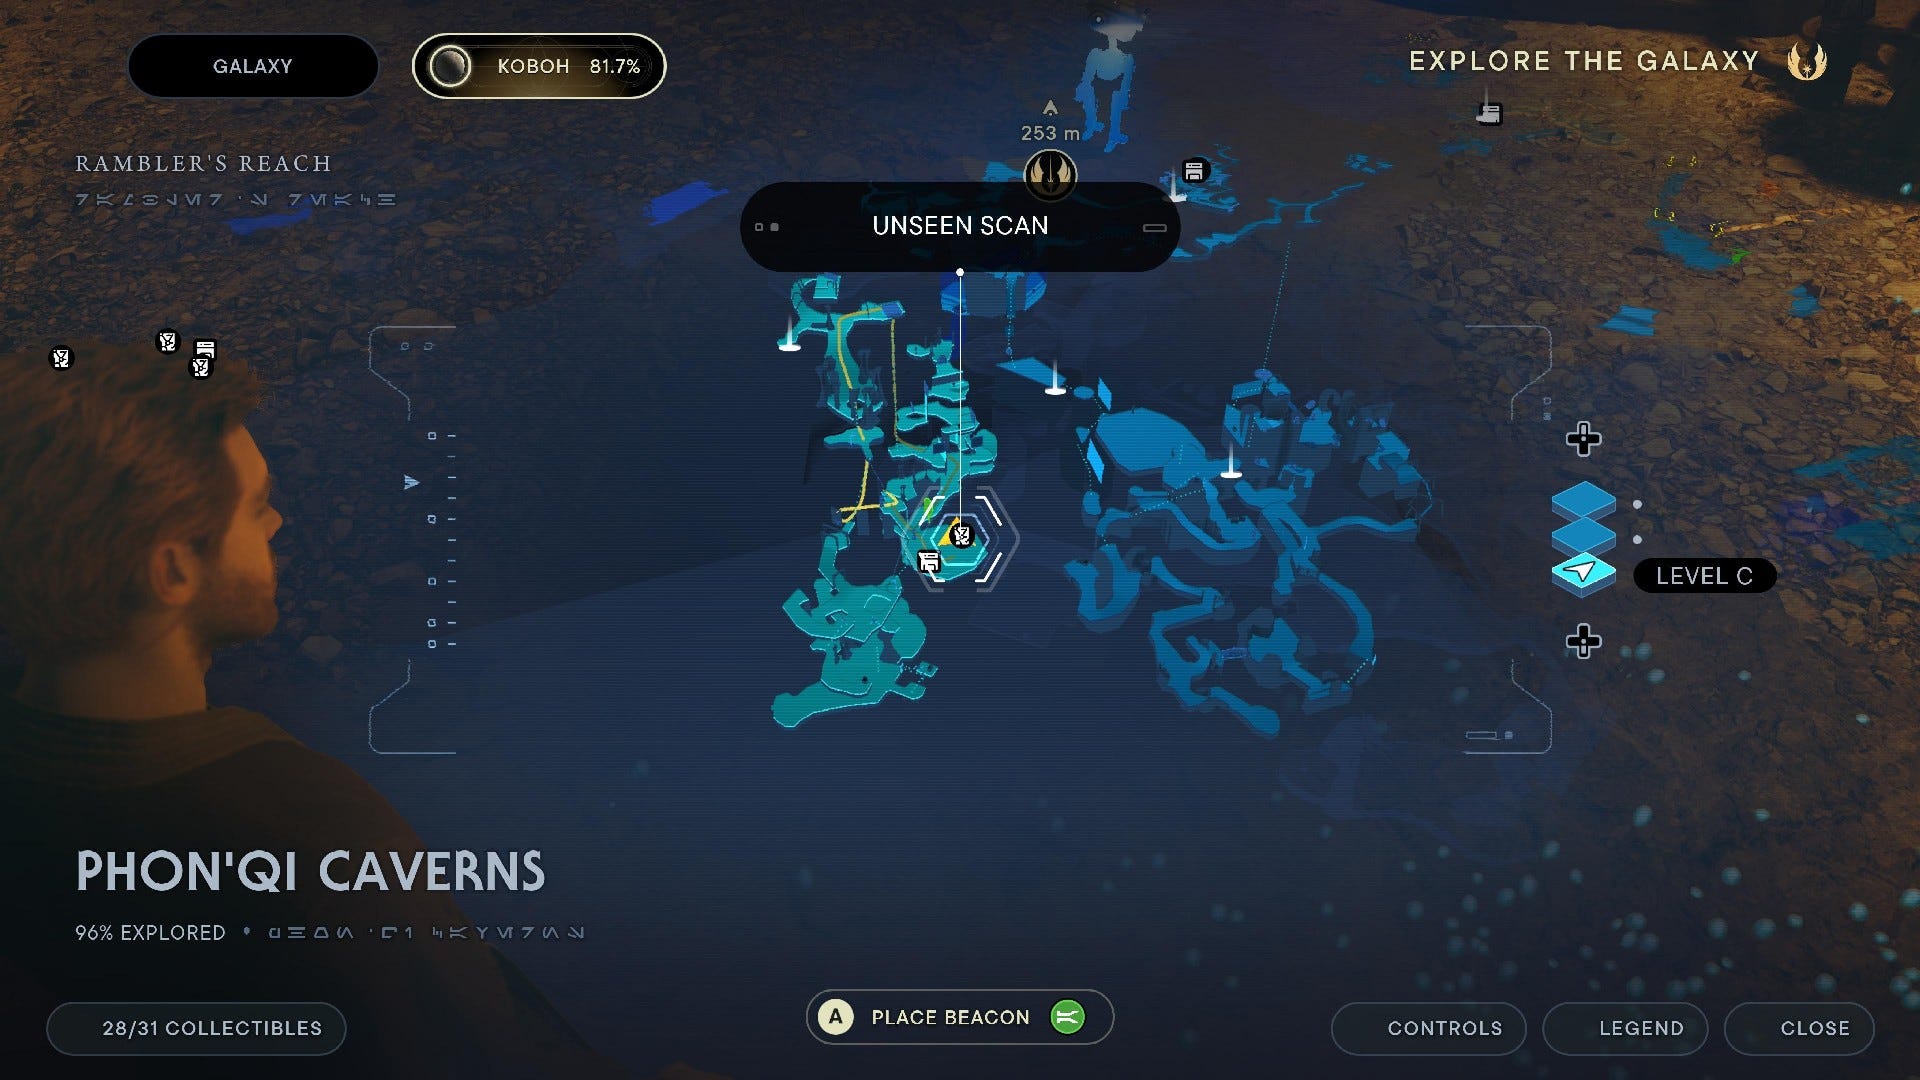
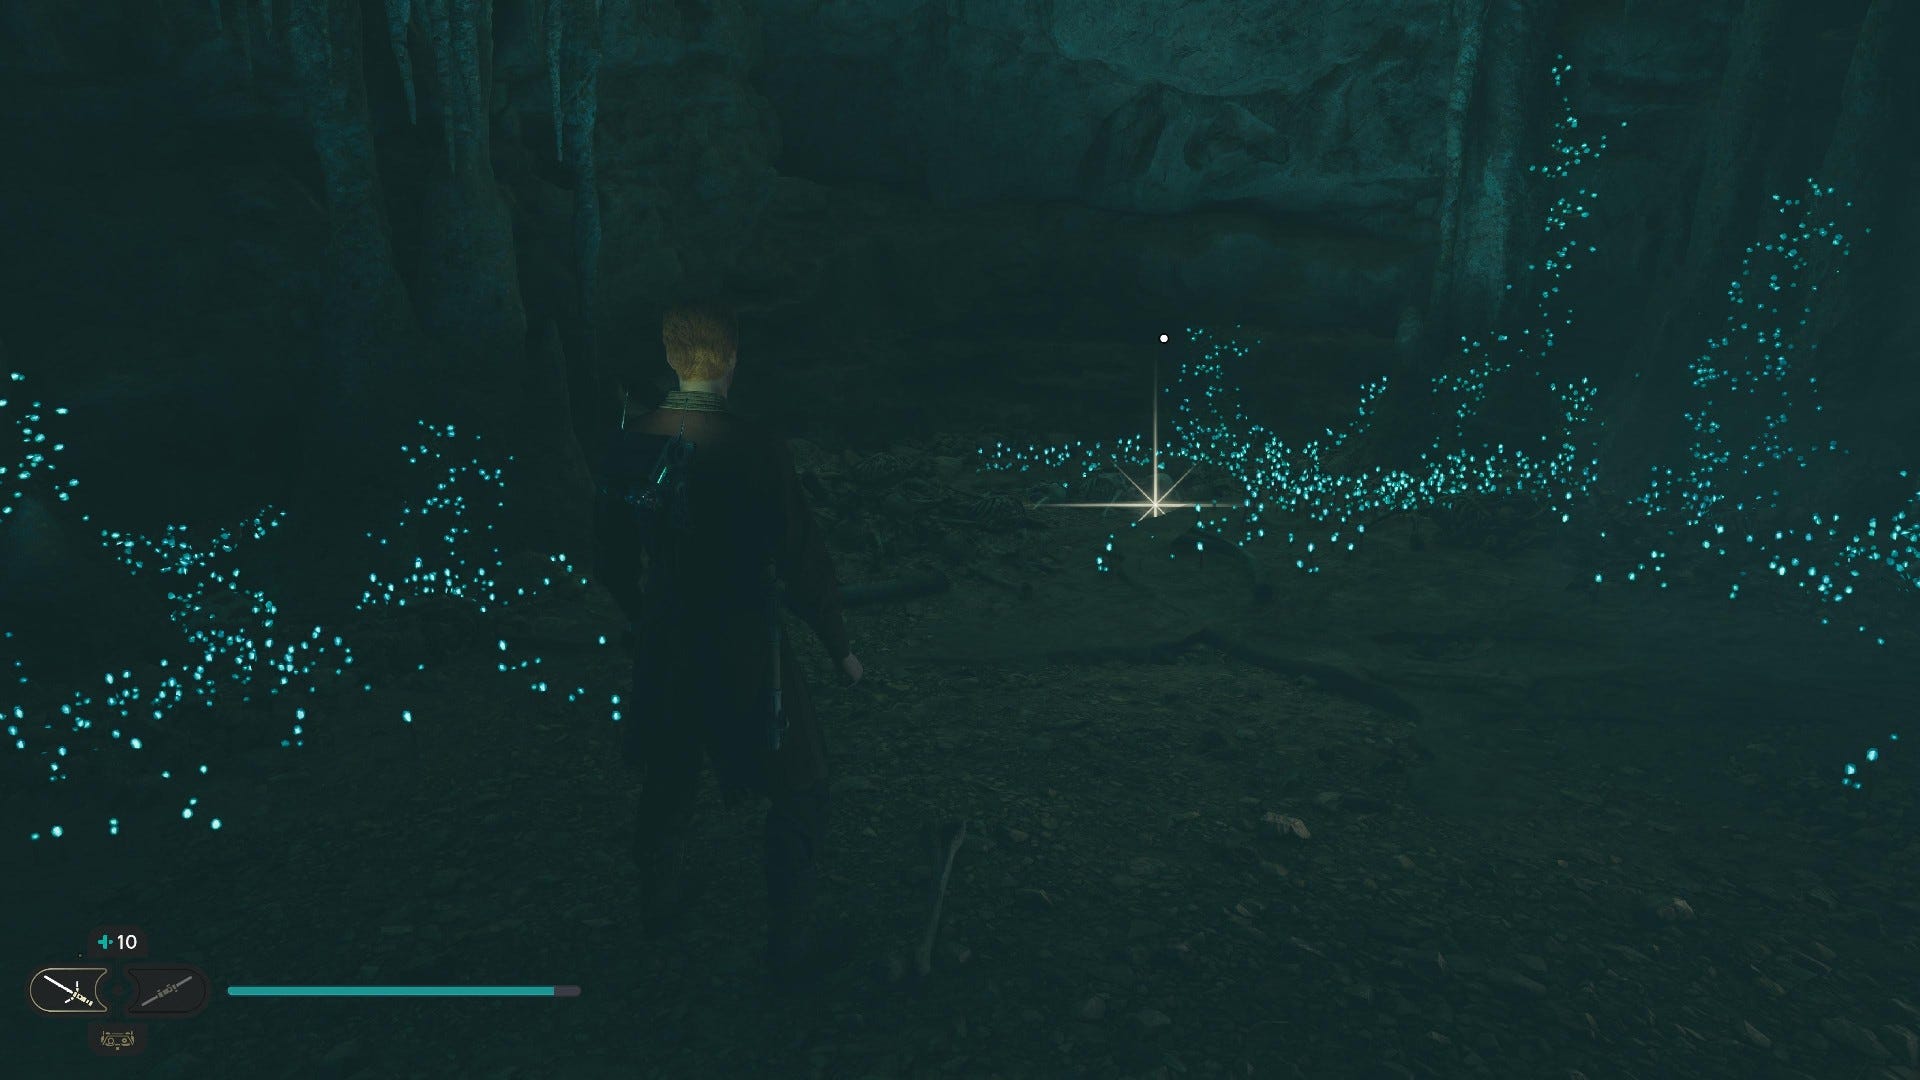
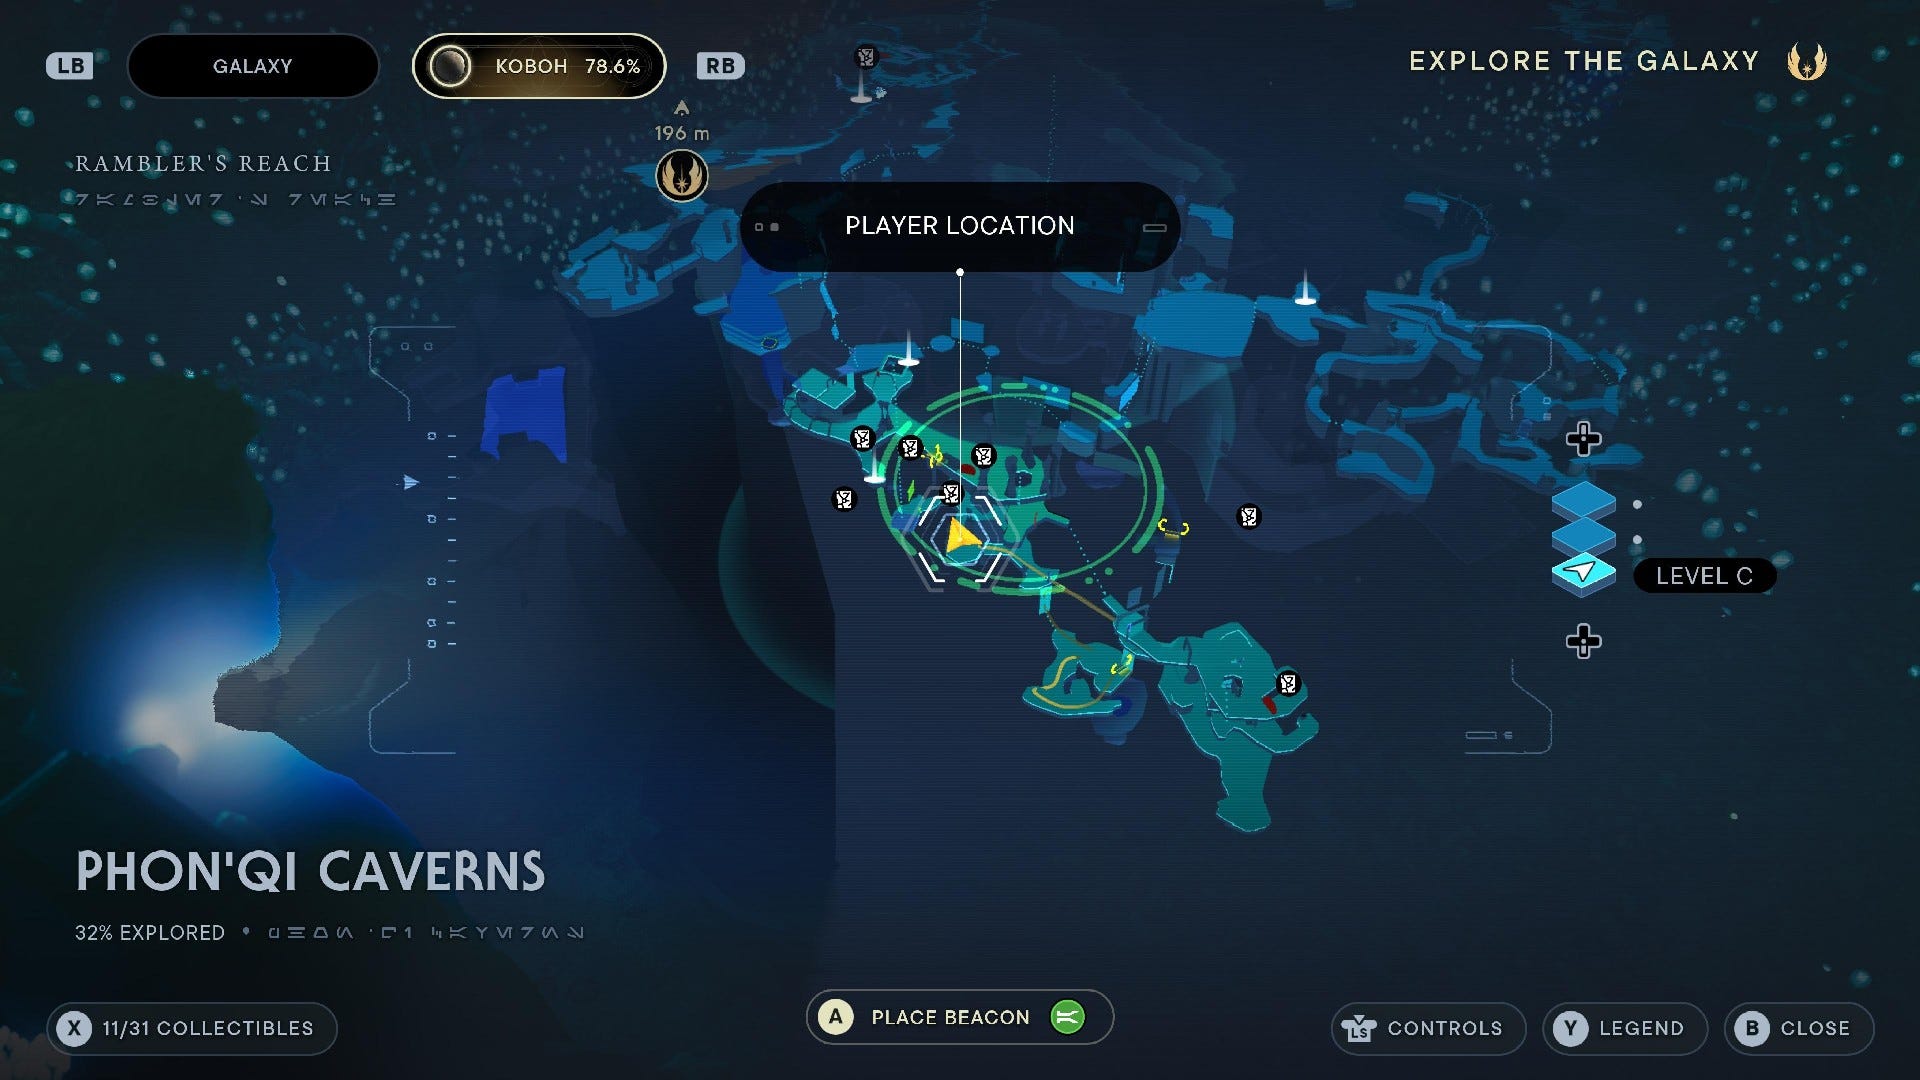
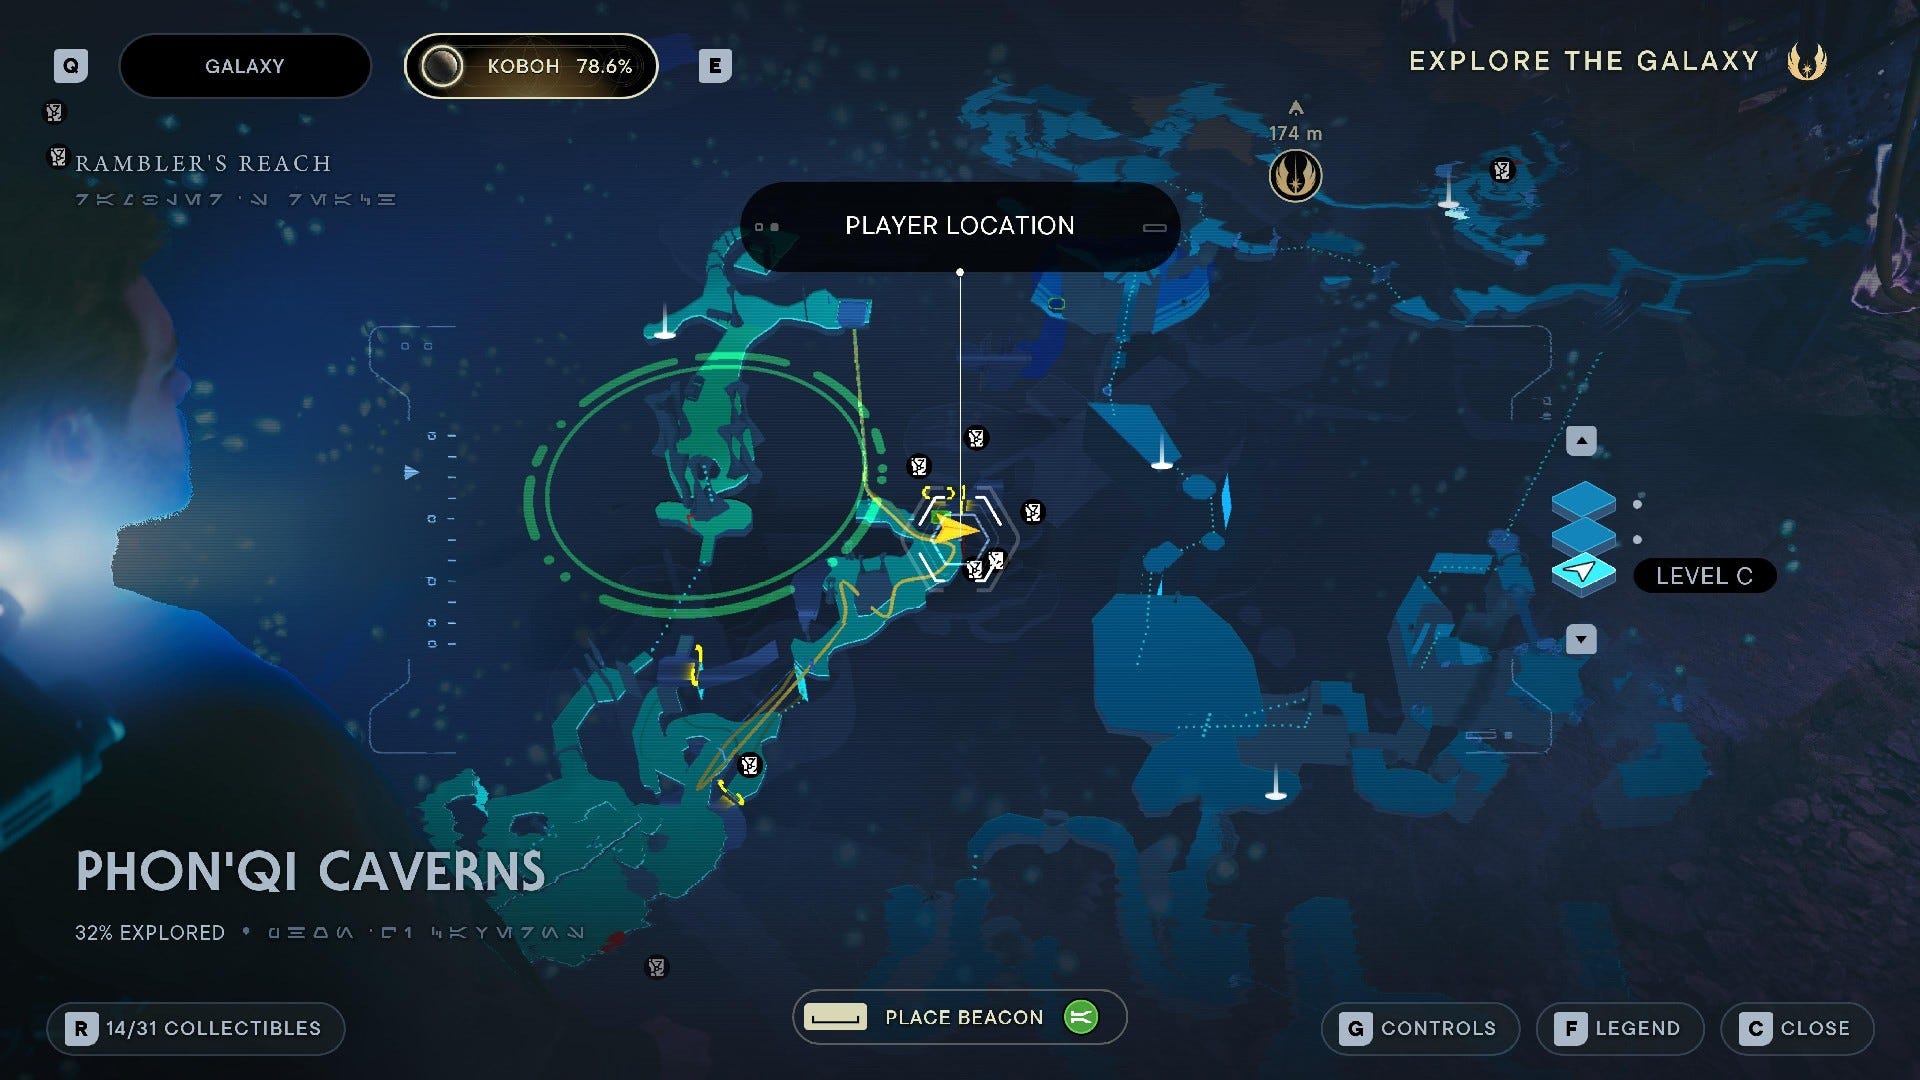
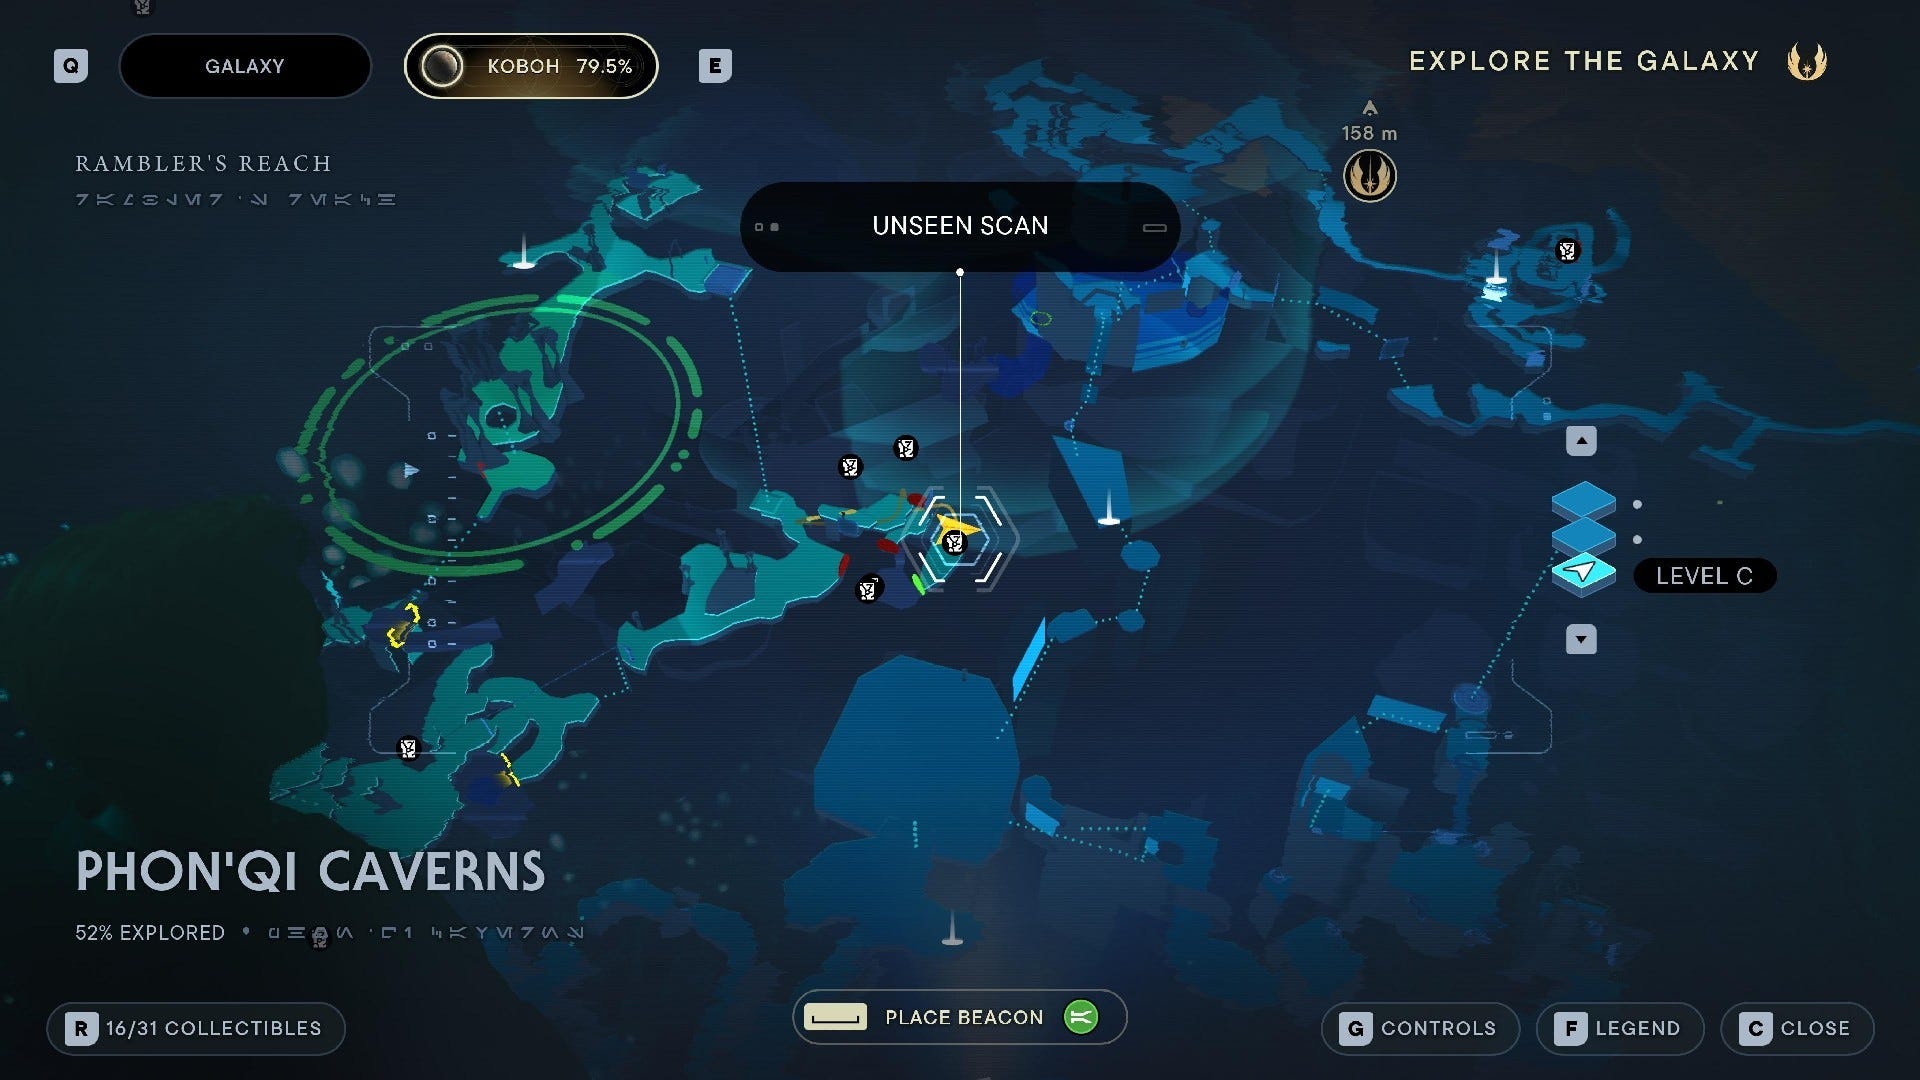
Phon’Qi Caverns collectibles
Phon’Qi Caverns Chests:

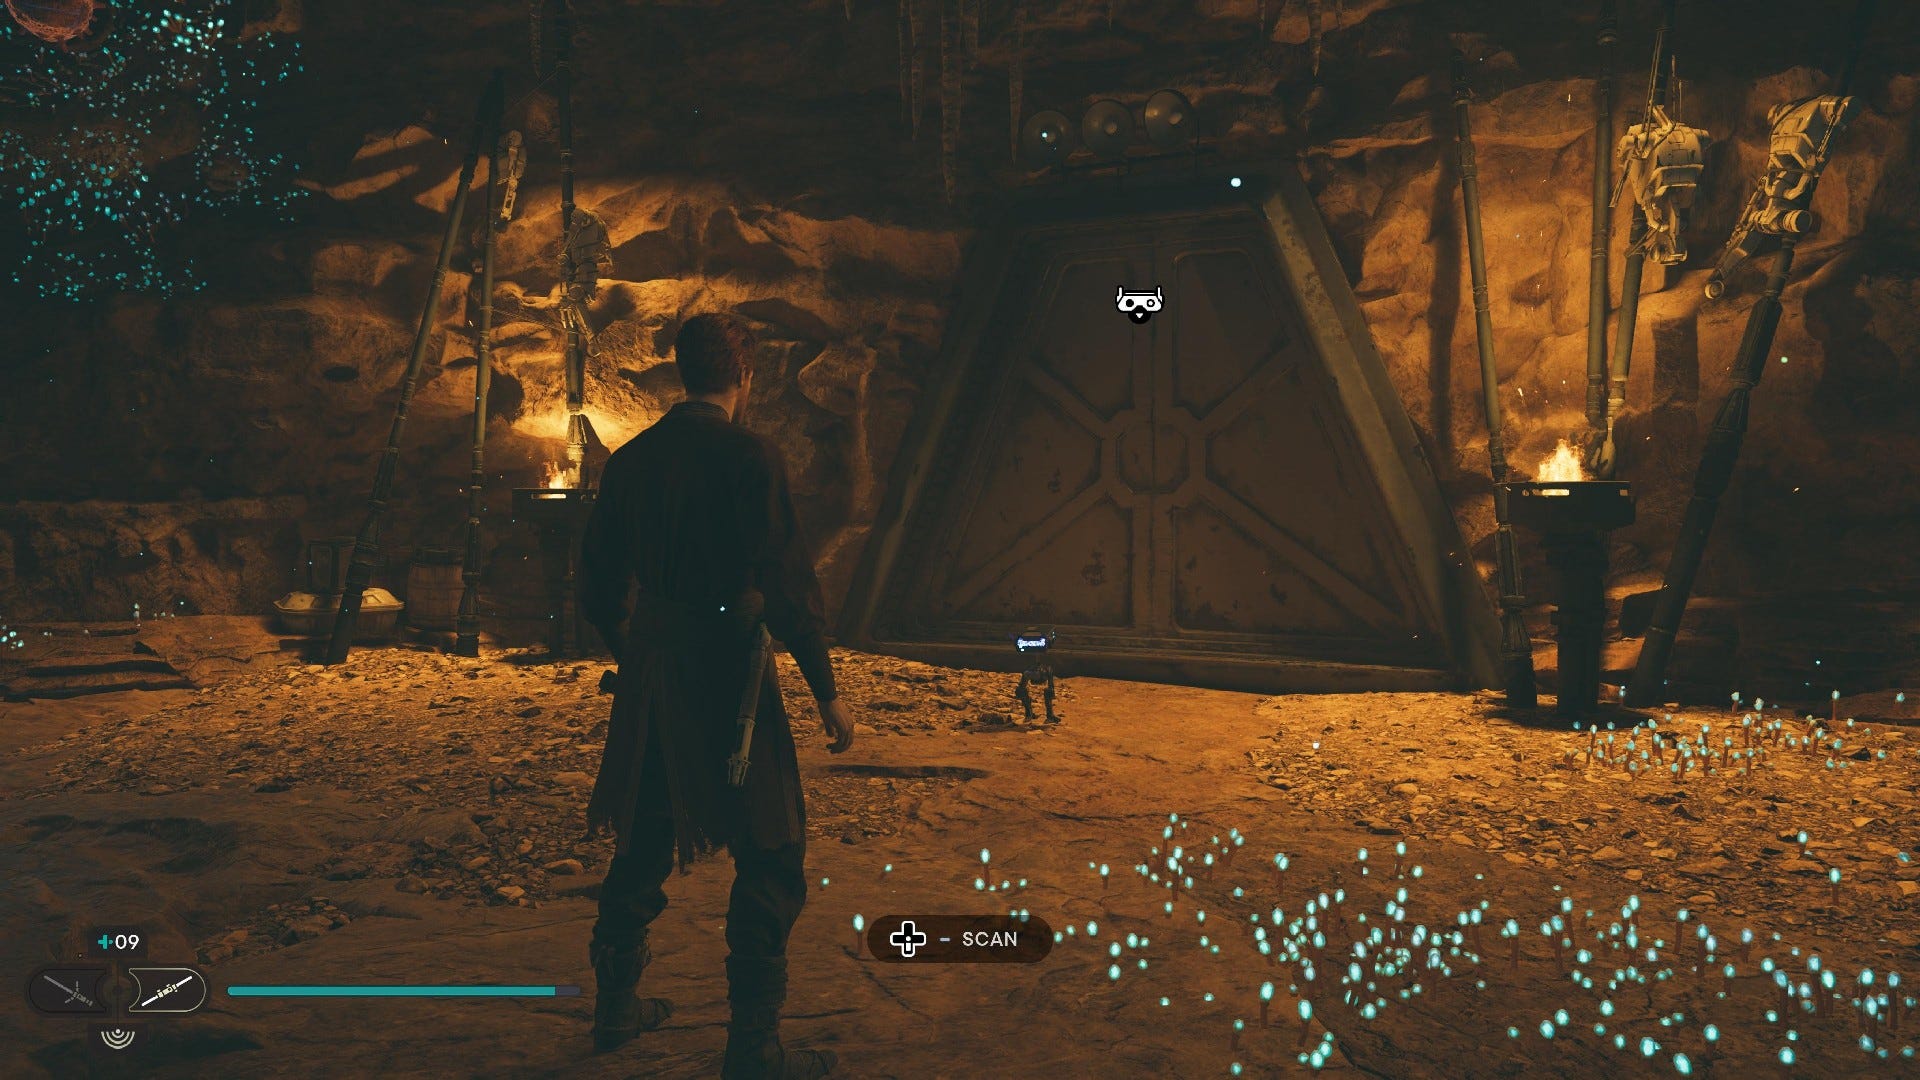
Chest #1 (Bomber material): Underneath the third ceiling turret, next to the flaming brazier.

Ability (Slice Magnaguard): Jump up the wall opposite the green forcefield with the Skill Point Essence.

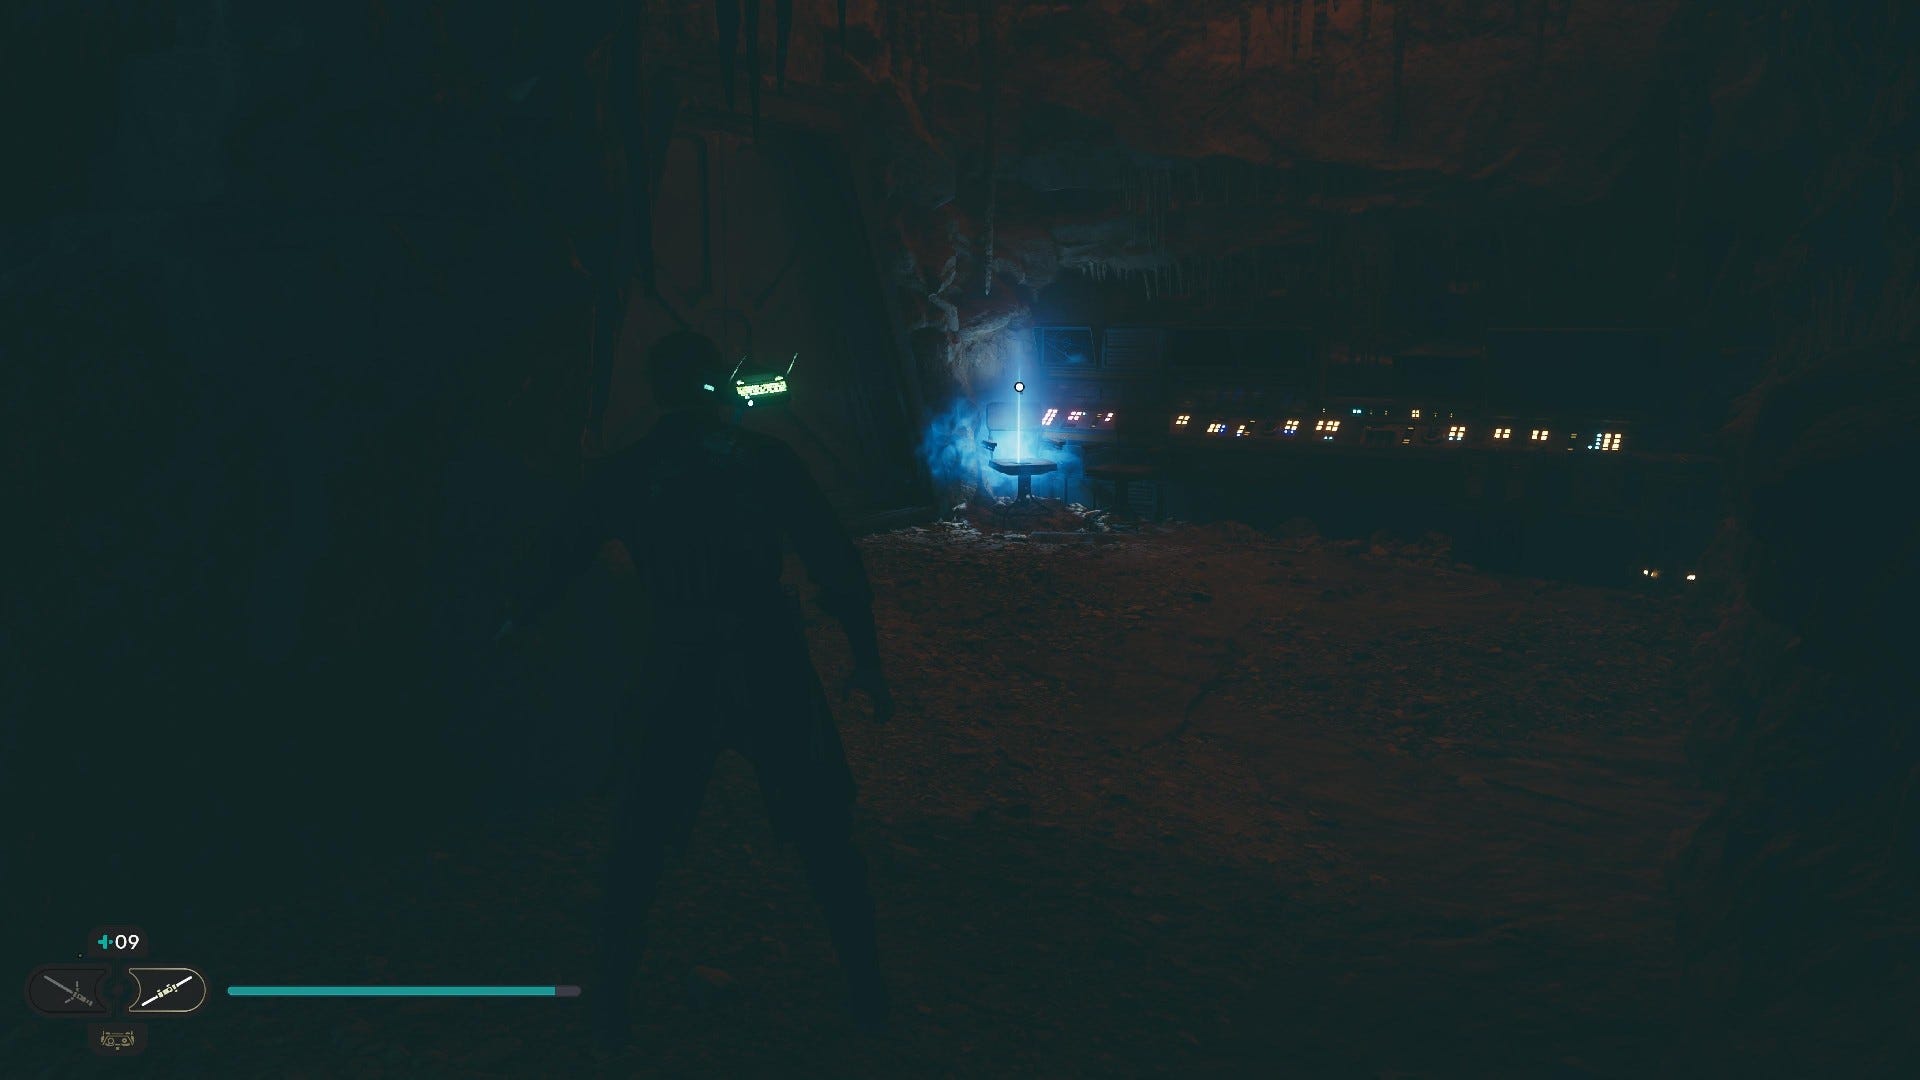
Ability (Chests on Holomap): After fighting the three bosses, climb up the wall in the next room and scan the terminal in the middle of the room.

Chest #2 (Duelist Grip): Use an acid ball on the nearby door to reach the chest.

Chest #3 (Duelist Pommel): Dive into the tiny circular pool where Skoova Stev is catching fish.
Chest #4 (Duelist Switch): Use acid ball on the door leading from the Rancor room, then grapple up twice.

Chest #5 (Duelist Emitter): Use acid ball on the very first door in the caverns, and then Force Slam down the two ceiling objects. One of the holes that appear in the ground leads to a chest.
Phon’Qi Caverns Essences:

Skill Point Essence #1: From the very first electrical door in the caverns, wall-run to the left until you reach the essence.


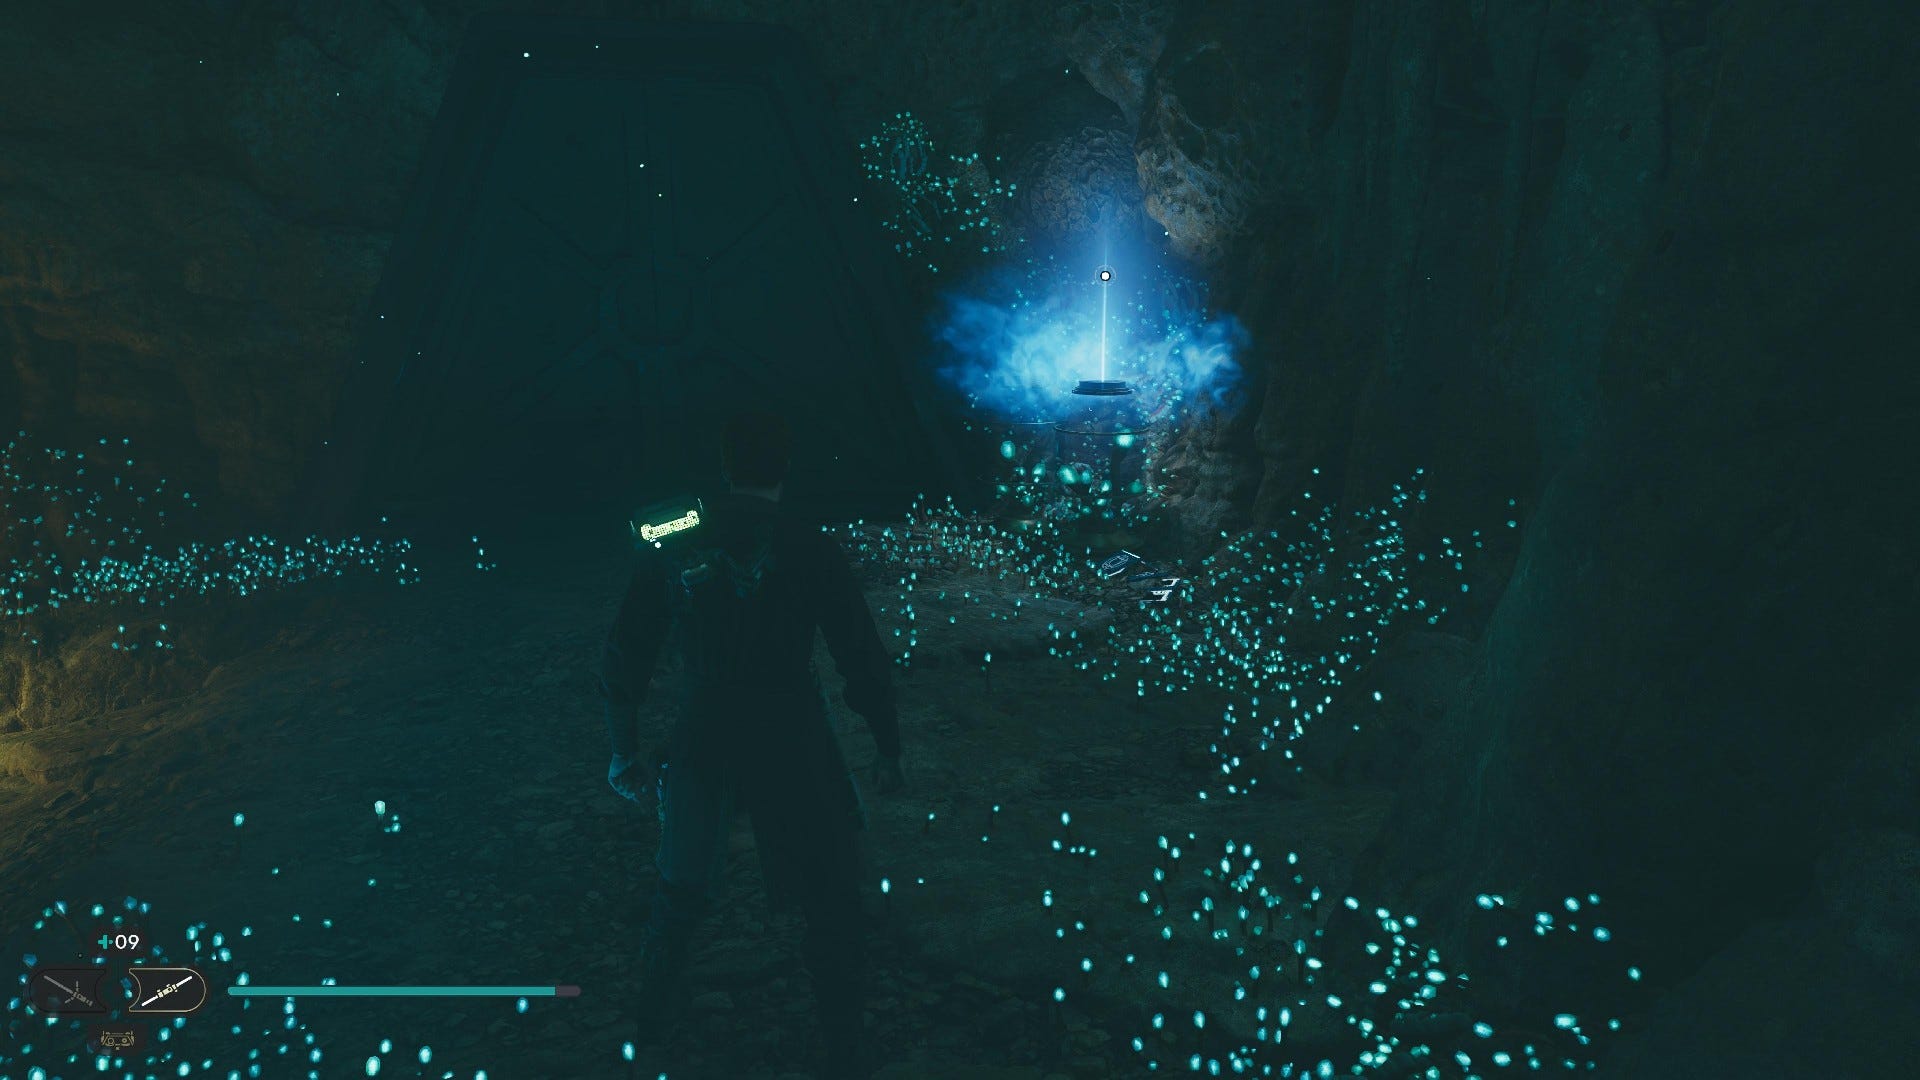
Skill Point Essence #2: Head through the green forcefield down the drop in front of the bottom part of the elevator.

Skill Point Essence #3: After fighting the three bosses, climb up the wall in the next room, turn left, and climb again. Slice the door, and then turn left once more.
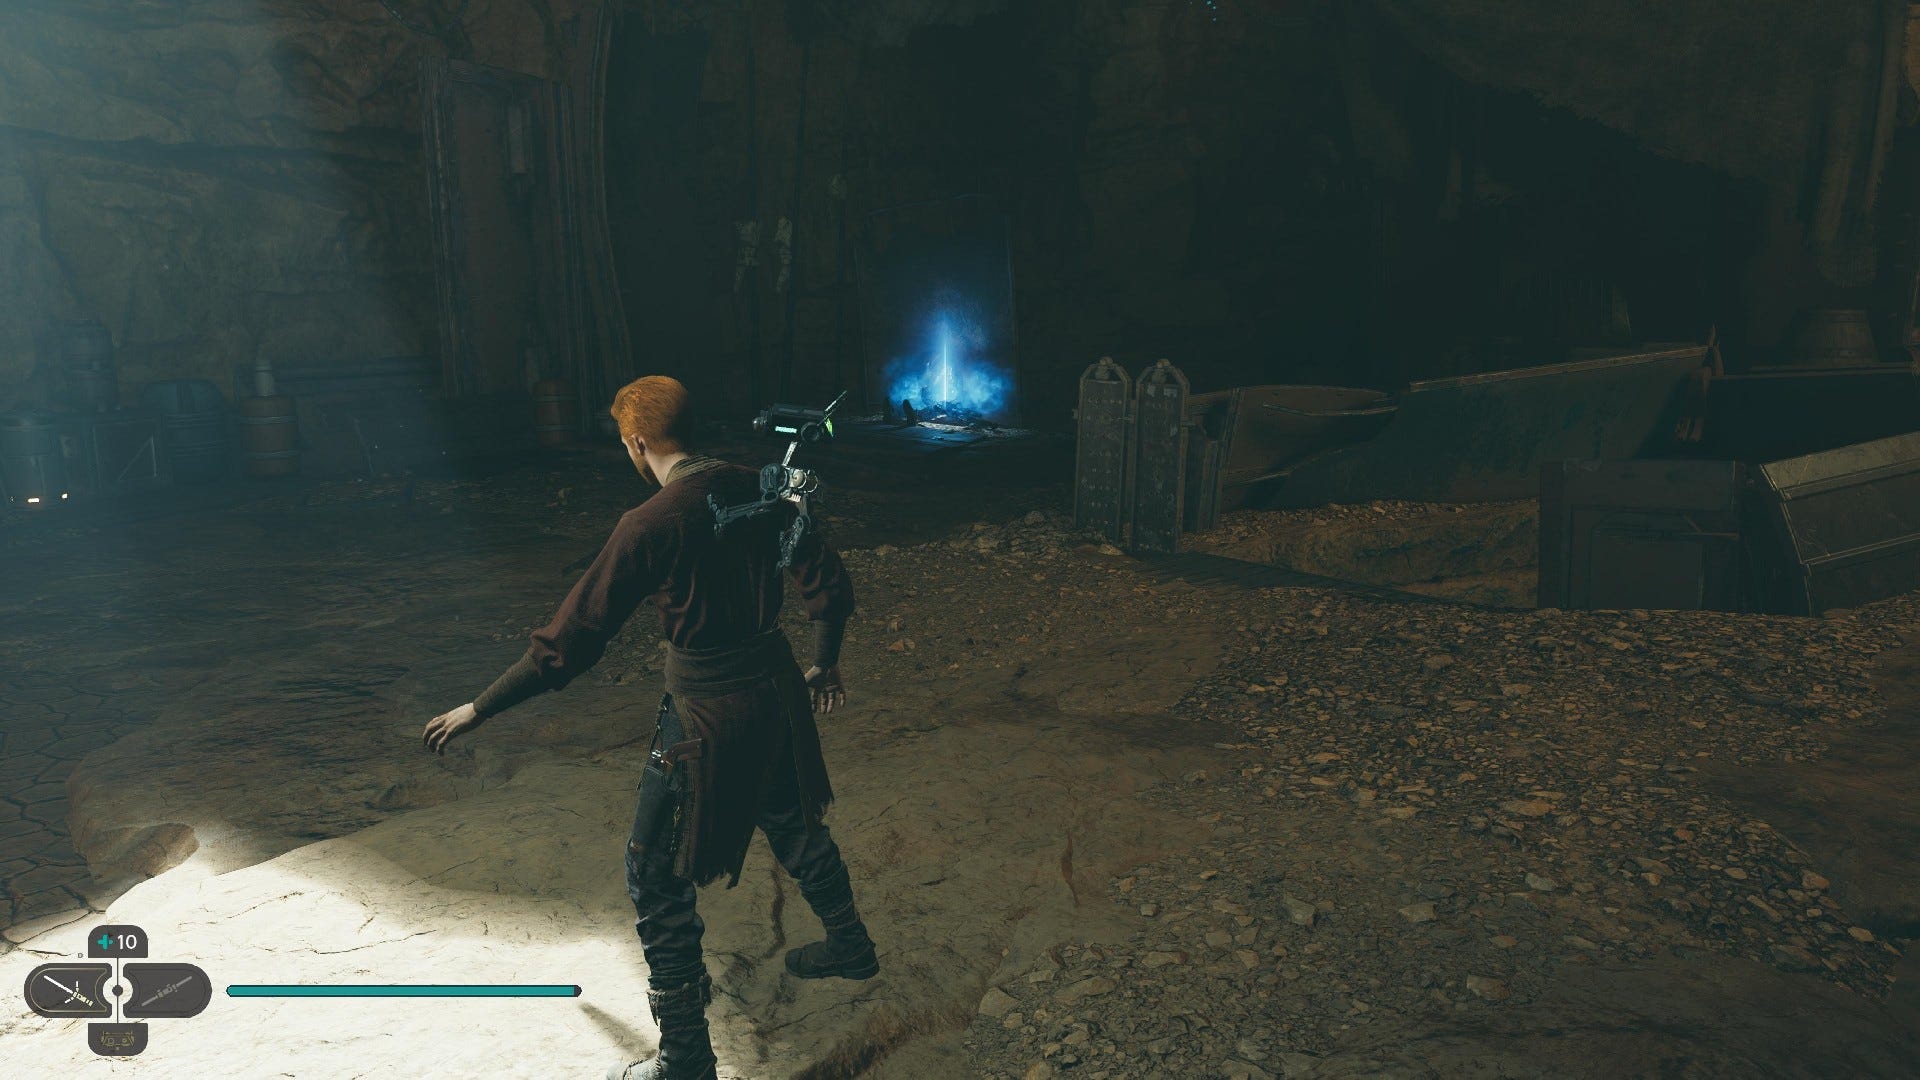
Phon’Qi Caverns Databanks:
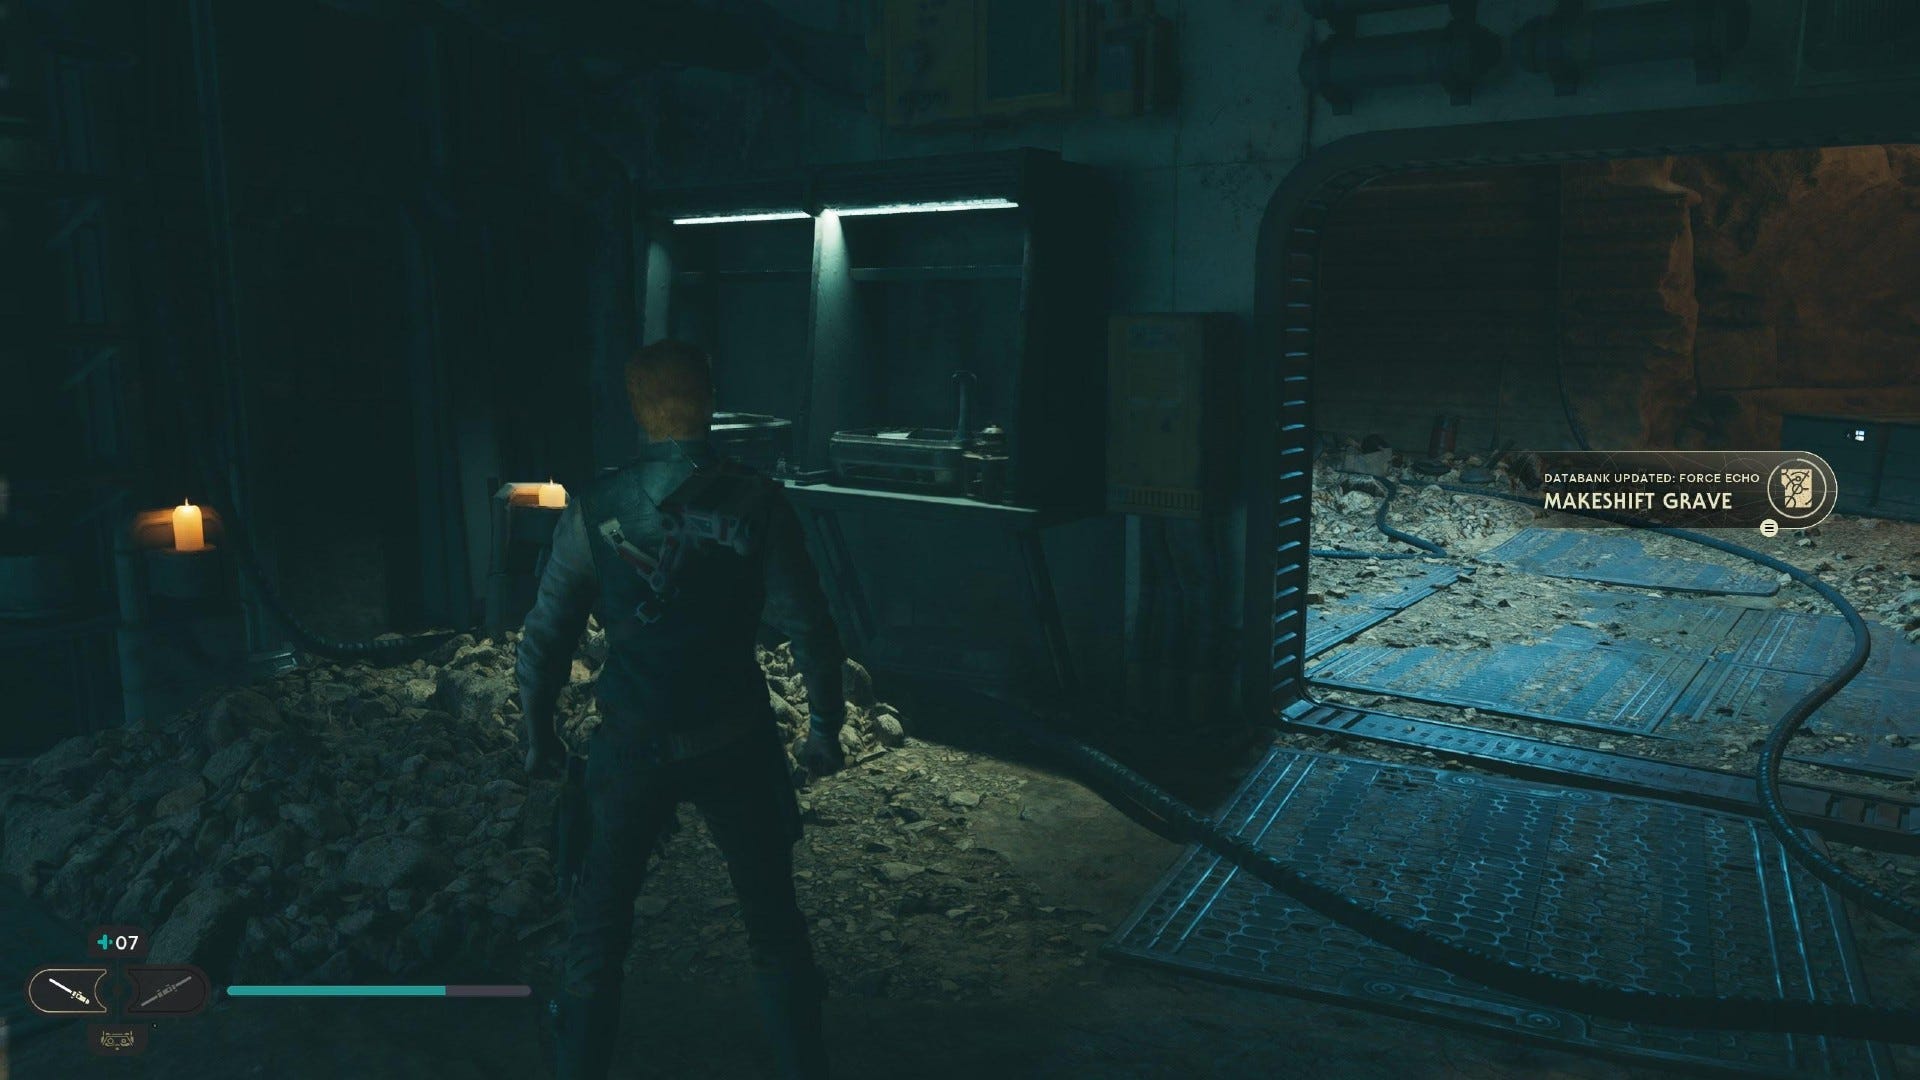
Force Echo (Makeshift Grave): Fly across from Foothill Falls and then head into basement of shack (entrance is near the group of Bedlam Raiders).
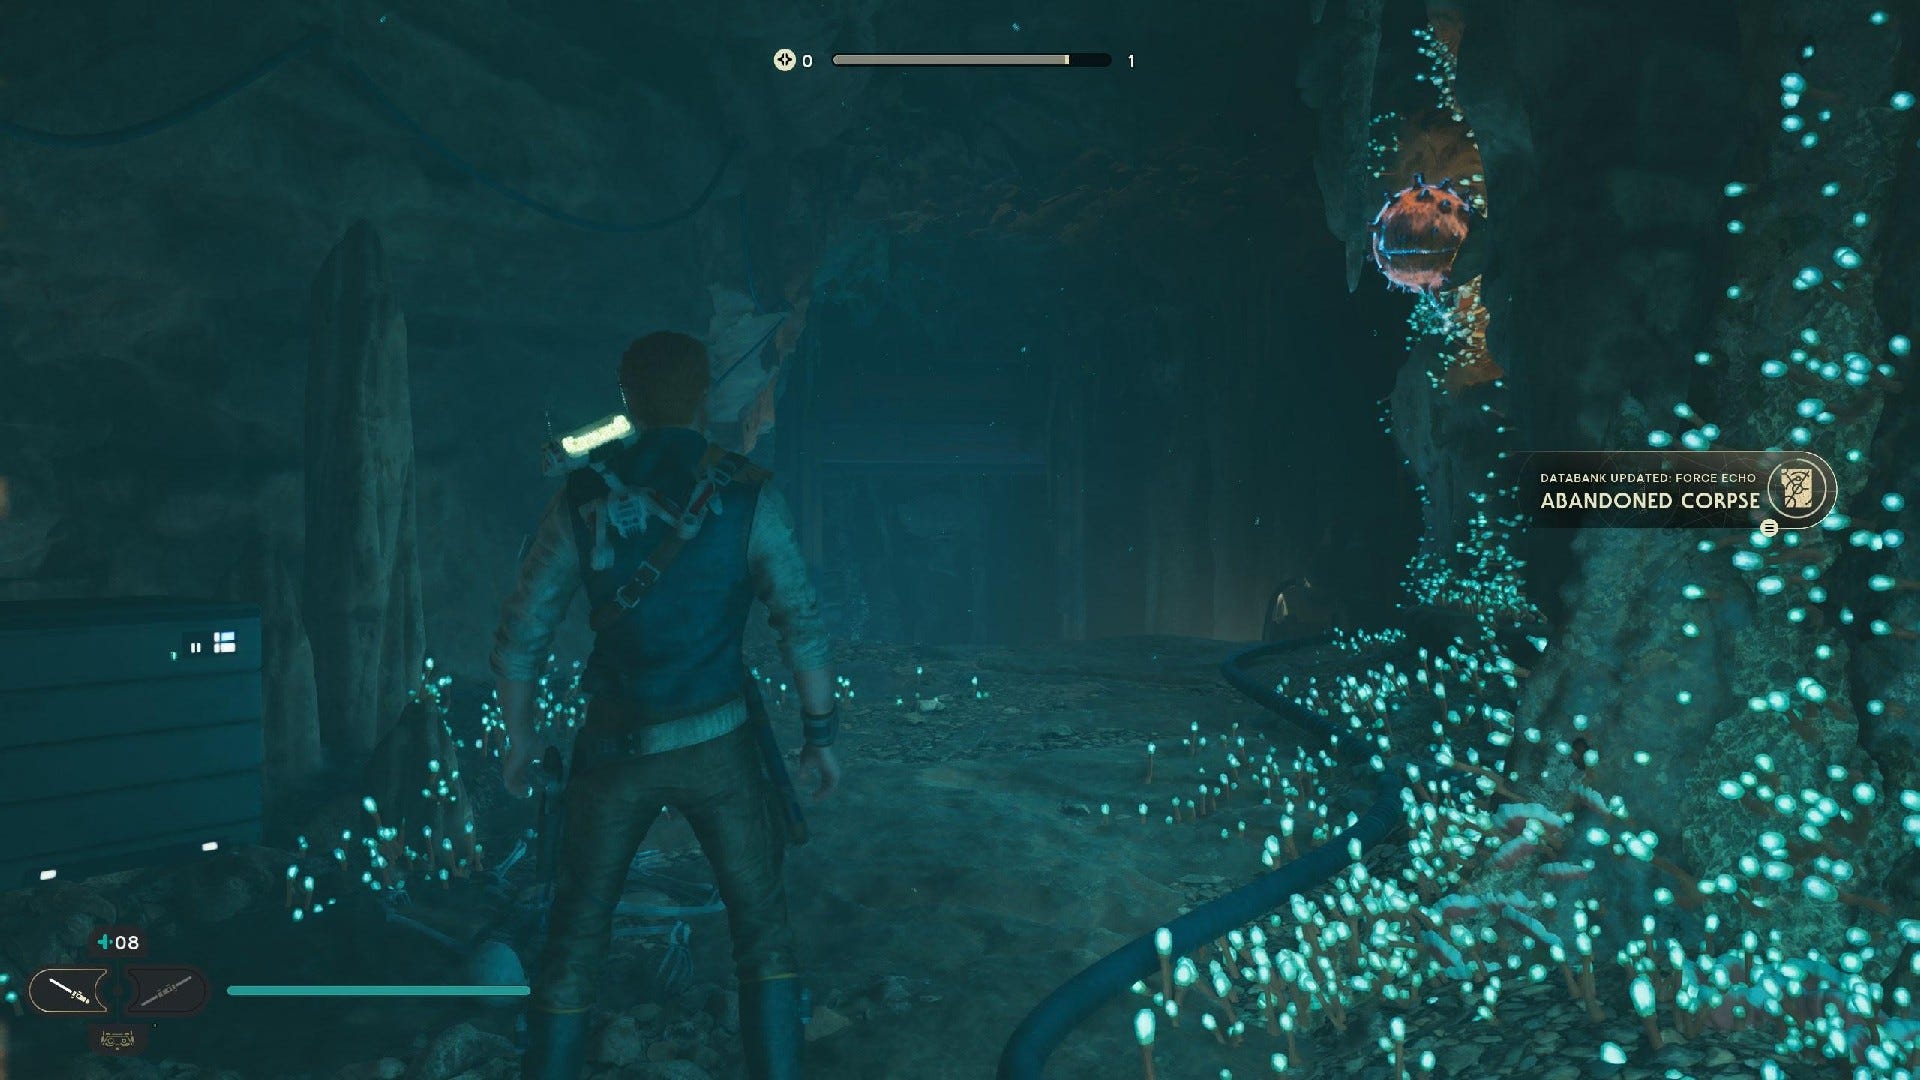
Force Echo (Abandoned Corpse): Squeeze through the gap from T-1N8 and turn left.

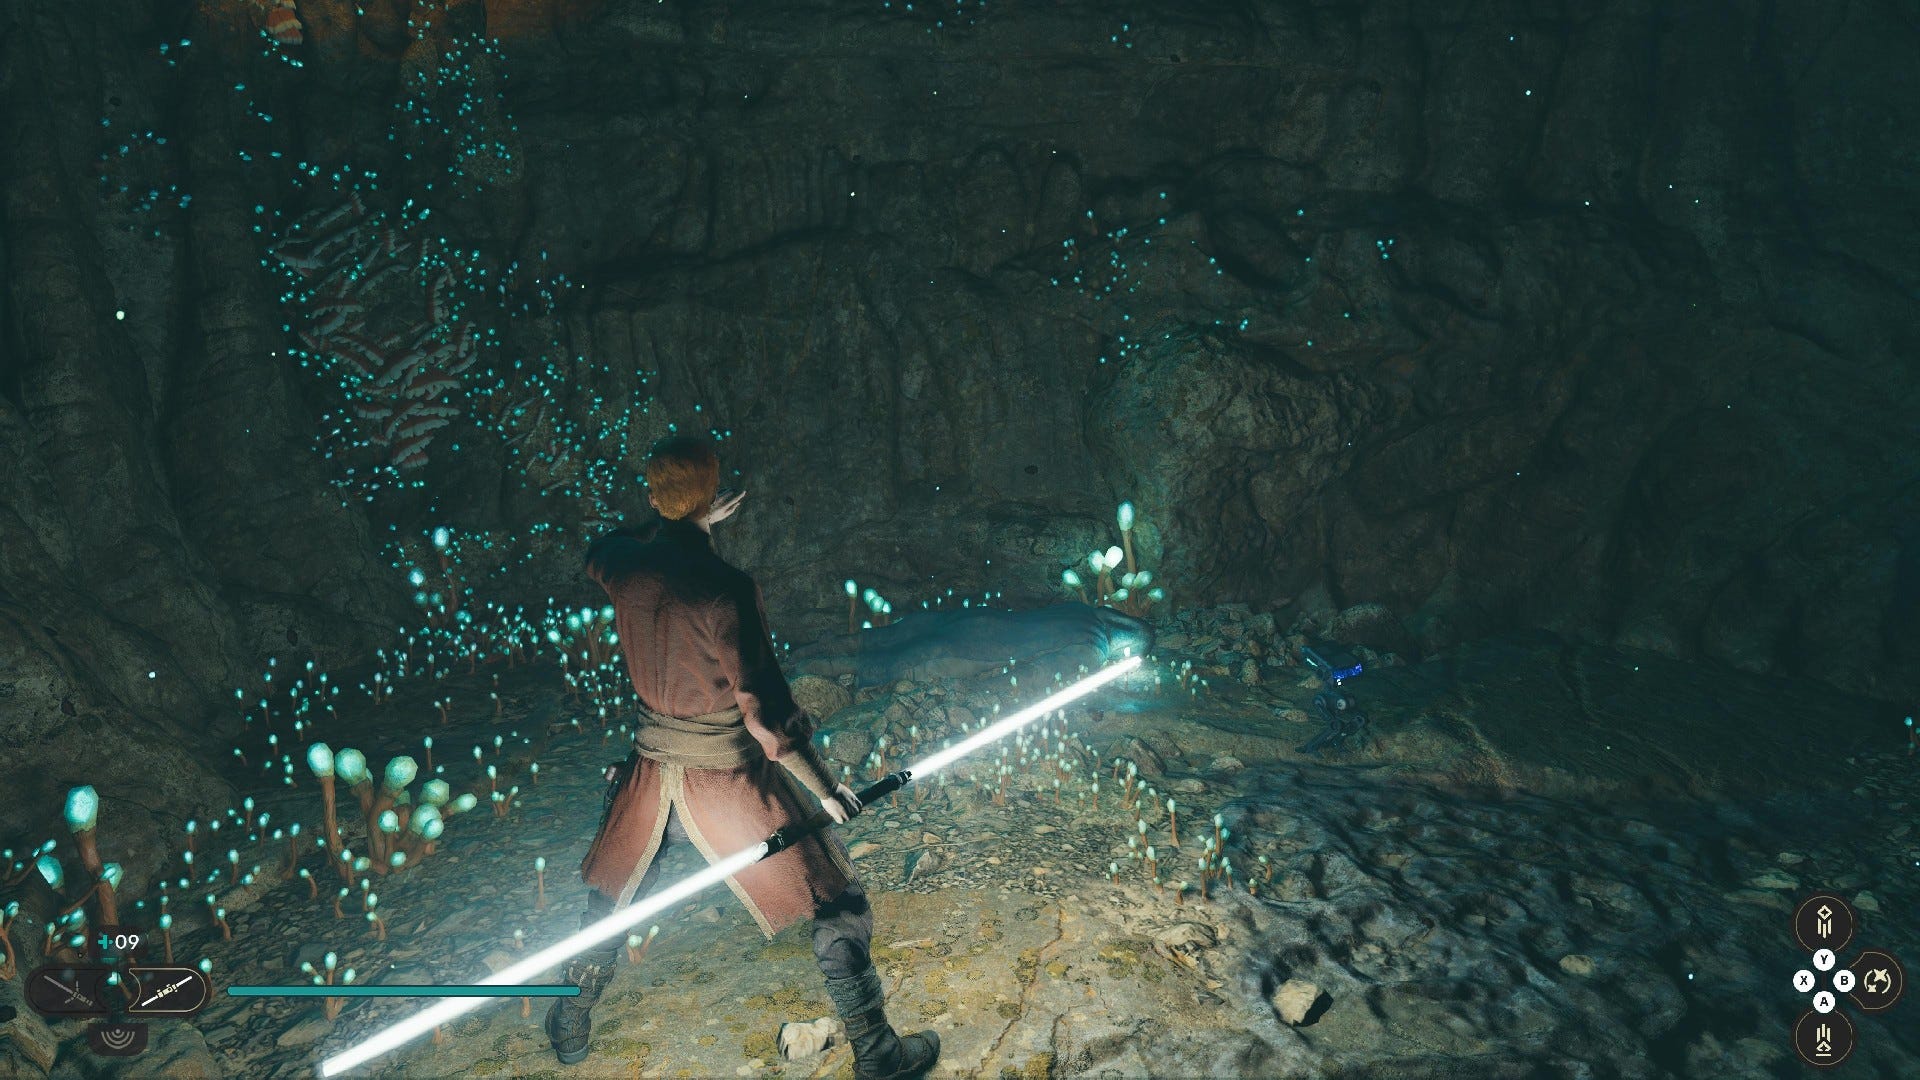
Databank (Cavern Fungus): Force Lift the obstacle out of the hole to go further down into the caverns, then grapple to the nearby ledge on your right.
Force Echo (A Gen’dai Plots): Follow the path after going down the hole and grappling to the right. At the end of the next room is a droid corpse with an Echo.
Databank (Raider Depot): Drop down the hole in the room with the “A Gen’dai Plots” Force Echo, and destroy the turret. Scan the console below the turret.
Databank (Rancor Prey): Behind the Rancor.
Force Echo (A Cave Too Far): In the same room as the Rancor, near the opposite wall.

Databank (Dead Jedi): After being trapped between the two forcefields and dropped, head through the green forcefield above you.
Force Echo (A Fallen Knight): After being trapped between the two forcefields and dropped, head through the green forcefield above you, then throw one of the acid balls at the electric gate and look to the right for the Force Echo.

Force Echo (Rayvis’s Search): In the next room after fighting the three bosses.
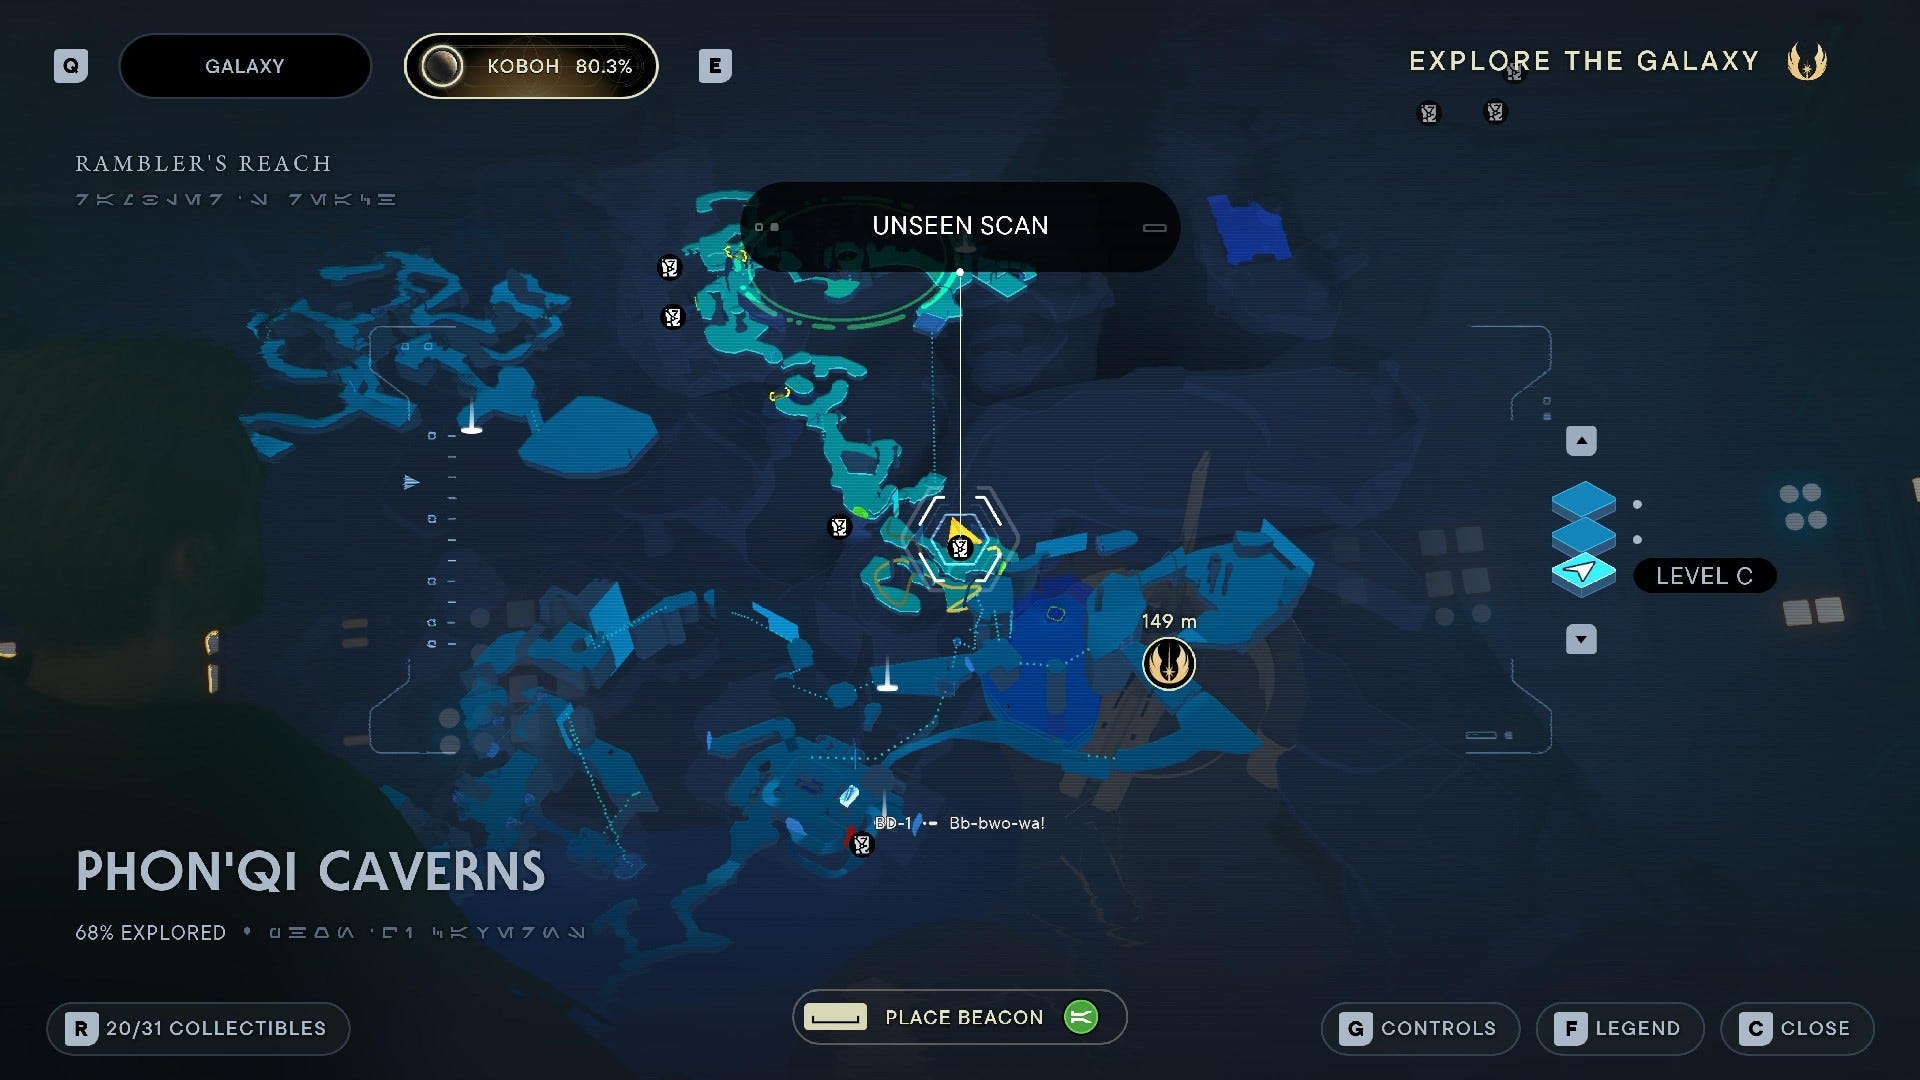
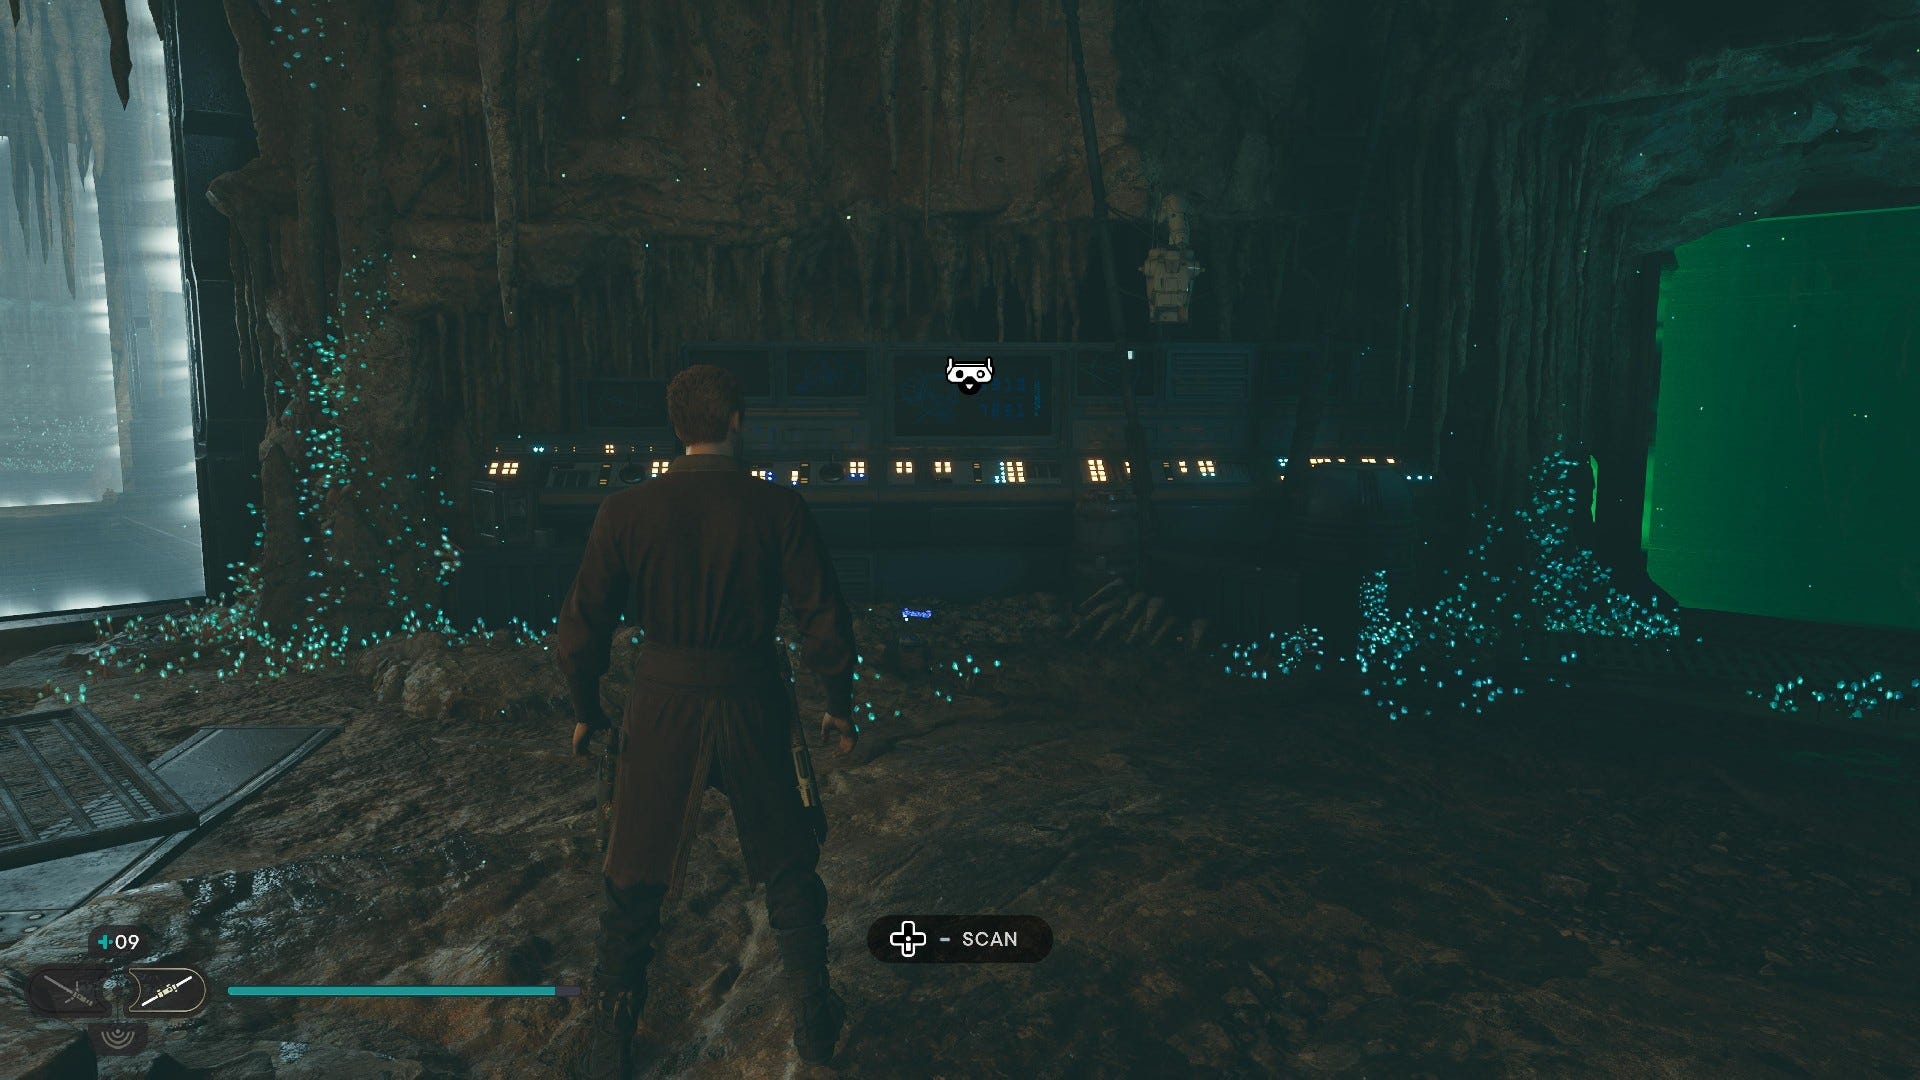
Databank (Republic Control Room): After fighting the three bosses, climb up the wall in the next room and scan the terminal on the right.

Force Echo (Scientific Frisson): Use acid ball on the nearby door.

Force Echo (As Above, So Below): Use acid ball on the door leading from the Rancor room.
Databank (Cave Turbolift Network): Use acid ball on the very first electrical door in the caverns, and scan the door inside.
Phon’Qi Caverns Treasures:

Datadisc #1: Behind the Rancor.
Datadisc #2: Where the magnaguard fights you.


Datadisc #3: One of the pots in front of the electric circular gate, behind which the raider with the double-bladed green lightsaber waits.

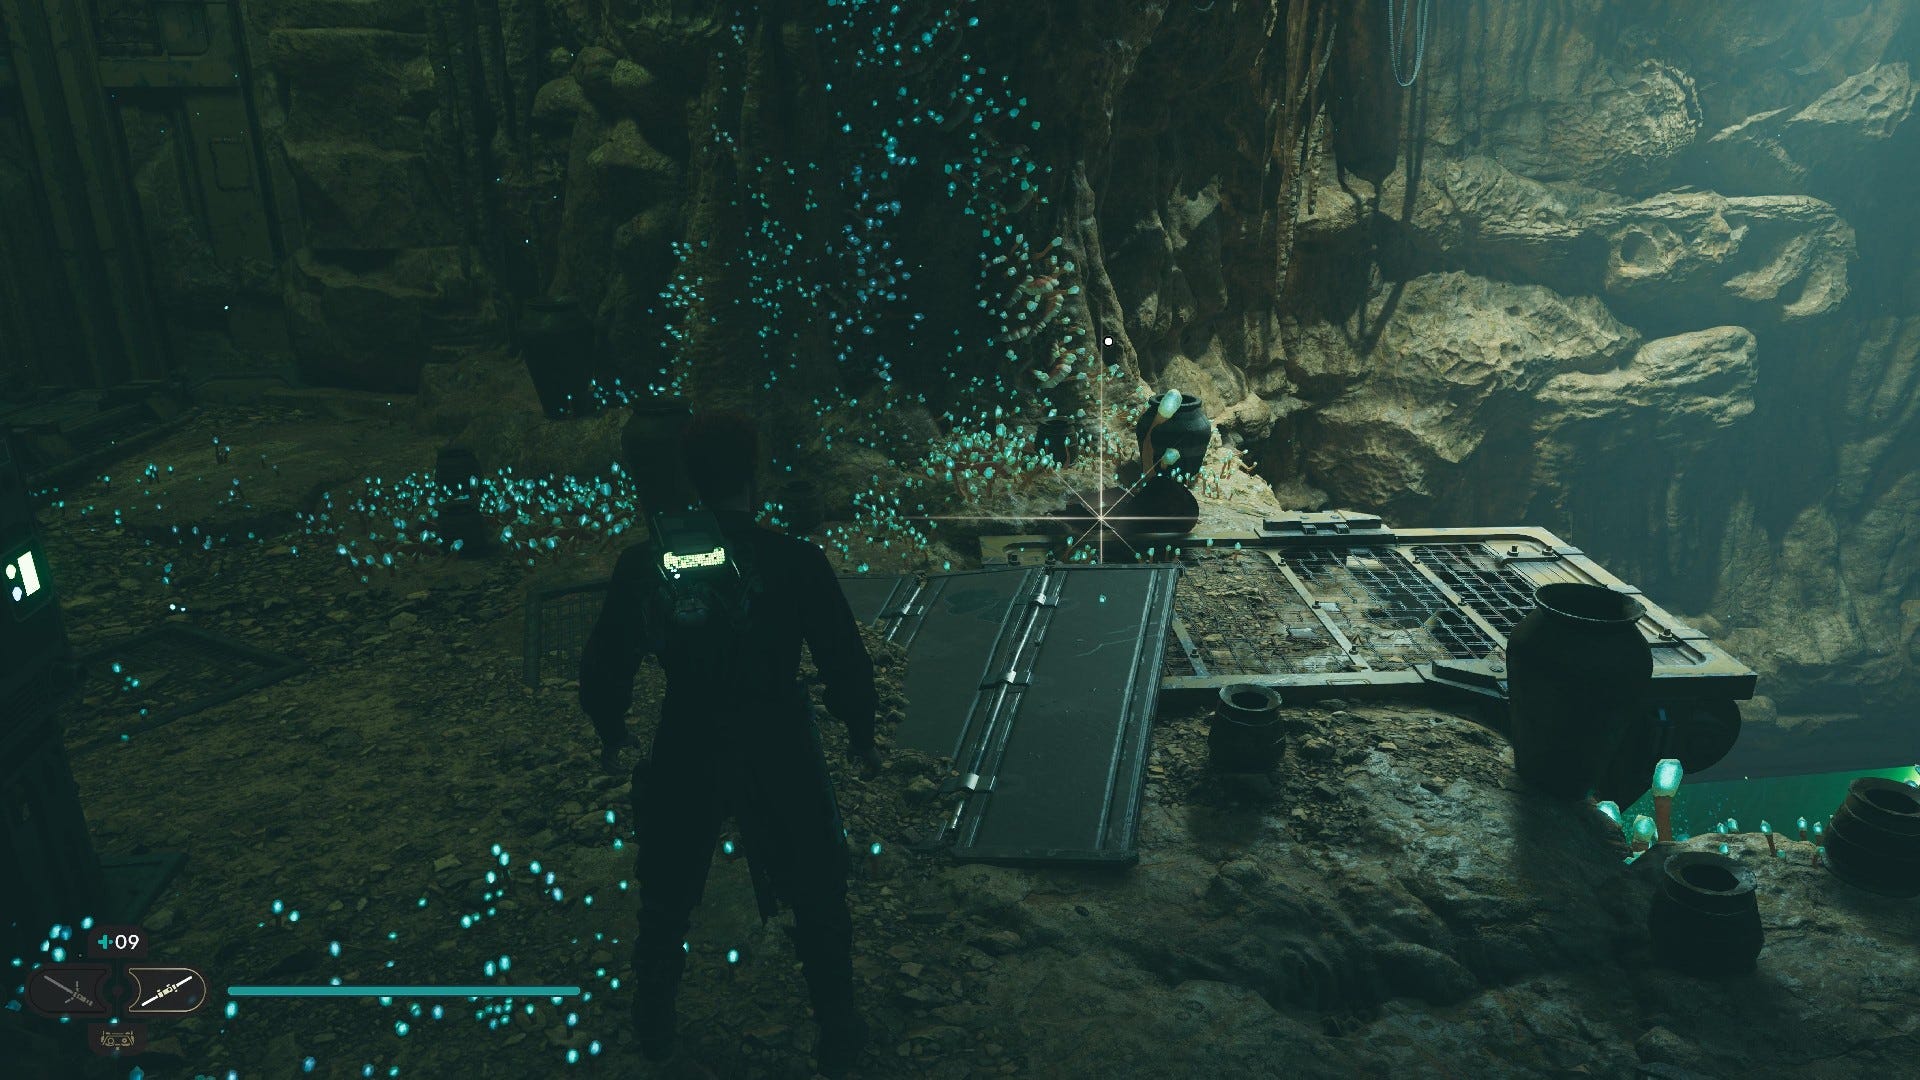
Datadisc #4: One of the pots on the edge of the drop right in front of the bottom part of the elevator.
Datadisc #5: One of the pots to the left of the electric circular gate, behind which the raider with the double-bladed green lightsaber waits.
Datadisc #6: After being trapped between the two forcefields and dropped, head through the green forcefield above you.
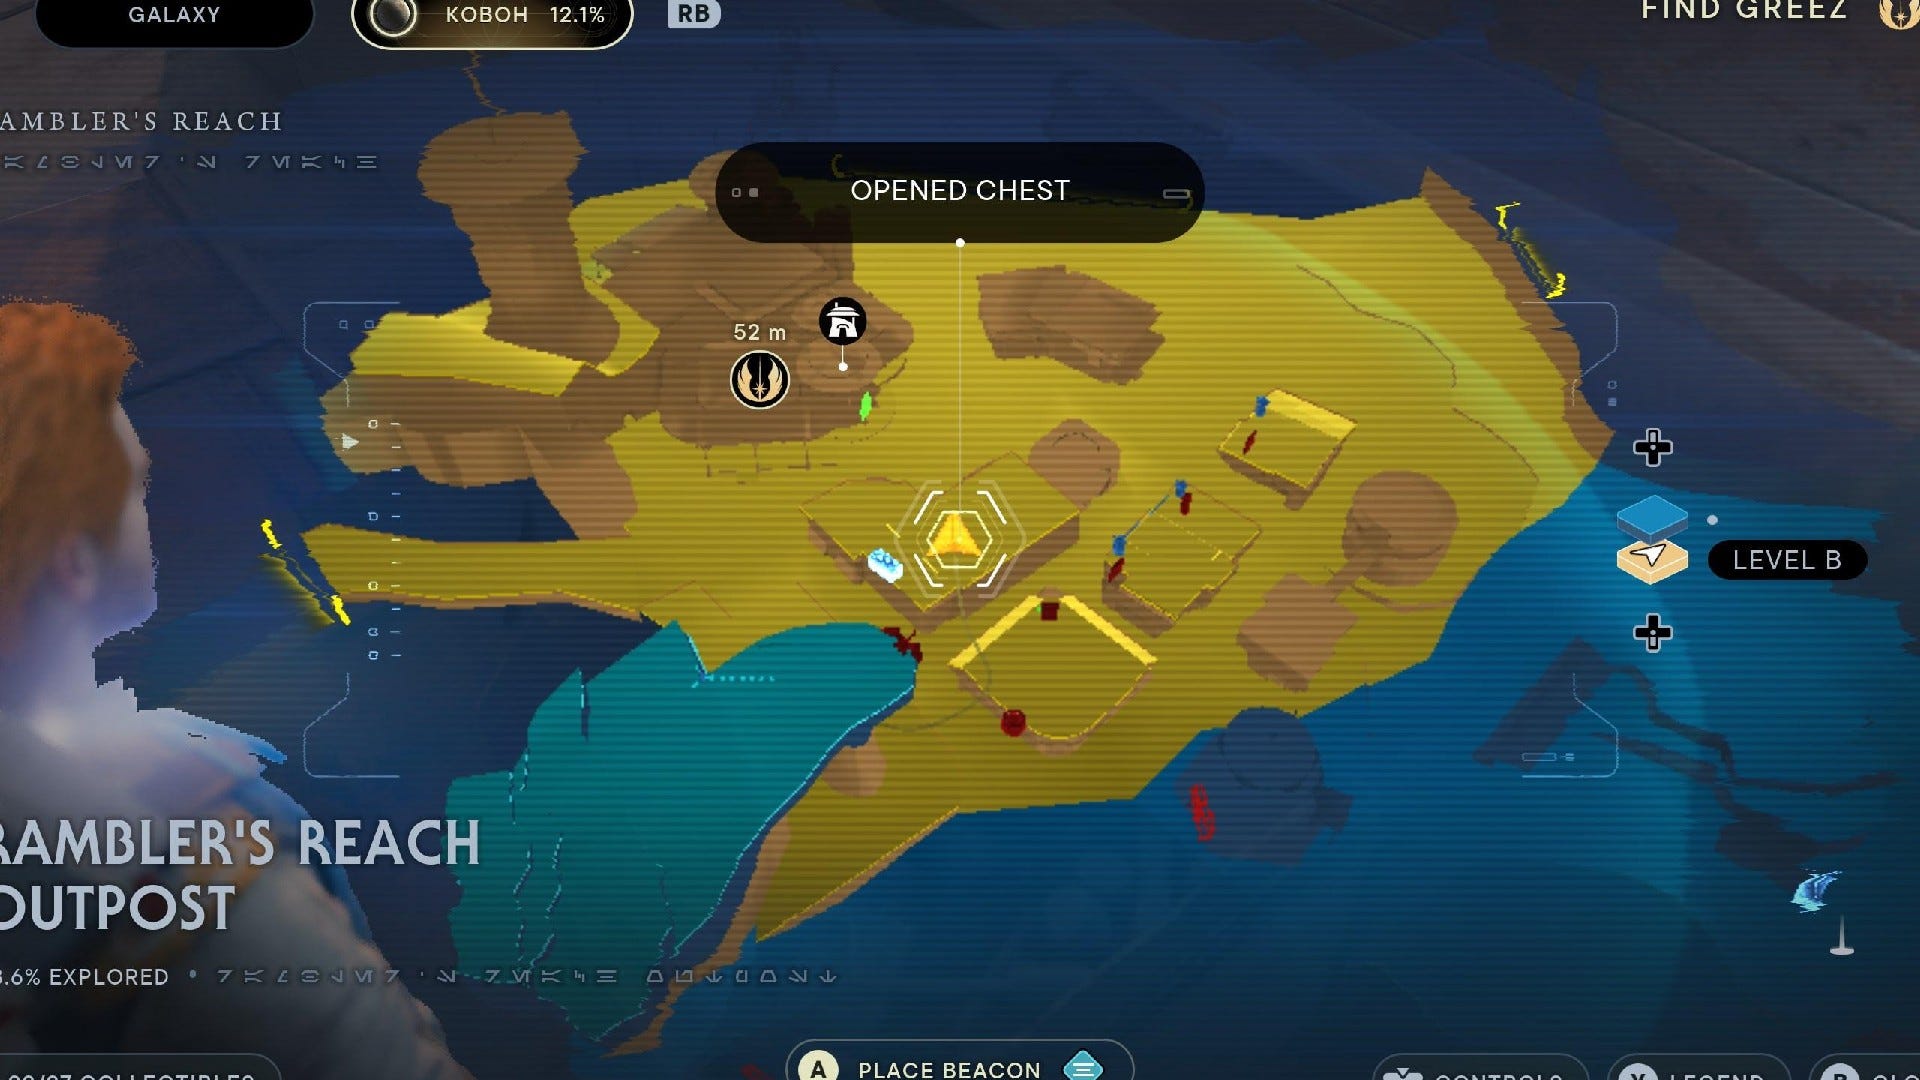
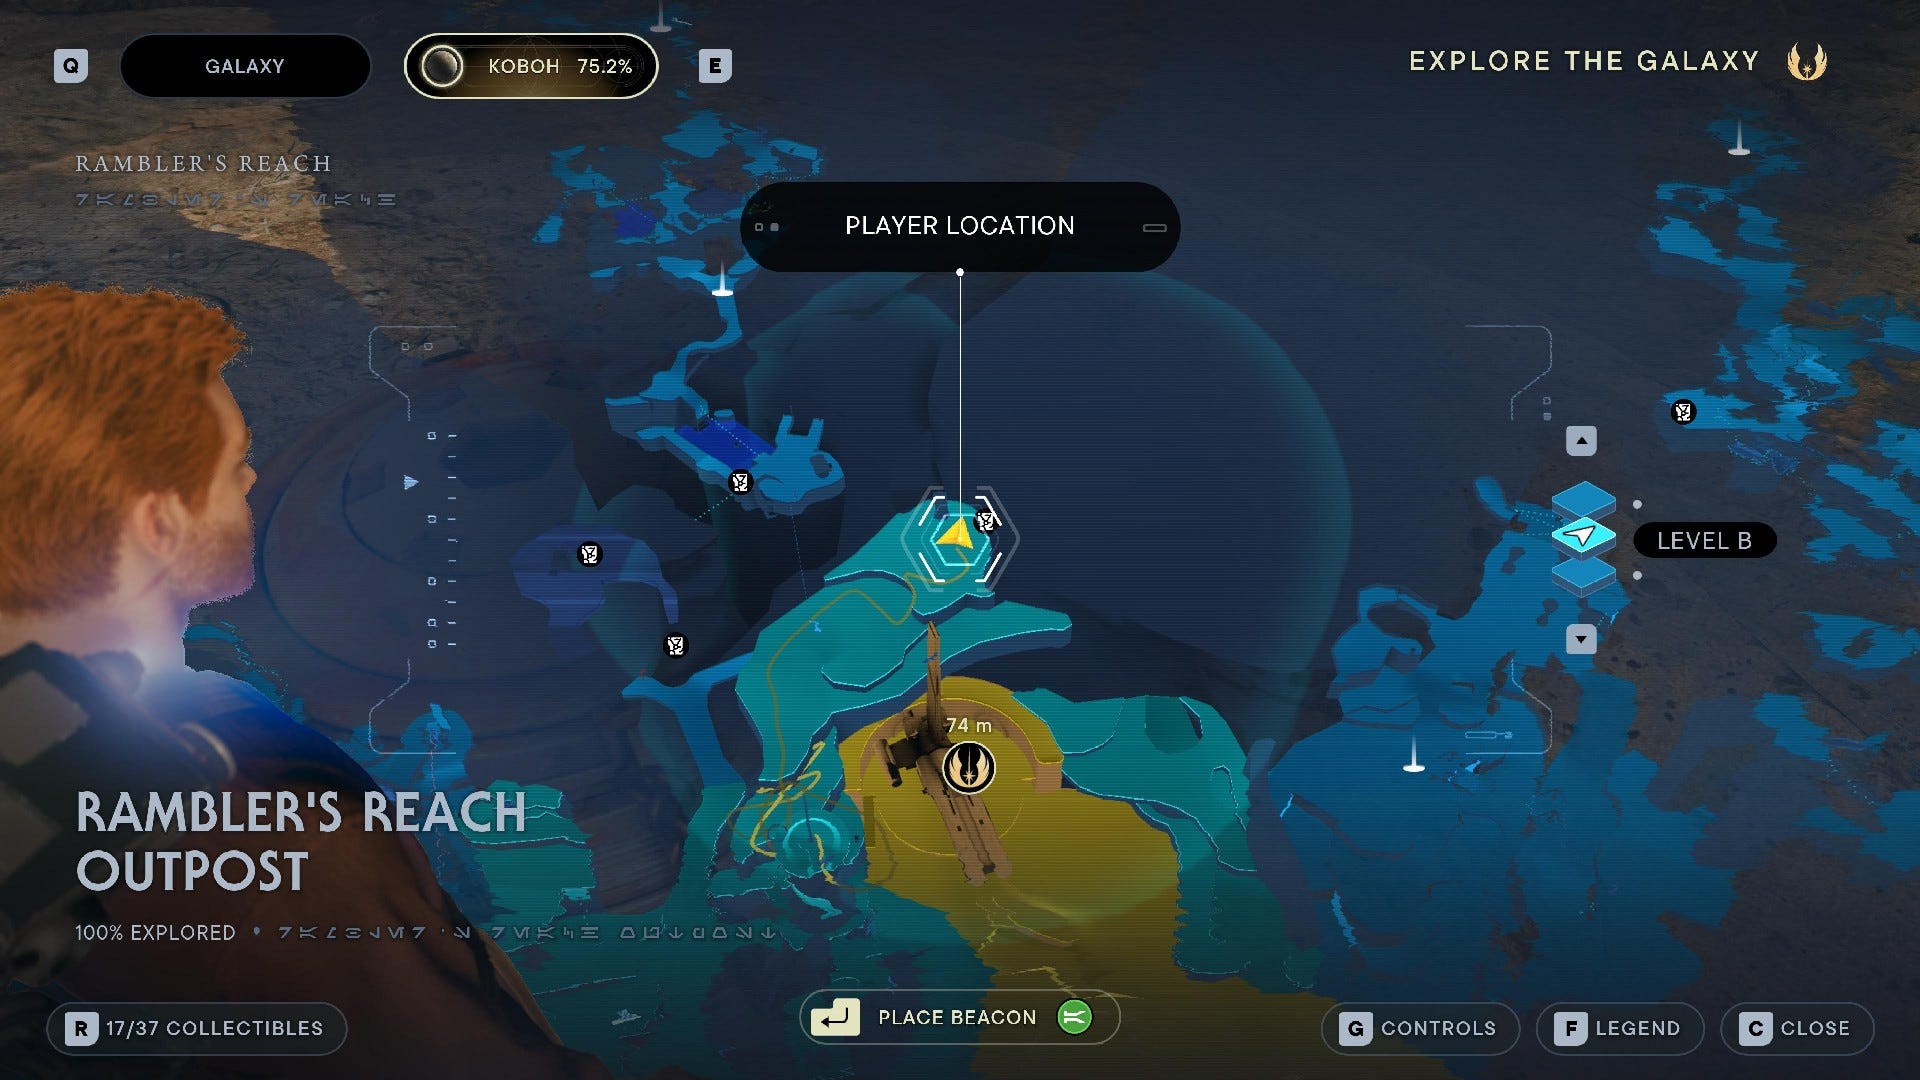
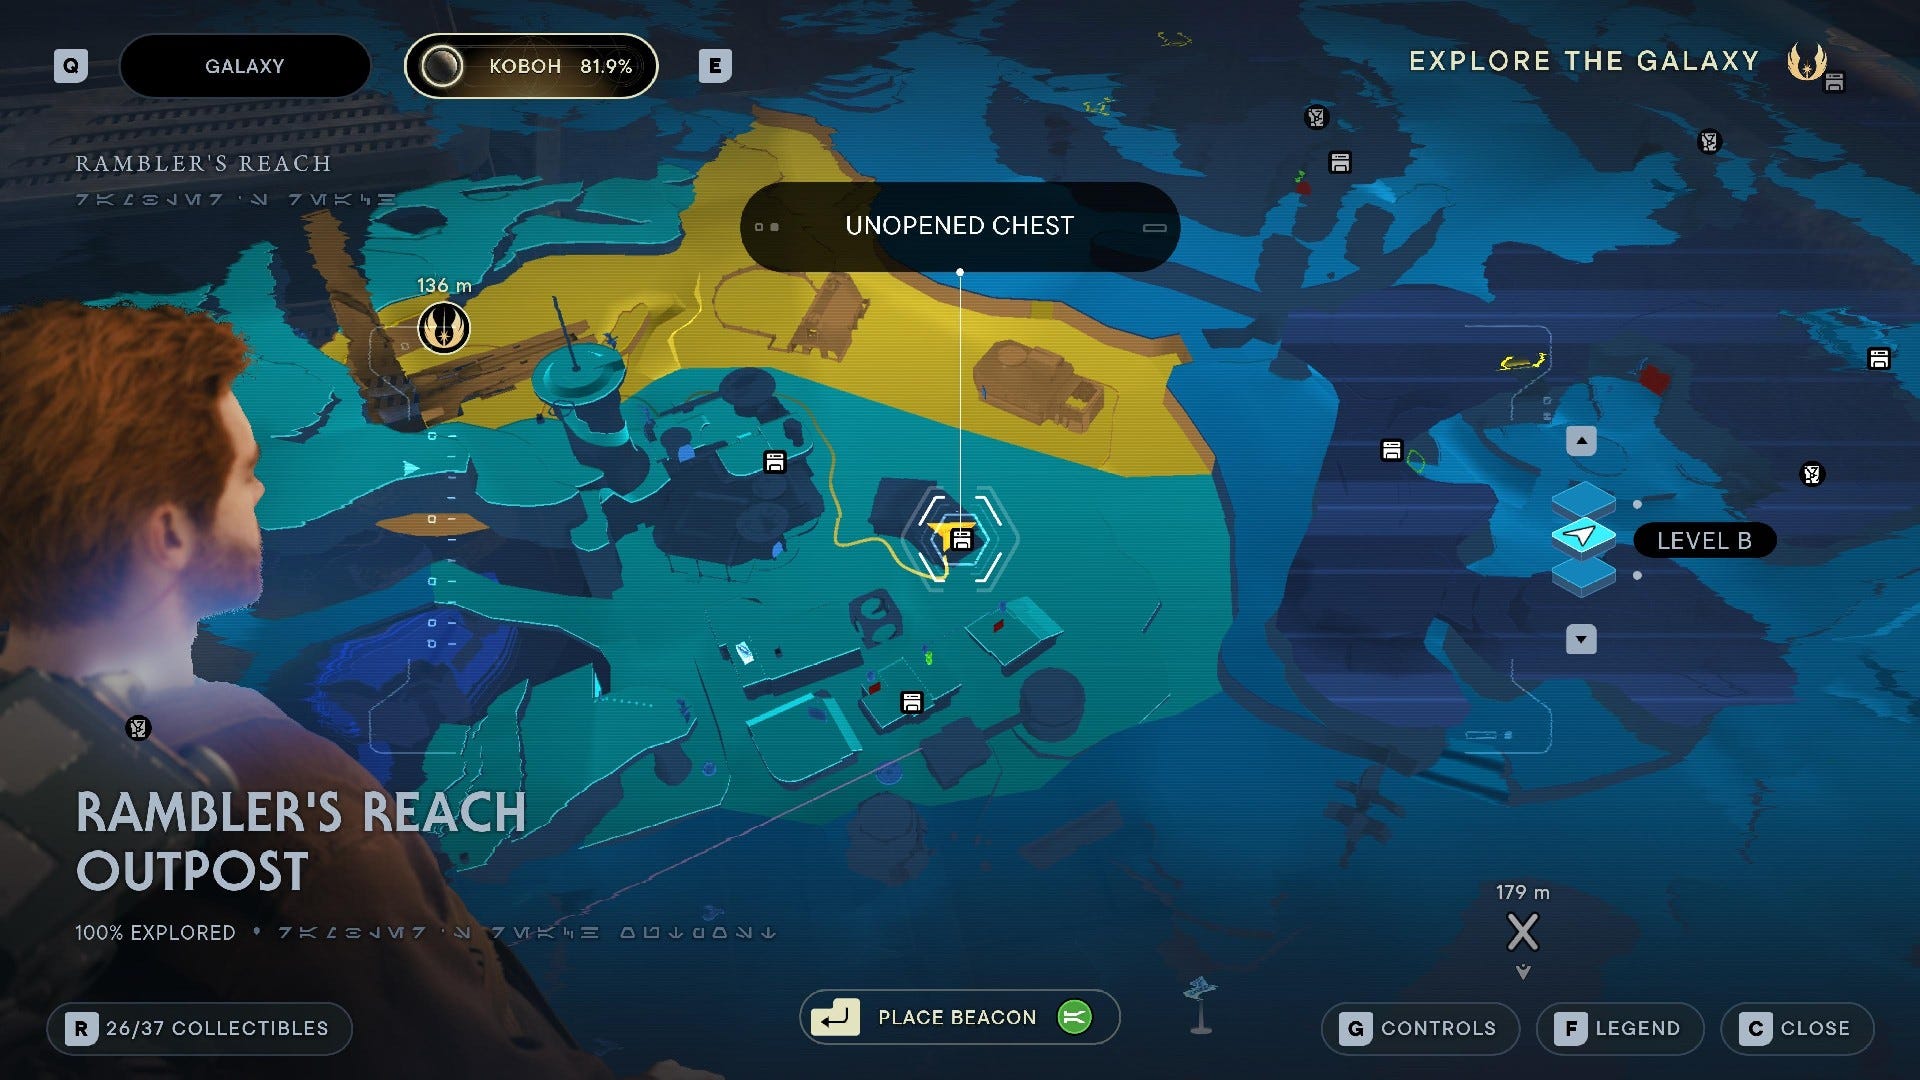
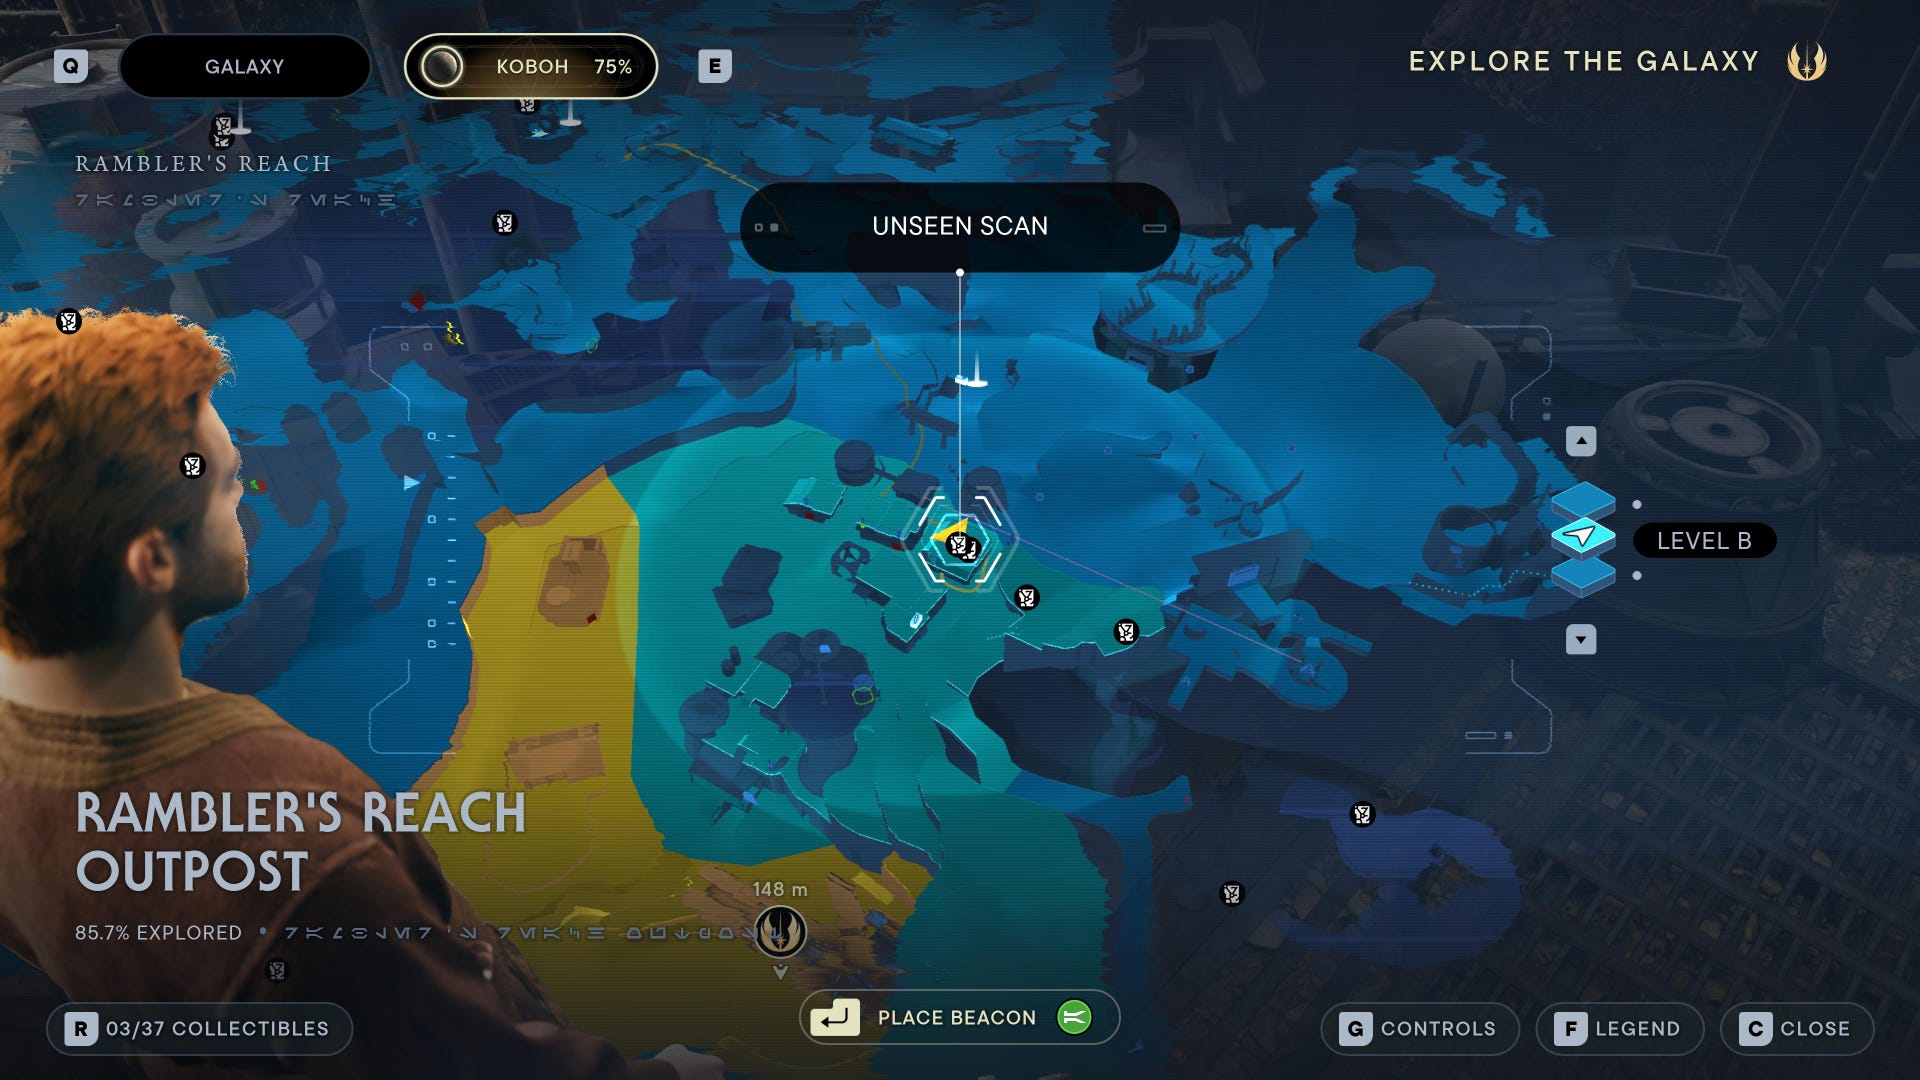
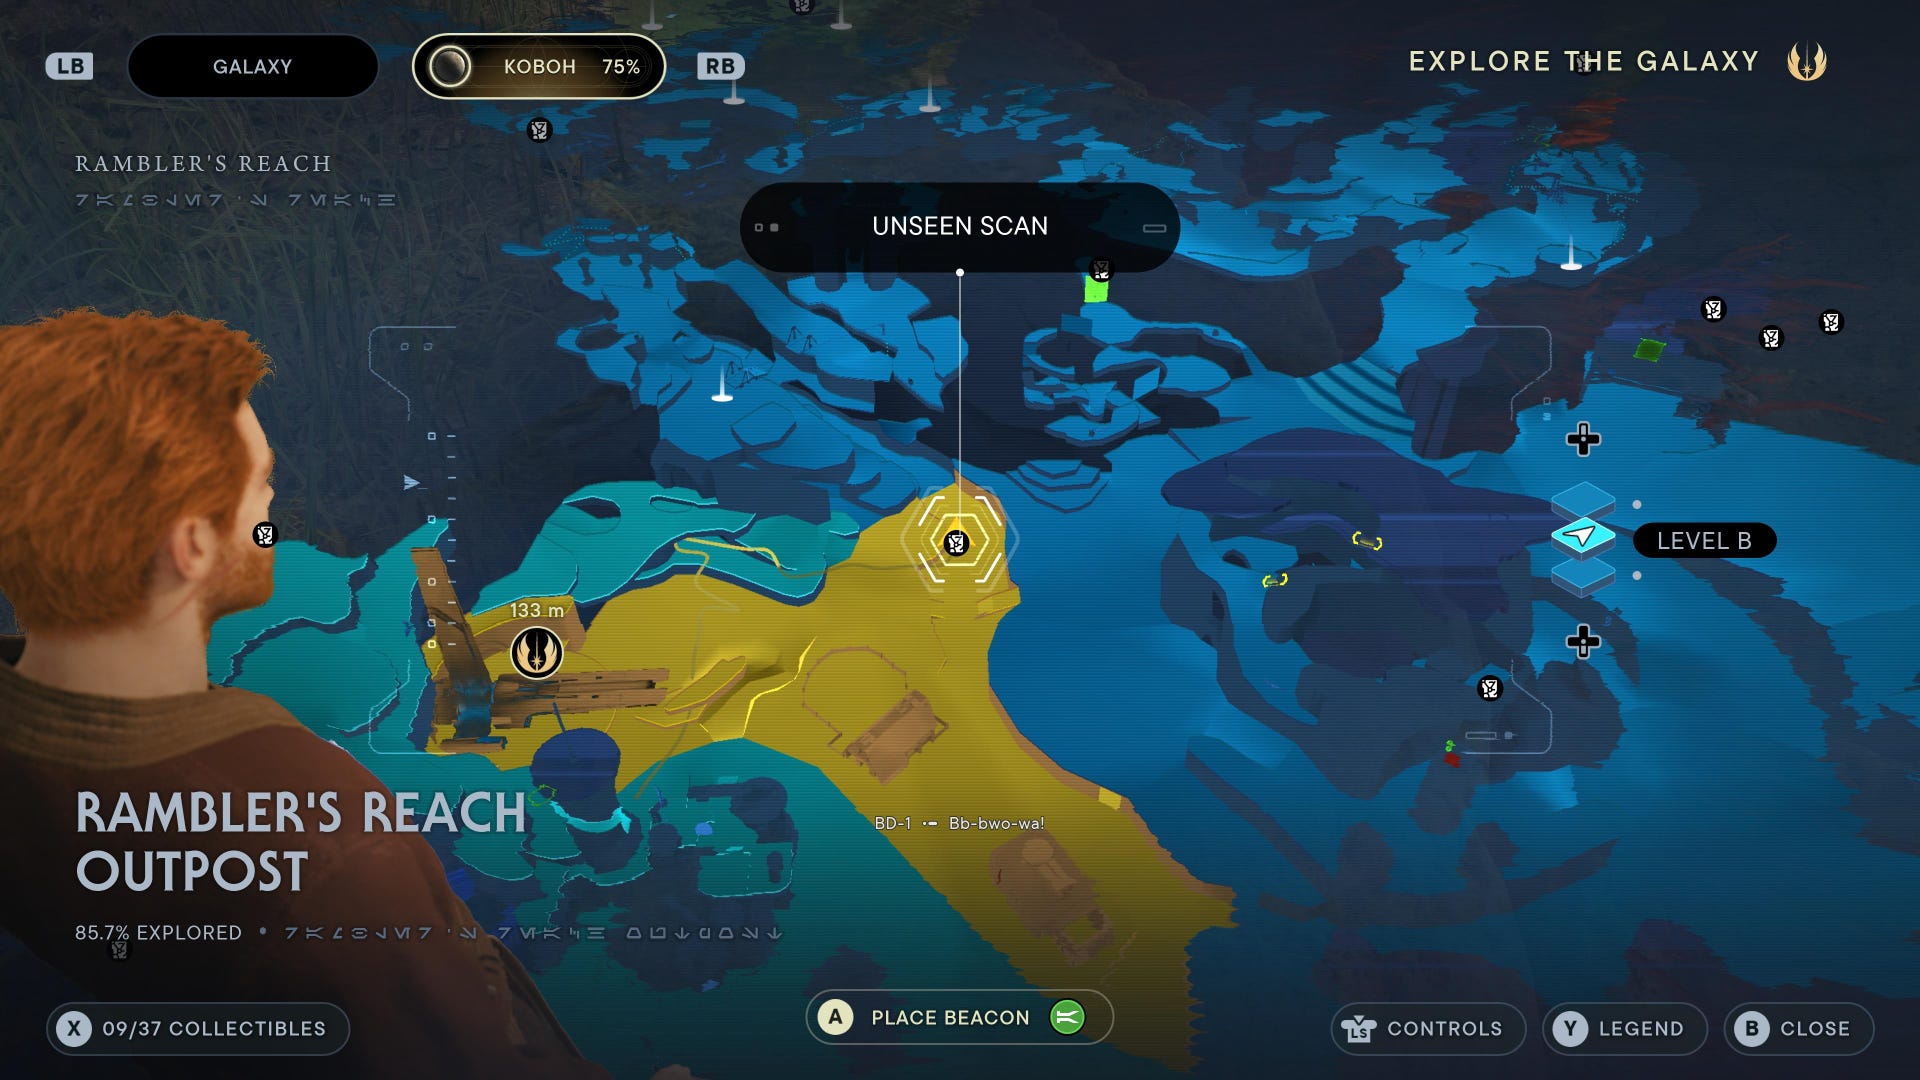
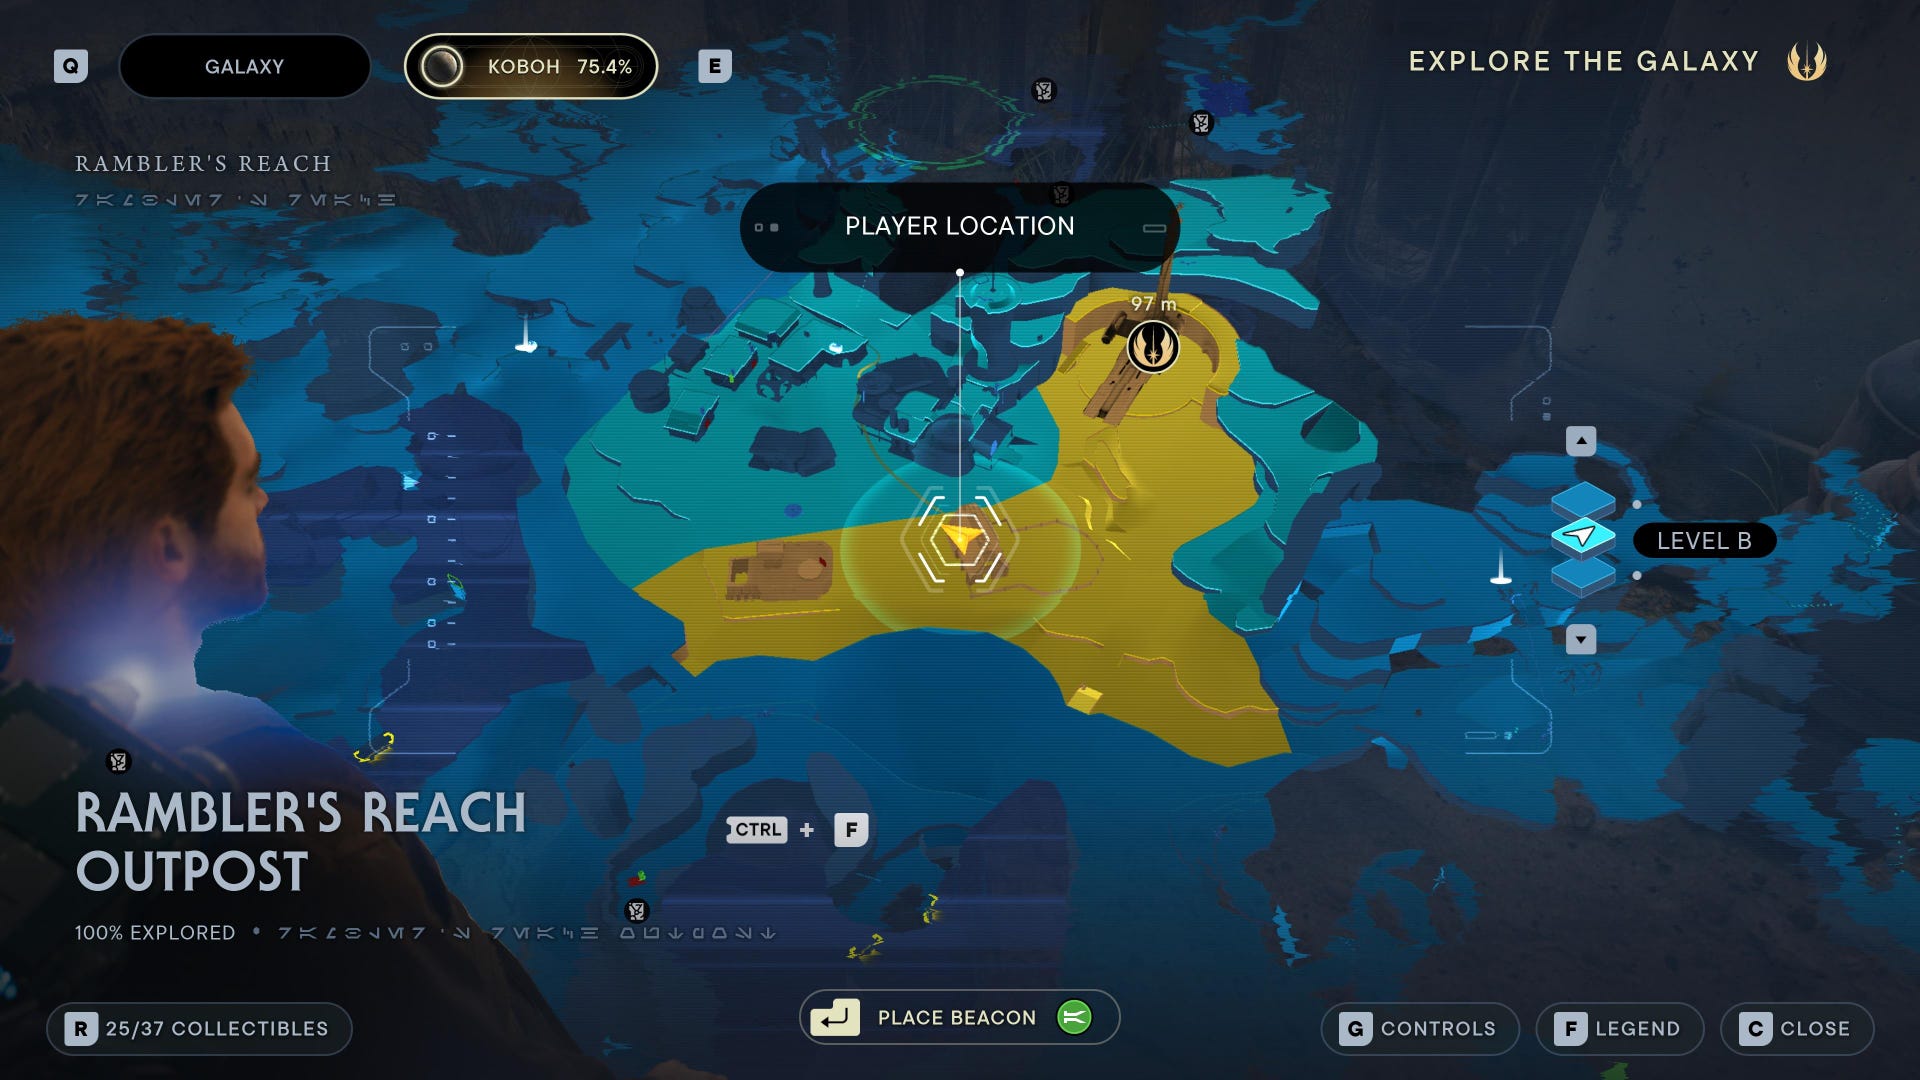
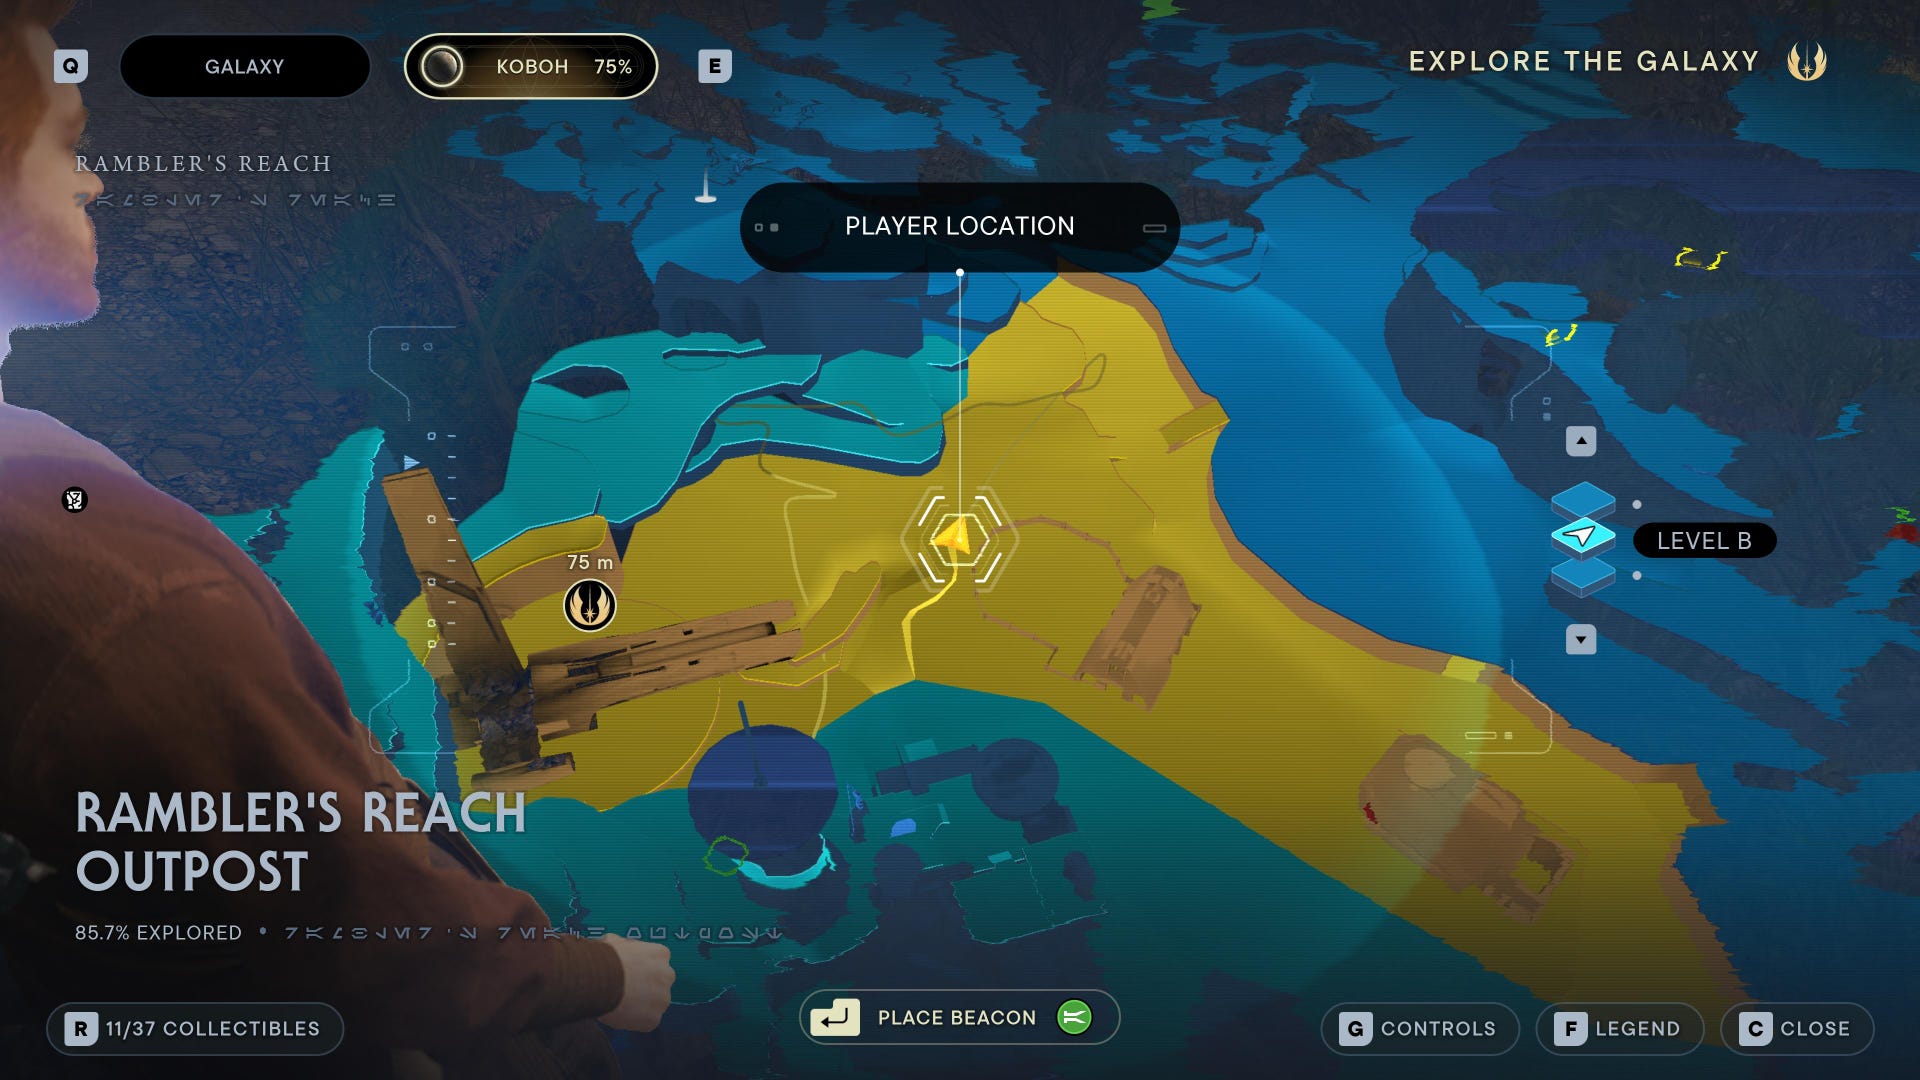
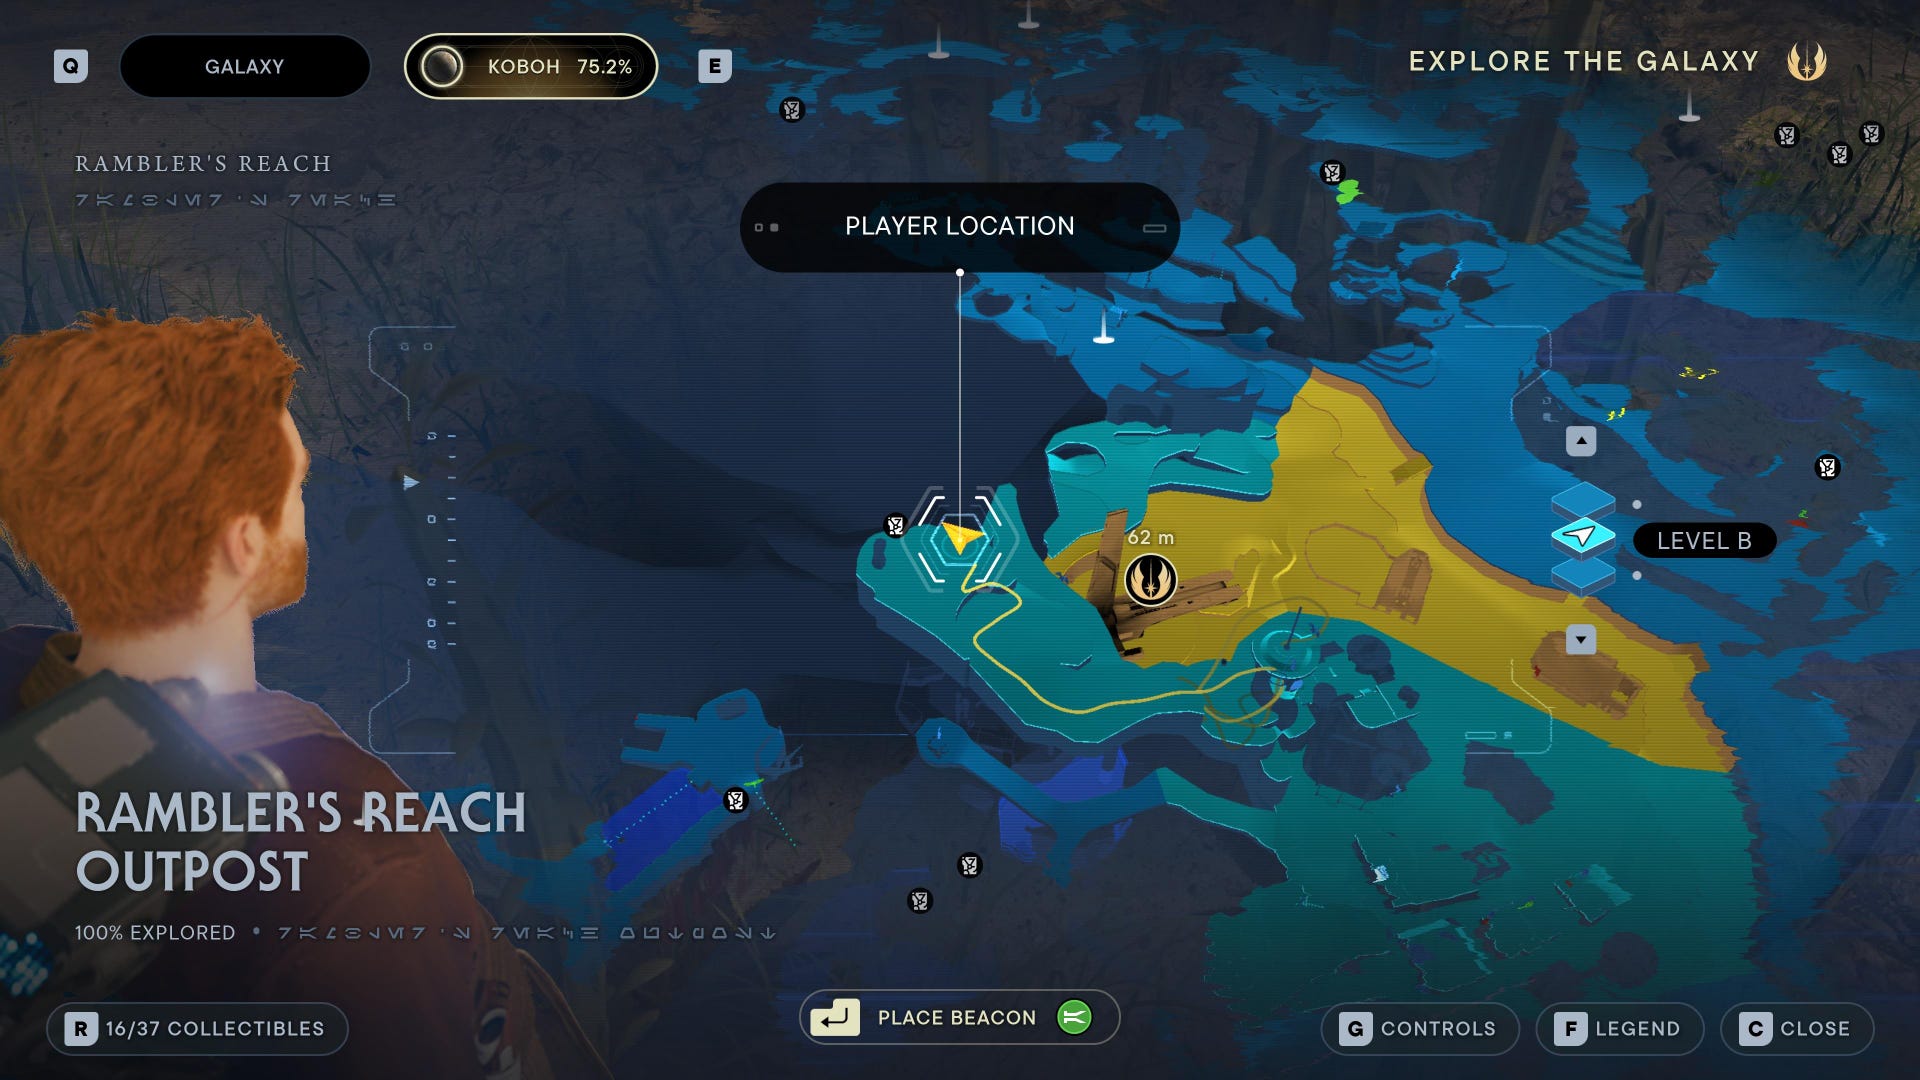
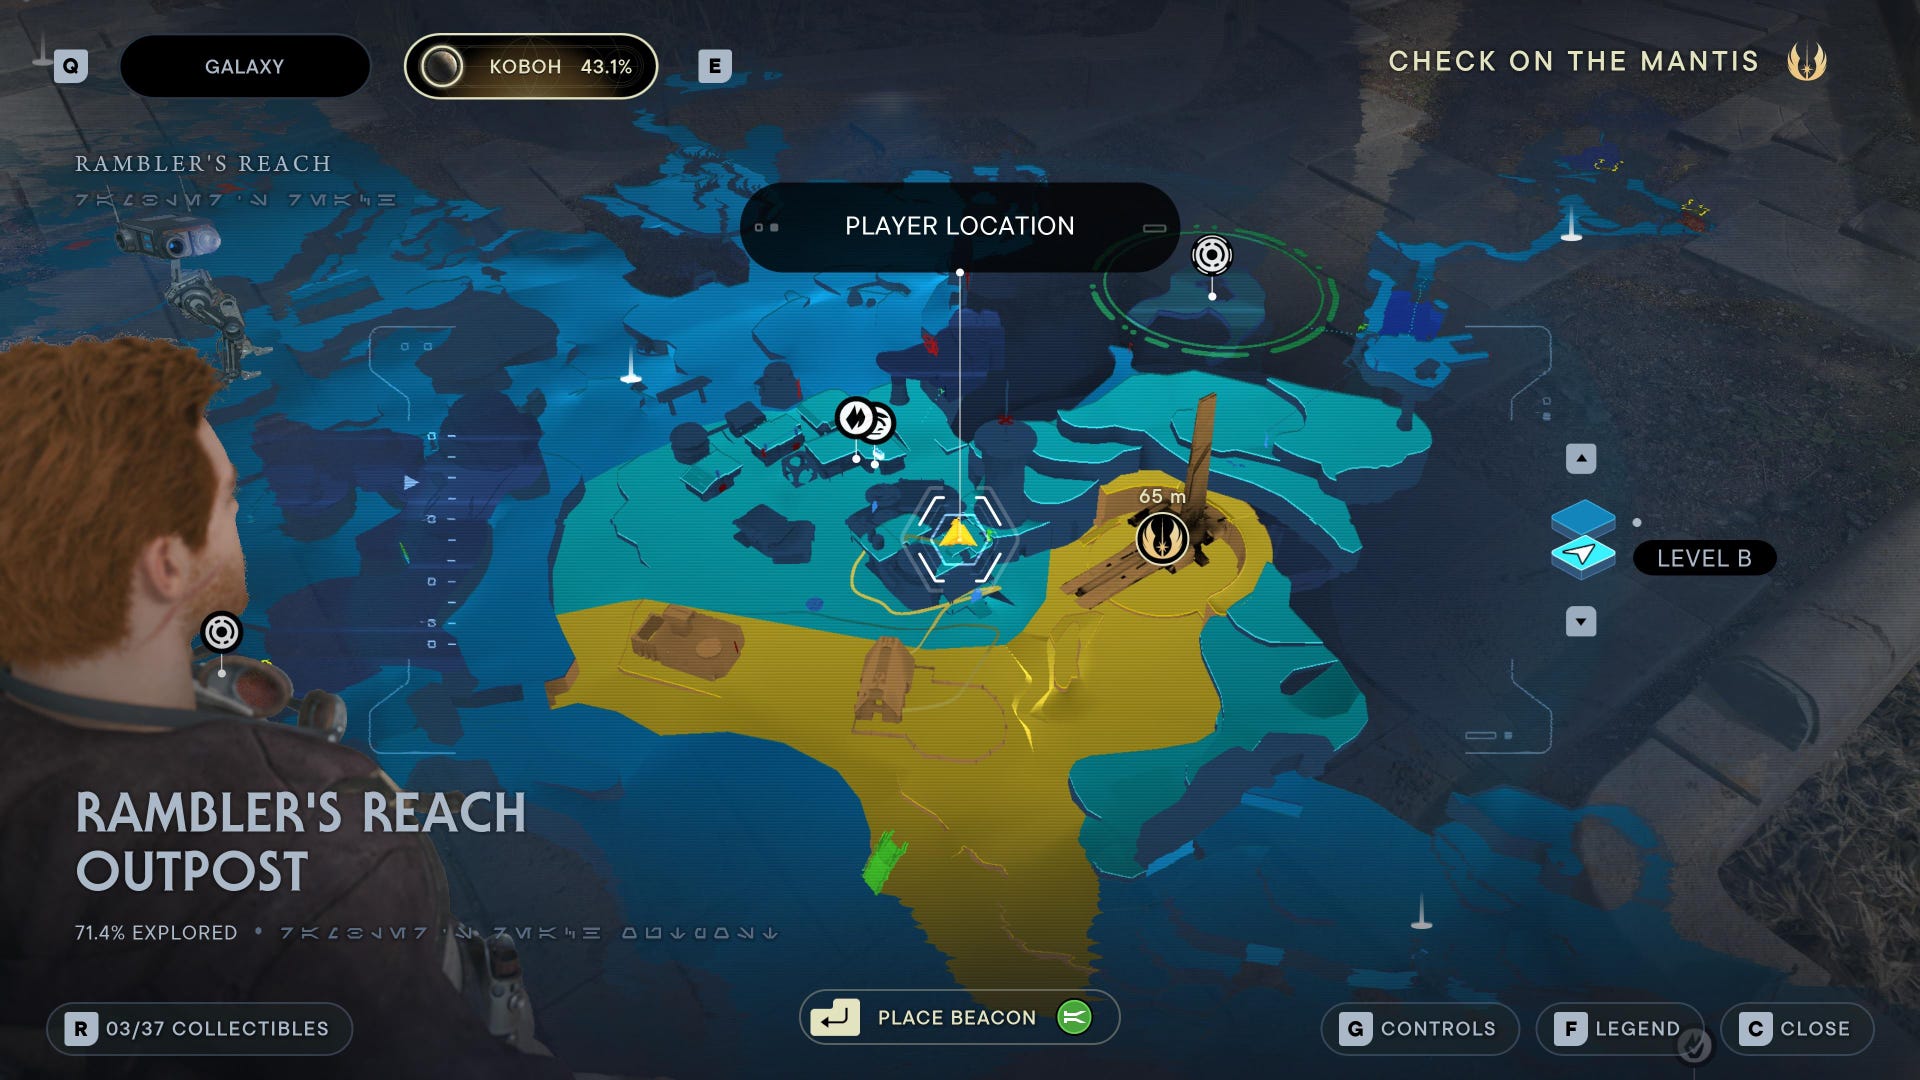
Rambler’s Reach Outpost collectibles
Rambler’s Reach Outpost Chests:

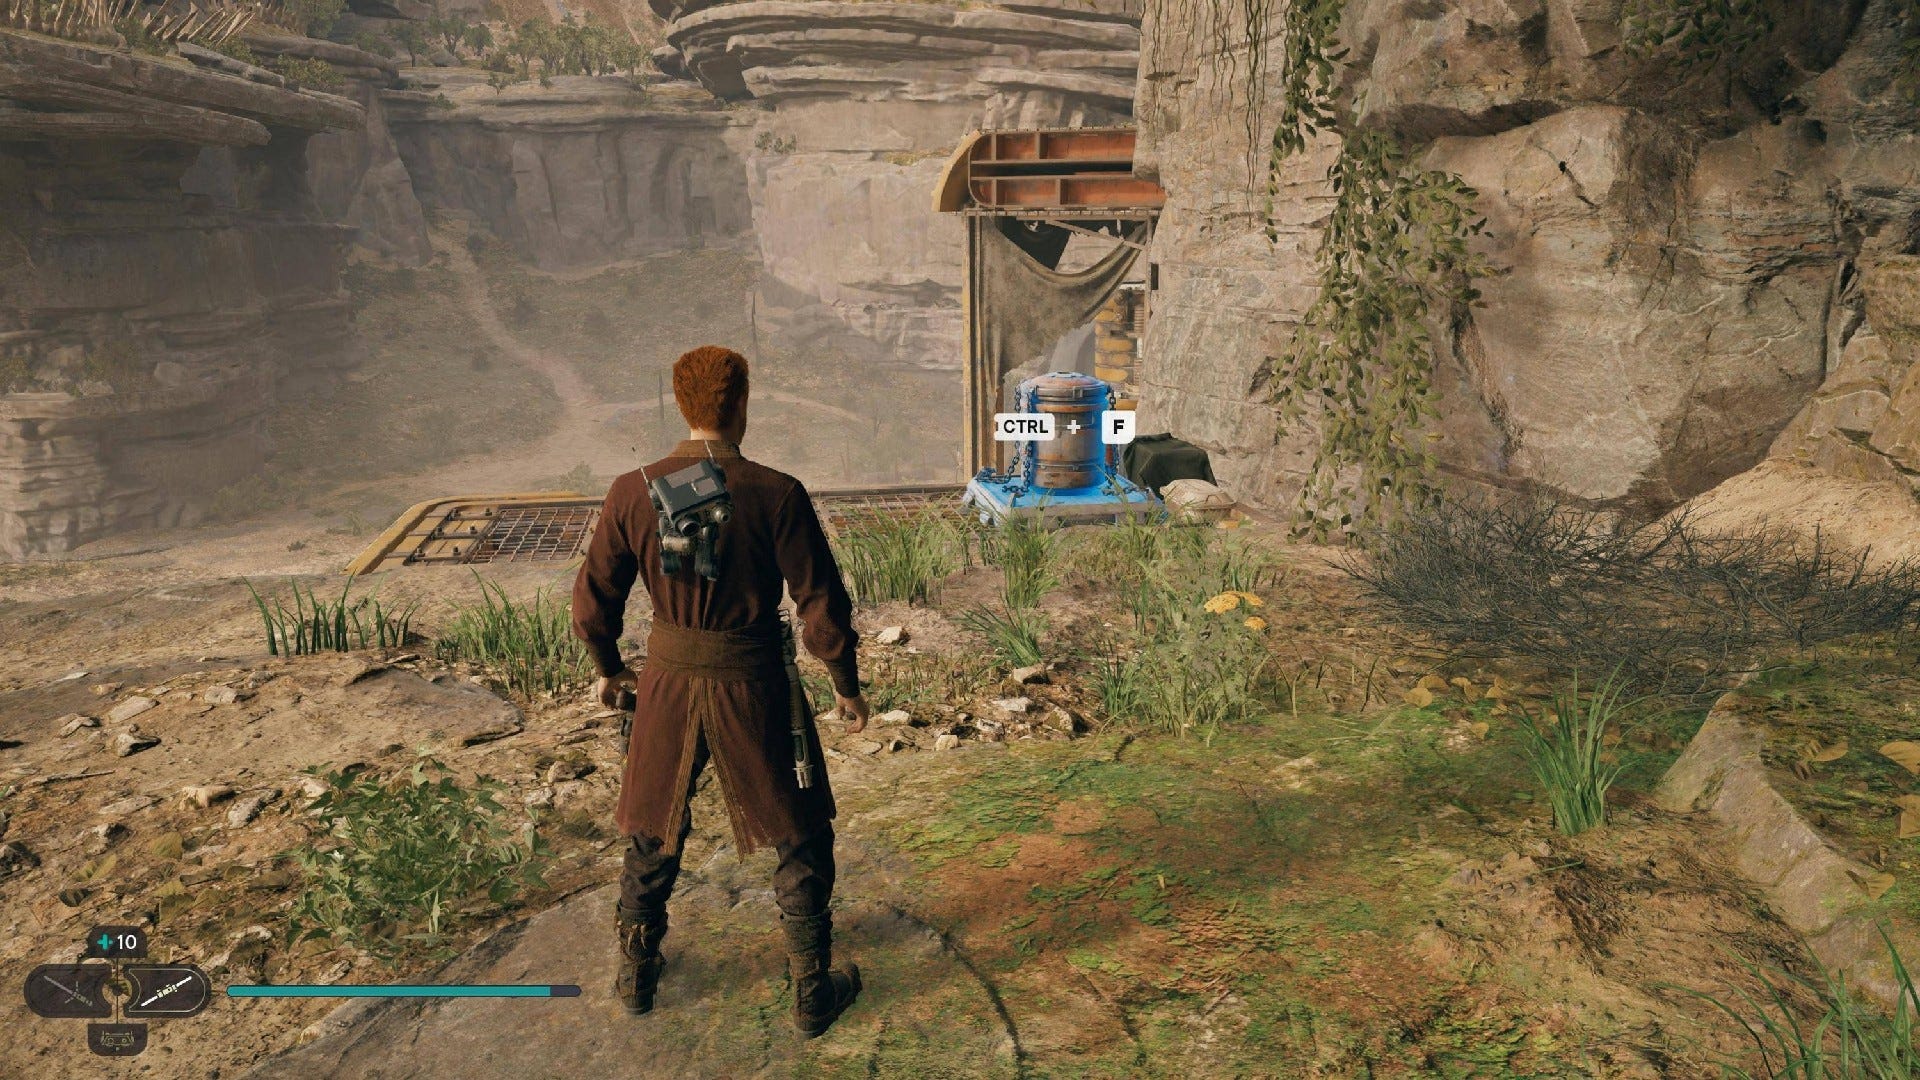
Chest #1 (Arakyd Heavy Barrel): This chest requires you to Force Lift and then Force Slam it. Found on the left ridge overlooking the Rambler’s Reach Outpost. Grapple onto the vines to reach it.
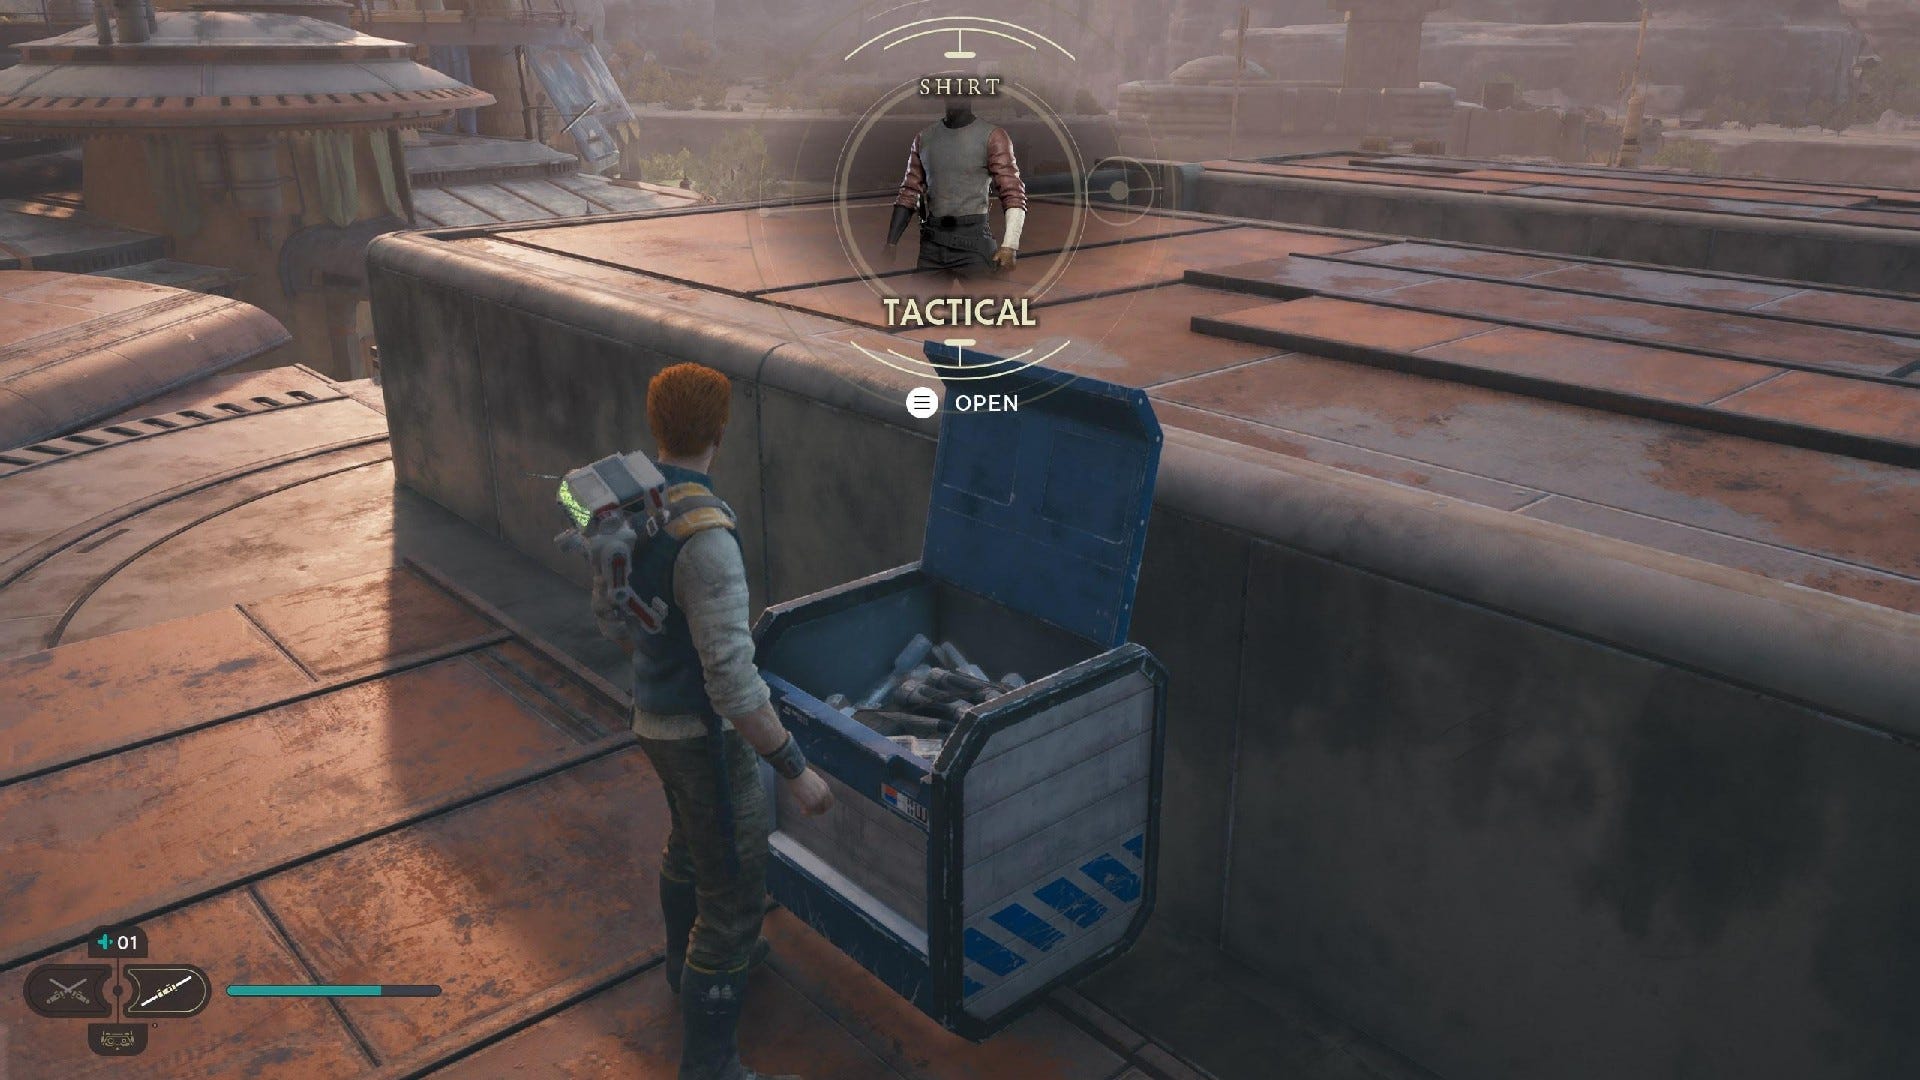
Chest #2 (Tactical Shirt): On the roof of the building.

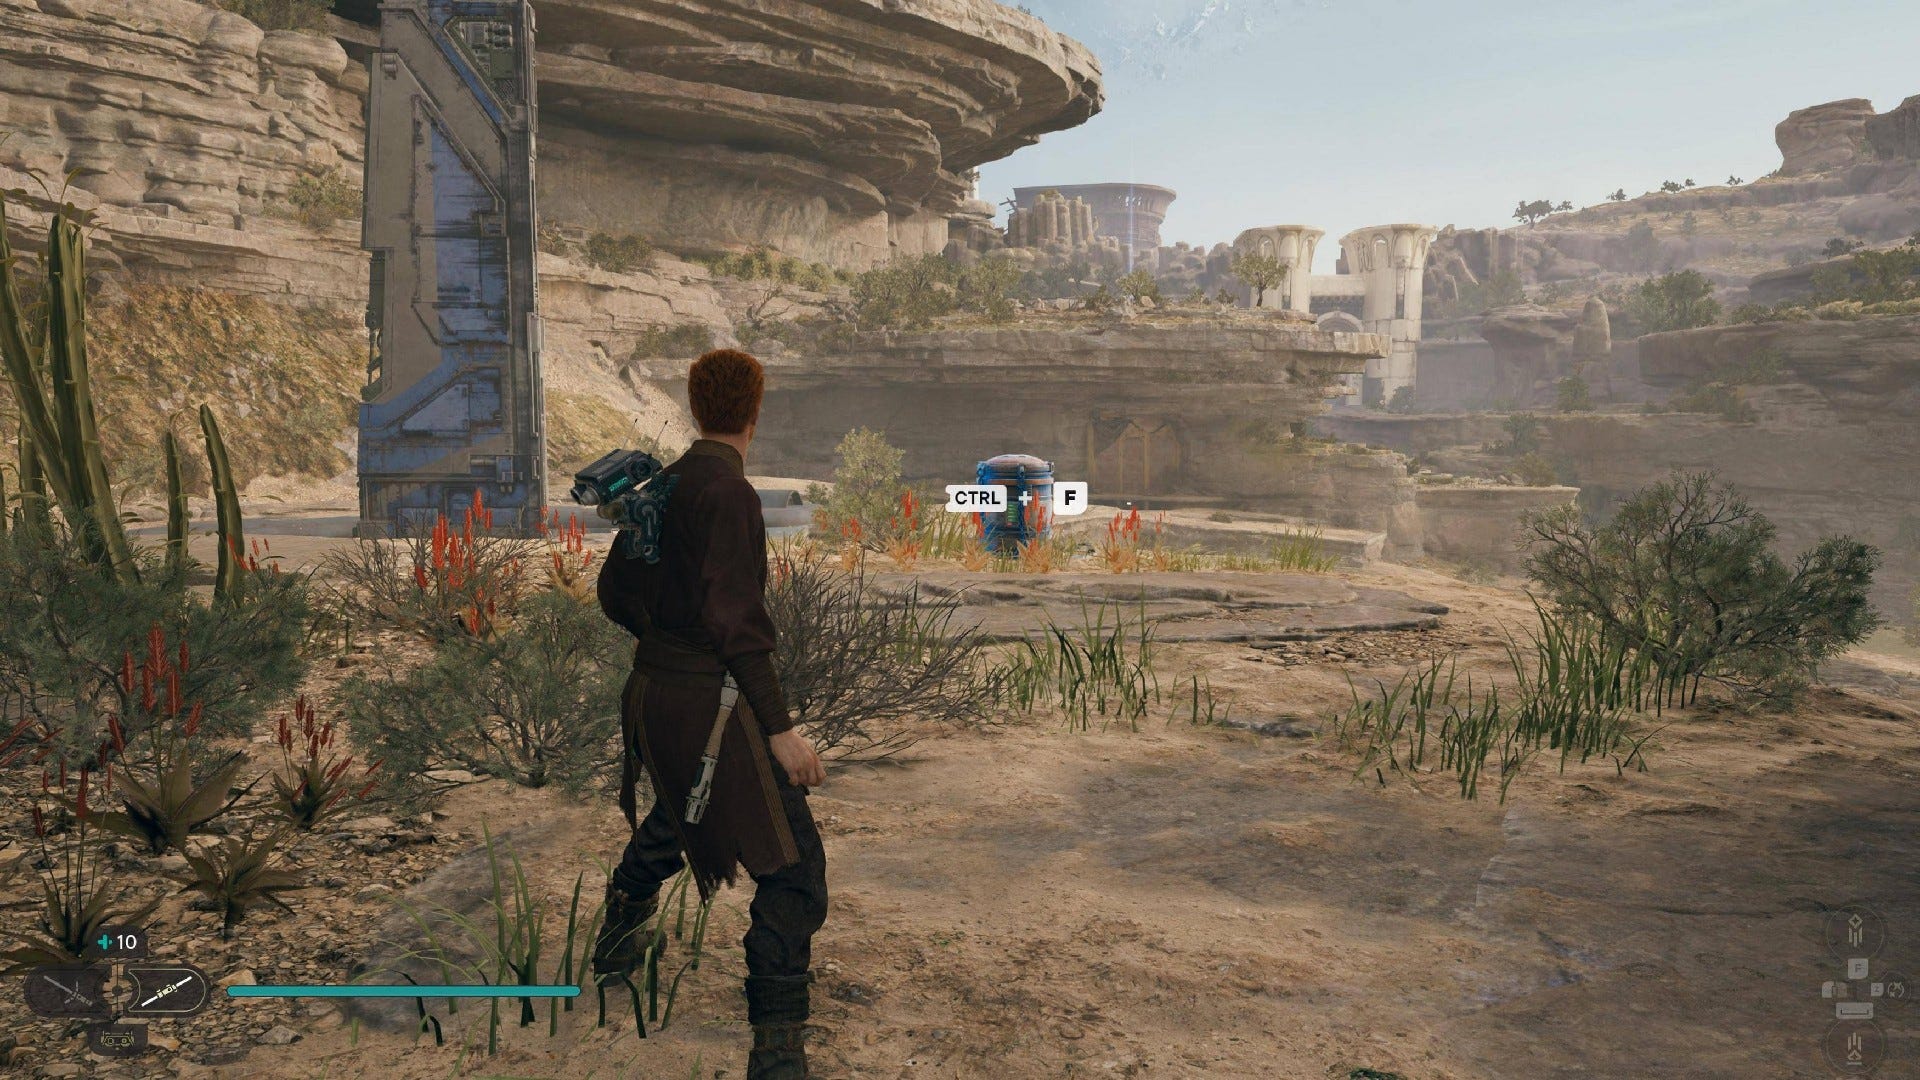
Chest #3 (Rebel Paint BD-1 materials): This chest requires you to Force Lift and then Force Slam it. Found on the first ledge of the cliff that rises up behind Pyloon Saloon and around the Mantis. Use the garden and the vines to reach it.
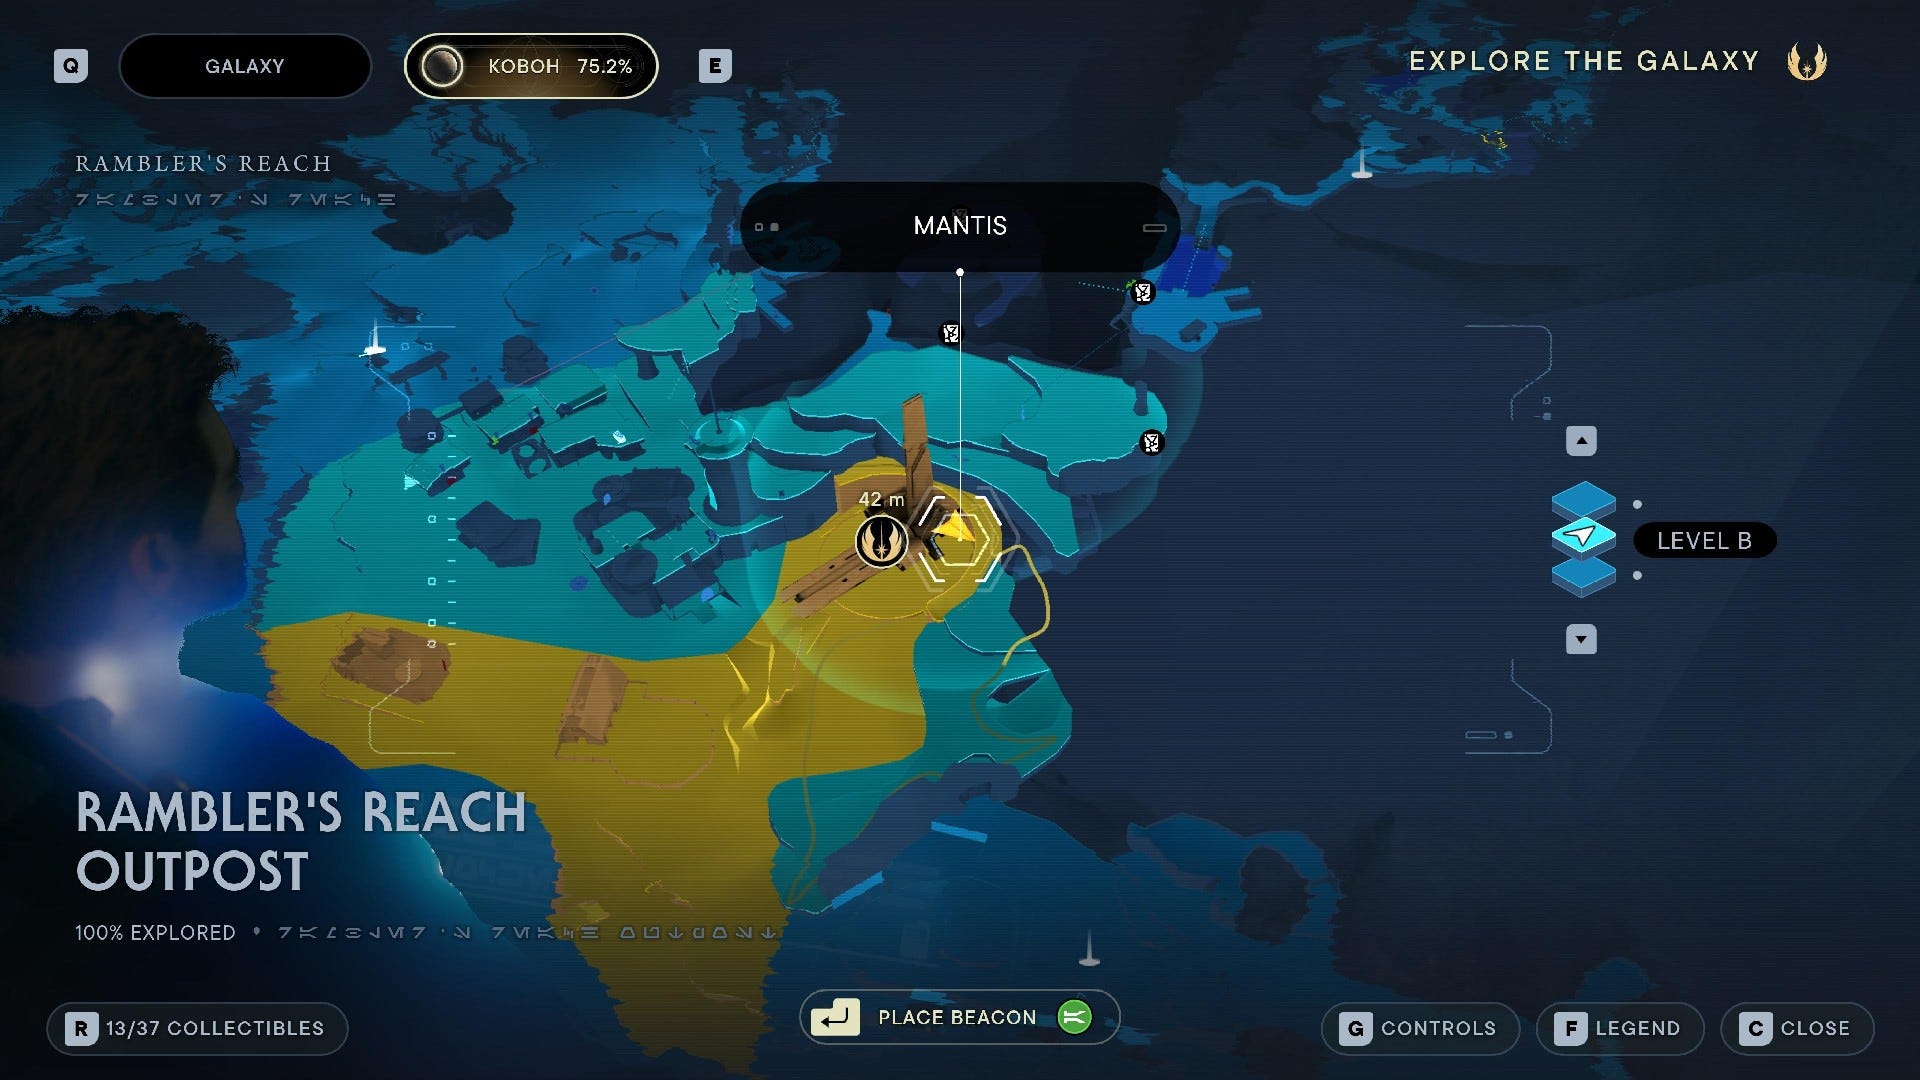
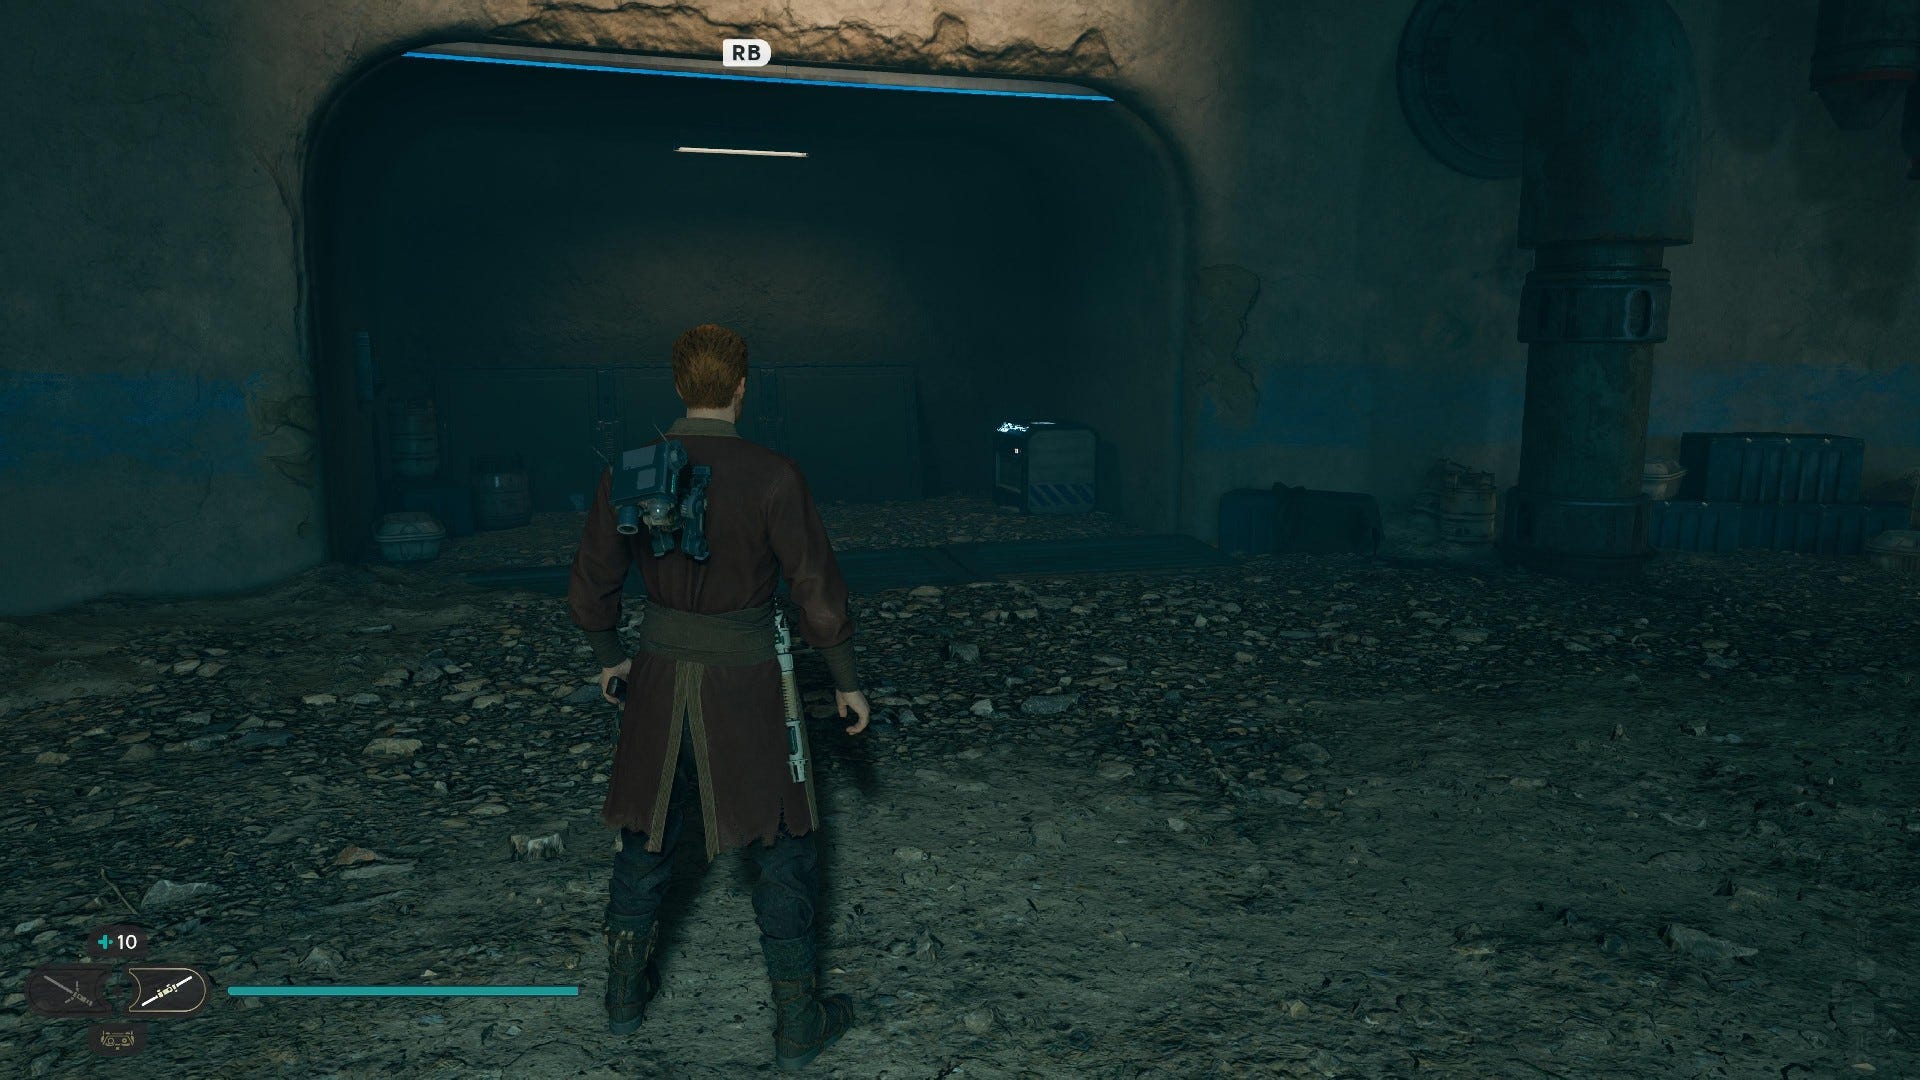
Chest #4 (Bomber Pants): Use Force Lift on the middle door underneath the Mantis landing pad.

Chest #5 (Edgehawk Pommel): This chest requires you to Force Lift and then Force Slam it. Reach the highest level of the area behind the Mantis.

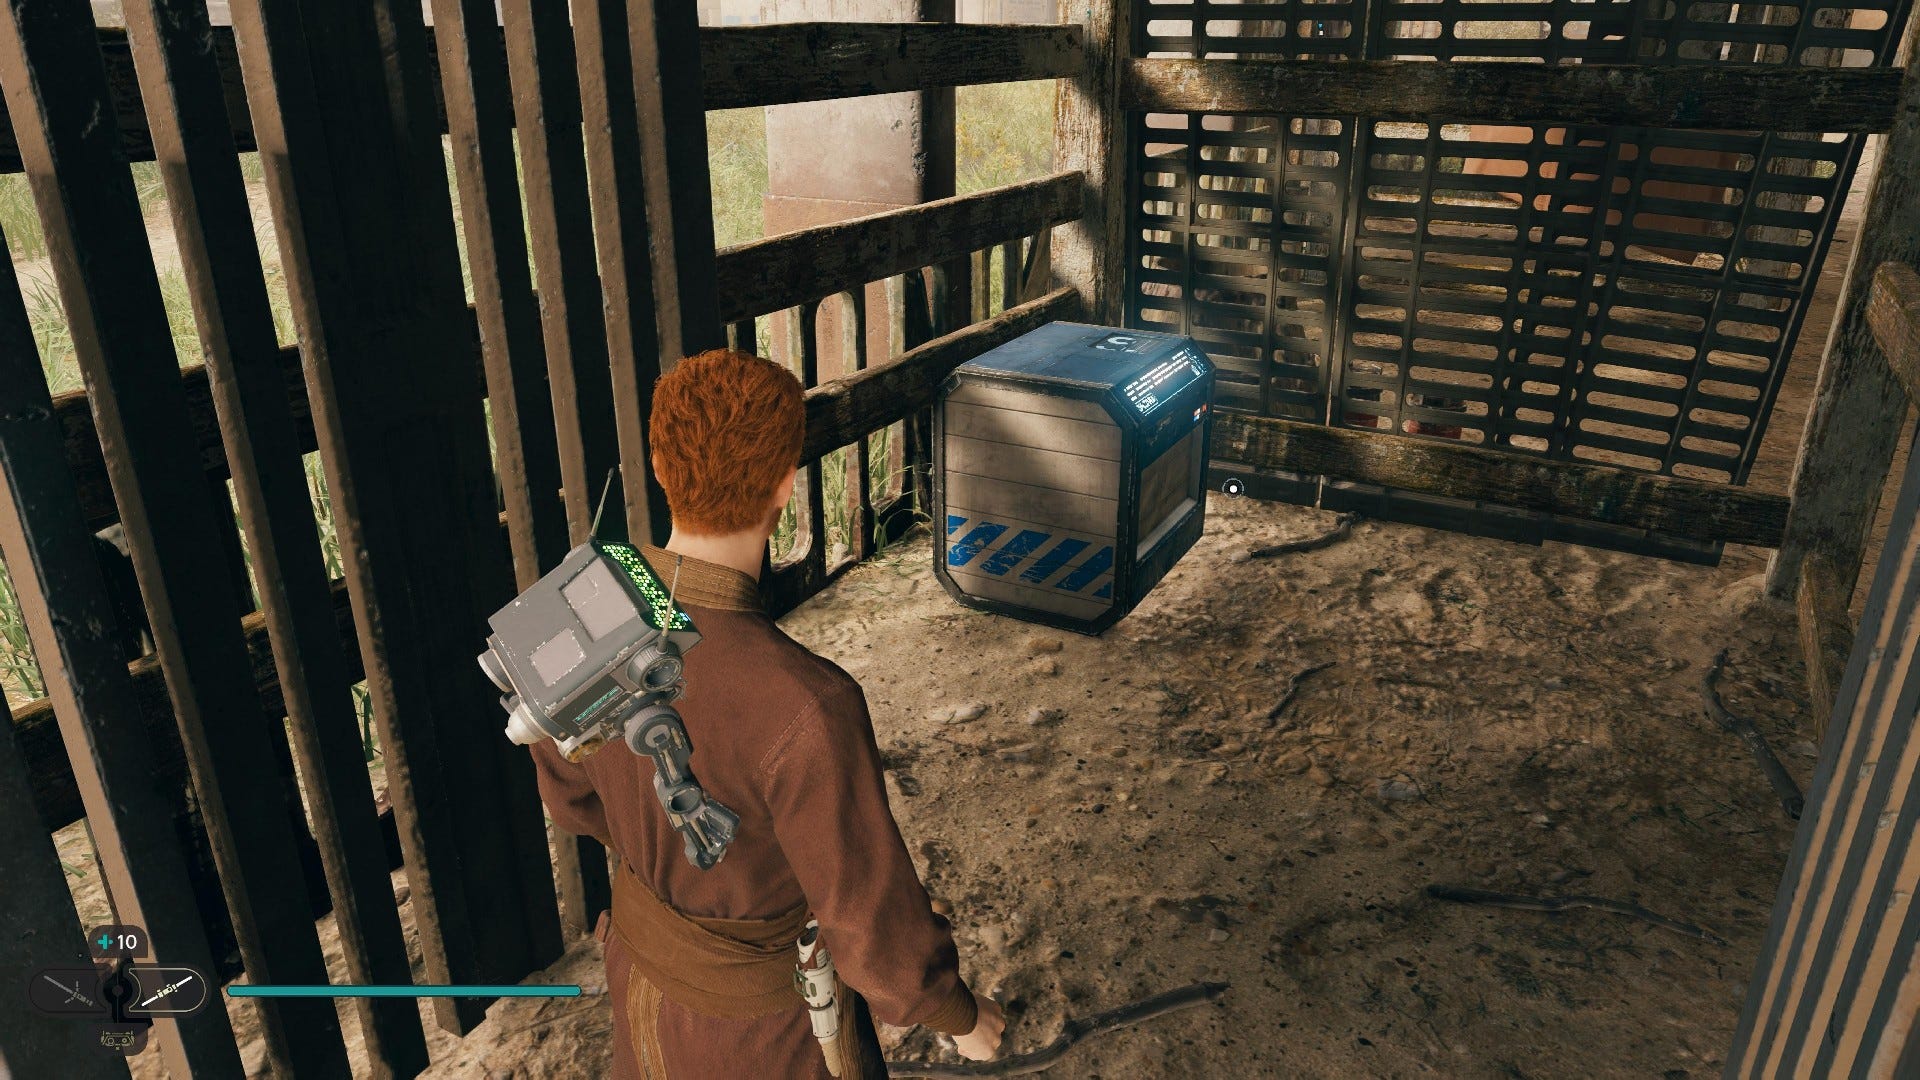
Chest #6 (Unique Metal BD-1 materials): Nekko super jump into the top floor of the stable, then Force Lift the grate in the floor and drop down for the chest.
Chest #7 (Duelist material): Inside T-1N8’s house – you need to rescue her from Phon’Qi Caverns and then speak to her outside the house to unlock it.
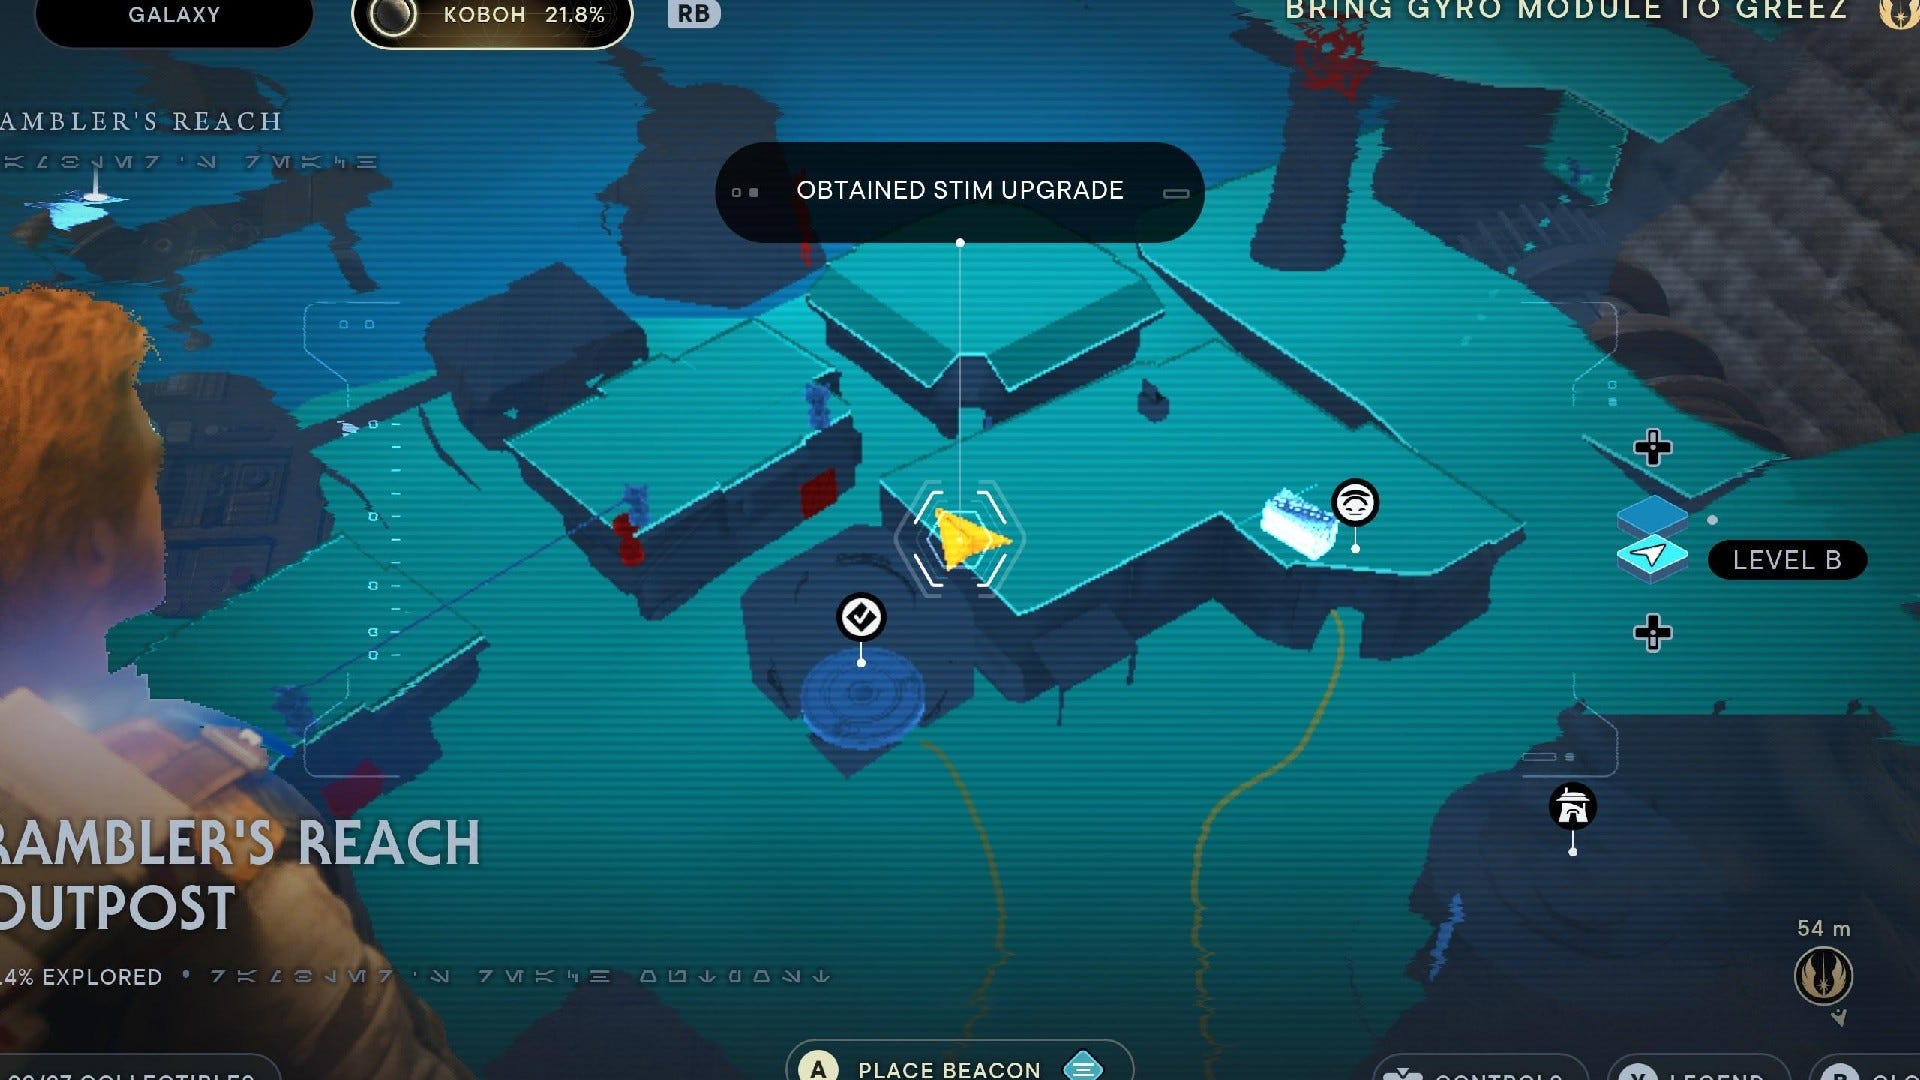
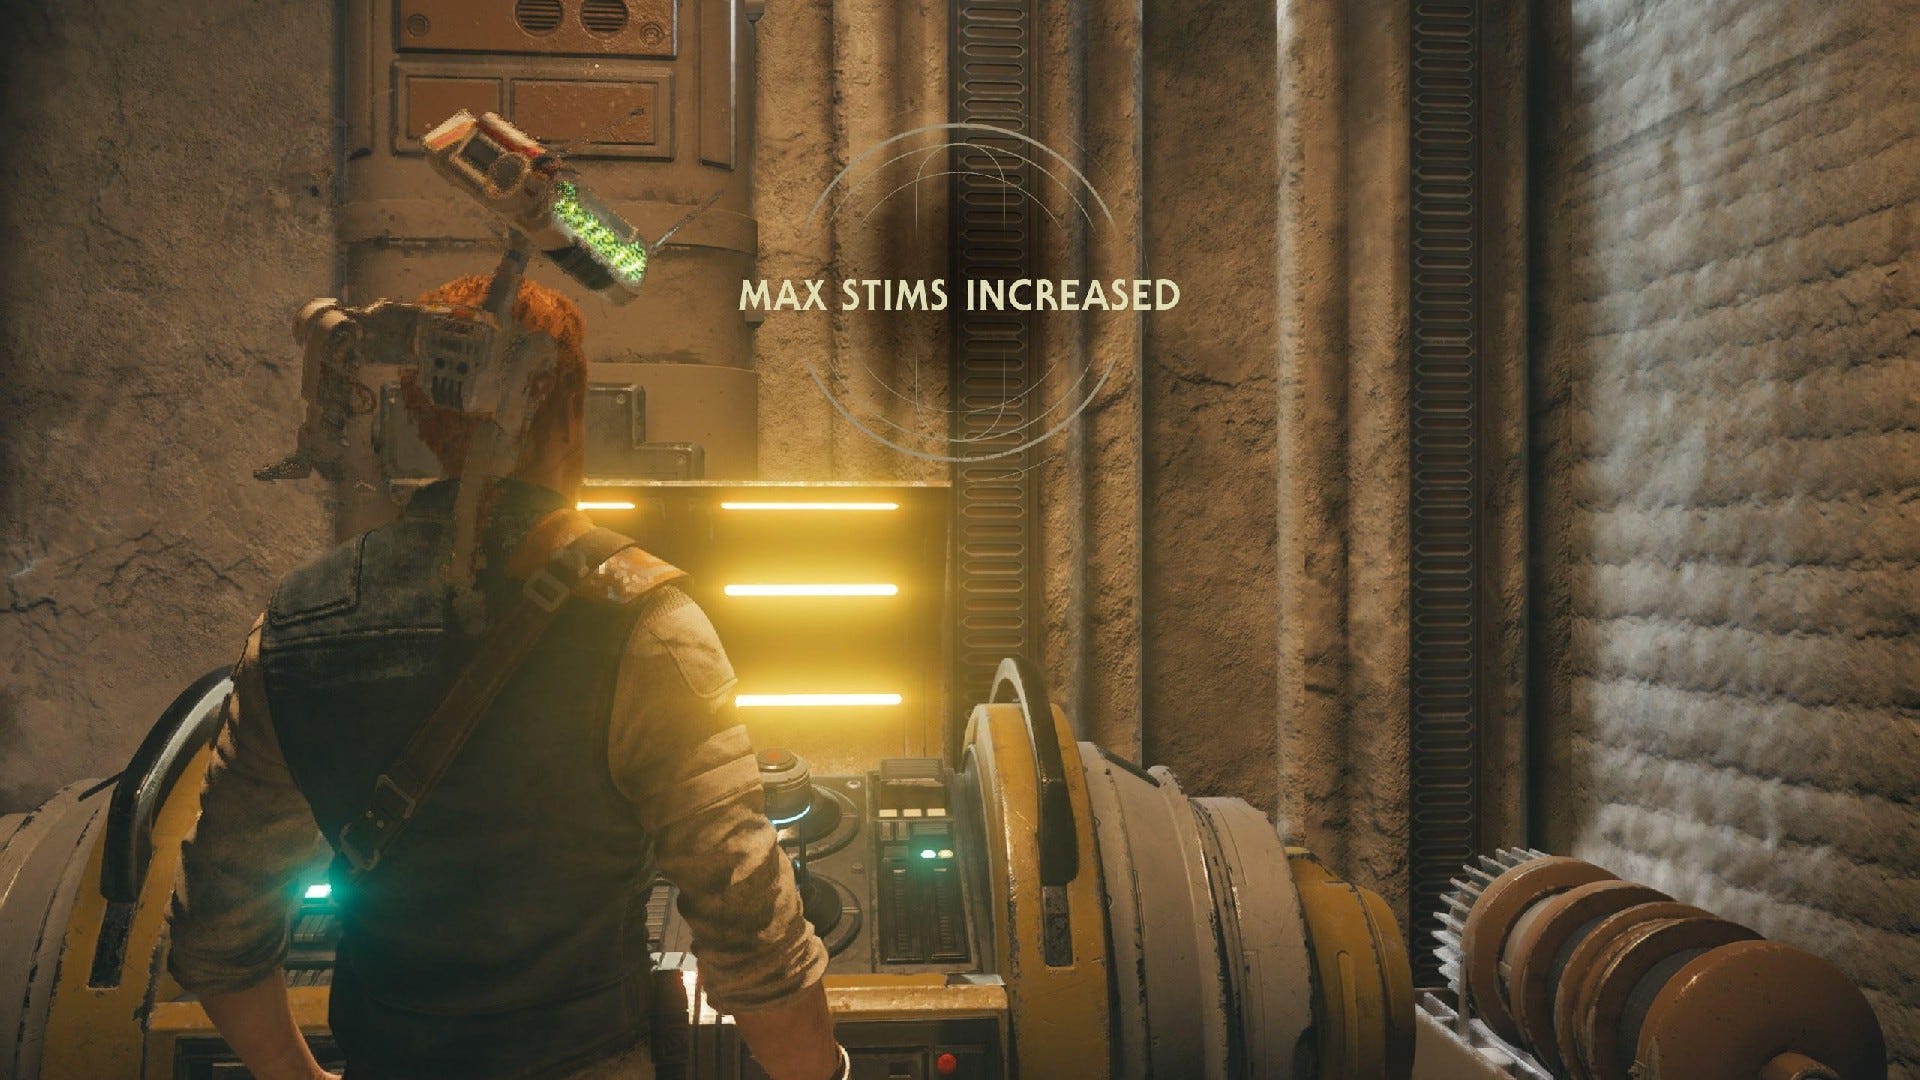
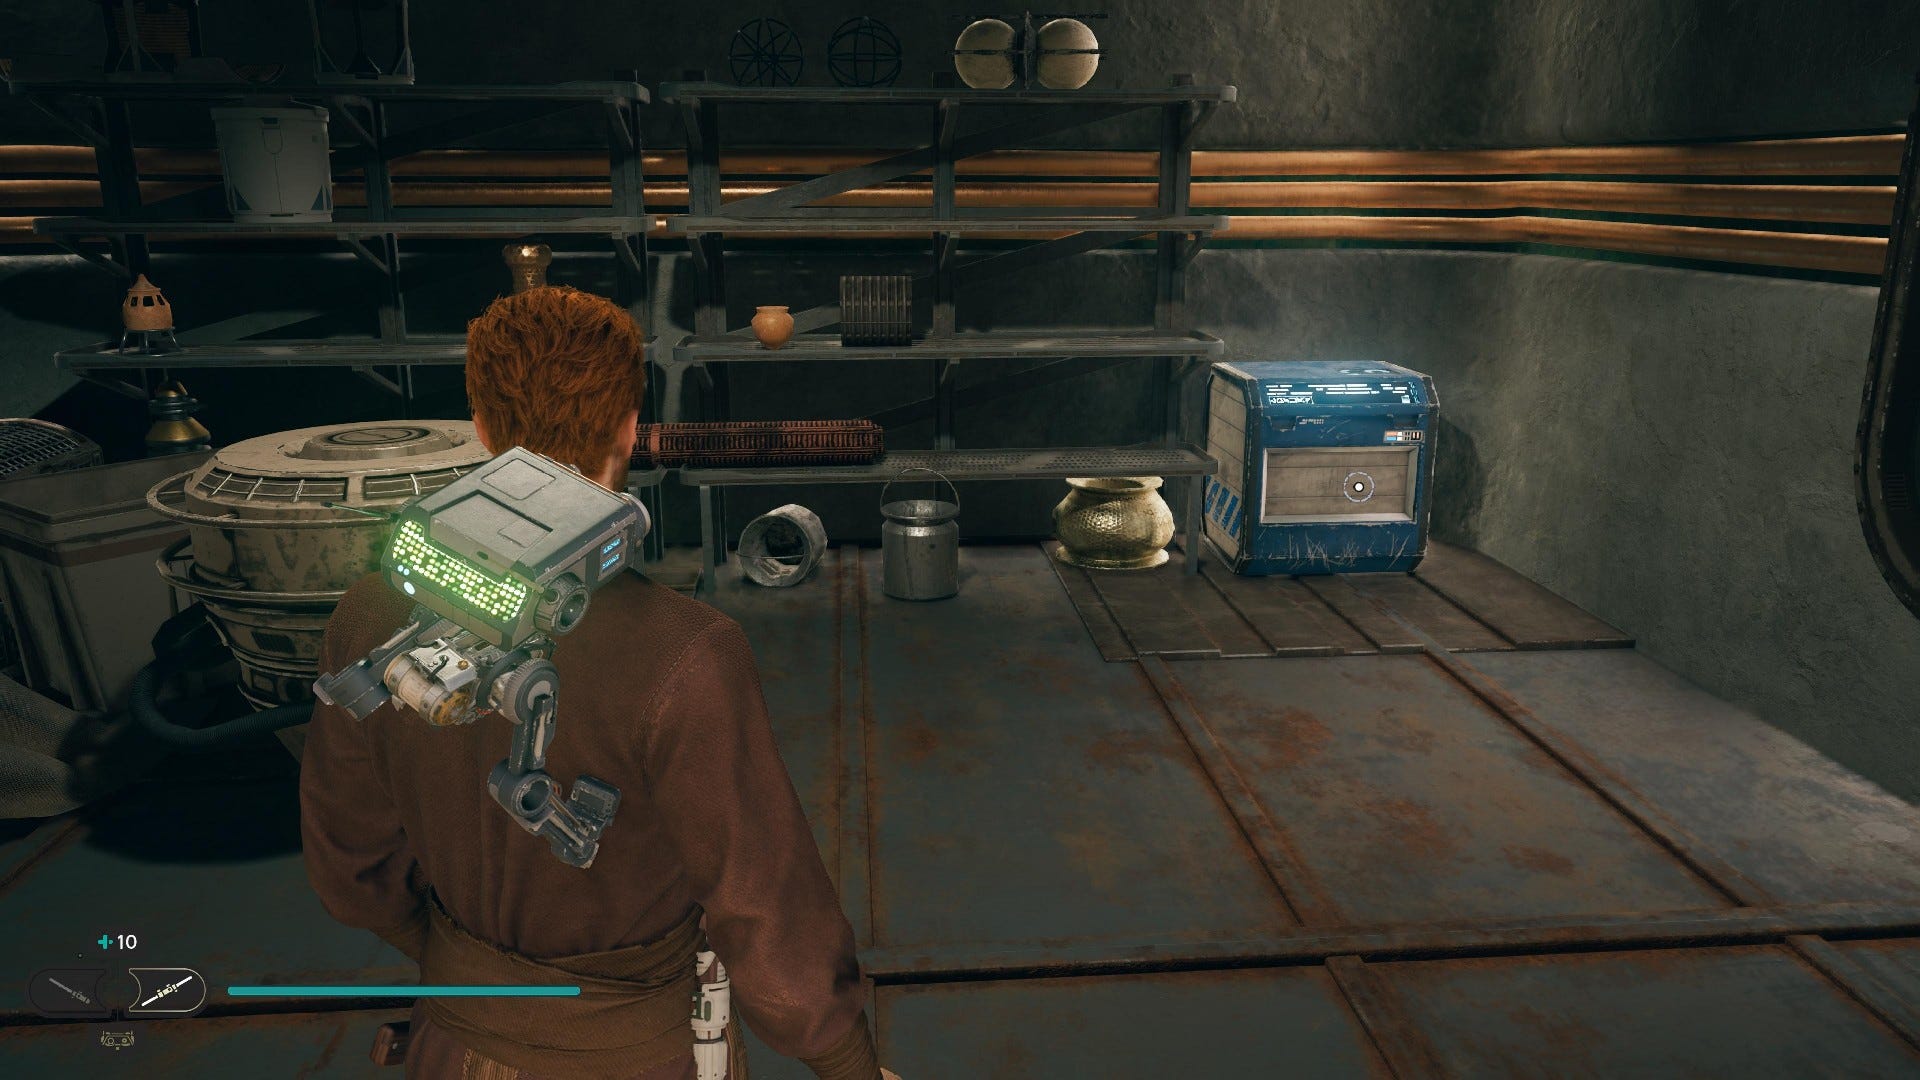
Stim Canister: In Doma’s Shop, purchase the Mysterious Keycode in her shop to unlock the nearby door. Head through for the Stim.
Rambler’s Reach Outpost Essences:
Skill Point Essence: Talk to the person inside the closed off building with all the eye cameras, near the entrance to the outpost. After Jedi mind-tricking them, go down the staircase that opens in the floor.
Rambler’s Reach Outpost Databanks:
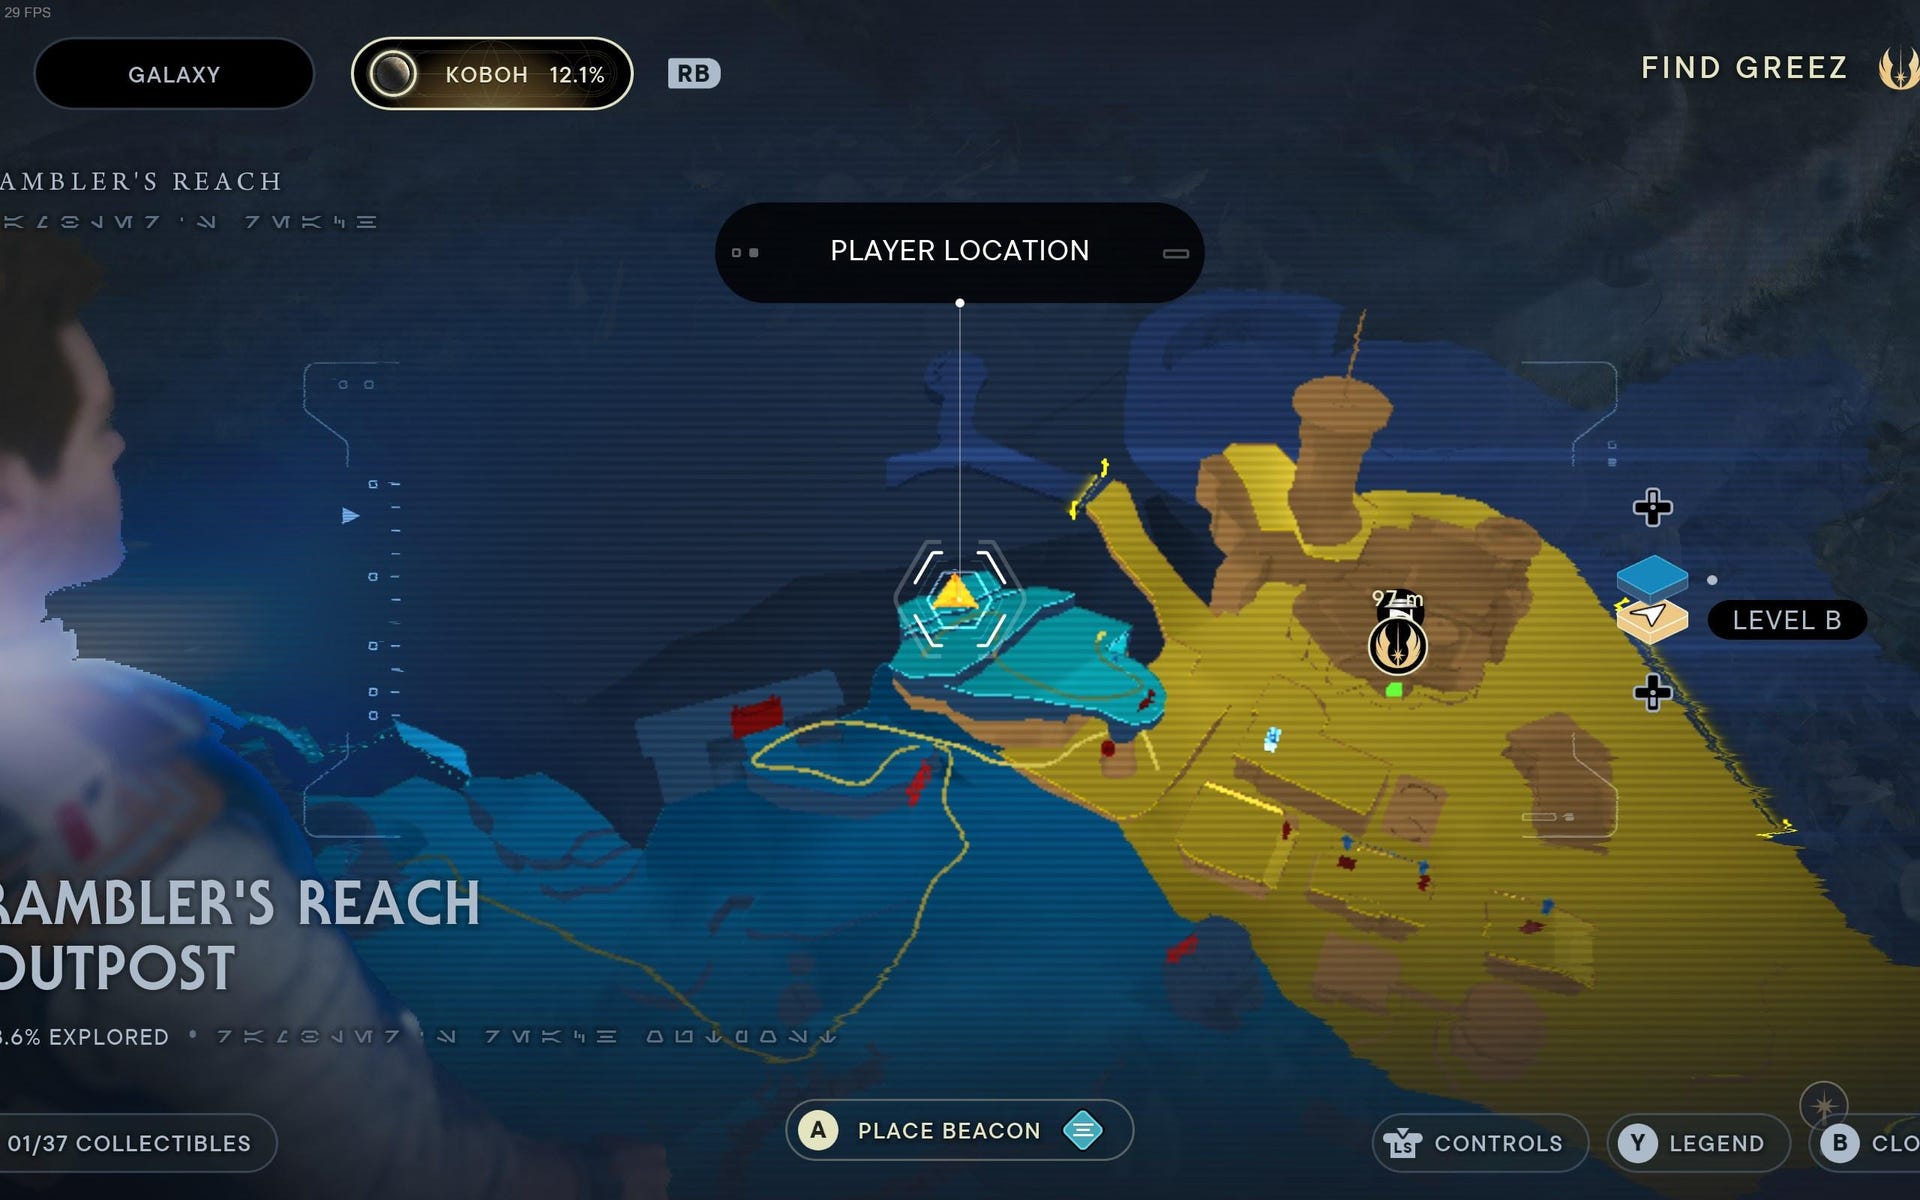
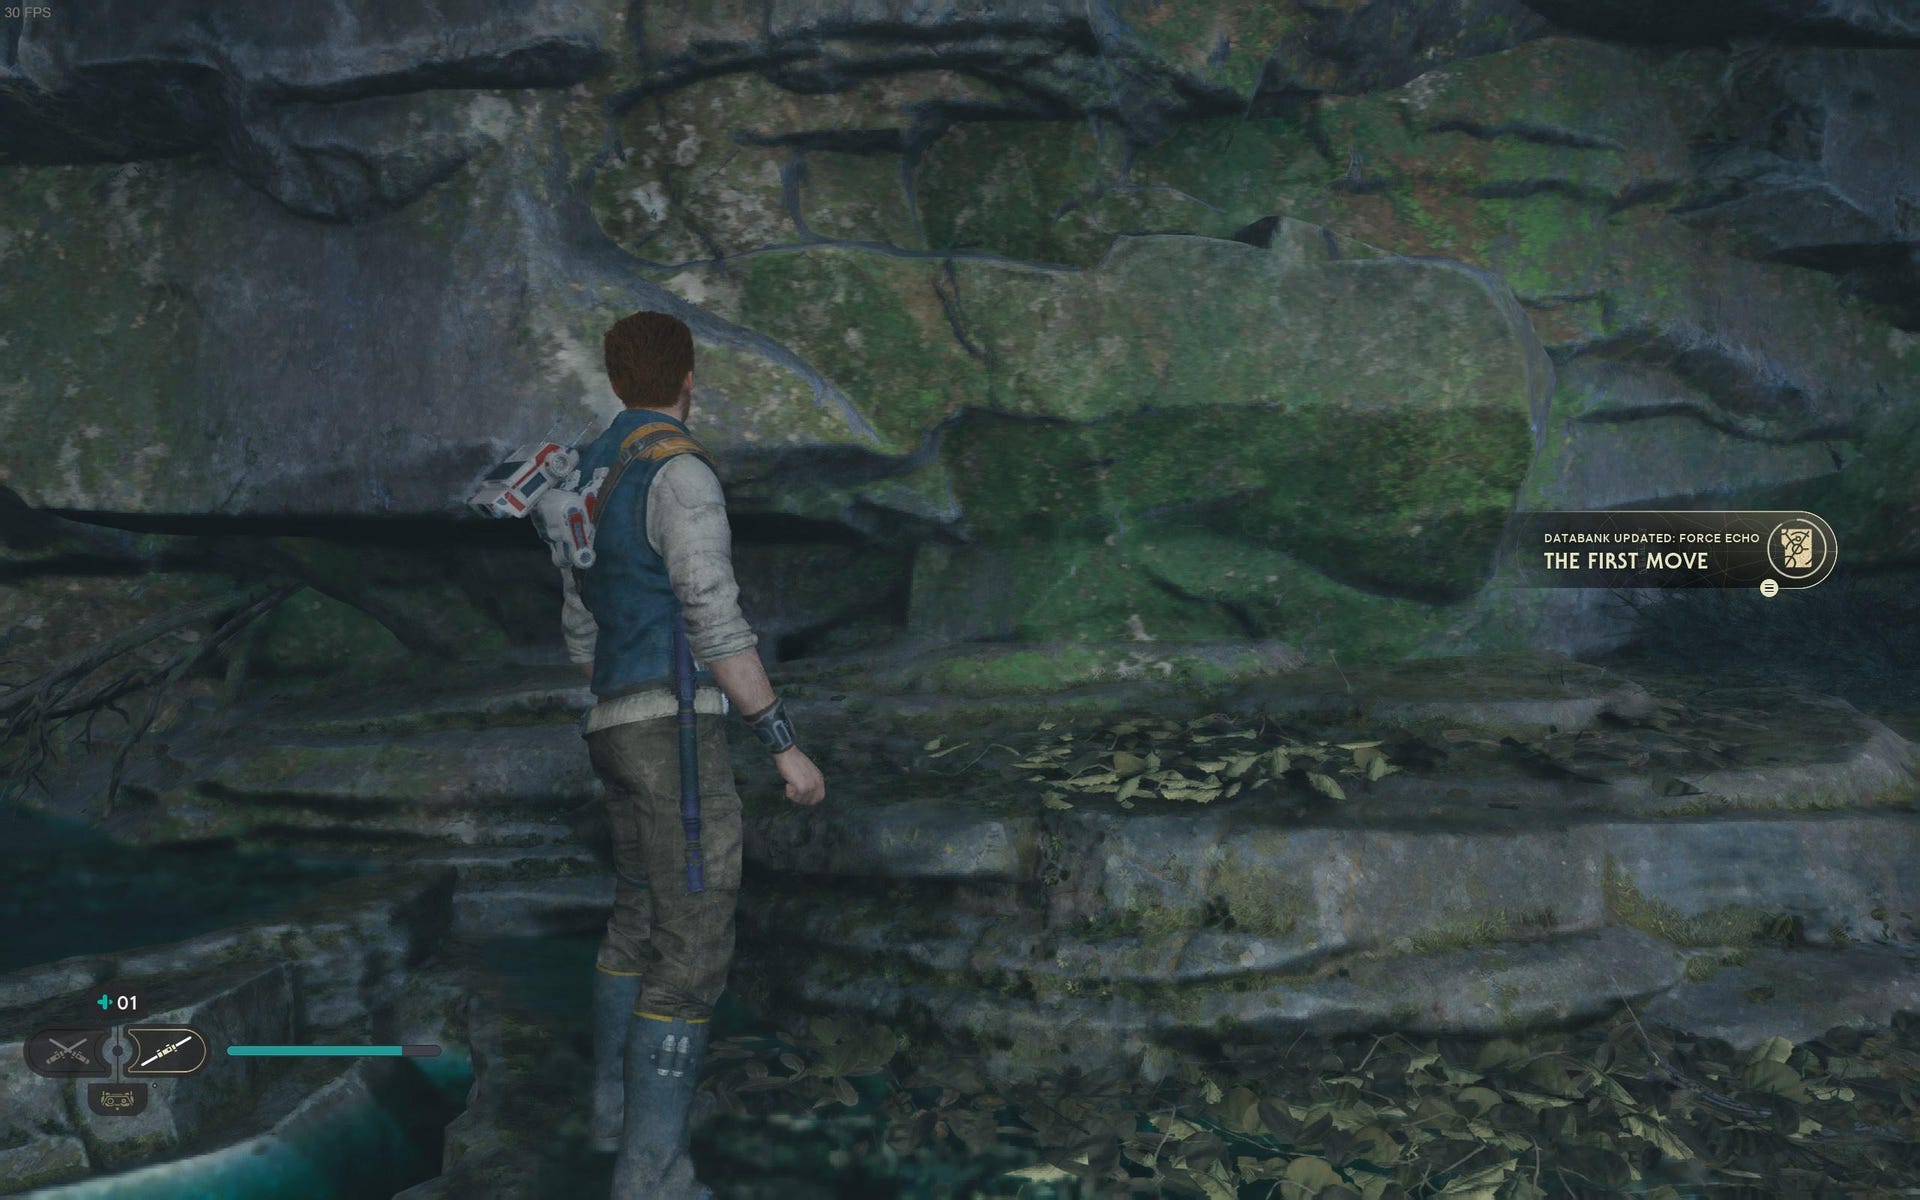
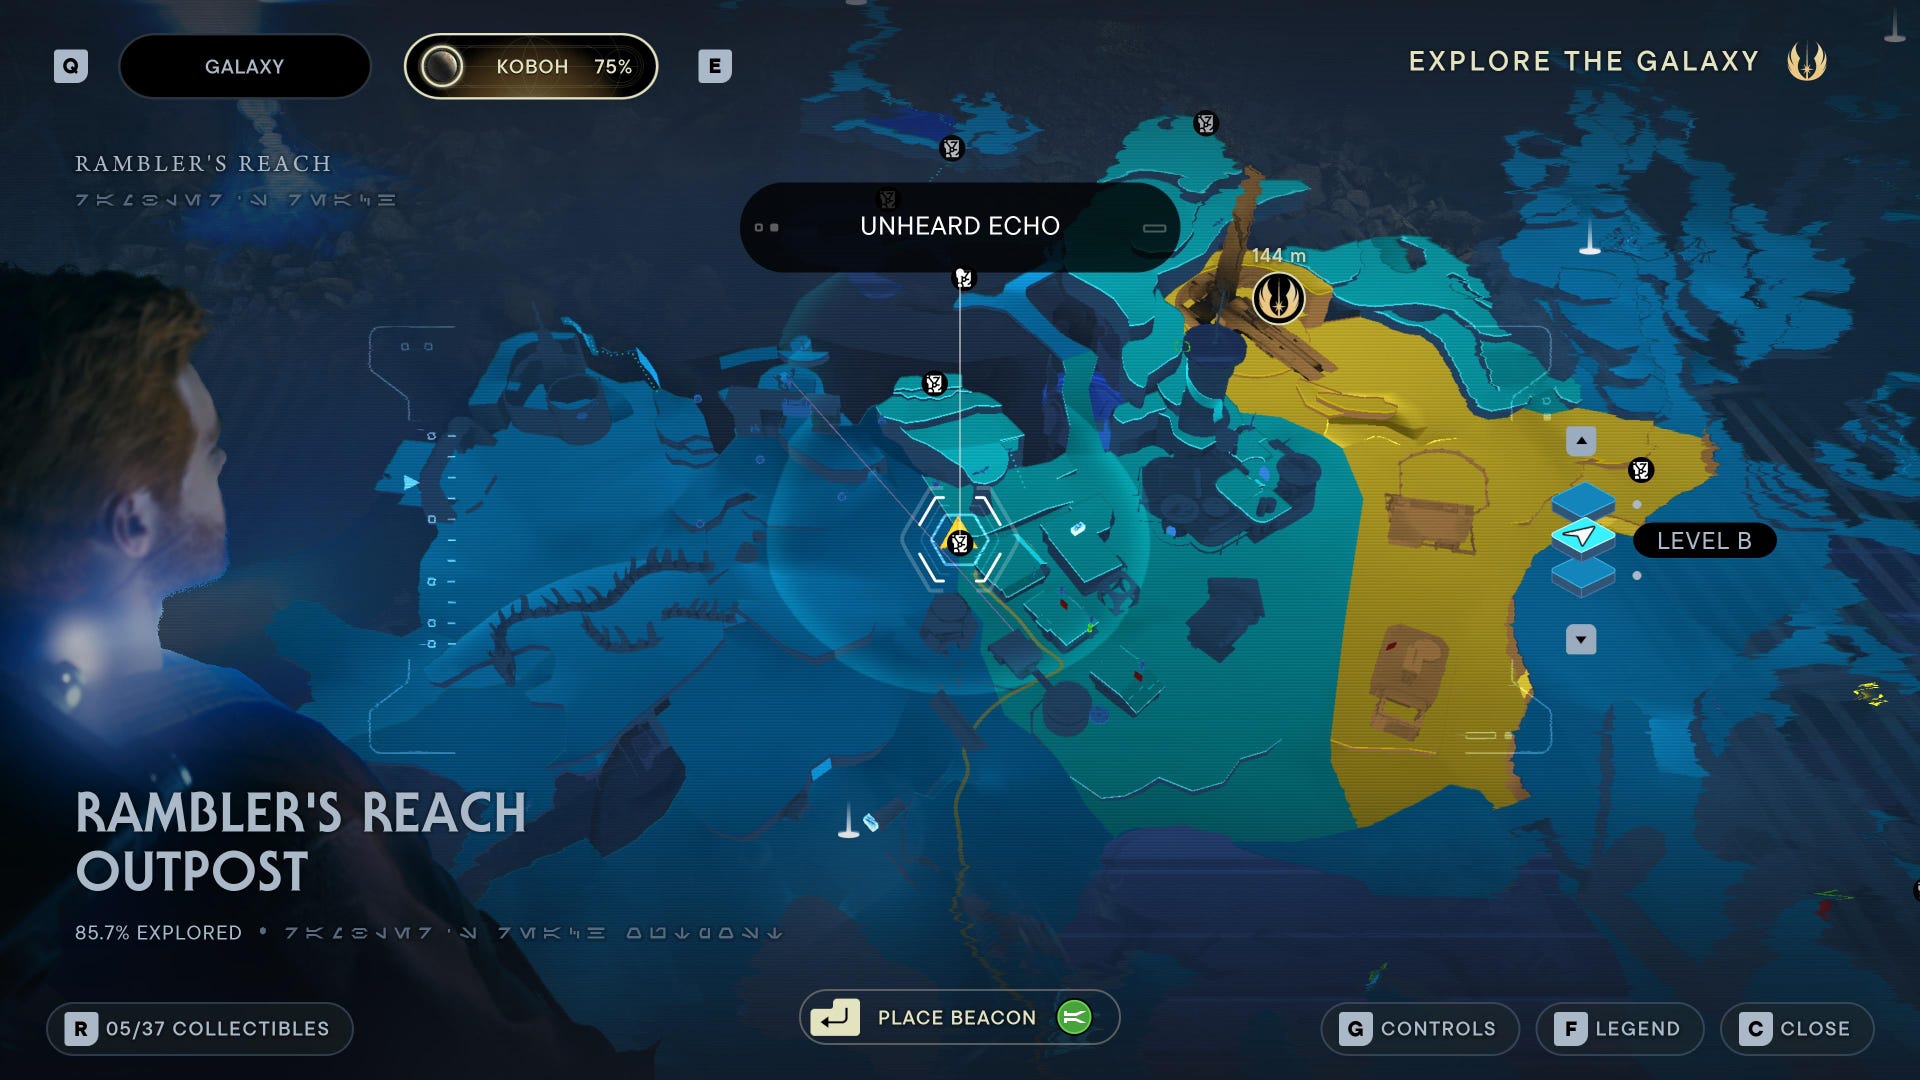
Force Echo (The First Move): On the left ridge overlooking the Rambler’s Reach Outpost. Use grapple and climb vines to reach it.
Databank (Obsession): Force Lift and then dash through the forcefield door of the building marked on the map.
Databank (Forever Curious): Force Lift and then dash through the forcefield door of the building marked on the map.
Force Echo (Soont Madas): Talk to the person inside the closed off building with all the eye cameras, near the entrance to the outpost. After jedi mind-tricking them, go down the staircase that opens in the floor.
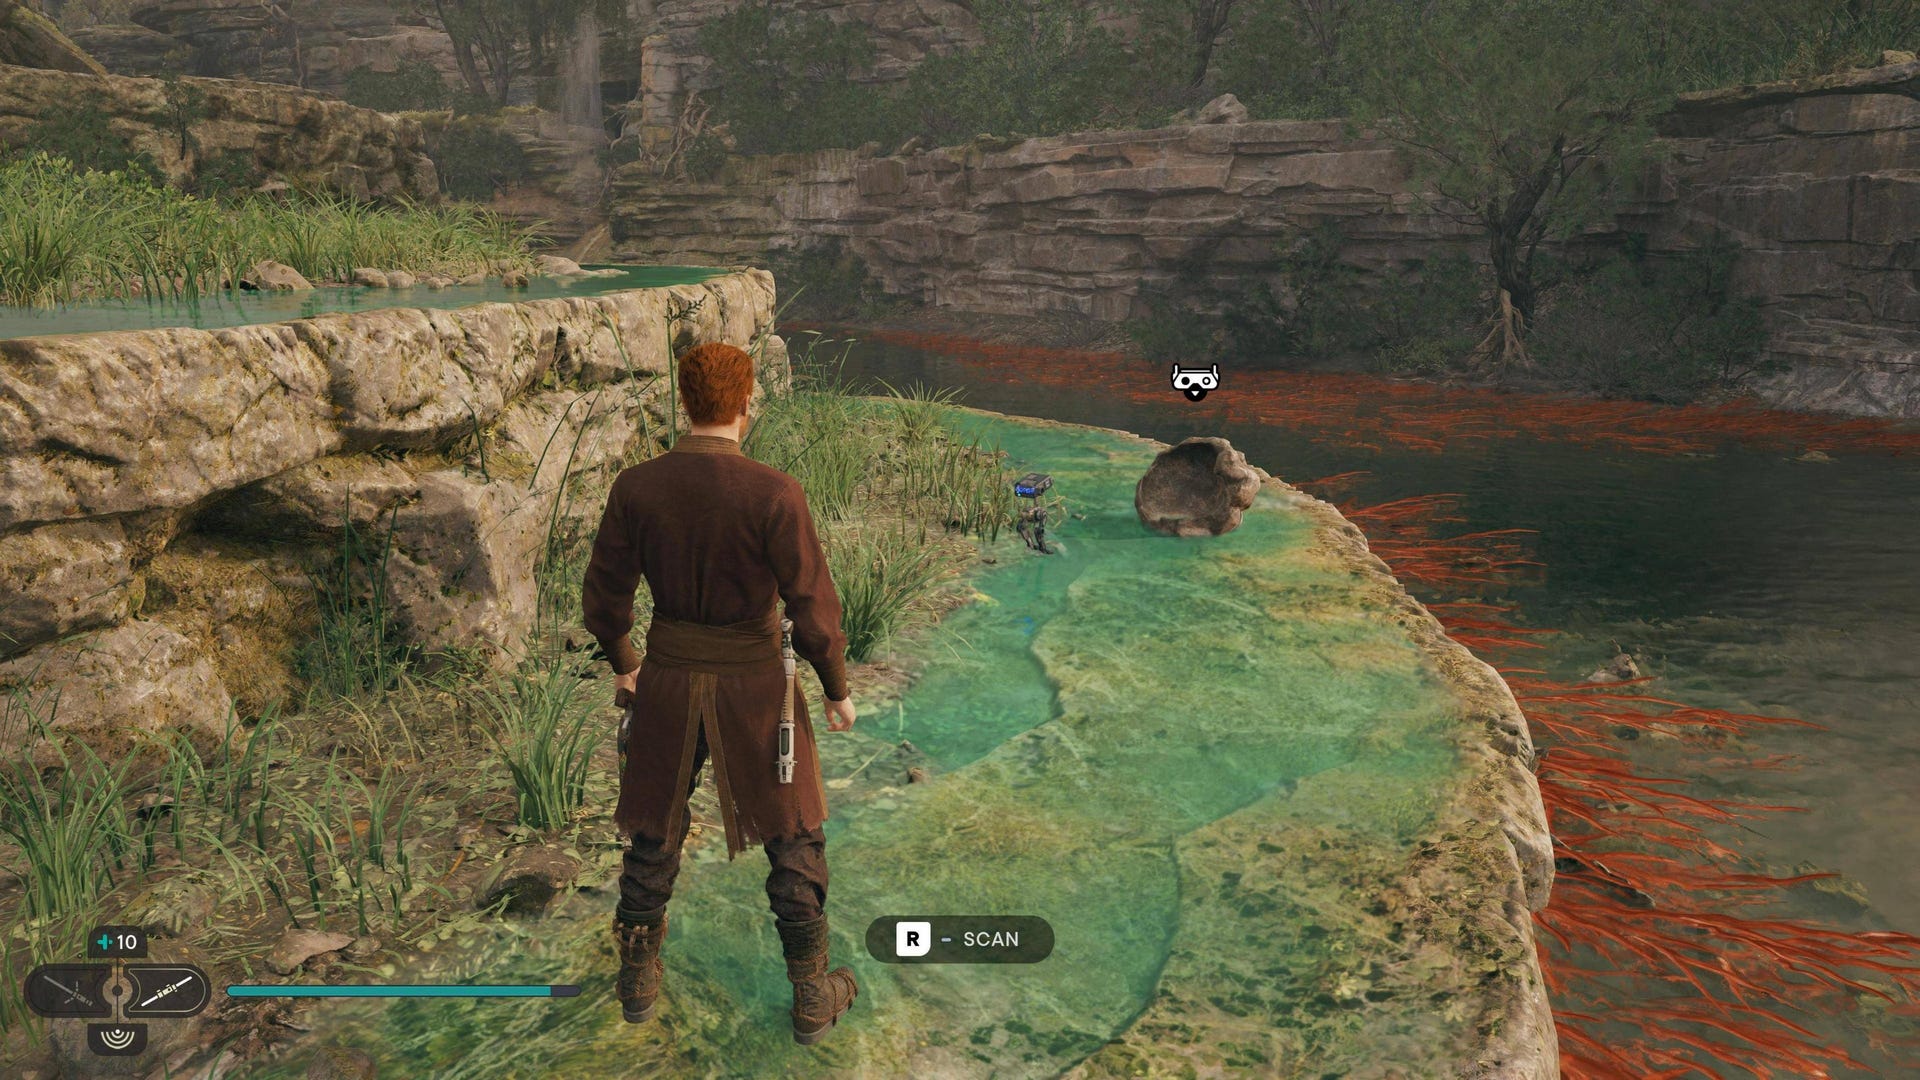
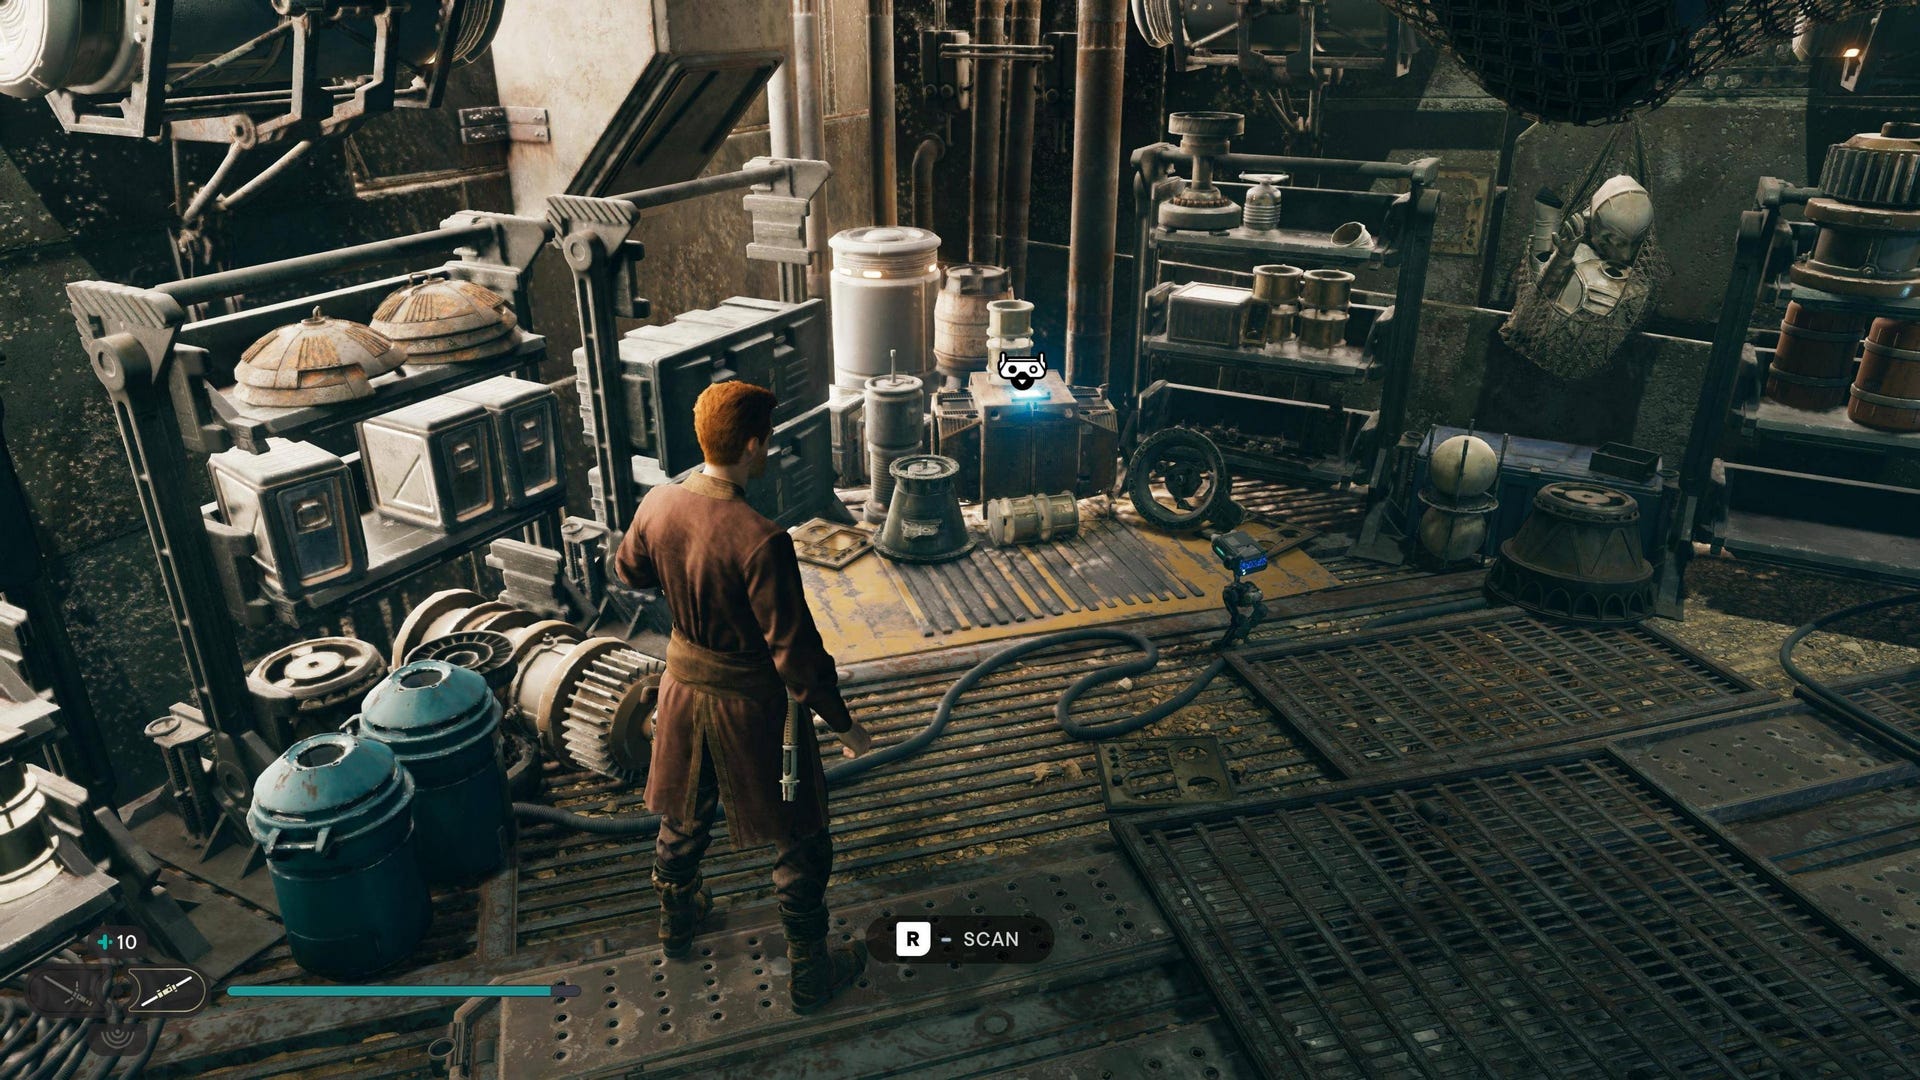
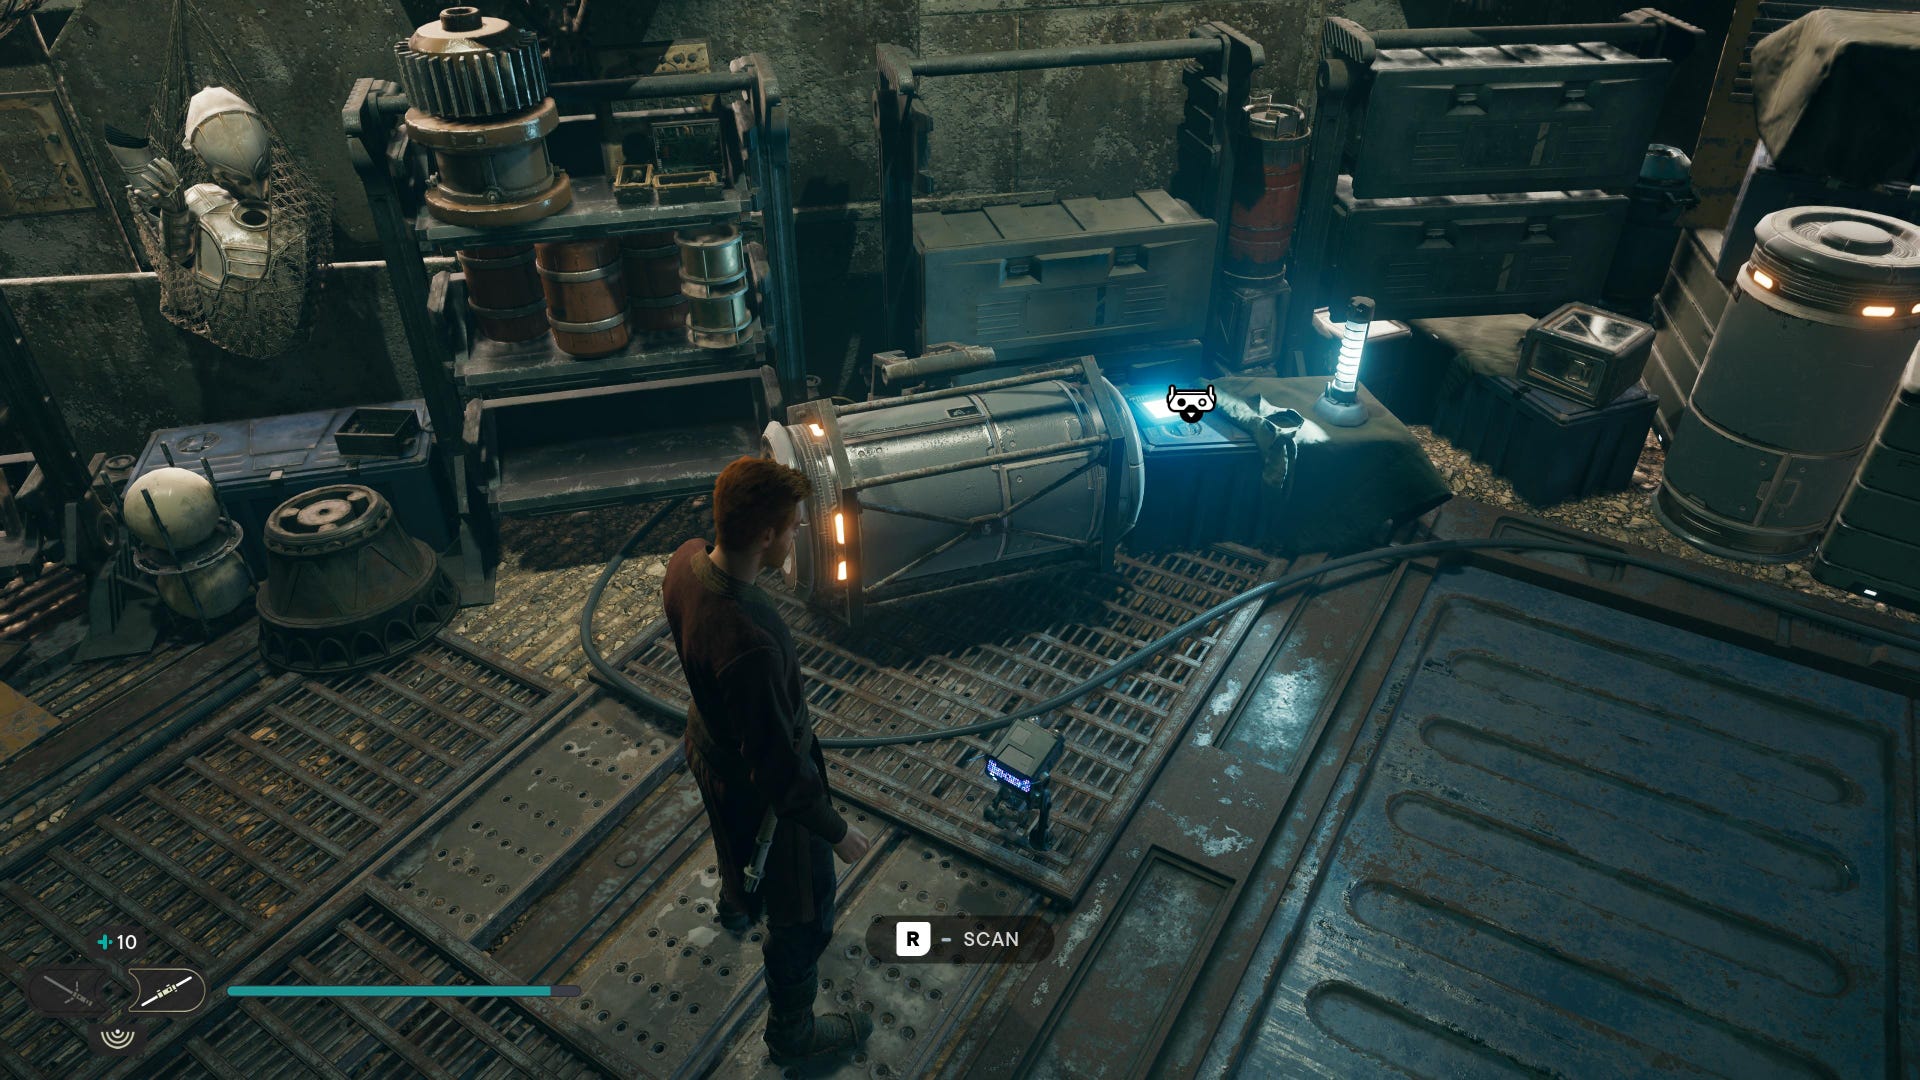
Databank (Turgle’s Shiny Shell): Scan the shell on the edge of the river.
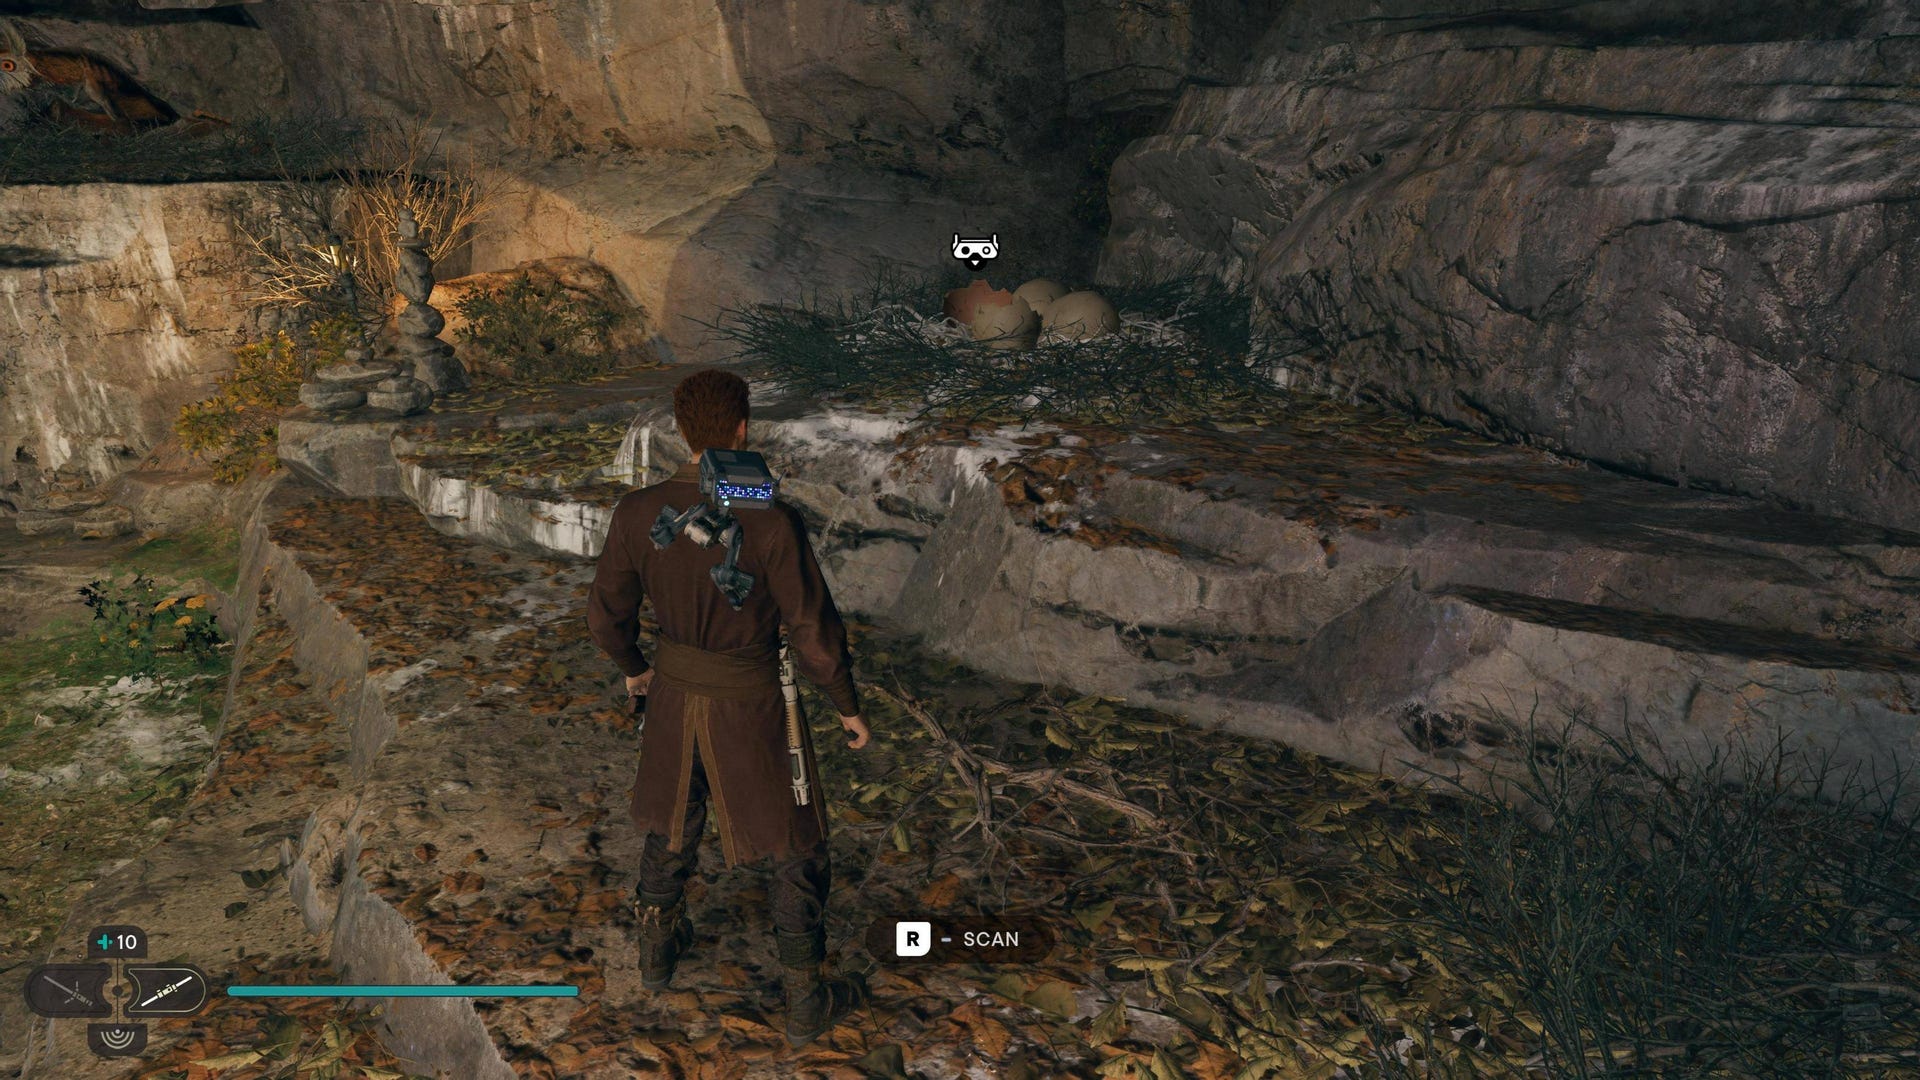
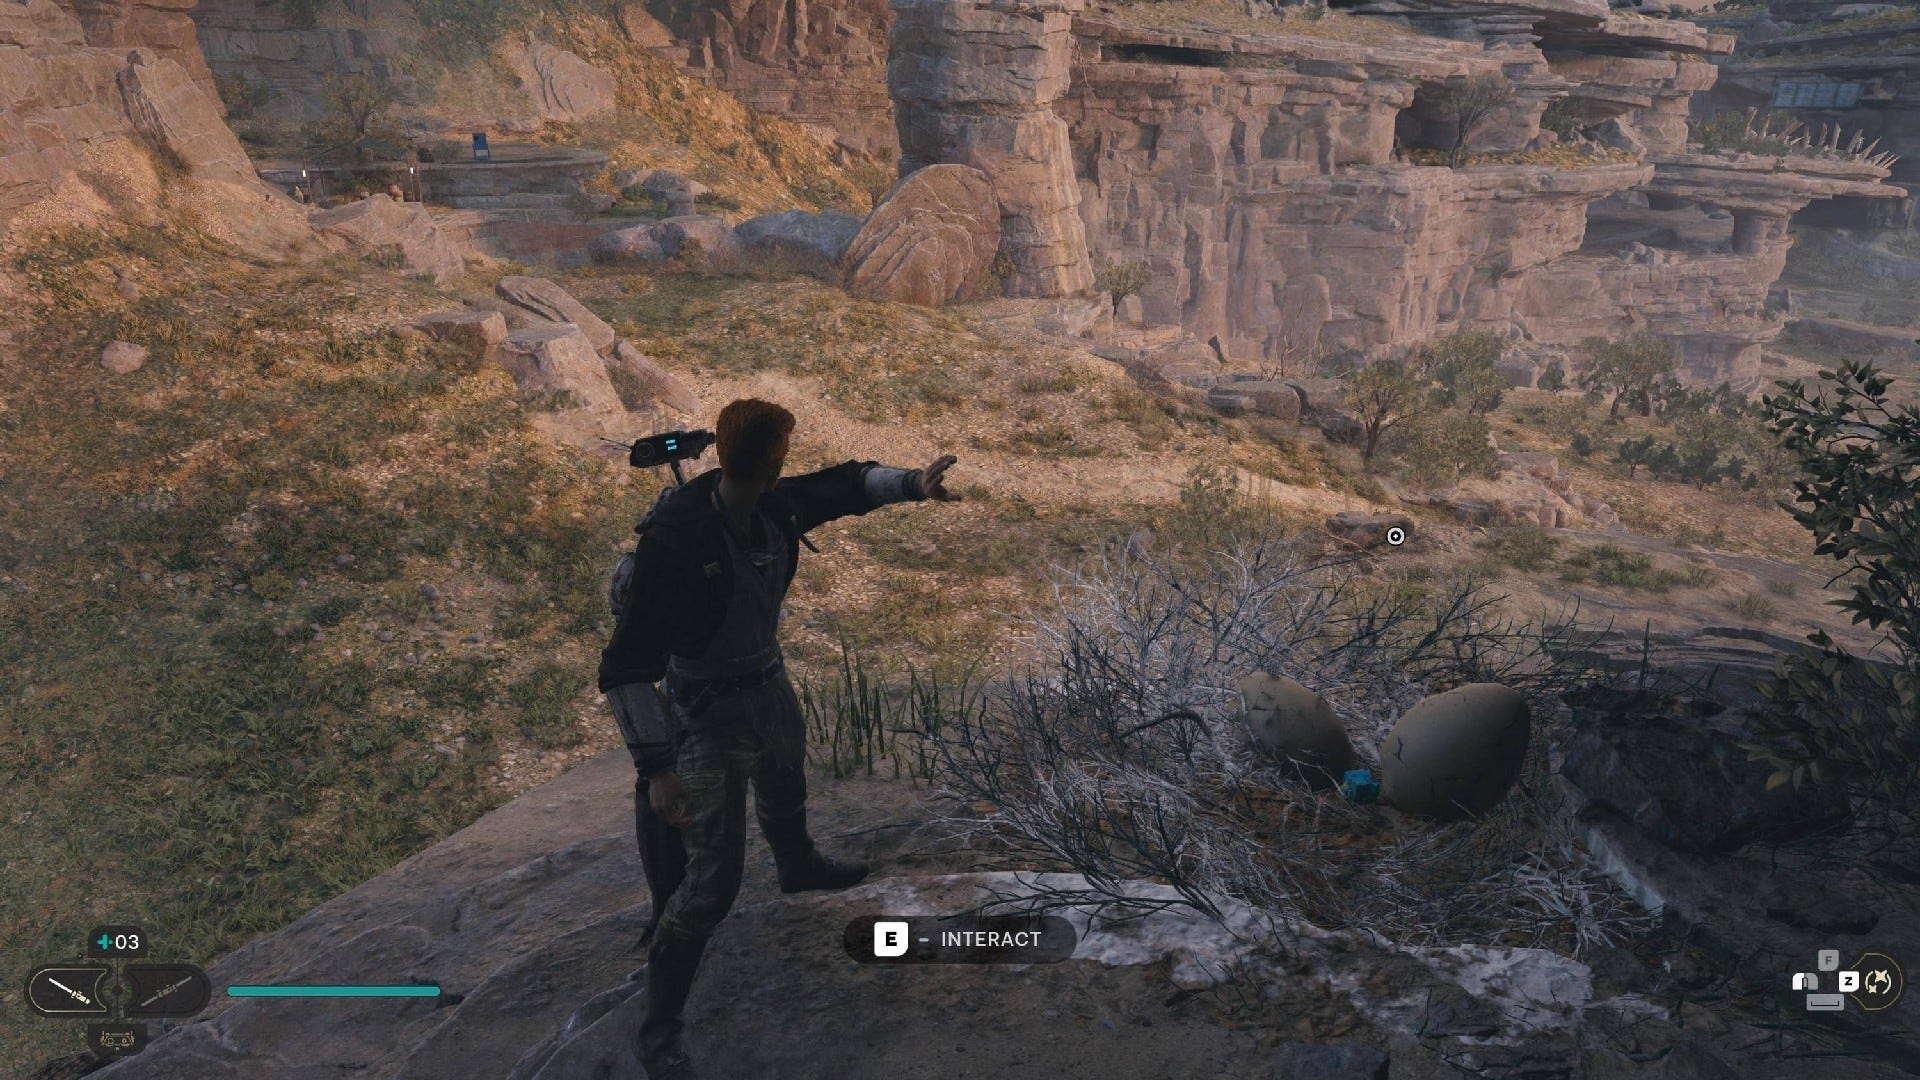
Databank (Relter Egg): Reach the highest level of the area behind the Mantis and scan the nest in the cave.
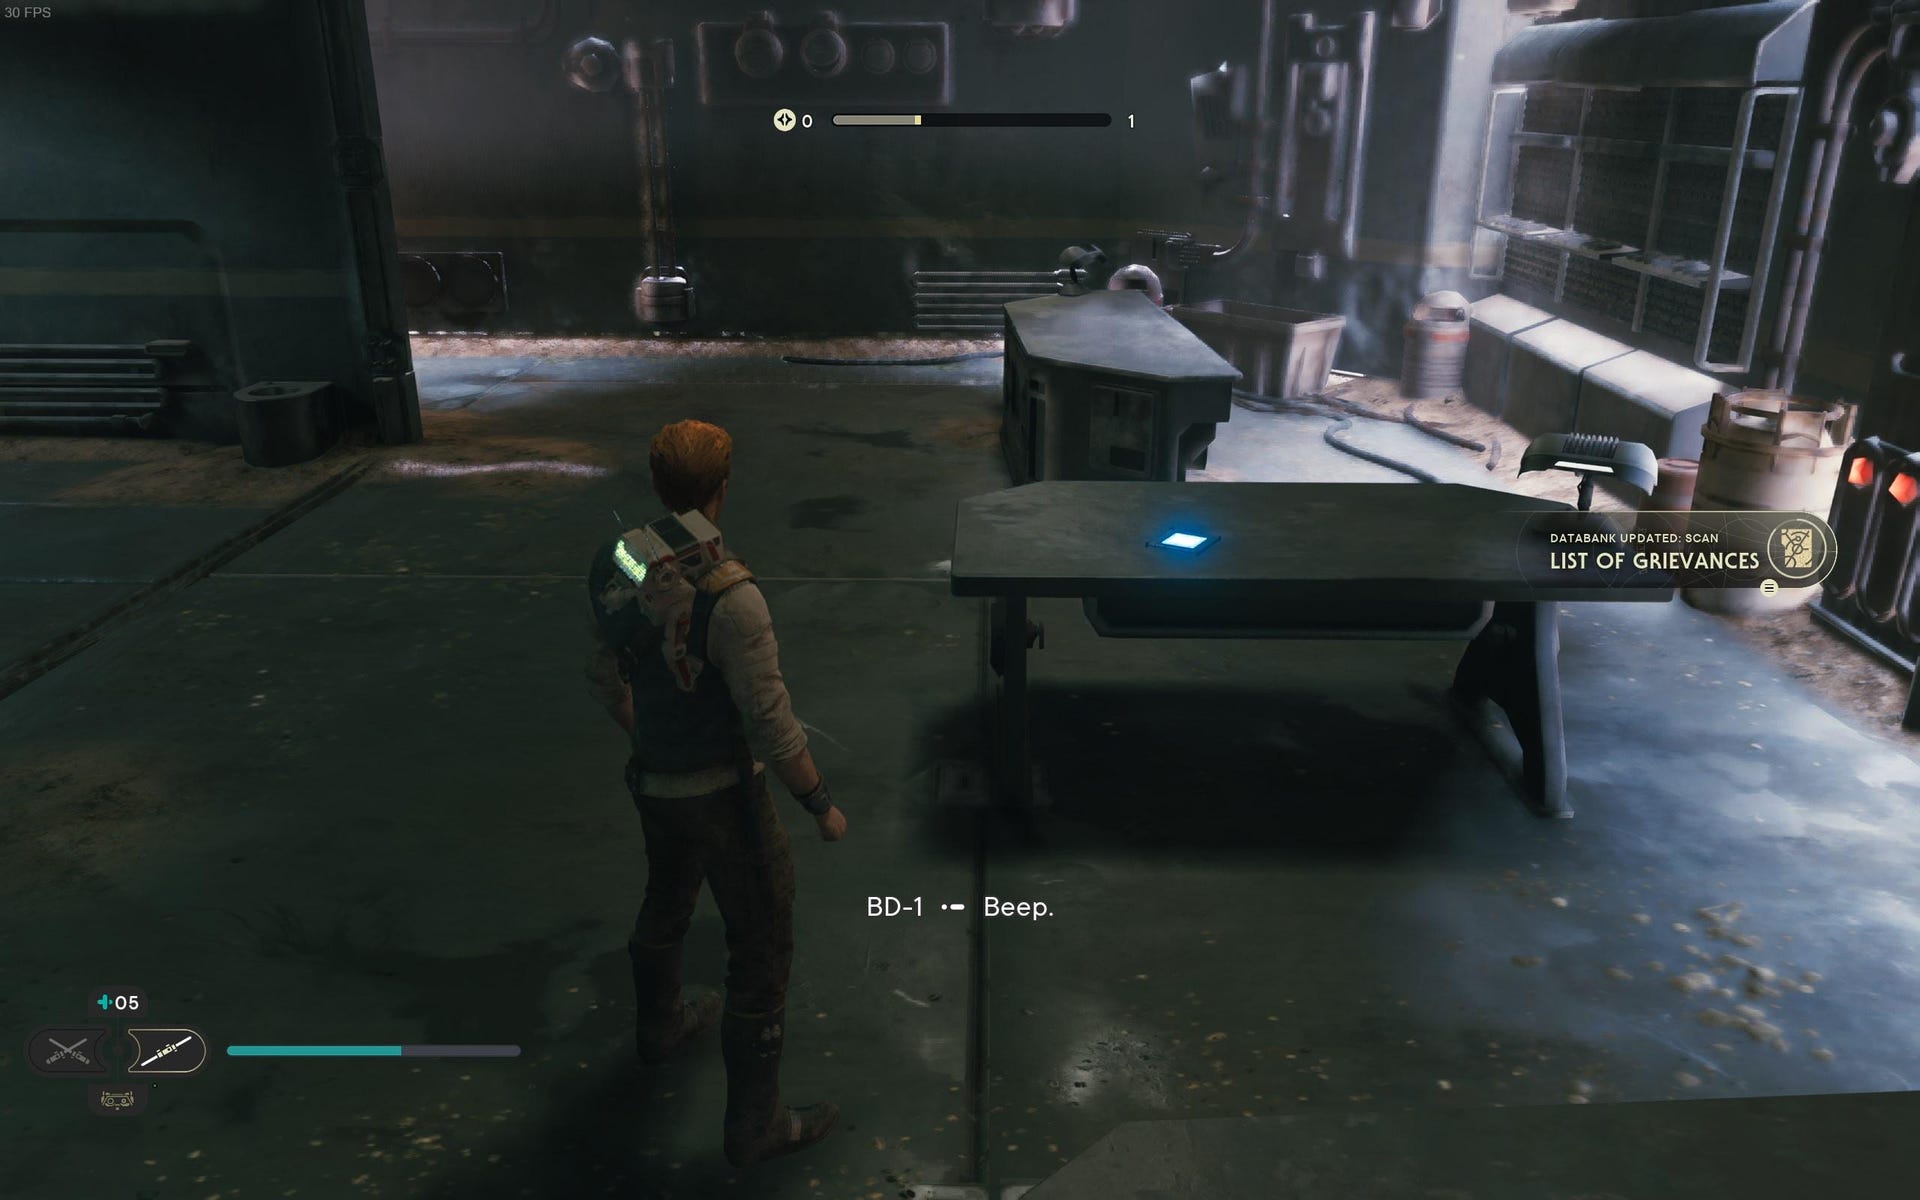
Databank (List of Grievances): Nekko super jump onto the roof of the building and drop down from there.

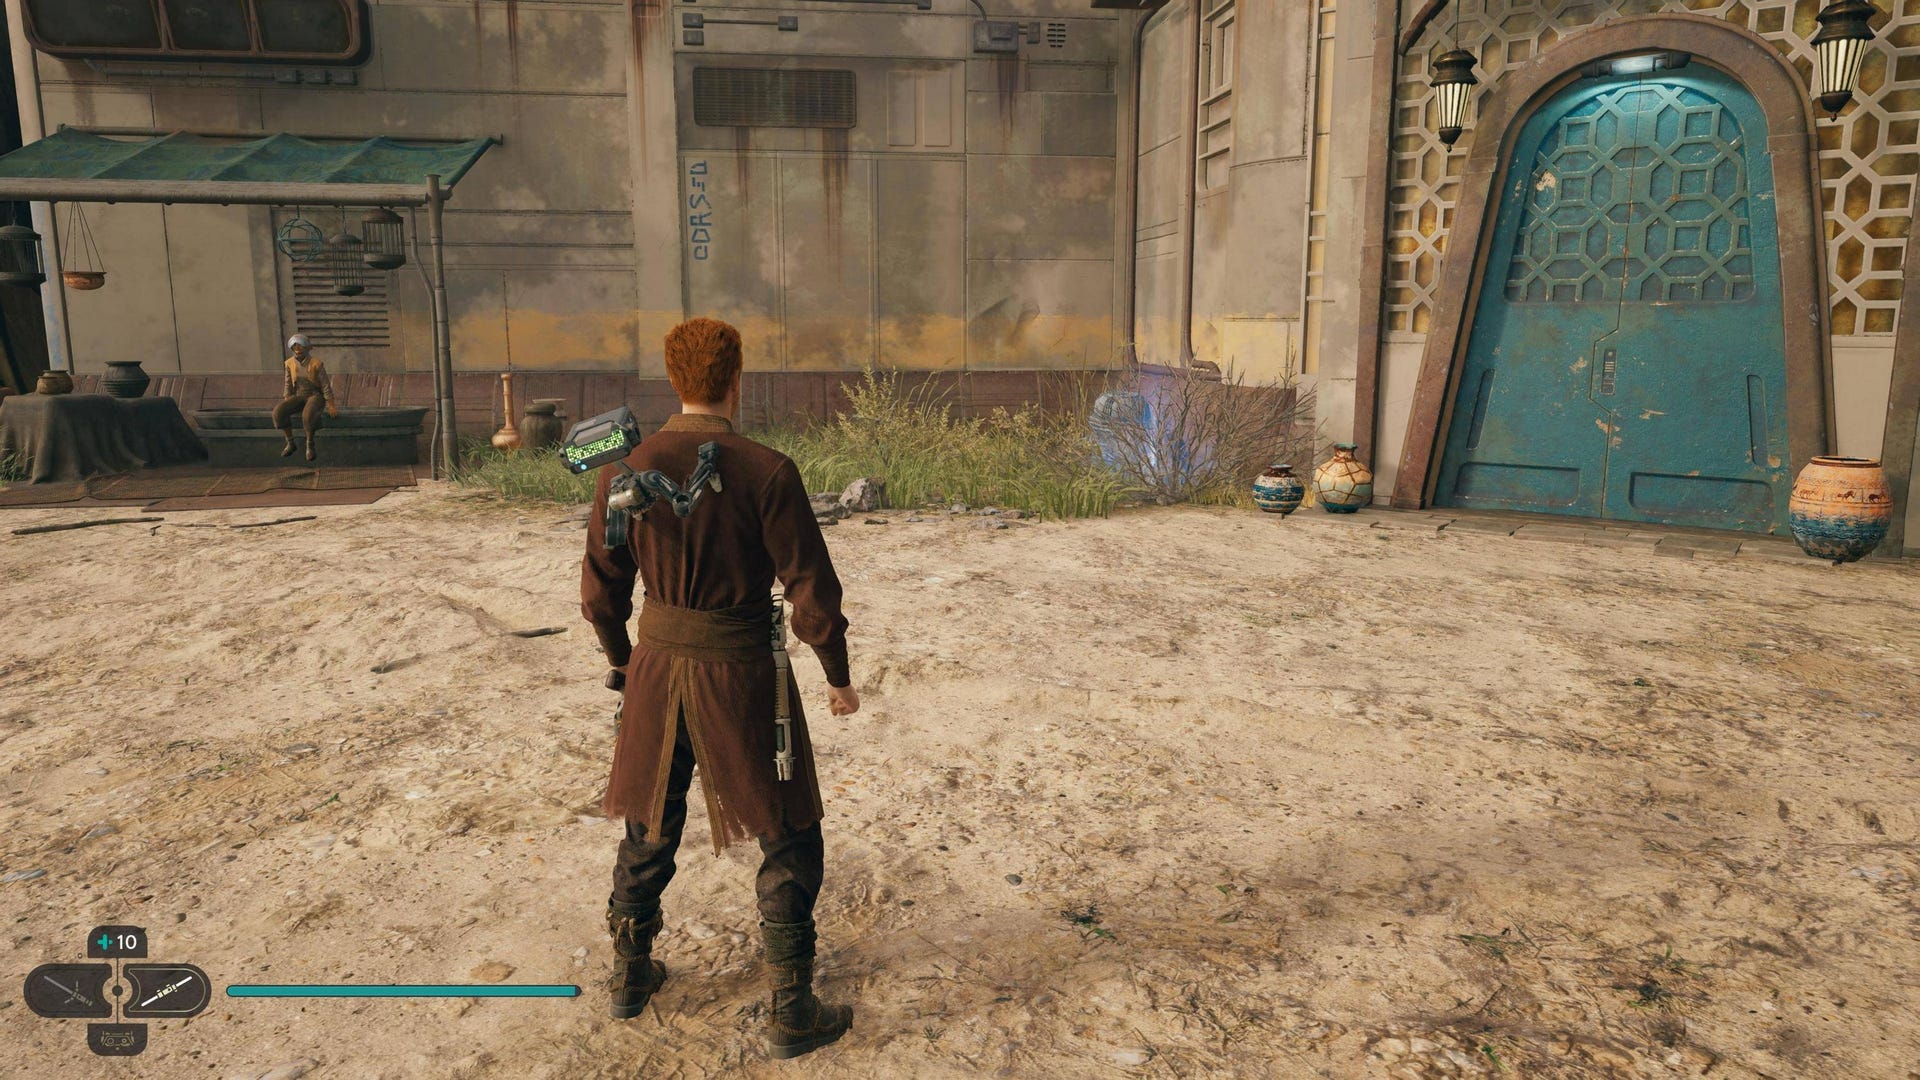
Force Echo (Mistakes): To the left of the blue door to Doma’s shop. Only available after reaching the end of the main story.

Force Echo (Leash): Underneath the Mantis. Only available after reaching the end of the main story.


Force Echo (Disguises): By the post in the ground near the Mantis. Only available after reaching the end of the main story.
Rambler’s Reach Outpost Force Tears:

Force Tear (Fractured History): Next to Doma’s Shop.
Force Tear (Fractured Duality): On top of the tallest building of the outpost, can climb up the vines from the garden.
Rambler’s Reach Outpost Treasures:

Priorite Shard #1: Dropped by Scavenger Droid.
Priorite Shard #2: Nekko super jump onto the roof of the building and drop down from there.


Priorite Shard #3: Nekko super jump into top floor of the stable.
Priorite Shard #4: Force Lift the dung on the bottom floor of the stable.
Rambler’s Reach Outpost Seed Pods:
Bluebell Squish (Felucian Yellow): On the edge of the stable fence.

Pine Fern: Reach the penultimate (in height) level of the area behind the Mantis and slash the plant at the map location.

Pine Fern (Dathomirian Red): Reach the penultimate (in height) level of the area behind the Mantis and slash the plant at the map location.
Pine Fern: Reach the penultimate (in height) level of the area behind the Mantis and slash the plant at the map location.

Pine Fern: Reach the highest level of the area behind the Mantis and slash the plant at the map location.
Pine Fern: Reach the highest level of the area behind the Mantis and slash the plant at the map location.
Pine Fern (Nabooan Green): In the garden atop Pyloon’s Saloon.
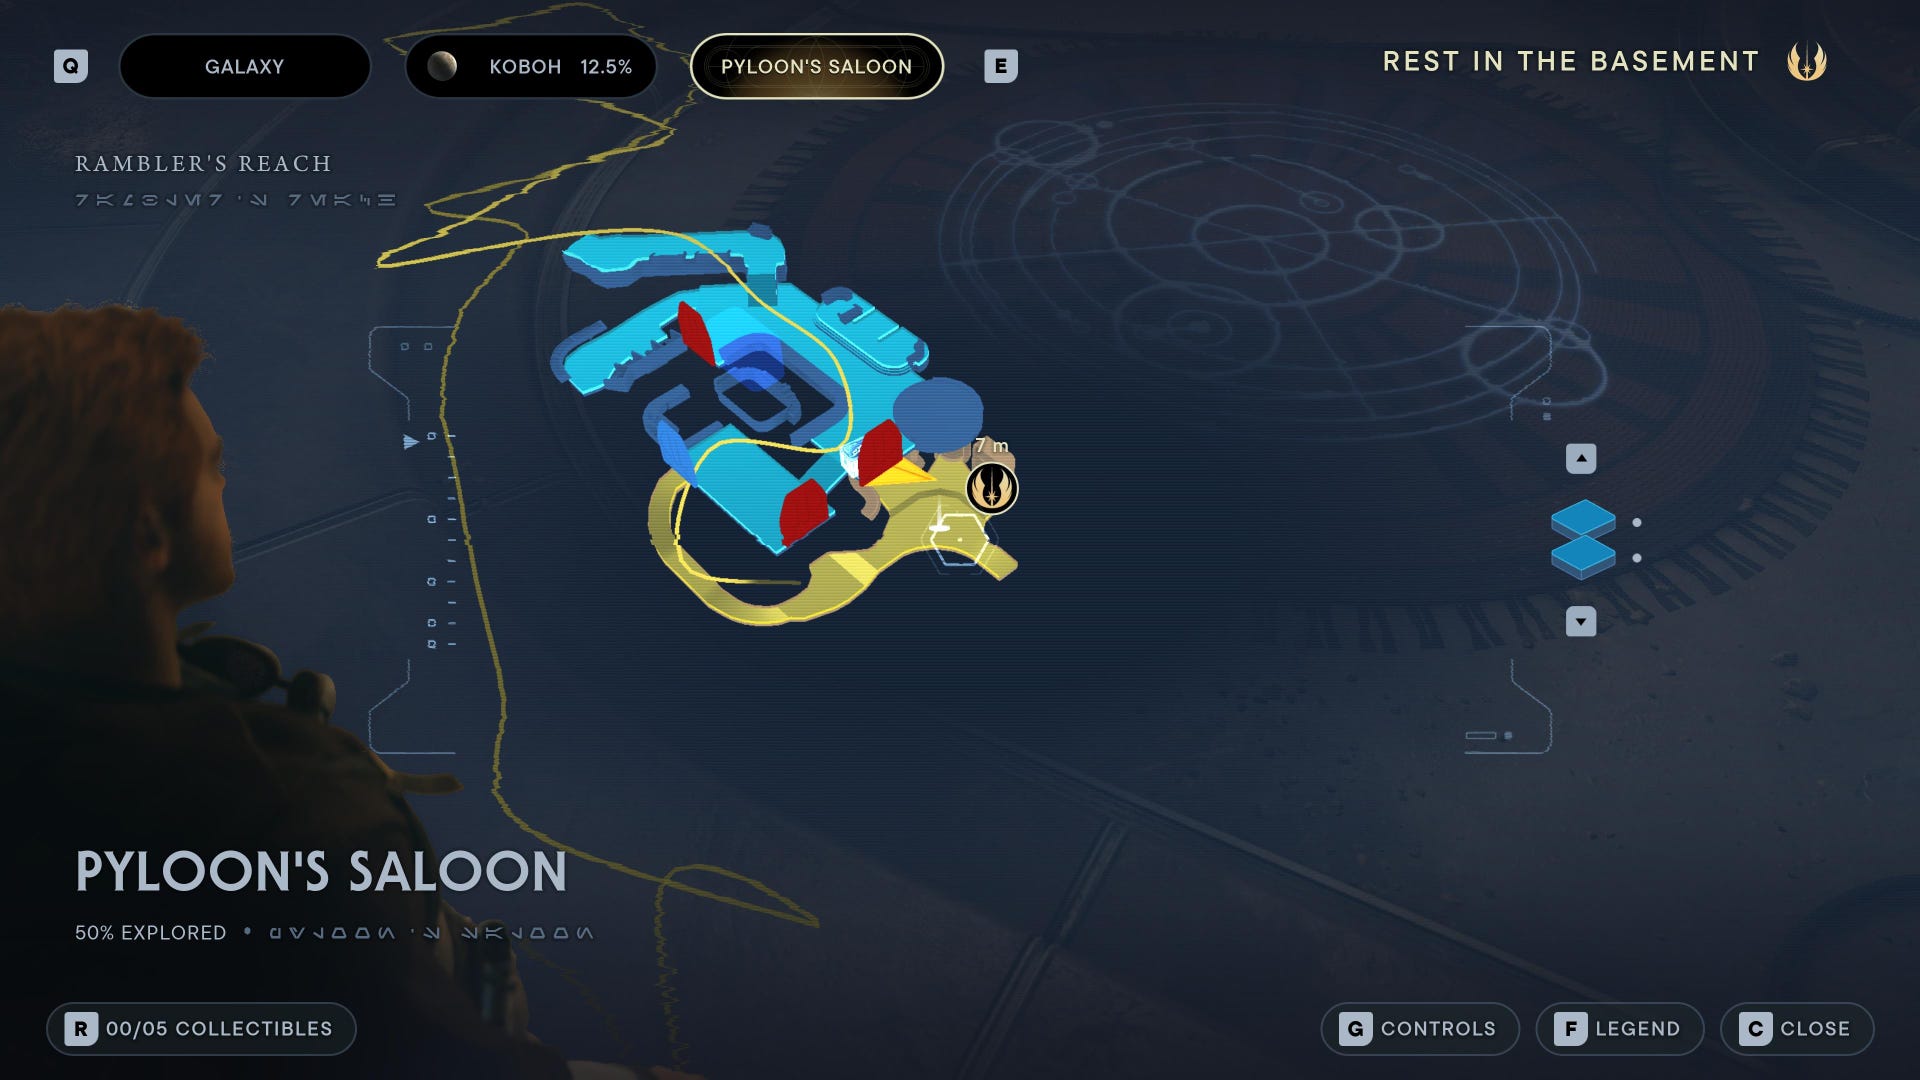
Pyloon’s Saloon collectibles
Pyloon’s Saloon Chests:
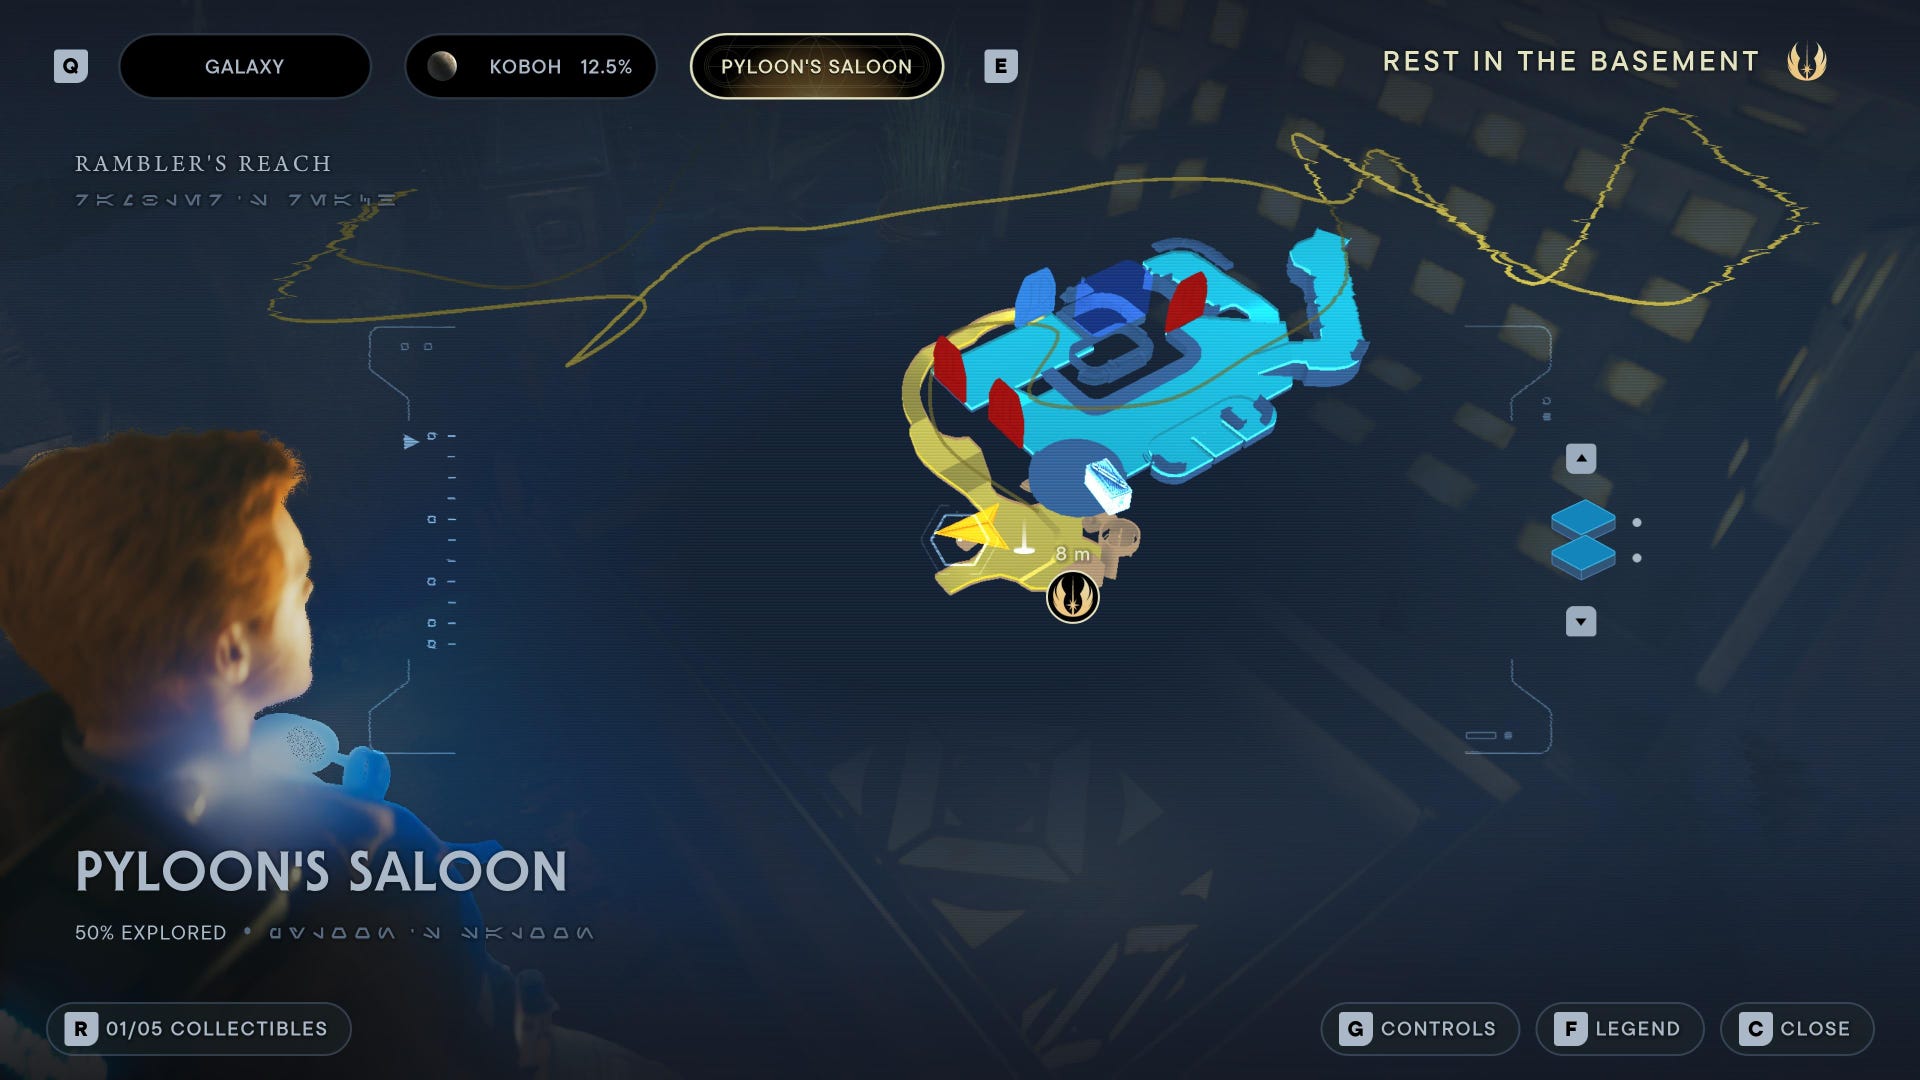
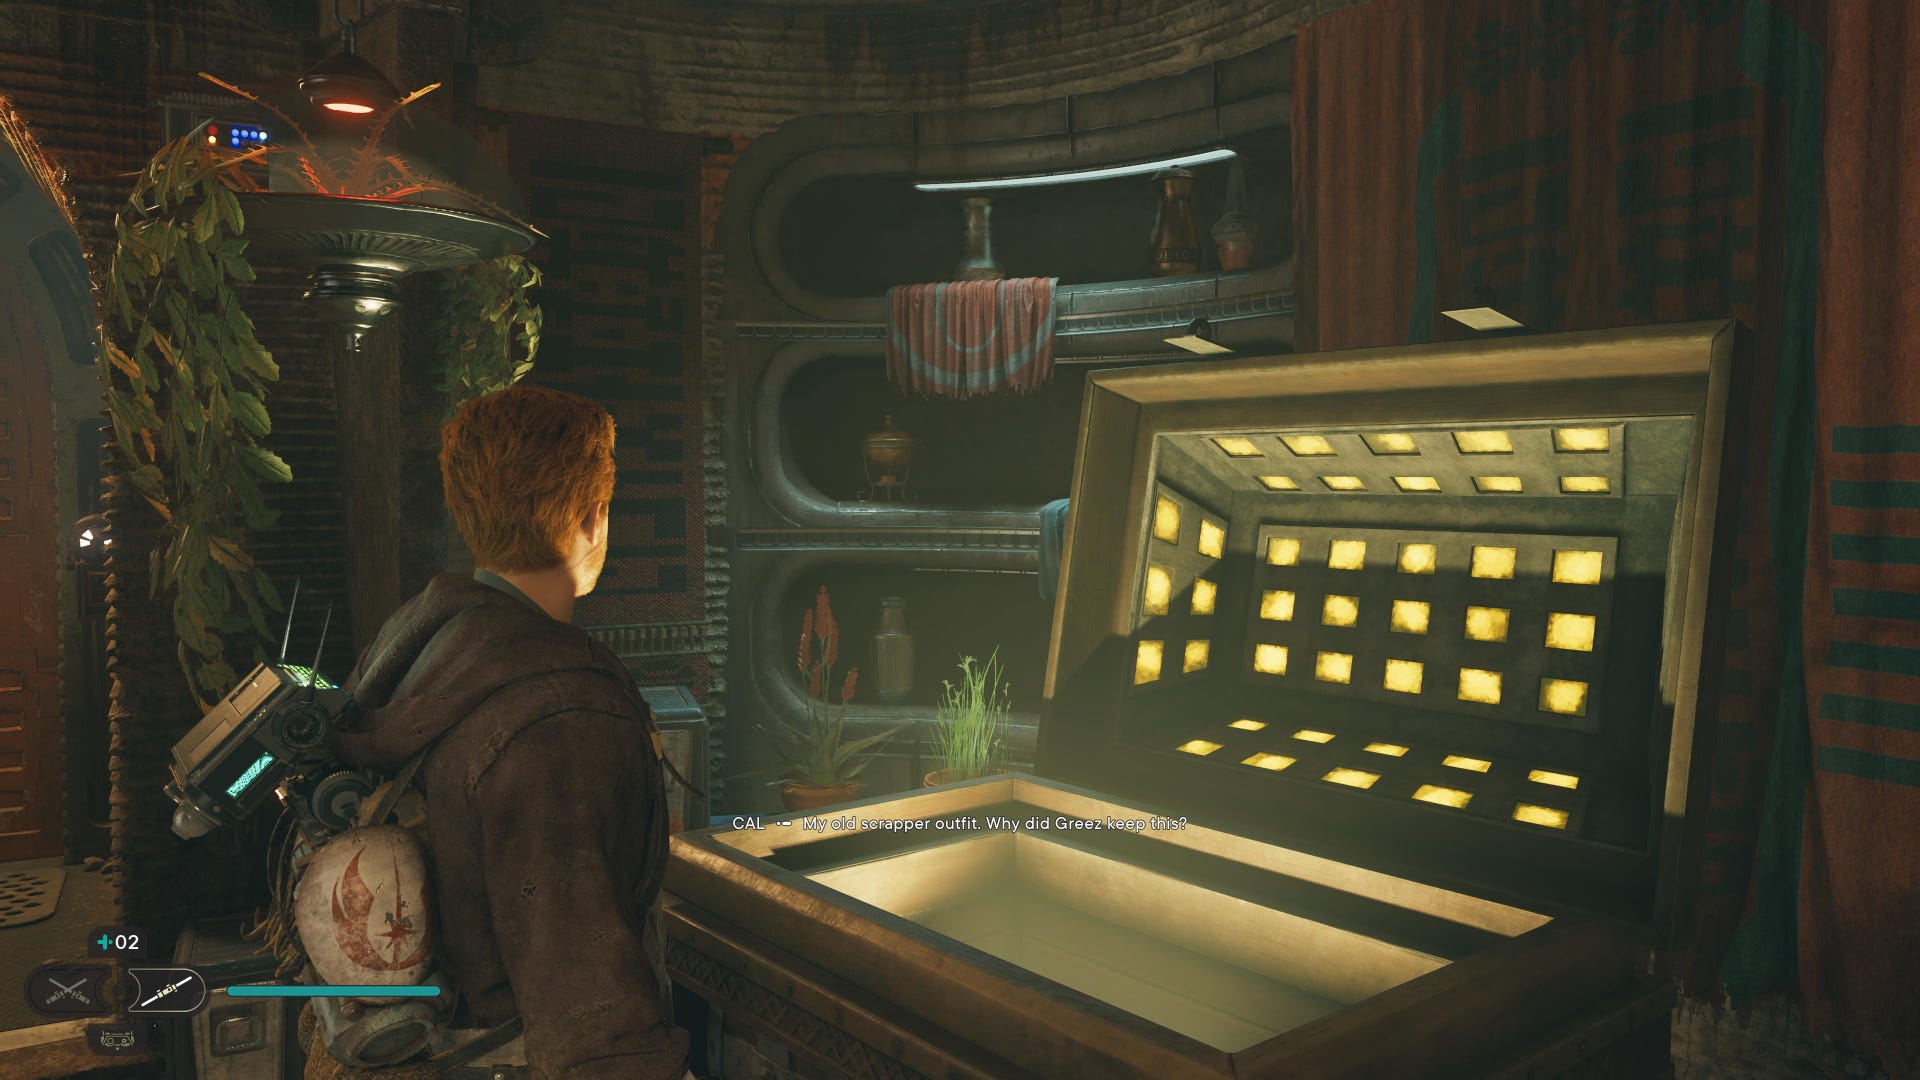
Chest (Scrapper Outfit): Next to the Meditation Point.
Pyloon’s Saloon Databanks:
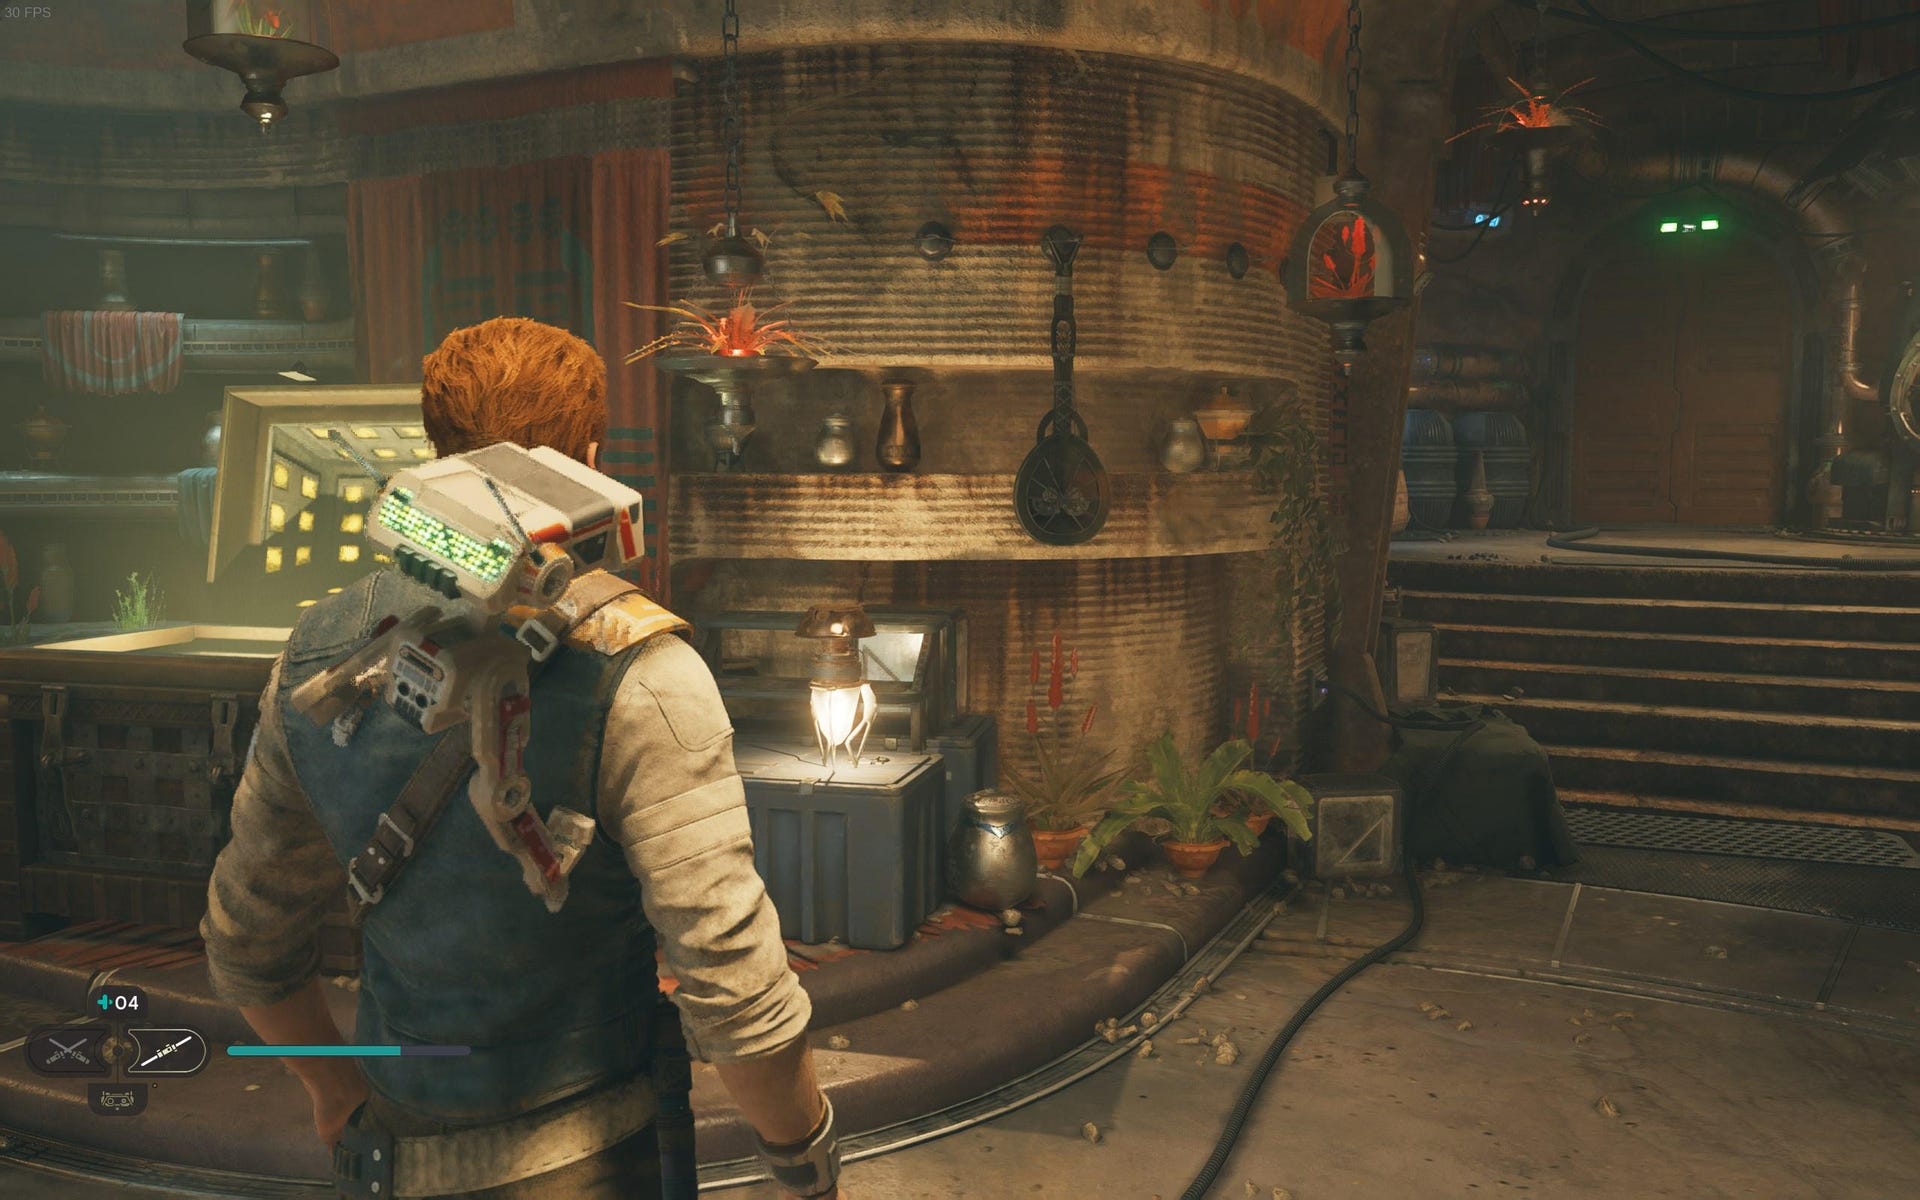
Databank (Hallikset): Next to the Meditation Point.

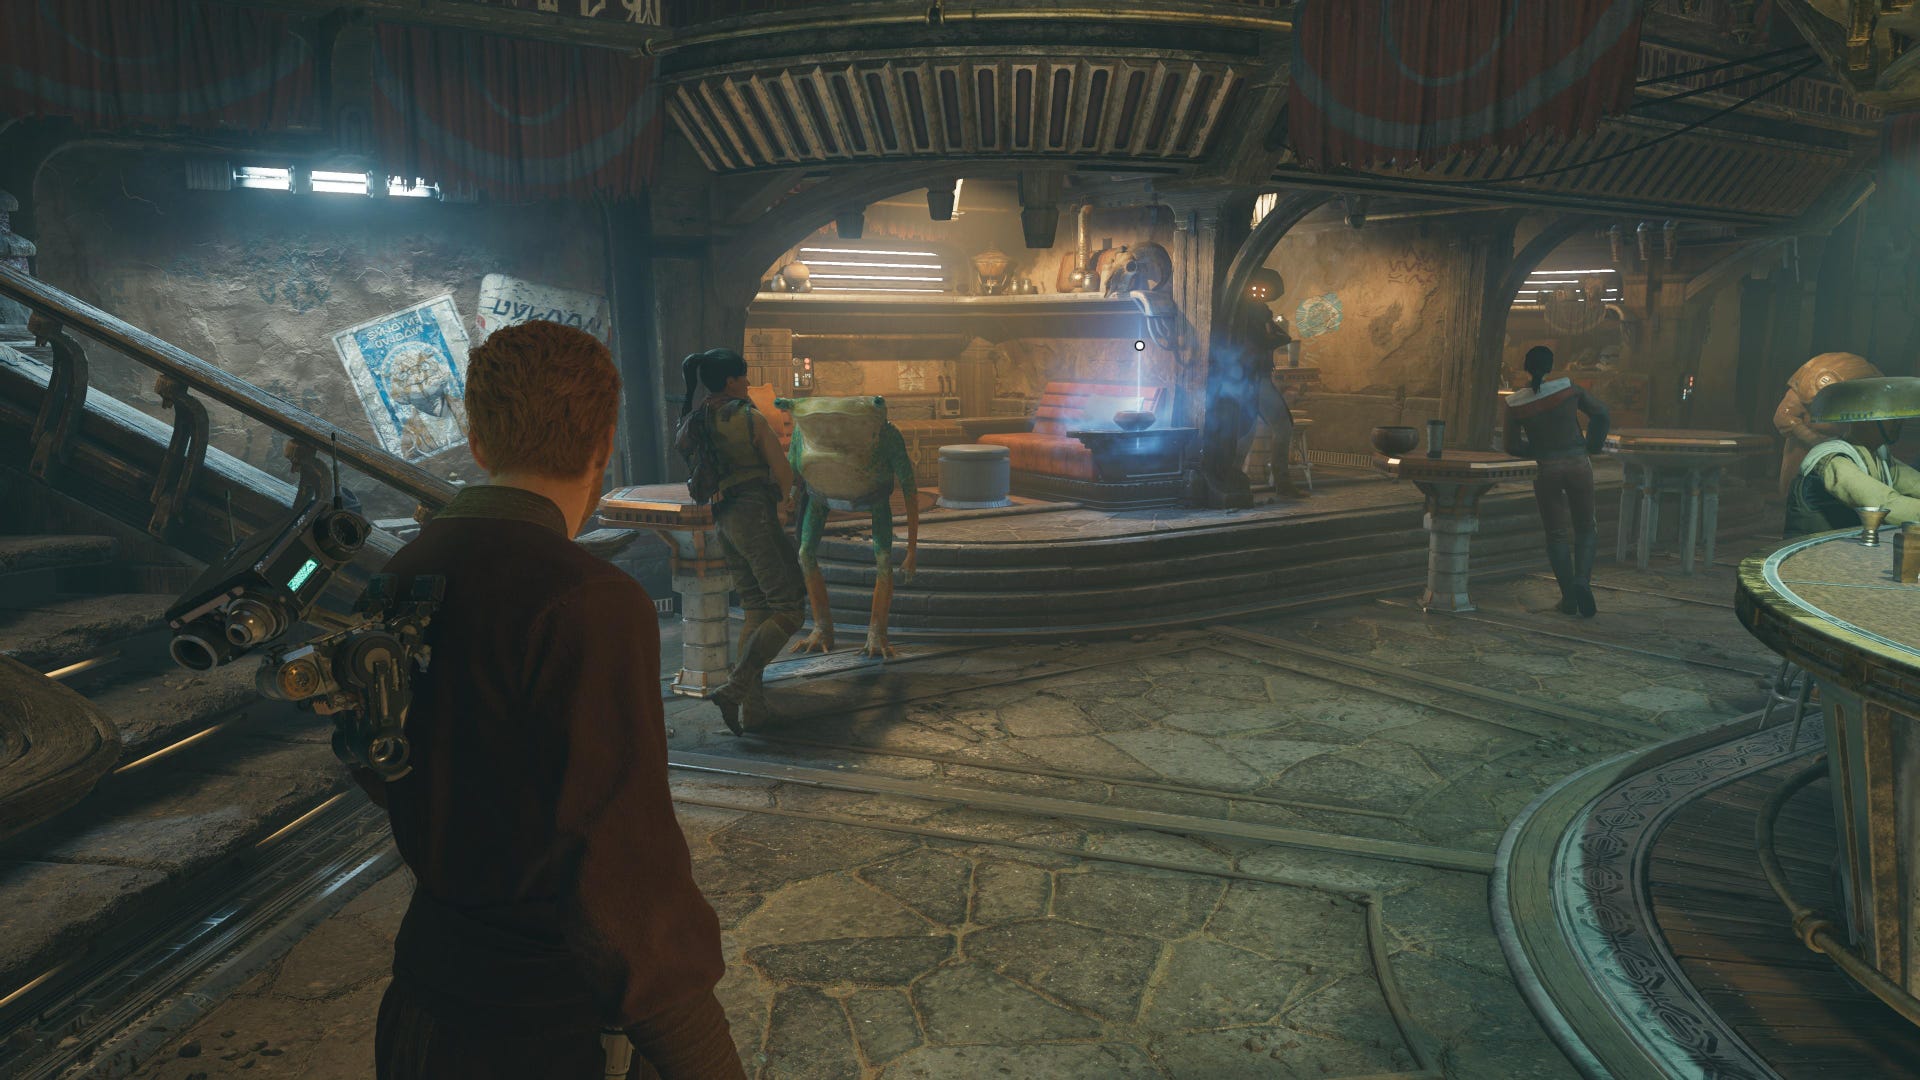
Force Echo (Angles): In the bar area of Pyloon’s Saloon. Only available after reaching the end of the main story.
Pyloon’s Saloon Treasures:
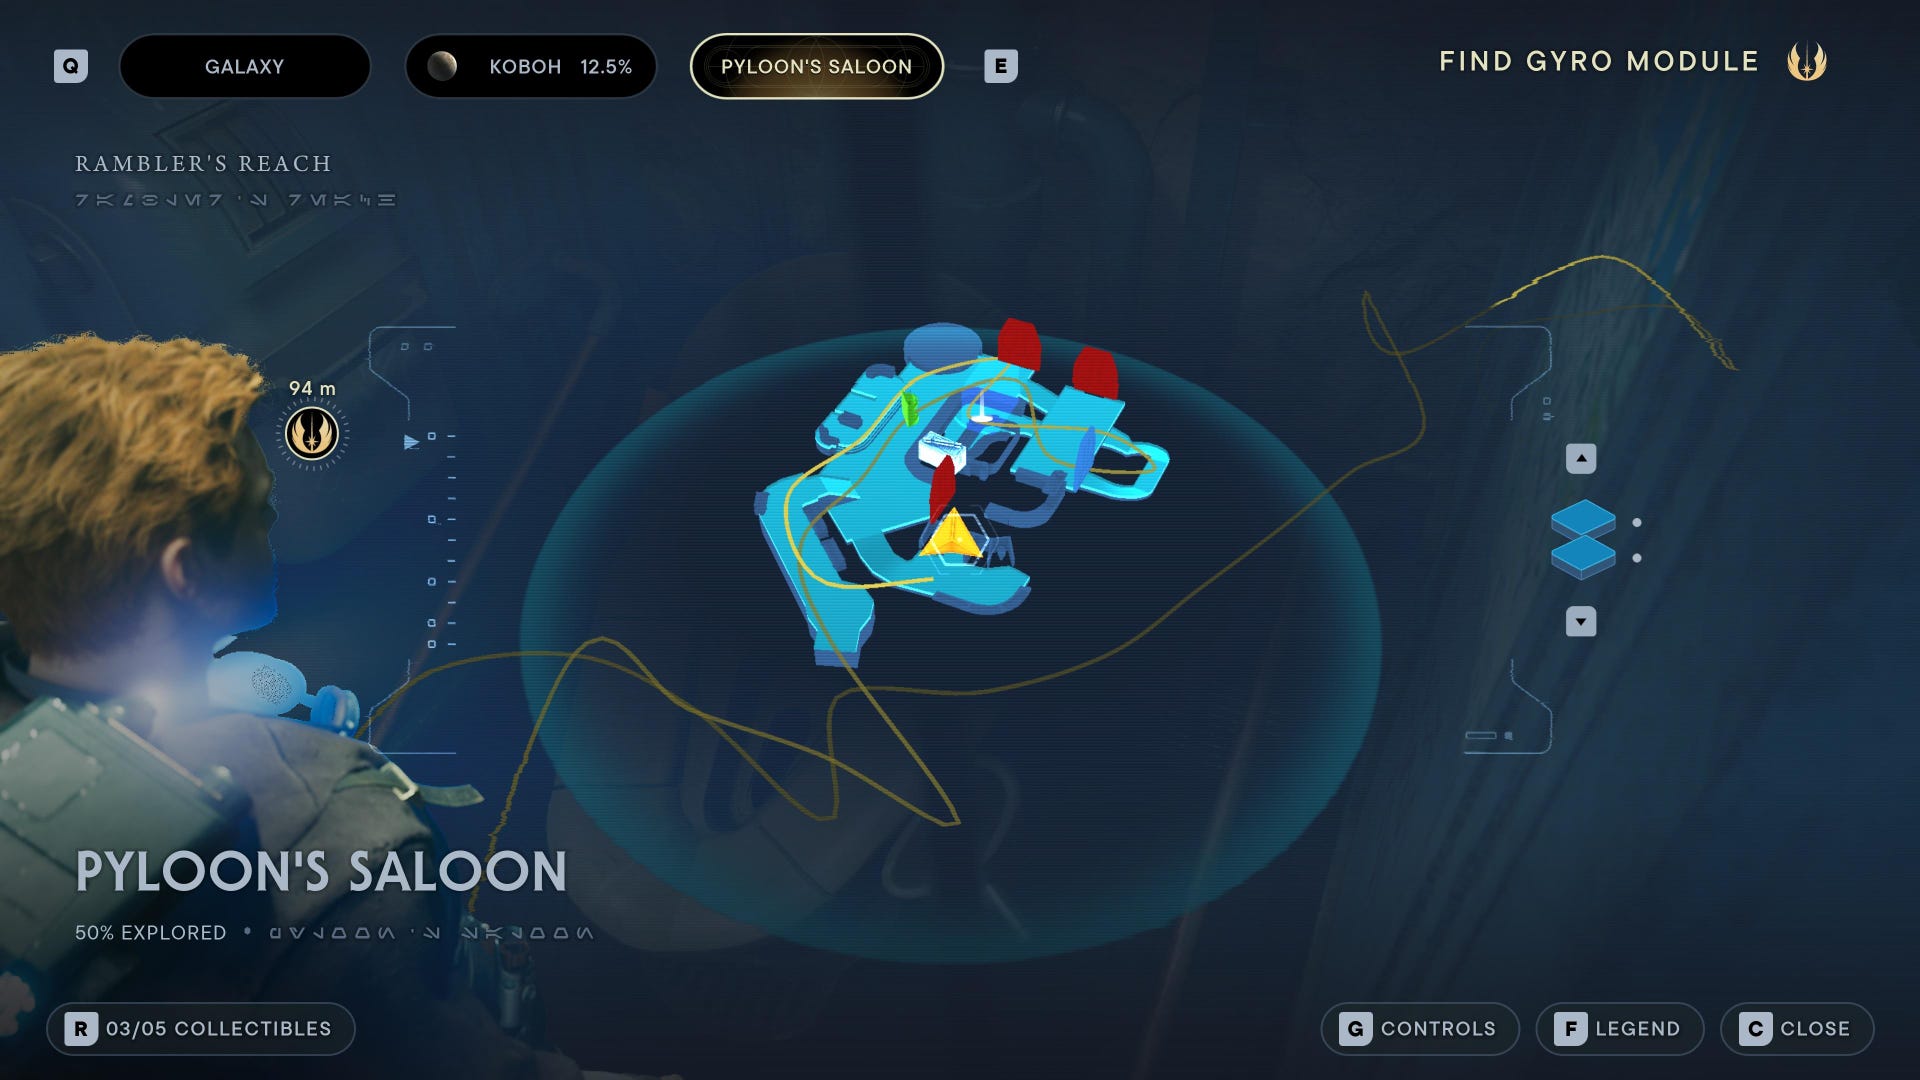
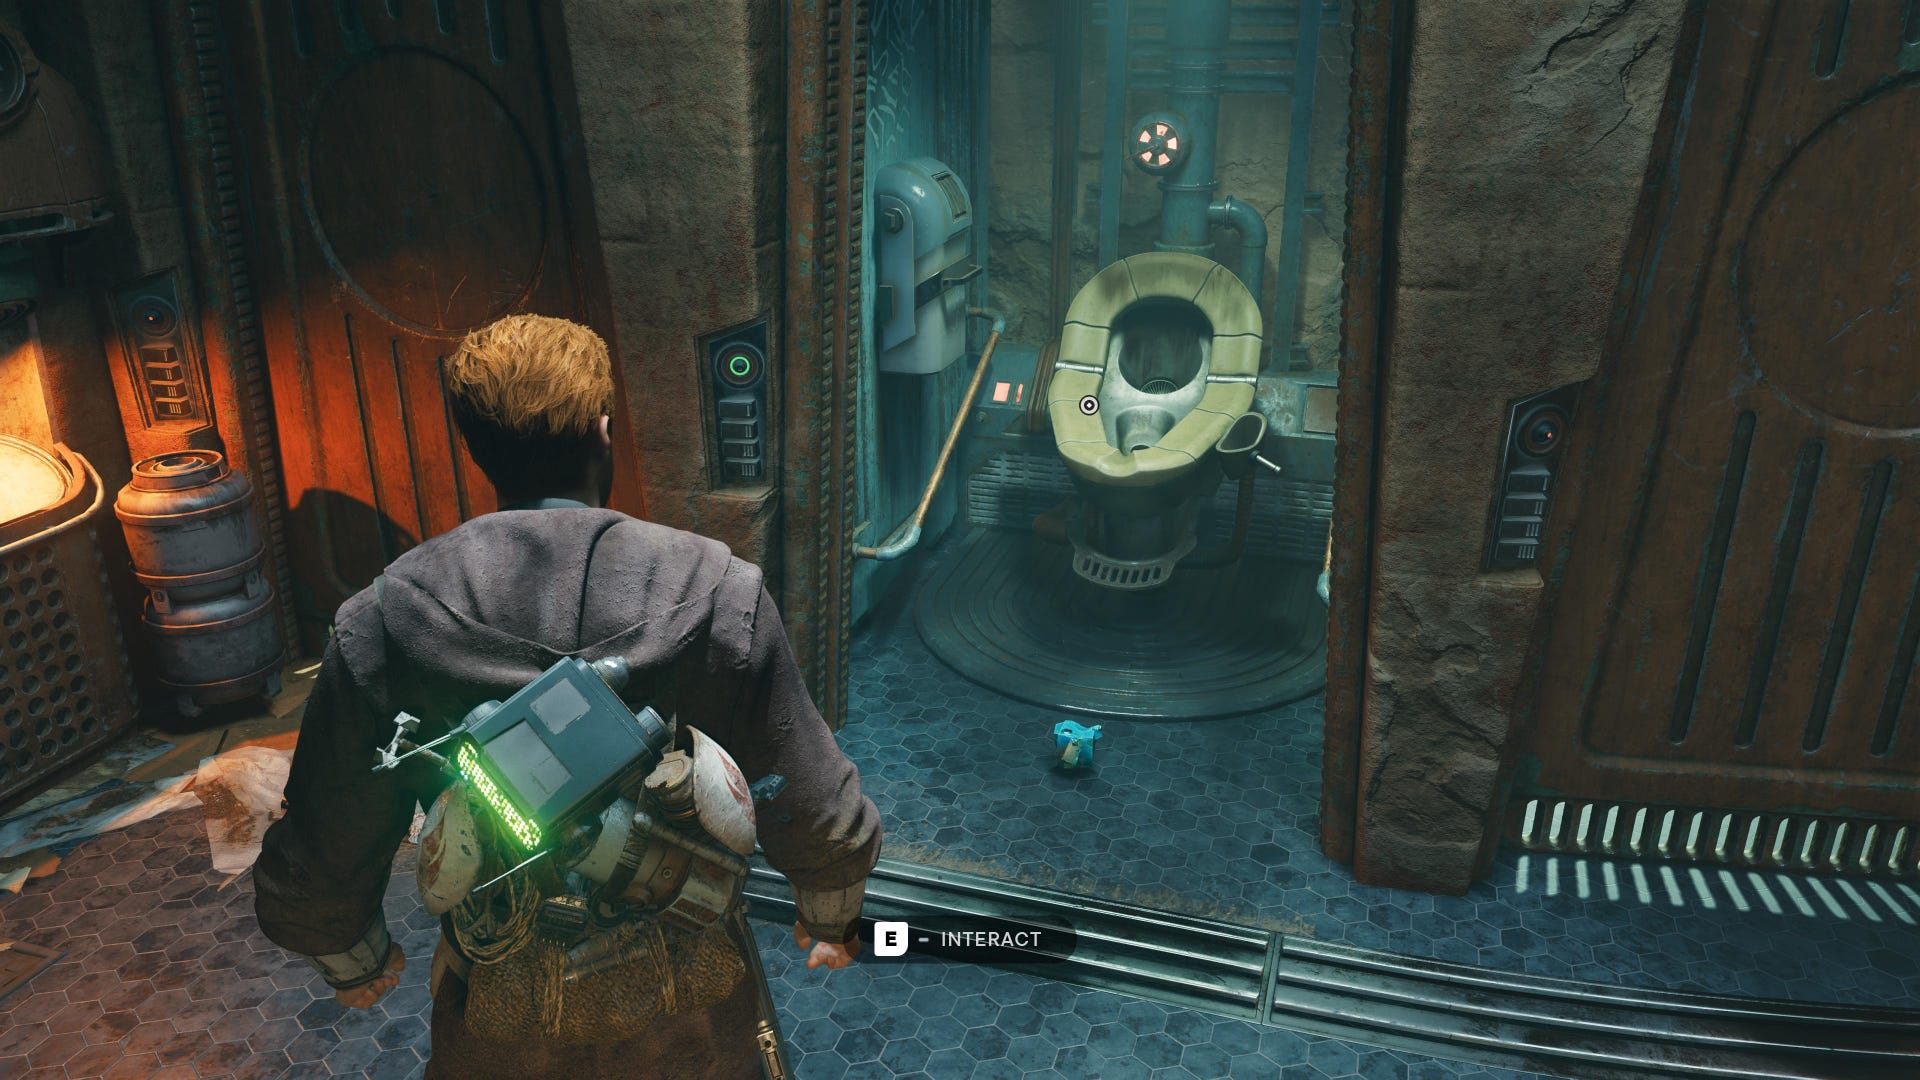
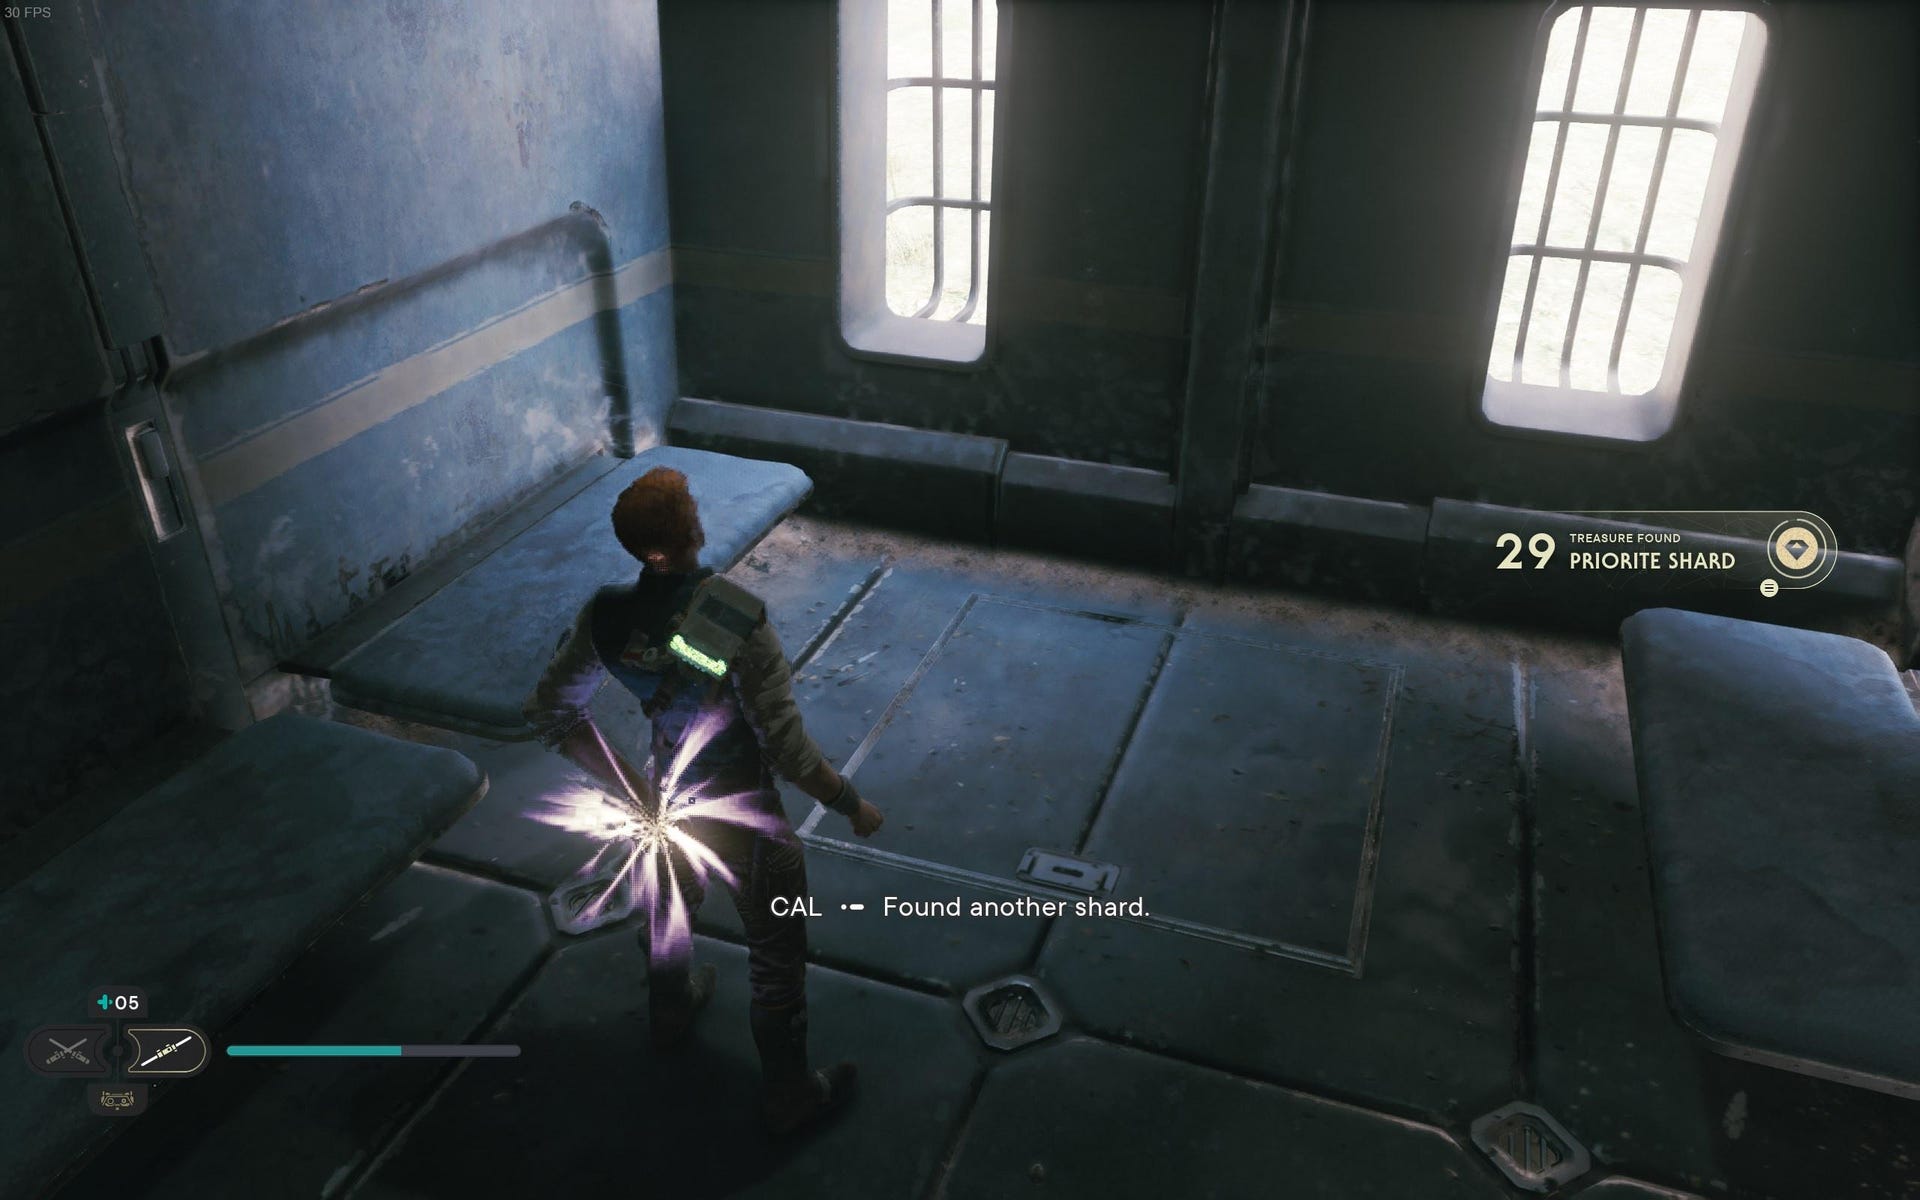
Priorite Shard: In the toilet in Pyloon’s Saloon.
Smuggler’s Tunnels collectibles
Smuggler’s Tunnels Chests:
Chest (Tactical material): Dive underwater at the bottom of the tunnels.
Smuggler’s Tunnels Essences:
Skill Point Essence: Smuggler’s Tunnels, first danger room.
New Perk Slot: From the outpost side, follow the path until you emerge into a cavern with a green forcefield. Dash through first one then the other forcefield in front of you.
Smuggler’s Tunnels Databanks:
Databank (No Way Out): First room of Smuggler’s Tunnels.
Databank (List Of Grievances): Next to the green forcefield in the Outpost building (nekko super jump to get in).
Databank (Jailbreak Inventory): Follow the path through down the tunnel (from the outpost side) until you see light and defeat the Gorgers. Then look on the left for a datapad to scan.
Force Echo (Death In The Dark): From the outpost side, follow the path until you emerge into a cavern with a green forcefield. To your left is a body with the echo.
Databank (One Last Victory): From the outpost side, follow the path until you emerge into a cavern with a green forcefield. Dash through the forcefield and then turn left to reach the side platform.
Smuggler’s Tunnels Force Tears:
Force Tear (Fractured Momentum): Retrace your steps until you’re above the Collapsed Passage Meditation Point, then wall-run over to the green forcefield and dash through it.
Smuggler’s Tunnels Treasures:
Priorite Shard #1: Next to the green forcefield in the Outpost building (Nekko super jump to get in).
Priorite Shard #2: Down the Smuggler’s Tunnels from the outpost side (past the green forcefield), take the first left.
Priorite Shard #3: Follow the path through down the tunnel (from the outpost side) until you see light and defeat the Gorgers. Then look to the right.
Priorite Shard #4: From the outpost side, follow the path until you emerge into a cavern with a green forcefield. Dash through the forcefield and then turn left to reach the side platform.
Collapsed Passage collectibles
Collapsed Passage Treasures:
Datadisc: On a raised platform in the Collapsed Passage. Double back after the back-to-back wall-jumping section.
Harvest Ridge collectibles
Harvest Ridge Chests:
Chest #1 (Wanderer Pants): Use Nekko mount to super jump up wall (marked purple), and then do both wall runs and pole swing across gap to get chest.
Chest #2 (Shortpaw’s Dance music track): From the Meditation Point, glide down onto the top of the barn.
Harvest Ridge Essences:
New Perk Slot: Get into the barn, complete the puzzle with the Nekko, then get out the way you came and super jump up to the nearby ledge. Alternatively, wall-run around the outside upper section of the barn to get on the roof, and then dash across to the nearby ledge. Whichever – after you’re up there, look to the right for the essence.
Harvest Ridge Databanks:
Force Echo (Home On The Range): Get up to the top part of Harvest Ridge (via Moldy Depths), then Nekko super jump to the next level and drop into the barn. Scan the eggs.
Harvest Ridge Treasures:
Priorite Shard: Use Nekko mount to super jump up wall (marked purple), and then do both wall runs but drop down instead of pole-swinging. Follow the path round to the left to find the Priorite.
Harvest Ridge Seed Pods:
Palm Fruit Shell (Felucian Yellow): In tunnels near the slippery slope that leads back down into Riverbed Watch.
Bluebell Squish: Near the slippery slope.
Palm Fruit Shell: Near the slippery slope.
Palm Fruit Shell: Near the slippery slope.
Bluebell Squish: By broken fence near the big metal grate outside building in Harvest Ridge.
Palm Fruit Shell Seed Pod: By the fence to the side of the building with the pullcord door leading to Moldy Depths.
Palm Fruit Shell (Alderaanian Blue): Use Nekko mount to super jump up nearby wall (marked purple on map) and then turn left and slash glowing plant up ahead.
Palm Fruit Shell: Use Nekko mount to super jump up wall, and then wall run across gap and turn left. Slash plant.
Palm Fruit Shell: Use Nekko mount to super jump up to vines in the middle, and then slash plant immediately on your right.
5x Palm Fruit Shell (inc. Rare): Use Nekko mount to super jump up wall, wall-run, then go all the way up to the top of the right-hand of the two walls that you jump between.
Bluebell Squish: Get up to the top part of Harvest Ridge (via Moldy Depths), then look to the left of where the droids and raider attack you, against the cliff wall.
Palm Fruit Shell (Dathomirian Red): Get up to the top part of Harvest Ridge (via Moldy Depths), then Nekko super jump to the next level and look in the back left corner for the plant.
Moldy Depths collectibles
Moldy Depths Treasures:
Datadisc: Get down into Moldy Depths by opening the drawstring door next to DD-EC in Harvest Ridge. Datadisc is in a corner near where all the Gorgers are
Fort Kah’lin collectibles
Fort Kah’lin Chests:
Chest #1 (Bomber Shirt): In room behind CIS tanker in Fort Kah’Lin.
Chest #2 (Poncho Outfit): Defeat Spawn of Oggdo and loot chest in boss arena.
Chest #3 (Mountaineer material): Mind-trick the guy in the room marked on the map. Can easily reach it from the Harvest Ridge Meditation Point or via the Grapple Balloon nearby in Fort Kah’lin.
Fort Kah’lin Essences:
Skill Point Essence: Get onto the very top level of the fort, then head to the ledge above where you drop down into the Spawn Of Oggdo room.
Fort Kah’lin Databanks:
Databank (Past Signs of Life): In the room directly ahead of Fort Kah’Lin Meditation Point.
Databank (Bandit Camp): In room to the left of the Fort Kah’Lin Meditation Point.
Force Echo (Victorious Surrender): Follow path to the left of Fort Kah’Lin Meditation Point until you reach a dead end.
Databank (A House Divided): On the super battle droid body in the corner of the marked house. Can easily reach from the Harvest Ridge Meditation Point of via the Grapple Balloon nearby in Fort Kah’lin.
Force Echo (Internal Affairs): On the B1 droid body in the corner of the marked house. Can easily reach from the Harvest Ridge Meditation Point of via the Grapple Balloon nearby in Fort Kah’lin.
Fort Kah’lin Treasures:
Priorite Shard: You can grab the glint that lures you into Spawn of Oggdo’s arena, on the grate that opens, after defeating the boss.
Untamed Downs collectibles
Untamed Downs Chests:
Chest #1 (Santari Khri lightsaber): In Untamed Downs cave, use a Roller Mine from previous bunker and guide it into cave to break wall.
Chest #2 (Geonosian Audio Sensors): In an Untamed Downs cave that you jump to reach, follow path to top and use vines on roof to get higher. Kill the Mogu and go past, then turn right and run across wall to find a chest.
Chest #3 (Arakyd Heavy Grip): Requires the electro-dart ability. Found in the centre of the region, on the edge of a drop. Shoot the nearby electrical conduit to open the chest.
Chest #4 (Hunter Material): Requires the electro-dart ability. Between the two pillars on the border between Untamed Downs and Harvest Ridge, shoot a dart at the nearby electrical conduit.
Chest (Mountaineer Jacket): In Bilemaw Cave, jump onto pillar and climb vines. Then, follow path around and jump from ledge to second pillar. Mind control Garra to make them move off the chest.
Untamed Downs Essences:
Skill Point Essence #1: Past the green forcefield at the end of the bunker with all the mines, Force Lift the door on the right and head through, then turn left.
Skill Point Essence #2: Dash over the gap in front of the Untamed Downs Meditation Point and follow the path until you reach the arena with the 3 large beasts. Behind the waterfall is the essence.
Untamed Downs Databanks:
Force Echo (Breaking, Not Entering): Up the slope from the battle droids in the Untamed Downs, by a sealed door.
Force Echo (A Small Mercy): In alcove on the left as you re-enter Untamed Downs through the back of Fort Kah’Lin.
Databank (An Ecological Study): Ahead of Untamed Downs Meditation Point, down the ridge in the cave.
Force Echo (Technological Betrayal): In the bunker with the shielded doorway, guarded by Roller Mines, at the end of the Untamed Downs field.
Force Echo (Shelter of Last Resort): In Untamed Downs cave, use a Roller Mine from previous bunker and guide it into cave to break wall.
Databank (Mogu Den): In the cave that you have to jump to reach in Untamed Downs, follow path around to find scan point.
Databank (The Deep Caverns): Past the green forcefield at the end of the bunker with all the mines, check behind the hanging box on the right-hand side.
Databank (Gift Of Fire): Past the green forcefield at the end of the bunker with all the mines, Force Lift the door on the right and head through, then turn left.
Databank (The Truth): Past the green forcefield at the end of the bunker with all the mines, Force Lift the door on the right and head through, then turn right.
Databank (Bilemaw Burrow): In the Bilemaw cave accessible from Harvest Ridge.
Databank (Warning Sign): Dash over the gap in front of the Untamed Downs Meditation Point and follow the path until you hit the sign.
Force Echo (The Feeding Grounds): Dash over the gap in front of the Untamed Downs Meditation Point and follow the path until you reach the arena with the 3 large beasts. After that, climb the wall and you’ll see the echo.
Force Echo (The Ties That Bind): From the cave on the edge of Untamed Downs, ride the glider to the central rock. Use the bar to swing to the top, then enter the cave.
Force Echo (Turgle Makes a Deal): In Bilemaw cave in Harvest Ridge, sits under Fort Kah’Lin. Climb vines on pillar and follow path around.
Untamed Downs Treasures:
Priorite Shard #1: In Untamed Downs Meditation Point cave, through the waterfall.
Priorite Shard #2: When entering Mogu room, turn right and hop across gap to ledge.
Priorite Shard #3: Use Nekko super jump to reach the green forcefield in the rock, then follow the path up and jump across to the high ledge with the priorite.
Priorite Shard #4: By the crashed ship on the ridge near Fort Kah’lin, Force Lift the stones on the ground.
Priorite Shard #5: At the base of the two large archways in the cliff side, near Fort Kah’lin. Force Lift the stones on the ground.
Priorite Shard #6: Nekko super jump onto the ledge near the locked door in the centre.
Untamed Downs Seed Pods:
Palm Fruit Shell (Nabooan Green): Up the slope from the battle droids in the Untamed Downs, by a sealed door. Opposite Force Echo.
Alignment Control Center collectibles
Alignment Control Center Chests:
Chest (Harmony Pommel): Cave that leads to Alignment Control Center elevator, near where you enter slide down wall and run across to find chest beneath the entrance.
Alignment Control Center Databanks:
Force Echo (Patience): Only available after reaching the end of the main story. At end of oval room with waves of enemies adjoining Meditation Point room.
Alignment Control Center Treasures:
Datadisc: From the cave on the edge of Untamed Downs, ride the glider to the central rock. Then jump down the centre into the cave mouth below and find the corpse on the edge of another drop.
Swindler’s Wash collectibles
Swindler’s Wash Chests:
Swindler’s Wash Essences:
Swindler’s Wash Databanks:
Swindler’s Wash Force Tears:
Swindler’s Wash Treasures:
Swindler’s Wash Seed Pods:
Bygone Settlement collectibles
Bygone Settlement Chests:
Bygone Settlement Essences:
Bygone Settlement Force Tears:
Bygone Settlement Treasures:
Bygone Settlement Seed Pods:
Basalt Rift collectibles
Basalt Rift Chests:
Basalt Rift Essences:
Basalt Rift Databanks:
Basalt Rift Force Tears:
Basalt Rift Treasures:
Basalt Rift Seed Pods:
Nekko Pools collectibles
Nekko Pools Chests:
Nekko Pools Databanks:
Nekko Pools Treasures:
Nekko Pools Seed Pods:
Bilemaw Den collectibles
Bilemaw Den Chests:
Bilemaw Den Essences:
Bilemaw Den Seed Pods:
Rift Passage collectibles
Rift Passage Chests:
Rift Passage Essences:
Rift Passage Databanks:
Rift Passage Force Tears:
Rift Passage Treasures:
Rift Passage Seed Pods:
Forest Array collectibles
Forest Array Chests:
Forest Array Treasures:
Rehabilitation Wing collectibles
Rehabilitation Wing Essences:
Rehabilitation Wing Databanks:
Igneous Fissure collectibles
Igneous Fissure Databanks:
Igneous Fissure Treasures:
Devastated Settlement collectibles
Devastated Settlement Chests:
Devastated Settlement Essences:
Devastated Settlement Databanks:
Devastated Settlement Force Tears:
Devastated Settlement Treasures:
Devastated Settlement Seed Pods:
Boiling Bluff collectibles
Boiling Bluff Databanks:
Boiling Bluff Treasures:
Boiling Bluff Seed Pods:
Viscid Bog collectibles
Viscid Bog Chests:
Viscid Bog Essences:
Viscid Bog Databanks:
Viscid Bog Treasures:
Viscid Bog Seed Pods:
Loading Gantry collectibles
Loading Gantry Chests:
Loading Gantry Databanks:
Loading Gantry Treasures:
Lucrehulk Core collectibles
Lucrehulk Core Chests:
Lucrehulk Core Essences:
Lucrehulk Core Databanks:
Lucrehulk Core Treasures:
Yurt Barracks collectibles
Yurt Barracks Chests:
Yurt Barracks Essences:
Yurt Barracks Databanks:
Yurt Barracks Treasures:
Generator Underbelly collectibles
Generator Underbelly Chests:
Generator Underbelly Essences:
Generator Underbelly Databanks:
Generator Underbelly Treasures:
Forward Control Tower collectibles
Forward Control Tower Chests:
Forward Control Tower Essences:
Forward Control Tower Databanks:
Forward Control Tower Treasures:
Foothill Falls Chests:
Foothill Falls Databanks:
Foothill Falls Treasures:
Foothill Falls Seed Pods:
Mountain Ascent collectibles
Mountain Ascent Chests:
Mountain Ascent Databanks:
Mountain Ascent Treasures:
Mountain Ascent Seed Pods:
Marl Cavern collectibles
Marl Cavern Essences:
Marl Cavern Databanks:
Marl Cavern Force Tears:
Marl Cavern Treasures:
Fogged Expanse collectibles
Fogged Expanse Chests:
Fogged Expanse Essences:
Fogged Expanse Databanks:
Fogged Expanse Treasures:
Fogged Expanse Seed Pods:
Imperial Post 8L-055 collectibles
Imperial Post 8L-055 Chests:
Imperial Post 8L-055 Databanks:
Summit Ridge collectibles
Summit Ridge Essences:
Summit Ridge Databanks:
Summit Ridge Treasures:
Summit Ridge Seed Pods:
Observatory Understructure collectibles
Observatory Understructure Chests:
Observatory Understructure Databanks:
Observatory Understructure Treasures:
Diagnostics Corridor collectibles
Diagnostics Corridor Essences:
Diagnostics Corridor Databanks:
Diagnostics Corridor Treasures:
Observation Deck collectibles
Observation Deck Essences:
Observation Deck Databanks:
Chamber Of Fortitude collectibles
Chamber Of Fortitude Chests:
Chamber Of Fortitude Essences:
Chamber Of Fortitude Databanks:
Chamber Of Fortitude Treasures:
Chamber Of Duality collectibles
Chamber Of Duality Chests:
Chamber Of Duality Essences:
Chamber Of Duality Databanks:
Chamber Of Duality Treasures:
Chamber Of Clarity collectibles
Chamber Of Clarity Chests:
Chamber Of Clarity Essences:
Chamber Of Clarity Databanks:
Chamber Of Clarity Treasures:
Chamber Of Reason collectibles
Chamber Of Reason Chests:
Chamber Of Reason Essences:
Chamber Of Reason Databanks:
Chamber Of Reason Treasures:
